SAR Oodla Wirra Switches V2: Difference between revisions

From TrainzOnline
Jump to navigationJump to search
Pware (talk | contribs)
Created page with "<!-- V2.0 --> <table> <!-- BEGIN TOP TABLE --> <tr valign="top"> <td width=750> <table width=750> <!-- BEGIN TABBED link list with Switches page active--> <tr valign="top">..."
 
Pware (talk | contribs)
mNo edit summary
 
Line 1: Line 1:
<!-- V2.0 -->
<!-- V2.0 (separate V1.0 file) -->
<table> <!-- BEGIN TOP TABLE -->
<tr valign="top">
<tr valign="top">
Line 33: Line 33:
</tr>
</tr>
<tr valign="top">
<tr valign="top">
<td align="center"><span style="font-weight: 700;">Map and links updated for <span style="color: blue;">SAR Peterborough Narrow Gauge Division v2.0</span>. For the original <span style="color: blue;">V1.0</span> version click <span style="background-color: yellow;">[[SAR_Oodla_Wirra_Switches_V1|here]]</span></span></td>
<td align="center"><span style="font-weight: 700;">For <span style="color: blue;">SAR Peterborough Narrow Gauge Division v2.0</span>. For the original <span style="color: blue;">V1.0</span> click <span style="background-color: yellow;">[[SAR_Oodla_Wirra_Switches_V1|here]]</span></span></td>
</tr>
</tr>
</table>
</table>

Latest revision as of 00:13, 1 May 2024

    
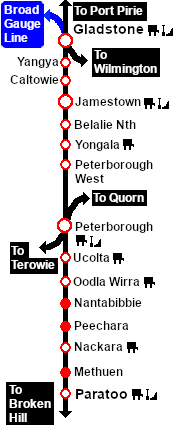
PortPirie-BrokenHill
Ucolta
Location Index
Scenarios

Nantabibbie
PortPirie-BrokenHill
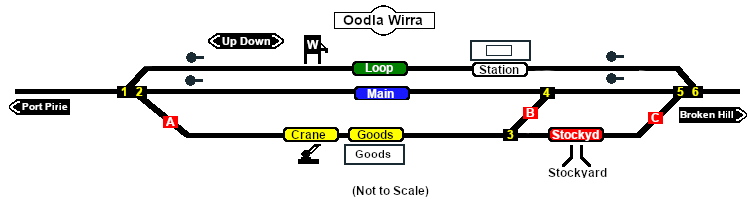
Oodla Wirra Switches map
For SAR Peterborough Narrow Gauge Division v2.0. For the original V1.0 click here
  Switches  
No. Name Facing and L/R Directions
(default direction first)
No. Name Facing and L/R Directions
(default direction first)
OW 1 Down (R) Main, (L) Station Loop OW 2 Down (L) Main, (R) Goods/Stockyard
 OWCP A  Up  (L) Catchpoint , (R) Port Pirie OW 3 Down (R) Stockyard, (L) Main Yard
 OWCP B  Down  (R) Catchpoint , (L) Main Yard OW 4 Up (R) Main, (L) Goods Shed
 OWCP C  Down  (R) Catchpoint , (L) Broken Hill OW 5 Up (R) Main Yard, (L) Stockyard
OW 6 Up (L) Main Yard, (R) Station Loop  '
 Switch Sets 
 Port Pirie -  Station  Loop   1 -L  Broken Hill -  Station  Loop   6 -R
 Port Pirie -  Main   1 -R  2 -L (  4 -R )  Broken Hill -  Main   6 -L  5 -R  4 -R
 Port Pirie -  Goods   1 -R  2 -R  A -R  Broken Hill -  Goods   6 -L  5 -R  4 -L  B -L  3 -R
    Broken Hill -  Stockyard   6 -L  5 -L  C -L
   (        ) = optional switches

PortPirie-BrokenHill

Gladstone-Paratoo Strip Map