|
|
| (269 intermediate revisions by the same user not shown) |
| Line 1: |
Line 1: |
| <!-- Intro Section --> | | <!-- Intro Section --> |
| <table width=1000> | | <table width=1000 cellpadding=2> |
| | <tr valign="top"> |
| | <td> |
| | <table width=996 bgcolor=#000000 cellpadding=2> |
| <tr valign="top"> | | <tr valign="top"> |
| <td>The information in this Wiki Page applies to '''Surveyor 2.0 (S20)''' as found in '''Trainz Plus''' and '''TRS22 Platinum'''.<br> | | <td> |
| | <table width=992 bgcolor=#ffffff cellpadding=2> |
| | <tr valign="middle"> |
| | <td width=35>[[image:Information35.png|link=]]</td> |
| | <td><span style="font-size: 15px;">The information in this Wiki Page applies to '''Surveyor 2.0 (S20)''' as found in '''Trainz Plus''' and '''TRS22 Platinum'''.</span></td> |
| | </tr> |
| | </table> |
| | </td> |
| | </tr> |
| | </table> |
| | <br> |
| There is a companion Wiki Page, [[image:WikiLink.PNG|link=]] '''[[How to Use S20 Tools|How to Use S20 Tools]]''', that covers the '''Surveyor 2.0''' Tools and the palettes that control how they work.</td> | | There is a companion Wiki Page, [[image:WikiLink.PNG|link=]] '''[[How to Use S20 Tools|How to Use S20 Tools]]''', that covers the '''Surveyor 2.0''' Tools and the palettes that control how they work.</td> |
| </tr> | | </tr> |
| Line 9: |
Line 22: |
| <table width=1000> <!-- BEGIN Nav Buttons Table --> | | <table width=1000> <!-- BEGIN Nav Buttons Table --> |
| <tr valign="top"> | | <tr valign="top"> |
| | <td width=629> </td> <!-- Filler Space --> |
| <td width=50> </td> <!-- for Skip Down --> | | <td width=50> </td> <!-- for Skip Down --> |
| <td width=629> </td> <!-- Filler Space -->
| |
| <td width=50> </td> <!-- for Skip Up --> | | <td width=50> </td> <!-- for Skip Up --> |
| <td width=46> </td> <!-- for Top --> | | <td width=46> </td> <!-- for Top --> |
| <td width=75> </td> <!-- for Next Up --> | | <td width=75> </td> <!-- for Next Up --> |
| <td width=75>[[image:NextDown.png|link=#stepS20vS10|alt=Next Down|Next Down]]</td> | | <td width=75>[[image:NextDown.png|link=#stepWorld|alt=Next Down|Next Down]]</td> |
| <td width=75>[[image:BackToBottom.png|link=#bottom|alt=Bottom|Bottom]]</td> | | <td width=75>[[image:BackToBottom.png|link=#bottom|alt=Bottom|Bottom]]</td> |
| </tr> | | </tr> |
| Line 24: |
Line 37: |
| __TOC__ | | __TOC__ |
| </td> | | </td> |
| <td width=800> | | <td align="top"> |
| | <table> |
| | <tr valign="top" align="center"> |
| | <td width=250>[[image:InfoPaletteFocus_S20.png|link=]]<br>[[image:S20_PaletteAssets.png|link=]]<br>[[image:DriverPalette250_S20.png|link=]]<br>[[image:CommodityPickerPalette250_S20.png|link=]]</td> |
| | <td width=250>[[image:BrushTools_S20.png|link=]]<br>[[image:LayersPalette_S20_SessionLayersOpen.png|link=]]<br>[[image:S20_PalettePackages.png|link=]]<br>[[image:LogsPalette250_S20.png|link=]]<br>[[image:SessionInfoPalette250_S20.png|link=]]<br>[[image:AssetPreviewPalette_S20.png|link=]]</td> |
| | <td width=250>[[image:BrushToolsScrapBrush_S20.png|link=]]<br>[[image:ScrapbookNewNamedPinned_S20.png|link=]]<br>[[image:S20_PalettePackages.png|link=]]<br>[[image:SessionOptionsPalette250_S20.png|link=]]<br>[[image:ScheduleInfoPaletteDriver250.png|link=]]</td> |
| | </tr> |
| | </table> |
| | <br> |
| <table bgcolor=#000000 cellpadding=2> | | <table bgcolor=#000000 cellpadding=2> |
| <tr valign="top"> | | <tr valign="top"> |
| <td> | | <td> |
| <table bgcolor="lightcyan" cellpadding=2> | | <table bgcolor=#ffffff cellpadding=2> |
| <tr valign="top"> | | <tr valign="top"> |
| <td colspan=2 align="center"><span style="font-weight: 700; font-size: 17px;">Surveyor 2.0 <span style="color: white; background-color: blue;"> Mouse </span> and <span style="color: white; background-color: black;"> Keyboard </span> Aids and Shortcuts</span></td> | | <td align="center"><span style="font-weight: 700; font-size: 15px;">Navigation Icons used in this Document</span></td> |
| </tr> | | </tr> |
|
| |
| <tr valign="top"> | | <tr valign="top"> |
| <td colspan=2></td> | | <td> |
| </tr> | | <table> |
| | |
| <tr valign="top"> | | <tr valign="top"> |
| <td></td> | | <td>[[image:BackToTop.png|link=#top|alt=Top|Top]] [[image:BackToBottom.png|link=#bottom|alt=Bottom|Bottom]]</td> |
| <td><span style="font-weight: 700; font-size: 15px; color: white; background-color: black;"> Operations </span></td> | | <td>at '''Chapter Headings''' to jump to the top/bottom of the document</td> |
| </tr> | | </tr> |
|
| |
| <tr valign="top"> | | <tr valign="top"> |
| <td width=150><span style="font-weight: 700; font-size: 15px; color: white; background-color: blue;"> LClick </span></td> | | <td>[[image:NextUp.png|link=#top|Next Up]] [[image:NextDown.png|link=#stepTools|link=|Next Down]]</td> |
| <td><span style="font-weight: 700; font-size: 17px;"> Left Click </span> on an object to '''<u>Select</u>''' it</td> | | <td>at '''Chapter Headings''' to jump to the next or previous '''Chapter'''<br> |
| | e.g. '''1.''' to '''2.''' to '''3.''', etc</td> |
| </tr> | | </tr> |
|
| |
| <tr valign="top"> | | <tr valign="top"> |
| <td><span style="font-weight: 700; font-size: 15px;"><span style="color: white; background-color: black;"> Shift </span> <span style="color: white; background-color: blue;"> LClick </span></span></td> | | <td>[[image:SkipUp.png|link=#top|Next Up]] [[image:SkipDown.png|link=#stepS20vS10|Skip Down]]</td> |
| <td>hold down the <span style="font-weight: 700; font-size: 17px;">Shift</span> key and <span style="font-weight: 700; font-size: 17px;"> Left Click </span> on another object to add it to the '''<u>Selection</u>'''</td> | | <td>within '''Chapters''' to jump to the next or previous '''Section'''<br> |
| | e.g. '''6.1''' to '''6.2''' to '''6.3''', etc</td> |
| </tr> | | </tr> |
|
| |
| <tr valign="top"> | | <tr valign="top"> |
| <td width=150><span style="font-weight: 700; font-size: 15px;"><span style="color: white; background-color: blue;"> LClick </span> <span style="color: white; background-color: blue;"> Drag </span></span></td> | | <td>[[image:HeadingUp.png|link=#top|To Heading]]</td> |
| <td><span style="font-weight: 700; font-size: 17px;">Left Click and Drag</span> to '''<u>Move</u>''' an object or a group of selected objects</td> | | <td>within '''Sections''' to return to the current '''Chapter Heading'''<br> |
| | e.g. '''6.3''' back to '''6.0'''</td> |
| </tr> | | </tr> |
|
| |
| <tr valign="top"> | | <tr valign="top"> |
| <td width=150><span style="font-weight: 700; font-size: 15px; color: white; background-color: blue;"> RClick </span></td> | | <td>[[image:SkipMinorUp.png|link=#top|Up]] [[image:SkipMinorDown.png|link=#stepS20vS10|Down]]</td> |
| <td><span style="font-weight: 700; font-size: 17px;">Right Click</span> on the terrain to '''<u>Move</u>''' the '''Compass Rose''' and '''Focus''' to that location or to open a setting menu in a palette</td> | | <td>within '''Sections''' to jump to the next or previous '''Sub-section'''<br> |
| | e.g. '''12.1.1''' to '''12.1.2''', etc</td> |
| </tr> | | </tr> |
|
| |
| <tr valign="top">
| |
| <td><span style="font-weight: 700; font-size: 15px; color: white; background-color: blue;"> DLClick </span></td>
| |
| <td><span style="font-weight: 700; font-size: 17px;">Double Left Click</span> on an object to add it and all nearby identical objects into a single '''<u>Selection</u>'''
| |
| <table>
| |
| <tr valign="top"> | | <tr valign="top"> |
| <td width=10>[[image:DotPointBlueSquare.png|10px|link=]]</td> | | <td>[[image:PageLink.PNG|link=]] <span style="font-weight: 700; font-size: 15px; color: blue;">Link</span></td> |
| <td>when used on a '''consist''' all the wagons in the consist, regardless of type, will be selected</td> | | <td>'''Internal link''' to another section within this document</td> |
| </tr> | | </tr> |
| <tr valign="top"> | | <tr valign="top"> |
| <td>[[image:DotPointBlueSquare.png|10px|link=]]</td> | | <td>[[image:WikiLink.PNG|link=]] <span style="font-weight: 700; font-size: 15px; color: blue;">Link</span></td> |
| <td>when used on a spline or track all the segments upto the next junction or last endpoint (in both directions) will be selected</td> | | <td>'''External link''' to another document</td> |
| </tr> | | </tr> |
| </table> | | </table> |
| </td> | | </td> |
| </tr> | | </tr> |
| | | </table> |
| <tr valign="top">
| | </td> |
| <td><span style="font-weight: 700; font-size: 15px;"><span style="color: white; background-color: black;"> Shift </span> <span style="color: white; background-color: blue;"> DLClick </span></span></td>
| |
| <td>hold down the <span style="font-weight: 700; font-size: 17px;">Shift</span> key and <span style="font-weight: 700; font-size: 17px;">Double Left Click</span> on another object to add it and its nearby identical objects to those already in the '''<u>Selection</u>'''</td>
| |
| </tr> | | </tr> |
| | | </table> |
| | <br> |
| | <table bgcolor=#000000 cellpadding=2> |
| <tr valign="top"> | | <tr valign="top"> |
| <td><span style="font-weight: 700; font-size: 15px;"><span style="color: white; background-color: black;"> Ctrl </span> <span style="color: white; background-color: blue;"> LClick </span> <span style="color: white; background-color: blue;"> Drag </span></span></td> | | <td> |
| <td>hold down the <span style="font-weight: 700; font-size: 17px;">Ctrl</span> key and <span style="font-weight: 700; font-size: 17px;">Left Click and Drag</span> to '''<u>Clone</u>''' an object or selected objects</td>
| | <table bgcolor=#ffffff cellpadding=2> |
| </tr>
| |
| | |
| <tr valign="top"> | | <tr valign="top"> |
| <td><span style="font-weight: 700; font-size: 15px;"><span style="color: white; background-color: black;"> Ctrl </span> <span style="color: white; background-color: black;"> C </span></span></td> | | <td colspan=2 align="center"><span style="font-weight: 700; font-size: 15px;">Colour Coded Labels used in this Document</span></td> |
| <td>press <span style="font-weight: 700; font-size: 17px;">Ctrl + C</span> to '''<u>Copy</u>''' selected objects (including the ground heights, ground textures and any '''TurfFX/Clutter Effect Layers''') into a new '''Scrapbook'''</td>
| |
| </tr> | | </tr> |
|
| |
| <tr valign="top"> | | <tr valign="top"> |
| <td><span style="font-weight: 700; font-size: 15px;"><span style="color: white; background-color: black;"> Ctrl </span> <span style="color: white; background-color: black;"> D </span></span></td> | | <td><span style="font-weight: 700; font-size: 15px; color: white; background-color: #797979;"> Palette </span></td> |
| <td>press <span style="font-weight: 700; font-size: 17px;">Ctrl + D</span> to '''<u>Unselect</u>''' a selected object (or '''ALL''' objects if multiple objects have been selected). Also removes the boundary lines from a '''Marquee Selection Area''' </td> | | <td>Name of a palette e.g. <span style="font-weight: 700; font-size: 15px; color: white; background-color: #797979;"> Assets Palette </span></td> |
| </tr> | | </tr> |
|
| |
| <tr valign="top"> | | <tr valign="top"> |
| <td><span style="font-weight: 700; font-size: 15px;"><span style="color: white; background-color: black;"> Ctrl </span> <span style="color: white; background-color: black;"> E </span></span></td> | | <td><span style="font-weight: 700; font-size: 15px; color: white; background-color: #000000;"> Option </span></td> |
| <td>press <span style="font-weight: 700; font-size: 17px;">Ctrl + E</span> to open the '''<u>Route Editor</u>''' (to edit the route name, description, thumbnail, scale, etc)</td> | | <td>Drop Down Menu option e.g. <span style="font-weight: 700; font-size: 15px; color: white; background-color: black;"> Copy </span></td> |
| </tr> | | </tr> |
|
| |
| <tr valign="top"> | | <tr valign="top"> |
| <td><span style="font-weight: 700; font-size: 15px;"><span style="color: white; background-color: black;"> Ctrl </span> <span style="color: white; background-color: black;"> F </span></span></td> | | <td><span style="font-weight: 700; font-size: 15px; color: white; background-color: #000000;"> Key </span></td> |
| <td>press <span style="font-weight: 700; font-size: 17px;">Ctrl + F</span> to open the '''<u>Object Finder</u>'''</td>
| | <td>Keystroke or keystroke combination e.g. <span style="font-weight: 700; font-size: 15px; color: white; background-color: black;"> Shift </span> or <span style="font-weight: 700; font-size: 15px;"><span style="color: white; background-color: black;"> Ctrl </span> + <span style="color: white; background-color: black;"> C </span></span></td> |
| </tr> | | </tr> |
|
| |
| <tr valign="top"> | | <tr valign="top"> |
| <td><span style="font-weight: 700; font-size: 15px;"><span style="color: white; background-color: black;"> Ctrl </span> <span style="color: white; background-color: black;"> F1 </span></span></td> | | <td><span style="font-weight: 700; font-size: 15px; color: gold; background-color: #000000;"> Control </span></td> |
| <td>press <span style="font-weight: 700; font-size: 17px;">Ctrl + F1</span> to switch from '''<u>Driver</u>''' to '''<u>Surveyor</u>''' via the '''UDS''' interface</td>
| | <td>A control setting in the <span style="font-weight: 700; font-size: 15px; color: white; background-color: #797979;"> Tool Options Palette </span> e.g. <span style="font-weight: 700; font-size: 15px; color: gold; background-color: black;"> Radius </span></td> |
| </tr> | | </tr> |
|
| |
| <tr valign="top"> | | <tr valign="top"> |
| <td><span style="font-weight: 700; font-size: 15px;"><span style="color: white; background-color: black;"> Ctrl </span> <span style="color: white; background-color: black;"> F2 </span></span></td> | | <td><span style="font-weight: 700; font-size: 15px; color: black; background-color: lightcyan;"> Mouse </span></td> |
| <td>press <span style="font-weight: 700; font-size: 17px;">Ctrl + F2</span> to switch from '''<u>Surveyor</u>''' to '''<u>Driver</u>''' via the '''UDS''' interface</td> | | <td>An action to be performed using the mouse e.g. <span style="font-weight: 700; font-size: 15px; background-color: lightcyan;"> Left Click and Drag </span></td> |
| </tr> | | </tr> |
| | | </table> |
| <tr valign="top">
| | </td> |
| <td><span style="font-weight: 700; font-size: 15px;"><span style="color: white; background-color: black;"> Ctrl </span> <span style="color: white; background-color: black;"> M </span></span></td>
| |
| <td>press <span style="font-weight: 700; font-size: 17px;">Ctrl + M</span> to open the '''<u>Mini Map</u>'''</td>
| |
| </tr> | | </tr> |
| | | </table> |
| <tr valign="top">
| | </td> |
| <td><span style="font-weight: 700; font-size: 15px;"><span style="color: white; background-color: black;"> Ctrl </span> <span style="color: white; background-color: black;"> R </span></span></td>
| |
| <td>press <span style="font-weight: 700; font-size: 17px;">Ctrl + R</span> to open the '''<u>Session Editor</u>''' (to edit the session name, description and rules)</td>
| |
| </tr> | | </tr> |
| | | </table> |
| | <br> |
| | <table width=1000> <!-- BEGIN Nav Buttons Table --> |
| <tr valign="top"> | | <tr valign="top"> |
| <td><span style="font-weight: 700; font-size: 15px;"><span style="color: white; background-color: black;"> Ctrl </span> <span style="color: white; background-color: black;"> S </span></span></td> | | <td width=629><span id="stepWorld"></span> |
| <td>press <span style="font-weight: 700; font-size: 17px;">Ctrl + S</span> to '''<u>Save</u>''' the current route and/or session (which ever has been edited)</td> | | ='''The Trainz Plus World'''= |
| | </td> |
| | <td width=50>[[image:SkipDown.png|link=#skipHidingShowing|Skip Down]]</td> |
| | <td width=50> </td> <!-- for Skip Up --> |
| | <td width=46>[[image:BackToTop.png|link=#top|alt=Top|Top]]</td> |
| | <td width=75> </td> <!-- for Next Up --> |
| | <td width=75>[[image:NextDown.png|link=#stepInfo|alt=Next Down|Next Down]]</td> |
| | <td width=75>[[image:BackToBottom.png|link=#bottom|alt=Bottom|Bottom]]</td> |
| </tr> | | </tr> |
| | </table> <!-- END Nav Buttons Table --> |
|
| |
|
| <tr valign="top"> | | <table width=1000> |
| <td><span style="font-weight: 700; font-size: 15px;"><span style="color: white; background-color: black;"> Ctrl </span> <span style="color: white; background-color: black;"> V </span></span></td> | | <tr> |
| <td>press <span style="font-weight: 700; font-size: 17px;">Ctrl + V</span> to '''<u>Paste</u>''' the current '''Scrapbook''' into the route at the cursor position (the '''Surveyor Compass Rose'''). The current settings in the <span style="font-weight: 700; font-size: 15px; color: white; background-color: #797979;"> Scrapbook Palette </span> Filter will control which objects are pasted and how they are pasted</td> | | <td>When you start '''Trainz Plus''' and '''TRS22 Platinum''' the world presented will look something like the following images, but what you actually see can be highly customised to your own preferences.</td> |
| </tr> | | </tr> |
| | </table> |
| | <br> |
| | <span style="font-weight: 700; font-size: 17px; color: white; background-color: blue"> Surveyor 2.0 </span><br> |
|
| |
|
| <tr valign="top">
| | [[image:S20_SurveyorScreen.png|link=]]<br> |
| <td><span style="font-weight: 700; font-size: 15px;"><span style="color: white; background-color: black;"> Ctrl </span> <span style="color: white; background-color: black;"> X </span></span></td>
| |
| <td>press <span style="font-weight: 700; font-size: 17px;">Ctrl + X</span> to '''<u>Cut</u>''' and remove selected objects from the route and place them into a new '''Scrapbook'''. The ground heights, ground textures, '''TurfFX/Clutter Effect Layers''' and any selected objects that are in locked layers will be copied into the '''Scrapbook''', not cut</td>
| |
| </tr> | |
|
| |
|
| <tr valign="top"> | | <table width=1000> |
| <td><span style="font-weight: 700; font-size: 15px;"><span style="color: white; background-color: black;"> Ctrl </span> <span style="color: white; background-color: black;"> Y </span></span></td> | | <tr> |
| <td>press <span style="font-weight: 700; font-size: 17px;">Ctrl + Y</span> to '''<u>Redo</u>''' (reverse) the last <span style="font-weight: 700; font-size: 17px"><span style="color: white; background-color: black;"> Ctrl </span> <span style="color: white; background-color: black;"> Z </span></span> command</td> | | <td>The dark grey strips on the left and right of the screen contain '''Palettes''' that have been '''Docked''' into the positions shown. Palettes are where selections can be made, information displayed and controls set.</td> |
| </tr> | | </tr> |
|
| |
| <tr valign="top"> | | <tr valign="top"> |
| <td><span style="font-weight: 700; font-size: 15px;"><span style="color: white; background-color: black;"> Ctrl </span> <span style="color: white; background-color: black;"> Z </span></span></td> | | <td> |
| <td>press <span style="font-weight: 700; font-size: 17px;">Ctrl + Z</span> to '''<u>Undo</u>''' previous actions</td>
| | <table width=1000 bgcolor=#000000 cellpadding=2> |
| </tr>
| |
| | |
| <tr valign="top"> | | <tr valign="top"> |
| <td><span style="font-weight: 700; font-size: 15px;"><span style="color: white; background-color: black;"> Ctrl </span> <span style="color: white; background-color: black;"> Space </span></span></td> | | <td> |
| <td>press <span style="font-weight: 700; font-size: 17px;">Ctrl + Space</span> to show/hide the '''<u>User Interface</u>'''. The Trainz Main Menu icons and all the docked palettes in the sidebars will be hidden while "free floating" palettes will still be visible and usable</td>
| | <table width=996 bgcolor=#ffffff cellpadding=2> |
| </tr>
| |
| | |
| <tr valign="top"> | | <tr valign="top"> |
| <td><span style="font-weight: 700; font-size: 15px; color: white; background-color: black;"> Alt </span></td> | | <td width=35>[[image:Information35.png|link=]]</td> |
| <td>hold down the <span style="font-weight: 700; font-size: 17px;"> Alt </span> key and hover the tool pointer over an object to '''<u>Identify</u>''' it</td> | | <td>The main difference between a '''Palette''' and a '''Window''' is that palettes can be docked or grouped together, windows cannot. All those listed in the [[image:SurveyorWindowIcon.png|link=]] '''Window Menu''' in '''Surveyor''' can be docked so they are '''Palettes'''.</td> |
| </tr> | | </tr> |
| | | </table> |
| <tr valign="top">
| | </td> |
| <td><span style="font-weight: 700; font-size: 15px;"><span style="color: white; background-color: black;"> Alt </span> <span style="color: white; background-color: blue;"> LClick </span></span></td>
| |
| <td>hold down the <span style="font-weight: 700; font-size: 17px;"> Alt </span> key and <span style="font-weight: 700; font-size: 17px;"> Left Click </span> on an object to '''<u>Select</u>''' it in the <span style="font-weight: 700; font-size: 15px; color: white; background-color: #797979;"> Assets Palette </span> and to copy some data from the object to the <span style="font-weight: 700; font-size: 15px; color: white; background-color: #797979;"> Tool Options Palette </span></td>
| |
| </tr> | | </tr> |
| | | </table> |
| <tr valign="top">
| | </td> |
| <td><span style="font-weight: 700; font-size: 15px; color: white; background-color: black;"> Delete </span></td>
| |
| <td>press the <span style="font-weight: 700; font-size: 17px;">Delete</span> key to '''<u>Delete</u>''' a selected object or objects from the route</td>
| |
| </tr> | | </tr> |
| | | </table> |
| | <br> |
| | <table width=1000> |
| <tr valign="top"> | | <tr valign="top"> |
| <td colspan=2></td> | | <td> |
| | <table width=450 bgcolor=#000000 cellpadding=2> |
| | <tr> |
| | <td> |
| | <table width=446 bgcolor=#ffffff cellpadding=2> |
| | <tr> |
| | <td colspan=2>Shown in the image above are 6 '''Palettes''' from top left to bottom right:-</td> |
| </tr> | | </tr> |
|
| |
| <tr valign="top"> | | <tr valign="top"> |
| <td></td> | | <td width=10>[[image:DotPoint.JPG|10px|link=]]</td> |
| <td><span style="font-weight: 700; font-size: 15px; color: white; background-color: black;"> Tools </span> a <span style="font-weight: 700; font-size: 17px; color: white; background-color: blue;"> LClick </span> on an '''Icon''' will also select it</td> | | <td>'''Layers'''</td> |
| </tr> | | </tr> |
| | | <tr> |
| <tr valign="top"> | | <td width=10>[[image:DotPoint.JPG|10px|link=]]</td> |
| <td colspan=2>
| | <td>'''Filter'''</td> |
| <table>
| |
| <tr valign="top">
| |
| <td width=40><span style="font-weight: 700; font-size: 17px; color: white; background-color: black;"> W </span></td> | |
| <td width=320>selects the <span style="font-weight: 700; font-size: 17px;">Brush Tool</span> [[image:S20_BrushToolIcon.png|link=|20px]]</td>
| |
| <td width=440 rowspan=7 valign="middle">[[image:ToolsKeyboard_S20.png|link=]]</td> | |
| </tr> | | </tr> |
| <tr valign="top"> | | <tr> |
| <td><span style="font-weight: 700; font-size: 17px; color: white; background-color: black;"> E </span></td>
| | <td width=10>[[image:DotPoint.JPG|10px|link=]]</td> |
| <td>selects the <span style="font-weight: 700; font-size: 17px;">Placement Tool</span> [[image:S20_PlacementToolIcon.png|link=|20px]]</td> | | <td>'''Assets'''</td> |
| </tr> | | </tr> |
| <tr valign="top"> | | <tr valign="top"> |
| <td><span style="font-weight: 700; font-size: 17px; color: white; background-color: black;"> R </span></td> | | <td width=10>[[image:DotPoint.JPG|10px|link=]]</td> |
| <td>selects the <span style="font-weight: 700; font-size: 17px;">Eyedropper Tool</span> [[image:S20_DropperToolIcon.png|link=|20px]]</td>
| | <td>'''Tools'''</td> |
| </tr> | | </tr> |
| <tr valign="top"> | | <tr valign="top"> |
| <td><span style="font-weight: 700; font-size: 17px; color: white; background-color: black;"> S </span></td> | | <td width=10>[[image:DotPoint.JPG|10px|link=]]</td> |
| <td>selects the <span style="font-weight: 700; font-size: 17px;">Free Move Tool</span> [[image:S20_FreeMoveToolIcon.png|link=|20px]]</td>
| | <td>'''Tool Options'''</td> |
| </tr> | | </tr> |
| <tr valign="top"> | | <tr valign="top"> |
| <td><span style="font-weight: 700; font-size: 17px; color: white; background-color: black;"> D </span></td> | | <td width=10>[[image:DotPoint.JPG|10px|link=]]</td> |
| <td>selects the <span style="font-weight: 700; font-size: 17px;">Fine Adjustment Tool</span> [[image:S20_FineAdjustmentToolIcon.png|link=|20px]]</td>
| | <td>'''Info'''</td> |
| </tr>
| |
| <tr valign="top">
| |
| <td><span style="font-weight: 700; font-size: 17px; color: white; background-color: black;"> F </span></td>
| |
| <td>selects the <span style="font-weight: 700; font-size: 17px;">Marquee Tool</span> [[image:S20_MarqueeToolIcon.png|link=|20px]]</td>
| |
| </tr>
| |
| <tr valign="top">
| |
| <td><span style="font-weight: 700; font-size: 17px; color: white; background-color: black;"> T </span></td>
| |
| <td>opens the <span style="font-weight: 700; font-size: 17px;">Context Menu</span> of a selected object</td>
| |
| </tr>
| |
| <tr valign="middle">
| |
| <td> </td>
| |
| <td colspan=2 align="center"><span style="font-weight: 700; font-size: 15px;">Object Context Icons:</span> [[image:ContextIconsOneRow_S20.png|link=]]</td> | |
| </tr> | | </tr> |
| </table> | | </table> |
| Line 223: |
Line 216: |
| </table> | | </table> |
| </td> | | </td> |
| </tr> | | <td width=50> </td> |
| </table> | | <td> |
| <br> | | <table width=500 bgcolor=#000000 cellpadding=2> |
| <table cellpadding=4 bgcolor="Aquamarine"> | | <tr> |
| <tr valign="top"> | | <td> |
| <td>[[image:LinkWiki.PNG|link=]]</td> | | <table width=496 bgcolor=#ffffff cellpadding=2> |
| <td>Further information on the topics mentioned in the above list can be found in '''Trainz Wiki Pages''' at:- | | <tr> |
| | <td colspan=2>Not shown are 6 more '''Palettes''' that have been hidden from view:- |
| <table> | | <table> |
| <tr valign="top"> | | <tr valign="top"> |
| <td width=10>[[image:BlackDot10x10.png|link=]]</td> | | <td width=10>[[image:DotPointBlueSquare.png|10px|link=]]</td> |
| <td>'''[[How to Use Session Editor|The Session Editor]]'''</td> | | <td>'''Scrapbook'''</td> |
| </tr> | | </tr> |
| <tr valign="top"> | | <tr valign="top"> |
| <td>[[image:BlackDot10x10.png|link=]]</td> | | <td width=10>[[image:DotPointBlueSquare.png|10px|link=]]</td> |
| <td>'''[[Route_and_Session_Basics#Editing_a_Route|The Route Editor]]'''</td> | | <td>'''Asset Preview'''</td> |
| </tr> | | </tr> |
| <tr valign="top"> | | <tr valign="top"> |
| <td>[[image:BlackDot10x10.png|link=]]</td> | | <td width=10>[[image:DotPointBlueSquare.png|10px|link=]]</td> |
| <td>'''[[How to Use the UDS Interface|The UDS Interface]]'''</td> | | <td>'''Content Packages'''</td> |
| </tr> | | </tr> |
| </table> | | <tr valign="top"> |
| </td> | | <td width=10>[[image:DotPointBlueSquare.png|10px|link=]]</td> |
| | <td>'''Dispatch Manager''' - in <span style="font-weight: 700; background-color: yellow;">Trainz Plus only</span> this is also a window in '''Driver'''</td> |
| </tr> | | </tr> |
| </table>
| |
| <br>
| |
| <table>
| |
| <tr valign="top"> | | <tr valign="top"> |
| <td><span style="font-weight: 700; font-size: 15px;">The Surveyor Tools</span></td> | | <td width=10>[[image:DotPointBlueSquare.png|10px|link=]]</td> |
| | <td>'''Logs'''</td> |
| </tr> | | </tr> |
| <tr valign="top"> | | <tr valign="top"> |
| <td>[[image:ToolsWork_S20.png|link=]]</td> | | <td width=10>[[image:DotPointBlueSquare.png|10px|link=]]</td> |
| | <td>'''Drivers'''</td> |
| </tr> | | </tr> |
| </table> | | </table> |
| <br>
| | </td> |
| <table bgcolor=#000000 width=600 cellpadding=2>
| |
| <tr valign="top">
| |
| <td>
| |
| <table bgcolor=#ffffb0 width=596 cellpadding=2>
| |
| <tr valign="top">
| |
| <td>
| |
| <table>
| |
| <tr valign="top">
| |
| <td width=25>[[image:NotePad.PNG|link=]]</td>
| |
| <td><span style="font-size: 17px; font-weight: 700;">Assets and Objects</span><br>
| |
| ----
| |
| (based on the '''[https://docs.trainzsimulator.com/surveyor-20 Surveyor 2.0 Overview]''' document)<br>
| |
| | |
| In this online documentation, the term <span style="font-weight: 700; font-size: 15px;">Asset</span> is used when discussing the items listed in '''Content Manager''' and the <span style="font-weight: 700; font-size: 15px; color: white; background-color: #797979;"> Assets Palette </span>. When an asset is placed into the '''Trainz World''' then it will be referred to as an <span style="font-weight: 700; font-size: 15px;">Object</span>.</td>
| |
| </tr> | | </tr> |
| </table> | | </table> |
| Line 280: |
Line 260: |
| </table> | | </table> |
| <br> | | <br> |
| <table bgcolor=#000000 cellpadding=2> | | <span style="font-weight: 700; font-size: 17px; color: white; background-color: blue"> Driver </span><br> |
| | <table width=1000 bgcolor=#000000 cellpadding=2> |
| <tr valign="top"> | | <tr valign="top"> |
| <td> | | <td> |
| <table bgcolor=#ffffff cellpadding=2> | | <table width=996 bgcolor=#ffffff cellpadding=2> |
| <tr valign="top"> | | <tr valign="top"> |
| <td align="center"><span style="font-weight: 700; font-size: 15px;">Navigation Icons used in this Document</span></td> | | <td width=35>[[image:Information35.png|link=]]</td> |
| | <td>The main difference between a '''Palette''' and a '''Window''' is that palettes can be docked or grouped together, windows cannot. All those listed in the [[image:SurveyorWindowIcon.png|link=]] '''Window Menu''' in '''Driver''' cannot be docked so they are '''Windows'''.</td> |
| | </tr> |
| | </table> |
| | </td> |
| </tr> | | </tr> |
| | </table> |
| | <br> |
| | All the windows in '''Driver''' are normally hidden.<br> |
| | |
| | [[image:S20_DriverScreen.png|link=]]<br> |
| | |
| | <table width=1000> |
| <tr valign="top"> | | <tr valign="top"> |
| <td> | | <td> |
| <table> | | <table width=350 bgcolor=#000000 cellpadding=2> |
| <tr valign="top"> | | <tr> |
| <td>[[image:BackToTop.png|link=#top|alt=Top|Top]] [[image:BackToBottom.png|link=#bottom|alt=Bottom|Bottom]]</td> | | <td> |
| <td>at '''Chapter Headings''' to jump to the top/bottom of the document</td> | | <table width=346 bgcolor=#ffffff cellpadding=2> |
| | <tr> |
| | <td colspan=2>Shown in the image above are 2 '''Windows''':-</td> |
| </tr> | | </tr> |
| <tr valign="top"> | | <tr> |
| <td>[[image:NextUp.png|link=#top|Next Up]] [[image:NextDown.png|link=#stepTools|link=|Next Down]]</td> | | <td width=10>[[image:DotPoint.JPG|10px|link=]]</td> |
| <td>at '''Chapter Headings''' to jump to the next or previous '''Chapter'''<br> | | <td>'''Session Options'''</td> |
| e.g. '''1.''' to '''2.''' to '''3.''', etc</td>
| |
| </tr> | | </tr> |
| <tr valign="top"> | | <tr valign="top"> |
| <td>[[image:SkipUp.png|link=#top|Next Up]] [[image:SkipDown.png|link=#stepS20vS10|Skip Down]]</td> | | <td width=10>[[image:DotPoint.JPG|10px|link=]]</td> |
| <td>within '''Chapters''' to jump to the next or previous '''Section'''<br>
| | <td>'''Commodity Picker'''</td> |
| e.g. '''3.1''' to '''3.2''' to '''3.3''', etc</td>
| |
| </tr>
| |
| <tr valign="top">
| |
| <td>[[image:HeadingUp.png|link=#top|To Heading]]</td>
| |
| <td>within '''Sections''' to return to the current '''Chapter Heading'''<br>
| |
| e.g. '''3.3''' back to '''3.0'''</td>
| |
| </tr>
| |
| <tr valign="top">
| |
| <td>[[image:SkipMinorUp.png|link=#top|Up]] [[image:SkipMinorDown.png|link=#stepS20vS10|Down]]</td>
| |
| <td>within '''Sections''' to jump to the next or previous '''Sub-section'''<br> | |
| e.g. '''3.1.1''' to '''3.1.2''' to '''3.1.3''', etc</td>
| |
| </tr> | | </tr> |
| </table> | | </table> |
| Line 319: |
Line 301: |
| </table> | | </table> |
| </td> | | </td> |
| </tr> | | <td width=50> </td> |
| </table> | | <td> |
| <br> | | <table width=600 bgcolor=#000000 cellpadding=2> |
| <table bgcolor=#000000 cellpadding=2> | | <tr> |
| <tr valign="top"> | |
| <td> | | <td> |
| <table bgcolor=#ffffff cellpadding=2> | | <table width=596 bgcolor=#ffffff cellpadding=2> |
| | <tr> |
| | <td colspan=2>Not shown are 5 more '''Windows''':- |
| | <table> |
| <tr valign="top"> | | <tr valign="top"> |
| <td colspan=2 align="center"><span style="font-weight: 700; font-size: 15px;">Colour Coded Labels used in this Document</span></td> | | <td width=10>[[image:DotPointBlueSquare.png|10px|link=]]</td> |
| | <td>'''Session Info'''</td> |
| </tr> | | </tr> |
| <tr valign="top"> | | <tr valign="top"> |
| <td><span style="font-weight: 700; font-size: 15px; color: white; background-color: #797979;"> Palette </span></td> | | <td>[[image:DotPointBlueSquare.png|10px|link=]]</td> |
| <td>Name of a palette e.g. <span style="font-weight: 700; font-size: 15px; color: white; background-color: #797979;"> Assets Palette </span></td> | | <td>'''Driver Control Center'''</td> |
| </tr> | | </tr> |
| <tr valign="top"> | | <tr valign="top"> |
| <td><span style="font-weight: 700; font-size: 15px; color: white; background-color: #000000;"> Option </span></td> | | <td width=10>[[image:DotPointBlueSquare.png|10px|link=]]</td> |
| <td>Drop Down Menu option e.g. <span style="font-weight: 700; font-size: 15px; color: white; background-color: black;"> Copy </span></td> | | <td>'''Dispatch Manager''' - in <span style="font-weight: 700; background-color: yellow;">Trainz Plus only</span> this is also a palette in '''Surveyor'''</td> |
| </tr> | | </tr> |
| <tr valign="top"> | | <tr valign="top"> |
| <td><span style="font-weight: 700; font-size: 15px; color: white; background-color: #000000;"> Key </span></td> | | <td>[[image:DotPointBlueSquare.png|10px|link=]]</td> |
| <td>Keystroke or keystroke combination e.g. <span style="font-weight: 700; font-size: 15px; color: white; background-color: black;"> Shift </span> or <span style="font-weight: 700; font-size: 15px;"><span style="color: white; background-color: black;"> Ctrl </span> + <span style="color: white; background-color: black;"> C </span></span></td> | | <td>'''Waybills'''</td> |
| </tr> | | </tr> |
| <tr valign="top"> | | <tr valign="top"> |
| <td><span style="font-weight: 700; font-size: 15px; color: gold; background-color: #000000;"> Control </span></td> | | <td>[[image:DotPointBlueSquare.png|10px|link=]]</td> |
| <td>A control setting in the <span style="font-weight: 700; font-size: 15px; color: white; background-color: #797979;"> Tool Options Palette </span> e.g. <span style="font-weight: 700; font-size: 15px; color: gold; background-color: black;"> Radius </span></td> | | <td>'''Schedule Info'''</td> |
| </tr> | | </tr> |
| <tr valign="top">
| | </table> |
| <td><span style="font-weight: 700; font-size: 15px; color: black; background-color: lightcyan;"> Mouse </span></td>
| | </td> |
| <td>An action to be performed using the mouse e.g. <span style="font-weight: 700; font-size: 15px; background-color: lightcyan;"> Left Click and Drag </span></td>
| |
| </tr> | | </tr> |
| </table> | | </table> |
| Line 357: |
Line 341: |
| </table> | | </table> |
| <br> | | <br> |
| <table width=1000> <!-- BEGIN Nav Buttons Table --> | | <table width=1000> <!-- BEGIN Nav Buttons Table SKIPS NO SECTIONS --> |
| <tr valign="top"> | | <tr valign="top"> |
| <td width=629><span id="stepS20vS10"></span> | | <td width=629><span id="skipHidingShowing"></span> |
| ='''Surveyor 2.0 vs Surveyor Classic'''= | | =='''Hiding and Showing Palettes and Windows'''== |
| </td> | | </td> |
| <td width=50> </td> <!-- for Skip Down --> | | <td width=50>[[image:SkipDown.png|link=#skipDocking|Skip Down]]</td> <!-- skip Down --> |
| <td width=50> </td> <!-- for Skip Up --> | | <td width=50>[[image:SkipUp.png|link=#stepWorld|Skip Up]]</td> <!-- skip Up --> |
| <td width=46>[[image:BackToTop.png|link=#top|alt=Top|Top]]</td>
| | <td width=46> </td> |
| <td width=75> </td> <!-- for Next Up --> | | <td width=75>[[image:HeadingUp.png|link=#stepWorld|alt=Heading|To Heading]]</td> |
| <td width=75>[[image:NextDown.png|link=#stepTools|alt=Next Down|Next Down]]</td> | | <td width=75> </td> |
| <td width=75>[[image:BackToBottom.png|link=#bottom|alt=Bottom|Bottom]]</td> | | <td width=75> </td> |
| </tr> | | </tr> |
| </table> <!-- END Nav Buttons Table --> | | </table> <!-- END Nav Buttons Table --> |
|
| |
|
| <table width=1000 cellpadding=2 bgcolor="lightcyan"> | | <table width=1000 bgcolor="lightcyan" cellpadding=2> |
| <tr valign="top"> | | <tr valign="top"> |
| <td colspan=2><span style="font-size: 17px; font-weight: 700;">Surveyor 2.0</span></td> | | <td width=10>[[image:BlueDot10x10.png|link=]]</td> |
| | <td>'''Palettes''' and '''Windows''', in both '''Surveyor''' and '''Driver''', are hidden and revealed using the [[image:SurveyorWindowIcon.png|link=]] '''Window Menu'''.</td> |
| </tr> | | </tr> |
| | </table> |
| | <br> |
| | <table bgcolor=#000000 width=1000 cellpadding=2> |
| <tr valign="top"> | | <tr valign="top"> |
| <td colspan=2>'''Surveyor 2.0''' (or '''S20''') is the new '''Surveyor''' interface provided to '''Trainz Plus''' and '''TRS22 Platinum''' as an alternative to '''Surveyor Classic''' which has existed since 2002. '''Surveyor Classic''' is still available as an option in '''Trainz Plus''' and '''TRS22 Platinum'''.</td> | | <td> |
| | <table bgcolor=#ffffe0 width=996 cellpadding=2> |
| | <tr valign="top"> |
| | <td>[[image:PencilTips.PNG|link=]]</td> |
| | <td>In '''Surveyor''' the visible/hidden state of each palette will be saved when you close the program. When you restart each palette will be returned to that last saved state.</td> |
| </tr> | | </tr> |
| | </table> |
| | </td> |
| | </tr> |
| | </table> |
| | <br> |
| | The visible and hidden '''Palettes''' and '''Windows''' in the screenshots shown above have had their visibility set by:- |
| | <table width=1000> |
| <tr valign="top"> | | <tr valign="top"> |
| <td colspan=2><span style="font-size: 17px; font-weight: 700;">Whats New</span></td> | | <td width=175 align="center"><span style="font-weight: 700; font-size: 15px; color: white; background-color: black;"> Surveyor </span><br> |
| </tr> | | [[image:WindowsMenu_S20.png|link=]]</td> |
| | <td width=170 align="center"><span style="font-weight: 700; font-size: 15px; color: white; background-color: black;"> Driver </span><br> |
| | [[image:WindowsMenu_Driver.png|link=]]</td> |
| | <td> |
| | <table bgcolor=#000000 cellpadding=2> |
| | <tr valign="top"> |
| | <td> |
| | <table bgcolor=#ffffff cellpadding=2> |
| <tr valign="top"> | | <tr valign="top"> |
| <td width=10>[[image:BlueDot10x10.png|link=]]</td> | | <td colspan=2><span style="font-weight: 700; font-size: 15px;;">Steps: To Hide or Show a Palette/Window:-</span></td> |
| <td>a single set of common tools that can be applied to '''ALL''' types of objects</td>
| |
| </tr> | | </tr> |
| <tr valign="top"> | | <tr valign="top"> |
| <td>[[image:BlueDot10x10.png|link=]]</td> | | <td width=20>[[image:DotPoint1.JPG|link=]]</td> |
| <td>the ability to select multiple objects of different types that can be manipulated as one with more freedom than was previously possible</td> | | <td><span style="font-weight: 700; font-size: 15px; background-color: lightcyan;"> Left Click </span> on the [[image:SurveyorWindowIcon.png|link=]] '''Window Menu'''</td> |
| </tr> | | </tr> |
| <tr valign="top"> | | <tr valign="top"> |
| <td>[[image:BlueDot10x10.png|link=]]</td> | | <td> </td> |
| <td>each object has its own '''Context Menu''' that applies specific actions depending on the type of object</td> | | <td> |
| </tr> | | <table> |
| <tr valign="top"> | | <tr valign="top"> |
| <td>[[image:BlueDot10x10.png|link=]]</td> | | <td with=10> </td> |
| <td>information and controls in dockable and moveable '''Palettes''' that can be hidden when not needed</td> | | <td>The popup menu will show:-</td> |
| </tr> | | </tr> |
| <tr valign="top"> | | <tr valign="top"> |
| <td>[[image:BlueDot10x10.png|link=]]</td> | | <td width=10>[[image:BulletTick.png|link=]]</td> |
| <td>a new '''Scrapbook''' asset to store "scenes" that can be pasted anywhere in a route, between routes and shared through the '''DLS'''</td> | | <td>visible palettes/windows have ticks next to their names - this includes those that are visible but minimised</td> |
| </tr> | | </tr> |
| <tr valign="top"> | | <tr valign="top"> |
| <td>[[image:BlueDot10x10.png|link=]]</td> | | <td>[[image:BulletNoTick.png|link=]]</td> |
| <td>a new '''Marquee Tool''' that allows:-<br> | | <td>invisible (hidden) palettes/windows have no ticks next to their names</td> |
| <table>
| |
| <tr valign="top">
| |
| <td width=10>[[image:DotPointBlueSquare.png|10px|link=]]</td>
| |
| <td>multiple baseboards to be added, deleted and have their heights, ground texture and grid sizes changed in a single operation</td>
| |
| </tr> | | </tr> |
| <tr valign="top"> | | <tr valign="top"> |
| <td>[[image:DotPointBlueSquare.png|10px|link=]]</td> | | <td> </td> |
| <td>objects, ground heights, ground textures and '''TurfFX/Clutter Effect Layers''' to be moved and copied</td> | | <td>minimised palettes and windows (e.g. the '''Mini Map''' or '''Drivers''' as shown in the images) are also listed below the bottom dividing line</td> |
| </tr> | | </tr> |
| </table> | | </table> |
| Line 417: |
Line 418: |
| </tr> | | </tr> |
| <tr valign="top"> | | <tr valign="top"> |
| <td>[[image:BlueDot10x10.png|link=]]</td> | | <td>[[image:DotPoint2.JPG|link=]]</td> |
| <td>'''HD Resolution''' in '''Trainz Plus'''</td> | | <td>To hide a visible palette or window, or to reveal an invisible one, simply <span style="font-weight: 700; font-size: 15px; background-color: lightcyan;"> Left Click </span> on its name <span style="font-weight: 700; font-size: 15px;">OR</span> on the [[image:BulletTick.png|link=]] [[image:BulletNoTick.png|link=]] icon next to its name</td> |
| </tr> | | </tr> |
| <tr valign="top"> | | <tr valign="top"> |
| <td>[[image:BlueDot10x10.png|link=]]</td> | | <td>[[image:DotPoint3.JPG|link=]]</td> |
| <td>'''Color Effect Layer''' in '''Trainz Plus''' routes that use '''HD Resolution'''</td> | | <td>To show a minimised palette or window <span style="font-weight: 700; font-size: 15px; background-color: lightcyan;"> Left Click </span> on its name</td> |
| | </tr> |
| | </table> |
| | </td> |
| </tr> | | </tr> |
| </table> | | </table> |
| <br> | | <br> |
| The following screen images help illustrate the change in philosophy that has occurred with the release of the '''Surveyor 2.0''' user interface.
| | See also [[image:PageLink.PNG|link=]] '''[[#Minimise Maximise Close|Minimise Maximise Close]]''' below. |
| <table bgcolor=#000000 width=1000 cellpadding=2> | | <br> |
| | <table bgcolor=#000000 cellpadding=2> |
| <tr valign="top"> | | <tr valign="top"> |
| <td> | | <td> |
| <table bgcolor=#ffffff width=996 cellpadding=2> | | <table bgcolor=#ffffb0 cellpadding=2> |
| <tr valign="top"> | | <tr valign="top"> |
| <td align="center" colspan=2><span style="font-weight: 700; font-size: 15px; color: white; background-color: blue;"> Surveyor Classic </span><br> | | <td width=25>[[image:NotePad.PNG|link=]]</td> |
| '''2002 - 2022'''<br>
| | <td>The '''Dispatch Manager''' window found in <span style="font-weight: 700; background-color: yellow;">Trainz Plus only</span> is located under the [[image:SurveyorToolsIcon_S20.png|link=]] '''Tools Menu''' in both '''Surveyor''' and '''Driver'''</td> |
| [[image:Surveyor10Screen.png|link=]]</td> | |
| </tr> | | </tr> |
| <tr valign="top">
| | </table> |
| <td width=10>[[image:DotPoint.JPG|10px|link=]]</td>
| |
| <td>all the tools are in separate fixed Tabbed Flyouts with a different Flyout and set of tools for each type of object (scenery, track, terrain, textures, trains, etc)</td>
| |
| </tr>
| |
| <tr valign="top">
| |
| <td>[[image:DotPoint.JPG|10px|link=]]</td>
| |
| <td>the workflow forces you to select the correct tool for the type of object and then apply it to just a single object at a time
| |
| </td> | | </td> |
| </tr> | | </tr> |
| Line 450: |
Line 448: |
| </table> | | </table> |
| <br> | | <br> |
| <table bgcolor=#000000 width=1000 cellpadding=2> | | <table width=1000 bgcolor=#000000 cellpadding=2> |
| <tr valign="top"> | | <tr valign="top"> |
| <td> | | <td> |
| <table bgcolor=#ffffff width=996 cellpadding=2> | | <table bgcolor=#ffffe0 cellpadding=2> |
| <tr valign="top"> | | <tr valign="top"> |
| <td align="center" colspan=2><span style="font-weight: 700; font-size: 15px; color: white; background-color: blue;"> Surveyor 2.0 </span><br> | | <td width=25>[[image:PencilTips.PNG|link=]]</td> |
| '''2022 - '''<br>
| | <td><span style="font-weight: 700; font-size: 15px;">Hiding the Menu Bar and Side Panels</span></td> |
| [[image:Surveyor20Screen.png|link=]]</td>
| |
| </tr> | | </tr> |
| <tr valign="top"> | | <tr valign="top"> |
| <td width=10>[[image:DotPoint.JPG|10px|link=]]</td> | | <td> </td> |
| <td>there is just one set of tools that can be applied to all types of objects | | <td>In '''Surveyor''' you can '''Hide''' the '''Menu Bar''' and all the palettes docked in the two side panels. Press the <span style="font-weight: 700; font-size: 15px;"><span style="color: white; background-color: black;"> Ctrl </span> + <span style="color: white; background-color: black;"> Space </span></span> keys to hide and show the menu bar and the side panels. This will not hide those palettes and windows that are undocked and "free floating".<br> |
| </td> | | See the '''Tips''' in [[image:PageLink.PNG|link=]] '''[[#skipMinMax|Minimise Maximise Close]]''' for an additional option.</td> |
| </tr> | |
| <tr valign="top"> | |
| <td>[[image:DotPoint.JPG|10px|link=]]</td> | |
| <td>the workflow allows you to select multiple objects (that can be of different types) and then apply a selected tool or operation to them all
| |
| </td> | |
| </tr> | | </tr> |
| </table> | | </table> |
| Line 474: |
Line 466: |
| </table> | | </table> |
| <br> | | <br> |
| <table width=1000> <!-- BEGIN Nav Buttons Table --> | | <table width=1000> <!-- BEGIN Nav Buttons Table SKIPS NO SECTIONS --> |
| <tr valign="top"> | | <tr valign="top"> |
| <td width=629><span id="stepTools"></span> | | <td width=629><span id="skipDocking"></span> |
| ='''The Tools Palette'''= | | =='''Docking and Undocking Palettes'''== |
| </td> | | </td> |
| <td width=50> </td> <!-- for Skip Down --> | | <td width=50>[[image:SkipDown.png|link=#skipResizing|Skip Down]]</td> <!-- skip Down --> |
| <td width=50> </td> <!-- for Skip Up --> | | <td width=50>[[image:SkipUp.png|link=#skipHidingShowing|Skip Up]]</td> <!-- skip Up --> |
| <td width=46>[[image:BackToTop.png|link=#top|alt=Top|Top]]</td> | | <td width=46> </td> |
| <td width=75>[[image:NextUp.png|link=#stepS20vS10|alt=Next Up|Next Up]]</td> | | <td width=75>[[image:HeadingUp.png|link=#stepWorld|alt=Heading|To Heading]]</td> |
| <td width=75>[[image:NextDown.png|link=#stepBrush|alt=Next Down|Next Down]]</td> | | <td width=75> </td> |
| <td width=75>[[image:BackToBottom.png|link=#bottom|alt=Bottom|Bottom]]</td> | | <td width=75> </td> |
| </tr> | | </tr> |
| </table> <!-- END Nav Buttons Table --> | | </table> <!-- END Nav Buttons Table --> |
| Line 491: |
Line 483: |
| <tr valign="top"> | | <tr valign="top"> |
| <td width=10>[[image:BlueDot10x10.png|link=]]</td> | | <td width=10>[[image:BlueDot10x10.png|link=]]</td> |
| <td>The <span style="font-weight: 700; font-size: 15px; color: white; background-color: #797979;"> Tools Palette </span> is at the core of '''Surveyor 2.0''' and takes the place of all the '''Tool Flyouts''' that have been the standard for Trainz Surveyor for many years. Some of the tools are new while others have been given a makeover and new abilities.</td> | | <td>'''Palettes''' in '''Surveyor''' are normally '''Docked''', locked into fixed positions on both sides of the '''Surveyor Screen'''. They can be '''Undocked''' and freed to move anywhere on the screen.</td> |
| | </tr> |
| | <tr valign="top"> |
| | <td>[[image:BlueDot10x10.png|link=]]</td> |
| | <td>'''Windows''' in '''Driver''' are '''Undocked''' and are free to move anywhere on the screen. They cannot be '''Docked'''.</td> |
| </tr> | | </tr> |
| </table> | | </table> |
| <br> | | <br> |
| <table width=1000 bgcolor=#000000 cellpadding=2> | | <table bgcolor=#000000 width=1000 cellpadding=2> |
| <tr valign="top"> | | <tr valign="top"> |
| <td> | | <td> |
| <table width=996 bgcolor=#ffffff cellpadding=2> | | <table bgcolor=#ffffe0 width=996 cellpadding=2> |
| <tr valign="middle"> | | <tr valign="top"> |
| <td width=35>[[image:Information.png|35px|link=]]</td> | | <td width=25>[[image:NotePad.PNG|link=]]</td> |
| <td>A '''Palette''' is a screen box containing tools, controls and/or information that can be hidden/revealed, moved around the screen, resized, docked and undocked with other palettes. There is a '''Trainz Wiki Page''' specifically covering the '''S20 Palettes''' at [[image:WikiLink.PNG|link=]] '''[[How_to_Use_S20_Palettes|How to Use the Surveyor 2.0 Palettes]]'''</td> | | <td><span style="font-size: 17px; font-weight: 700;">Notes:'''</span><br> |
| | ---- |
| | <table> |
| | <tr valign="top"> |
| | <td>[[image:DotPoint.JPG|10px|link=]]</td> |
| | <td>In '''Surveyor''' the docked or undocked state and position of each palette will be saved when you close the program. When you restart each palette will be returned to that last saved state.</td> |
| | </tr> |
| | <tr valign="top"> |
| | <td>[[image:DotPoint.JPG|10px|link=]]</td> |
| | <td>In '''Driver''' the position of a window will '''NOT''' be saved when you close the program.</td> |
| | </tr> |
| | </table> |
| | </td> |
| </tr> | | </tr> |
| </table> | | </table> |
| Line 508: |
Line 516: |
| </table> | | </table> |
| <br> | | <br> |
| | <span style="font-weight: 700; font-size: 17px;">Undocking a Palette</span> |
| | |
| <table width=1000> | | <table width=1000> |
| <tr valign="top"> | | <tr valign="top"> |
| <td width=531>[[image:Tools_S20.png|link=|alt=Tools and keymap for S20]]<br> | | <td width=210>[[image:PalettesUndocking1_S20.png|link=]]</td> |
| <br>
| |
| The <span style="font-weight: 700; font-size: 15px; color: white; background-color: black;"> Context Tool </span> is attached as an icon to a selected or newly placed object. The icon design will vary according to the type of object.
| |
| </td> | |
| <td width=469>
| |
| <span id="Notes_Palettes"></span>
| |
| <table bgcolor=#000000 width=469 cellpadding=2>
| |
| <tr valign="top">
| |
| <td> | | <td> |
| <table bgcolor=#ffffb0 width=465 cellpadding=2> | | <table width=790 bgcolor=#000000 cellpadding=2> |
| <tr valign="top"> | | <tr valign="top"> |
| <td width=25>[[image:NotePad.PNG|link=]]</td>
| |
| <td width=440><span style="font-size: 17px; font-weight: 700;">Notes: Palettes'''</span><br>
| |
| ----
| |
| </td>
| |
| </tr>
| |
| <tr valign="top">
| |
| <td colspan=2>
| |
| If the <span style="font-weight: 700; font-size: 15px; color: white; background-color: #797979;"> Tools Palette </span> is not shown on the screen, then:-
| |
| <table>
| |
| <tr valign="top">
| |
| <td width=175>[[image:WindowsMenu_S20.png|link=|alt=Windows Menu]]</td>
| |
| <td> | | <td> |
| <table bgcolor=#ffffff> | | <table width=786 bgcolor=#ffffff cellpadding=2> |
| <tr valign="top"> | | <tr valign="top"> |
| <td colspan=2><span style="font-weight: 700; font-size: 15px;">Steps:</span> To display palettes:-</td> | | <td colspan=2><span style="font-weight: 700; font-size: 15px;;">Steps: To Undock a Palette from its Docked Position on the Sides of the Screen:-</span></td> |
| </tr> | | </tr> |
| <tr valign="top"> | | <tr valign="top"> |
| <td width=20>[[image:DotPoint1.JPG|link=]]</td> | | <td width=20>[[image:DotPoint1.JPG|link=]]</td> |
| <td>open the [[image:SurveyorWindowIcon.png|link=]] '''Window Menu''' from the menu icons at the top of the screen</td> | | <td>Move the mouse pointer onto the '''Title Bar''' of the palette to be undocked. The pointer will take the shape of a 4 headed arrow</td> |
| </tr> | | </tr> |
| <tr valign="top"> | | <tr valign="top"> |
| <td> </td> | | <td colspan=2> |
| <td> | | <table width=786> |
| <table> | | <tr valign="top"> |
| | <td rowspan=3 width=265>[[image:PalettesUndocking2_S20.png|link=]]</td> |
| | <td width=25>[[image:DotPoint2.JPG|link=]]</td> |
| | <td><span style="font-weight: 700; font-size: 15px; background-color: lightcyan;"> Left Click and Drag </span> the palette to any position on the screen</td> |
| | </tr> |
| <tr valign="top"> | | <tr valign="top"> |
| <td width=10>[[image:BulletTick.png|link=]]</td> | | <td>[[image:DotPoint3.JPG|link=]]</td> |
| <td>visible palettes have ticks next to their names</td> | | <td>Release the mouse button in the new position</td> |
| </tr> | | </tr> |
| <tr valign="top"> | | <tr valign="top"> |
| <td>[[image:BulletNoTick.png|link=]]</td> | | <td colspan=2> |
| <td>invisible (hidden) palettes have no ticks next to their names</td> | | <table bgcolor=#ffffb0 cellpadding=2> |
| </tr> | | <tr valign="top"> |
| </table>
| | <td width=25>[[image:NotePad.PNG|link=]]</td> |
| </td> | | <td><span style="font-size: 17px; font-weight: 700;">Notes:'''</span></td> |
| </tr> | | </tr> |
| <tr valign="top"> | | <tr valign="top"> |
| <td>[[image:DotPoint2.JPG|link=]]</td> | | <td>[[image:DotPoint.JPG|10px|link=]]</td> |
| <td>if the <span style="font-weight: 700; font-size: 15px; color: white; background-color: #797979;"> Tools Palette </span>, or any required palette, does not have a tick next to its name then <span style="font-weight: 700; font-size: 15px; background-color: lightcyan;"> Left Click </span> on the name of the palette or on the empty [[image:BulletNoTick.png|link=]] box next to its name. This will add a [[image:BulletTick.png|link=]] and make the palette visible</td> | | <td>If an '''Undocked''' palette is '''Hidden''' or '''Minimised''' and made '''Visible''' again it will be returned to its previous '''Undocked''' position</td> |
| </tr> | | </tr> |
| <tr valign="top"> | | <tr valign="top"> |
| <td>[[image:DotPoint3.JPG|link=]]</td> | | <td>[[image:DotPoint.JPG|10px|link=]]</td> |
| <td>make sure that the <span style="font-weight: 700; font-size: 15px; color: white; background-color: #797979;"> Tool Options Palette </span> is also visible</td> | | <td>If an '''Undocked''' palette is '''Closed''' and reopened again it will be returned to its previous '''Undocked''' position</td> |
| </tr> | | </tr> |
| </table> | | </table> |
| '''Dispatch Manager''' is a window found under the [[image:SurveyorToolsIcon_S20.png|link=]] '''Tools Menu''' in both '''Surveyor''' and '''Driver''' in <span style="font-weight: 700; background-color: yellow;"> Trainz Plus </span> only</td>
| |
| </tr>
| |
| </table>
| |
| There is a '''Trainz Wiki Page''' specifically covering the '''S20 Palettes''' at<br>[[image:WikiLink.PNG|link=]] '''[[How_to_Use_S20_Palettes|How to Use the Surveyor 2.0 Palettes]]'''
| |
| </td> | | </td> |
| </tr> | | </tr> |
| Line 579: |
Line 571: |
| </table> | | </table> |
| <br> | | <br> |
| <table width=1000 bgcolor=#000000 cellpadding=2> | | <table bgcolor=#000000 cellpadding=2> |
| <tr valign="top"> | | <tr valign="top"> |
| <td> | | <td> |
| <table width=996 bgcolor=#ffffff cellpadding=2> | | <table bgcolor=#ffffe0 cellpadding=2> |
| <tr valign="top"> | | <tr valign="top"> |
| <td colspan=6>Detailed information and instructions for using each of these tools can be found in the links below</td> | | <td width=25>[[image:PencilTips.PNG|link=]]</td> |
| | <td>All palettes that are docked to the two sidebars on the screen can be hidden by pressing the <span style="font-weight: 700; font-size: 15px;"><span style="color: white; background-color: black;"> Ctrl </span> + <span style="color: white; background-color: black;"> Space </span></span> keys. Another press of the same keys will reveal them again.<br> |
| | The palettes that are '''Undocked''' and "free floating" will not be hidden and can still be used. This is a good way to clear out some of the screen real estate to provide more working space</td> |
| </tr> | | </tr> |
| <tr valign="top">
| | </table> |
| <td width=40>[[image:S20_BrushToolIcon.png|link=]]</td>
| | </td> |
| <td width=260>'''[[#The Brush Tool|The Brush Tool]]'''</td>
| |
| <td width=40>[[image:S20_PlacementToolIcon.png|link=]]</td>
| |
| <td width=260>'''[[#The Placement Tool|The Placement Tool]]'''</td>
| |
| <td width=40>[[image:S20_DropperToolIcon.png|link=]]</td>
| |
| <td width=260>'''[[#The Dropper Tool|The Dropper Tool]]'''</td>
| |
| </tr>
| |
| <tr valign="top">
| |
| <td>[[image:S20_FreeMoveToolIcon.png|link=]]</td>
| |
| <td width=260>'''[[#The Free Move Tool|The Free Move Tool]]'''</td>
| |
| <td width=40>[[image:S20_FineAdjustmentToolIcon.png|link=]]</td>
| |
| <td width=260>'''[[#The Fine Adjustment Tool|The Fine Adjustment Tool]]'''</td>
| |
| <td width=40>[[image:S20_MarqueeToolIcon.png|link=]]</td>
| |
| <td width=260>'''[[#The Marquee Tool|The Marquee Tool]]'''</td>
| |
| </tr> | | </tr> |
| </table> | | </table> |
| Line 607: |
Line 588: |
| </table> | | </table> |
| <br> | | <br> |
| <!-- Brush Section -->
| | <span style="font-weight: 700; font-size: 17px;">Docking a Palette</span> |
| <table width=1000> <!-- BEGIN Nav Buttons Table -->
| |
| <tr valign="top">
| |
| <td width=629><span id="stepBrush"></span>
| |
| ='''The Brush Tool'''=
| |
| </td>
| |
| <td width=50>[[image:SkipDown.png|link=#skip Ground Height|Skip Down]]</td>
| |
| <td width=50> </td> <!-- for Skip Up -->
| |
| <td width=46>[[image:BackToTop.png|link=#top|alt=Top|Top]]</td>
| |
| <td width=75>[[image:NextUp.png|link=#stepTools|alt=Next Up|Next Up]]</td>
| |
| <td width=75>[[image:NextDown.png|link=#stepPlacement|alt=Next Down|Next Down]]</td>
| |
| <td width=75>[[image:BackToBottom.png|link=#bottom|alt=Bottom|Bottom]]</td>
| |
| </tr>
| |
| </table> <!-- END Nav Buttons Table -->
| |
|
| |
|
| <table width=1000> | | <table width=1000> |
| <tr valign="top"> | | <tr valign="top"> |
| | <td>[[image:PalettesDocking_S20.png|link=]]</td> |
| <td> | | <td> |
| <table width=214 bgcolor=#000000 cellpadding=2> | | <table bgcolor=#000000 cellpadding=2> |
| <tr valign="top"> | | <tr valign="top"> |
| <td> | | <td> |
| <table width=210 bgcolor=#ffffff cellpadding=2> | | <table bgcolor=#ffffff cellpadding=2> |
| | <tr valign="top"> |
| | <td colspan=2><span style="font-weight: 700; font-size: 15px;;">Steps: To Reverse the Process and Dock a Palette:-</span></td> |
| | </tr> |
| | <tr valign="top"> |
| | <td width=20>[[image:DotPoint1.JPG|link=]]</td> |
| | <td>Move the mouse pointer onto the '''Title Bar''' of the free palette that is to be docked</td> |
| | </tr> |
| | <tr> |
| | <td colspan=2> </td> |
| | </tr> |
| | <tr valign="top"> |
| | <td>[[image:DotPoint2.JPG|link=]]</td> |
| | <td><span style="font-weight: 700; font-size: 15px; background-color: lightcyan;"> Left Click and Drag </span> the palette to the desired position in a docking area. A light grey area will show the palettes docking position</td> |
| | </tr> |
| | <tr> |
| | <td colspan=2> </td> |
| | </tr> |
| <tr valign="top"> | | <tr valign="top"> |
| <td width=40>[[image:S20_BrushToolIcon.png|link=]]</td> | | <td>[[image:DotPoint3.JPG|link=]]</td> |
| <td width=170>'''Keyboard Shortcut:''' <span style="color: white; background-color: black; font-weight: 700; font-size: 17px;"> W </span></td> | | <td>Release the mouse button and the palette</td> |
| | </tr> |
| | <tr> |
| | <td colspan=2> </td> |
| </tr> | | </tr> |
| </table> | | <tr> |
| </td> | | <td colspan=2>The palette does not have to be returned to its original position.</td> |
| </tr> | | </tr> |
| </table> | | </table> |
| </td> | | </td> |
| <td width=786 bgcolor="lightcyan"><span style="font-weight: 700; font-size: 15px;">The <span style="color: white; background-color: black;"> Brush Tool </span> "paints" ground heights, ground textures, effect layers and scrapbook scenes into your Trainz World</span></td>
| |
| </tr> | | </tr> |
| </table> | | </table> |
| <br> | | <br> |
| <table width=1000 bgcolor=#000000> | | <table bgcolor=#000000 cellpadding=2> |
| <tr valign="top"> | | <tr valign="top"> |
| <td> | | <td> |
| <table width=996 bgcolor=#ffe89a cellpadding=2> | | <table bgcolor=#ffffe0 cellpadding=2> |
| <tr valign="middle"> | | <tr valign="top"> |
| <td width=45>[[image:PalettesIcon_S20.png|link=]]</td> | | <td>[[image:PencilTips.PNG|link=]]</td> |
| <td>Various function of this tool use the <span style="font-weight: 700; font-size: 15px; color: white; background-color: #797979;"> Scrapbook Palette </span> <span style="font-weight: 700; font-size: 15px; color: white; background-color: #797979;"> Tool Options Palette </span> <span style="font-weight: 700; font-size: 15px; color: white; background-color: #797979;"> Info Palette </span> <span style="font-weight: 700; font-size: 15px; color: white; background-color: #797979;"> Filter Palette </span> and the <span style="font-weight: 700; font-size: 15px; color: white; background-color: #797979;"> Assets Palette </span>. If these palettes are not visible on the screen when required then refer to [[image:PageLink.PNG|link=]] '''[[#Notes_Palettes|Notes: Palettes]]''' at the top of this document.</td> | | <td>Free floating ('''Undocked''') palettes can be docked together in '''Surveyor''' to form a docked group that is still free floating</td> |
| | </tr> |
| | </table> |
| | </td> |
| </tr> | | </tr> |
| </table> | | </table> |
| Line 655: |
Line 646: |
| </table> | | </table> |
| <br> | | <br> |
| The [[image:S20_BrushToolIcon.png|link=|20px]] '''Brush Tool''' has two drop down menu lists.<br>
| | <table width=1000> <!-- BEGIN Nav Buttons Table SKIPS NO SECTIONS --> |
| | <tr valign="top"> |
| | <td width=629><span id="skipResizing"></span> |
| | =='''Resizing Palettes and Windows'''== |
| | </td> |
| | <td width=50>[[image:SkipDown.png|link=#skipMinMax|Skip Down]]</td> <!-- skip Down --> |
| | <td width=50>[[image:SkipUp.png|link=#skipDocking|Skip Up]]</td> <!-- skip Up --> |
| | <td width=46> </td> |
| | <td width=75>[[image:HeadingUp.png|link=#stepWorld|alt=Heading|To Heading]]</td> |
| | <td width=75> </td> |
| | <td width=75> </td> |
| | </tr> |
| | </table> <!-- END Nav Buttons Table --> |
|
| |
|
| <table width=1000 bgcolor=#000000 cellpadding=2> | | <table width=1000 bgcolor="lightcyan" cellpadding=2> |
| | <tr valign="top"> |
| | <td width=10>[[image:BlueDot10x10.png|link=]]</td> |
| | <td>Only '''Surveyor''' palettes that are '''Undocked''' can be resized. Some palettes have to be resized to display all their available information.</td> |
| | </tr> |
| | <tr valign="top"> |
| | <td>[[image:BlueDot10x10.png|link=]]</td> |
| | <td>Most '''Driver''' windows cannot be resized.</td> |
| | </tr> |
| | </table> |
| | <br> |
| | <table bgcolor=#000000 width=1000 cellpadding=2> |
| <tr valign="top"> | | <tr valign="top"> |
| <td> | | <td> |
| <table width=996 bgcolor=#ffffff cellpadding=2> | | <table bgcolor=#ffffe0 width=996 cellpadding=2> |
| <tr valign="middle"> | | <tr valign="top"> |
| <td width=200>[[image:BrushTools_S20.png|link=|alt=Brush Tools]]</td> | | <td>[[image:PencilTips.PNG|link=]]</td> |
| <td> | | <td> |
| <table width=800 cellpadding=2> | | <table> |
| <tr valign="top"> | | <tr valign="top"> |
| <td colspan=3 bgcolor=#ffffb0>[[image:BrushTargetIcon_S20.png|link=]] <span style="font-weight: 700; font-size: 15px; color: white; background-color: black;"> Brush Targets </span> The first drop down menu will set the '''"Brush Target"''' which is the type of brush. <span style="font-weight: 700; font-size: 15px; background-color: lightcyan;"> Left Click </span> on the drop down box and on a '''Target''' to select it. The '''Brush Targets''' are:-</td> | | <td>[[image:DotPoint.JPG|10px|link=]]</td> |
| | <td>In '''Surveyor''' the resized state of each palette will be saved when you close the program. When you restart each palette will be returned to that last saved state.</td> |
| </tr> | | </tr> |
| <tr valign="middle"> | | <tr valign="top"> |
| | <td>[[image:DotPoint.JPG|10px|link=]]</td> |
| | <td>In '''Driver''' the resized state of a window will '''NOT''' be saved when you close the program.</td> |
| | </tr> |
| | </table> |
| | </td> |
| | </tr> |
| | </table> |
| | </td> |
| | </tr> |
| | </table> |
| | <br> |
| | <table width=1000> |
| | <tr valign="top"> |
| | <td width=300>[[image:PalettesResizing_S20.png|link=]]</td> |
| | <td> |
| | <table bgcolor=#000000 cellpadding=2> |
| | <tr valign="top"> |
| <td> | | <td> |
| <table width=200> | | <table bgcolor=#ffffff cellpadding=2> |
| <tr valign="top"> | | <tr valign="top"> |
| <td width=10>[[image:BulletTick.png|link=]]</td> | | <td colspan=2><span style="font-weight: 700; font-size: 15px;;">Steps: To Resize a Palette or Window:-</span></td> |
| <td>'''Ground Height'''</td>
| |
| </tr> | | </tr> |
| <tr valign="top"> | | <tr valign="top"> |
| <td>[[image:BulletTick.png|link=]]</td> | | <td width=20>[[image:DotPoint1.JPG|link=]]</td> |
| <td>'''Ground Texture'''</td> | | <td>Move the mouse pointer onto any '''corner''' or onto an '''edge''' (left, right or bottom) of the palette/window. When it is in the correct position the pointer "mouse" arrow will change to a "two headed" arrow - if it does not change then it is a window that cannot be resized.</td> |
| </tr> | | </tr> |
| <tr valign="top"> | | <tr valign="top"> |
| <td>[[image:BulletTick.png|link=]]</td> | | <td>[[image:DotPoint2.JPG|link=]]</td> |
| <td>'''Scrapbook Data'''</td> | | <td><span style="font-weight: 700; font-size: 15px; background-color: lightcyan;"> Left Click and Drag </span> the pointer to expand or reduce the size of the palette or window. Palettes and windows have a maximum and minimum size beyond which they cannot be extended or reduced</td> |
| </tr> | | </tr> |
| <tr valign="top"> | | <tr valign="top"> |
| <td>[[image:BulletTick.png|link=]]</td> | | <td>[[image:DotPoint3.JPG|link=]]</td> |
| <td>'''<''List of Effect Layers''>'''</td> | | <td>Release the mouse button when the palette or window has reached the required size</td> |
| </tr> | | </tr> |
| <tr valign="top"> | | <tr valign="top"> |
| <td>[[image:BulletTick.png|link=]]</td> | | <td colspan=2> |
| <td>'''Edit Effect Layers'''</td> | | <table bgcolor=#ffffb0 cellpadding=2> |
| | <tr valign="top"> |
| | <td width=25>[[image:NotePad.PNG|link=]]</td> |
| | <td><span style="font-size: 17px; font-weight: 700;">Notes:'''</span></td> |
| </tr> | | </tr> |
| </table> | | <tr valign="top"> |
| </td> | | <td>[[image:DotPoint.JPG|10px|link=]]</td> |
| <td width=100>[[image:BrushToolsGroundOptions_S20.png|link=]]</td>
| | <td>If a resized palette is '''Hidden''' or '''Minimised''' and made '''Visible''' again it will be returned to its previous size</td> |
| <td>If you have any '''Effect Layers''' then they will appear as '''Targets''' in this Drop Down Menu. Select an '''Effect Layer''' to use the brush to paint with that layer. See [[image:PageLink.PNG|link=]] '''[[#skip Effect Layers|Effect Layers]]''' below for more details</td> | |
| </tr> | | </tr> |
| <tr valign="top"> | | <tr valign="top"> |
| <td colspan=3 bgcolor=#ffffb0>[[image:BrushActionIcon_S20.png|link=]] <span style="font-weight: 700; font-size: 15px; color: white; background-color: black;"> Brush Actions </span> The second drop down menu will set the '''"Brush Action"''' which is how the brush works. Its options will vary with the bush target selected (see the following sections) and for some targets no options will appear meaning that the selected brush target does not have any different actions</td> | | <td>[[image:DotPoint.JPG|10px|link=]]</td> |
| | <td>If a resized palette is '''Closed''' and reopened again it will be returned to its previous size</td> |
| </tr> | | </tr> |
| </table> | | </table> |
| Line 707: |
Line 741: |
| </table> | | </table> |
| <br> | | <br> |
| <table width=1000> <!-- BEGIN Section Nav Buttons --> | | <table width=700 bgcolor=#000000 cellpadding=2> |
| | <tr valign="top"> |
| | <td> |
| | <table width=696 bgcolor=#ffffb0 cellpadding=2> |
| <tr valign="top"> | | <tr valign="top"> |
| <td width=629><span id="skip Ground Height"></span> | | <td width=25>[[image:NotePad.PNG|link=]]</td> |
| =='''Ground Height'''==
| | <td>If a resized palette is returned to a docking area on either side of the screen then its dimensions will return to its default (original) values</td> |
| </td>
| | </tr> |
| <td width=50>[[image:SkipDown.png|link=#skip Ground Texture|Skip Down]]</td>
| | </table> |
| <td width=50>[[image:SkipUp.png|link=#stepBrush|Skip Up]]</td> | | </td> |
| <td width=46>[[image:SkipMinorDown.png|link=#Ground Grid|Down]][[image:SkipMinorBlank.png|link=]]</td> <!-- for Top and Minor Up/Down -->
| | </tr> |
| <td width=75>[[image:HeadingUp.png|link=#stepBrush|alt=Heading|To Heading]]</td> | | </table> |
| <td width=75> </td>
| | </td> |
| <td width=75> </td> <!-- for Bottom -->
| |
| </tr> | | </tr> |
| </table> <!-- END Section Nav Buttons --> | | </table> |
| | | <br> |
| <table>
| | <table width=1000> <!-- BEGIN Nav Buttons Table SKIPS NO SECTIONS --> |
| <tr valign="top"> | | <tr valign="top"> |
| <td>[[image:BrushTarget_GroundHeight.png|link=]]</td> | | <td width=629><span id="skipMinMax"></span> |
| | =='''Minimise Maximise Close'''== |
| | </td> |
| | <td width=50>[[image:SkipDown.png|link=#stepInfo|Skip Down]]</td> <!-- skip Down --> |
| | <td width=50>[[image:SkipUp.png|link=#skipResizing|Skip Up]]</td> <!-- skip Up --> |
| | <td width=46> </td> |
| | <td width=75>[[image:HeadingUp.png|link=#stepWorld|alt=Heading|To Heading]]</td> |
| | <td width=75> </td> |
| | <td width=75> </td> |
| </tr> | | </tr> |
| </table> | | </table> <!-- END Nav Buttons Table --> |
|
| |
|
| <table width=1000 bgcolor="lightcyan" cellpadding=2> | | <table width=1000 bgcolor="lightcyan" cellpadding=2> |
| <tr valign="top"> | | <tr valign="top"> |
| <td width=10>[[image:BlueDot10x10.png|link=]]</td> | | <td width=10>[[image:BlueDot10x10.png|link=]]</td> |
| <td>This '''Brush Target''' raises or lowers the '''Ground Surface Height''' by using a "painting" action</td> | | <td>'''Minimising''' will hide a palette or window but retain its size and position data.</td> |
| </tr> | | </tr> |
| </table>
| |
| <br>
| |
| <table width=1000 bgcolor=#000000 cellpadding=2>
| |
| <tr valign="top"> | | <tr valign="top"> |
| <td> | | <td>[[image:BlueDot10x10.png|link=]]</td> |
| <table width=996 bgcolor=#ffffff cellpadding=2> | | <td>'''Maximising''' will return a palette or window to the screen using its last size and position data.</td> |
| | </tr> |
| <tr valign="top"> | | <tr valign="top"> |
| <td width=35>[[image:Information.png|35px|link=]]</td> | | <td>[[image:BlueDot10x10.png|link=]]</td> |
| <td>All the '''Terrain Features''' in your '''Trainz World''' such as hills, valleys, railway cuttings and embankments, river and lake beds, are created using the '''Ground Height Brush'''</td> | | <td>'''Closing''' will remove a palette or window from the screen but its size and position data will be saved. When it is next opened it will be shown on the screen using its last size and position data.</td> |
| </tr>
| |
| </table>
| |
| </td> | |
| </tr> | | </tr> |
| </table> | | </table> |
| <br> | | <br> |
| <table width=1000 bgcolor=#000000> | | <table width=300 bgcolor=#000000 cellpadding=2> |
| <tr valign="top"> | | <tr valign="top"> |
| <td> | | <td> |
| <table width=996 bgcolor=#ffe89a cellpadding=2> | | <table bgcolor=#ffffb0 cellpadding=2> |
| <tr valign="middle">
| |
| <td width=45>[[image:PalettesIcon_S20.png|link=]]</td>
| |
| <td>This '''Brush Target''' uses the <span style="font-weight: 700; font-size: 15px; color: white; background-color: #797979;"> Tool Options Palette </span>. If this palette is not visible on the screen then refer to [[image:PageLink.PNG|link=]] '''[[#Notes_Palettes|Notes: Palettes]]''' at the top of this document.
| |
| </td>
| |
| </tr>
| |
| </table>
| |
| </td>
| |
| </tr>
| |
| </table>
| |
| <br>
| |
| <table width=1000 bgcolor=#000000 cellpadding=2>
| |
| <tr valign="top"> | | <tr valign="top"> |
| <td> | | <td> |
| <table width=996 bgcolor=#ffffff cellpadding=2> | | <table> |
| <tr valign="top"> | | <tr valign="top"> |
| <td width=150>[[image:BrushActionIcon_S20.png|link=]] <span style="font-weight: 700; font-size: 15px; color: white; background-color: black;"> Brush Actions </span></td> | | <td width=25>[[image:NotePad.PNG|link=]]</td> |
| <td>When the [[image:BrushTargetIcon_S20.png|link=]] <span style="font-weight: 700; font-size: 15px; color: white; background-color: black;"> Ground Height </span> '''Target''' is selected, the second drop down box will give a choice of several brush actions that control how the ground height is adjusted.</td> | | <td width=275><span style="font-size: 17px; font-weight: 700;">Notes:'''</span><br> |
| </tr> | | ---- |
| </table>
| |
| </td> | | </td> |
| </tr> | | </tr> |
| </table> | | </table> |
| | | <table> |
| <table width=1000> | |
| <tr valign="top"> | | <tr valign="top"> |
| <td colspan=3>The '''actions''' are:- </td> | | <td width=10>[[image:DotPoint.JPG|10px|link=]]</td> |
| | <td>All '''Surveyor''' palettes can be minimised</td> |
| </tr> | | </tr> |
| <tr valign="top"> | | <tr valign="top"> |
| <td width=350> | | <td>[[image:DotPoint.JPG|10px|link=]]</td> |
| <table width=350>
| | <td>Only two '''Driver''' windows can be minimised:- |
| <tr valign="top"> | |
| <td width=150> | |
| <table> | | <table> |
| <tr valign="top"> | | <tr valign="top"> |
| <td width=10>[[image:BulletTick.png|link=]]</td> | | <td width=10>[[image:RedDot10x10.png|10px|link=]]</td> |
| <td>'''Height Up'''</td>
| | <td>'''Session Options''', and</td> |
| </tr>
| |
| <tr valign="top">
| |
| <td>[[image:BulletTick.png|link=]]</td>
| |
| <td>'''Height Down'''</td>
| |
| </tr>
| |
| <tr valign="top">
| |
| <td>[[image:BulletTick.png|link=]]</td>
| |
| <td>'''Set Height'''</td> | |
| </tr> | | </tr> |
| <tr valign="top"> | | <tr valign="top"> |
| <td>[[image:BulletTick.png|link=]]</td> | | <td>[[image:RedDot10x10.png|10px|link=]]</td> |
| <td>'''Grade'''</td> | | <td>'''Driver Control Center'''</td> |
| </tr> | | </tr> |
| </table> | | </table> |
| </td> | | </td> |
| <td width=200>[[image:BrushToolsHeightOptions_S20.png|link=]]</td>
| |
| </tr>
| |
| <tr valign="top">
| |
| <td colspan=2>
| |
|
| |
| <table width=350 bgcolor=#000000 cellpadding=2>
| |
| <tr valign="top">
| |
| <td>
| |
| <table bgcolor=#ffffe0 cellpadding=2>
| |
| <tr valign="top">
| |
| <td width=25>[[image:PencilTips.PNG|link=]]</td>
| |
| <td>The <span style="font-weight: 700; font-size: 15px; color: white; background-color: #797979;"> Tool Options Palette </span> <span style="font-weight: 700; font-size: 15px; color: gold; background-color: black;"> Sensitivity </span> setting controls the rate or speed at which the height will be changed under the brush as you move it across the terrain.<br>
| |
| '''100%''' = fastest: '''1%''' = slowest</td>
| |
| </tr> | | </tr> |
| </table> | | </table> |
| Line 823: |
Line 827: |
| </tr> | | </tr> |
| </table> | | </table> |
| </td> | | <br> |
| | The image below shows a '''Surveyor 2.0''' screen with an open window box (the '''Find Object Tool''') and two Undocked palettes ('''Info''' and '''Layers''') |
| | <table width=1000 cellpadding=2> |
| | <tr valign="top"> |
| | <td width=600>[[image:PalettesWindowsOpen_S20.png|600px|link=]]</td> |
| <td> | | <td> |
| <table width=650 bgcolor=#000000 cellpadding=2> | | <table width=400 bgcolor=#000000 cellpadding=2> |
| <tr valign="top"> | | <tr valign="top"> |
| <td> | | <td> |
| <table bgcolor=#ffffff cellpadding=2> | | <table width=396 bgcolor=#ffffff cellpadding=2> |
| <tr valign="top"> | | <tr valign="top"> |
| <td colspan=2><span style="font-weight: 700; font-size: 17px;">Ground Height Brush Actions:</span></td> | | <td colspan=2>Each of the windows and palettes shown can be:-<br> |
| | <span style="font-weight: 700; font-size: 15px;">Options:</span></td> |
| </tr> | | </tr> |
| <tr valign="top"> | | <tr valign="top"> |
| <td width=150>[[image:BrushActionIcon_S20.png|link=]] <span style="font-weight: 700; font-size: 15px; color: white; background-color: black;"> Height Up </span><br> | | <td width=25>[[image:Ablue.png|link=]]</td> |
| [[image:BrushActionIcon_S20.png|link=]] <span style="font-weight: 700; font-size: 15px; color: white; background-color: black;"> Height Down </span></td>
| | <td>individually '''Minimised''' by a <span style="font-weight: 700; font-size: 15px; background-color: lightcyan;"> Left Click </span> on the <span style="font-weight: 700; font-size: 15px; color: white; background-color: black;"> - </span> icon in each of their top menu bars</td> |
| <td>raises/lowers the ground under the brush at a rate controlled by the <span style="font-weight: 700; font-size: 15px; color: white; background-color: #797979;"> Tool Options Palette </span> <span style="font-weight: 700; font-size: 15px; color: gold; background-color: black;"> Sensitivity </span> setting</td> | |
| </tr> | | </tr> |
| <tr valign="top"> | | <tr valign="top"> |
| <td>[[image:BrushActionIcon_S20.png|link=]] <span style="font-weight: 700; font-size: 15px; color: white; background-color: black;"> Set Height </span></td> | | <td>[[image:Bblue.png|link=]]</td> |
| <td>"plateaus" the ground under the brush to the <span style="font-weight: 700; font-size: 15px; color: white; background-color: #797979;"> Tool Options Palette </span> <span style="font-weight: 700; font-size: 15px; color: gold; background-color: black;"> Height </span> setting at a rate controlled by the <span style="font-weight: 700; font-size: 15px; color: gold; background-color: black;"> Sensitivity </span> setting</td> | | <td>individually '''Closed''' by a <span style="font-weight: 700; font-size: 15px; background-color: lightcyan;"> Left Click </span> on the <span style="font-weight: 700; font-size: 15px; color: white; background-color: black;"> x </span> icon in each of their top menu bars<br></td> |
| </tr> | | </tr> |
| <tr valign="top"> | | <tr valign="top"> |
| <td>[[image:BrushActionIcon_S20.png|link=]] <span style="font-weight: 700; font-size: 15px; color: white; background-color: black;"> Grade </span></td> | | <td colspan=2> |
| <td>creates a smooth slope under the brush at the <span style="font-weight: 700; font-size: 15px; color: white; background-color: #797979;"> Tool Options Palette </span> <span style="font-weight: 700; font-size: 15px; color: gold; background-color: black;"> Grade </span> and <span style="font-weight: 700; font-size: 15px; color: gold; background-color: black;"> Angle </span> settings at a rate controlled by the <span style="font-weight: 700; font-size: 15px; color: gold; background-color: black;"> Sensitivity </span> setting</td> | | <table> |
| | <tr valign="top"> |
| | <td width=25>[[image:Cblue.png|link=]]</td> |
| | <td>simultaneously '''Minimised''' in a single action from the [[image:SurveyorWindowIcon.png|link=]] '''Window Menu''' by selecting <span style="font-weight: 700; font-size: 15px; color: white; background-color: black;"> Minimise All Windows </span></td> |
| | <td width=170 rowspan=2>[[image:WindowsMenuMinimise_S20.png|link=]]</td> |
| </tr> | | </tr> |
| </table> | | </table> |
| </td> | | </td> |
| </tr> | | </tr> |
| </table>
| |
| </td>
| |
| </tr>
| |
| </table>
| |
| <br>
| |
| <table width=1000 bgcolor=#000000 cellpadding=2>
| |
| <tr valign="top">
| |
| <td>
| |
| <table width=996 bgcolor=#ffffff cellpadding=2>
| |
| <tr valign="top"> | | <tr valign="top"> |
| <td colspan=2> | | <td colspan=2> |
| <table> | | <table bgcolor=#ffffb0 width=396 cellpadding=2> |
| <tr valign="top"> | | <tr valign="top"> |
| <td width=35>[[image:Information.png|35px|link=]]</td> | | <td width=25>[[image:NotePad.PNG|link=]]</td> |
| <td><span style="font-weight: 700; font-size: 15px;">Ground heights are saved in the special Ground Height layer in the <span style="font-weight: 700; font-size: 15px; color: white; background-color: #797979;"> Layers Palette </span></span></td> | | <td>'''Minimising''' will "remember" the size and position of a palette or window so that it can later be restored to the same size and position</td> |
| </tr> | | </tr> |
| </table> | | </table> |
| </td> | | </td> |
| </tr>
| |
| <tr valign="top">
| |
| <td width=10>[[image:DotPoint.JPG|10px|link=]]</td>
| |
| <td>This layer cannot be renamed, deleted, moved or merged with any other layer</td>
| |
| </tr>
| |
| <tr valign="top">
| |
| <td>[[image:DotPoint.JPG|10px|link=]]</td>
| |
| <td>Most ground height edits are performed using the [[image:S20_BrushToolIcon.png|link=|20px]] '''Brush Tool'''. Edits can also be performed using the [[image:S20_MarqueeToolIcon.png|link=|20px]] '''Marquee Tool'''. Limited ground height edits under a selected object or objects can be performed using the <span style="font-weight: 700; font-size: 15px; color: white; background-color: black;"> Smooth Ground Under Selected </span> option in the objects '''Context Icon'''.</td>
| |
| </tr> | | </tr> |
| </table> | | </table> |
| Line 879: |
Line 874: |
| </tr> | | </tr> |
| </table> | | </table> |
| <br>
| |
| <table width=1000> <!-- BEGIN Section Nav Buttons -->
| |
| <tr valign="top">
| |
| <td width=629><span id="Ground Grid"></span>
| |
| ===<span style="font-weight: 700; font-size: 17px; color: white; background-color: blue;"> 5m Resolution, 10m Resolution, HD Resolution </span>===
| |
| </td> | | </td> |
| <td width=50> </td>
| |
| <td width=50> </td>
| |
| <td width=46>[[image:SkipMinorDown.png|link=#Ground Tool Options|Down]][[image:SkipMinorUp.png|link=#skip Ground Height|Up]]</td> <!-- for Top and Minor Up/Down -->
| |
| <td width=75> </td>
| |
| <td width=75> </td>
| |
| <td width=75> </td> <!-- for Bottom -->
| |
| </tr> | | </tr> |
| </table> <!-- END Section Nav Buttons --> | | </table> |
|
| |
|
| <table width=1000 bgcolor=#000000 cellpadding=2> | | <table width=1000> |
| | <tr valign="top"> |
| | <td width=180>[[image:PalettesWindowsMenu_S20.png|link=]]</td> |
| | <td> |
| | <table width=800 bgcolor=#000000 cellpadding=2> |
| <tr valign="top"> | | <tr valign="top"> |
| <td> | | <td> |
| <table width=996 bgcolor=#ffffb0 cellpadding=2> | | <table width=796 bgcolor=#ffffb0 cellpadding=2> |
| <tr valign="top"> | | <tr valign="top"> |
| <td width=25>[[image:NotePad.PNG|link=]]</td> | | <td width=25>[[image:NotePad.PNG|link=]]</td> |
| <td><span style="font-size: 17px;">'''Notes:'''</span><br> | | <td><span style="font-size: 17px; font-weight: 700;">Notes:'''</span><br> |
| ---- | | ---- |
| The terms '''Grid Size''' and '''Grid Resolution''' when used in this document refer to the following:-
| | A <span style="font-weight: 700; font-size: 15px; background-color: lightcyan;"> Left Click </span> on the [[image:SurveyorWindowIcon.png|link=]] '''Window Menu''' will show all the palettes and windows, visible and hidden, plus any that are minimised.</td> |
| </td> | |
| </tr> | | </tr> |
| <tr valign="top"> | | <tr valign="top"> |
| <td width=10>[[image:DotPoint.JPG|10px|link=]]</td> | | <td>[[image:DotPoint.JPG|10px|link=]]</td> |
| <td><span style="font-weight: 700; font-size: 15px;">Grid Size:</span> - the size of the yellow grid squares shown in an untextured baseboard. The grid squares are always '''10m x 10m''' in size regardless of the '''Working Scale''' (Real Scale, G Scale, HO Scale, etc) or the '''Working Units''' (metric or imperial). When a ruler object is used to measure the squares it will show their size using the selected '''Working Scale''' and '''Working Units'''</td> | | <td>In the image shown on the left the minimised windows are listed at the bottom of the menu list in the '''Minimised Windows Area''' as '''Find Object''', '''Info''' and '''Layers'''. '''Layers''' is also shown with the name of the currently selected layer.</td> |
| </tr> | | </tr> |
| <tr valign="top"> | | <tr valign="top"> |
| <td>[[image:DotPoint.JPG|10px|link=]]</td> | | <td>[[image:DotPoint.JPG|10px|link=]]</td> |
| <td><span style="font-weight: 700; font-size: 15px;">Grid Resolution:</span> - a measure of the '''level of detail''' that can be shown when using the '''Ground Height''' and '''Ground Texture''' brush tools. | | <td>Note that the '''Layers''' and '''Info''' palettes are listed twice - once with a [[image:BulletTick.png|link=]] icon in the '''Palette Area''', which indicates that they are "active", and again in the '''Minimised Windows Area''' at the bottom, which indicates that they are "active" but "minimised".</td> |
| <table> | | </tr> |
| | <tr valign="top"> |
| | <td colspan=2> |
| | <table bgcolor=#ffffff> |
| <tr valign="top"> | | <tr valign="top"> |
| <td width=10>[[image:RedDot10x10.png|link=]]</td> | | <td colspan=2><span style="font-weight: 700; font-size: 15px;">Steps: To Maximise a Palette or Window:-</span></td> |
| <td>A '''10m Resolution''' will allow the use of a brush of radius 10m without restrictions anywhere in the baseboard. Smaller brushes can be used but with restrictions that will increase as the brush size is reduced.</td>
| |
| </tr> | | </tr> |
| <tr valign="top"> | | <tr valign="top"> |
| <td width=10>[[image:RedDot10x10.png|link=]]</td> | | <td width=25>[[image:DotPoint1.JPG|link=]]</td> |
| <td>A '''5m Resolution''' will allow the use of a brush of radius 5m without restrictions anywhere in the baseboard. Smaller brushes can be used but with restrictions that will increase as the brush size is reduced.</td> | | <td><span style="font-weight: 700; font-size: 15px; background-color: lightcyan;"> Left Click </span> on its name or title in the '''Minimised Windows Area''' at the bottom of the list. |
| </tr> | | <table bgcolor=#fcbcbc> |
| <tr valign="top"> | | <tr valign="top"> |
| <td width=10>[[image:RedDot10x10.png|link=]]</td> | | <td>'''<u>DO NOT</u>''' click on the name of the palette or window shown with the [[image:BulletTick.png|link=]] icon in the upper '''Palettes''' section - this will '''CLOSE''' it</td> |
| <td>A '''HD Resolution''' will allow the use of a brush of radius as small as 0.12m (12cm) without any restrictions anywhere in the baseboard.</td>
| |
| </tr> | | </tr> |
| </table> | | </table> |
| Line 932: |
Line 920: |
| </tr> | | </tr> |
| </table> | | </table> |
| <br>
| | </td> |
| <table width=1000>
| |
| <tr valign="top">
| |
| <td>The choice of baseboard resolution affects the level of detail that it is possible to achieve in the ground terrain (for ditches, track beds, rail embankments and cuttings, etc) and the ground texture. The choice will also affect the physical size, in KB or MB, of the route when it is saved.<br>
| |
| <table>
| |
| <tr valign="top">
| |
| <td align="center" width=500>[[image:RailCutting10mGrid.png|link=]]<br>
| |
| '''Rail cutting through 10m Resolution terrain'''</td>
| |
| <td align="center" width=500>[[image:RailCuttingHDGrid.png|link=]]<br>
| |
| '''Rail cutting through HD Resolution terrain'''</td>
| |
| </tr> | | </tr> |
| </table> | | </table> |
| For more information on how your choice of resolution affects the ground height and ground textures, see [[image:PageLink.PNG|link=]] '''[[#Ground Brush Resolution|Ground Height Brush Size and Grid Size]]''', [[image:PageLink.PNG|link=]] '''[[#Texture Brush Resolution|Ground Texture Brush Size and Grid Size]]''' and [[image:PageLink.PNG|link=]] '''[[#HD Ground Texture|HD Resolution and Ground Textures]]''' below.</td>
| | <br> |
| </tr>
| | <table bgcolor=#000000 cellpadding=2> |
| </table>
| |
| | |
| <table width=1000 bgcolor=#000000 cellpadding=2> | |
| <tr valign="top"> | | <tr valign="top"> |
| <td> | | <td> |
| <table bgcolor=#ffffff cellpadding=2> | | <table bgcolor=#ffffe0 cellpadding=2> |
| <tr valign="top"> | | <tr valign="top"> |
| <td colspan=2>The choices are:-</td> | | <td width=25>[[image:PencilTips.PNG|link=]]</td> |
| | <td><span style="font-weight: 700; font-size: 15px;"><span style="color: white; background-color: red;"> 1 </span> Hiding the Menu Bar and Side Panels</span></td> |
| </tr> | | </tr> |
| <tr valign="top"> | | <tr valign="top"> |
| <td width=125><span style="font-weight: 700; font-size: 15px; color: white; background-color: black;"> 10m Resolution </span></td> | | <td> </td> |
| <td>This has been the standard resolution since the earliest days. It gives the lowest level of detail and the smallest file sizes. A baseboard with a resolution of '''10m''' will allow the unrestricted use of brushes with a radius down to 10m. Brushes of less than 10m can still be used but with reduced accuracy</td> | | <td>In '''Surveyor''' you can '''Hide''' the '''Menu Bar''' and all the palettes docked in the two side panels. Press the <span style="font-weight: 700; font-size: 15px;"><span style="color: white; background-color: black;"> Ctrl </span> + <span style="color: white; background-color: black;"> Space </span></span> keys to hide and show the menu bar and the side panels. This will not hide those palettes and windows that are undocked and "free floating"</td> |
| </tr> | | </tr> |
| <tr valign="top"> | | <tr valign="top"> |
| <td><span style="font-weight: 700; font-size: 15px; color: white; background-color: black;"> 5m Resolution </span></td> | | <td width=25>[[image:PencilTips.PNG|link=]]</td> |
| <td>This was a later addition to the '''Trainz World'''. It gives about '''4x''' as much detail as the '''10m Resolution''' but with an increase in file sizes. A baseboard with a resolution of '''5m''' will allow the unrestricted use of brushes with a radius down to 5m. Brushes of less than 5m can still be used but with reduced accuracy</td>
| | <td><span style="font-weight: 700; font-size: 15px;"><span style="color: white; background-color: red;"> 2 </span> Minimising All the Undocked Palettes and Windows</span></td> |
| </tr> | | </tr> |
| <tr valign="top"> | | <tr valign="top"> |
| <td colspan=2>You can have both '''10m Resolution''' and '''5m Resolution''' baseboards in the same route. Placing, for example, the '''10m Resolution''' baseboards away from the tracks where a higher level of detail may not be needed, and the '''5m Resolution''' baseboards under and close to the tracks where more detail may be needed</td> | | <td> </td> |
| | <td>In '''Surveyor''' and '''Driver''' you can '''Minimise''' all the "free floating" palettes and windows by selecting the <span style="font-weight: 700; font-size: 15px; color: white; background-color: black;"> Minimize All Windows </span> option from the [[image:SurveyorWindowIcon.png|link=]] '''Windows Menu'''. This will not hide the menu bar and the palettes that are docked in the two side panels. The minimized palettes and windows will appear at the bottom of the '''Windows Menu''' drop down list so they can be maximised and returned to the screen</td> |
| </tr> | | </tr> |
| <tr valign="top"> | | <tr valign="top"> |
| <td><span style="font-weight: 700; font-size: 15px; color: white; background-color: black;"> HD Resolution </span></td> | | <td colspan=2>You can combine both '''Tips''' <span style="font-weight: 700; font-size: 15px; color: white; background-color: red;"> 1 </span> and <span style="font-weight: 700; font-size: 15px; color: white; background-color: red;"> 2 </span> above in '''Surveyor''' to clear the screen of all items that are not part of your '''Trainz World'''</td> |
| <td>This is the latest addition to the '''Trainz World'''. It gives the highest level of detail, up to '''6,400x''' greater than the '''10m Resolution''', but with a signficant increase in file sizes. A route set to '''HD Resolution''' will allow the unrestricted use of brushes with a radius down to 0.12m (12cm). Smaller brush sizes are not possible.<br>
| |
| <span style="font-weight: 700; background-color: yellow;"> HD Resolution is only available in Trainz Plus </span>. It is <span style="font-weight: 700; background-color: yellow;"> NOT RECOMMENDED </span> that you mix '''HD Resolution''' baseboards with '''10m''' or '''5m Resolution''' baseboards in the same route</td> | |
| </tr> | | </tr> |
| <tr valign="top"> | | </table> |
| <td colspan=2>
| | </td> |
| <table bgcolor=#ffffb0 cellpadding=2>
| |
| <tr valign="top">
| |
| <td width=25>[[image:NotePad.PNG|link=]]</td>
| |
| <td>In '''Trainz Plus''' and '''TRS22PE''' the level of file compression used when saving '''.cdp''' files was significantly increased to reduce the size of the files. The size limit for a '''.cdp''' file is '''1 GB''' but larger assets, such as routes, can be saved by using '''Content Manager''' to open the asset in '''Windows Explorer''' and saving the folder using commonly available file compression software such as '''7Zip''' or '''WinRAR'''</td>
| |
| </tr> | | </tr> |
| </table> | | </table> |
| Line 982: |
Line 954: |
| </tr> | | </tr> |
| </table> | | </table> |
| | <br> |
| | <table width=1000> <!-- BEGIN Nav Buttons Table --> |
| | <tr valign="top"> |
| | <td width=629><span id="stepInfo"></span> |
| | ='''The Info Palette'''= |
| </td> | | </td> |
| | <td width=50>[[image:SkipDown.png|link=#skip XYZCoordinates|Skip Down]]</td> |
| | <td width=50>[[image:SkipUp.png|link=#skipMinMax|Skip Up]]</td> |
| | <td width=46>[[image:BackToTop.png|link=#top|alt=Top|Top]]</td> |
| | <td width=75>[[image:NextUp.png|link=#stepWorld|alt=Next Up|Next Up]]</td> |
| | <td width=75>[[image:NextDown.png|link=#stepTools|alt=Next Down|Next Down]]</td> |
| | <td width=75>[[image:BackToBottom.png|link=#bottom|alt=Bottom|Bottom]]</td> |
| | </tr> |
| | </table> <!-- END Nav Buttons Table --> |
| | |
| | <table width=1000 bgcolor=#ffffb0 cellpadding=2> |
| | <tr valign="top"> |
| | <td><span style="font-weight: 700; font-size: 15px;">This is a <span style="color: white; background-color: blue;"> Surveyor Only </span> palette</span></td> |
| </tr> | | </tr> |
| </table> | | </table> |
| <br> | | <br> |
| <table width=1000 bgcolor=#000000 cellpadding=2> | | <table width=1000 bgcolor=#000000> |
| <tr valign="top"> | | <tr valign="top"> |
| <td> | | <td> |
| <table width=996 bgcolor=#ffffff cellpadding=2> | | <table width=996 bgcolor=#ffe89a cellpadding=2> |
| <tr valign="middle"> | | <tr valign="middle"> |
| <td width=35>[[image:Information.png|35px|link=]]</td> | | <td width=45>[[image:PalettesIcon_S20.png|link=]]</td> |
| <td><span style="font-weight: 700; font-size: 15px;">The resolution is set when a route is created and new baseboards are added but it can be changed at any time</span></td> | | <td>If the <span style="font-weight: 700; font-size: 15px; color: white; background-color: #797979;"> Info Palette </span> is not visible on the screen then refer to [[image:PageLink.PNG|link=]] '''[[#Hiding and Showing Palettes and Windows|Hiding and Showing Palettes and Windows]]''' at the top of this document. Some <span style="font-weight: 700; font-size: 15px; color: white; background-color: #797979;"> Info Palette </span> functions will also require the <span style="font-weight: 700; font-size: 15px; color: white; background-color: #797979;"> Assets Palette </span> and the <span style="font-weight: 700; font-size: 15px; color: white; background-color: #797979;"> Tool Options Palette </span>.</td> |
| </tr> | | </tr> |
| </table> | | </table> |
| Line 999: |
Line 988: |
| </table> | | </table> |
| <br> | | <br> |
| <table width=1000> <!-- BEGIN Section Nav Buttons --> | | <table width=1000 bgcolor="lightcyan" cellpadding=2> |
| <tr valign="top"> | | <tr valign="top"> |
| <td width=629><span id="Grid Size"></span> | | <td colspan=2>This palette can be easily overlooked but it has some very useful features:-</td> |
| ====Identifying the Grid Resolution====
| |
| </td> | |
| </tr> | | </tr> |
| </table>
| |
|
| |
| <table width=1000>
| |
| <tr valign="top"> | | <tr valign="top"> |
| <td>When you load a route into '''Surveyor''' there may be no obvious clues as to what the resolution of its baseboards actually are and routes can have a mixture of baseboards set to '''10m Resolution''' and '''5m Resolution'''. | | <td>[[image:BlueDot10x10.png|10px|link=]]</td> |
| </td> | | <td>naming objects</td> |
| </tr> | | </tr> |
| </table>
| |
| <br>
| |
| <table bgcolor=#0000ff width=1000 cellpadding=2>
| |
| <tr valign="top"> | | <tr valign="top"> |
| <td> | | <td>[[image:BlueDot10x10.png|10px|link=]]</td> |
| <table cellpadding=2 bgcolor=#bbffff> | | <td>providing precise data and control over the "focus" - the position of the cursor</td> |
| | </tr> |
| <tr valign="top"> | | <tr valign="top"> |
| <td width=30>[[image:Question.PNG|link=|30px]]</td> | | <td>[[image:BlueDot10x10.png|10px|link=]]</td> |
| <td><span style="font-weight: 700; font-size: 15px;">How Can You Identify the Resolution of a Baseboard or Route?</span></td> | | <td>providing precise data and control over the position and orientation of objects (it can be used instead of the [[image:S20_FreeMoveToolIcon.png|link=|20px]] '''Free Move Tool''' and the [[image:S20_FineAdjustmentToolIcon.png|link=|20px]] '''Fine Adjustment Tool''')</td> |
| </tr> | | </tr> |
| <tr valign="top"> | | <tr valign="top"> |
| <td> </td> | | <td>[[image:BlueDot10x10.png|10px|link=]]</td> |
| <td>The only reliable way to check the resolution of a selected baseboard is to use the '''Ground Height Brush''' and set its radius to specific values to test the baseboard. The available resolutions are '''HD''' (in <span style="font-weight: 700; background-color: yellow;"> Trainz Plus only </span>), '''10m''' and '''5m'''. It is possible to mix both '''10m''' and '''5m''' baseboards in the same route so adjoining baseboards can have different resolutions. | | <td>identifying and setting the "home" layer and binding layer of a selected object</td> |
| <table bgcolor=#ffffe0 cellpadding=2> | | </tr> |
| <tr valign="top"> | | <tr valign="top"> |
| <td width=25>[[image:PencilTips.PNG|link=]]</td> | | <td>[[image:BlueDot10x10.png|10px|link=]]</td> |
| <td><span style="font-weight: 700; font-size: 15px;">Quick HD Check:</span> In '''Trainz Plus''' if you are near an '''edge baseboard''' then look over the edge. If you see a vertical wall dropping down then the route is using '''5m''' and/or '''10m Resolution'''. If no vertical wall is seen then it is using '''HD Resolution'''</td> | | <td>used for locking and unlocking a selected objects layer</td> |
| </tr> | | </tr> |
| </table> | | </table> |
| <br> | | <br> |
| <table bgcolor=#ffffff cellpadding=2> | | <table width=1000 bgcolor=#000000 cellpadding=2> |
| <tr valign="top"> | | <tr valign="top"> |
| <td colspan=2><span style="font-weight: 700; font-size: 15px;">Steps:</span> To detect '''HD Resolution''' in '''Trainz Plus''':-</td> | | <td> |
| | <table width=996 bgcolor=#ffffff cellpadding=2> |
| | <tr valign="middle"> |
| | <td width=35>[[image:Information35.png|link=]]</td> |
| | <td><span style="font-size: 15px;">All '''Heights''' and '''Positions''' in the '''Info Palette''' are always entered and displayed in <span style="background-color: yellow; font-weight: 700;">metres</span> even if you are using '''Imperial''' units (feet) for your distance measurements. Heights are always measured from the <span style="background-color: yellow; font-weight: 700;">Absolute ZERO metres</span> level and not from the height of the current baseboard.</span></td> |
| </tr> | | </tr> |
| | </table> |
| | </td> |
| | </tr> |
| | </table> |
| | <br> |
| | <table width=1000> |
| <tr valign="top"> | | <tr valign="top"> |
| <td width=25>[[image:DotPoint1.JPG|link=]]</td> | | <td>The components of the <span style="font-weight: 700; font-size: 15px; color: white; background-color: #797979;"> Info Palette </span> are identified in the image below.</td> |
| <td>Select the '''Ground Height Brush''' in the <span style="font-weight: 700; font-size: 15px; color: white; background-color: #797979;"> Tools Palette </span> and set its <span style="font-weight: 700; font-size: 15px; color: gold; background-color: black;"> Radius </span> value in the <span style="font-weight: 700; font-size: 15px; color: white; background-color: #797979;"> Tool Options Palette </span> to '''0.2m'''</td>
| |
| </tr> | | </tr> |
| | </table> |
| | <br> |
| | The components of the <span style="font-weight: 700; font-size: 15px; color: white; background-color: #797979;"> Info Palette </span> are identified in the image below.<br> |
| | <table width=1000> |
| <tr valign="top"> | | <tr valign="top"> |
| <td>[[image:DotPoint2.JPG|link=]]</td> | | <td width=370>[[image:InfoPalette_S20.png|link=]]</td> |
| <td>Move the '''Ground Height Brush''' in small circles around the surface but '''DO NOT''' hold down the mouse button | | <td> |
| <table> | | <table> |
| <tr valign="top"> | | <tr valign="top"> |
| <td width=10>[[image:DotPoint.JPG|10px|link=]]</td> | | <td width=10>[[image:BlueDot10x10.png|link=]]</td> |
| <td>If the brush circle is '''NOT''' red then the grid is '''HD'''</td> | | <td>Every item in the palette can be edited.</td> |
| </tr> | | </tr> |
| <tr valign="top"> | | <tr valign="top"> |
| <td>[[image:DotPoint.JPG|10px|link=]]</td> | | <td>[[image:BlueDot10x10.png|link=]]</td> |
| <td>If the brush circle is red everywhere then it is either a '''5m Resolution''' or a '''10m Resolution'''</td> | | <td>Each of the small arrowhead icons in the palette will open to display more information and controls or a drop down menu of options.</td> |
| </tr>
| |
| </table>
| |
| See [[image:PageLink.PNG|link=]] '''[[#Ground Brush Resolution|Ground Height Brush Size and Grid Resolution]]''' for an example of this technique
| |
| </td> | |
| </tr> | | </tr> |
| </table> | | </table> |
| <br> | | <br> |
| <table bgcolor=#ffffff cellpadding=2> | | <table bgcolor=#000000 cellpadding=2> |
| <tr valign="top"> | | <tr valign="top"> |
| <td colspan=2><span style="font-weight: 700; font-size: 15px;">Steps:</span> To detect '''5m Resolution''' and '''10m Resolution''' in '''Trainz Plus''' and '''TRS22PE''':-</td> | | <td> |
| </tr>
| | <table bgcolor=#ffffb0 cellpadding=2> |
| <tr valign="top"> | | <tr valign="top"> |
| <td> </td>
| | <td width=25>[[image:NotePad.PNG|link=]]</td> |
| <td>In '''Trainz Plus''' perform <span style="font-weight: 700; font-size: 15px;">Steps <span style="color: white; background-color: red;"> 1 </span> and <span style="color: white; background-color: red;"> 2 </span></span> above first and if the baseboard is not '''HD Resolution''' then continue with the following steps:-</td>
| | <td> |
| </tr>
| |
| <tr valign="top">
| |
| <td width=25>[[image:DotPoint3.JPG|link=]]</td> | |
| <td>Select the '''Ground Height Brush''' in the <span style="font-weight: 700; font-size: 15px; color: white; background-color: #797979;"> Tools Palette </span> and set its <span style="font-weight: 700; font-size: 15px; color: gold; background-color: black;"> Radius </span> value in the <span style="font-weight: 700; font-size: 15px; color: white; background-color: #797979;"> Tool Options Palette </span> to '''3m'''</td>
| |
| </tr>
| |
| <tr valign="top">
| |
| <td>[[image:DotPoint4.JPG|link=]]</td>
| |
| <td>Move the '''Ground Height Brush''' in small circles around the surface but '''DO NOT''' hold down the mouse button | |
| <table> | | <table> |
| <tr valign="top"> | | <tr valign="top"> |
| <td width=10>[[image:DotPoint.JPG|10px|link=]]</td> | | <td width=10>[[image:DotPoint.JPG|10px|link=]]</td> |
| <td>If the brush circle does '''NOT''' turn red at any point of its motion then the resolution for that baseboard is '''5m'''</td> | | <td>The '''Asset Name''' is the name given to the asset by its creator and the name that will appear in the asset list of '''Content Manager''' and in the <span style="font-weight: 700; font-size: 15px; color: white; background-color: #797979;"> Assets Palette </span></td> |
| </tr> | | </tr> |
| <tr valign="top"> | | <tr valign="top"> |
| <td>[[image:DotPoint.JPG|10px|link=]]</td> | | <td>[[image:DotPoint.JPG|10px|link=]]</td> |
| <td>If the brush circle '''DOES''' turn red at some places then the resolution for that baseboard is '''10m'''</td> | | <td>The '''Object Name''' is the optional name that you have given the object so that it can be quickly located in the route and/or session. Some objects, such as station name signs, will require an '''Object Name''' that will be visible in Surveyor and Driver</td> |
| </tr> | | </tr> |
| </table> | | </table> |
| See [[image:PageLink.PNG|link=]] '''[[#Ground Brush Resolution|Ground Height Brush Size and Grid Resolution]]''' for an example of this technique
| |
| </td> | | </td> |
| </tr> | | </tr> |
| Line 1,094: |
Line 1,076: |
| </table> | | </table> |
| <br> | | <br> |
| <table width=1000> <!-- BEGIN Section Nav Buttons --> | | <table width=1000> <!-- BEGIN Section Nav Buttons --> |
| <tr valign="top"> | | <tr valign="top"> |
| <td width=629><span id="Setting Grid"></span> | | <td width=629><span id="skip XYZCoordinates"></span> |
| ====Setting and Converting Grid Resolutions==== | | =='''Palette Coordinates'''== |
| </td> | | </td> |
| | <td width=50>[[image:SkipDown.png|link=#skip Info Settings Menu|Skip Down]]</td> |
| | <td width=50>[[image:SkipUp.png|link=#stepInfo|Skip Up]]</td> |
| | <td width=46> </td> <!-- for Top --> |
| | <td width=75>[[image:HeadingUp.png|link=#stepInfo|alt=Heading|To Heading]]</td> |
| | <td width=75> </td> <!-- for Next Down --> |
| | <td width=75> </td> <!-- for Bottom --> |
| </tr> | | </tr> |
| </table> | | </table> <!-- END Section Nav Buttons --> |
|
| |
|
| <table width=1000> | | <table width=1000> |
| <tr valign="top"> | | <tr valign="top"> |
| <td width=500> | | <td width=700> |
| <table width=500 bgcolor=#000000 cellpadding=2> | | <table bgcolor=#000000 cellpadding=2> |
| | <tr valign="top"> |
| | <td> |
| | <table bgcolor=#ffffff cellpadding=2> |
| <tr valign="top"> | | <tr valign="top"> |
| <td><span style="font-weight: 700; font-size: 15px; color: white; background-color: black;"> Grid Options </span> | | <td colspan=2> |
| <table width=496 bgcolor=#ffffff cellpadding=2> | | <table> |
| | <tr valign="middle"> |
| | <td width=35>[[image:Information35.png|link=]]</td> |
| | <td>All the positional data and controls in the <span style="font-weight: 700; font-size: 15px; color: white; background-color: #797979;"> Info Palette </span> are defined in the following ways:-</td> |
| | </tr> |
| | </table> |
| | </td> |
| | </tr> |
| <tr valign="top"> | | <tr valign="top"> |
| <td colspan=2 bgcolor="lightcyan">In '''TRS22PE''':-</td> | | <td><span style="font-weight: 700; font-size: 17px; color: white; background-color: black;"> x: </span></td> |
| | <td>is '''ALWAYS''' the <span style="font-weight: 700; font-size: 17px; color: white; background-color: black;"> North-South </span> compass direction regardless of the direction that an object is facing</td> |
| </tr> | | </tr> |
| <tr valign="top"> | | <tr valign="top"> |
| <td width=10>[[image:DotPoint.JPG|10px|link=]]</td> | | <td><span style="font-weight: 700; font-size: 17px; color: white; background-color: black;"> y: </span></td> |
| <td>'''10m Resolution''' - this is the default for the '''first baseboard''' when a new route is created and for each new baseboard. You will have the option of changing the resolution when adding baseboards</td> | | <td>is '''ALWAYS''' the <span style="font-weight: 700; font-size: 17px; color: white; background-color: black;"> East-West </span> compass direction regardless of the direction that an object is facing</td> |
| </tr> | | </tr> |
| <tr valign="top"> | | <tr valign="top"> |
| <td>[[image:DotPoint.JPG|10px|link=]]</td> | | <td><span style="font-weight: 700; font-size: 17px; color: white; background-color: black;"> z: </span></td> |
| <td>'''5m Resolution''' - you can set '''5m''' as the resolution for each new baseboard when it is added. You can have a mixture of '''5m''' and '''10m''' Grid baseboards in the same route</td> | | <td>is '''ALWAYS''' the <span style="font-weight: 700; font-size: 17px; color: white; background-color: black;"> Vertical </span> direction (perpendicular to the compass directions) regardless of how an object has been rolled or tilted</td> |
| </tr> | | </tr> |
| <tr valign="top"> | | <tr valign="top"> |
| Line 1,125: |
Line 1,124: |
| <tr valign="top"> | | <tr valign="top"> |
| <td width=25>[[image:NotePad.PNG|link=]]</td> | | <td width=25>[[image:NotePad.PNG|link=]]</td> |
| <td>'''HD Resolution''' routes can be loaded into '''TRS22PE''' but the HD terrain will not appear at the same level of "sharpness" as it would in '''Trainz Plus''' - it will be "smoothed" to a lower resolution. The ground heights in '''HD''' routes cannot be edited in '''TRS22PE''' unless the baseboards are converted to '''5m Resolution''' or '''10m Resolution'''</td> | | <td><span style="font-size: 17px;">'''Notes:'''</span><br> |
| </tr> | | ---- |
| </table>
| |
| </td> | | </td> |
| </tr> | | </tr> |
| <tr valign="top"> | | <tr valign="top"> |
| <td colspan=2> </td> | | <td width=10>[[image:DotPoint.JPG|10px|link=]]</td> |
| | <td>distances are measured in '''metres''' from the '''North-West''' corner of the first baseboard. If that baseboard is later deleted then distances will '''still''' be measured from its original and now "virtual" North-West corner.</td> |
| </tr> | | </tr> |
| <tr valign="top"> | | <tr valign="top"> |
| <td colspan=2 bgcolor="lightcyan">In '''Trainz Plus''':-</td> | | <td>[[image:DotPoint.JPG|10px|link=]]</td> |
| </tr>
| | <td><span style="font-weight: 700; font-size: 17px;"> + </span> positive distances are in the <span style="font-weight: 700; font-size: 15px; color: white; background-color: black;"> South </span>, <span style="font-weight: 700; font-size: 15px; color: white; background-color: black;"> East </span> and <span style="font-weight: 700; font-size: 15px; color: white; background-color: black;"> Up </span> directions</td> |
| <tr valign="top">
| |
| <td width=10>[[image:DotPoint.JPG|10px|link=]]</td>
| |
| <td>'''HD Resolution''' (0.125m or 12.5cm) - this is the default for the '''first baseboard''' when a new route is created and for each new baseboard. You will have the option of changing the resolution when adding baseboards. <span style="background-color: #ffffb0;">If you are using '''HD Resolution''' then it is recommended that '''ALL''' the baseboards should use '''HD Resolution'''</span></td> | |
| </tr> | | </tr> |
| <tr valign="top"> | | <tr valign="top"> |
| <td>[[image:DotPoint.JPG|10px|link=]]</td> | | <td>[[image:DotPoint.JPG|10px|link=]]</td> |
| <td>'''5m Resolution''' - you can set '''5m''' as the resolution for each new baseboard when it is added. You can have a mixture of '''5m''' and '''10m''' Grid baseboards in the same route</td> | | <td><span style="font-weight: 700; font-size: 17px;"> - </span> negative distances are in the <span style="font-weight: 700; font-size: 15px; color: white; background-color: black;"> North </span>, <span style="font-weight: 700; font-size: 15px; color: white; background-color: black;"> West </span> and <span style="font-weight: 700; font-size: 15px; color: white; background-color: black;"> Down </span> directions</td> |
| </tr> | | </tr> |
| <tr valign="top"> | | <tr valign="top"> |
| <td>[[image:DotPoint.JPG|10px|link=]]</td> | | <td>[[image:DotPoint.JPG|10px|link=]]</td> |
| <td>'''10m Resolution''' - you can set '''10m''' as the resolution for each new baseboard when it is added. You can have a mixture of '''5m''' and '''10m''' Grid baseboards in the same route</td> | | <td>New boards added to the '''North''' of the first baseboard will have negative '''x''' coordinates and new boards added to the '''West''' of the first baseboard will have negative '''y''' coordinates.</td> |
| </tr> | | </tr> |
| </table> | | </table> |
| Line 1,153: |
Line 1,149: |
| </table> | | </table> |
| </td> | | </td> |
| <td width=500>
| |
| <table width=500 bgcolor=#000000 cellpadding=2>
| |
| <tr valign="top">
| |
| <td><span style="font-weight: 700; font-size: 15px; color: white; background-color: black;"> Grid Conversions </span>
| |
| <table width=496 bgcolor=#ffffff cellpadding=2>
| |
| <tr valign="top">
| |
| <td colspan=2 bgcolor="lightcyan">In '''TRS22PE''':-</td>
| |
| </tr> | | </tr> |
| <tr valign="top"> | | </table> |
| <td colspan=2>The [[image:S20_MarqueeToolIcon.png|link=|20px]] '''[[#The Marquee Tool|Marquee Tool]]''' is used to:-</td> | | </td> |
| | <td width=300>[[image:PositionXYZ_S20.png|300px|link=]]</td> |
| </tr> | | </tr> |
| | </table> |
| | <br> |
| | <table width=1000> <!-- BEGIN Section Nav Buttons --> |
| <tr valign="top"> | | <tr valign="top"> |
| <td width=10>[[image:DotPoint.JPG|10px|link=]]</td> | | <td width=629><span id="skip Info Settings Menu"></span> |
| <td>'''add''' individual and multiple baseboards. You can select their resolution from '''5m Resolution''' and '''10m Resolution''' and you can use both resolutions in the same route</td> | | =='''Info Settings Menu'''== |
| | </td> |
| | <td width=50>[[image:SkipDown.png|link=#skip Focus Info and Controls|Skip Down]]</td> |
| | <td width=50>[[image:SkipUp.png|link=#skip XYZCoordinates|Skip Up]]</td> |
| | <td width=46> </td> <!-- for Top --> |
| | <td width=75>[[image:HeadingUp.png|link=#stepInfo|alt=Heading|To Heading]]</td> |
| | <td width=75> </td> <!-- for Next Down --> |
| | <td width=75> </td> <!-- for Bottom --> |
| </tr> | | </tr> |
| | </table> <!-- END Section Nav Buttons --> |
| | |
| | <table width=1000> |
| <tr valign="top"> | | <tr valign="top"> |
| <td>[[image:DotPoint.JPG|10px|link=]]</td> | | <td>All the '''Focus''', '''Position''' and '''Rotation''' settings have drop down menus that allow values to be transferred to and from other settings and other tools.</td> |
| <td>'''convert''' individual and multiple baseboards between '''5m Resolution''' and '''10m Resolution''' and from '''HD Resolution''' to either '''5m Resolution''' or '''10m Resolution'''</td>
| |
| </tr> | | </tr> |
| | </table> |
| | <br> |
| | <table width=1000> |
| | <tr valign="top"> |
| | <td width=270>[[image:InfoPaletteSettingDropMenu1_S20.png|link=]]<br><br> |
| | [[image:InfoPaletteSettingDropMenu2_S20.png|link=]]</td> |
| | <td> |
| | <table bgcolor=#000000 cellpadding=2> |
| <tr valign="top"> | | <tr valign="top"> |
| <td> </td> | | <td> |
| <td>See [[image:PageLink.PNG|link=]] '''[[#skip Managing Baseboards|Managing Baseboards]]''' for more details on adding and converting baseboards</td> | | <table bgcolor=#ffffff cellpadding=2> |
| </tr>
| |
| <tr valign="top"> | | <tr valign="top"> |
| <td colspan=2 bgcolor="lightcyan">In '''Trainz Plus''':-</td> | | <td colspan=2><span style="font-weight: 700; font-size: 15px;">Steps: To Use the Drop Down Menus:-</span></td> |
| </tr> | | </tr> |
| <tr valign="top"> | | <tr valign="top"> |
| <td colspan=2>The [[image:S20_MarqueeToolIcon.png|link=|20px]] '''[[#The Marquee Tool|Marquee Tool]]''' is used to:-</td> | | <td width=20>[[image:DotPoint1.JPG|link=]]</td> |
| | <td><span style="font-weight: 700; font-size: 15px; color: black; background-color: lightcyan;"> Left Click </span> on the small '''arrowhead''' icon next to one of the labels <span style="font-weight: 700; font-size: 15px; color: white; background-color: black;"> Focus: </span> <span style="font-weight: 700; font-size: 15px; color: white; background-color: black;"> Pos: </span> or <span style="font-weight: 700; font-size: 15px; color: white; background-color: black;"> Rot: </span> to open up its list of settings</td> |
| </tr> | | </tr> |
| <tr valign="top"> | | <tr valign="top"> |
| <td width=10>[[image:DotPoint.JPG|10px|link=]]</td> | | <td width=20>[[image:DotPoint2.JPG|link=]]</td> |
| <td>'''add''' individual and multiple baseboards. You can select their resolution from '''HD Resolution''', '''5m Resolution''' and '''10m Resolution'''. <span style="font-weight: 700; background-color: yellow;"> It is NOT RECOMMENDED that you mix HD Resolution baseboards with 10m or 5m Resolution baseboards in the same route</span></td> | | <td><span style="font-weight: 700; font-size: 15px; color: black; background-color: lightcyan;"> Right Click </span> inside an <span style="font-weight: 700; font-size: 15px; color: white; background-color: #797979;"> Info Palette </span> setting box</td> |
| </tr> | | </tr> |
| <tr valign="top"> | | <tr valign="top"> |
| <td>[[image:DotPoint.JPG|10px|link=]]</td> | | <td colspan=2>The first time the popup menu is opened it will only show two active options - '''Paste''' and '''Select All'''.</td> |
| <td>'''convert''' individual and multiple baseboards between '''HD Resolution''', '''5m Resolution''' and '''10m Resolution'''. <span style="font-weight: 700; background-color: yellow;"> It is NOT RECOMMENDED that you mix HD Resolution baseboards with 10m or 5m Resolution baseboards in the same route</span></td>
| |
| </tr> | | </tr> |
| <tr valign="top"> | | <tr valign="top"> |
| <td> </td> | | <td colspan=2> |
| <td>See [[image:PageLink.PNG|link=]] '''[[#skip Managing Baseboards|Managing Baseboards]]''' for more details on adding and converting baseboards</td>
| | <table> |
| </tr> | |
| <tr valign="top"> | | <tr valign="top"> |
| <td colspan=2>The [[image:SurveyorToolsIcon_S20.png|link=]] '''Surveyor Tools Menu''' has an option that will '''convert''' an entire route from '''5m''' and/or '''10m Resolution''' to '''HD Resolution''' in a single step. See [[image:PageLink.PNG|link=]] '''[[#stepUpgrading|Upgrading a Route to HD]]'''</td> | | <td width=60><span style="font-weight: 700; font-size: 15px; color: white; background-color: black;"> Paste </span></td> |
| | <td>will paste the contents of your Operating System (Windows, MacOS) clipboard into the setting. If data is already present then the pasted data will be added to it, not replace it. To replace the contents use the <span style="font-weight: 700; font-size: 15px; color: white; background-color: black;"> Select All </span> option first (see below) then the <span style="font-weight: 700; font-size: 15px; color: white; background-color: black;"> Paste </span> option</td> |
| </tr> | | </tr> |
| </table> | | </table> |
| </td> | | </td> |
| | </tr> |
| | <tr valign="top"> |
| | <td colspan=2> |
| | <table> |
| | <tr valign="top"> |
| | <td width=90><span style="font-weight: 700; font-size: 15px; color: white; background-color: black;"> Select All </span></td> |
| | <td>will highlight the contents of the selected setting. You can also achieve this with a <span style="font-weight: 700; font-size: 15px; background-color: lightcyan;"> Left Click and Drag </span> across the contents of the setting</td> |
| </tr> | | </tr> |
| </table> | | </table> |
| </td> | | </td> |
| </tr> | | </tr> |
| </table>
| |
| <br>
| |
| <table width=1000 bgcolor=#000000 cellpadding=2>
| |
| <tr valign="top"> | | <tr valign="top"> |
| <td> | | <td>[[image:DotPoint3.JPG|link=]]</td> |
| <table width=996 bgcolor=#ffffb0 cellpadding=2> | | <td><span style="font-weight: 700; font-size: 15px; color: black; background-color: lightcyan;"> Right Click </span> inside the same <span style="font-weight: 700; font-size: 15px; color: white; background-color: #797979;"> Info Palette </span> setting box</td> |
| | </tr> |
| <tr valign="top"> | | <tr valign="top"> |
| <td width=25>[[image:NotePad.PNG|link=]]</td> | | <td colspan=2>Once the value in a setting has been selected (highlighted) the popup menu will show all options as active.</td> |
| <td><span style="font-size: 17px; font-weight: 700;">Notes:'''</span><br>
| |
| ----</td>
| |
| </tr> | | </tr> |
| <tr valign="top"> | | <tr valign="top"> |
| <td>[[image:DotPoint.JPG|10px|link=]]</td> | | <td colspan=2> |
| <td>'''HD Resolution''' routes are restricted to using just '''16 different''' ground textures '''per baseboard''', but each baseboard can have 16 completely different ground textures.<br> | | <table> |
| See [[image:PageLink.PNG|link=]] '''[[#HD Ground Texture|HD Resolution and Ground Textures]]''' below for more information</td>
| | <tr valign="top"> |
| | <td><span style="font-weight: 700; font-size: 15px; color: white; background-color: black;"> Cut </span></td> |
| | <td>will copy the contents of the selected setting into your Operating System clipboard. The contents will then be deleted from the setting</td> |
| | </tr> |
| | </table> |
| | </td> |
| </tr> | | </tr> |
| <tr valign="top"> | | <tr valign="top"> |
| <td>[[image:DotPoint.JPG|10px|link=]]</td> | | <td colspan=2> |
| <td>With each increase in Resolution (from '''10m''' to '''5m''' to '''HD''') there will be an increase in the route file size</td> | | <table> |
| | <tr valign="top"> |
| | <td><span style="font-weight: 700; font-size: 15px; color: white; background-color: black;"> Copy </span></td> |
| | <td>will copy the contents of the selected setting into your Operating System clipboard without deleting it</td> |
| | </tr> |
| | </table> |
| | </td> |
| </tr> | | </tr> |
| <tr valign="top"> | | <tr valign="top"> |
| <td>[[image:DotPoint.JPG|10px|link=]]</td> | | <td colspan=2> |
| <td>Converting to a higher Resolution (e.g. from '''10m''' to '''5m''' or to '''HD''') will not automatically increase the surface details that will be shown. You will have to do that work yourself</td>
| | <table> |
| </tr> | |
| <tr valign="top"> | | <tr valign="top"> |
| <td>[[image:DotPoint.JPG|10px|link=]]</td> | | <td><span style="font-weight: 700; font-size: 15px; color: white; background-color: black;"> Delete </span> will delete the contents of the selected setting. You can also achieve this with a <span style="font-weight: 700; font-size: 15px; background-color: lightcyan;"> Left Click and Drag </span> across the contents and then press the <span style="font-weight: 700; font-size: 15px; color: white; background-color: black;"> Delete </span> key</td> |
| <td>Converting to or from '''HD Resolution''' will "smooth" the surface details so a sharp ridge line, for example, will become a smoother ridge line. You may need to manually edit the ground terrain</td> | |
| </tr> | | </tr> |
| </table> | | </table> |
| Line 1,235: |
Line 1,256: |
| </tr> | | </tr> |
| </table> | | </table> |
| <br>
| |
| <table width=1000> <!-- BEGIN Section Nav Buttons -->
| |
| <tr valign="top">
| |
| <td width=629><span id="Ground Tool Options"></span>
| |
| ===<span style="font-weight: 700; font-size: 17px; color: white; background-color: blue;"> Ground Height Brush Tool Options </span>===
| |
| </td> | | </td> |
| <td width=50> </td>
| | </tr> |
| <td width=50> </td>
| | </table> |
| <td width=46>[[image:SkipMinorDown.png|link=#Identify Ground Height|Down]][[image:SkipMinorUp.png|link=#Ground Grid|Up]]</td> <!-- for Top and Minor Up/Down -->
| |
| <td width=75> </td>
| |
| <td width=75> </td>
| |
| <td width=75> </td> <!-- for Bottom -->
| |
| </tr>
| |
| </table> <!-- END Section Nav Buttons -->
| |
| | |
| <table width=1000 bgcolor=#000000 cellpadding=2>
| |
| <tr valign="top">
| |
| <td>
| |
| <table bgcolor=#ffffb0 cellpadding=2>
| |
| <tr valign="top">
| |
| <td width=25>[[image:NotePad.PNG|link=]]</td>
| |
| <td width=970><span style="font-size: 17px; font-weight: 700;">Notes: Tool Options Palette Controls</span><br>
| |
| ----</td>
| |
| </tr>
| |
| <tr valign="top">
| |
| <td width=10>[[image:DotPoint.JPG|10px|link=]]</td>
| |
| <td>The active ground height brush options for each action are shown in the <span style="font-weight: 700; font-size: 15px; color: white; background-color: #797979;"> Tool Options Palette </span> with a <span style="font-size: 15px; font-weight: 700; color: gold; background-color: black;"> Gold </span> coloured icon next to their names. Those options that have their icon greyed out will be ignored by the selected action, but they can still be edited.</td>
| |
| </tr>
| |
| <tr valign="top">
| |
| <td width=10>[[image:DotPoint.JPG|10px|link=]]</td>
| |
| <td>Most of the data entry boxes in the <span style="font-weight: 700; font-size: 15px; color: white; background-color: #797979;"> Tool Options Palette </span> have a '''Popup Menu''' (<span style="font-weight: 700; font-size: 15px; background-color: lightcyan;">Right Click</span> inside the box) that can be used to collect and distribute data - see the Wiki Page [[image:WikiLink.PNG|link=]] '''[[How to Use S20 Palettes#Tool Options Popups|How to Use the Surveyor 2.0 Palettes]]''' for more details.</td>
| |
| </tr> | |
| </table> | |
| </td> | | </td> |
| </tr> | | </tr> |
| Line 1,273: |
Line 1,264: |
| <br> | | <br> |
| <table width=1000> | | <table width=1000> |
| <tr valign="top" align="center">
| |
| <td>
| |
| <table width=630>
| |
| <tr valign="top"> | | <tr valign="top"> |
| <td width=210><span style="font-size: 15px; font-weight: 700; color: white; background-color: black;"> Height Up/Height Down </span><br>[[image:BrushToolsHeightUpDown_S20.png|link=|alt=Up/Down brush options]]</td> | | <td>Next to the <span style="font-weight: 700; font-size: 15px; color: white; background-color: black;"> z: </span> value in both the '''Focus''' and '''Position''' settings is a small white down arrowhead. <span style="font-weight: 700; font-size: 15px; background-color: lightcyan;"> Left Click </span> on the arrowhead to open its menu.</td> |
| <td width=210><span style="font-size: 15px; font-weight: 700; color: white; background-color: black;"> Set Height </span><br>[[image:BrushToolsHeightSet_S20.png|link=|alt=Height brush options]]</td>
| |
| <td width=210 rowspan=2><span style="font-size: 15px; font-weight: 700; color: white; background-color: black;"> Grade </span><br>[[image:BrushToolsHeightGrade_S20.png|link=|alt=Grade brush options]]</td>
| |
| </tr> | | </tr> |
| | </table> |
| | <br> |
| | <table width=1000> |
| <tr valign="top"> | | <tr valign="top"> |
| <td colspan=2> | | <td width=325>[[image:InfoPaletteFocusMenu_S20.png|link=]]</td> |
| | <td>There is only one option in the sub-menu.<br> |
| <table bgcolor=#000000 cellpadding=2> | | <table bgcolor=#000000 cellpadding=2> |
| <tr valign="top"> | | <tr valign="top"> |
| <td> | | <td> |
| <table bgcolor=#ffffe0 cellpadding=2> | | <table bgcolor=#ffffff cellpadding=2> |
| <tr valign="top" align="left"> | | <tr valign="top"> |
| <td width=25>[[image:PencilTips.PNG|link=]]</td> | | <td><span style="font-weight: 700; font-size: 15px; background-color: lightcyan;"> Left Click </span> on the <span style="font-weight: 700; font-size: 15px; color: white; background-color: black;"> Use Height for Brush </span> option to copy the current <span style="font-weight: 700; font-size: 15px; color: white; background-color: black;"> z: </span> value to the <span style="font-weight: 700; font-size: 15px; color: white; background-color: #797979;"> Tool Options Palette </span> <span style="font-weight: 700; font-size: 15px; color: gold; background-color: black;"> Height </span> setting.</td> |
| <td>On the right of each data entry box is a pair of '''Up/Down''' arrow controls. <span style="font-weight: 700; font-size: 15px; background-color: lightcyan;">Left Click and Drag</span> up or down on these to adjust the value in smaller increments</td> | |
| </tr> | | </tr> |
| </table> | | </table> |
| Line 1,296: |
Line 1,285: |
| </table> | | </table> |
| </td> | | </td> |
| <!-- <td> </td> -->
| |
| </tr> | | </tr> |
| </table> | | </table> |
| | <br> |
| | <table width=1000> <!-- BEGIN Section Nav Buttons --> |
| | <tr valign="top"> |
| | <td width=629><span id="skip Focus Info and Controls"></span> |
| | =='''Focus Info and Controls'''== |
| </td> | | </td> |
| <td width=390><br> | | <td width=50>[[image:SkipDown.png|link=#skip Asset Name Menu|Skip Down]]</td> |
| <table bgcolor=#000000 width=390 cellpadding=2> | | <td width=50>[[image:SkipUp.png|link=#skip Info Settings Menu|Skip Up]]</td> |
| | <td width=46> </td> <!-- for Top --> |
| | <td width=75>[[image:HeadingUp.png|link=#stepInfo|alt=Heading|To Heading]]</td> |
| | <td width=75> </td> <!-- for Next Down --> |
| | <td width=75> </td> <!-- for Bottom --> |
| | </tr> |
| | </table> <!-- END Section Nav Buttons --> |
| | |
| | <table width=1000 bgcolor="lightcyan" cellpadding=2> |
| <tr valign="top"> | | <tr valign="top"> |
| <td> | | <td width=10>[[image:BlueDot10x10.png|link=]]</td> |
| <table bgcolor=#ffffff width=386 align="left">
| | <td>The '''Focus''' shows the current position and height of the '''Compass''' object</td> |
| <tr valign="top">
| |
| <td width=90><span style="font-size: 15px; font-weight: 700; color: gold; background-color: black;"> Radius </span></td>
| |
| <td width=286>the brush radius (metres)</td> | |
| </tr> | | </tr> |
| | </table> |
| | <br> |
| | <table width=1000> |
| <tr valign="top"> | | <tr valign="top"> |
| <td colspan=2> | | <td width=225>[[image:InfoPaletteFocus_S20.png|link=]]</td> |
| <table bgcolor=#ffffb0> | | <td> |
| | <table width=786 bgcolor=#000000 cellpadding=2> |
| <tr valign="top"> | | <tr valign="top"> |
| <td width=90 align="right">'''Range:''' </td> | | <td> |
| <td width=296>for '''5m Resolution''' and '''10m Resolution''' see '''Notes:''' below<br> | | <table width=782 bgcolor=#ffffff cellpadding=2> |
| '''0.12m''' and above for '''HD Resolution''' (<span style="background-color: yellow;">in '''Trainz Plus''' only</span>)</td> | | <tr valign="middle"> |
| | <td width=35>[[image:Information35.png|link=]]</td> |
| | <td><span style="font-size: 15px;">All '''Focus Data''' in the '''Info Palette''' are entered and displayed in <span style="background-color: yellow; font-weight: 700;">metres</span> even if you are using '''Imperial''' units (feet) for your distance measurements. Heights are always measured from the <span style="background-color: yellow; font-weight: 700;">Absolute ZERO metres</span> level and not from the height of the current baseboard.</span></td> |
| </tr> | | </tr> |
| </table> | | </table> |
| </td> | | </td> |
| </tr> | | </tr> |
| | </table> |
| | <br> |
| | <table bgcolor=#000000 cellpadding=2> |
| <tr valign="top"> | | <tr valign="top"> |
| <td><span style="font-size: 15px; font-weight: 700; color: gold; background-color: black;"> Height </span></td> | | <td> |
| <td>the brush height (metres)</td>
| | <table bgcolor=#ffffff cellpadding=2> |
| | <tr valign="top"> |
| | <td colspan=2><span style="font-weight: 700; font-size: 15px;">Steps: To Edit the Compass Position (Focus) Data</span></td> |
| </tr> | | </tr> |
| <tr valign="top"> | | <tr valign="top"> |
| <td colspan=2> | | <td width=25>[[image:DotPoint1.JPG|link=]]</td> |
| <table bgcolor=#ffffb0> | | <td><span style="font-weight: 700; font-size: 15px; background-color: lightcyan;"> Left Click </span> on the '''Arrowhead''' icon in front of the <span style="font-weight: 700; font-size: 15px; color: white; background-color: black;"> Focus: </span> label. This will open its data for editing.</td> |
| | </tr> |
| <tr valign="top"> | | <tr valign="top"> |
| <td width=90 align="right">'''Range:''' </td> | | <td>[[image:DotPoint2.JPG|link=]]</td> |
| <td width=296>'''-3000m''' to '''+3000m'''</td> | | <td>The <span style="font-weight: 700; font-size: 15px; color: white; background-color: black;"> x: </span>, <span style="font-weight: 700; font-size: 15px; color: white; background-color: black;"> y: </span> and <span style="font-weight: 700; font-size: 15px; color: white; background-color: black;"> z: </span> text boxes show the current position (focus) of the compass with <span style="font-weight: 700; font-size: 15px; color: white; background-color: black;"> z: </span> showing its height. The <span style="font-weight: 700; font-size: 15px; color: white; background-color: black;"> x: </span> and <span style="font-weight: 700; font-size: 15px; color: white; background-color: black;"> y: </span> values can be edited to move the compass to a new position. Editing the <span style="font-weight: 700; font-size: 15px; color: white; background-color: black;"> z: </span> value has no effect.<br> |
| </tr> | | <table bgcolor=#ffffe0 cellpadding=2> |
| </table> | | <tr valign="top"> |
| </td> | | <td width=25>[[image:PencilTips.PNG|link=]]</td> |
| </tr> | | <td> |
| | <table> |
| <tr valign="top"> | | <tr valign="top"> |
| <td><span style="font-size: 15px; font-weight: 700; color: gold; background-color: black;"> Sensitivity </span></td> | | <td width=10>[[image:DotPoint.JPG|10px|link=]]</td> |
| <td>the rate at which the '''Height''' changes under the brush</td>
| | <td>On the right of each data entry box is a pair of '''Up/Down''' arrow controls. <span style="font-weight: 700; font-size: 15px; background-color: lightcyan;"> Left Click and Drag </span> up or down on these to adjust the value in smaller increments down to '''centimetres'''</td> |
| </tr> | | </tr> |
| <tr valign="top"> | | <tr valign="top"> |
| <td colspan=2> | | <td>[[image:DotPoint.JPG|10px|link=]]</td> |
| <table bgcolor=#ffffb0> | | <td>Each data entry box has a drop down menu list of options. <span style="font-weight: 700; font-size: 15px; background-color: lightcyan;"> Right Click </span> inside the box to open its menu list - see [[image:PageLink.PNG|link=]] '''[[#Info Settings Menu|Info Settings Menu]]''' above for the details</td> |
| <tr valign="top"> | |
| <td width=90 align="right">'''Range:''' </td> | |
| <td width=296>'''1%''' (very slowly) to '''100%''' (very quickly)</td>
| |
| </tr> | | </tr> |
| </table> | | </table> |
| </td> | | </td> |
| </tr>
| |
| <tr valign="top">
| |
| <td><span style="font-size: 15px; font-weight: 700; color: gold; background-color: black;"> Grade </span></td>
| |
| <td>slope gradient - see '''Notes:''' below</td>
| |
| </tr>
| |
| <tr valign="top">
| |
| <td colspan=2>
| |
| <table bgcolor=#ffffb0>
| |
| <tr valign="top">
| |
| <td width=90 align="right">'''Range:''' </td>
| |
| <td width=296>'''0%''' = flat ('''"Plateau"''' in '''Classic''') to</td>
| |
| </tr>
| |
| <tr valign="top">
| |
| <td> </td>
| |
| <td>±'''100%''' = steep (but '''not''' vertical)</td>
| |
| </tr> | | </tr> |
| </table> | | </table> |
| Line 1,367: |
Line 1,360: |
| </tr> | | </tr> |
| <tr valign="top"> | | <tr valign="top"> |
| <td><span style="font-size: 15px; font-weight: 700; color: gold; background-color: black;"> Angle </span></td> | | <td>[[image:DotPoint3.JPG|link=]]</td> |
| <td>grade direction - see '''Notes:''' below</td>
| | <td>The height (<span style="font-weight: 700; font-size: 15px; color: white; background-color: black;"> z: </span>) value can be copied into the <span style="font-weight: 700; font-size: 15px; color: white; background-color: #797979;"> Tool Options Palette </span> <span style="font-weight: 700; font-size: 15px; color: gold; background-color: black;"> Height </span> setting (open the '''down arrowhead''' next the <span style="font-weight: 700; font-size: 15px; color: white; background-color: black;"> z: </span> value) and select the option <span style="font-weight: 700; font-size: 15px; color: white; background-color: black;"> Use Height for Brush </span></td> |
| </tr> | |
| <tr valign="top"> | |
| <td colspan=2>
| |
| <table bgcolor=#ffffb0>
| |
| <tr valign="top">
| |
| <td width=90 align="right">'''Range:''' </td>
| |
| <td width=296>'''0°''' (North) to '''±359°'''<br>
| |
| a negative value reverses the grade direction</td>
| |
| </tr> | |
| </table>
| |
| </td> | |
| </tr> | | </tr> |
| </table> | | </table> |
| Line 1,395: |
Line 1,377: |
| <tr valign="top"> | | <tr valign="top"> |
| <td width=25>[[image:NotePad.PNG|link=]]</td> | | <td width=25>[[image:NotePad.PNG|link=]]</td> |
| <td><span style="font-size: 17px; font-weight: 700;">Notes:</span><br> | | <td><span style="font-weight: 700; font-size: 15px;">Moving the Focus</span></td> |
| ----
| |
| </td> | |
| </tr> | | </tr> |
| <tr valign="top"> | | <tr valign="top"> |
| <td >[[image:DotPoint.JPG|10px|link=]]</td> | | <td colspan=2> |
| <td>Unlike '''Surveyor Classic''', there is no upper limit to the brush <span style="font-size: 15px; font-weight: 700; color: gold; background-color: black;"> Radius </span>. Brushes of hundreds of metres (even kilometres) in size are possible. However, the performance will '''decrease''' as the brush radius '''increases'''. If you are using the brush to set an entire baseboard, or many baseboards, to a specific height then the [[image:S20_MarqueeToolIcon.png|link=|20px]] '''[[#The Marquee Tool|Marquee Tool]]''' might be a better choice.</td>
| | <table> |
| </tr>
| |
| <tr valign="top">
| |
| <td >[[image:DotPoint.JPG|10px|link=]]</td>
| |
| <td>There is a lower limit to the brush <span style="font-size: 15px; font-weight: 700; color: gold; background-color: black;"> Radius </span> that is dictated by the baseboard resolution ('''10m Resolution''', '''5m Resolution''' or '''HD Resolution'''). For the '''5m Resolution''' and the '''10m Resolution''' baseboards it is possible to have brushes smaller than the resolution but they will have restrictions imposed. These restrictions will increase as the brush becomes smaller. For '''HD Resolution''' the minimum radius is '''0.12m'''. <span style="font-weight: 700; background-color: yellow;"> Note: HD resolution is only available in Trainz Plus </span>.<br>
| |
| See [[image:PageLink.PNG|link=]] '''[[#Ground Brush Resolution|Ground Height Brush Size and Grid Resolution]]''' for the details.</td>
| |
| </tr> | |
| <tr valign="top"> | | <tr valign="top"> |
| <td>[[image:DotPoint.JPG|10px|link=]]</td> | | <td>[[image:DotPoint.JPG|10px|link=]]</td> |
| <td>The <span style="font-size: 15px; font-weight: 700; color: gold; background-color: black;"> Grade </span> is defined as '''vertical rise''' divided by '''horizontal distance''' converted to a percentage figure. So a grade of 100% (the maximum allowed) would mean a slope formed by the height and distance both being the same value (e.g. a height increase of 50m over a distance of 50m). A vertical slope (a cliff) would have an infinite grade (cliff height divided by 0) which is currently impossible in Surveyor.</td> | | <td>You cannot move the '''Focus''' to a position that is not on a baseboard</td> |
| </tr> | | </tr> |
| <tr valign="top"> | | <tr valign="top"> |
| <td>[[image:DotPoint.JPG|10px|link=]]</td> | | <td>[[image:DotPoint.JPG|10px|link=]]</td> |
| <td>The <span style="font-size: 15px; font-weight: 700; color: gold; background-color: black;"> Angle </span> controls the compass direction when creating a grade in the ground surface - '''0°''' = North, '''180³''' = South<br> | | <td>If you enter an <span style="font-weight: 700; font-size: 15px; color: white; background-color: black;"> x: </span> or <span style="font-weight: 700; font-size: 15px; color: white; background-color: black;"> y: </span> value that is "out in empty space" (beyond the edge of a boundary baseboard) then the '''Focus''' and compass will be moved to a point on the baseboard edge that is the closest to the entered co-ordinates</td> |
| Angles greater than '''360°''' can be entered but will give the same result as the angle '''minus''' 360°. For example: '''450°''' is exactly the same angle as '''90°''' (450°-360°=90°)</td>
| |
| </tr> | | </tr> |
| </table> | | </table> |
| Line 1,421: |
Line 1,394: |
| </tr> | | </tr> |
| </table> | | </table> |
| <br>
| |
| <table width=1000> <!-- BEGIN Section Nav Buttons -->
| |
| <tr valign="top">
| |
| <td width=629><span id="Identify Ground Height"></span>
| |
| ===<span style="font-weight: 700; font-size: 17px; color: white; background-color: blue;"> Identifying the Ground Height </span>===
| |
| </td> | | </td> |
| <td width=50> </td>
| |
| <td width=50> </td>
| |
| <td width=46>[[image:SkipMinorDown.png|link=#Paint Ground Height|Down]][[image:SkipMinorUp.png|link=#Ground Tool Options|Up]]</td> <!-- for Top and Minor Up/Down -->
| |
| <td width=75> </td>
| |
| <td width=75> </td>
| |
| <td width=75> </td> <!-- for Bottom -->
| |
| </tr> | | </tr> |
| </table> <!-- END Section Nav Buttons --> | | </table> |
| | | <br> |
| <table width=1000 bgcolor=#000000 cellpadding=2> | | <table width=1000 bgcolor=#000000 cellpadding=2> |
| <tr valign="top"> | | <tr valign="top"> |
| <td> | | <td> |
| <table width=996 bgcolor=#ffffe0 cellpadding=2> | | <table width=996 bgcolor=#ffffe0 cellpadding=2> |
| <tr valign="top">
| |
| <td colspan=5>
| |
| <table width=996>
| |
| <tr valign="top"> | | <tr valign="top"> |
| <td width=25>[[image:PencilTips.PNG|link=]]</td> | | <td width=25>[[image:PencilTips.PNG|link=]]</td> |
| <td>You can copy the current '''Ground Height''' of any spot in the route into the <span style="font-weight: 700; font-size: 15px; color: white; background-color: #797979;"> Tool Options Palette </span> <span style="font-weight: 700; font-size: 15px; color: gold; background-color: black;"> Height </span> setting. Once it has been copied the '''height''' can be applied to the '''Ground Height Brush''' or to any object in the route.</td> | | <td>If it has not been deleted you can identify the '''North-West''' corner of the original (first) baseboard by entering <span style="font-weight: 700; font-size: 15px;">0</span> as the <span style="font-weight: 700; font-size: 15px; color: white; background-color: black;"> Focus: </span> <span style="font-weight: 700; font-size: 15px; color: white; background-color: black;"> x: </span> and <span style="font-weight: 700; font-size: 15px; color: white; background-color: black;"> y: </span> co-ordinates.<br><br> |
| | If, after entering the co-ordinates, the focus changes to another set of co-ordinates then the original (first) baseboard has been deleted. The '''Focus''' and compass will move to a position on the nearest current baseboard that is closest to the original '''0, 0''' ('''North-West''' corner) co-ordinates.</td> |
| </tr> | | </tr> |
| </table> | | </table> |
| Line 1,451: |
Line 1,411: |
| </tr> | | </tr> |
| </table> | | </table> |
| | <br> |
| | <table width=1000> <!-- BEGIN Section Nav Buttons --> |
| | <tr valign="top"> |
| | <td width=629><span id="skip Asset Name Menu"></span> |
| | =='''Asset Name Menu'''== |
| </td> | | </td> |
| | <td width=50>[[image:SkipDown.png|link=#skip Object Name|Skip Down]]</td> |
| | <td width=50>[[image:SkipUp.png|link=#skip Focus Info and Controls|Skip Up]]</td> |
| | <td width=46> </td> <!-- for Top --> |
| | <td width=75>[[image:HeadingUp.png|link=#stepInfo|alt=Heading|To Heading]]</td> |
| | <td width=75> </td> <!-- for Next Down --> |
| | <td width=75> </td> <!-- for Bottom --> |
| </tr> | | </tr> |
| </table> | | </table> <!-- END Section Nav Buttons --> |
|
| |
|
| | <table width=1000 bgcolor="lightcyan" cellpadding=2> |
| | <tr valign="top"> |
| | <td width=10>[[image:BlueDot10x10.png|link=]]</td> |
| | <td>'''"Asset Name"''' refers to the name of the asset as displayed in the <span style="font-weight: 700; font-size: 15px; color: white; background-color: #797979;"> Assets Palette </span> and in '''Content Manager'''. This is not the same as the '''Object Name''' (see the next section)</td> |
| | </tr> |
| | </table> |
| | <br> |
| <table width=1000> | | <table width=1000> |
| <tr> | | <tr valign="top"> |
| <td colspan=3>To copy the '''Ground Height''' into the <span style="font-weight: 700; font-size: 15px; color: white; background-color: #797979;"> Tool Options Palette </span> <span style="font-weight: 700; font-size: 15px; color: gold; background-color: black;"> Height </span> setting choose one of the following:-<br> | | <td colspan=2>You must have an object (or objects) selected for the '''Asset Name''' data to be shown. If more than one object has been selected then you will be shown the '''Asset Name''' for the '''last''' object selected</td> |
| <span style="font-weight: 700; font-size: 15px;">Options:</span> </td>
| |
| </tr> | | </tr> |
| <tr valign="top"> | | <tr valign="top"> |
| <td> | | <td width=210>[[image:InfoPaletteMulti_S20.png|link=]]</td> |
| <table width=300 bgcolor=#0000ff cellpadding=2> | | <td>If different objects (with different '''<kuid>''' codes) have been selected then a count of the additional objects will be added. The '''(+2)''' shown in the object name in the image on the left indicates that 2 additional different objects are in the group of selected objects.</td> |
| | </tr> |
| | </table> |
| | <br> |
| | <table width=1000> |
| <tr valign="top"> | | <tr valign="top"> |
| | <td width=385 rowspan=2>[[image:InfoPaletteMenu_S20.png|link=]]</td> |
| <td> | | <td> |
| <table width=296 bgcolor=#ffffff cellpadding=2> | | <table bgcolor=#000000 cellpadding=2> |
| <tr valign="top"> | | <tr valign="top"> |
| <td width=25>[[image:Ablue.png|link=]]</td>
| |
| <td>Using the '''Eyedropper''' option found in all the tools</td>
| |
| </tr>
| |
| <tr valign="top">
| |
| <td> </td>
| |
| <td> | | <td> |
| <table bgcolor=#ffffff cellpadding=2> | | <table bgcolor=#ffffff cellpadding=2> |
| <tr valign="top"> | | <tr valign="top"> |
| <td colspan=2><span style="font-weight: 700; font-size: 15px;">Steps:</span><br> | | <td colspan=2><span style="font-weight: 700; font-size: 15px;">Steps: To Open the Menu of a Selected Asset or Assets</span></td> |
| <table>
| |
| <tr valign="top">
| |
| <td width=20>[[image:DotPoint1.JPG|link=]]</td>
| |
| <td>move the mouse pointer to the spot on the terrain</td>
| |
| </tr> | | </tr> |
| <tr valign="top"> | | <tr valign="top"> |
| <td>[[image:DotPoint2.JPG|link=]]</td> | | <td width=25>[[image:DotPoint1.JPG|link=]]</td> |
| <td>hold down the <span style="font-weight: 700; font-size: 15px; color: white; background-color: black;"> Alt </span> key and <span style="font-weight: 700; font-size: 15px; background-color: lightcyan;"> Left Click </span></td> | | <td>Next to the '''Asset Name''' is a small white '''Arrowhead''' icon. <span style="font-weight: 700; font-size: 15px; background-color: lightcyan;"> Left Click </span> on the arrowhead to open the asset menu</td> |
| </tr> | | </tr> |
| </table> | | </table> |
| </td> | | </td> |
| </tr>
| |
| <tr valign="top">
| |
| <td colspan=2>This option is a good choice when there are no '''scenery objects''' (e.g. vegetation, splines, buildings, etc) over the ground being sampled by the '''eyedropper'''.<br>
| |
| <table bgcolor=#fcbcbc cellpadding=2>
| |
| <tr valign="top">
| |
| <td><span style="font-weight: 700; font-size: 15px;">Warning: </span> This will switch the [[image:S20_BrushToolIcon.png|link=|20px]] '''Brush Tool''' from '''Ground Height''' to '''Ground Texture''' for painting with the texture or grid pattern at the location clicked</td>
| |
| </tr> | | </tr> |
| </table> | | </table> |
| </td> | | </td> |
| </tr> | | </tr> |
| </table> | | <tr valign="top"> |
| </td>
| | <!-- <td> in rowspan --> |
| </tr>
| |
| </table>
| |
| </td>
| |
| </tr>
| |
| </table>
| |
| </td>
| |
| <td width=50 align="center"><span style="font-weight: 700; font-size: 15px;">OR</span></td>
| |
| <td> | | <td> |
| <table width=300 bgcolor=#0000ff cellpadding=2> | | <br> |
| | <table width=615 bgcolor=#000000 cellpadding=2> |
| <tr valign="top"> | | <tr valign="top"> |
| <td> | | <td> |
| <table width=296 bgcolor=#ffffff cellpadding=2> | | <table width=611 bgcolor=#ffffff cellpadding=2> |
| <tr valign="top"> | | <tr valign="top"> |
| <td width=25>[[image:Bblue.png|link=]]</td> | | <td colspan=2><span style="font-weight: 700; font-size: 17px;">Asset Name Menu Options</span></td> |
| <td>Using the '''Compass''' and the <span style="font-weight: 700; font-size: 15px; color: white; background-color: #797979;"> Tool Options Palette </span> <span style="font-weight: 700; font-size: 15px; color: gold; background-color: black;"> Height </span> setting</td>
| |
| </tr> | | </tr> |
| <tr valign="top"> | | <tr> |
| <td> </td> | | <td colspan=2> |
| <td>
| |
| <table bgcolor=#ffffff cellpadding=2>
| |
| <tr valign="top">
| |
| <td><span style="font-weight: 700; font-size: 15px;">Steps:</span>
| |
| <table> | | <table> |
| <tr valign="top"> | | <tr valign="top"> |
| <td width=20>[[image:DotPoint1.JPG|link=]]</td>
| | <td><span style="font-weight: 700; font-size: 15px; color: white; background-color: black;"> Copy </span></td> |
| <td><span style="font-weight: 700; font-size: 15px; background-color: lightcyan;">Right Click</span> at the spot on the terrain to move the '''Compass'''</td> | | <td>copies the asset '''name''' and '''<kuid>''' into your operating systems clipboard. If more than two assets have been selected then only the first two will be copied</td> |
| </tr> | | </tr> |
| <tr valign="top">
| | </table> |
| <td>[[image:DotPoint2.JPG|link=]]</td>
| | </td> |
| <td><span style="font-weight: 700; font-size: 15px; background-color: lightcyan;">Right Click</span> inside the <span style="font-weight: 700; font-size: 15px; color: gold; background-color: black;"> Height </span> setting box</td>
| |
| </tr> | | </tr> |
| | <tr> |
| | <td colspan=2> |
| | <table> |
| <tr valign="top"> | | <tr valign="top"> |
| <td>[[image:DotPoint3.JPG|link=]]</td>
| | <td><span style="font-weight: 700; font-size: 15px; color: white; background-color: black;"> Show Asset Details </span></td> |
| <td><span style="font-weight: 700; font-size: 15px; background-color: lightcyan;"> Left Click </span> on the menu option<br> | | <td>opens a new window showing the image and description of the selected object</td> |
| <span style="font-weight: 700; font-size: 15px; color: white; background-color: black;"> Get Height at Compass </span></td>
| |
| </tr> | | </tr> |
| </table> | | </table> |
| </td> | | </td> |
| </tr> | | </tr> |
| | <tr> |
| | <td colspan=2> |
| | <table> |
| <tr valign="top"> | | <tr valign="top"> |
| <td colspan=2>This option is recommended when there are '''scenery objects''' (e.g. vegetation, splines, buildings, etc) between the ground and the '''eyedropper'''. In these cases the object name shown in the eyedropper <span style="font-weight: 700; font-size: 15px; color: white; background-color: black;"> Tooltip </span> is '''NOT''' the name of a ground texture or a grid pattern.</td> | | <td width=220><span style="font-weight: 700; font-size: 15px; color: white; background-color: black;"> List Assets in New Window </span></td> |
| | <td>opens up '''Content Manager''' and lists all the selected objects</td> |
| </tr> | | </tr> |
| </table> | | </table> |
| </td> | | </td> |
| | </tr> |
| | <tr> |
| | <td colspan=2> |
| | <table> |
| | <tr valign="top"> |
| | <td><span style="font-weight: 700; font-size: 15px; color: white; background-color: black;"> Add to Picklist </span></td> |
| | <td>adds selected objects to a '''Picklist'''</td> |
| </tr> | | </tr> |
| </table> | | </table> |
| </td> | | </td> |
| </tr> | | </tr> |
| </table>
| | <tr> |
| </td>
| | <td colspan=2> |
| <td width=50 align="center"><span style="font-weight: 700; font-size: 15px;">OR</span></td>
| |
| <td>
| |
| <table width=300 bgcolor=#0000ff cellpadding=2>
| |
| <tr valign="top">
| |
| <td>
| |
| <table width=296 bgcolor=#ffffff cellpadding=2>
| |
| <tr valign="top">
| |
| <td width=25>[[image:Cblue.png|link=]]</td>
| |
| <td>Using the '''Compass''' and the <span style="font-weight: 700; font-size: 15px; color: white; background-color: #797979;"> Info Palette </span></td>
| |
| </tr>
| |
| <tr valign="top"> | |
| <td> </td> | |
| <td>
| |
| <table bgcolor=#ffffff cellpadding=2>
| |
| <tr valign="top">
| |
| <td><span style="font-weight: 700; font-size: 15px;">Steps:</span>
| |
| <table> | | <table> |
| <tr valign="top"> | | <tr valign="top"> |
| <td width=20>[[image:DotPoint1.JPG|link=]]</td> | | <td width=180><span style="font-weight: 700; font-size: 15px; color: white; background-color: black;"> Remove from Picklist </span></td> |
| <td><span style="font-weight: 700; font-size: 15px; background-color: lightcyan;">Right Click</span> at the spot on the terrain to move the '''Compass'''</td>
| | <td><span style="font-weight: 700; font-size: 15px; color: white; background-color: red;"> NOT WORKING </span><span style="font-weight: 700; font-size: 15px; background-color: #fcbcbc;"> (a known bug)</span><br> |
| </tr>
| | use this same option found in the <span style="font-weight: 700; font-size: 15px; color: white; background-color: #797979;"> Filter Palette </span> or '''Content Manager''' instead</td> |
| <tr valign="top">
| |
| <td>[[image:DotPoint2.JPG|link=]]</td>
| |
| <td>Open the <span style="font-weight: 700; font-size: 15px; color: white; background-color: #797979;"> Info Palette </span> '''Focus''' controls</td>
| |
| </tr>
| |
| <tr valign="top">
| |
| <td>[[image:DotPoint3.JPG|link=]]</td>
| |
| <td><span style="font-weight: 700; font-size: 15px; background-color: lightcyan;"> Left Click </span> the <span style="font-weight: 700; font-size: 15px; color: white; background-color: black;"> z: </span> control '''down arrowhead''' icon</td> | |
| </tr>
| |
| <tr valign="top">
| |
| <td>[[image:DotPoint4.JPG|link=]]</td>
| |
| <td>select the menu option<br>
| |
| <span style="font-weight: 700; font-size: 15px; color: white; background-color: black;"> Use Height for Brush </span></td> | |
| </tr> | | </tr> |
| </table> | | </table> |
| </td> | | </td> |
| </tr> | | </tr> |
| | <tr> |
| | <td colspan=2> |
| | <table> |
| <tr valign="top"> | | <tr valign="top"> |
| <td colspan=2>This option involves more steps but is also recommended when there are '''scenery objects''' (e.g. vegetation, splines, buildings, etc) between the ground and the '''eyedropper'''. In these cases the object name shown in the eyedropper <span style="font-weight: 700; font-size: 15px; color: white; background-color: black;"> Tooltip </span> is '''NOT''' the name of a ground texture or a grid pattern.</td> | | <td><span style="font-weight: 700; font-size: 15px; color: white; background-color: black;"> Select in Assets Palette </span></td> |
| | <td>selects and highlights the selected object in the <span style="font-weight: 700; font-size: 15px; color: white; background-color: #797979;"> Assets Palette </span></td> |
| </tr> | | </tr> |
| </table> | | </table> |
| Line 1,600: |
Line 1,544: |
| </table> | | </table> |
| <br> | | <br> |
| <table width=1000> <!-- BEGIN Section Nav Buttons --> | | <table width=1000> <!-- BEGIN Section Nav Buttons --> |
| <tr valign="top"> | | <tr valign="top"> |
| <td width=629><span id="Paint Ground Height"></span> | | <td width=629><span id="skip Object Name"></span> |
| ===<span style="font-weight: 700; font-size: 17px; color: white; background-color: blue;"> "Painting" the Ground Height </span>=== | | =='''Object Name'''== |
| </td> | | </td> |
| <td width=50> </td> | | <td width=50>[[image:SkipDown.png|link=#skip Position Info and Controls|Skip Down]]</td> |
| <td width=50> </td>
| | <td width=50>[[image:SkipUp.png|link=#skip Asset Name Menu|Skip Up]]</td> |
| <td width=46>[[image:SkipMinorDown.png|link=#Ground Brush Resolution|Down]][[image:SkipMinorUp.png|link=#Identify Ground Height|Up]]</td> <!-- for Top and Minor Up/Down -->
| | <td width=46> </td> <!-- for Top --> |
| <td width=75> </td> | | <td width=75>[[image:HeadingUp.png|link=#stepInfo|alt=Heading|To Heading]]</td> |
| <td width=75> </td> | | <td width=75> </td> <!-- for Next Down --> |
| <td width=75> </td> <!-- for Bottom --> | | <td width=75> </td> <!-- for Bottom --> |
| </tr> | | </tr> |
| Line 1,617: |
Line 1,561: |
| <tr valign="top"> | | <tr valign="top"> |
| <td width=10>[[image:BlueDot10x10.png|link=]]</td> | | <td width=10>[[image:BlueDot10x10.png|link=]]</td> |
| <td>The ground surface is "sculptured" up, down or to a set height by using a "painting action" with the [[image:S20_BrushToolIcon.png|link=|20px]] '''Brush Tool'''</td> | | <td>'''"Object Name"''' refers to the name that you give to an object</td> |
| </tr> | | </tr> |
| </table> | | </table> |
| Line 1,623: |
Line 1,567: |
| <table width=1000> | | <table width=1000> |
| <tr valign="top"> | | <tr valign="top"> |
| | <td>You can give any object in your '''Trainz World''' an identifying name. In some cases a name is vital for '''AI''' and session operations, in other cases it will be needed as a display feature - for example: to be shown on a station nameboard. You must have the object (or objects) selected for this option to be available. If more than one object has been selected then only the last object (the one with the '''Context Icon''') will be given a name</td> |
| | </tr> |
| | </table> |
| | |
| | <table width=1000> |
| | <tr valign="top"> |
| | <td width=225>[[image:InfoPaletteObjectName_S20.png|link=]]</td> |
| <td> | | <td> |
| <table width=495 bgcolor=#000000 cellpadding=2> | | <table bgcolor=#000000 cellpadding=2> |
| <tr valign="top"> | | <tr valign="top"> |
| <td> | | <td> |
| <table bgcolor=#ffffff cellpadding=2> | | <table bgcolor=#ffffff cellpadding=2> |
| <tr valign="top"> | | <tr valign="top"> |
| <td colspan=2><span style="font-weight: 700; font-size: 15px;">Steps:</span> To set the '''Ground Surface Height''':-</td> | | <td colspan=2><span style="font-weight: 700; font-size: 15px;">Steps: To Name (or Rename) an Object:-</span></td> |
| </tr> | | </tr> |
| <tr valign="top"> | | <tr valign="top"> |
| <td colspan=2> | | <td width=25>[[image:DotPoint1.JPG|link=]]</td> |
| <table bgcolor=#ffffe0 cellpadding=2> | | <td width=450>Use the [[image:S20_FreeMoveToolIcon.png|link=|20px]] '''Free Move Tool''' or the [[image:S20_FineAdjustmentToolIcon.png|link=|20px]] '''Fine Adjustment Tool''' to select an object</td> |
| | <td rowspan=4> |
| | <table width=325 bgcolor=#ffffe0 cellpadding=2> |
| <tr valign="top"> | | <tr valign="top"> |
| <td width=25>[[image:PencilTips.PNG|link=]]</td> | | <td width=25>[[image:PencilTips.PNG|link=]]</td> |
| <td>You can jump directly to step <span style="font-weight: 700; font-size: 15px; color: white; background-color: red;"> 3 </span> by selecting the '''Ground Height''' layer in the <span style="font-weight: 700; font-size: 15px; color: white; background-color: #797979;"> Layers Palette </span>. Once the [[image:BrushTargetIcon_S20.png|link=]] <span style="font-weight: 700; font-size: 15px; color: white; background-color: black;"> Ground Height </span> target has been selected the '''minimum''' steps needed to start changing the terrain are <span style="font-weight: 700; font-size: 15px; color: white; background-color: red;"> 3 </span> and <span style="font-weight: 700; font-size: 15px; color: white; background-color: red;"> 5 </span></td> | | <td>If the <span style="font-weight: 700; font-size: 15px; color: white; background-color: black;"> Name: </span> text entry box is greyed out and cannot be selected then the layer containing the object is locked. Use the <span style="font-weight: 700; font-size: 15px; color: white; background-color: #797979;"> Layers Palette </span> to unlock the layer (see [[image:PageLink.PNG|link=]] '''[[#The Layers Palette|The Layers Palette]]'''), reselect the object and try again</td> |
| </tr> | | </tr> |
| </table> | | </table> |
| </td> | | </td> |
| </tr>
| |
| <tr valign="top">
| |
| <td width=20>[[image:DotPoint1.JPG|link=]]</td>
| |
| <td>In the <span style="font-weight: 700; font-size: 15px; color: white; background-color: #797979;"> Tools Palette </span> <span style="font-weight: 700; font-size: 15px; background-color: lightcyan;">Left Click</span> on the [[image:S20_BrushToolIcon.png|link=|20px]] '''Brush Tool''' or press the <span style="font-weight: 700; font-size: 15px; color: white; background-color: black;"> W </span> key</td>
| |
| </tr> | | </tr> |
| <tr valign="top"> | | <tr valign="top"> |
| <td>[[image:DotPoint2.JPG|link=]]</td> | | <td>[[image:DotPoint2.JPG|link=]]</td> |
| <td>select the [[image:BrushTargetIcon_S20.png|link=]] <span style="font-weight: 700; font-size: 15px; color: white; background-color: black;"> Ground Height </span> target from the brush top drop down menu</td> | | <td>In the <span style="font-weight: 700; font-size: 15px; color: white; background-color: #797979;"> Info Palette </span> <span style="font-weight: 700; font-size: 15px; background-color: lightcyan;"> Left Click </span> inside the '''Name:''' text entry box</td> |
| | <!-- <td> in rowspan --> |
| </tr> | | </tr> |
| <tr valign="top"> | | <tr valign="top"> |
| <td>[[image:DotPoint3.JPG|link=]]</td> | | <td>[[image:DotPoint3.JPG|link=]]</td> |
| <td>select the [[image:BrushActionIcon_S20.png|link=]] (<span style="font-weight: 700; font-size: 15px; color: white; background-color: black;"> Height Up </span>, <span style="font-weight: 700; font-size: 15px; color: white; background-color: black;"> Height Down </span>, etc) action from the brush second drop down menu</td> | | <td>Enter or edit the name</td> |
| | <!-- <td> in rowspan --> |
| </tr> | | </tr> |
| <tr valign="top"> | | <tr valign="top"> |
| <td>[[image:DotPoint4.JPG|link=]]</td> | | <td>[[image:DotPoint4.JPG|link=]]</td> |
| <td>In the <span style="font-weight: 700; font-size: 15px; color: white; background-color: #797979;"> Tool Options Palette </span> set any of the brush controls - <span style="font-weight: 700; font-size: 15px; color: gold; background-color: black;"> Radius </span>,<span style="font-weight: 700; font-size: 15px; color: gold; background-color: black;"> Height </span>, <span style="font-weight: 700; font-size: 15px; color: gold; background-color: black;"> Grade </span>, <span style="font-weight: 700; font-size: 15px; color: gold; background-color: black;"> Angle </span>, <span style="font-weight: 700; font-size: 15px; color: gold; background-color: black;"> Sensitivity </span></td> | | <td>Press the <span style="font-weight: 700; font-size: 15px; color: white; background-color: black;"> Enter </span> key</td> |
| | <!-- <td> in rowspan --> |
| </tr> | | </tr> |
| <tr valign="top"> | | <tr valign="top"> |
| <td>[[image:DotPoint5.JPG|link=]]</td> | | <td>[[image:DotPoint5.JPG|link=]]</td> |
| <td><span style="font-weight: 700; font-size: 15px; background-color: lightcyan;">Left Click and Drag</span> on the terrain to change the terrain height</td> | | <td bgcolor="yellow" colspan=2>Make sure that you '''SAVE''' before you exit '''Trainz'''</td> |
| | </tr> |
| | </table> |
| | </td> |
| </tr> | | </tr> |
| </table> | | </table> |
| Line 1,666: |
Line 1,621: |
| </table> | | </table> |
| <br> | | <br> |
| <table bgcolor=#000000 cellpadding=2> | | <table width=1000 bgcolor=#000000 cellpadding=2> |
| <tr valign="top"> | | <tr valign="top"> |
| <td> | | <td> |
| <table bgcolor=#ffffe0 cellpadding=2> | | <table width=996 bgcolor=#ffffb0 cellpadding=2> |
| <tr valign="top"> | | <tr valign="top"> |
| <td width=25>[[image:PencilTips.PNG|link=]]</td> | | <td width=25>[[image:NotePad.PNG|link=]]</td> |
| <td>You can use the '''Marquee Tool''' to set a large area, an entire baseboard or several baseboards to a specific height. See [[image:PageLink.PNG|link=]] '''[[#skip Managing Baseboards|Managing Baseboards]]''' for more details</td> | | <td>If more than one object has been selected then only the '''last selected object''', the one with the '''Context Icon''', will be named.</td> |
| </tr> | | </tr> |
| </table> | | </table> |
| Line 1,678: |
Line 1,633: |
| </tr> | | </tr> |
| </table> | | </table> |
| </td> | | <br> |
| <td width=10> </td> | | <table width=1000 cellpadding=2> |
| | <tr valign="top"> |
| | <td width=420>[[image:ObjectsUsingSameName.png|link=]]</td> |
| <td> | | <td> |
| <table width=495 bgcolor=#000000 cellpadding=2> | | <table width=580 bgcolor=#000000 cellpadding=2> |
| <tr valign="top"> | | <tr valign="top"> |
| <td> | | <td> |
| <table width=496 bgcolor=#ffffb0 cellpadding=2> | | <table width=576 bgcolor=#ffffff cellpadding=2> |
| <tr valign="top"> | | <tr valign="top"> |
| <td width=25>[[image:NotePad.PNG|link=]]</td> | | <td align="center" colspan=2><span style="font-weight: 700; font-size: 15px;">There is no ban on two or more objects using the same name</span></td> |
| <td width=470><span style="font-size: 17px; font-weight: 700;">Notes:'''</span><br>
| |
| ----</td>
| |
| </tr> | | </tr> |
| <tr valign="top">
| | </table> |
| <td>[[image:DotPoint.JPG|10px|link=]]</td>
| | </td> |
| <td>The rate or speed at which the ground height changes under the brush is controlled by the <span style="font-weight: 700; font-size: 15px; color: white; background-color: #797979;"> Tool Options Palette </span> <span style="font-weight: 700; font-size: 15px; color: gold; background-color: black;"> Sensitivity </span> setting
| |
| <table cellpadding=2 bgcolor=#ffffff>
| |
| <tr>
| |
| <td colspan="2">
| |
| ----</td>
| |
| </tr> | | </tr> |
| | </table> |
| | <br> |
| | In the image shown on the left there are 4 objects all named '''Old Orroroo Rd'''.<br> |
| | <br> |
| | This will not cause any problems for scenery objects apart from finding the ''exact'' one you want with the '''Finder Tool''' (<span style="font-weight: 700; font-size: 15px;"><span style="color: white; background-color: black;"> Ctrl </span> + <span style="color: white; background-color: black;"> F </span></span> keys) as shown in the image on the left - Which of the 4 "Old Orroroo Rd" objects is the one that I need?<br> |
| | <br> |
| | <table bgcolor=#ff0000 cellpadding=2> |
| <tr valign="top"> | | <tr valign="top"> |
| <td>[[image:Gears.PNG|link=]]</td> | | <td> |
| <td><span style="font-weight: 700; font-size: 15px;"><span style="color: gold; background-color: black;"> Sensitivity </span> Settings:'''</span> | | <table bgcolor=#fcbcbc cellpadding=2> |
| <table>
| |
| <tr valign="top"> | | <tr valign="top"> |
| <td width=10>[[image:BlackDot10x10.png|link=]]</td> | | <td>[[image:Stop.PNG|link=]]</td> |
| <td>'''1%''' for the smallest possible change with each sweep of the brush</td> | | <td><span style="font-size: 15px; font-weight: 700;">WARNING:</span><br> |
| | '''Duplicate names''' will cause problems for '''Industries''' (including passenger enabled stations), '''Locomotives''', '''Track Marks''', '''Triggers''', '''Switches''', '''Signals''', etc that have to be identified to control the operation of a session.</td> |
| </tr> | | </tr> |
| <tr valign="top"> | | <tr valign="top"> |
| <td>[[image:BlackDot10x10.png|link=]]</td> | | <td colspan=2 align="center"><span style="font-weight: 700; font-size: 15px;">These objects must have unique names</span></td> |
| <td>'''100%''' for the largest possible change with each sweep of the brush</td>
| |
| </tr> | | </tr> |
| <tr valign="top"> | | </table> |
| <td colspan=2>Values between these two limits will give intermediate changes with each sweep of the brush over the same area</td>
| | </td> |
| </tr> | | </tr> |
| </table> | | </table> |
| </td> | | </td> |
| </tr> | | </tr> |
| | </table> |
| | <br> |
| | <table width=1000> <!-- BEGIN Section Nav Buttons --> |
| <tr valign="top"> | | <tr valign="top"> |
| <td colspan="2"> | | <td width=629><span id="skip Position Info and Controls"></span> |
| ----</td>
| | =='''Position Info and Controls'''== |
| </tr>
| |
| </table>
| |
| </td> | | </td> |
| | <td width=50>[[image:SkipDown.png|link=#skip Rotation Info and Controls|Skip Down]]</td> |
| | <td width=50>[[image:SkipUp.png|link=#skip Object Name|Skip Up]]</td> |
| | <td width=46> </td> <!-- for Top --> |
| | <td width=75>[[image:HeadingUp.png|link=#stepInfo|alt=Heading|To Heading]]</td> |
| | <td width=75> </td> <!-- for Next Down --> |
| | <td width=75> </td> <!-- for Bottom --> |
| </tr> | | </tr> |
| | </table> <!-- END Section Nav Buttons --> |
| | |
| | <table width=1000> |
| <tr valign="top"> | | <tr valign="top"> |
| <td>[[image:DotPoint.JPG|10px|link=]]</td>
| | <td colspan=2>You must have an object (or objects) selected for the '''Position Info and Controls''' to be edited. If more than one object has been selected then you will be shown the data for the '''last''' object selected</td> |
| <td colspan=2>Unlike '''Surveyor Classic''', there is no upper limit to the brush <span style="font-size: 15px; font-weight: 700; color: gold; background-color: black;"> Radius </span>. Brushes of hundreds of metres (even kilometres) in size are possible. However, the performance will '''decrease''' as the brush radius '''increases'''. If you are using the brush to set the terrain of an entire baseboard, or many baseboards, to a set height then the [[image:S20_MarqueeToolIcon.png|link=|20px]] '''[[#The Marquee Tool|Marquee Tool]]''' may be a better choice.</td> | |
| </tr> | | </tr> |
| <tr valign="top"> | | <tr valign="top"> |
| <td >[[image:DotPoint.JPG|10px|link=]]</td> | | <td width=310>[[image:InfoPalettePos_S20.png|link=]]</td> |
| <td>There is a lower limit to the brush <span style="font-size: 15px; font-weight: 700; color: gold; background-color: black;"> Radius </span> that is dictated by the baseboard resolution ('''10m Resolution''', '''5m Resolution''' or '''HD Resolution'''). For '''5m and 10m Resolutions''' brushes smaller than the set resolution are possible but will have restrictions that will increase as the brush becomes smaller. For '''HD Resolution''' the minimum radius is '''0.12m'''. <span style="font-weight: 700; background-color: yellow;"> Note: HD resolution is only available in Trainz Plus </span>.<br> | | <td> |
| See [[image:PageLink.PNG|link=]] '''[[#Ground Brush Resolution|Ground Height Brush Size and Grid Resolution]]''' for the details.</td>
| | <table bgcolor=#000000 cellpadding=2> |
| </tr> | | <tr valign="top"> |
| </table> | | <td> |
| </td> | | <table bgcolor=#ffffff cellpadding=2> |
| | <tr valign="middle"> |
| | <td width=35>[[image:Information35.png|link=]]</td> |
| | <td><span style="font-size: 15px;">All '''Position Data''' in the '''Info Palette''' are entered and displayed in <span style="background-color: yellow; font-weight: 700;">metres</span> even if you are using '''Imperial''' units (feet) for your distance measurements. Heights are always measured from the <span style="background-color: yellow; font-weight: 700;">Absolute ZERO metres</span> level and not from the height of the current baseboard.</span></td> |
| </tr> | | </tr> |
| </table> | | </table> |
| Line 1,740: |
Line 1,708: |
| </table> | | </table> |
| <br> | | <br> |
| <table width=1000 bgcolor="lightcyan"> | | <table bgcolor=#000000 cellpadding=2> |
| <tr valign="top">
| |
| <td width=10>[[image:BlueDot10x10.png|link=]]</td>
| |
| <td>Most objects have a '''height''' value that can be set and altered using the objects '''Context Menu''' or through the '''Placement''', '''Free Move''' and '''Fine Adjustment''' tools (see the sections below dealing with each of these tools for more details).</td>
| |
| </tr>
| |
| </table>
| |
| <br>
| |
| <table width=1000 bgcolor=#000000 cellpadding=2>
| |
| <tr valign="top"> | | <tr valign="top"> |
| <td> | | <td> |
| <table bgcolor=#ffffff cellpadding=2> | | <table bgcolor=#ffffff cellpadding=2> |
| <tr valign="top"> | | <tr valign="top"> |
| <td colspan=2>
| | <td colspan=2><span style="font-weight: 700; font-size: 15px;">Steps: To Edit the Position Info of a Selected Object or Objects:-</span></td> |
| <table>
| |
| <tr valign="middle">
| |
| <td width=35>[[image:Information.png|35px|link=]]</td>
| |
| <td colspan=2><span style="font-weight: 700; font-size: 17px;">Object Context Menu Ground Height Options</span></td> | |
| </tr> | | </tr> |
| </table> | | <tr valign="top"> |
| </td> | | <td width=25>[[image:DotPoint1.JPG|link=]]</td> |
| | <td><span style="font-weight: 700; font-size: 15px; background-color: lightcyan;"> Left Click </span> on the '''Arrowhead''' icon in front of the <span style="font-weight: 700; font-size: 15px; color: white; background-color: black;"> Pos: </span> label. This will open its data for editing.</td> |
| </tr> | | </tr> |
| <tr valign="top"> | | <tr valign="top"> |
| <td colspan=2>Once an object has been placed you can open its '''Context Menu''' (<span style="font-weight: 700; font-size: 15px; background-color: lightcyan;"> Left Click </span> on its icon or press the <span style="font-weight: 700; font-size: 15px; color: white; background-color: black;"> T </span> key) to access a range of options and functions. The following '''Ground Height''' specific options will appear, along with other more general options, in the objects '''Context Menu'''. | | <td>[[image:DotPoint2.JPG|link=]]</td> |
| ----</td>
| | <td>The <span style="font-weight: 700; font-size: 15px; color: white; background-color: black;"> x: </span>, <span style="font-weight: 700; font-size: 15px; color: white; background-color: black;"> y: </span> and <span style="font-weight: 700; font-size: 15px; color: white; background-color: black;"> z: </span> text boxes show the current position of the object with <span style="font-weight: 700; font-size: 15px; color: white; background-color: black;"> z: </span> showing the height. These values can be edited to move the object or objects to a new position but '''CARE''' will be needed - see '''Notes:''' below. If any selected object is in a locked layer then it will not move.<br> |
| </tr> | | <table bgcolor=#ffffe0 cellpadding=2> |
| <tr valign="top"> | | <tr valign="top"> |
| | <td width=25>[[image:PencilTips.PNG|link=]]</td> |
| <td> | | <td> |
| <table> | | <table> |
| <tr valign="top"> | | <tr valign="top"> |
| <td><span style="font-weight: 700; font-size: 15px; color: white; background-color: black;"> Smooth Ground Under Selected </span></td> | | <td width=10>[[image:DotPoint.JPG|10px|link=]]</td> |
| <td>smooths the height of the ground under the selected object to match the set height of the object. The size of the area affected will depend on which has the greater value: the width of the object <span style="font-weight: 700; font-size: 15px;">OR</span> the <span style="font-weight: 700; font-size: 15px; color: white; background-color: #797979;"> Tool Options Palette </span> <span style="font-weight: 700; font-size: 15px; color: gold; background-color: black;"> Radius </span> setting. If multiple objects at different heights have been selected then the ground height will be set to match, as far as possible, the heights of each object</td> | | <td>On the right of each data entry box is a pair of '''Up/Down''' arrow controls. <span style="font-weight: 700; font-size: 15px; background-color: lightcyan;"> Left Click and Drag </span> up or down on these to adjust the value in smaller increments down to '''centimetres'''</td> |
| | </tr> |
| | <tr valign="top"> |
| | <td>[[image:DotPoint.JPG|10px|link=]]</td> |
| | <td>Each data entry box has a drop down menu list of options. <span style="font-weight: 700; font-size: 15px; background-color: lightcyan;"> Right Click </span> inside the box to open its menu list - see [[image:PageLink.PNG|link=]] '''[[#Info Settings Menu|Info Settings Menu]]''' above for the details</td> |
| | </tr> |
| | </table> |
| | </td> |
| </tr> | | </tr> |
| </table> | | </table> |
| Line 1,776: |
Line 1,742: |
| </tr> | | </tr> |
| <tr valign="top"> | | <tr valign="top"> |
| <td> | | <td>[[image:DotPoint3.JPG|link=]]</td> |
| <table> | | <td>The height (<span style="font-weight: 700; font-size: 15px; color: white; background-color: black;"> z: </span>) value can be copied into the <span style="font-weight: 700; font-size: 15px; color: white; background-color: #797979;"> Tool Options Palette </span> <span style="font-weight: 700; font-size: 15px; color: gold; background-color: black;"> Height </span> setting (open the '''down arrowhead''' next the <span style="font-weight: 700; font-size: 15px; color: white; background-color: black;"> z: </span> value) and select the option <span style="font-weight: 700; font-size: 15px; color: white; background-color: black;"> Use Height for Brush </span></td> |
| <tr valign="top"> | | </tr> |
| <td><span style="font-weight: 700; font-size: 15px; color: white; background-color: black;"> Settle on Ground </span></td> | | </table> |
| <td>sets the height of the '''selected objects''' to match the height of the ground beneath them ("drops them back to earth")</td> | | </td> |
| </tr> | | </tr> |
| </table> | | </table> |
| </td> | | </td> |
| </tr> | | </tr> |
| | </table> |
| | <br> |
| | <table width=1000 bgcolor=#000000 cellpadding=2> |
| <tr valign="top"> | | <tr valign="top"> |
| <td> | | <td> |
| | <table width=996 bgcolor=#ffffb0 cellpadding=2> |
| | <tr valign="top"> |
| | <td width=25>[[image:NotePad.PNG|link=]]</td> |
| | <td><span style="font-size: 17px; font-weight: 700;">Notes:</span><br> |
| | ----</td> |
| | </tr> |
| | <tr valign="top"> |
| | <td colspan=2> |
| <table> | | <table> |
| <tr valign="top"> | | <tr valign="top"> |
| <td><span style="font-weight: 700; font-size: 15px; color: white; background-color: black;"> Apply Height </span></td> | | <td width=10>[[image:DotPoint.JPG|10px|link=]]</td> |
| <td>sets the height of the '''selected object''' to the value in the <span style="font-weight: 700; font-size: 15px; color: white; background-color: #797979;"> Tool Options Palette </span> <span style="font-weight: 700; font-size: 15px; color: gold; background-color: black;"> Height </span> setting. Where multiple objects have been selected the '''context object''', the one with the '''Context Icon''', will have its height set to the <span style="font-weight: 700; font-size: 15px; color: gold; background-color: black;"> Height </span> value and the other '''selected objects''' will have their heights adjusted up or down by the same amount</td>
| | <td>If you enter an <span style="font-weight: 700; font-size: 15px; color: white; background-color: black;"> x: </span> or <span style="font-weight: 700; font-size: 15px; color: white; background-color: black;"> y: </span> value that is "out in empty space" (beyond the edge of a boundary baseboard) then the objects will be moved to that position and may vanish from view. The '''Undo''' (<span style="font-weight: 700; font-size: 15px;"><span style="color: white; background-color: black;"> Ctrl </span> + <span style="color: white; background-color: black;"> Z </span></span>) command can be used to immediately reverse the move or the [[image:S20_MarqueeToolIcon.png|link=|20px]] '''Marquee Tool''' can be used to add a baseboard under the "floating" objects if you know where they are located. You can also use the [[image:S20_MarqueeToolIcon.png|link=|20px]] '''Marquee Tool''' to select those objects and delete them. <span style="background-color: yellow;"><span style="font-weight: 700; font-size: 15px;">Note:</span> The compass rose cannot be moved beyond the edge of a boundary baseboard </span></td> |
| | </tr> |
| | <tr valign="top"> |
| | <td>[[image:DotPoint.JPG|10px|link=]]</td> |
| | <td>The <span style="font-weight: 700; font-size: 15px; color: white; background-color: black;"> z: </span> value gives the current height of the object (or the last object selected). Entering a value that is above or below the ground height will move the object to that height. In the case of multiple selected objects the height of each will be adjusted up or down by the same value, they will not be all set to the same height.</td> |
| </tr> | | </tr> |
| </table> | | </table> |
| Line 1,800: |
Line 1,781: |
| </table> | | </table> |
| <br> | | <br> |
| <table width=1000> <!-- BEGIN Section Nav Buttons --> | | <table width=1000> <!-- BEGIN Section Nav Buttons --> |
| <tr valign="top"> | | <tr valign="top"> |
| <td width=629><span id="Ground Brush Resolution"></span> | | <td width=629><span id="skip Rotation Info and Controls"></span> |
| ===<span style="font-weight: 700; font-size: 17px; color: white; background-color: blue;"> Ground Height Brush Size and Grid Resolution </span>=== | | =='''Rotation Info and Controls'''== |
| </td> | | </td> |
| <td width=50> </td> | | <td width=50>[[image:SkipDown.png|link=#skip Layer Info and Controls|Skip Down]]</td> |
| <td width=50> </td>
| | <td width=50>[[image:SkipUp.png|link=#skip Position Info and Controls|Skip Up]]</td> |
| <td width=46>[[image:SkipMinorDown.png|link=#Terrain Tips|Down]][[image:SkipMinorUp.png|link=#Paint Ground Height|Up]]</td> <!-- for Top and Minor Up/Down -->
| | <td width=46> </td> <!-- for Top --> |
| <td width=75> </td> | | <td width=75>[[image:HeadingUp.png|link=#stepInfo|alt=Heading|To Heading]]</td> |
| <td width=75> </td> | | <td width=75> </td> <!-- for Next Down --> |
| <td width=75> </td> <!-- for Bottom --> | | <td width=75> </td> <!-- for Bottom --> |
| </tr> | | </tr> |
| </table> <!-- END Section Nav Buttons --> | | </table> <!-- END Section Nav Buttons --> |
|
| |
|
| <table width=1000 bgcolor="lightcyan" cellpadding=2> | | <table width=1000> |
| <tr valign="top"> | | <tr valign="top"> |
| <td width=10>[[image:BlueDot10x10.png|link=]]</td> | | <td colspan=2>You must have an object (or objects) selected for the '''Rotation Info and Controls''' to be edited. If more than one object has been selected then you will be shown the data for the '''last''' object selected</td> |
| <td>The minimum allowed brush size is dictated by the set baseboard resolution</td>
| |
| </tr> | | </tr> |
| | </table> |
| | |
| | <table width=1000 bgcolor=#000000 cellpadding=2> |
| <tr valign="top"> | | <tr valign="top"> |
| <td width=10>[[image:BlueDot10x10.png|link=]]</td> | | <td> |
| <td>Brushes that are smaller than the set resolution are possible but they will have restrictions on where they can be used</td> | | <table bgcolor=#ffffb0 cellpadding=2> |
| | <tr valign="top"> |
| | <td width=25>[[image:NotePad.PNG|link=]]</td> |
| | <td>If this option is greyed out (shown as <span style="font-weight: 700; font-size: 15px; color: grey; background-color: black;"> Rot: </span>) and cannot be opened then the selected object (splines for example) cannot be rotated using this method or it cannot be rotated at all. It may be possible to rotate it using some of the '''Rotational Anchors''' found in the [[image:S20_FineAdjustmentToolIcon.png|link=|20px]] '''Fine Adjustment Tool'''</td> |
| </tr> | | </tr> |
| </table> | | </table> |
| <br>
| |
| <table width=1000> <!-- BEGIN Section Nav Buttons -->
| |
| <tr valign="top">
| |
| <td width=629><span id="Ground Heights 5m/10m"></span>
| |
| ====Ground Heights in 5m/10m Resolutions====
| |
| </td> | | </td> |
| </tr> | | </tr> |
| </table> | | </table> |
| | | <br> |
| <table width=1000> | | <table width=1000> |
| <tr valign="top"> | | <tr valign="top"> |
| <td>Ground height brushes can be smaller than the set '''5m ''' or '''10m''' baseboard resolution. For example: you can alter the ground height with a brush size of '''2.5m''' on a '''10m Resolution''' baseboard but there will be restrictions on where you can use a bush that small.</td> | | <td width=310>[[image:InfoPaletteRot_S20.png|link=]]</td> |
| | <td> |
| | <table bgcolor=#000000 cellpadding=2> |
| | <tr valign="top"> |
| | <td> |
| | <table bgcolor=#ffffff cellpadding=2> |
| | <tr valign="middle"> |
| | <td width=35>[[image:Information35.png|link=]]</td> |
| | <td><span style="font-size: 15px;">All '''Rotation Data''' in the '''Info Palette''' are entered and displayed in <span style="background-color: yellow; font-weight: 700;">degrees</span>.</span></td> |
| </tr> | | </tr> |
| </table> | | </table> |
| | | </td> |
| <table width=1000 > | | </tr> |
| | </table> |
| | <br> |
| | <table bgcolor=#000000 cellpadding=2> |
| | <tr valign="top"> |
| | <td> |
| | <table bgcolor=#ffffff cellpadding=2> |
| <tr valign="top"> | | <tr valign="top"> |
| <td width=10>[[image:DotPoint.JPG|10px|link=]]</td> | | <td colspan=2><span style="font-weight: 700; font-size: 15px;">Steps: To Edit the Rotation Info of a Selected Object or Objects:-</span></td> |
| <td>When the brush size is from 50% to under 100% of the Resolution (e.g. from '''2.5m''' to '''4.9m''' in a '''5m Resolution''' baseboard or from '''5m''' to '''9.9m''' in a '''10m Resolution''' baseboard) then it will work best when used on the grid lines - yellow lines for the '''10m Resolution''', and both grey and yellow lines for the '''5m Resolution'''. Between the grid lines its effect will be reduced.</td>
| |
| </tr> | | </tr> |
| <tr valign="top"> | | <tr valign="top"> |
| <td>[[image:DotPoint.JPG|10px|link=]]</td> | | <td width=25>[[image:DotPoint1.JPG|link=]]</td> |
| <td>When the brush size is less than 50% of the Grid Resolution (e.g. '''<2.5m''' for the '''5m Resolution''' or '''<5.0m''' for the '''10m Resolution''') then it will be restricted to the grid line '''intersections''' - yellow for the '''10m Resolution''', and both yellow and grey for the '''5m Resolution'''.</td> | | <td><span style="font-weight: 700; font-size: 15px; background-color: lightcyan;"> Left Click </span> on the '''Arrowhead''' icon in front of the <span style="font-weight: 700; font-size: 15px; color: white; background-color: black;"> Rot: </span> label. This will open its data for editing.</td> |
| </tr> | | </tr> |
| <tr valign="top"> | | <tr valign="top"> |
| <td colspan=2> | | <td>[[image:DotPoint2.JPG|link=]]</td> |
| <table> | | <td>The <span style="font-weight: 700; font-size: 15px; color: white; background-color: black;"> r: </span> ('''R'''oll), <span style="font-weight: 700; font-size: 15px; color: white; background-color: black;"> p: </span> ('''P'''itch) and <span style="font-weight: 700; font-size: 15px; color: white; background-color: black;"> y: </span> ('''Y'''aw) text boxes show the current orientation of the object (or the last selected object). These values can be edited to rotate the object or objects in 3D space but '''Terms and Conditions''' will apply (see the '''Notes:''' below). If any selected object is in a locked layer then it will not rotate.<br> |
| | <table bgcolor=#ffffe0 cellpadding=2> |
| | <tr valign="top"> |
| | <td width=25>[[image:PencilTips.PNG|link=]]</td> |
| | <td> |
| | <table> |
| <tr valign="top"> | | <tr valign="top"> |
| <td width=160>[[image:BrushCircleHeight01mA@05m.png|link=]]</td> | | <td width=10>[[image:DotPoint.JPG|10px|link=]]</td> |
| <td width=160>[[image:BrushCircleHeight01mB@05m.png|link=]]</td>
| | <td>On the right of each data entry box is a pair of '''Up/Down''' arrow controls. <span style="font-weight: 700; font-size: 15px; background-color: lightcyan;"> Left Click and Drag </span> up or down on these to adjust the value in smaller increments of '''1°'''</td> |
| <td width=160>[[image:BrushCircleHeight01mC@05m.png|link=]]</td> | |
| <td width=160>[[image:BrushCircleHeight01mX@05m.png|link=]]</td>
| |
| <td>The <span style="font-weight: 700; font-size: 15px; color: red;">RED</span> brush circle indicates that the brush size is too small to work in that part of the grid square</td>
| |
| </tr> | | </tr> |
| <tr valign="top"> | | <tr valign="top"> |
| <td colspan=4 align="center">'''Resolution:''' 5m Resolution - '''Brush Size:''' 1m</td> | | <td>[[image:DotPoint.JPG|10px|link=]]</td> |
| <td> </td> | | <td>Each data entry box has a drop down menu list of options. <span style="font-weight: 700; font-size: 15px; background-color: lightcyan;"> Right Click </span> inside the box to open its menu list - see [[image:PageLink.PNG|link=]] '''[[#Info Settings Menu|Info Settings Menu]]''' above for the details</td> |
| </tr> | | </tr> |
| </table> | | </table> |
| Line 1,866: |
Line 1,862: |
| </tr> | | </tr> |
| </table> | | </table> |
| <br>
| |
| <table width=1000> <!-- BEGIN Section Nav Buttons -->
| |
| <tr valign="top">
| |
| <td width=629><span id="Ground Heights HD"></span>
| |
| ====Ground Heights in HD Resolution====
| |
| </td> | | </td> |
| </tr> | | </tr> |
| </table> | | </table> |
| | | </td> |
| <table width=1000 bgcolor="lightcyan" cellpadding=2>
| |
| <tr valign="top">
| |
| <td width=10>[[image:BlueDot10x10.png|link=]]</td>
| |
| <td>You cannot have a brush size smaller than '''0.12m''' (12cm)</td>
| |
| </tr> | | </tr> |
| <tr valign="top">
| | </table> |
| <td>[[image:BlueDot10x10.png|link=]]</td>
| | </td> |
| <td>The brush is not restricted to grid lines or intersections and can alter the ground height anywhere within each grid square</td>
| |
| </tr> | | </tr> |
| </table> | | </table> |
|
| |
| <table width=1000>
| |
| <tr valign="top">
| |
| <td>The '''Surveyor Route Editor''' will allow you to switch between two minimum brush sizes when working with '''HD Resolution''' routes.</td>
| |
| </tr>
| |
| <tr valign="top">
| |
| <td>This option, <span style="background-color: yellow;">available in '''Trainz Plus''' only</span>, allows you to set the brush size to work in the default '''HD''' (High Definition) or at a lower '''SD''' (Standard Definition) which is easier to work with over larger areas.
| |
| <br> | | <br> |
| <table> | | <table width=1000 bgcolor=#000000 cellpadding=2> |
| <tr valign="top"> | | <tr valign="top"> |
| <td> | | <td> |
| <table width=500 bgcolor=#000000 cellpadding=2> | | <table width=996 bgcolor=#ffffb0 cellpadding=2> |
| <tr valign="top"> | | <tr valign="top"> |
| <td>
| | <td width=25>[[image:NotePad.PNG|link=]]</td> |
| <table bgcolor=#ffffff cellpadding=2>
| | <td><span style="font-size: 17px; font-weight: 700;">Notes:</span><br> |
| <tr valign="middle">
| | ----</td> |
| <td width=35>[[image:Information.png|35px|link=]]</td> | |
| <td>The distinction between these two options is:-</td> | |
| </tr> | | </tr> |
| <tr valign="top"> | | <tr valign="top"> |
| <td><span style="font-weight: 700; font-size: 15px; color: white; background-color: black;"> HD </span></td> | | <td width=10>[[image:DotPoint.JPG|10px|link=]]</td> |
| <td>This is the full '''HD Mode''' where the minimum brush size is '''0.12m''' (12cm). This is the default selection</td> | | <td>If several objects have been selected then the last selected object, the one with the '''Context Icon''', will be the centre of all rotations.</td> |
| </tr> | | </tr> |
| <tr valign="top">
| |
| <td><span style="font-weight: 700; font-size: 15px; color: white; background-color: black;"> SD </span></td>
| |
| <td>This is a reduced '''HD Mode''' where the minimum brush size is '''2m'''</td>
| |
| </tr>
| |
| <tr valign="top">
| |
| <td colspan=2>Both modes:-
| |
| <table>
| |
| <tr valign="top"> | | <tr valign="top"> |
| <td width=10>[[image:DotPoint.JPG|10px|link=]]</td> | | <td width=10>[[image:DotPoint.JPG|10px|link=]]</td> |
| <td>have all the normal '''HD''' controls and features</td> | | <td>Not all objects will allow rotations. For example, '''SpeedTree''' objects can only be rotated using the <span style="font-weight: 700; font-size: 15px; color: white; background-color: black;"> y: </span> value, changes to the <span style="font-weight: 700; font-size: 15px; color: white; background-color: black;"> r: </span> and <span style="font-weight: 700; font-size: 15px; color: white; background-color: black;"> p: </span> values will be ignored. '''Spline''' objects can only be rotated using the <span style="font-weight: 700; font-size: 15px; color: white; background-color: blue;"> Blue </span> and <span style="font-weight: 700; font-size: 15px; color: white; background-color: red;"> Red </span> '''Rotational Anchors''' found in the [[image:S20_FineAdjustmentToolIcon.png|link=|20px]] '''Fine Adjustment Tool'''</td> |
| </tr> | | </tr> |
| <tr valign="top">
| | </table> |
| <td>[[image:DotPoint.JPG|10px|link=]]</td>
| | </td> |
| <td>will work anywhere within the grid squares of a '''HD Resolution''' route and are not restricted to the grid lines or intersections</td>
| |
| </tr> | | </tr> |
| | </table> |
| | <br> |
| | <table bgcolor=#000000 width=1000 cellpadding=2> |
| <tr valign="top"> | | <tr valign="top"> |
| <td>[[image:DotPoint.JPG|10px|link=]]</td> | | <td> |
| <td>can be used in different areas of the same baseboard</td>
| | <table bgcolor=#ffffb0 width=996 cellpadding=2> |
| </tr>
| |
| </table>
| |
| <table bgcolor=#ffffb0 cellpadding=2> | |
| <tr valign="top"> | | <tr valign="top"> |
| <td width=25>[[image:NotePad.PNG|link=]]</td> | | <td width=25>[[image:NotePad.PNG|link=]]</td> |
| <td><span style="font-size: 17px;">'''Notes:'''</span><br> | | <td><span style="font-size: 17px; font-weight: 700;">Notes:</span><br> |
| ---- | | ---- |
| </td> | | The rotation data and controls are defined in the following ways:-<br> |
| | <table width=970> |
| | <tr valign="top"> |
| | <td width=820> |
| | <table> |
| | <tr valign="top"> |
| | <td width=20><span style="font-weight: 700; font-size: 17px; color: white; background-color: black;"> r: </span></td> |
| | <td>'''ALWAYS''' rotates in the '''vertical plane''' around the <span style="font-weight: 700; text-decoration: underline;">selected objects</span> '''Y''' axis (which was defined when it was created).<br> |
| | This is the same as the <span style="font-weight: 700; font-size: 15px; color: white; background-color: red;"> Red </span> '''Rotational Anchor''' in the [[image:S20_FineAdjustmentToolIcon.png|link=|20px]] '''Fine Adjustment Tool'''</td> |
| </tr> | | </tr> |
| <tr valign="top"> | | <tr valign="top"> |
| <td width=10>[[image:DotPoint.JPG|10px|link=]]</td> | | <td><span style="font-weight: 700; font-size: 17px; color: white; background-color: black;"> p: </span></td> |
| <td>The '''HD Mode''' and '''SD Mode''' only work on baseboards set to '''HD Resolution'''</td> | | <td>'''ALWAYS''' rotates in the '''vertical plane''' around the <span style="font-weight: 700; text-decoration: underline;">selected objects</span> '''Y''' axis '''PLUS''' '''90°'''.<br> |
| | This is the same as the <span style="font-weight: 700; font-size: 15px; color: white; background-color: green;"> Green </span> '''Rotational Anchor''' in the [[image:S20_FineAdjustmentToolIcon.png|link=|20px]] '''Fine Adjustment Tool'''</td> |
| </tr> | | </tr> |
| <tr valign="top"> | | <tr valign="top"> |
| <td>[[image:DotPoint.JPG|10px|link=]]</td> | | <td><span style="font-weight: 700; font-size: 17px; color: white; background-color: black;"> y: </span></td> |
| <td>Selecting '''HD Mode''' will not convert a '''10m''' or '''5m''' resolution baseboard to '''HD''' resolution</td>
| | <td>'''ALWAYS''' rotates in the '''horizontal plane''' around the <span style="font-weight: 700; text-decoration: underline;">compass</span> '''Z''' or <span style="font-weight: 700; font-size: 15px;">Vertical</span> axis regardless of how the object has been rolled or pitched. This is similar to but <span style="font-weight: 700; text-decoration: underline;">NOT exactly the same</span> as the <span style="font-weight: 700; font-size: 15px; color: white; background-color: blue;"> Blue </span> '''Rotational Anchor''' in the [[image:S20_FineAdjustmentToolIcon.png|link=|20px]] '''Fine Adjustment Tool'''. The difference will become obvious if the object has had a '''roll''' or '''pitch''' rotation applied before the '''yaw''' rotation</td> |
| </tr> | | </tr> |
| </table> | | </table> |
| </td> | | </td> |
| | <td width=150>[[image:FineAdjust3DFrameSmall_S20.png|link=]]</td> |
| </tr> | | </tr> |
| </table>
| |
| </td>
| |
| </tr>
| |
| </table>
| |
| <table width=500>
| |
| <tr valign="top"> | | <tr valign="top"> |
| <td colspan=2>The setting can be switched during editing without affecting or altering the existing terrain. For example:-</td> | | <td> |
| | <table> |
| | <tr> |
| | <td width=170 align="right"><span style="font-weight: 700; font-size: 15px;"><span style="color: white; background-color: black;"> Rot: </span> <span style="color: white; background-color: black;"> y: </span> = </span></td> |
| | <td width=200><span style="font-weight: 700; font-size: 15px;">0°</span> '''East'''</td> |
| | <td width=200><span style="font-weight: 700; font-size: 15px;">90°</span> '''North'''</td> |
| | <td width=200><span style="font-weight: 700; font-size: 15px;">180°</span> '''West'''</td> |
| | <td width=200><span style="font-weight: 700; font-size: 15px;">270°</span> '''South'''</td> |
| | </tr> |
| | </table> |
| | </td> |
| | </tr> |
| | </table> |
| | </td> |
| </tr> | | </tr> |
| <tr valign="top"> | | <tr valign="top"> |
| <td width=10>[[image:DotPoint.JPG|10px|link=]]</td> | | <td colspan=2> |
| <td>you can start editing the terrain using the '''HD Mode''' to give you the highest level of precision in one area of a baseboard</td>
| | <table> |
| </tr> | |
| <tr valign="top"> | | <tr valign="top"> |
| <td>[[image:DotPoint.JPG|10px|link=]]</td> | | <td align="center"><span style="font-weight: 700; font-size: 15px;">Original</span><br>[[image:RotationAxis_S20.png|link=]]</td> |
| <td>then switch to '''SD Mode''' to work in another area of the same (or a different) baseboard at a lower level of precision - which would be faster than using the '''HD Mode'''</td> | | <td align="center"><span style="font-weight: 700; font-size: 15px;">Roll: <span style="color: white; background-color: black;"> r: = 45 </span></span><br>[[image:RotationAxisRoll_S20.png|link=]]</td> |
| | <td align="center"><span style="font-weight: 700; font-size: 15px;">Pitch: <span style="color: white; background-color: black;"> p: = 45 </span></span><br>[[image:RotationAxisPitch_S20.png|link=]]</td> |
| | <td align="center"><span style="font-weight: 700; font-size: 15px;">Yaw: <span style="color: white; background-color: black;"> y: = 45 </span></span><br>[[image:RotationAxisYaw_S20.png|link=]]</td> |
| </tr> | | </tr> |
| <tr valign="top"> | | <tr valign="top"> |
| <td>[[image:DotPoint.JPG|10px|link=]]</td> | | <td> </td> |
| <td>then switch back to '''HD Mode''' to continue working in the same, or another, high precision area</td> | | <td colspan=3 align="center">All rotations shown are 45° in the <span style="font-weight: 700; font-size: 15px;">+</span> ('''anticlockwise''') direction as viewed in the direction of the axis</td> |
| </tr> | | </tr> |
| </table> | | </table> |
| </td> | | </td> |
| <td> | | </tr> |
| <table width=500 bgcolor=#000000>
| |
| <tr valign="top"> | | <tr valign="top"> |
| | <td> </td> |
| <td> | | <td> |
| <table bgcolor=#ffffff> | | <table> |
| <tr valign="top"> | | <tr valign="top"> |
| <td colspan=2><span style="font-weight: 700; font-size: 15px;">Steps:</span> To switch between '''HD''' and '''SD''' modes at any time:-</td> | | <td colspan=2> |
| | ---- |
| | </td> |
| </tr> | | </tr> |
| <tr valign="top"> | | <tr valign="top"> |
| <td> | | <td>[[image:DotPoint.JPG|10px|link=]]</td> |
| <table> | | <td>Some objects will '''NOT''' allow <span style="font-weight: 700; font-size: 15px;">Roll</span> or <span style="font-weight: 700; font-size: 15px;">Pitch</span> rotations</td> |
| | </tr> |
| <tr valign="top"> | | <tr valign="top"> |
| <td> | | <td>[[image:DotPoint.JPG|10px|link=]]</td> |
| <table>
| | <td>all angles are measured in degrees</td> |
| <tr valign="top">
| |
| <td width=25>[[image:DotPoint1.JPG|link=]]</td>
| |
| <td><span style="font-weight: 700; font-size: 15px; background-color: lightcyan;"> Left Click </span> on the '''Main Menu''' [[image:EditMenu_S20.png|link=]] '''Edit Menu''' and select the <span style="font-weight: 700; font-size: 15px; color: white; background-color: black;"> Edit Route... </span> option<br> | |
| '''Shortcut:''' Press <span style="font-weight: 700; font-size: 15px;"><span style="color: white; background-color: black;"> Ctrl </span> + <span style="color: white; background-color: black;"> E </span></span></td>
| |
| </tr> | | </tr> |
| <tr valign="top"> | | <tr valign="top"> |
| <td colspan=2>This will open the '''Route Editor''' dialogue window which, <span style="background-color: yellow;">in '''Trainz Plus''' only</span>, has an additional control, the '''Route Edit Detail'''</td> | | <td>[[image:DotPoint.JPG|10px|link=]]</td> |
| | <td><span style="font-weight: 700; font-size: 15px;"> + </span> positive angles are '''anticlockwise''' when viewed facing the rotation axis direction</td> |
| </tr> | | </tr> |
| <tr valign="top"> | | <tr valign="top"> |
| <td colspan=2>[[image:RouteEditDetailHD_S20.png|link=]]</td> | | <td>[[image:DotPoint.JPG|10px|link=]]</td> |
| | <td><span style="font-weight: 700; font-size: 15px;"> - </span> negative angles are '''clockwise''' when viewed facing the rotation axis direction</td> |
| </tr> | | </tr> |
| <tr valign="top"> | | <tr valign="top"> |
| <td>[[image:DotPoint2.JPG|link=]]</td> | | <td>[[image:DotPoint.JPG|10px|link=]]</td> |
| <td><span style="font-weight: 700; font-size: 15px; background-color: lightcyan;"> Left Click </span> on either the <span style="font-weight: 700; font-size: 15px; color: white; background-color: black;"> SD </span> or the <span style="font-weight: 700; font-size: 15px; color: white; background-color: black;"> HD </span> button</td> | | <td>angles greater than 360° can be entered but will give the same result as the angle '''minus''' 360°. For example: 450° is exactly the same angle as 90° (450°-360°=90°)</td> |
| </tr> | | </tr> |
| <tr valign="top"> | | <tr valign="top"> |
| <td>[[image:DotPoint3.JPG|link=]]</td> | | <td>[[image:DotPoint.JPG|10px|link=]]</td> |
| <td><span style="font-weight: 700; font-size: 15px; background-color: lightcyan;"> Left Click </span> on the [[image:Tick.PNG|link=|alt=Tick]] icon at the bottom right of the dialogue window to make the switch</td> | | <td>clockwise and anti-clockwise angles are complementary. For example: entering -270° (clockwise) will give the same angle as entering +90° (anticlockwise)</td> |
| </tr> | | </tr> |
| </table> | | </table> |
| Line 2,006: |
Line 1,995: |
| </table> | | </table> |
| </td> | | </td> |
| <td>[[image:EditMenuOptions_S20.png|link=]]</td>
| |
| </tr> | | </tr> |
| </table> | | </table> |
| | <br> |
| | <table width=1000> <!-- BEGIN Section Nav Buttons --> |
| | <tr valign="top"> |
| | <td width=629><span id="skip Layer Info and Controls"></span> |
| | =='''Layer Info and Controls'''== |
| </td> | | </td> |
| | <td width=50>[[image:SkipDown.png|link=#skip Assigning Objects to a Different Layer|Skip Down]]</td> |
| | <td width=50>[[image:SkipUp.png|link=#skip Rotation Info and Controls|Skip Up]]</td> |
| | <td width=46> </td> <!-- for Top --> |
| | <td width=75>[[image:HeadingUp.png|link=#stepInfo|alt=Heading|To Heading]]</td> |
| | <td width=75> </td> <!-- for Next Down --> |
| | <td width=75> </td> <!-- for Bottom --> |
| </tr> | | </tr> |
| </table> | | </table> <!-- END Section Nav Buttons --> |
| <br> | | |
| <table bgcolor=#000000 cellpadding=2> | | <table width=1000 bgcolor=#000000 cellpadding=2> |
| <tr valign="top"> | | <tr valign="top"> |
| <td> | | <td> |
| <table bgcolor=#ffffb0 cellpadding=2> | | <table width=996 bgcolor=#ffffb0 cellpadding=2> |
| <tr valign="top"> | | <tr valign="top"> |
| <td width=25>[[image:NotePad.PNG|link=]]</td> | | <td width=25>[[image:NotePad.PNG|link=]]</td> |
| <td>When using <span style="font-weight: 700; font-size: 15px; color: white; background-color: black;"> SD </span> mode brush sizes less than '''2m''' will be ignored and a '''2m''' brush size will be used instead. Larger brush sizes can be set and used</td> | | <td><span style="font-size: 17px; font-weight: 700;">Notes:</span><br> |
| </tr>
| | ---- |
| </table>
| |
| </td> | | </td> |
| </tr> | | </tr> |
| </table> | | <tr valign="top"> |
| </td> | | <td>[[image:DotPoint.JPG|10px|link=]]</td> |
| | <td>the <span style="font-weight: 700; font-size: 15px; color: white; background-color: #797979;"> Info Palette </span> is best used to show and edit the '''layer''' and '''binding layer''' assignments of individual selected objects</td> |
| | </tr> |
| | <tr valign="top"> |
| | <td width=10>[[image:DotPoint.JPG|10px|link=]]</td> |
| | <td>operations such as '''creating, deleting, merging, renaming, moving''' and '''hiding layers''' are performed using the <span style="font-weight: 700; font-size: 15px; color: white; background-color: #797979;"> Layers Palette </span></td> |
| | </tr> |
| | <tr valign="top"> |
| | <td>[[image:DotPoint.JPG|10px|link=]]</td> |
| | <td>layers can be '''Locked''' and '''Unlocked''' using the <span style="font-weight: 700; font-size: 15px; color: white; background-color: #797979;"> Info Palette </span> or the <span style="font-weight: 700; font-size: 15px; color: white; background-color: #797979;"> Layers Palette </span> but the <span style="font-weight: 700; font-size: 15px; color: white; background-color: #797979;"> Layers Palette </span> is often the better choice for these tasks</td> |
| </tr> | | </tr> |
| </table> | | </table> |
| Line 2,032: |
Line 2,039: |
| </table> | | </table> |
| <br> | | <br> |
| <table width=1000> <!-- BEGIN Section Nav Buttons --> | | <table width=1000> |
| <tr valign="top"> | | <tr valign="top"> |
| <td width=629><span id="Terrain Tips"></span> | | <td>You must have an object (or objects) selected for the layer data to be shown and edited. The name of the layer containing the selected object (or objects) will be shown next to the <span style="font-weight: 700; font-size: 15px; color: white; background-color: black;"> Layer: </span> label. The label can be opened by a <span style="font-weight: 700; font-size: 15px; background-color: lightcyan;"> Left Click </span> on its small '''arrowhead''' icon.<br> |
| ===<span style="font-weight: 700; font-size: 17px; color: white; background-color: blue;"> Terrain Forming Tips </span>===
| | If the layer name is shown as <span style="font-weight: 700; font-size: 15px; color: white; background-color: black;"> - </span> then multiple objects have been selected and not all of them are in the same layer. If this is a problem then see the '''Tips:''' below.</td> |
| </td> | | <td width=210>[[image:InfoPaletteLayerLabel_S20.png|link=]]</td> |
| <td width=50> </td> | |
| <td width=50> </td>
| |
| <td width=46>[[image:SkipMinorDown.png|link=#skip Ground Texture|Down]][[image:SkipMinorUp.png|link=#Ground Brush Resolution|Up]]</td> <!-- for Top and Minor Up/Down --> | |
| <td width=75> </td>
| |
| <td width=75> </td>
| |
| <td width=75> </td> <!-- for Bottom -->
| |
| </tr> | | </tr> |
| </table> <!-- END Section Nav Buttons --> | | </table> |
| | | <br> |
| <table width=1000 bgcolor=#000000 cellpadding=2> | | <table width=1000 bgcolor=#000000 cellpadding=2> |
| <tr valign="top"> | | <tr valign="top"> |
| Line 2,052: |
Line 2,053: |
| <tr valign="top"> | | <tr valign="top"> |
| <td width=25>[[image:PencilTips.PNG|link=]]</td> | | <td width=25>[[image:PencilTips.PNG|link=]]</td> |
| <td><span style="font-weight: 700; font-size: 15px;">Using Splines to Set a Ground Gradient</span><br> | | <td>If you only want to select objects that are in the same layer, then one strategy is:-</td> |
| See [[image:PageLink.PNG|link=]] '''[[#PT: Add Spline|Add a Spline Object]]''' for the details on laying a spline. Once you have set a spline segment to a specific gradient you can bring the terrain up or down to match the gradient beneath the spline so that it will sit smoothly on top of the ground
| | </tr> |
| | <tr valign="top"> |
| | <td colspan=2> |
| <table bgcolor=#ffffff cellpadding=2> | | <table bgcolor=#ffffff cellpadding=2> |
| <tr valign="top"> | | <tr valign="top"> |
| <td colspan=2><span style="font-weight: 700; font-size: 15px;">Steps:</span> To Use Splines to Form the Terrain:-</td> | | <td width=25>[[image:DotPoint1.JPG|link=]]</td> |
| </tr> | | <td>Deselect all the objects. Either <span style="font-weight: 700; font-size: 15px; background-color: lightcyan;"> Left Click </span> on an empty space on the baseboard or press the <span style="font-weight: 700; font-size: 15px;"><span style="color: white; background-color: black;"> Ctrl </span> + <span style="color: white; background-color: black;"> D </span></span> keys</td> |
| <tr valign="top"> | |
| <td width=20>[[image:DotPoint1.JPG|link=]]</td> | |
| <td>After laying the spline segment set its gradient to the required value or its endpoints to the required heights</td>
| |
| </tr> | | </tr> |
| <tr valign="top"> | | <tr valign="top"> |
| <td>[[image:DotPoint2.JPG|link=]]</td> | | <td>[[image:DotPoint2.JPG|link=]]</td> |
| <td>In the <span style="font-weight: 700; font-size: 15px; color: white; background-color: #797979;"> Tool Options Palette </span> set the <span style="font-weight: 700; font-size: 15px; color: gold; background-color: black;"> Radius </span> control to the required brush radius. The distance on each side of the spline that will be affected will increase with larger entered values. The minimum radius value will depend on the set baseboard resolution - approximately 10m radius for 10m and 5m resolutions, 5m for HD resolution</td> | | <td>Select, <span style="font-weight: 700; font-size: 15px; background-color: lightcyan;"> Left Click </span> on, a single starting object</td> |
| </tr> | | </tr> |
| <tr valign="top"> | | <tr valign="top"> |
| <td>[[image:DotPoint3.JPG|link=]]</td> | | <td>[[image:DotPoint3.JPG|link=]]</td> |
| <td>Open the spline segments '''Context Menu''' (<span style="font-weight: 700; font-size: 15px; background-color: lightcyan;"> Left Click </span> on its icon or press the <span style="font-weight: 700; font-size: 15px; color: white; background-color: black;"> T </span> key) and select the option <span style="font-weight: 700; font-size: 15px; color: white; background-color: black;"> Smooth Ground Under Selected </span></td> | | <td><span style="font-weight: 700; font-size: 15px;"><span style="color: white; background-color: black;"> Shift </span> + <span style="background-color: lightcyan;"> Left Click </span></span> on a second object to add to the selection<br> |
| | If the layer name does not disappear then repeat this step with each object to be added until the layer name disappears</td> |
| </tr> | | </tr> |
| <tr valign="top"> | | <tr valign="top"> |
| <td>[[image:DotPoint4.JPG|link=]]</td> | | <td>[[image:DotPoint4.JPG|link=]]</td> |
| <td>If it is no longer needed you can delete the spline leaving the ground with its new gradient</td> | | <td>When the layer name disappears deselect the last object selected - <span style="font-weight: 700; font-size: 15px;"><span style="color: white; background-color: black;"> Shift </span> + <span style="background-color: lightcyan;"> Left Click </span></span> on it again</td> |
| </tr> | | </tr> |
| </table> | | </table> |
| <table bgcolor=#ffffb0 cellpadding=2> | | <br> |
| <tr valign="top">
| | Another strategy is to hide a layer (or layers) to prevent its objects from being selected. Locking a layer will not prevent its objects from being selected.</td> |
| <td width=25>[[image:NotePad.PNG|link=]]</td>
| |
| <td>You can also perform this operation with multiple spline segments, each with a different gradient if needed. See the example below.</td>
| |
| </tr> | | </tr> |
| </table> | | </table> |
| </td> | | </td> |
| </tr> | | </tr> |
| | </table> |
| | <br> |
| | <table width=1000> |
| <tr valign="top"> | | <tr valign="top"> |
| <td width=25>[[image:PencilTips.PNG|link=]]</td> | | <td width=215>[[image:InfoPaletteLayer_S20.png|link=]]</td> |
| <td><span style="font-weight: 700; font-size: 15px;">Using Splines to Smooth Out "Bumpy" Terrain</span><br> | | <td> |
| See [[image:PageLink.PNG|link=]] '''[[#PT: Add Spline|Add a Spline Object]]''' for the details on laying a spline. This technique uses several joined spline segments to create a smoothly curved suface. Using just a single spline segment, as in the example above, will result in a straight (not curved) gradient.
| | <table bgcolor=#000000 cellpadding=2> |
| | <tr valign="top"> |
| | <td> |
| <table bgcolor=#ffffff cellpadding=2> | | <table bgcolor=#ffffff cellpadding=2> |
| <tr valign="top"> | | <tr valign="top"> |
| <td colspan=2><span style="font-weight: 700; font-size: 15px;">Steps:</span> To Use Splines to Set the Shape of the Terrain:-</td> | | <td colspan=2><span style="font-weight: 700; font-size: 15px;">Steps: To Lock or Unlock a Selected Objects Layer:-</span></td> |
| | </tr> |
| | <tr valign="top"> |
| | <td width=25>[[image:DotPoint1.JPG|link=]]</td> |
| | <td><span style="font-weight: 700; font-size: 15px; background-color: lightcyan;"> Left Click </span> on the '''Arrowhead''' icon in front of the <span style="font-weight: 700; font-size: 15px; color: white; background-color: black;"> Layer: </span> title. This will open the '''Layer Controls''' for editing.</td> |
| </tr> | | </tr> |
| <tr valign="top"> | | <tr valign="top"> |
| <td width=20>[[image:DotPoint1.JPG|link=]]</td> | | <td colspan=2>The names of two layers will be shown. The current '''Assigned Layer''' (see [[image:PageLink.PNG|link=]] '''[[#Assigning Objects to a Different Layer|Assigning Objects to Layers]]''' below) for the object and its '''Binding Layer''' (see [[image:PageLink.PNG|link=]] '''[[#Assigning Objects to a Binding Layer|Assigning a Binding Layer]]''' below). Below that will be two buttons.</td> |
| <td>In the <span style="font-weight: 700; font-size: 15px; color: white; background-color: #797979;"> Tool Options Palette </span> set the <span style="font-weight: 700; font-size: 15px; color: gold; background-color: black;"> Radius </span> control to the required brush radius (see step <span style="font-weight: 700; font-size: 15px; color: white; background-color: red;"> 2 </span> in the example above)</td>
| |
| </tr> | | </tr> |
| <tr valign="top"> | | <tr valign="top"> |
| <td>[[image:DotPoint2.JPG|link=]]</td> | | <td>[[image:DotPoint2.JPG|link=]]</td> |
| <td>Lay a sequence of connected identical spline segments across the terrain. Set all their endpoints to the required heights '''OR''' leave them at their current heights resting on the terrain surface. '''Track''' or '''Ruler''' splines are ideal for this purpose</td> | | <td>The top button will show the current '''Locked/Unlocked''' status of the layer containing the selected object. There are two possible states for the button:-<br> |
| </tr> | | [[image:InfoPaletteLockedLayerBtn_S20.png|link=]] Indicates that the layer is currently '''Unlocked'''. <span style="font-weight: 700; font-size: 15px; background-color: lightcyan;"> Left Click </span> on this button to '''Lock''' the layer<br><br> |
| | [[image:InfoPaletteUnlockedLayerBtn_S20.png|link=]] Indicates that the layer is currently '''Locked'''. <span style="font-weight: 700; font-size: 15px; background-color: lightcyan;"> Left Click </span> on this button to '''Unlock''' the layer<br> |
| | Clicking this button will also change the '''Locked''' or '''Unlocked''' padlock icon shown next to the layer name in the <span style="font-weight: 700; font-size: 15px; color: white; background-color: #797979;"> Layers Palette </span> |
| | <table> |
| <tr valign="top"> | | <tr valign="top"> |
| <td>[[image:DotPoint3.JPG|link=]]</td> | | <td>[[image:AssetsPaletteLockedUnlockedLayers_S20.png|link=]]</td> |
| <td><span style="font-weight: 700; font-size: 15px; background-color: lightcyan;"> Double Left Click </span> on one of the segments to select (highlight) them all | | <td> |
| <table bgcolor=#ffffb0 cellpadding=2> | | <table bgcolor=#ffffb0 cellpadding=2> |
| <tr valign="top"> | | <tr valign="top"> |
| <td width=25>[[image:NotePad.PNG|link=]]</td> | | <td width=25>[[image:NotePad.PNG|link=]]</td> |
| <td>It is important that '''ALL''' the spline segments are highlighted (selected) for all the following steps. If they lose the highlighting at any stage then repeat this step to select them all again</td> | | <td><span style="font-size: 17px; font-weight: 700;">Notes:</span><br> |
| | ---- |
| | <table> |
| | <tr valign="top"> |
| | <td width=10>[[image:DotPoint.JPG|10px|link=]]</td> |
| | <td>Objects in a '''Locked Layer''' cannot be deleted or moved</td> |
| | </tr> |
| | <tr valign="top"> |
| | <td>[[image:DotPoint.JPG|10px|link=]]</td> |
| | <td>'''Locked Layers''' can be deleted, moved and merged with other layers</td> |
| </tr> | | </tr> |
| </table> | | </table> |
| </td> | | </td> |
| </tr> | | </tr> |
| <tr valign="top">
| | </table> |
| <td>[[image:DotPoint4.JPG|link=]]</td>
| | </td> |
| <td>In the <span style="font-weight: 700; font-size: 15px; color: white; background-color: #797979;"> Info Palette </span> open the spline '''Pos''' ('''x: y: z:''' controls)</td>
| |
| </tr> | | </tr> |
| <tr valign="top">
| | </table> |
| <td>[[image:DotPoint5.JPG|link=]]</td>
| | </td> |
| <td>On the right of the '''z:''' control data box are a pair of '''Up/Down''' arrows. Perform a single <span style="font-weight: 700; font-size: 15px; background-color: lightcyan;"> Left Click </span> on one of the two arrows. This will smooth out the spline between the endpoints</td>
| |
| </tr> | | </tr> |
| <tr valign="top"> | | <tr valign="top"> |
| <td>[[image:DotPoint6.JPG|link=]]</td> | | <td colspan=2>The lower button will change the '''Active Layer''' to the layer that contains this object. See [[image:PageLink.PNG|link=]] '''[[#Assigning Objects to a Different Layer|Assigning Objects to Layers]]''' below for details on setting the '''Active Layer'''.</td> |
| <td>Open the spline '''Context Menu''' (<span style="font-weight: 700; font-size: 15px; background-color: lightcyan;"> Left Click </span> on its icon or press the <span style="font-weight: 700; font-size: 15px; color: white; background-color: black;"> T </span> key) and select the option <span style="font-weight: 700; font-size: 15px; color: white; background-color: black;"> Smooth Ground Under Selected </span></td>
| |
| </tr>
| |
| <tr valign="top">
| |
| <td>[[image:DotPoint7.JPG|link=]]</td>
| |
| <td>If you are going to smooth out a wider area of terrain using the same spline then use the [[image:S20_FreeMoveToolIcon.png|link=|20px]] '''[[#The Free Move Tool|Free Move Tool]]''' to drag the highlighted spline segments to the left or right to their new position. If necessary (because in their new positions the endpoints may need to be at a different height) open the spline '''Context Menu''' and select the option <span style="font-weight: 700; font-size: 15px; color: white; background-color: black;"> Settle on Ground </span> or manually adjust the height of each endpoint</td>
| |
| </tr>
| |
| <tr valign="top">
| |
| <td>[[image:DotPoint8.JPG|link=]]</td>
| |
| <td>Repeat steps <span style="font-weight: 700; font-size: 15px; color: white; background-color: red;"> 4 </span> to <span style="font-weight: 700; font-size: 15px; color: white; background-color: red;"> 7 </span> above until the process is complete</td>
| |
| </tr> | | </tr> |
| </table> | | </table> |
| Line 2,138: |
Line 2,146: |
| </table> | | </table> |
| <br> | | <br> |
| <table width=1000> <!-- BEGIN Section Nav Buttons --> | | <table width=1000> <!-- BEGIN Section Nav Buttons --> |
| <tr valign="top"> | | <tr valign="top"> |
| <td width=629><span id="skip Ground Texture"></span> | | <td width=629><span id="skip Assigning Objects to a Different Layer"></span> |
| =='''Ground Texture'''== | | =='''Assigning Objects to a Different Layer'''== |
| </td> | | </td> |
| <td width=50>[[image:SkipDown.png|link=#skip Scrapbook Data|Skip Down]]</td> | | <td width=50>[[image:SkipDown.png|link=#skip Assigning Objects to a Binding Layer|Skip Down]]</td> |
| <td width=50>[[image:SkipUp.png|link=#skip Ground Height|Skip Up]]</td> | | <td width=50>[[image:SkipUp.png|link=#skip Layer Info and Controls|Skip Up]]</td> |
| <td width=46>[[image:SkipMinorDown.png|link=#Texture Tool Options|Down]][[image:SkipMinorUp.png|link=#Terrain Tips|Up]]</td> <!-- for Top and Minor Up/Down --> | | <td width=46> </td> <!-- for Top --> |
| <td width=75>[[image:HeadingUp.png|link=#stepBrush|alt=Heading|To Heading]]</td> | | <td width=75>[[image:HeadingUp.png|link=#stepInfo|alt=Heading|To Heading]]</td> |
| <td width=75> </td> | | <td width=75> </td> <!-- for Next Down --> |
| <td width=75> </td> <!-- for Bottom --> | | <td width=75> </td> <!-- for Bottom --> |
| </tr> | | </tr> |
| </table> <!-- END Section Nav Buttons --> | | </table> <!-- END Section Nav Buttons --> |
|
| |
|
| <table> | | <table width=1000 bgcolor="lightcyan" cellpadding=2> |
| <tr valign="top"> | | <tr valign="top"> |
| <td>[[image:BrushTarget_GroundTexture.png|link=]]</td> | | <td width=10>[[image:BlueDot10x10.png|link=]]</td> |
| | <td>The '''Active Layer''' is the layer used by the '''Placement Tool''' when objects are added to your '''Trainz World'''.</td> |
| </tr> | | </tr> |
| </table> | | </table> |
|
| |
|
| <table width=1000 bgcolor="lightcyan" cellpadding=2> | | <table width=1000> |
| <tr valign="top"> | | <tr valign="top"> |
| <td width=10>[[image:BlueDot10x10.png|link=]]</td> | | <td>A selected object or group of objects can be assigned to a different layer. If multiple objects have been selected then they '''do not''' all have to be in the same layer BUT their current layer or layers must be '''unlocked'''. The destination layer can be '''locked''' and this will not stop the layer reassignment.</td> |
| <td>This '''Brush Target''' paints the currently selected '''Ground Texture''' (from the <span style="font-weight: 700; font-size: 15px; color: white; background-color: #797979;"> Assets Palette </span>) on the ground</td>
| |
| </tr> | | </tr> |
| </table> | | </table> |
| <br> | | <br> |
| <table width=1000 bgcolor=#000000 cellpadding=2> | | <table width=1000> |
| | <tr valign="top"> |
| | <td width=265>[[image:InfoPaletteLayerDropBoxList_S20.png|link=]]</td> |
| | <td width=735> |
| | <table bgcolor=#000000 width=735 cellpadding=2> |
| <tr valign="top"> | | <tr valign="top"> |
| <td> | | <td> |
| <table width=996 bgcolor=#ffffff cellpadding=2> | | <table bgcolor=#ffffff width=731 cellpadding=2> |
| <tr valign="middle"> | | <tr valign="top"> |
| <td width=35>[[image:Information.png|35px|link=]]</td> | | <td colspan=3><span style="font-weight: 700; font-size: 15px;">Steps: To Change the Assigned Layer of an Object or Group of Objects:-</span></td> |
| <td>All the '''Terrain Textures''' in your '''Trainz World''' are painted onto the terrain using the '''Ground Texture Brush'''. These textures create the appearance of different soils, rocks, grasses and artificial surfaces (concrete, asphalt, gravel, etc)</td> | | </tr> |
| | <tr valign="top"> |
| | <td width=20>[[image:DotPoint1.JPG|link=]]</td> |
| | <td colspan=2><span style="font-weight: 700; font-size: 15px; background-color: lightcyan;"> Left Click </span> inside the <span style="font-weight: 700; font-size: 15px; color: white; background-color: black;"> Layer: </span> text box. A drop down list of all the layers in the route and session will be shown. The layer currently containing the selected object (for a '''single selected object only''') will be shown with a [[image:BulletTick.png|link=]] in front of its name</td> |
| | </tr> |
| | <tr valign="top"> |
| | <td>[[image:DotPoint2.JPG|link=]]</td> |
| | <td><span style="font-weight: 700; font-size: 15px; background-color: lightcyan;"> Left Click </span> on the name of the destination layer shown in the drop down list but first read the '''Warning''' below</td> |
| | <td width=300> |
| | <table bgcolor=#ffffb0 cellpadding=2> |
| | <tr valign="top"> |
| | <td width=25>[[image:NotePad.PNG|link=]]</td> |
| | <td>Any object that is in a '''locked''' layer will not be reassigned to the new layer</td> |
| | </tr> |
| | </table> |
| | </td> |
| | </tr> |
| | <tr valign="top"> |
| | <td colspan=3>The layer reassignment will start the instant the destination layer is selected. If you see a '''Debugging Window''' on the screen as the task is processed, it will inform you when the task has been completed or if it has failed (usually because a layer is locked)</td> |
| </tr> | | </tr> |
| </table> | | </table> |
| Line 2,178: |
Line 2,208: |
| </table> | | </table> |
| <br> | | <br> |
| <table width=1000 bgcolor=#000000> | | <table bgcolor=#000000 cellpadding=2> |
| <tr valign="top"> | | <tr valign="top"> |
| <td> | | <td> |
| <table width=996 bgcolor=#ffe89a cellpadding=2> | | <table bgcolor=#ffffb0 cellpadding=2> |
| <tr valign="middle"> | | <tr valign="top"> |
| <td width=45>[[image:PalettesIcon_S20.png|link=]]</td> | | <td width=25>[[image:NotePad.PNG|link=]]</td> |
| <td>This '''Brush Target''' uses the <span style="font-weight: 700; font-size: 15px; color: white; background-color: #797979;"> Tool Options Palette </span>, <span style="font-weight: 700; font-size: 15px; color: white; background-color: #797979;"> Filter Palette </span> and <span style="font-weight: 700; font-size: 15px; color: white; background-color: #797979;"> Assets Palette </span>. If these palettes are not visible on the screen then refer to [[image:PageLink.PNG|link=]] '''[[#Notes_Palettes|Notes: Palettes]]''' at the top of this document. | | <td>Once a target layer has been selected then the <span style="font-weight: 700; font-size: 15px; color: white; background-color: black;"> Select Layer </span> button, which sets the '''Active Layer''', will become active '''IF''' the target layer is not already the '''Active Layer'''. A <span style="font-weight: 700; font-size: 15px; background-color: lightcyan;"> Left Click </span> on this button will set it as the '''Active Layer'''.</td> |
| </td> | |
| </tr> | | </tr> |
| </table> | | </table> |
| Line 2,192: |
Line 2,221: |
| </table> | | </table> |
| <br> | | <br> |
| <table width=1000 bgcolor=#000000 cellpadding=2> | | <table bgcolor=#000000 cellpadding=2> |
| <tr valign="top"> | | <tr valign="top"> |
| <td> | | <td> |
| <table width=996 bgcolor=#ffffff cellpadding=2> | | <table bgcolor=#ffffe0 cellpadding=2> |
| <tr valign="top"> | | <tr valign="top"> |
| <td width=150>[[image:BrushActionIcon_S20.png|link=]] <span style="font-weight: 700; font-size: 15px; color: white; background-color: black;"> Brush Actions </span></td> | | <td width=25>[[image:PencilTips.PNG|link=]]</td><td>You can also set the '''Active Layer''' by selecting its name from the list in the <span style="font-weight: 700; font-size: 15px; color: white; background-color: #797979;"> Layers Palette </span>.</td> |
| <td>When the [[image:BrushTargetIcon_S20.png|link=]] <span style="font-weight: 700; font-size: 15px; color: white; background-color: black;"> Ground Texture </span> '''Target''' is selected, the second drop down box will be disabled - there are no brush texture actions.</td> | | </tr> |
| | </table> |
| | </td> |
| </tr> | | </tr> |
| </table> | | </table> |
| Line 2,205: |
Line 2,236: |
| </table> | | </table> |
| <br> | | <br> |
| <table width=1000 bgcolor=#000000 cellpadding=2> | | <table width=1000 bgcolor=#ff0000 cellpadding=2> |
| <tr valign="top"> | | <tr valign="top"> |
| <td> | | <td> |
| <table width=996 bgcolor=#ffffff cellpadding=2> | | <table width=996 bgcolor=#fcbcbc cellpadding=2> |
| <tr valign="top"> | | <tr valign="top"> |
| <td colspan=2> | | <td>[[image:Stop.PNG|link=]]</td> |
| | <td><span style="font-size: 15px; font-weight: 700;">WARNING:</span> |
| <table> | | <table> |
| <tr valign="middle">
| |
| <td width=35>[[image:Information.png|35px|link=]]</td>
| |
| <td><span style="font-weight: 700; font-size: 15px;">Ground textures are saved in the special Ground Texture layer in the <span style="font-weight: 700; font-size: 15px; color: white; background-color: #797979;"> Layers Palette </span></span></td>
| |
| </tr>
| |
| </table>
| |
| </td>
| |
| </tr>
| |
| <tr valign="top"> | | <tr valign="top"> |
| <td width=10>[[image:DotPoint.JPG|10px|link=]]</td> | | <td width=10>[[image:DotPoint.JPG|10px|link=]]</td> |
| <td>This layer cannot be renamed, deleted, moved or merged with any other layer</td> | | <td>Setting a layer for an object or a group of selected objects will move them to that layer</td> |
| </tr> | | </tr> |
| <tr valign="top"> | | <tr valign="top"> |
| <td>[[image:DotPoint.JPG|10px|link=]]</td> | | <td>[[image:DotPoint.JPG|10px|link=]]</td> |
| <td>Ground texture edits are mostly performed using the [[image:S20_BrushToolIcon.png|link=|20px]] '''Brush Tool'''. They can also be performed using the [[image:S20_MarqueeToolIcon.png|link=|20px]] '''Marquee Tool'''. Limited ground texture edits under a selected object or objects can be performed using the <span style="font-weight: 700; font-size: 15px; color: white; background-color: black;"> Paint Under Selected </span> option in the objects '''Context Icon'''.</td> | | <td>If objects are moved from one layer group to another (such as from the '''Route Layers''' to the '''Session Layers''') then it will change where those objects are saved (in the '''Route''' or in the '''Session''')</td> |
| | </tr> |
| | </table> |
| | </td> |
| </tr> | | </tr> |
| </table> | | </table> |
| Line 2,232: |
Line 2,260: |
| </table> | | </table> |
| <br> | | <br> |
| <table width=1000> <!-- BEGIN Section Nav Buttons --> | | <table bgcolor=#000000 width=1000 cellpadding=2> |
| <tr valign="top"> | | <tr valign="top"> |
| <td width=629><span id="Texture Tool Options"></span> | | <td> |
| ===<span style="font-weight: 700; font-size: 17px; color: white; background-color: blue;"> Ground Texture Brush Tool Options </span>=== | | <table bgcolor=#ffffff width=996 cellpadding=2> |
| </td>
| | <tr> |
| <td width=50> </td>
| | <td colspan=2><span style="font-weight: 700; font-size: 15px;">Options: To Set the Current Layer to the '''Active Layer''':-</span></td> |
| <td width=50> </td>
| |
| <td width=46>[[image:SkipMinorDown.png|link=#Identify Ground Texture|Down]][[image:SkipMinorUp.png|link=#skip Ground Texture|Up]]</td> <!-- for Top and Minor Up/Down -->
| |
| <td width=75> </td>
| |
| <td width=75> </td>
| |
| <td width=75> </td> <!-- for Bottom -->
| |
| </tr> | | </tr> |
| </table> <!-- END Section Nav Buttons -->
| |
|
| |
| <table width=1000 bgcolor=#000000 cellpadding=2>
| |
| <tr valign="top"> | | <tr valign="top"> |
| <td> | | <td colspan=2>[[image:Ablue.png|link=]] '''If the <span style="font-weight: 700; font-size: 15px; color: white; background-color: black;"> Select Layer </span> button is greyed out'''</td> |
| <table bgcolor=#ffffb0 cellpadding=2> | | </tr> |
| <tr valign="top"> | | <tr valign="top"> |
| <td width=25>[[image:NotePad.PNG|link=]]</td> | | <td>[[image:InfoPaletteLayerSelectBtnOff_S20.png|link=]]</td> |
| <td width=970><span style="font-size: 17px; font-weight: 700;">Notes: Tool Options Palette Controls</span><br> | | <td>then the selected object is now assigned to the current '''Active Layer''' so there is no need to use this option</td> |
| ----</td>
| |
| </tr> | | </tr> |
| <tr valign="top"> | | <tr valign="top"> |
| <td width=10>[[image:DotPoint.JPG|10px|link=]]</td> | | <td colspan=2>[[image:Bblue.png|link=]] '''If it is NOT greyed out'''</td> |
| <td>The active texture brush options are shown in the <span style="font-weight: 700; font-size: 15px; color: white; background-color: #797979;"> Tool Options Palette </span> with a <span style="font-size: 15px; font-weight: 700; color: gold; background-color: black;"> Gold </span> coloured icon next to their names. Those options that have their icon greyed out will be ignored, but they can still be edited.</td>
| |
| </tr> | | </tr> |
| <tr valign="top"> | | <tr valign="top"> |
| <td>[[image:DotPoint.JPG|10px|link=]]</td> | | <td>[[image:InfoPaletteLayerSelectBtnOn_S20.png|link=]]</td> |
| <td>Most of the data entry boxes in the <span style="font-weight: 700; font-size: 15px; color: white; background-color: #797979;"> Tool Options Palette </span> have a '''Popup Menu''' (<span style="font-weight: 700; font-size: 15px; background-color: lightcyan;">Right Click</span> inside the box) that can be used to collect and distribute data - see the Wiki Page [[image:WikiLink.PNG|link=]] '''[[How to Use S20 Palettes#Tool Options Popups|How to Use the Surveyor 2.0 Palettes]]''' for more details.</td> | | <td>then the selected object is now assigned to a layer that is '''not''' the current '''Active Layer'''. <span style="font-weight: 700; font-size: 15px; background-color: lightcyan;"> Left Click </span> on the <span style="font-weight: 700; font-size: 15px; color: white; background-color: black;"> Select Layer </span> button to switch the '''Active Layer''' to the same layer as the object |
| | </td> |
| </tr> | | </tr> |
| </table> | | </table> |
| Line 2,268: |
Line 2,287: |
| </table> | | </table> |
| <br> | | <br> |
| <table width=1000> | | <table width=1000> <!-- BEGIN Section Nav Buttons --> |
| <tr valign="top"> | | <tr valign="top"> |
| <td> | | <td width=629><span id="skip Assigning Objects to a Binding Layer"></span> |
| <table width=800> | | =='''Assigning Objects to a Binding Layer'''== |
| | </td> |
| | <td width=50>[[image:SkipDown.png|link=#stepTools]]</td> |
| | <td width=50>[[image:SkipUp.png|link=#skip Assigning Objects to a Different Layer|Skip Up|Skip Down]]</td> |
| | <td width=46> </td> <!-- for Top --> |
| | <td width=75>[[image:HeadingUp.png|link=#stepInfo|alt=Heading|To Heading]]</td> |
| | <td width=75> </td> <!-- for Next Down --> |
| | <td width=75> </td> <!-- for Bottom --> |
| | </tr> |
| | </table> <!-- END Section Nav Buttons --> |
| | |
| | <table width=1000 bgcolor="lightcyan" cellpadding=2> |
| <tr valign="top"> | | <tr valign="top"> |
| <td rowspan=2 width=200>[[image:BrushToolsTexture_S20.png|link=|alt=Texture brush options]]</td> | | <td width=10>[[image:BlueDot10x10.png|link=]]</td> |
| <td> | | <td>The '''Binding Layer''', or '''Bound Layer''' as it is also called, is a tool used in the development of your '''Trainz World'''</td> |
| <table bgcolor=#000000 width=600 cellpadding=2> | | </tr> |
| <tr valign="top"> | | <tr valign="top"> |
| <td> | | <td>[[image:BlueDot10x10.png|link=]]</td> |
| <table bgcolor=#ffffff width=596> | | <td>Setting a '''Binding Layer''' allows you to temporarily assign an object to a second layer while it is still in its original layer. The object will then take on the properties ('''Locked''' or '''Unlocked''', '''Hidden''' or '''Visible''') of both layers.</td> |
| | </tr> |
| <tr valign="top"> | | <tr valign="top"> |
| <td width=90><span style="font-size: 15px; font-weight: 700; color: gold; background-color: black;"> Radius </span></td> | | <td>[[image:BlueDot10x10.png|link=]]</td> |
| <td width=506>the brush radius (metres)</td> | | <td>Setting a '''Binding Layer''' has '''NO''' effect on where an object is saved (in the Route or the Session) or on any of the properties of the object</td> |
| </tr> | | </tr> |
| | </table> |
| | |
| | <table width=1000> |
| | <tr> |
| | <td> |
| | <table bgcolor=#000000 width=454 cellpadding=2> |
| <tr valign="top"> | | <tr valign="top"> |
| <td colspan=2> | | <td> |
| <table bgcolor=#ffffb0 width=596> | | <table bgcolor=#ffffff width=450 cellpadding=2> |
| <tr valign="top"> | | <tr valign="top"> |
| <td width=90 align="right">'''Range:''' </td> | | <td width=150 align="center">'''Assigned<br>Layer'''</td> |
| <td width=506>for '''5m Resolution''' and '''10m Resolution''' see '''Notes:''' below<br> | | <td rowspan=9 bgcolor="black" width=1></td> <!-- Row count --> |
| '''0.12m''' and above for '''HD Resolution''' (<span style="background-color: yellow;">in '''Trainz Plus''' only</span>)</td>
| | <td width=150 align="center">'''Binding<br>Layer'''</td> |
| | <td rowspan=9 bgcolor="black" width=1></td> <!-- Row count --> |
| | <td width=150 align="center">'''Object<br>Status'''</td> |
| </tr> | | </tr> |
| </table> | | <tr> |
| </td> | | <td bgcolor="black" colspan=5></td> |
| </tr> | | </tr> |
| <tr valign="top"> | | <tr valign="top"> |
| <td><span style="font-size: 15px; font-weight: 700; color: gold; background-color: black;"> Sensitivity </span></td> | | <td>[[image:LayerUnLocked_S20.png|link=]] '''Unlocked'''</td> |
| <td>texture transparency</td> | | <td>[[image:LayerUnLocked_S20.png|link=]] or '''None'''</td> |
| | <td>[[image:LayerUnLocked_S20.png|link=]] '''Unlocked'''</td> |
| </tr> | | </tr> |
| <tr valign="top"> | | <tr valign="top"> |
| <td colspan=2> | | <td bgcolor=#ffffb0>[[image:LayerLocked_S20.png|link=]] '''LOCKED'''</td> |
| <table bgcolor=#ffffb0 width=596>
| | <td>[[image:LayerLocked_S20.png|link=]] or [[image:LayerUnLocked_S20.png|link=]] or '''None'''</td> |
| <tr valign="top"> | | <td bgcolor=#ffffb0>[[image:LayerLocked_S20.png|link=]] '''LOCKED'''</td> |
| <td width=90 align="right">'''Range:''' </td> | |
| <td width=506>'''1%''' = almost transparent to</td> | |
| </tr> | | </tr> |
| <tr valign="top"> | | <tr valign="top"> |
| <td> </td> | | <td>[[image:LayerUnLocked_S20.png|link=]] '''Unlocked'''</td> |
| <td width=306>'''100%''' = solid (opaque)</td> | | <td bgcolor=#ffffb0>[[image:LayerLocked_S20.png|link=]] '''LOCKED'''</td> |
| | <td bgcolor=#ffffb0>[[image:LayerLocked_S20.png|link=]] '''LOCKED'''</td> |
| </tr> | | </tr> |
| </table> | | <tr> |
| </td> | | <td bgcolor="black" colspan=5></td> |
| </tr> | | </tr> |
| <tr valign="top"> | | <tr valign="top"> |
| <td><span style="font-size: 15px; font-weight: 700; color: gold; background-color: black;"> Rotation </span></td> | | <td>[[image:LayerEyeOpen_S20.png|link=]] '''Visible'''</td> |
| <td>initial rotation angle - see '''Notes:''' below</td> | | <td>[[image:LayerEyeOpen_S20.png|link=]] or '''None'''</td> |
| | <td>[[image:LayerEyeOpen_S20.png|link=]] '''Visible'''</td> |
| </tr> | | </tr> |
| <tr valign="top"> | | <tr valign="top"> |
| <td colspan=2> | | <td bgcolor="lightcyan">[[image:LayerEyeClosed_S20.png|link=]] '''HIDDEN'''</td> |
| <table bgcolor=#ffffb0 width=596> | | <td>[[image:LayerEyeOpen_S20.png|link=]] or [[image:LayerEyeClosed_S20.png|link=]] or '''None'''</td> |
| | <td bgcolor="lightcyan">[[image:LayerEyeClosed_S20.png|link=]] '''HIDDEN'''</td> |
| | </tr> |
| <tr valign="top"> | | <tr valign="top"> |
| <td width=90 align="right">'''Range:''' </td> | | <td>[[image:LayerEyeOpen_S20.png|link=]] '''Visible'''</td> |
| <td width=506>'''0°''' to '''±359°''' (larger angles can be entered)</td> | | <td bgcolor="lightcyan">[[image:LayerEyeClosed_S20.png|link=]] '''HIDDEN'''</td> |
| | <td bgcolor="lightcyan">[[image:LayerEyeClosed_S20.png|link=]] '''HIDDEN'''</td> |
| </tr> | | </tr> |
| </table> | | </table> |
| </td> | | </td> |
| </tr> | | </tr> |
| | </table> |
| | </td> |
| | <td> |
| | <table width=550> |
| <tr valign="top"> | | <tr valign="top"> |
| <td><span style="font-size: 15px; font-weight: 700; color: gold; background-color: black;"> Scale </span></td> | | <td colspan=2><span style="font-weight: 700; font-size: 15px;">In Summary:-</span></td> |
| <td>the texture pattern scaling factor as a %</td>
| |
| </tr> | | </tr> |
| <tr valign="top"> | | <tr valign="top"> |
| <td colspan=2> | | <td width=10>[[image:DotPoint.JPG|10px|link=]]</td> |
| <table bgcolor=#ffffb0 width=596> | | <td bgcolor=#ffffb0>If the '''Assigned Layer''' or the '''Binding Layer''' of an object is '''Locked''' then the object will be '''Locked'''</td> |
| | </tr> |
| <tr valign="top"> | | <tr valign="top"> |
| <td width=90 align="right">'''Range:''' </td> | | <td width=10>[[image:DotPoint.JPG|10px|link=]]</td> |
| <td width=506>'''0.01%''' = smallest<br> | | <td bgcolor="lightcyan">If the '''Assigned Layer''' or the '''Binding Layer''' of an object is '''Hidden''' then the object will be '''Hidden'''</td> |
| '''100%''' = full size<br> | |
| '''>100%''' larger than full size</td> | |
| </tr> | | </tr> |
| </table> | | </table> |
| </td> | | <table bgcolor=#000000 cellpadding=2> |
| </tr>
| |
| <tr valign="top"> | | <tr valign="top"> |
| <td colspan=2> | | <td> |
| <table bgcolor=#ffffb0 cellpadding=2> | | <table bgcolor=#ffffb0 cellpadding=2> |
| <tr valign="top"> | | <tr valign="top"> |
| <td width=25>[[image:NotePad.PNG|link=]]</td> | | <td width=25>[[image:NotePad.PNG|link=]]</td> |
| <td>The <span style="font-weight: 700; font-size: 15px; color: gold; background-color: black;"> Height </span> <span style="font-weight: 700; font-size: 15px; color: gold; background-color: black;"> Grade </span> and <span style="font-weight: 700; font-size: 15px; color: gold; background-color: black;"> Angle </span> settings have no effect on textures as they are always painted on the existing ground surface.</td> | | <td><span style="font-size: 17px; font-weight: 700;">Notes:</span><br> |
| </tr>
| | ---- |
| </table>
| |
| </td> | | </td> |
| </tr> | | </tr> |
| </table> | | <tr valign="top"> |
| </td> | | <td>[[image:DotPoint.JPG|10px|link=]]</td> |
| | <td>Objects in a '''Hidden Layer''' cannot be seen and therefore, cannot be selected, deleted or moved</td> |
| </tr> | | </tr> |
| </table>
| |
| </td>
| |
| </tr>
| |
| </table>
| |
| <table width=600 bgcolor=#000000 cellpadding=2>
| |
| <tr valign="top"> | | <tr valign="top"> |
| <td> | | <td>[[image:DotPoint.JPG|10px|link=]]</td> |
| <table width=596 bgcolor=#ffffe0 cellpadding=2>
| | <td>The <span style="font-weight: 700; font-size: 15px; color: white; background-color: #797979;"> Layers Palette </span> is the ONLY way to create, delete, name and hide layers</td> |
| <tr valign="top" align="left">
| |
| <td width=25>[[image:PencilTips.PNG|link=]]</td>
| |
| <td>On the right of each data entry box is a pair of '''Up/Down''' arrow controls. <span style="font-weight: 700; font-size: 15px; background-color: lightcyan;">Left Click and Drag</span> up or down on these to adjust the value in smaller increments</td> | |
| </tr> | | </tr> |
| </table> | | </table> |
| Line 2,375: |
Line 2,411: |
| </table> | | </table> |
| <br> | | <br> |
| <table width=1000 bgcolor=#000000 cellpadding=2> | | <table bgcolor=#000000 width=1000 cellpadding=2> |
| <tr valign="top"> | | <tr valign="top"> |
| <td> | | <td> |
| <table width=996 bgcolor=#ffffb0 cellpadding=2> | | <table bgcolor=#ffffff width=996 cellpadding=2> |
| <tr valign="top"> | | <tr valign="top"> |
| <td> | | <td colspan=2>Some examples of using the '''Binding Layer''':-<br> |
| <table width=996> | | <span style="font-weight: 700; font-size: 15px; color: white; background-color: blue;"> Example 1: </span></td> |
| | </tr> |
| <tr valign="top"> | | <tr valign="top"> |
| <td width=25>[[image:NotePad.PNG|link=]]</td> | | <td width=100>'''The problem:'''</td> |
| <td><span style="font-size: 17px; font-weight: 700;">Notes:</span><br> | | <td>You need to stop an object from being selected so that you can you move other objects on or around it</td> |
| ----
| |
| </td> | |
| </tr> | | </tr> |
| </table>
| |
| <table width=996>
| |
| <tr valign="top"> | | <tr valign="top"> |
| <td width=10>[[image:DotPoint.JPG|10px|link=]]</td> | | <td>'''The solution:'''</td> |
| <td>Unlike '''Surveyor Classic''', there is no upper limit to the brush <span style="font-size: 15px; font-weight: 700; color: gold; background-color: black;"> Radius </span>. Brushes of hundreds of metres (even kilometres) in size are possible. However, the performance will '''decrease''' as the brush radius '''increases'''. If you are using the brush to paint an entire baseboard, or many baseboards, then the [[image:S20_MarqueeToolIcon.png|link=|20px]] '''[[#The Marquee Tool|Marquee Tool]]''' will be quicker but it will not give you the options of changing the scale and rotation while painting the texture.</td> | | <td>Use the <span style="font-weight: 700; font-size: 15px; color: white; background-color: #797979;"> Layers Palette </span> to create a new empty layer and lock it. Set the '''Binding Layer''' of the object to the new locked layer. The object will then be locked so it cannot be selected or moved even though its original layer is unlocked. When the edit has been completed delete the empty locked layer you just created to unlock all its bound objects and remove all their bindings |
| | </td> |
| </tr> | | </tr> |
| <tr valign="top"> | | <tr valign="top"> |
| <td >[[image:DotPoint.JPG|10px|link=]]</td> | | <td colspan=2><span style="font-weight: 700; font-size: 15px; color: white; background-color: blue;"> Example 2: </span></td> |
| <td>There is a lower limit to the brush <span style="font-size: 15px; font-weight: 700; color: gold; background-color: black;"> Radius </span> that is dictated by the baseboard resolution ('''10m''', '''5m''' or '''HD'''). For the '''5m''' and the '''10m''' Resolutions it is possible to have brushes smaller than the set Resolution but they will have restrictions imposed. These restrictions will increase as the brush becomes smaller. For '''HD Resolution''' the minimum radius is '''0.12m'''. <span style="font-weight: 700; background-color: yellow;"> Note: HD resolution is only available in Trainz Plus </span>.<br>
| |
| See [[image:PageLink.PNG|link=]] '''[[#Texture Brush Resolution|Ground Texture Brush Size and Grid Resolution]]''' for the details.</td>
| |
| </tr> | | </tr> |
| <tr valign="top"> | | <tr valign="top"> |
| <td>[[image:DotPoint.JPG|10px|link=]]</td> | | <td>'''The problem:'''</td> |
| <td>The <span style="font-size: 15px; font-weight: 700; color: gold; background-color: black;"> Rotation </span> controls the starting compass angle ('''0°''' = North, '''180°''' = South) for the texture when painting and is often used to avoid pattern repetition. As in '''Surveyor Classic''', holding down the <span style="font-size: 15px; font-weight: 700; color: white; background-color: black;"> [ </span> or <span style="font-size: 15px; font-weight: 700; color: white; background-color: black;"> ] </span> keys while painting will continuously change the rotation angle</td> | | <td>A group of objects (e.g trees) are blocking access to another object.</td> |
| </tr> | | </tr> |
| </table> | | <tr valign="top"> |
| | <td>'''The solution:'''</td> |
| | <td>Use the <span style="font-weight: 700; font-size: 15px; color: white; background-color: #797979;"> Layers Palette </span> to create a new empty layer and hide it. Set the '''Binding Layer''' of the blocking objects to the new hidden layer. The blocking objects will no longer be visible and cannot be selected even though their original layer is still visible. When the edit has been completed delete the empty hidden layer you just created to make all its bound objects visible and remove all their bindings |
| </td> | | </td> |
| </tr> | | </tr> |
| Line 2,411: |
Line 2,445: |
| </table> | | </table> |
| <br> | | <br> |
| <table width=1000> <!-- BEGIN Section Nav Buttons --> | | <table width=1000> |
| <tr valign="top"> | | <tr valign="top"> |
| <td width=629><span id="Identify Ground Texture"></span> | | <td width=265>[[image:InfoPaletteBindingDropBox_S20.png|link=]]</td> |
| ===<span style="font-weight: 700; font-size: 17px; color: white; background-color: blue;"> Identifying and Selecting a Ground Texture </span>===
| | <td> |
| </td>
| | <table bgcolor=#000000 width=735 cellpadding=2> |
| <td width=50> </td>
| |
| <td width=50> </td>
| |
| <td width=46>[[image:SkipMinorDown.png|link=#Paint Ground Texture|Down]][[image:SkipMinorUp.png|link=#Texture Tool Options|Up]]</td> <!-- for Top and Minor Up/Down -->
| |
| <td width=75> </td>
| |
| <td width=75> </td> | |
| <td width=75> </td> <!-- for Bottom -->
| |
| </tr>
| |
| </table> <!-- END Section Nav Buttons -->
| |
| | |
| [[image:Ablue.png|link=]] If you have a ground texture in your route that you want to identify or select again.
| |
| | |
| <table width=1000 bgcolor=#000000 cellpadding=2> | |
| <tr valign="top"> | | <tr valign="top"> |
| <td> | | <td> |
| <table width=996 bgcolor=#ffffff cellpadding=2> | | <table bgcolor=#ffffff width=731 cellpadding=2> |
| <tr valign="top"> | | <tr valign="top"> |
| <td colspan=2><span style="font-weight: 700; font-size: 15px;">Steps:</span> To Identify an existing Ground Texture used in the Route:-</td> | | <td colspan=3><span style="font-weight: 700; font-size: 15px;;">Steps: To Change the Assigned Binding Layer of an Object or Group of Objects:-</span></td> |
| </tr> | | </tr> |
| <tr valign="top"> | | <tr valign="top"> |
| <td width=25>[[image:DotPoint1.JPG|link=]]</td> | | <td width=20>[[image:DotPoint1.JPG|link=]]</td> |
| <td>Move the mouse pointer onto the texture to be identified and hold down the <span style="font-weight: 700; font-size: 15px; color: white; background-color: black;"> Alt </span> key. The textures name name will appear in the pointers <span style="font-weight: 700; font-size: 15px; color: white; background-color: black;"> ToolTip </span></td> | | <td colspan=2><span style="font-weight: 700; font-size: 15px; background-color: lightcyan;"> Left Click </span> inside the <span style="font-weight: 700; font-size: 15px; color: white; background-color: black;"> Binding: </span> text box. A drop down list of all the layers in the route and session will be shown except, for a '''single selected object only''', the current layer for that object - an object cannot be bound to its own layer. The current binding layer (if already set) will be shown with a [[image:BulletTick.png|link=]] in front of its name</td> |
| </tr> | | </tr> |
| <tr valign="top"> | | <tr valign="top"> |
| <td colspan=2><span style="font-weight: 700; font-size: 15px;">Steps:</span> To Select an existing Ground Texture used in the Route:-</td> | | <td>[[image:DotPoint2.JPG|link=]]</td> |
| | <td><span style="font-weight: 700; font-size: 15px; background-color: lightcyan;"> Left Click </span> on the name of the destination layer shown in the drop down list. Selecting the layer <span style="font-weight: 700; font-size: 15px; color: white; background-color: black;"> <none> </span> will remove any set binding layer from the object or objects</td> |
| | <td width=300> |
| | <table bgcolor=#ffffb0 cellpadding=2> |
| | <tr valign="top"> |
| | <td width=25>[[image:NotePad.PNG|link=]]</td> |
| | <td>The object layer and the binding layer do not have to be '''unlocked'''. All the objects do not have to be in the same layer</td> |
| </tr> | | </tr> |
| <tr valign="top">
| | </table> |
| <td>[[image:DotPoint2.JPG|link=]]</td>
| | </td> |
| <td>While holding down the <span style="font-weight: 700; font-size: 15px; color: white; background-color: black;"> Alt </span> key <span style="font-weight: 700; font-size: 15px; background-color: lightcyan;"> Left Click </span> on the texture</td>
| |
| </tr> | | </tr> |
| <tr valign="top"> | | <tr valign="top"> |
| <td colspan=2><br> | | <td colspan=2>Assigning the binding layer will start the instant the layer is selected</td> |
| The texture will be selected in the <span style="font-weight: 700; font-size: 15px; color: white; background-color: #797979;"> Assets Palette </span>, the [[image:S20_BrushToolIcon.png|link=|20px]] '''Brush Tool''' and its '''Ground Texture''' target will also be activated so you can immediately start painting with that texture using the current <span style="font-weight: 700; font-size: 15px; color: white; background-color: #797979;"> Tool Options Palette </span> settings. This will also copy the '''Ground Height''' at the selected point into the <span style="font-weight: 700; font-size: 15px; color: white; background-color: #797979;"> Tool Options Palette </span> <span style="font-weight: 700; font-size: 15px; color: gold; background-color: black;"> Height </span> setting but this value is ignored when painting with a texture.</td>
| |
| </tr> | | </tr> |
| </table> | | </table> |
| Line 2,454: |
Line 2,480: |
| </table> | | </table> |
| <br> | | <br> |
| [[image:Bblue.png|link=]] If a ground texture is not in your route or it is not visible in your '''Surveyor''' view, then it can be selected from the <span style="font-weight: 700; font-size: 15px; color: white; background-color: #797979;"> Assets Palette </span>.
| | <table bgcolor=#000000 cellpadding=2> |
| | |
| <table width=1000 bgcolor=#000000 cellpadding=2> | |
| <tr valign="top"> | | <tr valign="top"> |
| <td> | | <td> |
| <table width=996 bgcolor=#ffffff cellpadding=2> | | <table bgcolor=#ffffb0 cellpadding=2> |
| <tr valign="top"> | | <tr valign="top"> |
| <td><span style="font-weight: 700; font-size: 15px;">Steps:</span> To select a new Texture:-</td> | | <td width=25>[[image:NotePad.PNG|link=]]</td> |
| | <td>If a '''Binding Layer''' is deleted then all the objects bound to that layer will have their '''Binding Layer''' reset to <span style="font-weight: 700; font-size: 15px; color: white; background-color: black;"> <none> </span></td> |
| </tr> | | </tr> |
| <tr valign="top"> | | </table> |
| <td>
| | </td> |
| <table>
| |
| <tr valign="top">
| |
| <td>
| |
| <table>
| |
| <tr valign="top">
| |
| <td width=25>[[image:DotPoint1.JPG|link=]]</td>
| |
| <td>In the <span style="font-weight: 700; font-size: 15px; color: white; background-color: #797979;"> Filter Palette </span> if the '''Ground Textures''' [[image:GroundTextureFilter_S20.png|link=]] icon, the first icon in the list, is not selected (shown in blue) then <span style="font-weight: 700; font-size: 15px; background-color: lightcyan;"> Left Click </span> on the [[image:GroundTextureFilter_S20.png|link=]] icon or select '''Ground Textures''' from the '''Content Drop Down Menu'''.</td>
| |
| </tr> | | </tr> |
| </table> | | </table> |
| </td> | | </td> |
| <td>[[image:FilterPaletteDefault_S20.png|link=]]</td>
| |
| </tr> | | </tr> |
| </table> | | </table> |
| </td> | | <br> |
| | <table width=1000> |
| | <tr valign="top"> |
| | <td colspan=2>As an example, the image below shows what you will see for a single object that has had:-</td> |
| </tr> | | </tr> |
| <tr valign="top"> | | <tr valign="top"> |
| | <td width=230>[[image:InfoPaletteLayerSetBindingSet_S20.png|link=]]</td> |
| <td> | | <td> |
| <table> | | <table width=790> |
| | <tr valign="top"> |
| | <td width=10>[[image:DotPoint.JPG|10px|link=]]</td> |
| | <td>its assigned layer changed (in the example from "route-layer" to "Station Industries")</td> |
| | </tr> |
| <tr valign="top"> | | <tr valign="top"> |
| <td> | | <td>[[image:DotPoint.JPG|10px|link=]]</td> |
| <table> | | <td>its binding layer set (in the example to "Multi Industries")</td> |
| | </tr> |
| <tr valign="top"> | | <tr valign="top"> |
| <td>[[image:DotPoint2.JPG|link=]]</td> | | <td>[[image:DotPoint.JPG|10px|link=]]</td> |
| <td>In the <span style="font-weight: 700; font-size: 15px; color: white; background-color: #797979;"> Assets Palette </span> you have the option of adding a text string to the <span style="font-weight: 700; font-size: 15px; color: white; background-color: black;"> Search </span> box to narrow down the search results</td> | | <td>the newly assigned layer is locked so you have the option to '''UNLOCK''' it</td> |
| </tr> | | </tr> |
| <tr valign="top"> | | <tr valign="top"> |
| <td>[[image:DotPoint3.JPG|link=]]</td> | | <td>[[image:DotPoint.JPG|10px|link=]]</td> |
| <td>In the <span style="font-weight: 700; font-size: 15px; color: white; background-color: #797979;"> Assets Palette </span> when the ground texture you want is shown in the list <span style="font-weight: 700; font-size: 15px; background-color: lightcyan;"> Left Click </span> on its name to select it</td> | | <td>the newly assigned layer is not the '''Active Layer''' so you have the option to make it the '''Active Layer'''</td> |
| </tr> | | </tr> |
| <tr valign="top"> | | <tr valign="top"> |
| <td colspan=2><br> | | <td colspan=2><br> |
| After selecting a texture both the [[image:S20_BrushToolIcon.png|link=|20px]] '''Brush Tool''' and its '''Ground Texture''' target will be selected so you can immediately start painting with that texture using the current <span style="font-weight: 700; font-size: 15px; color: white; background-color: #797979;"> Tool Options Palette </span> settings
| |
| <br> | | <br> |
| <table bgcolor=#ffffe0 cellpadding=2> | | <table cellpadding=2 bgcolor="Aquamarine"> |
| <tr valign="top"> | | <tr valign="top"> |
| <td width=25>[[image:PencilTips.PNG|link=]]</td> | | <td>[[image:LinkWiki.PNG|link=]]</td> |
| <td>You can see images of the actual textures by a <span style="font-weight: 700; font-size: 15px; background-color: lightcyan;"> Left Click </span> on the [[image:AssetsPaletteListToggleViewIcon_S20.png|link=]] Thumbnail icon in the <span style="font-weight: 700; font-size: 15px; color: white; background-color: #797979;"> Assets Palette </span>. This works best when the <span style="font-weight: 700; font-size: 15px; color: white; background-color: #797979;"> Assets Palette </span> has been undocked and expanded - see the '''Trainz Wiki Page [[image:WikiLink.PNG|link=]] [[How_to_Use_S20_Palettes#The_Assets_Palette|How to Use S20 Palettes - Assets Palette]]''' for more details.<br> | | <td>More information on creating, editing and using '''Layers''' can be found on the '''Trainz Wiki''' at:- |
| Another <span style="font-weight: 700; font-size: 15px; background-color: lightcyan;"> Left Click </span> on the icon will restore the list of asset names</td>
| | <table> |
| | <tr valign="top"> |
| | <td>[[image:BlackDot10x10.png|link=]]</td> |
| | <td>'''[[How_to_Use_Layers|How to Use Layers]]''' |
| | </td> |
| </tr> | | </tr> |
| </table> | | </table> |
| Line 2,509: |
Line 2,538: |
| </table> | | </table> |
| </td> | | </td> |
| <td>[[image:AssetsPaletteNew_S20.png|link=]]</td>
| |
| </tr> | | </tr> |
| </table> | | </table> |
| Line 2,515: |
Line 2,543: |
| </tr> | | </tr> |
| </table> | | </table> |
| | <br> |
| | <table width=1000> <!-- BEGIN Nav Buttons Table --> |
| | <tr valign="top"> |
| | <td width=629><span id="stepTools"></span> |
| | ='''The Tools Palette'''= |
| </td> | | </td> |
| | <td width=50> </td> <!-- for Skip Down --> |
| | <td width=50>[[image:SkipUp.png|link=#skip Assigning Objects to a Binding Layer|Skip Up]]</td> |
| | <td width=46>[[image:BackToTop.png|link=#top|alt=Top|Top]]</td> |
| | <td width=75>[[image:NextUp.png|link=#stepInfo|alt=Next Up|Next Up]]</td> |
| | <td width=75>[[image:NextDown.png|link=#stepOptions|alt=Next Down|Next Down]]</td> |
| | <td width=75>[[image:BackToBottom.png|link=#bottom|alt=Bottom|Bottom]]</td> |
| | </tr> |
| | </table> <!-- END Nav Buttons Table --> |
| | |
| | <table width=1000 bgcolor=#ffffb0 cellpadding=2> |
| | <tr valign="top"> |
| | <td><span style="font-weight: 700; font-size: 15px;">This is a <span style="color: white; background-color: blue;"> Surveyor Only </span> palette</span></td> |
| </tr> | | </tr> |
| </table> | | </table> |
| <br> | | <br> |
| <table width=1000 bgcolor=#000000 cellpadding=2> | | <table width=1000 bgcolor=#000000> |
| <tr valign="top"> | | <tr valign="top"> |
| <td> | | <td> |
| <table width=996 bgcolor=#ffffb0 cellpadding=2> | | <table width=996 bgcolor=#ffe89a cellpadding=2> |
| <tr valign="top"> | | <tr valign="middle"> |
| <td width=25>[[image:NotePad.PNG|link=]]</td> | | <td width=45>[[image:PalettesIcon_S20.png|link=]]</td> |
| <td><span style="font-size: 17px;">'''Notes:'''</span><br> | | <td>If the <span style="font-weight: 700; font-size: 15px; color: white; background-color: #797979;"> Tools Palette </span> is not visible on the screen then refer to [[image:PageLink.PNG|link=]] '''[[#Hiding and Showing Palettes and Windows|Hiding and Showing Palettes and Windows]]''' at the top of this document |
| ----
| | </td> |
| | </tr> |
| | </table> |
| </td> | | </td> |
| </tr> | | </tr> |
| | </table> |
| | <br> |
| | <table width=1000> |
| <tr valign="top"> | | <tr valign="top"> |
| <td width=10>[[image:DotPoint.JPG|10px|link=]]</td> | | <td width=210>[[image:S20_PaletteTools.png|link=]]</td> |
| <td>The <span style="font-weight: 700; font-size: 15px; color: white; background-color: #797979;"> Assets Palette </span> display is controlled by the selections made in the <span style="font-weight: 700; font-size: 15px; color: white; background-color: #797979;"> Filter Palette </span>. Selecting '''Ground Textures''' in the <span style="font-weight: 700; font-size: 15px; color: white; background-color: #797979;"> Filter Palette </span> will produce a list of all the installed ground textures in the <span style="font-weight: 700; font-size: 15px; color: white; background-color: #797979;"> Assets Palette </span>.</td> | | <td> |
| </tr>
| | <table width=790 bgcolor="lightcyan" cellpadding=2> |
| <tr valign="top"> | | <tr valign="top"> |
| <td>[[image:DotPoint.JPG|10px|link=]]</td> | | <td width=10>[[image:BlueDot10x10.png|link=]]</td> |
| <td>For more information about the <span style="font-weight: 700; font-size: 15px; color: white; background-color: #797979;"> Filter Palette </span> see the '''Trainz Wiki Page [[image:WikiLink.PNG|link=]] [[How to Use S20 Palettes#The Filter Palette|How to Use the Surveyor 2.0 Palettes - Filter Palette]]'''</td> | | <td>The <span style="font-weight: 700; font-size: 15px; color: white; background-color: #797979;"> Tools Palette </span> is at the core of the new interface and takes the place of all the '''Tool Flyouts''' that have been the standard for Trainz Surveyor for many years. Some of the tools are new while others have been given a makeover and new abilities. The tools manipulate the Surveyor World you see in many different ways.</td> |
| </tr> | | </tr> |
| | </table> |
| | <br> |
| | <table> |
| <tr valign="top"> | | <tr valign="top"> |
| <td>[[image:DotPoint.JPG|10px|link=]]</td> | | <td width=531>[[image:Tools_S20.png|link=|alt=Tools and keymap for S20]]</td> |
| <td>For more information about the <span style="font-weight: 700; font-size: 15px; color: white; background-color: #797979;"> Assets Palette </span> see the '''Trainz Wiki Page [[image:WikiLink.PNG|link=]] [[How to Use S20 Palettes#The Assets Palette|How to Use the Surveyor 2.0 Palettes - Assets Palette]]'''</td> | | <td valign="bottom">The <span style="font-weight: 700; font-size: 15px; color: white; background-color: black;"> Context Tool </span> is attached as an icon to a selected or newly placed object. The icon and its '''Context menu''' will vary according to the type of object.</td> |
| </tr> | | </tr> |
| </table> | | </table> |
| Line 2,546: |
Line 2,599: |
| </table> | | </table> |
| <br> | | <br> |
| <table width=1000> <!-- BEGIN Section Nav Buttons --> | | <table width=1000 bgcolor=#000000 cellpadding=2> |
| <tr valign="top"> | | <tr valign="top"> |
| <td width=629><span id="Paint Ground Texture"></span> | | <td> |
| ===<span style="font-weight: 700; font-size: 17px; color: white; background-color: blue;"> Painting a Ground Texture </span>=== | | <table width=996 bgcolor=#ffe89a cellpadding=2> |
| | <tr valign="middle"> |
| | <td width=45>[[image:PalettesIcon_S20.png|link=]]</td> |
| | <td>Various brush tools make use of the <span style="font-weight: 700; font-size: 15px; color: white; background-color: #797979;"> Tool Options Palette </span>, the <span style="font-weight: 700; font-size: 15px; color: white; background-color: #797979;"> Assets Palette </span>, the <span style="font-weight: 700; font-size: 15px; color: white; background-color: #797979;"> Info Palette </span>, the <span style="font-weight: 700; font-size: 15px; color: white; background-color: #797979;"> Layers Palette </span> and the <span style="font-weight: 700; font-size: 15px; color: white; background-color: #797979;"> Scrapbook Palette </span>. If a palette required by one of the brush tools is not visible on the screen then refer to [[image:PageLink.PNG|link=]] '''[[#Hiding and Showing Palettes and Windows|Hiding and Showing Palettes and Windows]]''' at the top of this document. |
| | </td> |
| | </tr> |
| | </table> |
| </td> | | </td> |
| <td width=50> </td>
| |
| <td width=50> </td>
| |
| <td width=46>[[image:SkipMinorDown.png|link=#Texture Brush Resolution|Down]][[image:SkipMinorUp.png|link=#Identify Ground Texture|Up]]</td> <!-- for Top and Minor Up/Down -->
| |
| <td width=75> </td>
| |
| <td width=75> </td>
| |
| <td width=75> </td> <!-- for Bottom -->
| |
| </tr> | | </tr> |
| </table> <!-- END Section Nav Buttons --> | | </table> |
| | <br> |
| | =='''The Brush Tool'''== |
|
| |
|
| <table width=1000> | | <table width=1000> |
| <tr valign="top"> | | <tr valign="top"> |
| <td> | | <td> |
| <table width=495 bgcolor=#000000 cellpadding=2> | | <table width=214 bgcolor=#000000 cellpadding=2> |
| <tr valign="top"> | | <tr valign="top"> |
| <td> | | <td> |
| <table bgcolor=#ffffff cellpadding=2> | | <table width=210 bgcolor=#ffffff cellpadding=2> |
| <tr valign="top"> | | <tr valign="top"> |
| <td colspan=2><span style="font-weight: 700; font-size: 15px;">Steps:</span> To Paint with a '''Ground Texture''':-</td> | | <td width=40>[[image:S20_BrushToolIcon.png|link=]]</td> |
| | <td width=170>'''Keyboard Shortcut:''' <span style="color: white; background-color: black; font-weight: 700; font-size: 17px;"> W </span></td> |
| </tr> | | </tr> |
| <tr valign="top"> | | </table> |
| <td colspan=2>
| | </td> |
| <table bgcolor=#ffffe0 cellpadding=2>
| |
| <tr valign="top">
| |
| <td width=25>[[image:PencilTips.PNG|link=]]</td>
| |
| <td>If the <span style="font-weight: 700; font-size: 15px; color: white; background-color: #797979;"> Assets Palette </span> is already showing the list of ground textures then you can jump directly to step <span style="font-weight: 700; font-size: 15px; color: white; background-color: red;"> 4 </span>. If it is not showing the ground textures then you can still jump directly to step <span style="font-weight: 700; font-size: 15px; color: white; background-color: red;"> 4 </span> by selecting the '''Ground Texture''' layer in the <span style="font-weight: 700; font-size: 15px; color: white; background-color: #797979;"> Layers Palette </span><br>
| |
| Once the <span style="font-weight: 700; font-size: 15px; color: white; background-color: black;"> Ground Texture </span> target has been selected the '''minimum''' steps needed to start painting are <span style="font-weight: 700; font-size: 15px; color: white; background-color: red;"> 5 </span> and <span style="font-weight: 700; font-size: 15px; color: white; background-color: red;"> 7 </span></td>
| |
| </tr> | | </tr> |
| </table> | | </table> |
| </td> | | </td> |
| | <td width=786 bgcolor="lightcyan"><span style="font-weight: 700; font-size: 15px;">The <span style="color: white; background-color: black;"> Brush Tool </span> "paints" the ground height, ground textures, effect layers and scrapbook scenes in the Trainz World</span></td> |
| </tr> | | </tr> |
| | </table> |
| | |
| | <table width=1000> |
| <tr valign="top"> | | <tr valign="top"> |
| <td width=20>[[image:DotPoint1.JPG|link=]]</td> | | <td width=200>[[image:BrushTools_S20.png|link=|alt=Brush Tools]]</td> |
| <td>In the <span style="font-weight: 700; font-size: 15px; color: white; background-color: #797979;"> Tools Palette </span> <span style="font-weight: 700; font-size: 15px; background-color: lightcyan;">Left Click</span> on the [[image:S20_BrushToolIcon.png|link=|20px]] '''Brush Tool''' or press the <span style="font-weight: 700; font-size: 15px; color: white; background-color: black;"> W </span> key</td> | | <td> |
| | <table width=800> |
| | <tr valign="top"> |
| | <td colspan=3>The '''Brush Tool''' has two drop down menu lists.<br> |
| | The first drop down menu will set the '''"Brush Target"''' which is the type of brush.<br> |
| | The '''Targets''' are:-</td> |
| </tr> | | </tr> |
| <tr valign="top"> | | <tr valign="top"> |
| <td>[[image:DotPoint2.JPG|link=]]</td> | | <td width=200> |
| <td>select the <span style="font-weight: 700; font-size: 15px; color: white; background-color: black;"> Ground Texture </span> from the brush '''Target''' Drop Down Menu</td> | | <table> |
| | <tr valign="top"> |
| | <td width=10>[[image:BulletTick.png|link=]]</td> |
| | <td>'''Ground Height'''</td> |
| </tr> | | </tr> |
| <tr valign="top"> | | <tr valign="top"> |
| <td>[[image:DotPoint3.JPG|link=]]</td> | | <td>[[image:BulletTick.png|link=]]</td> |
| <td>In the <span style="font-weight: 700; font-size: 15px; color: white; background-color: #797979;"> Filter Palette </span> select the '''Ground Texture''' list by a <span style="font-weight: 700; font-size: 15px; background-color: lightcyan;"> Left Click </span> on the [[image:GroundTextureFilter_S20.png|link=]] icon (the first icon in the row)</td> | | <td>'''Ground Texture'''</td> |
| </tr> | | </tr> |
| <tr valign="top"> | | <tr valign="top"> |
| <td>[[image:DotPoint4.JPG|link=]]</td> | | <td>[[image:BulletTick.png|link=]]</td> |
| <td>In the <span style="font-weight: 700; font-size: 15px; color: white; background-color: #797979;"> Assets Palette </span> you have the option of narrowing the search by entering the name or a partial name of the texture in the <span style="font-weight: 700; font-size: 15px; color: white; background-color: black;"> Search </span> box</td> | | <td>'''Scrapbook Data'''</td> |
| </tr> | | </tr> |
| <tr valign="top"> | | <tr valign="top"> |
| <td>[[image:DotPoint5.JPG|link=]]</td> | | <td>[[image:BulletTick.png|link=]]</td> |
| <td>In the <span style="font-weight: 700; font-size: 15px; color: white; background-color: #797979;"> Assets Palette </span> select the required '''Ground Texture''' from the filtered list</td> | | <td>'''<''List of Effect Layers''>'''</td> |
| </tr> | | </tr> |
| <tr valign="top"> | | <tr valign="top"> |
| <td>[[image:DotPoint6.JPG|link=]]</td> | | <td>[[image:BulletTick.png|link=]]</td> |
| <td>In the <span style="font-weight: 700; font-size: 15px; color: white; background-color: #797979;"> Tool Options Palette </span> set any brush controls - <span style="font-weight: 700; font-size: 15px; color: gold; background-color: black;"> Radius </span>, <span style="font-weight: 700; font-size: 15px; color: gold; background-color: black;"> Sensitivity </span>, <span style="font-weight: 700; font-size: 15px; color: gold; background-color: black;"> Rotation </span>, <span style="font-weight: 700; font-size: 15px; color: gold; background-color: black;"> Scale </span></td> | | <td>'''Edit Effect Layers'''</td> |
| </tr> | | </tr> |
| | </table> |
| | </td> |
| | <td width=100>[[image:BrushToolsGroundOptions_S20.png|link=]]</td> |
| | <td width=350> |
| | <table bgcolor=#000000 width=350 cellpadding=2> |
| | <tr valign="top"> |
| | <td> |
| | <table bgcolor=#ffffb0 width=346 cellpadding=2> |
| <tr valign="top"> | | <tr valign="top"> |
| <td>[[image:DotPoint7.JPG|link=]]</td> | | <td width=25>[[image:NotePad.PNG|link=]]</td> |
| <td><span style="font-weight: 700; font-size: 15px; background-color: lightcyan;">Left Click and Drag</span> on the terrain to start painting</td> | | <td>If you have any '''Effect Layers''' then they will appear as '''Targets''' in this drop down list. Select an '''Effect Layer''' to use the brush to paint with that layer.</td> |
| | </tr> |
| | </table> |
| | </td> |
| | </tr> |
| | </table> |
| | </td> |
| | </tr> |
| | </table> |
| | </td> |
| | </tr> |
| | </table> |
| | <table> |
| | <tr> |
| | <td>The '''Brush Targets''' <span style="font-weight: 700; font-size: 15px; color: white; background-color: black;"> Ground Height </span>, <span style="font-weight: 700; font-size: 15px; color: white; background-color: black;"> Scrapbook Data </span> and <span style="font-weight: 700; font-size: 15px; color: white; background-color: black;"> Effect Layers </span> have a second drop down menu that controls the '''Brush Action'''.</td> |
| | </tr> |
| | </table> |
| | <table width=1000 bgcolor=#000000 cellpadding=2> |
| | <tr> |
| | <td> |
| | <table width=996 bgcolor=#ffffff cellpadding=2> |
| | <tr> |
| | <td>For more detailed information on using the '''Brush Tool''' see the '''Trainz Wiki''' page [[image:WikiLink.PNG|link=]] '''[[How_to_Use_S20_Tools#The Brush Tool|How to Use the Surveyor 2.0 Tools]]'''</td> |
| </tr> | | </tr> |
| </table> | | </table> |
| Line 2,614: |
Line 2,707: |
| </table> | | </table> |
| <br> | | <br> |
| <table width=495 bgcolor=#000000 cellpadding=2> | | |
| | =='''The Placement Tool'''== |
| | |
| | <table width=1000> |
| <tr valign="top"> | | <tr valign="top"> |
| <td> | | <td> |
| <table bgcolor=#ffffe0 cellpadding=2> | | <table width=214 bgcolor=#000000 cellpadding=2> |
| <tr valign="top"> | | <tr valign="top"> |
| <td width=25>[[image:PencilTips.PNG|link=]]</td>
| |
| <td> | | <td> |
| <table> | | <table width=210 bgcolor=#ffffff cellpadding=2> |
| <tr valign="top"> | | <tr valign="top"> |
| <td width=10>[[image:DotPoint.JPG|10px|link=]]</td> | | <td width=40>[[image:S20_PlacementToolIcon.png|link=]]</td> |
| <td>You can use the '''Marquee Tool''' to paint a large area, an entire baseboard or several baseboards with a selected ground texture. See [[image:PageLink.PNG|link=]] '''[[#skip Managing Baseboards|Managing Baseboards]]''' for more details</td> | | <td width=170>'''Keyboard Shortcut:''' <span style="color: white; background-color: black; font-weight: 700; font-size: 17px;"> E </span></td> |
| </tr>
| |
| <tr valign="top">
| |
| <td>[[image:DotPoint.JPG|10px|link=]]</td>
| |
| <td>You can set a default '''Ground Texture''' that will automatically cover every new baseboard added. See [[image:PageLink.PNG|link=]] '''[[#Default Baseboard Ground Texture|Default Baseboard Ground Texture]]''' below for more details</td>
| |
| </tr> | | </tr> |
| </table> | | </table> |
| Line 2,635: |
Line 2,726: |
| </table> | | </table> |
| </td> | | </td> |
| | <td width=786 bgcolor="lightcyan"><span style="font-weight: 700; font-size: 15px;">The <span style="color: white; background-color: black;"> Placement Tool </span> adds objects to a Trainz World</span></td> |
| </tr> | | </tr> |
| </table> | | </table> |
| </td>
| | |
| <td width=10> </td>
| | <table width=1000> |
| <td>
| |
| <table width=495 bgcolor=#000000 cellpadding=2> | |
| <tr valign="top"> | | <tr valign="top"> |
| | <td width=200>[[image:PlacementTools_S20.png|link=|alt=Placement Tools]]</td> |
| <td> | | <td> |
| <table bgcolor=#ffffb0 cellpadding=2> | | <table width=800> |
| <tr valign="top"> | | <tr valign="top"> |
| <td width=25>[[image:NotePad.PNG|link=]]</td> | | <td colspan=5>The '''Placement Tool''' places all types of objects except ground textures and effect layers. Use the '''Brush Tool''' to add ground textures and effect layers.</td> |
| <td width=470><span style="font-size: 17px; font-weight: 700;">Notes:'''</span><br>
| |
| ----
| |
| </td> | |
| </tr> | | </tr> |
| <tr valign="top"> | | <tr valign="top"> |
| <td>[[image:DotPoint.JPG|10px|link=]]</td> | | <td>[[image:SceneryMeshFilter_S20.png|link=]]</td> |
| <td>The '''intensity''' at which the ground texture is painted is controlled by the <span style="font-weight: 700; font-size: 15px; color: white; background-color: #797979;"> Tool Options Palette </span> <span style="font-weight: 700; font-size: 15px; color: gold; background-color: black;"> Sensitivity </span> setting. This allows you to paint over an existing texture (including the '''Grid''' pattern) in a way that will let most, some or none of the original texture show through | | <td>all non-spline scenery assets</td> |
| <table cellpadding=2 bgcolor=#ffffff> | | <td> </td> |
| <tr> | | <td>[[image:ScenerySplineFilter_S20.png|link=]]</td> |
| <td colspan="2"> | | <td>all spline scenery assets</td> |
| ----</td>
| |
| </tr> | | </tr> |
| <tr valign="top"> | | <tr valign="top"> |
| <td>[[image:Gears.PNG|link=]]</td> | | <td>[[image:TrackSplineFilter_S20.png|link=]]</td> |
| <td><span style="font-weight: 700; font-size: 15px;"><span style="color: gold; background-color: black;"> Sensitivity </span> Settings:'''</span> | | <td>all track spline assets</td> |
| <table>
| | <td> </td> |
| <tr valign="top">
| | <td>[[image:TrackMeshFilter_S20.png|link=]]</td> |
| <td width=10>[[image:BlackDot10x10.png|link=]]</td> | | <td>all track (non spline) assets (signals, etc)</td> |
| <td>'''1%''' to make the new texture almost transparent. The level of transparency will decrease with each new brush sweep over the same area</td> | |
| </tr> | | </tr> |
| <tr valign="top"> | | <tr valign="top"> |
| <td>[[image:BlackDot10x10.png|link=]]</td> | | <td>[[image:TrainFilter_S20.png|link=]]</td> |
| <td>'''50%''' to make the new texture 50% or semi-transparent</td> | | <td>all rolling stock assets</td> |
| | <td colspan=3> </td> |
| </tr> | | </tr> |
| <tr valign="top"> | | </table> |
| <td>[[image:BlackDot10x10.png|link=]]</td> | | <br> |
| <td>'''100%''' to make the new texture completely hide the original texture with a single sweep of the brush</td> | | <table width=800 bgcolor=#000000 cellpadding=2> |
| </tr> | | <tr> |
| <tr valign="top"> | | <td> |
| <td colspan=2>Values between these two limits will give intermediate changes with each sweep of the brush over the same area</td> | | <table width=796 bgcolor=#ffffff cellpadding=2> |
| | <tr> |
| | <td>For more detailed information on using the '''Placement Tool''' see the '''Trainz Wiki''' page [[image:WikiLink.PNG|link=]] '''[[How_to_Use_S20_Tools#The Placement Tool|How to Use the Surveyor 2.0 Tools]]'''</td> |
| </tr> | | </tr> |
| </table> | | </table> |
| </td> | | </td> |
| </tr>
| |
| <tr valign="top">
| |
| <td colspan="2">
| |
| ----</td>
| |
| </tr> | | </tr> |
| </table> | | </table> |
| </td> | | </td> |
| </tr> | | </tr> |
| | </table> |
| | <br> |
| | |
| | =='''The Eyedropper Tool'''== |
| | |
| | <table width=1000> |
| <tr valign="top"> | | <tr valign="top"> |
| <td>[[image:DotPoint.JPG|10px|link=]]</td> | | <td> |
| <td colspan=2>Unlike '''Surveyor Classic''', there is no upper limit to the brush <span style="font-size: 15px; font-weight: 700; color: gold; background-color: black;"> Radius </span>. Brushes of hundreds of metres (even kilometres) in size are possible. However, the performance will '''decrease''' as the brush radius '''increases'''. If you are using the brush to paint an entire baseboard, or many baseboards, then the [[image:S20_MarqueeToolIcon.png|link=|20px]] '''[[#The Marquee Tool|Marquee Tool]]''' will be quicker but it will not give you options for changing the brush properties when painting.</td> | | <table width=214 bgcolor=#000000 cellpadding=2> |
| </tr> | | <tr valign="top"> |
| | <td> |
| | <table width=210 bgcolor=#ffffff cellpadding=2> |
| <tr valign="top"> | | <tr valign="top"> |
| <td >[[image:DotPoint.JPG|10px|link=]]</td> | | <td width=40>[[image:S20_DropperToolIcon.png|link=]]</td> |
| <td>There is a lower limit to the brush <span style="font-size: 15px; font-weight: 700; color: gold; background-color: black;"> Radius </span> that is dictated by the baseboard resolution ('''10m''', '''5m''' or '''HD'''). For the '''5m''' and the '''10m''' Resolutions it is possible to have brushes smaller than the set Resolution but they will have restrictions imposed. These restrictions will increase as the brush becomes smaller. For '''HD Resolution''' the minimum radius is '''0.12m'''. <span style="font-weight: 700; background-color: yellow;"> Note: HD resolution is only available in Trainz Plus </span>.<br> | | <td width=170>'''Keyboard Shortcut:''' <span style="color: white; background-color: black; font-weight: 700; font-size: 17px;"> R </span></td> |
| See [[image:PageLink.PNG|link=]] '''[[#Texture Brush Resolution|Ground Texture Brush Size and Grid Resolution]]''' for the details.</td>
| |
| </tr> | | </tr> |
| </table> | | </table> |
| Line 2,701: |
Line 2,793: |
| </table> | | </table> |
| </td> | | </td> |
| | <td width=786 bgcolor="lightcyan"><span style="font-weight: 700; font-size: 15px;">The <span style="color: white; background-color: black;"> Eyedropper Tool </span> identifies and selects objects in a Trainz World</span></td> |
| </tr> | | </tr> |
| </table> | | </table> |
| <br>
| | |
| <table width=1000 bgcolor="lightcyan"> | | <table width=1000> |
| <tr valign="top"> | | <tr valign="top"> |
| <td width=10>[[image:BlueDot10x10.png|link=]]</td> | | <td width=200>[[image:EyedropperTools_S20.png|link=]]</td> |
| <td>Most objects can have a '''Ground Texture''' automatically painted beneath them.</td> | | <td> |
| </tr>
| | <table width=800 bgcolor=#000000 cellpadding=2> |
| </table>
| |
| <br>
| |
| <table width=1000 bgcolor=#000000 cellpadding=2> | |
| <tr valign="top"> | | <tr valign="top"> |
| <td> | | <td> |
| <table bgcolor=#ffffff cellpadding=2> | | <table bgcolor=#ffffe0 width=796 cellpadding=2> |
| <tr valign="top"> | | <tr valign="top"> |
| <td colspan=2> | | <td>[[image:PencilTips.PNG|link=]]</td> |
| <table>
| | <td>The '''Eyedropper''' is also inside all the tools in this palette so you can quickly identify any object without having to switch to the '''Eyedropper Tool''' and back again. Hold down the <span style="font-weight: 700; font-size: 15px; color: white; background-color: black;"> Alt </span> key to activate this feature in other tools |
| <tr valign="middle">
| | </td> |
| <td width=35>[[image:Information.png|35px|link=]]</td>
| |
| <td><span style="font-weight: 700; font-size: 17px;">Object Context Menu Ground Texture Option</span></td> | |
| </tr> | | </tr> |
| </table> | | </table> |
| </td> | | </td> |
| </tr> | | </tr> |
| <tr valign="top"> | | </table> |
| <td colspan=2>Once an object has been placed you can open its '''Context Menu''' (<span style="font-weight: 700; font-size: 15px; background-color: lightcyan;"> Left Click </span> on its icon or press the <span style="font-weight: 700; font-size: 15px; color: white; background-color: black;"> T </span> key) to access a range of options and functions. The following '''Ground Texture''' specific options will appear, along with other more general options, in the objects '''Context Menu'''. | | <br> |
| ----</td>
| | <table width=790 bgcolor=#000000 cellpadding=2> |
| </tr> | | <tr> |
| <tr valign="top">
| |
| <td> | | <td> |
| <table> | | <table width=786 bgcolor=#ffffff cellpadding=2> |
| <tr valign="top">
| | <tr> |
| <td><span style="font-weight: 700; font-size: 15px; color: white; background-color: black;"> Paint Under Selected </span></td>
| | <td>For more detailed information on using the '''Eyedropper Tool''' see the '''Trainz Wiki''' page [[image:WikiLink.PNG|link=]] '''[[How_to_Use_S20_Tools#The Eyedropper Tool|How to Use the Surveyor 2.0 Tools]]'''</td> |
| <td>the texture selected in the <span style="font-weight: 700; font-size: 15px; color: white; background-color: #797979;"> Assets Palette </span> will be painted under the '''selected''' objects. The <span style="font-weight: 700; font-size: 15px; color: white; background-color: #797979;"> Tool Options Palette </span> brush settings (<span style="font-weight: 700; font-size: 15px; color: gold; background-color: black;"> Radius </span> and <span style="font-weight: 700; font-size: 15px; color: gold; background-color: black;"> Sensitivity </span>) will control how the texture is applied. If no ground texture has been selected in the <span style="font-weight: 700; font-size: 15px; color: white; background-color: #797979;"> Assets Palette </span> then this option will be greyed out. This option is frequently used to paint a texture under '''selected''' track (or other) splines. | |
| </td>
| |
| </tr>
| |
| <tr valign="top">
| |
| <td colspan=2>
| |
| <table bgcolor=#ffffb0 cellpadding=2>
| |
| <tr valign="top">
| |
| <td width=25>[[image:NotePad.PNG|link=]]</td>
| |
| <td>Objects have a '''minimum brush size''' that represents the smallest area that can be painted beneath them using the <span style="font-weight: 700; font-size: 15px; color: white; background-color: black;"> Paint Under Selected </span> option. This minimum area will vary in size between objects but it will be rectangular even for circular objects. If the <span style="font-weight: 700; font-size: 15px; color: white; background-color: #797979;"> Tool Options Palette </span> brush <span style="font-weight: 700; font-size: 15px; color: gold; background-color: black;"> Radius </span> is set to a smaller size then the brush <span style="font-weight: 700; font-size: 15px; color: gold; background-color: black;"> Radius </span> will be ignored and the objects minimum brush size will be used instead.</td>
| |
| </tr>
| |
| </table>
| |
| </td> | |
| </tr> | | </tr> |
| </table> | | </table> |
| Line 2,755: |
Line 2,830: |
| </table> | | </table> |
| <br> | | <br> |
| <table width=1000> <!-- BEGIN Section Nav Buttons --> | | |
| | =='''The Free Move Tool'''== |
| | |
| | <table width=1000> |
| <tr valign="top"> | | <tr valign="top"> |
| <td width=629><span id="Texture Brush Resolution"></span> | | <td> |
| ===<span style="font-weight: 700; font-size: 17px; color: white; background-color: blue;"> Ground Texture Brush Size and Grid Resolution </span>===
| | <table width=214 bgcolor=#000000 cellpadding=2> |
| </td>
| |
| <td width=50> </td>
| |
| <td width=50> </td>
| |
| <td width=46>[[image:SkipMinorDown.png|link=#Texture Tips|Down]][[image:SkipMinorUp.png|link=#Paint Ground Texture|Up]]</td> <!-- for Top and Minor Up/Down -->
| |
| <td width=75> </td>
| |
| <td width=75> </td>
| |
| <td width=75> </td> <!-- for Bottom -->
| |
| </tr>
| |
| </table> <!-- END Section Nav Buttons -->
| |
| | |
| <table width=1000 bgcolor="lightcyan" cellpadding=2> | |
| <tr valign="top"> | | <tr valign="top"> |
| <td width=10>[[image:BlueDot10x10.png|link=]]</td> | | <td> |
| <td>The minimum allowed brush size is dictated by the set baseboard resolution</td>
| | <table width=210 bgcolor=#ffffff cellpadding=2> |
| </tr>
| |
| <tr valign="top"> | | <tr valign="top"> |
| <td width=10>[[image:BlueDot10x10.png|link=]]</td> | | <td width=40>[[image:S20_FreeMoveToolIcon.png|link=]]</td> |
| <td>Brushes that are smaller than the set resolution are possible but they will have restrictions on where they can be used</td> | | <td width=170>'''Keyboard Shortcut:''' <span style="color: white; background-color: black; font-weight: 700; font-size: 17px;"> S </span></td> |
| </tr> | | </tr> |
| </table> | | </table> |
| <br>
| |
| <table width=1000> <!-- BEGIN Section Nav Buttons -->
| |
| <tr valign="top">
| |
| <td width=629><span id="Ground Texture 5m/10m"></span>
| |
| ====Ground Textures in 5m/10m Resolutions====
| |
| </td> | | </td> |
| </tr> | | </tr> |
| </table> | | </table> |
| | | </td> |
| <table width=1000> | | <td width=786 bgcolor="lightcyan"><span style="font-weight: 700; font-size: 15px;">The <span style="color: white; background-color: black;"> Free Move Tool </span> moves objects around a Trainz World</span></td> |
| <tr valign="top"> | |
| <td>Ground texture brushes can be smaller than the set '''5m Resolution''' or '''10m Resolution''' baseboard size. For example: you can paint a ground texture with a brush size of '''2.5m''' on a '''10m Resolution''' baseboard but there will be restrictions on where you can use a bush that small.</td> | |
| </tr> | | </tr> |
| </table> | | </table> |
|
| |
|
| <table width=1000 > | | <table width=1000> |
| <tr valign="top"> | | <tr valign="top"> |
| <td width=10>[[image:DotPoint.JPG|10px|link=]]</td> | | <td width=200>[[image:FreeMoveTools_S20.png|link=]]</td> |
| <td>When the brush size is from 50% to under 100% of the Grid Resolution (e.g. from '''2.5m''' to '''4.9m''' in a '''5m Resolution''' or from '''5m''' to '''9.9m''' in a '''10m Resolution''') then it will work best when used on the grid lines - yellow lines for the '''10m Resolution''', and both grey and yellow lines for the '''5m Resolution'''. Between the grid lines its effect will be reduced.</td> | | <td> |
| </tr> | | <table width=800> |
| <tr valign="top"> | | <tr valign="top"> |
| <td>[[image:DotPoint.JPG|10px|link=]]</td> | | <td> |
| <td>When the brush size is less than 50% of the Grid Resolution (e.g. '''<2.5m''' for the '''5m Resolution''' or '''<5.0m''' for the '''10m Resolution''') then it will be restricted to the grid line '''intersections''' - yellow for the '''10m Resolution''', and both yellow and grey for the '''5m Resolution'''.</td> | | <table bgcolor=#000000 width=800 cellpadding=2> |
| </tr>
| |
| <tr valign="top"> | | <tr valign="top"> |
| <td colspan=2> | | <td> |
| <table> | | <table bgcolor=#ffffb0 width=796 cellpadding=2> |
| <tr valign="top"> | | <tr valign="top"> |
| <td width=160>[[image:BrushCircleHeight01mA@05m.png|link=]]</td> | | <td width=25>[[image:NotePad.PNG|link=]]</td> |
| <td width=160>[[image:BrushCircleHeight01mB@05m.png|link=]]</td> | | <td><span style="font-size: 17px; font-weight: 700;">Notes:'''</span><br> |
| <td width=160>[[image:BrushCircleHeight01mC@05m.png|link=]]</td> | | ---- |
| <td width=160>[[image:BrushCircleHeight01mX@05m.png|link=]]</td>
| | The [[image:S20_FreeMoveToolIcon.png|link=|20px]] '''Free Move Tool''' can move any selected object or objects (except '''Ground Textures''' and '''Effect Layers''') in any direction horizontally. Vertical movements can be achieved by using the '''Height''' control in the <span style="font-weight: 700; font-size: 15px; color: white; background-color: #797979;"> Tool Options Palette </span>. |
| <td>The <span style="font-weight: 700; font-size: 15px; color: red;">RED</span> brush circle indicates that the brush size is too small to work in that part of the grid square</td>
| | </td> |
| </tr> | | </tr> |
| <tr valign="top">
| | </table> |
| <td colspan=4 align="center">'''Resolution:''' 5m Resolution - '''Brush Size:''' 1m</td>
| | </td> |
| <td> </td>
| |
| </tr> | | </tr> |
| </table> | | </table> |
| Line 2,822: |
Line 2,879: |
| </table> | | </table> |
| <br> | | <br> |
| <table width=1000> <!-- BEGIN Section Nav Buttons --> | | <table width=800 bgcolor=#000000 cellpadding=2> |
| <tr valign="top"> | | <tr> |
| <td width=629><span id="Ground Texture HD"></span> | | <td> |
| ====Ground Textures in HD Resolution====
| | <table width=796 bgcolor=#ffffff cellpadding=2> |
| | <tr> |
| | <td>For more detailed information on using the [[image:S20_FreeMoveToolIcon.png|link=|20px]] '''Free Move Tool''' see the '''Trainz Wiki''' page [[image:WikiLink.PNG|link=]] '''[[How_to_Use_S20_Tools#The Free Move Tool|How to Use the Surveyor 2.0 Tools]]'''</td> |
| | </tr> |
| | </table> |
| </td> | | </td> |
| </tr> | | </tr> |
| </table> | | </table> |
| | | </td> |
| <table width=1000 bgcolor="lightcyan" cellpadding=2>
| |
| <tr valign="top">
| |
| <td width=10>[[image:BlueDot10x10.png|link=]]</td>
| |
| <td>You cannot have a brush size smaller than '''0.12m''' (12cm)</td>
| |
| </tr>
| |
| <tr valign="top">
| |
| <td>[[image:BlueDot10x10.png|link=]]</td>
| |
| <td>The brush is not restricted to grid lines or intersections and can paint a ground texture anywhere within each grid square</td>
| |
| </tr>
| |
| <tr valign="top">
| |
| <td>[[image:BlueDot10x10.png|link=]]</td>
| |
| <td>You are restricted to using a '''maximum''' of 16 ground textures per baseboard (but each baseboard can have up to 16 different textures)</td>
| |
| </tr> | | </tr> |
| </table> | | </table> |
| | <br> |
| | |
| | =='''The Fine Adjustment Tool'''== |
|
| |
|
| <table width=1000> | | <table width=1000> |
| <tr valign="top"> | | <tr valign="top"> |
| <td>The '''Surveyor Route Editor''' will allow you to switch between two minimum brush sizes when working with '''HD Resolution''' routes.</td> | | <td> |
| </tr> | | <table width=214 bgcolor=#000000 cellpadding=2> |
| <tr valign="top"> | | <tr valign="top"> |
| <td>This option, <span style="background-color: yellow;">available in '''Trainz Plus''' only</span>, allows you to set the brush size to work in the default '''HD''' (High Definition) or at a lower '''SD''' (Standard Definition) which is easier to work with over larger areas. | | <td> |
| <br> | | <table width=210 bgcolor=#ffffff cellpadding=2> |
| <table> | | <tr valign="top"> |
| | <td width=40>[[image:S20_FineAdjustmentToolIcon.png|link=]]</td> |
| | <td width=170>'''Keyboard Shortcut:''' <span style="color: white; background-color: black; font-weight: 700; font-size: 17px;"> D </span></td> |
| | </tr> |
| | </table> |
| | </td> |
| | </tr> |
| | </table> |
| | </td> |
| | <td width=786 bgcolor="lightcyan"><span style="font-weight: 700; font-size: 15px;">The <span style="color: white; background-color: black;"> Fine Adjustment Tool </span> makes 3D adjustments (XYZ position and rotations) to objects in a Trainz World</span></td> |
| | </tr> |
| | </table> |
| | |
| | <table width=1000> |
| <tr valign="top"> | | <tr valign="top"> |
| | <td width=200>[[image:FineAdjustmentTools_S20.png|link=|alt=Fine Adjustment Tools]]</td> |
| <td> | | <td> |
| <table width=500 bgcolor=#000000 cellpadding=2> | | <table bgcolor=#000000 width=800 cellpadding=2> |
| <tr valign="top"> | | <tr valign="top"> |
| <td> | | <td> |
| <table bgcolor=#ffffff cellpadding=2> | | <table bgcolor=#ffffb0 width=796 cellpadding=2> |
| <tr valign="middle"> | | <tr valign="top"> |
| <td width=35>[[image:Information.png|35px|link=]]</td> | | <td width=25>[[image:NotePad.PNG|link=]]</td> |
| <td>The distinction between these two options is:-</td> | | <td><span style="font-size: 17px; font-weight: 700;">Notes:'''</span><br> |
| | ---- |
| | The [[image:S20_FineAdjustmentToolIcon.png|link=|20px]] '''Fine Adjustment Tool''' can move any selected object or objects (except '''Ground Textures''' and '''Effect Layers''') in any direction horizontally and vertically. It can also rotate those objects through 3 different axes of rotation. |
| | </td> |
| </tr> | | </tr> |
| <tr valign="top">
| | </table> |
| <td><span style="font-weight: 700; font-size: 15px; color: white; background-color: black;"> HD </span></td>
| | </td> |
| <td>This is the full '''HD Mode''' where the minimum brush size is '''0.12m''' (12cm). This is the default selection</td>
| |
| </tr> | | </tr> |
| | </table> |
| | |
| | <table width=800> |
| <tr valign="top"> | | <tr valign="top"> |
| <td><span style="font-weight: 700; font-size: 15px; color: white; background-color: black;"> SD </span></td> | | <td>The most obvious feature of the [[image:S20_FineAdjustmentToolIcon.png|link=|20px]] '''Fine Adjustment Tool''' is the '''3D Anchor Frame''' it adds to a selected object. The frame is made of 3 straight and 3 curved coloured lines, called <span style="font-weight: 700; font-size: 15px;">Anchors</span>, which control position and orientation.<br></td> |
| <td>This is a reduced '''HD Mode''' where the minimum brush size is '''2m'''</td>
| |
| </tr> | | </tr> |
| <tr valign="top"> | | <tr valign="top"> |
| <td colspan=2>Both modes:- | | <td> |
| <table> | | <table> |
| <tr valign="top"> | | <tr valign="top"> |
| <td width=10>[[image:DotPoint.JPG|10px|link=]]</td> | | <td width=250>[[image:FineAdjust3DFrame_S20.png|link=]]</td> |
| <td>have all the normal '''HD''' controls and features</td> | | <td width=550>The '''Anchor''' controls are:- |
| | <table width=550> |
| | <tr valign="top"> |
| | <td colspan=2><span style="font-weight: 700; font-size: 15px; color: white; background-color: black;"> The Horizontal and Vertical Anchors </span></td> |
| </tr> | | </tr> |
| <tr valign="top"> | | <tr valign="top"> |
| <td>[[image:DotPoint.JPG|10px|link=]]</td> | | <td width=150><span style="font-weight: 700; font-size: 15px; color: white; background-color: red;"> Red </span> <span style="font-weight: 700; font-size: 15px; color: white; background-color: green;"> Green </span> <span style="font-weight: 700; font-size: 15px; color: white; background-color: blue;"> Blue </span></td> |
| <td>will work anywhere within the grid squares of a '''HD Resolution''' route and are not restricted to the grid lines or intersections</td> | | <td>move the object (forward and back, or up and down) in the direction of the '''Anchor''' line</td> |
| </tr> | | </tr> |
| <tr valign="top"> | | <tr valign="top"> |
| <td>[[image:DotPoint.JPG|10px|link=]]</td> | | <td colspan=2><span style="font-weight: 700; font-size: 15px; color: white; background-color: black;"> The Rotational Anchors </span></td> |
| <td>can be used in different areas of the same baseboard</td>
| |
| </tr> | | </tr> |
| </table>
| |
| <table bgcolor=#ffffb0 cellpadding=2>
| |
| <tr valign="top"> | | <tr valign="top"> |
| <td width=25>[[image:NotePad.PNG|link=]]</td> | | <td width=150><span style="font-weight: 700; font-size: 15px; color: white; background-color: red;"> Red </span> <span style="font-weight: 700; font-size: 15px; color: white; background-color: green;"> Green </span> <span style="font-weight: 700; font-size: 15px; color: white; background-color: blue;"> Blue </span></td> |
| <td><span style="font-size: 17px;">'''Notes:'''</span><br> | | <td>rotate the object (clockwise and anti-clockwise) along the '''Anchor''' arc line. <span style="background-color: #ffffb0; font-weight: 700;"> Note: Not all objects will allow rotations in all directions </span></td> |
| ----
| |
| </td> | |
| </tr> | | </tr> |
| <tr valign="top"> | | <tr valign="top"> |
| <td width=10>[[image:DotPoint.JPG|10px|link=]]</td> | | <td colspan=2><span style="font-weight: 700; font-size: 15px; color: white; background-color: black;"> The Object Anchor </span></td> |
| <td>The '''HD Mode''' and '''SD Mode''' only work on baseboards set to '''HD Resolution'''</td>
| |
| </tr> | | </tr> |
| <tr valign="top"> | | <tr valign="top"> |
| <td>[[image:DotPoint.JPG|10px|link=]]</td> | | <td colspan=2><span style="font-weight: 700; font-size: 15px; background-color: black;">    </span> (black central dot) moves the object in any horizontal direction</td> |
| <td>Selecting '''HD Mode''' will not convert a '''10m''' or '''5m''' resolution baseboard to '''HD''' resolution</td>
| |
| </tr> | | </tr> |
| </table> | | </table> |
| Line 2,909: |
Line 2,975: |
| </tr> | | </tr> |
| </table> | | </table> |
| <table width=500>
| | </td> |
| <tr valign="top">
| |
| <td colspan=2>The setting can be switched during editing without affecting or altering the existing terrain. For example:-</td>
| |
| </tr> | | </tr> |
| <tr valign="top"> | | </table> |
| <td width=10>[[image:DotPoint.JPG|10px|link=]]</td> | | <br> |
| <td>you can start painting the terrain using the '''HD Mode''' to give you the highest level of precision in one area of a baseboard</td>
| | <table width=1000 bgcolor=#000000 cellpadding=2> |
| | <tr> |
| | <td> |
| | <table width=996 bgcolor=#ffffff cellpadding=2> |
| | <tr> |
| | <td>For more detailed information on using the [[image:S20_FineAdjustmentToolIcon.png|link=|20px]] '''Fine Adjustment Tool''' see the '''Trainz Wiki''' page [[image:WikiLink.PNG|link=]] '''[[How_to_Use_S20_Tools#The Fine Adjustment Tool|How to Use the Surveyor 2.0 Tools]]'''</td> |
| </tr> | | </tr> |
| <tr valign="top">
| | </table> |
| <td>[[image:DotPoint.JPG|10px|link=]]</td>
| | </td> |
| <td>then switch to '''SD Mode''' to work in another area of the same (or a different) baseboard at a lower level of precision - which would be faster than using the '''HD Mode'''</td>
| |
| </tr> | | </tr> |
| | </table> |
| | <br> |
| | =='''The Marquee Tool'''== |
| | |
| | <table width=1000> |
| <tr valign="top"> | | <tr valign="top"> |
| <td>[[image:DotPoint.JPG|10px|link=]]</td>
| |
| <td>then switch back to '''HD Mode''' to continue working in the same, or another, high precision area</td>
| |
| </tr>
| |
| </table>
| |
| </td>
| |
| <td> | | <td> |
| <table width=500 bgcolor=#000000> | | <table width=214 bgcolor=#000000 cellpadding=2> |
| <tr valign="top"> | | <tr valign="top"> |
| <td> | | <td> |
| <table bgcolor=#ffffff> | | <table width=210 bgcolor=#ffffff cellpadding=2> |
| <tr valign="top"> | | <tr valign="top"> |
| <td colspan=2><span style="font-weight: 700; font-size: 15px;">Steps:</span> To switch between '''HD''' and '''SD''' modes at any time:-</td> | | <td width=40>[[image:S20_MarqueeToolIcon.png|link=]]</td> |
| | <td width=170>'''Keyboard Shortcut:''' <span style="color: white; background-color: black; font-weight: 700; font-size: 17px;"> F </span></td> |
| | </tr> |
| | </table> |
| | </td> |
| | </tr> |
| | </table> |
| | </td> |
| | <td width=786 bgcolor="lightcyan"><span style="font-weight: 700; font-size: 15px;">The <span style="color: white; background-color: black;"> Marquee Tool </span> selects and copies objects, deletes baseboards, adds new baseboards and sets their properties, adds texture to baseboards in a Trainz World, creates scrapbooks</span></td> |
| </tr> | | </tr> |
| | </table> |
| | |
| | <table width=1000> |
| | <tr valign="top"> |
| | <td width=200>[[image:MarqueeTools_S20.png|link=]]</td> |
| | <td> |
| | <table width=800 bgcolor=#000000 cellpadding=2> |
| <tr valign="top"> | | <tr valign="top"> |
| <td> | | <td> |
| <table> | | <table width=796 bgcolor=#ffffb0 cellpadding=2> |
| <tr valign="top"> | | <tr valign="top"> |
| <td> | | <td> |
| <table> | | <table> |
| <tr valign="top"> | | <tr valign="top"> |
| <td width=25>[[image:DotPoint1.JPG|link=]]</td> | | <td width=25>[[image:NotePad.PNG|link=]]</td> |
| <td><span style="font-weight: 700; font-size: 15px; background-color: lightcyan;"> Left Click </span> on the '''Main Menu''' [[image:EditMenu_S20.png|link=]] '''Edit Menu''' and select the <span style="font-weight: 700; font-size: 15px; color: white; background-color: black;"> Edit Route... </span> option<br> | | <td><span style="font-size: 17px; font-weight: 700;">Notes:'''</span><br> |
| '''Shortcut:''' Press <span style="font-weight: 700; font-size: 15px;"><span style="color: white; background-color: black;"> Ctrl </span> + <span style="color: white; background-color: black;"> E </span></span></td>
| | ---- |
| | </td> |
| </tr> | | </tr> |
| | </table> |
| | <table> |
| <tr valign="top"> | | <tr valign="top"> |
| <td colspan=2>This will open the '''Route Editor''' dialogue window which, <span style="background-color: yellow;">in '''Trainz Plus''' only</span>, has an additional control, the '''Route Edit Detail'''</td> | | <td width=10>[[image:DotPoint.JPG|10px|link=]]</td> |
| | <td>The '''Marquee Tool''' draws out a rectangular area, the '''Marquee Selection Area''', on the route. Any objects (including '''Ground Heights''', '''Ground Textures''' and '''Effect Layers''') that are inside the '''Marquee Selection Area''' or touched by its boundary can be selected to be added to a '''Scrapbook''', moved, rotated or deleted (scenery objects only)</td> |
| </tr> | | </tr> |
| <tr valign="top"> | | <tr valign="top"> |
| <td colspan=2>[[image:RouteEditDetailHD_S20.png|link=]]</td> | | <td>[[image:DotPoint.JPG|10px|link=]]</td> |
| | <td>The '''Marquee Selection Area''' can be drawn outside the baseboards to add new baseboards or over existing baseboards to delete or convert them</td> |
| </tr> | | </tr> |
| <tr valign="top">
| | </table> |
| <td>[[image:DotPoint2.JPG|link=]]</td>
| | </td> |
| <td><span style="font-weight: 700; font-size: 15px; background-color: lightcyan;"> Left Click </span> on either the <span style="font-weight: 700; font-size: 15px; color: white; background-color: black;"> SD </span> or the <span style="font-weight: 700; font-size: 15px; color: white; background-color: black;"> HD </span> button</td>
| |
| </tr> | | </tr> |
| <tr valign="top">
| | </table> |
| <td>[[image:DotPoint3.JPG|link=]]</td>
| | </td> |
| <td><span style="font-weight: 700; font-size: 15px; background-color: lightcyan;"> Left Click </span> on the [[image:Tick.PNG|link=|alt=Tick]] icon at the bottom right of the dialogue window to make the switch</td>
| |
| </tr> | | </tr> |
| </table> | | </table> |
| Line 2,964: |
Line 3,050: |
| </tr> | | </tr> |
| </table> | | </table> |
| </td> | | <br> |
| <td>[[image:EditMenuOptions_S20.png|link=]]</td> | | <table width=800 bgcolor=#000000 cellpadding=2> |
| | <tr> |
| | <td> |
| | <table width=796 bgcolor=#ffffff cellpadding=2> |
| | <tr> |
| | <td>For more detailed information on using the '''Marquee Tool''' see the '''Trainz Wiki''' page [[image:WikiLink.PNG|link=]] '''[[How_to_Use_S20_Tools#The Marquee Tool|How to Use the Surveyor 2.0 Tools]]'''</td> |
| </tr> | | </tr> |
| </table> | | </table> |
| Line 2,972: |
Line 3,063: |
| </table> | | </table> |
| <br> | | <br> |
| <table bgcolor=#000000 cellpadding=2> | | <table width=1000> <!-- BEGIN Nav Buttons Table --> |
| <tr valign="top"> | | <tr valign="top"> |
| <td> | | <td width=629><span id="stepOptions"></span> |
| <table bgcolor=#ffffb0 cellpadding=2> | | ='''The Tool Options Palette'''= |
| | </td> |
| | <td width=50>[[image:SkipDown.png|link=#skip Tool Options Popups|Skip Down]]</td> |
| | <td width=50> </td> <!-- for SkipUp --> |
| | <td width=46>[[image:BackToTop.png|link=#top|alt=Top|Top]]</td> |
| | <td width=75>[[image:NextUp.png|link=#stepTools|alt=Next Up|Next Up]]</td> |
| | <td width=75>[[image:NextDown.png|link=#stepAssets|alt=Next Down|Next Down]]</td> |
| | <td width=75>[[image:BackToBottom.png|link=#bottom|alt=Bottom|Bottom]]</td> |
| | </tr> |
| | </table> <!-- END Nav Buttons Table --> |
| | |
| | <table width=1000 bgcolor=#ffffb0 cellpadding=2> |
| <tr valign="top"> | | <tr valign="top"> |
| <td width=25>[[image:NotePad.PNG|link=]]</td> | | <td><span style="font-weight: 700; font-size: 15px;">This is a <span style="color: white; background-color: blue;"> Surveyor Only </span> palette</span></td> |
| <td>When using <span style="font-weight: 700; font-size: 15px; color: white; background-color: black;"> SD </span> mode brush sizes less than '''2m''' will be ignored and a '''2m''' brush size will be used instead. Larger brush sizes can be set and used</td>
| |
| </tr> | | </tr> |
| </table> | | </table> |
| | <br> |
| | <table width=1000 bgcolor=#000000> |
| | <tr valign="top"> |
| | <td> |
| | <table width=996 bgcolor=#ffe89a cellpadding=2> |
| | <tr valign="middle"> |
| | <td width=45>[[image:PalettesIcon_S20.png|link=]]</td> |
| | <td>If the <span style="font-weight: 700; font-size: 15px; color: white; background-color: #797979;"> Tool Options Palette </span> is not visible on the screen then refer to [[image:PageLink.PNG|link=]] '''[[#Hiding and Showing Palettes and Windows|Hiding and Showing Palettes and Windows]]''' at the top of this document |
| </td> | | </td> |
| </tr> | | </tr> |
| Line 2,987: |
Line 3,096: |
| </tr> | | </tr> |
| </table> | | </table> |
| </td> | | <br> |
| | <table width=1000 bgcolor="lightcyan" cellpadding=2> |
| | <tr valign="top"> |
| | <td width=10>[[image:BlueDot10x10.png|link=]]</td> |
| | <td>This palette is used by various tools to set controls and parameters. For a detailed description of all the options presented by the <span style="font-weight: 700; font-size: 15px; color: white; background-color: #797979;"> Tools Palette </span> for the different tools, see the '''Trainz Wiki''' page [[image:WikiLink.PNG|link=]] '''[[How_to_Use_S20_Tools#The_Tools_Palette|How to Use the Surveyor 2.0 Tools]]'''</td> |
| </tr> | | </tr> |
| </table> | | </table> |
| Line 2,996: |
Line 3,109: |
| <table width=996 bgcolor=#ffffff cellpadding=2> | | <table width=996 bgcolor=#ffffff cellpadding=2> |
| <tr valign="middle"> | | <tr valign="middle"> |
| <td width=35>[[image:Information.png|35px|link=]]</td> | | <td width=35>[[image:Information35.png|link=]]</td> |
| <td><span style="font-weight: 700; font-size: 15px;">You are limited to using a maximum of 16 ground textures in each HD baseboard<br> | | <td><span style="font-size: 15px;">All '''Heights''' and '''Positions''' in the '''Tool Options Palette''' are entered and displayed in <span style="background-color: yellow; font-weight: 700;">metres</span> even if you are using '''Imperial''' units (feet) for your distance measurements. '''Heights''' are measured from the <span style="background-color: yellow; font-weight: 700;">Absolute ZERO metres</span> level and not from the height of the current baseboard.</span></td> |
| See [[image:PageLink.PNG|link=]] [[#HD Ground Texture|HD Resolution and Ground Textures]] below for information on this restriction</span></td>
| |
| </tr> | | </tr> |
| </table> | | </table> |
| Line 3,005: |
Line 3,117: |
| </table> | | </table> |
| <br> | | <br> |
| <table width=1000> <!-- BEGIN Section Nav Buttons --> | | <table width=1000> |
| <tr valign="top"> | | <tr valign="top"> |
| <td width=629><span id="Texture Tips"></span> | | <td colspan=2>All the '''Tool Options''' controls and settings are shown in the image below. The controls are shown in the image as being "inactive". An "active" control will have its icon (to the left of the control name) shown in <span style="font-weight: 700; font-size: 15px; color: gold; background-color: black;"> Gold </span>. Different '''Brush Types''' and '''Brush Actions''' will activate different controls.</td> |
| ===<span style="font-weight: 700; font-size: 17px; color: white; background-color: blue;"> Texture Painting Tips </span>===
| |
| </td>
| |
| <td width=50> </td>
| |
| <td width=50> </td>
| |
| <td width=46>[[image:SkipMinorDown.png|link=#Default Ground Texture|Down]][[image:SkipMinorUp.png|link=#Texture Brush Resolution|Up]]</td> <!-- for Top and Minor Up/Down -->
| |
| <td width=75> </td>
| |
| <td width=75> </td>
| |
| <td width=75> </td> <!-- for Bottom -->
| |
| </tr> | | </tr> |
| </table> <!-- END Section Nav Buttons -->
| |
|
| |
| <table width=1000 bgcolor=#000000 cellpadding=2>
| |
| <tr valign="top"> | | <tr valign="top"> |
| | <td width=220>[[image:ToolOptionsPaletteNone_S20.png|link=]]</td> |
| <td> | | <td> |
| <table width=996 bgcolor=#ffffe0 cellpadding=2> | | <table bgcolor=#000000 width=780 cellpadding=2> |
| <tr valign="top"> | | <tr valign="top"> |
| <td width=25>[[image:PencilTips.PNG|link=]]</td> | | <td> |
| <td><span style="font-weight: 700; font-size: 15px;">Rotate the Brush While Painting</span> | | <table bgcolor=#ffffff width=776 align="left"> |
| <table>
| |
| <tr valign="top"> | | <tr valign="top"> |
| <td>The texture brush can be rotated while painting to help breakup any repetition patterns that may form. These patterns can appear when a non-uniform texture (e.g. a photoimage of an actual ground surface) is used as the texture. The rotation will "randomise" the texture appearance to avoid the patterns forming. Use one of the following techniques:-</td> | | <td width=90><span style="font-size: 15px; font-weight: 700; color: gold; background-color: black;"> Radius </span></td> |
| | <td width=686><span style="font-weight: 700; font-size: 15px; color: white; background-color: black;"> All Brushes </span> the brush radius (metres)</td> |
| </tr> | | </tr> |
| </table>
| |
| <table bgcolor=#ffffff cellpadding=2>
| |
| <tr valign="top"> | | <tr valign="top"> |
| <td width=25>[[image:Ablue.png|link=]]</td> | | <td colspan=2> |
| <td>While painting with the texture brush periodically alter the <span style="font-weight: 700; font-size: 15px; color: white; background-color: black;"> Rotation </span> setting in the <span style="font-weight: 700; font-size: 15px; color: white; background-color: #797979;"> Tool Options Palette </span> by any required angle <span style="font-weight: 700; font-size: 15px;">OR</span></td> | | <table bgcolor=#ffffb0> |
| </tr>
| |
| <tr valign="top"> | | <tr valign="top"> |
| <td>[[image:Bblue.png|link=]]</td> | | <td width=90 align="right">'''Range:''' </td> |
| <td>While painting with the texture brush hold down the <span style="font-weight: 700; font-size: 15px; color: white; background-color: black;"> [ </span> or the <span style="font-weight: 700; font-size: 15px; color: white; background-color: black;"> ] </span> key. This will continuosly rotate the brush texture in 10° increments while painting '''BUT''' it can result in the texture image looking "blurred" and losing detail. This will be particulary noticeable where the texture is made from a photo image, such as the rocks in a cliff face or the "litter" on a forest floor. A variation of this technique that avoids this blurring effect in such situations is to periodically "tap" one of those keys instead of holding it down continuously</td>
| | <td width=686>'''5m''' and above for '''5m''' and '''10m''' grid resolutions<br> |
| | '''0.12m''' and above for '''HD Terrain''' (available in '''Trainz Plus''' only)<br> |
| | For '''Effect Layers''' the minimum brush size will vary. See '''Notes:''' below</td> |
| </tr> | | </tr> |
| </table> | | </table> |
| Line 3,044: |
Line 3,145: |
| </tr> | | </tr> |
| <tr valign="top"> | | <tr valign="top"> |
| <td colspan=2> | | <td><span style="font-size: 15px; font-weight: 700; color: gold; background-color: black;"> Height </span></td> |
| ---- | | <td><span style="font-weight: 700; font-size: 15px; color: white; background-color: black;"> Set Ground Height </span> <span style="font-weight: 700; font-size: 15px; color: white; background-color: black;"> Water Effect Layer </span> <span style="font-weight: 700; font-size: 15px; color: white; background-color: black;"> Object Placement </span> the brush or object height (metres)</td> |
| </td> | |
| </tr> | | </tr> |
| <tr valign="top"> | | <tr valign="top"> |
| <td width=25>[[image:PencilTips.PNG|link=]]</td> | | <td colspan=2> |
| <td><span style="font-weight: 700; font-size: 15px;">Paint Under Splines and Mesh Objects</span> | | <table bgcolor=#ffffb0> |
| <table>
| |
| <tr valign="top"> | | <tr valign="top"> |
| <td>Once a spline or scenery mesh object has been added it can have a ground texture painted beneath it. Use the following technique:-</td> | | <td width=90 align="right">'''Range:''' </td> |
| | <td width=686>'''-3000m''' to '''3000m'''</td> |
| </tr> | | </tr> |
| </table> | | </table> |
| <table bgcolor=#ffffff cellpadding=2> | | </td> |
| | </tr> |
| <tr valign="top"> | | <tr valign="top"> |
| <td colspan=2><span style="font-weight: 700; font-size: 15px;">Steps:</span> To Paint a Texture Under any Object:-</td> | | <td><span style="font-size: 15px; font-weight: 700; color: gold; background-color: black;"> Sensitivity </span></td> |
| | <td><span style="font-weight: 700; font-size: 15px; color: white; background-color: black;"> Ground Heights </span> <span style="font-weight: 700; font-size: 15px; color: white; background-color: black;"> Ground Textures </span> <span style="font-weight: 700; font-size: 15px; color: white; background-color: black;"> Scrapbook Data </span> <span style="font-weight: 700; font-size: 15px; color: white; background-color: black;"> Water Effect Layers </span><br><span style="font-weight: 700; font-size: 15px; color: white; background-color: black;"> Color Effect Layer </span> the rate at which the ground height/water layer is raised/lowered or the texture being "painted" becomes visible</td> |
| </tr> | | </tr> |
| <tr valign="top"> | | <tr valign="top"> |
| <td width=25>[[image:DotPoint1.JPG|link=]]</td> | | <td colspan=2> |
| <td>Use either the [[image:S20_FreeMoveToolIcon.png|link=|20px]] '''[[#The Free Move Tool|Free Move Tool]]''' or the [[image:S20_FineAdjustmentToolIcon.png|link=|20px]] '''[[#The Fine Adjustment Tool|Fine Adjustment Tool]]''' to select the object, spline segment or multiple spline segments. You can also use the [[image:S20_PlacementToolIcon.png|link=|20px]] '''[[#The Placement Tool|Placement Tool]]''' on a single object immediately after it has been added by the '''Placement Tool'''</td> | | <table bgcolor=#ffffb0> |
| | <tr valign="top"> |
| | <td width=90 align="right">'''Range:''' </td> |
| | <td width=686>'''1%''' (very slowly) to<br> |
| | '''100%''' (very quickly)</td> |
| </tr> | | </tr> |
| <tr valign="top">
| | </table> |
| <td>[[image:DotPoint2.JPG|link=]]</td>
| | </td> |
| <td>In the <span style="font-weight: 700; font-size: 15px; color: white; background-color: #797979;"> Assets Palette </span> select a texture</td>
| |
| </tr> | | </tr> |
| <tr valign="top"> | | <tr valign="top"> |
| <td>[[image:DotPoint3.JPG|link=]]</td> | | <td><span style="font-size: 15px; font-weight: 700; color: gold; background-color: black;"> Grade </span></td> |
| <td>In the <span style="font-weight: 700; font-size: 15px; color: white; background-color: #797979;"> Tool Options Palette </span> set the brush <span style="font-weight: 700; font-size: 15px; color: gold; background-color: black;"> Radius </span> value which will set the width of the painted area out from the centre of the object. The smaller the radius the less "realistic" the texture painting can appear</td> | | <td><span style="font-weight: 700; font-size: 15px; color: white; background-color: black;"> Ground Height Grade </span> <span style="font-weight: 700; font-size: 15px; color: white; background-color: black;"> Water Effect Layer </span> <span style="font-weight: 700; font-size: 15px; color: white; background-color: black;"> Spline Object Placement </span> the slope of the ground, spline or water effect layer</td> |
| </tr> | | </tr> |
| <tr valign="top"> | | <tr valign="top"> |
| <td>[[image:DotPoint4.JPG|link=]]</td> | | <td colspan=2> |
| <td>Open the '''Context Menu''' (<span style="font-weight: 700; font-size: 15px; background-color: lightcyan;"> Left Click </span> on its icon or press the <span style="font-weight: 700; font-size: 15px; color: white; background-color: black;"> T </span> key) of the selected object</td> | | <table bgcolor=#ffffb0> |
| </tr>
| |
| <tr valign="top"> | | <tr valign="top"> |
| <td>[[image:DotPoint5.JPG|link=]]</td> | | <td width=90 align="right">'''Range:''' </td> |
| <td>Select the option <span style="font-weight: 700; font-size: 15px; color: white; background-color: black;"> Paint Under Selected </span> - if you have not selected a texture in the <span style="font-weight: 700; font-size: 15px; color: white; background-color: #797979;"> Assets Palette </span> then this option will not be available</td>
| | <td width=686>'''0%''' (flat) to<br> |
| | '''±100%''' (steep but '''not''' vertical)</td> |
| </tr> | | </tr> |
| </table> | | </table> |
| Line 3,084: |
Line 3,189: |
| </tr> | | </tr> |
| <tr valign="top"> | | <tr valign="top"> |
| <td colspan=2> | | <td><span style="font-size: 15px; font-weight: 700; color: gold; background-color: black;"> Angle </span></td> |
| ---- | | <td><span style="font-weight: 700; font-size: 15px; color: white; background-color: black;"> Ground Height Grade </span> <span style="font-weight: 700; font-size: 15px; color: white; background-color: black;"> Water Effect Layer </span> grade direction (compass degrees)</td> |
| </td> | |
| </tr> | | </tr> |
| <tr valign="top"> | | <tr valign="top"> |
| <td width=25>[[image:PencilTips.PNG|link=]]</td> | | <td colspan=2> |
| <td><span style="font-weight: 700; font-size: 15px;">Use a Color Effect Layer to Enhance a Ground Texture</span> <span style="font-weight: 700; background-color: yellow;"> The Color Effect Layer is only available in Trainz Plus when using the HD resolution </span><br>
| | <table bgcolor=#ffffb0> |
| A color effect layer is used to add tinting to existing ground textures in selected areas of a route. Use the following technique:-
| |
| <table bgcolor=#ffffff cellpadding=2> | |
| <tr valign="top"> | | <tr valign="top"> |
| <td colspan=2><span style="font-weight: 700; font-size: 15px;">Steps:</span> To Paint a Color Effect Layer Over a Texture:-</td> | | <td width=90 align="right">'''Range:''' </td> |
| | <td width=686>'''0°''' (North) to '''±359°'''<br> |
| | a negative value reverses the grade direction</td> |
| | </tr> |
| | </table> |
| | </td> |
| </tr> | | </tr> |
| <tr valign="top"> | | <tr valign="top"> |
| <td width=25>[[image:DotPoint1.JPG|link=]]</td> | | <td><span style="font-size: 15px; font-weight: 700; color: gold; background-color: black;"> Rotation </span></td> |
| <td>In the <span style="font-weight: 700; font-size: 15px; color: white; background-color: #797979;"> Layers Palette </span> select the '''Color Effect Layer'''. If no color effect layer is present then you will need to create one (see [[image:PageLink.PNG|link=]] '''[[#Edit Color|Edit a Color Effect Layer]]''') or load one (see [[image:PageLink.PNG|link=]] '''[[#Load Preset|Load a Preset Effect Layer]]''')</td> | | <td><span style="font-weight: 700; font-size: 15px; color: white; background-color: black;"> Ground Textures </span> <span style="font-weight: 700; font-size: 15px; color: white; background-color: black;"> Scrapbook Data </span> initial rotation angle (degrees)</td> |
| </tr> | | </tr> |
| <tr valign="top"> | | <tr valign="top"> |
| <td>[[image:DotPoint2.JPG|link=]]</td> | | <td colspan=2> |
| <td>In the <span style="font-weight: 700; font-size: 15px; color: white; background-color: #797979;"> Tool Options Palette </span> select the brush <span style="font-weight: 700; font-size: 15px; color: gold; background-color: black;"> Radius </span>, <span style="font-weight: 700; font-size: 15px; color: gold; background-color: black;"> Sensitivity </span> and the <span style="font-weight: 700; font-size: 15px; color: gold; background-color: black;"> Color </span> to be painted. See [[image:PageLink.PNG|link=]] '''[[#Color Effect Layer|Color Effect Layer]]''' for the details</td> | | <table bgcolor=#ffffb0> |
| </tr>
| |
| <tr valign="top"> | | <tr valign="top"> |
| <td>[[image:DotPoint3.JPG|link=]]</td> | | <td width=90 align="right">'''Range:''' </td> |
| <td>Use the brush to paint the effect over a selected area</td> | | <td width=686>'''0°''' to '''±360°'''</td> |
| </tr> | | </tr> |
| </table> | | </table> |
| Line 3,112: |
Line 3,218: |
| </tr> | | </tr> |
| <tr valign="top"> | | <tr valign="top"> |
| <td colspan=2> | | <td><span style="font-size: 15px; font-weight: 700; color: gold; background-color: black;"> Scale </span></td> |
| ---- | | <td> <span style="font-weight: 700; font-size: 15px; color: white; background-color: black;"> Ground Textures </span> <span style="font-weight: 700; font-size: 15px; color: white; background-color: black;"> Scrapbook Data (Clone Brush) </span> the brush scaling factor</td> |
| </td> | |
| </tr> | | </tr> |
| <tr valign="top"> | | <tr valign="top"> |
| <td width=25>[[image:PencilTips.PNG|link=]]</td> | | <td colspan=2> |
| <td><span style="font-weight: 700; font-size: 15px;">Identify an Existing Ground Texture and its Settings</span><br>
| | <table bgcolor=#ffffb0> |
| If you need to identify a texture already in the route and duplicate its settings then use the following technique:-
| |
| <table bgcolor=#ffffff cellpadding=2> | |
| <tr valign="top"> | | <tr valign="top"> |
| <td colspan=2><span style="font-weight: 700; font-size: 15px;">Steps:</span> To Identify a Ground Texture and Copy its Settings:-</td> | | <td width=90 align="right">'''Range:''' </td> |
| | <td width=686>'''0.01%''' = smallest to<br> |
| | '''100%''' = full size to<br> |
| | '''>100%''' larger than full size</td> |
| | </tr> |
| | </table> |
| | </td> |
| </tr> | | </tr> |
| <tr valign="top"> | | <tr valign="top"> |
| <td width=25>[[image:DotPoint1.JPG|link=]]</td> | | <td><span style="font-size: 15px; font-weight: 700; color: gold; background-color: black;"> Intensity </span></td> |
| <td>Move the mouse pointer onto the texture used in the route</td> | | <td><span style="font-weight: 700; font-size: 15px; color: white; background-color: black;"> TurfFX & Clutter Effect Layers </span> the effect layer '''density''' within the brush area</td> |
| </tr> | | </tr> |
| <tr valign="top"> | | <tr valign="top"> |
| <td>[[image:DotPoint2.JPG|link=]]</td> | | <td colspan=2> |
| <td>Hold down the <span style="font-weight: 700; font-size: 15px; color: white; background-color: black;"> Alt </span> key and <span style="font-weight: 700; font-size: 15px; background-color: lightcyan;"> Left Click </span> on the texture. This will copy the <span style="font-weight: 700; font-size: 15px; color: gold; background-color: black;"> Rotation </span> and <span style="font-weight: 700; font-size: 15px; color: gold; background-color: black;"> Scale </span> settings from the placed texture into the <span style="font-weight: 700; font-size: 15px; color: white; background-color: #797979;"> Tool Options Palette </span> as well as select that texture in the <span style="font-weight: 700; font-size: 15px; color: white; background-color: #797979;"> Assets Palette </span></td> | | <table bgcolor=#ffffb0> |
| | <tr valign="top"> |
| | <td width=90 align="right">'''Range:''' </td> |
| | <td width=686>'''1%''' (almost none) to<br> |
| | '''100%''' (maximum)</td> |
| </tr> | | </tr> |
| </table> | | </table> |
| | </td> |
| | </tr> |
| | <tr valign="top"> |
| | <td width=90><span style="font-size: 15px; font-weight: 700; color: gold; background-color: black;"> Condition </span></td> |
| | <td><span style="font-weight: 700; font-size: 15px; color: white; background-color: black;"> Track Spline Object Placement </span> sets the track '''condition''' (or "ride comfort") for each segment</td> |
| | </tr> |
| | <tr valign="top"> |
| | <td colspan=2> |
| | <table bgcolor=#ffffb0> |
| | <tr valign="top"> |
| | <td width=90 align="right">'''Range:''' </td> |
| | <td width=686>'''1%''' (terrible track condition) to<br> |
| | '''50%''' (average track condition) to<br> |
| | '''100%''' (perfect track condition)<br> |
| </td> | | </td> |
| </tr> | | </tr> |
| </table> | | </table> |
| </td> | | </td> |
| | </tr> |
| | <tr valign="top"> |
| | <td><span style="font-size: 15px; font-weight: 700; color: gold; background-color: black;"> Shape </span></td> |
| | <td><span style="font-weight: 700; font-size: 15px; color: white; background-color: black;"> Scrapbook Data </span> brush shape</td> |
| | </tr> |
| | <tr valign="top"> |
| | <td colspan=2> |
| | <table bgcolor=#ffffb0> |
| | <tr valign="top"> |
| | <td width=90 align="right">'''Options:''' </td> |
| | <td width=145>[[image:BrushToolsScrapShapes_S20.png|link=]]</td> |
| | <td>'''Circle''' and '''Square''' will set the brush to the selected shape<br> |
| | '''Natural''' will set the brush to the same shape as the '''Marquee''' that created the scrapbook, which may be rectangular</td> |
| </tr> | | </tr> |
| </table> | | </table> |
| <br>
| |
| <span id="Default Baseboard Ground Texture"></span>
| |
| <table width=1000> <!-- BEGIN Section Nav Buttons -->
| |
| <tr valign="top">
| |
| <td width=629><span id="Default Ground Texture"></span>
| |
| ===<span style="font-weight: 700; font-size: 17px; color: white; background-color: blue;"> Default Baseboard Ground Texture </span>===
| |
| </td> | | </td> |
| <td width=50> </td>
| |
| <td width=50> </td>
| |
| <td width=46>[[image:SkipMinorDown.png|link=#HD Ground Texture|Down]][[image:SkipMinorUp.png|link=#Texture Tips|Up]]</td> <!-- for Top and Minor Up/Down -->
| |
| <td width=75> </td>
| |
| <td width=75> </td>
| |
| <td width=75> </td> <!-- for Bottom -->
| |
| </tr> | | </tr> |
| </table> <!-- END Section Nav Buttons --> | | <tr valign="top"> |
| | | <td><span style="font-size: 15px; font-weight: 700; color: gold; background-color: black;"> Color </span></td> |
| <table width=1000> | | <td><span style="font-weight: 700; font-size: 15px; color: white; background-color: black;"> Color Effect Layer </span> colour selection ('''RGB''' and '''Brightness''' values) - '''Trainz Plus''' only</td> |
| <tr> | |
| <td colspan=2>When a new route is created or a new baseboard is added it will be covered with the ground texture for the selected '''Region''' or the default texture if no region has been set. This can be changed to a different texture (including to the standard '''TRS19/TRS22''' grid pattern).</td> | |
| </tr> | | </tr> |
| <tr valign="top"> | | <tr valign="top"> |
| <td width=360>[[image:MainMenuSetGroundTexture.png|link=]]</td> | | <td colspan=2> |
| | <table bgcolor=#ffffb0> |
| | <tr valign="top"> |
| | <td width=90 align="right">'''Range:''' </td> |
| | <td width=686> |
| | <table> |
| | <tr valign="top"> |
| | <td>[[image:BrushToolsColorLayerPicker_S20.png|link=]]</td> |
| <td> | | <td> |
| <table bgcolor=#000000 cellpadding=2> | | <table> |
| <tr valign="top"> | | <tr valign="top"> |
| <td> | | <td colspan=2><span style="font-weight: 700; font-size: 15px; background-color: lightcyan;"> Left Click </span> on the coloured box next to the title '''Color''' to open the colour selector.<br> |
| <table bgcolor=#ffffff cellpadding=2> | | <span style="font-weight: 700; font-size: 15px;">Set a Colour:</span> Select a colour by either:-</td> |
| | </tr> |
| <tr valign="top"> | | <tr valign="top"> |
| <td colspan=2><span style="font-weight: 700; font-size: 15px;">Steps:</span> To disable the current default ground texture (easiest method):-</td> | | <td width=10>[[image:DotPoint.JPG|10px|link=]]</td> |
| | <td>a <span style="font-weight: 700; font-size: 15px; background-color: lightcyan;"> Left Click </span> on the colour in the colour picker device, <span style="font-weight: 700; font-size: 15px;">OR</span> </td> |
| </tr> | | </tr> |
| <tr valign="top"> | | <tr valign="top"> |
| <td width=20>[[image:DotPoint1.JPG|link=]]</td> | | <td>[[image:DotPoint.JPG|10px|link=]]</td> |
| <td>open the [[image:SurveyorDisplayIcon.png|link=]] '''Surveyor Display Menu'''</td> | | <td>enter its '''RGB''' value in '''Hexadecimal'''</td> |
| </tr> | | </tr> |
| <tr valign="top"> | | <tr valign="top"> |
| <td>[[image:DotPoint2.JPG|link=]]</td> | | <td colspan=2><span style="font-weight: 700; font-size: 15px;">Optionally:</span> Set a brightness value for the selected colour by moving the slider up or down</td> |
| <td>select the <span style="font-weight: 700; font-size: 15px; color: white; background-color: black;"> Ground </span> option</td>
| |
| </tr> | | </tr> |
| <tr valign="top"> | | <tr valign="top"> |
| <td>[[image:DotPoint3.JPG|link=]]</td> | | <td colspan=2><span style="font-weight: 700; font-size: 15px;">Reset:</span> <span style="font-weight: 700; font-size: 15px; background-color: lightcyan;"> Left Click </span> the '''Reset button''' (the circular arrow on the bottom right) to cancel your changes and reset the colour to its default value. This default value is set using the '''Edit Effect Layer...''' - see '''[[#Color Layer Edit|Edit Color Effect Layer]]''' below</td> |
| <td>select the <span style="font-weight: 700; font-size: 15px; color: white; background-color: black;"> Grid </span> sub-option. This will use the current grid texture.</td>
| | </tr> |
| | </table> |
| | </td> |
| | </tr> |
| | </table> |
| | </td> |
| </tr> | | </tr> |
| </table> | | </table> |
| Line 3,187: |
Line 3,326: |
| </td> | | </td> |
| </tr> | | </tr> |
| <tr> | | </table> |
| <td colspan=2>A more complex solution is to edit an existing '''Region''' or create one of your own to add your preferred ground texture (such as the standard '''TRS19/22''' grid pattern) to each new route you create and every new baseboard that you add.</td>
| | </td> |
| </tr> | | </tr> |
| </table> | | </table> |
| | | <br> |
| <table bgcolor=#000000 width=1000 cellpadding=2> | | <table width=1000 bgcolor=#000000 cellpadding=2> |
| <tr valign="top"> | | <tr valign="top"> |
| <td> | | <td> |
| <table bgcolor=#ffffb0 cellpadding=2> | | <table width=996 bgcolor=#ffffe0 cellpadding=2> |
| <tr valign="top"> | | <tr valign="top"> |
| <td width=25>[[image:NotePad.PNG|link=]]</td> | | <td width=25>[[image:PencilTips.PNG|link=]]</td> |
| <td><span style="font-size: 17px; font-weight: 700;">Notes:</span><br> | | <td> |
| ----
| |
| <table> | | <table> |
| <tr valign="top"> | | <tr valign="top"> |
| <td> | | <td width=10>[[image:DotPoint.JPG|10px|link=]]</td> |
| <table width=500> | | <td>On the right of each data entry box is a pair of '''Up/Down''' arrow controls. <span style="font-weight: 700; font-size: 15px; background-color: lightcyan;"> Left Click and Drag </span> up or down on these to adjust the value in smaller increments</td> |
| | </tr> |
| <tr valign="top"> | | <tr valign="top"> |
| <td>The '''Baseboard Ground Texture''', chosen from the '''Surveyor Display Menu''' or by specifying a '''Region''', will become the default for every new route you create and every new baseboard you add, until you change it to something else.</td> | | <td>[[image:DotPoint.JPG|10px|link=]]</td> |
| | <td>Each data entry box has a drop down menu list of options. <span style="font-weight: 700; font-size: 15px; background-color: lightcyan;"> Right Click </span> inside the box to open its menu list - see [[image:PageLink.PNG|link=]] '''[[#Info Settings Menu|Info Settings Menu]]''' above for the details</td> |
| </tr> | | </tr> |
| </table> | | </table> |
| </td> | | </td> |
| | </tr> |
| | </table> |
| | </td> |
| | </tr> |
| | </table> |
| | <br> |
| | <table width=1000 bgcolor=#000000 cellpadding=2> |
| | <tr valign="top"> |
| <td> | | <td> |
| <table cellpadding=2 bgcolor="Aquamarine"> | | <table width=996 bgcolor=#ffffb0 cellpadding=2> |
| <tr valign="top"> | | <tr valign="top"> |
| <td>[[image:LinkWiki.PNG|link=]]</td>
| |
| <td> | | <td> |
| Information on creating and editing '''Region''' assets can be found on the '''Trainz Wiki''' at:-<br>
| | <table width=996> |
| :'''[[How_to_Create_a_Region_Asset|How to Create a Region Asset]]'''
| | <tr valign="top"> |
| | <td width=25>[[image:NotePad.PNG|link=]]</td> |
| | <td><span style="font-size: 17px; font-weight: 700;">Notes:'''</span><br> |
| | ---- |
| </td> | | </td> |
| | </tr> |
| | </table> |
| | <table width=996> |
| | <tr valign="top"> |
| | <td width=10>[[image:DotPoint.JPG|10px|link=]]</td> |
| | <td>Unlike '''Surveyor Classic''', there is no upper limit to the brush <span style="font-size: 15px; font-weight: 700; color: gold; background-color: black;"> Radius </span>. Brushes of hundreds of metres (even kilometres) in size are possible. However, the program performance will '''decrease''' as the brush radius '''increases'''. If you are using the brush to set an entire baseboard, or many baseboards, to a specific height then the '''Marquee Tool''' would be a better choice.</td> |
| | </tr> |
| | <tr valign="top"> |
| | <td>[[image:DotPoint.JPG|10px|link=]]</td> |
| | <td>The <span style="font-size: 15px; font-weight: 700; color: gold; background-color: black;"> Grade </span> is defined as '''vertical rise''' divided by '''horizontal distance''' converted to a percentage figure. So a grade of 100% (the maximum allowed) would mean a slope formed by the height and distance both being the same value (e.g. a height increase of 50m over a distance of 50m). A vertical slope (e.g. a cliff) would have an infinite grade which is currently impossible in Surveyor.</td> |
| | </tr> |
| | <tr valign="top"> |
| | <td>[[image:DotPoint.JPG|10px|link=]]</td> |
| | <td>The <span style="font-size: 15px; font-weight: 700; color: gold; background-color: black;"> Rotation </span> controls the starting angle for placing a scrapbook or a texture when painting and is often used to avoid pattern repetition. As in '''Surveyor Classic''', holding down the <span style="font-size: 15px; font-weight: 700; color: white; background-color: black;"> [ </span> or <span style="font-size: 15px; font-weight: 700; color: white; background-color: black;"> ] </span> keys while painting a texture will continuously change the rotation angle. <span style="background-color: yellow;"><span style="font-weight: 700;"> NOTE: </span> When painting '''PBR''' ground textures care must be taken when using these rotation keys. There can be performance penalties from excessive PBR texture rotations.</span></td> |
| | </tr> |
| | <tr valign="top"> |
| | <td>[[image:DotPoint.JPG|10px|link=]]</td> |
| | <td>For '''TurfFX''' and '''Clutter''' effect layers the '''minimum''' brush <span style="font-size: 15px; font-weight: 700; color: gold; background-color: black;"> Radius </span> will depend on the configuration settings (asset density, resources used, etc) of the layer that is being painted. If the <span style="font-size: 15px; font-weight: 700; color: gold; background-color: black;"> Radius </span> setting is below the '''minimum''' for the selected layer then the brush circle will turn red and it will not paint</td> |
| | </tr> |
| | <tr valign="top"> |
| | <td>[[image:DotPoint.JPG|10px|link=]]</td> |
| | <td> |
| | <table bgcolor=#fcbcbc cellpadding=2> |
| | <tr valign="top"> |
| | <td>[[image:Stop.PNG|link=]]</td> |
| | <td><span style="font-size: 15px; font-weight: 700;">Warning:</span><br> |
| | Setting extreme values for the <span style="font-weight: 700; font-size: 15px; color: gold; background-color: black;"> Scale </span> and the <span style="font-weight: 700; font-size: 15px; color: gold; background-color: black;"> Radius </span> when using the <span style="font-weight: 700; font-size: 15px; color: white; background-color: black;"> Scrapbook Data Clone Brush </span> can cause performance issues (i.e. long delays) while the program attempts to scale and clone the scrapbook contents</td> |
| </tr> | | </tr> |
| </table> | | </table> |
| Line 3,229: |
Line 3,406: |
| </table> | | </table> |
| <br> | | <br> |
| <span id="HD and Texture"></span>
| | <table width=1000> <!-- BEGIN Section Nav Buttons --> |
| <table width=1000> <!-- BEGIN Section Nav Buttons --> | |
| <tr valign="top"> | | <tr valign="top"> |
| <td width=629><span id="HD Ground Texture"></span> | | <td width=629><span id="skip Tool Options Popups"></span> |
| ===<span style="font-weight: 700; font-size: 17px; color: white; background-color: blue;"> HD Resolution and Ground Textures </span>=== | | =='''Tool Options Popups'''== |
| </td> | | </td> |
| <td width=50> </td> | | <td width=50>[[image:SkipDown.png|link=#skip Tool Options Active Controls|Skip Down]]</td> |
| <td width=50> </td>
| | <td width=50>[[image:SkipUp.png|link=#stepOptions|Skip Up]]</td> |
| <td width=46>[[image:SkipMinorDown.png|link=#skip Scrapbook Data|Down]][[image:SkipMinorUp.png|link=#Default Ground Texture|Up]]</td> <!-- for Top and Minor Up/Down -->
| | <td width=46> </td> <!-- for Top --> |
| <td width=75> </td> | | <td width=75>[[image:HeadingUp.png|link=#stepOptions|alt=Heading|To Heading]]</td> |
| <td width=75> </td> | | <td width=75> </td> <!-- for Next Down --> |
| <td width=75> </td> <!-- for Bottom --> | | <td width=75> </td> <!-- for Bottom --> |
| </tr> | | </tr> |
| </table> <!-- END Section Nav Buttons --> | | </table> <!-- END Section Nav Buttons --> |
|
| |
|
| <table width=1000 bgcolor=#000000 cellpadding=2> | | <table width=1000 bgcolor="lightcyan" cellpadding=2> |
| <tr valign="top"> | | <tr valign="top"> |
| <td>
| | <td width=10>[[image:BlueDot10x10.png|link=]]</td> |
| <table width=996 bgcolor=#ffffff cellpadding=2>
| | <td>Most of the data entry boxes in the <span style="font-weight: 700; font-size: 15px; color: white; background-color: #797979;"> Tool Options Palette </span> have a '''Popup Menu'''. <span style="font-weight: 700; font-size: 15px; color: blue;"> Right Click </span> inside a box to bring up its menu</td> |
| <tr valign="middle">
| |
| <td width=35>[[image:Information.png|35px|link=]]</td> | |
| <td>'''HD Resolution''' is only available as an option in '''Trainz Plus'''</td> | |
| </tr> | | </tr> |
| </table> | | </table> |
| </td> | | <br> |
| </tr>
| |
| </table>
| |
| | |
| <table width=1000> | | <table width=1000> |
| <tr valign="top"> | | <tr valign="top"> |
| <td>The '''HD''' option provides a surface resolution in '''Trainz Plus''' of '''0.125m''' (12.5cm) from the standard '''5m''' or '''10m''' resolutions. This gives you far more realistic terrain for cuttings, embankments, ditches, drains, the track bed, etc.<br> | | <td width=100>[[image:ToolOptionsPopup.png|link=]]</td> |
| | | <td> |
| However, there is a price that has to be paid for using this feature. <span style="font-weight: 700; font-size: 15px; background-color: yellow;">You will be limited to a maximum of 16 different ground textures PER BASEBOARD</span> but each baseboard can have 16 completely different ground textures.<br>
| | <table width=900 bgcolor=#000000 cellpadding=2> |
| | |
| <table width=1000 bgcolor=#000000 cellpadding=2> | |
| <tr valign="top"> | | <tr valign="top"> |
| <td> | | <td> |
| <table bgcolor=#ffffb0 cellpadding=2> | | <table width=896 bgcolor=#ffffff cellpadding=2> |
| <tr valign="top"> | | <tr valign="top"> |
| <td width=25>[[image:NotePad.PNG|link=]]</td> | | <td colspan=2><span style="font-weight: 700; font-size: 17px;">Tool Popup Common Options</span> <span style="font-weight: 700; font-size: 15px;">for <span style="color: gold; background-color: black;"> Radius </span> <span style="color: gold; background-color: black;"> Angle </span> <span style="color: gold; background-color: black;"> Sensitivity </span> <span style="color: gold; background-color: black;"> Rotation </span> <span style="color: gold; background-color: black;"> Scale </span> <span style="color: gold; background-color: black;"> Intensity </span></span></td> |
| <td width=975><span style="font-size: 17px; font-weight: 700;">Notes:'''</span><br>
| |
| ---- | |
| This is a limitation imposed by your computer '''hardware''' and not one "plucked out of the air" by '''N3V''' to make life more difficult for route creators. Other sims/games that use '''High Definition (HD)''', or its equivalent, have the same or an even more restrictive limit (e.g. 8 textures per baseboard equivalent)</td>
| |
| </tr> | |
| </table> | |
| </td> | |
| </tr> | | </tr> |
| </table> | | <tr valign="top"> |
| </td> | | <td><span style="font-weight: 700; font-size: 15px; color: white; background-color: black;"> Cut </span></td> |
| | <td>copies and deletes the '''highlighted''' value in the data entry box into your Operating System (Windows, MacOS) clipboard</td> |
| | </tr> |
| | <tr valign="top"> |
| | <td><span style="font-weight: 700; font-size: 15px; color: white; background-color: black;"> Copy </span></td> |
| | <td>copies the '''highlighted''' value in the data entry box to your Operating System clipboard</td> |
| </tr> | | </tr> |
| </table>
| |
| <br>
| |
| <table width=1000 bgcolor=#000000 cellpadding=2>
| |
| <tr valign="top"> | | <tr valign="top"> |
| <td> | | <td><span style="font-weight: 700; font-size: 15px; color: white; background-color: black;"> Paste </span></td> |
| <table bgcolor=#bbffff cellpadding=2> | | <td>copies the value from your Operating System clipboard into the data entry box</td> |
| | </tr> |
| <tr valign="top"> | | <tr valign="top"> |
| <td colspan=2> | | <td><span style="font-weight: 700; font-size: 15px; color: white; background-color: black;"> Delete </span></td> |
| <table> | | <td>deletes the '''highlighted''' value in the data entry box</td> |
| | </tr> |
| <tr valign="top"> | | <tr valign="top"> |
| <td width=30>[[image:Question.PNG|link=|30px]]</td> | | <td><span style="font-weight: 700; font-size: 15px; color: white; background-color: black;"> Select All </span></td> |
| <td colspan=2><span style="font-weight: 700; font-size: 15px;">What happens if you exceed the limit of 16 textures in a baseboard?</span></td>
| | <td>selects ('''highlights''') the current value in the data entry box</td> |
| </tr> | | </tr> |
| </table> | | </table> |
| </td> | | </td> |
| </tr>
| |
| <tr valign="top">
| |
| <td width=10>[[image:DotPoint.JPG|10px|link=]]</td>
| |
| <td>If you have upgraded a route from '''5m Resolution''' or '''10m Resolution''' to '''HD Resolution''' (see [[image:PageLink.PNG|link=]] '''[[#stepUpgrading|Upgrading a Route to HD]]''') then '''Trainz Plus''' will replace any textures in any baseboards that are over the limit with textures already used in those baseboards. The upgrade process will give you the '''x''' and '''y''' co-ordinates of all the altered baseboards so you can check for any visible changes</td>
| |
| </tr>
| |
| <tr valign="top">
| |
| <td>[[image:DotPoint.JPG|10px|link=]]</td>
| |
| <td>If you are adding ground textures to a '''HD''' route and paint a new texture onto a baseboard that already has 16 ground textures, then the new texture will be replaced by one that is already present in that baseboard</td>
| |
| </tr> | | </tr> |
| </table> | | </table> |
| Line 3,311: |
Line 3,469: |
| <tr valign="top"> | | <tr valign="top"> |
| <td> | | <td> |
| <table width=996 bgcolor=#ffffe0 cellpadding=2> | | <table bgcolor=#ffffe0 cellpadding=2> |
| <tr valign="top"> | | <tr valign="top"> |
| <td width=25>[[image:PencilTips.PNG|link=]]</td> | | <td>[[image:PencilTips.PNG|link=]]</td> |
| <td>There is a simple way to get around the 16 textures per baseboard limit - add a '''Color Effect Layer''' (in '''Trainz Plus''' and '''HD''' routes only).<br> | | <td>Highlight the value in the text box (use a <span style="font-weight: 700; font-size: 15px; background-color: lightcyan;"> Left Click and Drag </span> over the data entry or <span style="font-weight: 700; font-size: 15px; background-color: lightcyan;"> Left Click </span> the <span style="font-weight: 700; font-size: 15px; color: white; background-color: black;"> Select All </span> option first) before choosing the <span style="font-weight: 700; font-size: 15px; color: white; background-color: black;"> Cut </span>, <span style="font-weight: 700; font-size: 15px; color: white; background-color: black;"> Copy </span> or <span style="font-weight: 700; font-size: 15px; color: white; background-color: black;"> Delete </span> options above</td> |
| This layer allows different coloured tints to be painted over individual areas of the existing ground textures to alter their appearence and increase the range of colours in a baseboard.<br>
| |
| The '''Color Effect Layer''' only works in routes that use the '''HD''' resolution. Details can be found in the [[image:PageLink.PNG|link=]] '''[[#Effect Layers|Effect Layers]]''' section below.</td>
| |
| </tr> | | </tr> |
| </table> | | </table> |
| Line 3,323: |
Line 3,479: |
| </table> | | </table> |
| <br> | | <br> |
| <table width=1000> <!-- BEGIN Section Nav Buttons --> | | <table width=1000> |
| | <tr valign="top"> |
| | <td width=170>[[image:ToolOptionsPopupHeight.png|link=]]</td> |
| | <td> |
| | <table width=830 bgcolor=#000000 cellpadding=2> |
| | <tr valign="top"> |
| | <td> |
| | <table width=826 bgcolor=#ffffff cellpadding=2> |
| | <tr valign="top"> |
| | <td colspan=2><span style="font-weight: 700; font-size: 17px;">Tool Popup Options</span> <span style="font-weight: 700; font-size: 15px;">for <span style="color: gold; background-color: black;"> Height </span></span></td> |
| | </tr> |
| | <tr> |
| | <td colspan=2>'''All of the Tool Popup Common Options above plus ...'''</td> |
| | </tr> |
| | <tr valign="top"> |
| | <td width=200><span style="font-weight: 700; font-size: 15px; color: white; background-color: black;"> Get Height from Selection </span></td> |
| | <td>copies the '''Height''' value of the '''Selected Object''' and places it into the data entry box</td> |
| | </tr> |
| <tr valign="top"> | | <tr valign="top"> |
| <td width=629><span id="skip Scrapbook Data"></span> | | <td><span style="font-weight: 700; font-size: 15px; color: white; background-color: black;"> Get Height at Compass </span></td> |
| =='''Scrapbook Data'''==
| | <td>copies the '''Height''' value of the '''Compass Rose''' and places it into the data entry box. This is the '''Focus z''' value from the <span style="font-weight: 700; font-size: 15px; color: white; background-color: #797979;"> Info Palette </span></td> |
| </td> | |
| <td width=50>[[image:SkipDown.png|link=#skip Effect Layers|Skip Down]]</td> | |
| <td width=50>[[image:SkipUp.png|link=#skip Ground Texture|Skip Up]]</td>
| |
| <td width=46>[[image:SkipMinorDown.png|link=#Create Scrapbook|Down]][[image:SkipMinorUp.png|link=#HD Ground Texture|Up]]</td> <!-- for Top and Minor Up/Down -->
| |
| <td width=75>[[image:HeadingUp.png|link=#stepBrush|alt=Heading|To Heading]]</td>
| |
| <td width=75> </td>
| |
| <td width=75> </td> <!-- for Bottom -->
| |
| </tr> | | </tr> |
| </table> <!-- END Section Nav Buttons -->
| |
|
| |
| <table>
| |
| <tr valign="top"> | | <tr valign="top"> |
| <td>[[image:BrushTarget_ScrapbookData.png|link=]]</td> | | <td><span style="font-weight: 700; font-size: 15px; color: white; background-color: black;"> Set Height to Selection </span></td> |
| | <td>applies the '''Height''' value to the '''Selected Object'''</td> |
| </tr> | | </tr> |
| </table> | | </table> |
| | | </td> |
| <table width=1000 bgcolor="lightcyan" cellpadding=2> | | </tr> |
| <tr valign="top"> | | </table> |
| <td width=10>[[image:BlueDot10x10.png|link=]]</td>
| | </td> |
| <td>This '''Brush Target''' paints the currently selected '''Scrapbook''' (from the <span style="font-weight: 700; font-size: 15px; color: white; background-color: #797979;"> Scrapbook Palette </span>) onto the ground</td>
| |
| </tr> | | </tr> |
| </table> | | </table> |
| <br> | | <br> |
| <table width=1000 bgcolor=#000000 cellpadding=2> | | <table width=1000> |
| <tr valign="top"> | | <tr valign="top"> |
| | <td width=170>[[image:ToolOptionsPopupGrade.png|link=]]</td> |
| <td> | | <td> |
| <table width=996 bgcolor=#ffffff cellpadding=2> | | <table width=830 bgcolor=#000000 cellpadding=2> |
| <tr valign="top"> | | <tr valign="top"> |
| <td colspan=2> | | <td> |
| <table> | | <table width=826 bgcolor=#ffffff cellpadding=2> |
| <tr valign="top"> | | <tr valign="top"> |
| <td width=35>[[image:Information.png|35px|link=]]</td> | | <td colspan=2><span style="font-weight: 700; font-size: 17px;">Tool Popup Options</span> <span style="font-weight: 700; font-size: 15px;">for <span style="color: gold; background-color: black;"> Grade </span></span></td> |
| <td>The '''Scrapbook''' is a Surveyor 2.0 '''Clipboard''' that can hold multiple objects of different types. Like your operating system clipboard you can '''Cut''' or '''Copy''' selected objects into a new scrapbook and then '''Paste''' them anywhere in your route. The '''Scrapbook''' has additional features:-</td> | |
| </tr> | | </tr> |
| </table>
| | <tr> |
| </td>
| | <td colspan=2>'''All of the Tool Popup Common Options above plus ...'''</td> |
| </tr>
| |
| <tr valign="top"> | |
| <td width=10>[[image:DotPoint.JPG|10px|link=]]</td> | |
| <td>you can have multiple scrapbooks, that can be permanent or temporary, ready for use whenever Surveyor is started</td>
| |
| </tr> | | </tr> |
| <tr valign="top"> | | <tr valign="top"> |
| <td>[[image:DotPoint.JPG|10px|link=]]</td> | | <td width=200><span style="font-weight: 700; font-size: 15px; color: white; background-color: black;"> Get Grade from Selection </span></td> |
| <td>you can '''Paint''' a scrapbook into a scene, using the [[image:S20_BrushToolIcon.png|link=|20px]] '''Brush Tool''', with a range of control options and '''Brush Actions'''</td> | | <td>copies the '''Grade''' value of the '''Selected Object''' and places it into the data entry box</td> |
| </tr> | | </tr> |
| <tr valign="top"> | | <tr valign="top"> |
| <td>[[image:DotPoint.JPG|10px|link=]]</td> | | <td><span style="font-weight: 700; font-size: 15px; color: white; background-color: black;"> Set Grade to Selection </span></td> |
| <td>you can control which '''types''' of objects in a scrapbook are painted or pasted and how they are painted/pasted. You can alter these controls to suit different situations</td> | | <td>applies the '''Grade''' value to the '''Selected Object'''</td> |
| </tr> | | </tr> |
| </table> | | </table> |
| Line 3,381: |
Line 3,540: |
| </table> | | </table> |
| <br> | | <br> |
| <table width=1000 bgcolor=#000000> | | <table bgcolor=#000000 cellpadding=2> |
| | <tr valign="top"> |
| | <td> |
| | <table bgcolor=#ffffb0 cellpadding=2> |
| <tr valign="top"> | | <tr valign="top"> |
| | <td width=25>[[image:NotePad.PNG|link=]]</td> |
| <td> | | <td> |
| <table width=996 bgcolor=#ffe89a cellpadding=2>
| | The '''Grade''' setting only applies to '''Spline Objects''', '''Ground Heights (Grade)''' and '''Water Effect Layers''' |
| <tr valign="middle">
| | </td> |
| <td width=45>[[image:PalettesIcon_S20.png|link=]]</td>
| | </tr> |
| <td>This '''Brush Target''' uses both the <span style="font-weight: 700; font-size: 15px; color: white; background-color: #797979;"> Tool Options Palette </span> and the <span style="font-weight: 700; font-size: 15px; color: white; background-color: #797979;"> Scrapbook Palette </span>. If these palettes are not visible on the screen then refer to [[image:PageLink.PNG|link=]] '''[[#Notes_Palettes|Notes: Palettes]]''' at the top of this document.</td>
| | </table> |
| | </td> |
| </tr> | | </tr> |
| </table> | | </table> |
| Line 3,394: |
Line 3,558: |
| </table> | | </table> |
| <br> | | <br> |
| <table width=1000> <!-- BEGIN Section Nav Buttons --> | | <table width=1000> |
| <tr valign="top"> | | <tr valign="top"> |
| <td width=629><span id="Create Scrapbook"></span> | | <td width=180>[[image:ToolOptionsPopupCondition.png|link=]]</td> |
| ===<span style="font-size: 17px; color: white; background-color: blue;"> Creating a Scrapbook </span>===
| | <td> |
| </td>
| | <table width=815 bgcolor=#000000 cellpadding=2> |
| <td width=50> </td>
| |
| <td width=50> </td>
| |
| <td width=46>[[image:SkipMinorDown.png|link=#Paste Scrapbook|Down]][[image:SkipMinorUp.png|link=#skip Scrapbook Data|Up]]</td> <!-- for Top and Minor Up/Down -->
| |
| <td width=75> </td>
| |
| <td width=75> </td>
| |
| <td width=75> </td> <!-- for Bottom --> | |
| </tr>
| |
| </table> <!-- END Section Nav Buttons -->
| |
| | |
| A new scrapbook is created by one of two methods:-
| |
| <table width=1000 bgcolor=#0000ff cellpadding=2> | |
| <tr valign="top"> | | <tr valign="top"> |
| <td> | | <td> |
| <table bgcolor=#ffffff cellpadding=2> | | <table width=811 bgcolor=#ffffff cellpadding=2> |
| <tr valign="top"> | | <tr valign="top"> |
| <td><span style="font-weight: 700; font-size: 15px;">Options:</span> | | <td colspan=2><span style="font-weight: 700; font-size: 17px;">Tool Popup Options</span> <span style="font-weight: 700; font-size: 15px;">for <span style="color: gold; background-color: black;"> Condition </span></span></td> |
| <table> | | </tr> |
| | <tr> |
| | <td colspan=2>'''All of the Tool Popup Common Options above plus ...'''</td> |
| | </tr> |
| <tr valign="top"> | | <tr valign="top"> |
| <td width=25>[[image:Ablue.png|link=]]</td> | | <td width=220><span style="font-weight: 700; font-size: 15px; color: white; background-color: black;"> Get Condition from Selection </span></td> |
| <td>use the [[image:S20_MarqueeToolIcon.png|link=|20px]] '''[[#The_Marquee_Tool|Marquee Tool]]''' to select an area of the route containing objects. You can use the filters in the <span style="font-weight: 700; font-size: 15px; color: white; background-color: #797979;"> Filter Palette </span> and <span style="font-weight: 700; font-size: 15px; color: white; background-color: #797979;"> Assets Palette </span> to restrict the objects that will be selected for the scrapbook <span style="font-weight: 700; font-size: 15px;">OR</span></td>
| | <td>copies the '''Condition''' value of the '''Selected Track Spline''' and places it into the data entry box</td> |
| </tr> | | </tr> |
| <tr valign="top"> | | <tr valign="top"> |
| <td>[[image:Bblue.png|link=]]</td> | | <td><span style="font-weight: 700; font-size: 15px; color: white; background-color: black;"> Set Condition to Selection </span></td> |
| <td>use the [[image:S20_FreeMoveToolIcon.png|link=|20px]] '''[[#The Free Move Tool|Free Move Tool]]''' or the [[image:S20_FineAdjustmentToolIcon.png|link=|20px]] '''[[#The Fine Adjustment Tool|Fine Adjustment Tool]]''' to select a group of individual objects for the scrapbook. You can use the filters in the <span style="font-weight: 700; font-size: 15px; color: white; background-color: #797979;"> Filter Palette </span> and <span style="font-weight: 700; font-size: 15px; color: white; background-color: #797979;"> Assets Palette </span> to restrict the objects that will be selected for the scrapbook</td>
| | <td>applies the '''Condition''' value to the '''Selected Track Spline'''</td> |
| </tr> | |
| </table>
| |
| </td> | |
| </tr> | | </tr> |
| </table> | | </table> |
| Line 3,432: |
Line 3,585: |
| </table> | | </table> |
| <br> | | <br> |
| <table width=1000> | | <table bgcolor=#000000 cellpadding=2> |
| <tr valign="top"> | | <tr valign="top"> |
| <td> | | <td> |
| <table width=495 bgcolor=#000000 cellpadding=2> | | <table bgcolor=#ffffb0 cellpadding=2> |
| <tr valign="top"> | | <tr valign="top"> |
| | <td width=25>[[image:NotePad.PNG|link=]]</td> |
| <td> | | <td> |
| <table bgcolor=#ffffff cellpadding=2> | | The '''Condition''' setting only applies to '''Track Spline Objects''' |
| | </td> |
| | </tr> |
| | </table> |
| | </td> |
| | </tr> |
| | </table> |
| | </td> |
| | </tr> |
| | </table> |
| | <br> |
| | <table width=1000> <!-- BEGIN Section Nav Buttons --> |
| <tr valign="top"> | | <tr valign="top"> |
| <td colspan=2><span style="font-weight: 700; font-size: 15px;">Steps:</span> Copy or Move the Selected Objects into the Scrapbook:- | | <td width=629><span id="skip Tool Options Active Controls"></span> |
| <table>
| | =='''Tool Options Active Controls'''== |
| <tr valign="top"> | | </td> |
| <td width=25>[[image:DotPoint1.JPG|link=]]</td> | | <td width=50>[[image:SkipDown.png|link=#stepAssets|Skip Down]]</td> |
| <td>use either '''Option''' [[image:Ablue.png|link=]] or '''Option''' [[image:Bblue.png|link=]] above to select the objects to be included in the scrapbook</td> | | <td width=50>[[image:SkipUp.png|link=#skip Tool Options Popups|Skip Up]]</td> |
| | <td width=46> </td> <!-- for Top --> |
| | <td width=75>[[image:HeadingUp.png|link=#stepOptions|alt=Heading|To Heading]]</td> |
| | <td width=75> </td> <!-- for Next Down --> |
| | <td width=75> </td> <!-- for Bottom --> |
| </tr> | | </tr> |
| | </table> <!-- END Section Nav Buttons --> |
| | |
| | <table width=1000 bgcolor="lightcyan" cellpadding=2> |
| <tr valign="top"> | | <tr valign="top"> |
| <td>[[image:DotPoint2.JPG|link=]]</td> | | <td width=10>[[image:BlueDot10x10.png|link=]]</td> |
| <td>if you intend to keep this scrapbook (make it permanent) then position your camera (screen point of view) to give the best view of the selected objects. The screen view will become the thumbnail for the scrapbook</td> | | <td>Different '''Tool Palette''' and '''Brush Type''' selections will activate different option controls</td> |
| </tr> | | </tr> |
| <tr valign="top"> | | </table> |
| <td>[[image:DotPoint3.JPG|link=]]</td> | | <br> |
| <td>then either:-
| | Some '''examples''' of when the controls will become active are:-<br> |
| <table> | | <table width=1000> |
| <tr valign="top"> | | <tr valign="top"> |
| <td width=25>[[image:Ablue.png|link=]]</td> | | <td width=25>[[image:Ablue.png|link=]]</td> |
| <td><span style="font-weight: 700; font-size: 15px; background-color: lightcyan;"> Left Click </span> on the displayed '''Context Menu''' icon (or press the <span style="font-weight: 700; font-size: 15px; color: white; background-color: black;"> T </span> key) and select either the <span style="font-weight: 700; font-size: 15px; color: white; background-color: black;"> Copy </span> or <span style="font-weight: 700; font-size: 15px; color: white; background-color: black;"> Cut </span> option <span style="font-weight: 700; font-size: 15px;">OR</span></td> | | <td>If a '''Brush Tool''' is selected then the exact controls that will be active will vary between the different brushes and brush actions. For example, selecting the <span style="font-weight:700; font-size: 15px; color: white; background-color: black;"> Ground Height Brush </span> and the <span style="font-weight:700; font-size: 15px; color: white; background-color: black;"> Set Height </span> brush action will active the following '''Tool Options'''.</td> |
| </tr> | | </tr> |
| | </table> |
| | |
| | <table width=1000> |
| <tr valign="top"> | | <tr valign="top"> |
| <td>[[image:Bblue.png|link=]]</td> | | <td width=200>[[image:BrushToolsHeightSet_S20.png|link=]]<br> |
| <td>press either <span style="font-weight: 700; font-size: 15px;"><span style="color: white; background-color: black;"> Ctrl </span> + <span style="color: white; background-color: black;"> C </span></span> (Copy) or <span style="font-weight: 700; font-size: 15px;"><span style="color: white; background-color: black;"> Ctrl </span> + <span style="color: white; background-color: black;"> X </span></span> (Cut)</td> | | <br> |
| </tr>
| | <table width=198 bgcolor=#000000 cellpadding=2> |
| <tr valign="top"> | | <tr valign="top"> |
| <td colspan=2> | | <td> |
| <table bgcolor=#ffffb0 cellpadding=2> | | <table width=194 bgcolor=#ffffb0 cellpadding=2> |
| <tr valign="top"> | | <tr valign="top"> |
| <td width=25>[[image:NotePad.PNG|link=]]</td> | | <td width=25>[[image:NotePad.PNG|link=]]</td> |
| <td>In both cases using the <span style="font-weight: 700; font-size: 15px;"><span style="color: white; background-color: black;"> Ctrl </span> + <span style="color: white; background-color: black;"> X </span></span> or <span style="font-weight: 700; font-size: 15px; color: white; background-color: black;"> Cut </span> options will remove the selected objects from your '''Trainz World''' if they are '''NOT''' in locked layers</td> | | <td>The brush <span style="font-weight: 700; font-size: 15px; color: gold; background-color: black;"> Radius </span> and <span style="font-weight: 700; font-size: 15px; color: gold; background-color: black;"> Height </span> are entered and displayed in <span style="background-color: yellow; font-weight: 700;">metres</span>.</td> |
| </tr> | | </tr> |
| </table> | | </table> |
| Line 3,474: |
Line 3,649: |
| </table> | | </table> |
| </td> | | </td> |
| </tr> | | <td> |
| | <table width=700 bgcolor=#000000 cellpadding=2> |
| <tr valign="top"> | | <tr valign="top"> |
| <td colspan=2>More detailed instructions on creating '''Scrapbooks''' can be found in the [[image:S20_MarqueeToolIcon.png|link=|20px]] '''[[#The_Marquee_Tool|Marquee Tool]]''' section of this document | | <td> |
| <table bgcolor=#ffffb0 cellpadding=2> | | <table bgcolor=#ffffff cellpadding=2> |
| <tr valign="top"> | | <tr valign="top"> |
| <td width=25>[[image:NotePad.PNG|link=]]</td> | | <td width=100><span style="font-weight: 700; font-size: 15px; color: gold; background-color: black;"> Radius </span></td> |
| <td>'''Scrapbooks''' will normally expire (self delete) after 5 days. Instructions on how to make a scrapbook permanent can be found at [[image:PageLink.PNG|link=]] '''[[#Scrapbook_Palette|The Scrapbook Palette]]''' below</td> | | <td width=600>the brush radius (metres)</td> |
| </tr> | | </tr> |
| </table> | | <tr valign="top"> |
| </td> | | <td colspan=2> |
| | <table width=700 bgcolor=#ffffb0> |
| | <tr valign="top"> |
| | <td width=90 align="right">'''Range:''' </td> |
| | <td>'''5m''' and above for '''5m''' and '''10m''' grid resolutions<br> |
| | '''0.12m''' and above for '''HD Terrain''' (available in '''Trainz Plus''' only)</td> |
| </tr> | | </tr> |
| </table> | | </table> |
| </td> | | </td> |
| </tr> | | </tr> |
| </table> | | <tr valign="top"> |
| </td> | | <td><span style="font-weight: 700; font-size: 15px; color: gold; background-color: black;"> Height </span></td> |
| | <td>the exact height, in metres, that the ground will be raised (or lowered) to</td> |
| </tr> | | </tr> |
| </table>
| |
| </td>
| |
| <td width=10> </td>
| |
| <td>
| |
| <table width=495 bgcolor=#000000 cellpadding=2>
| |
| <tr valign="top"> | | <tr valign="top"> |
| <td> | | <td colspan=2> |
| <table bgcolor=#ffffb0 cellpadding=2> | | <table width=700 bgcolor=#ffffb0> |
| <tr valign="top"> | | <tr valign="top"> |
| <td width=25>[[image:NotePad.PNG|link=]]</td> | | <td width=90 align="right">'''Range:''' </td> |
| <td><span style="font-size: 17px; font-weight: 700;">Notes:</span><br> | | <td>'''-3000m''' to '''+3000m'''</td> |
| ----</td>
| |
| </tr> | | </tr> |
| <tr> | | </table> |
| <td colspan=2>'''Scrapbooks''', when created, will contain:-</td>
| | </td> |
| </tr> | | </tr> |
| <tr valign="top"> | | <tr valign="top"> |
| <td>[[image:DotPoint.JPG|10px|link=]]</td> | | <td><span style="font-weight: 700; font-size: 15px; color: gold; background-color: black;"> Sensitivity </span></td> |
| <td>'''Ground Heights'''</td> | | <td>the '''speed''' at which the ground height will be changed</td> |
| </tr> | | </tr> |
| <tr valign="top"> | | <tr valign="top"> |
| <td>[[image:DotPoint.JPG|10px|link=]]</td> | | <td colspan=2> |
| <td>'''Ground Textures'''</td> | | <table width=700 bgcolor=#ffffb0> |
| | <tr valign="top"> |
| | <td width=90 align="right">'''Range:''' </td> |
| | <td>'''1%''' (very slowly) to<br> |
| | '''100%''' (very quickly)</td> |
| | </tr> |
| | </table> |
| | </td> |
| </tr> | | </tr> |
| <tr valign="top"> | | <tr valign="top"> |
| <td>[[image:DotPoint.JPG|10px|link=]]</td> | | <td colspan=2> |
| <td>'''TurfFX/Clutter Effect Layers''' - if present</td> | | <table bgcolor=#ffffe0 cellpadding=2> |
| | <tr valign="top" align="left"> |
| | <td width=25>[[image:PencilTips.PNG|link=]]</td> |
| | <td> |
| | <table> |
| | <tr valign="top"> |
| | <td width=10>[[image:DotPoint.JPG|10px|link=]]</td> |
| | <td>On the right of each data entry box is a pair of '''Up/Down''' arrow controls. <span style="font-weight: 700; font-size: 15px; background-color: lightcyan;"> Left Click and Drag </span> up or down on these to adjust the value in smaller increments</td> |
| </tr> | | </tr> |
| <tr valign="top"> | | <tr valign="top"> |
| <td>[[image:DotPoint.JPG|10px|link=]]</td> | | <td>[[image:DotPoint.JPG|10px|link=]]</td> |
| <td>'''Selected Objects''' - scenery items, splines, track, signals, etc</td> | | <td>Each data entry box has a drop down menu list of options. <span style="font-weight: 700; font-size: 15px; background-color: lightcyan;"> Right Click </span> inside the box to open its menu list - see [[image:PageLink.PNG|link=]] '''[[#Info Settings Menu|Info Settings Menu]]''' above for the details</td> |
| </tr> | | </tr> |
| <tr valign="top">
| | </table> |
| <td>[[image:DotPoint.JPG|10px|link=]]</td>
| | </td> |
| <td><span style="font-weight: 700; font-size: 15px;">But <span style="background-color: yellow;"> <span style="text-decoration: underline;">NOT</span> Rolling Stock (Trains) </span></span>. Rolling Stock consists can be saved for later use as new '''Consist Assets'''. See [[image:PageLink.PNG|link=]] '''[[#FM: Context Rolling|Rolling Stock Object Context Menu]]''' for the details.</td>
| |
| </tr> | | </tr> |
| <tr valign="top"> | | </table> |
| <td colspan=2>The ground heights, ground textures and '''TurfFX/Clutter Effect Layers''' in the '''Marquee Selection Area''' (method [[image:Ablue.png|link=]] above) or under the selected objects (method [[image:Bblue.png|link=]]) will always be added to the scrapbook. You can use the filters in the <span style="font-weight: 700; font-size: 15px; color: white; background-color: #797979;"> Filter Palette </span> and <span style="font-weight: 700; font-size: 15px; color: white; background-color: #797979;"> Assets Palette </span> to control which other objects will also be added</td>
| | </td> |
| </tr> | | </tr> |
| </table> | | </table> |
| Line 3,538: |
Line 3,727: |
| </table> | | </table> |
| <br> | | <br> |
| <table width=1000> <!-- BEGIN Section Nav Buttons --> | | <table width=1000> |
| <tr valign="top"> | | <tr valign="top"> |
| <td width=629><span id="Paste Scrapbook"></span> | | <td width=20>[[image:Bblue.png|link=]]</td> |
| ===<span style="font-weight: 700; font-size: 17px; color: white; background-color: blue;"> Pasting a Scrapbook </span>===
| | <td>If a '''Track Spline Object''' is selected with the [[image:S20_FreeMoveToolIcon.png|link=|20px]] '''Free Move Tool''' or the [[image:S20_FineAdjustmentToolIcon.png|link=|20px]] '''Fine Adjustment Tool''' then the following '''Tool Options''' will become active.</td> |
| </td>
| |
| <td width=50> </td>
| |
| <td width=50> </td> | |
| <td width=46>[[image:SkipMinorDown.png|link=#Paste Scrapbook Tips|Down]][[image:SkipMinorUp.png|link=#Create Scrapbook|Up]]</td> <!-- for Top and Minor Up/Down -->
| |
| <td width=75> </td>
| |
| <td width=75> </td>
| |
| <td width=75> </td> <!-- for Bottom -->
| |
| </tr> | | </tr> |
| </table> <!-- END Section Nav Buttons --> | | </table> |
|
| |
|
| To paste a scrapbook into your '''Trainz World''':-<br>
| |
| <table width=1000> | | <table width=1000> |
| <tr valign="top"> | | <tr valign="top"> |
| | <td width=200>[[image:PlacementSplineTools_S20.png|link=]]</td> |
| <td> | | <td> |
| <table width=495 bgcolor=#000000 cellpadding=2> | | <table width=700 bgcolor=#000000 cellpadding=2> |
| <tr valign="top"> | | <tr valign="top"> |
| <td> | | <td> |
| <table bgcolor=#ffffff cellpadding=2> | | <table bgcolor=#ffffff cellpadding=2> |
| <tr valign="top"> | | <tr valign="top"> |
| <td colspan=2><span style="font-weight: 700; font-size: 15px;">Steps:</span> To Paste a Scrapbook:-</td> | | <td> |
| | <table> |
| | <tr valign="top"> |
| | <td width=100><span style="font-weight: 700; font-size: 15px; color: gold; background-color: black;"> Grade </span></td> |
| | <td width=600>the track gradient. A '''positive grade''' will set the 2<sup>nd</sup> endpoint higher than the 1<sup>st</sup>. A '''negative grade''' will set the 2<sup>nd</sup> endpoint lower than the 1<sup>st</sup>.</td> |
| </tr> | | </tr> |
| <tr valign="top"> | | <tr valign="top"> |
| <td colspan=2> | | <td colspan=2> |
| <table bgcolor=#ffffe0 cellpadding=2> | | <table width=700 bgcolor=#ffffb0> |
| <tr valign="top"> | | <tr valign="top"> |
| <td width=25>[[image:PencilTips.PNG|link=]]</td> | | <td width=90 align="right">'''Range:''' </td> |
| <td>The '''minimum''' steps needed to paste the scrapbook currently shown as a thumbnail in the <span style="font-weight: 700; font-size: 15px; color: white; background-color: #797979;"> Scrapbook Palette </span> are <span style="font-weight: 700; font-size: 15px; color: white; background-color: red;"> 1 </span> and <span style="font-weight: 700; font-size: 15px; color: white; background-color: red;"> 4 </span>. This will paste using the current settings in the '''Scrapbook Filter''' and the <span style="font-weight: 700; font-size: 15px; color: white; background-color: #797979;"> Tool Options Palette </span>. The <span style="font-weight: 700; font-size: 15px; color: white; background-color: #797979;"> Scrapbook Palette </span> does not have to be visible on the screen</td>
| | <td width=600>'''0%''' = flat ('''"Plateau"''' in '''Classic''') to<br> |
| | '''±100%''' = steep (but '''not''' vertical)</td> |
| </tr> | | </tr> |
| </table> | | </table> |
| </td> | | </td> |
| </tr> | | </tr> |
|
| |
| <tr valign="top"> | | <tr valign="top"> |
| <td width=25>[[image:DotPoint1.JPG|link=]]</td> | | <td><span style="font-weight: 700; font-size: 15px; color: gold; background-color: black;"> Condition </span></td> |
| <td>Move the '''Compass Rose''' to the position where the scrapbook will be placed</td> | | <td>the track condition of each track segment</td> |
| </tr> | | </tr> |
| <tr valign="top"> | | <tr valign="top"> |
| <td>[[image:DotPoint2.JPG|link=]]</td> | | <td colspan=2> |
| <td>In the <span style="font-weight: 700; font-size: 15px; color: white; background-color: #797979;"> Scrapbook Palette </span> select the required '''Scrapbook'''. Its image will be shown in the palette thumbnails. See [[image:PageLink.PNG|link=]] '''[[#Scrapbook Palette|The Scrapbook Palette]]''' for more details</td> | | <table bgcolor=#ffffb0> |
| </tr>
| |
| <tr valign="top"> | | <tr valign="top"> |
| <td>[[image:DotPoint3.JPG|link=]]</td> | | <td width=90 align="right">'''Range:''' </td> |
| <td>Set the [[image:PageLink.PNG|link=]] '''[[#Scrapbook Filters|The Scrapbook Filters]]''' to include/exclude any objects or features</td>
| | <td width=600>'''1%''' (terrible track condition) to<br> |
| </tr>
| | '''50%''' (average track condition) to<br> |
| <tr valign="top">
| | '''100%''' (perfect track condition)<br> |
| <td>[[image:DotPoint4.JPG|link=]]</td>
| |
| <td>Press the keys <span style="font-weight: 700; font-size: 15px;"><span style="color: white; background-color: black;"> Ctrl </span> + <span style="color: white; background-color: black;"> V </span></span>. You can also select an object, open its '''Context Menu''' and select the <span style="font-weight: 700; font-size: 15px; color: white; background-color: black;"> Paste </span> option - the scrapbook will still be placed at the current position of the compass rose</td>
| |
| </tr>
| |
| <tr valign="top">
| |
| <td colspan=2>
| |
| <table bgcolor=#ffffb0 cellpadding=2>
| |
| <tr valign="top">
| |
| <td width=25>[[image:NotePad.PNG|link=]]</td> | |
| <td>The scrapbook will be pasted inside a '''Marquee Selection Area''' which can be moved, rotated and/or resized. See the [[image:S20_MarqueeToolIcon.png|link=|20px]] '''[[#The_Marquee_Tool|Marquee Tool]]''' for more details. The <span style="font-weight: 700; font-size: 15px; color: white; background-color: #797979;"> Tool Options Palette </span> controls <span style="font-weight: 700; font-size: 15px; color: gold; background-color: black;"> Scale </span> and <span style="font-weight: 700; font-size: 15px; color: gold; background-color: black;"> Rotation </span> have no effect when pasting a scrapbook</td>
| |
| </tr>
| |
| </table>
| |
| </td> | | </td> |
| </tr>
| |
| <tr valign="top">
| |
| <td>[[image:DotPoint5.JPG|link=]]</td>
| |
| <td>If you change your mind immediately after the Scrapbook has been pasted and while it is still surrounded by the '''Marquee Selection Area''', you can remove the scrapbook objects by pressing the <span style="font-weight: 700; font-size: 15px; color: white; background-color: black;"> Delete </span> key</td>
| |
| </tr>
| |
| <tr valign="top">
| |
| <td>[[image:DotPoint6.JPG|link=]]</td>
| |
| <td>To remove the '''Marquee Selection Area''' but leave the pasted scrapbook intact, <span style="font-weight: 700; font-size: 15px; background-color: lightcyan;"> Left Click </span> anywhere outside the area or press the <span style="font-weight: 700; font-size: 15px;"><span style="color: white; background-color: black;"> Ctrl </span> + <span style="color: white; background-color: black;"> D </span></span> keys</td>
| |
| </tr> | | </tr> |
| </table> | | </table> |
| </td> | | <table bgcolor=#ffffe0 cellpadding=2> |
| </tr>
| |
| </table>
| |
| </td>
| |
| <td width=10> </td>
| |
| <td>
| |
| <table width=495 bgcolor=#000000 cellpadding=2>
| |
| <tr valign="top"> | | <tr valign="top"> |
| | <td width=25>[[image:PencilTips.PNG|link=]]</td> |
| <td> | | <td> |
| <table bgcolor=#ffffb0 cellpadding=2> | | <table> |
| <tr valign="top">
| |
| <td width=25>[[image:NotePad.PNG|link=]]</td>
| |
| <td><span style="font-size: 17px; font-weight: 700;">Notes:</span><br>
| |
| ----</td>
| |
| </tr>
| |
| <tr>
| |
| <td colspan=2>
| |
| '''Scrapbooks''', when painted or pasted, can contain any combinations of:-</td>
| |
| </tr>
| |
| <tr valign="top"> | | <tr valign="top"> |
| <td width=10>[[image:DotPoint.JPG|10px|link=]]</td> | | <td width=10>[[image:DotPoint.JPG|10px|link=]]</td> |
| <td>'''Ground Heights'''</td> | | <td>Use the [[image:S20_FreeMoveToolIcon.png|link=|20px]] '''Free Move Tool''' or the [[image:S20_FineAdjustmentToolIcon.png|link=|20px]] '''Fine Adjustment Tool''' to select multiple track segments and set their track condition simultaneously</td> |
| </tr> | | </tr> |
| <tr valign="top"> | | <tr valign="top"> |
| <td>[[image:DotPoint.JPG|10px|link=]]</td> | | <td>[[image:DotPoint.JPG|10px|link=]]</td> |
| <td>'''Ground Textures'''</td> | | <td>The '''Track Condition''' can also be set for each individal track segment in its '''Context Menu''' <span style="font-size: 15px; font-weight: 700; color: white; background-color: black;"> Edit Properties </span> option</td> |
| </tr> | | </tr> |
| <tr valign="top"> | | <tr valign="top"> |
| <td>[[image:DotPoint.JPG|10px|link=]]</td> | | <td>[[image:DotPoint.JPG|10px|link=]]</td> |
| <td>'''TurfFX/Clutter Effect Layers'''</td> | | <td>On the right of each data entry box is a pair of '''Up/Down''' arrow controls. <span style="font-weight: 700; font-size: 15px; background-color: lightcyan;"> Left Click and Drag </span> up or down on these to adjust the value in smaller increments</td> |
| </tr> | | </tr> |
| <tr valign="top">
| | </table> |
| <td>[[image:DotPoint.JPG|10px|link=]]</td>
| | </td> |
| <td>'''Scenery Objects (Meshes)''' - individual buildings, trees, signals, etc</td>
| |
| </tr> | | </tr> |
| <tr valign="top">
| | </table> |
| <td>[[image:DotPoint.JPG|10px|link=]]</td>
| | </td> |
| <td>'''Scenery Splines''' - roads, track, fences, etc</td>
| |
| </tr> | | </tr> |
| <tr valign="top"> | | </table> |
| <td colspan=2>You have options in [[image:PageLink.PNG|link=]] '''[[#Scrapbook Filters|The Scrapbook Filters]]''' that will control which of these data types are added to your '''Trainz World''' and how they are added.</td>
| | </td> |
| </tr> | | </tr> |
| </table> | | </table> |
| Line 3,659: |
Line 3,809: |
| </table> | | </table> |
| <br> | | <br> |
| <table width=1000> <!-- BEGIN Section Nav Buttons --> | | <table width=1000> |
| <tr valign="top"> | | <tr valign="top"> |
| <td width=629><span id="Paste Scrapbook Tips"></span> | | <td width=20>[[image:Cblue.png|link=]]</td> |
| ===<span style="font-weight: 700; font-size: 17px; color: white; background-color: blue;"> Scrapbook Pasting Tips </span>===
| | <td>If the '''Scrapbook Data Brush''' is selected to paint the current '''Scrapbook''' into the '''Trainz World''' then certain controls that will affect the painting of the '''Scrapbook''' will, depending on the brush action selected, become active.</td> |
| </td>
| |
| <td width=50> </td>
| |
| <td width=50> </td>
| |
| <td width=46>[[image:SkipMinorDown.png|link=#Scrapbook Brush|Down]][[image:SkipMinorUp.png|link=#Paste Scrapbook|Up]]</td> <!-- for Top and Minor Up/Down -->
| |
| <td width=75> </td> | |
| <td width=75> </td>
| |
| <td width=75> </td> <!-- for Bottom -->
| |
| </tr> | | </tr> |
| </table> <!-- END Section Nav Buttons --> | | </table> |
|
| |
|
| <table width=1000 bgcolor=#000000 cellpadding=2> | | <table width=1000> |
| <tr valign="top"> | | <tr valign="top"> |
| <td> | | <td> |
| <table width=996 bgcolor=#ffffe0 cellpadding=2> | | <table width=420> |
| <tr valign="top"> | | <tr valign="top"> |
| <td width=25>[[image:PencilTips.PNG|link=]]</td> | | <td width=210><span style="font-size: 15px; font-weight: 700; color: white; background-color: black;"> Scrapbook Brush </span><br>[[image:BrushToolsScrapBrush_S20.png|link=|alt=Brush options]]</td> |
| <td><span style="font-weight: 700; font-size: 15px;">Add Variety to Pasting a Scrapbook</span> | | <td width=210><span style="font-size: 15px; font-weight: 700; color: white; background-color: black;"> Scrapbook Clone </span><br>[[image:BrushToolsScrapClone_S20.png|link=|alt=Clone options]]</td> |
| <table> | |
| <tr valign="top">
| |
| <td>A single scrapbook can be pasted many times in a layout but each instance can have variations that will make it different from the others. Use the following technique:-</td>
| |
| </tr> | | </tr> |
| </table> | | </table> |
| <table bgcolor=#ffffff cellpadding=2> | | <br> |
| | <table width=418 bgcolor=#000000 cellpadding=2> |
| <tr valign="top"> | | <tr valign="top"> |
| <td colspan=2><span style="font-weight: 700; font-size: 15px;">Steps:</span> To add variety to Pasting a Scrapbook:-</td> | | <td> |
| </tr>
| | <table width=414 bgcolor=#ffffb0 cellpadding=2> |
| <tr valign="top"> | | <tr valign="top"> |
| <td width=20>[[image:DotPoint1.JPG|link=]]</td> | | <td width=25>[[image:NotePad.PNG|link=]]</td> |
| <td>Use the [[image:PageLink.PNG|link=]] '''[[#Scrapbook Filters|Scrapbook Filters]]''' to change the elements that are placed into the route (e.g. Ground, Scenery, Textures, Splines, Effect Layers) and how they are added (None, Add, Overwrite) each time it is pasted</td> | | <td>The scrapbook brush <span style="font-weight: 700; font-size: 15px; color: gold; background-color: black;"> Radius </span> is entered and displayed in <span style="background-color: yellow; font-weight: 700;">metres</span>.</td> |
| </tr> | | </tr> |
| </table> | | </table> |
| Line 3,698: |
Line 3,839: |
| </table> | | </table> |
| </td> | | </td> |
| | <td> |
| | <table width=580 bgcolor=#000000 cellpadding=2> |
| | <tr valign="top"> |
| | <td> |
| | <table bgcolor=#ffffff cellpadding=2> |
| | <tr valign="top"> |
| | <td> |
| | <table> |
| | <tr valign="top"> |
| | <td width=100><span style="font-weight: 700; font-size: 15px; color: gold; background-color: black;"> Radius </span></td> |
| | <td width=480>the brush radius (metres)</td> |
| | </tr> |
| | <tr valign="top"> |
| | <td colspan=2> |
| | <table width=580 bgcolor=#ffffb0> |
| | <tr valign="top"> |
| | <td width=90 align="right">'''Range:''' </td> |
| | <td>'''5m''' and above for '''5m''' and '''10m''' grid resolutions<br> |
| | '''0.12m''' and above for '''HD Terrain''' (available in '''Trainz Plus''' only)</td> |
| </tr> | | </tr> |
| </table> | | </table> |
| <br> | | </td> |
| <table width=1000> <!-- BEGIN Section Nav Buttons --> | | </tr> |
| <tr valign="top"> | | <tr valign="top"> |
| <td width=629><span id="Scrapbook Brush"></span> | | <td><span style="font-weight: 700; font-size: 15px; color: gold; background-color: black;"> Sensitivity </span></td> |
| ===<span style="font-size: 17px; color: white; background-color: blue;"> Scrapbook Brush Actions </span>===
| | <td>if the <span style="font-weight: 700; font-size: 15px; color: white; background-color: black;"> Ground Height </span> option has been enabled in the <span style="font-weight: 700; font-size: 15px; color: white; background-color: #797979;"> Scrapbook Palette </span> filter settings, then this will set the rate or speed at which the ground height will change</td> |
| </td> | |
| <td width=50> </td> | |
| <td width=50> </td>
| |
| <td width=46>[[image:SkipMinorDown.png|link=#Scrapbook Tool Options|Down]][[image:SkipMinorUp.png|link=#Paste Scrapbook Tips|Up]]</td> <!-- for Top and Minor Up/Down --> | |
| <td width=75> </td>
| |
| <td width=75> </td>
| |
| <td width=75> </td> <!-- for Bottom -->
| |
| </tr> | | </tr> |
| </table> <!-- END Section Nav Buttons -->
| |
|
| |
| <table width=1000 bgcolor=#000000 cellpadding=2>
| |
| <tr valign="top"> | | <tr valign="top"> |
| <td> | | <td colspan=2> |
| <table width=996 bgcolor=#ffffff cellpadding=2> | | <table width=580 bgcolor=#ffffb0> |
| <tr valign="top"> | | <tr valign="top"> |
| <td width=150>[[image:BrushActionIcon_S20.png|link=]] <span style="font-weight: 700; font-size: 15px; color: white; background-color: black;"> Brush Actions </span></td> | | <td width=90 align="right">'''Range:''' </td> |
| <td>When the [[image:BrushTargetIcon_S20.png|link=]] <span style="font-weight: 700; font-size: 15px; color: white; background-color: black;"> Scrapbook Data </span> '''Target''' is selected the second drop down box will give a choice of two brush actions that control how the scrapbook will be painted.</td> | | <td>'''1%''' (very slowly) to<br> |
| | '''100%''' (very quickly)</td> |
| </tr> | | </tr> |
| </table> | | </table> |
| </td> | | </td> |
| </tr> | | </tr> |
| </table>
| |
|
| |
| <table width=1000>
| |
| <tr valign="top"> | | <tr valign="top"> |
| <td colspan=2>The '''actions''' are:- </td> | | <td><span style="font-weight: 700; font-size: 15px; color: gold; background-color: black;"> Rotation </span></td> |
| | <td>the starting angle (or orientation) of the scrapbook</td> |
| </tr> | | </tr> |
| <tr valign="top"> | | <tr valign="top"> |
| <td width=200> | | <td colspan=2> |
| <table> | | <table width=580 bgcolor=#ffffb0> |
| | <tr valign="top"> |
| | <td width=90 align="right">'''Range:''' </td> |
| | <td>'''0°''' to '''±360°''' (larger angles can be entered)</td> |
| | </tr> |
| | </table> |
| | </td> |
| | </tr> |
| <tr valign="top"> | | <tr valign="top"> |
| <td width=10>[[image:BulletTick.png|link=]]</td> | | <td><span style="font-weight: 700; font-size: 15px; color: gold; background-color: black;"> Scale </span></td> |
| <td>'''Scrapbook Brush'''</td> | | <td>the scaling factor as a % used by the <span style="font-weight: 700; font-size: 15px; color: white; background-color: black;"> Scrapbook Clone </span> action</td> |
| </tr> | | </tr> |
| <tr valign="top"> | | <tr valign="top"> |
| <td>[[image:BulletTick.png|link=]]</td> | | <td colspan=2> |
| <td>'''Scrapbook Clone'''</td> | | <table width=580 bgcolor=#ffffb0> |
| | <tr valign="top"> |
| | <td width=90 align="right">'''Range:''' </td> |
| | <td>'''0.01%''' = smallest to<br> |
| | '''100%''' = full size to<br> |
| | '''>100%''' larger than full size</td> |
| </tr> | | </tr> |
| </table> | | </table> |
| </td> | | </td> |
| <td width=200>[[image:BrushToolsScrapbookOptions_S20.png|link=]]</td>
| | </tr> |
| <td width=600>
| |
| <table width=600 bgcolor=#000000 cellpadding=2>
| |
| <tr valign="top"> | | <tr valign="top"> |
| <td>
| | <td><span style="font-weight: 700; font-size: 15px; color: gold; background-color: black;"> Shape </span></td> |
| <table width=596 bgcolor=#ffffff cellpadding=2>
| | <td>the physical shape of the scrapbook brush</td> |
| <tr valign="top">
| |
| <td><span style="font-weight: 700; font-size: 17px;">Scrapbook Brush Actions:</span></td> | |
| </tr> | | </tr> |
| <tr valign="top"> | | <tr valign="top"> |
| <td> | | <td colspan=2> |
| <table> | | <table width=580 bgcolor=#ffffb0> |
| <tr valign="top"> | | <tr valign="top"> |
| <td width=170>[[image:BrushActionIcon_S20.png|link=]] <span style="font-weight: 700; font-size: 15px; color: white; background-color: black;"> Scrapbook Brush </span></td> | | <td width=90 align="right">'''Options:''' </td> |
| <td> will '''resize''' the scrapbook contents to fit the selected brush shape and size</td> | | <td width=145>[[image:BrushToolsScrapShapes_S20.png|link=]]</td> |
| | <td><span style="font-weight: 700; font-size: 15px; color: white; background-color: black;"> Circle </span> and <span style="font-weight: 700; font-size: 15px; color: white; background-color: black;"> Square </span> will set the brush to the selected shape with the <span style="font-size: 15px; font-weight: 700; color: gold; background-color: black;"> Radius </span> setting the brush size</td> |
| </tr> | | </tr> |
| <tr valign="top"> | | <tr valign="top"> |
| <td>[[image:BrushActionIcon_S20.png|link=]] <span style="font-weight: 700; font-size: 15px; color: white; background-color: black;"> Scrapbook Clone </span></td> | | <td> </td> |
| <td> will paint the scrapbook sized according to the <span style="font-weight: 700; font-size: 15px; color: white; background-color: #797979;"> Tool Options Palette </span> <span style="font-weight: 700; font-size: 15px; color: gold; background-color: black;"> Scale </span> setting</td>
| | <td colspan=2><span style="font-weight: 700; font-size: 15px; color: white; background-color: black;"> Natural </span> will set the brush to the same shape as the '''Marquee''' that created the scrapbook, which may be rectangular. The <span style="font-size: 15px; font-weight: 700; color: gold; background-color: black;"> Radius </span> setting will scale the brush size</td> |
| </tr> | | </tr> |
| </table> | | </table> |
| Line 3,771: |
Line 3,929: |
| </td> | | </td> |
| </tr> | | </tr> |
| </table>
| |
| </td>
| |
| </tr>
| |
| </table>
| |
| <br>
| |
| <table width=1000 bgcolor=#000000>
| |
| <tr valign="top"> | | <tr valign="top"> |
| <td> | | <td> |
| <table width=996 bgcolor=#ffffb0> | | <table bgcolor=#ffffe0 cellpadding=2> |
| <tr valign="top"> | | <tr valign="top" align="left"> |
| <td width=25>[[image:NotePad.PNG|link=]]</td> | | <td width=25>[[image:PencilTips.PNG|link=]]</td> |
| <td><span style="font-size: 17px; font-weight: 700;">Notes:</span><br> | | <td> |
| ----
| |
| </td>
| |
| </tr>
| |
| <tr valign="top">
| |
| <td colspan=2>[[image:BrushActionIcon_S20.png|link=]] <span style="font-size: 15px; font-weight: 700; color: white; background-color: black;"> Scrapbook Brush </span> will '''resize''' the scrapbook contents to fit the selected brush shape and size.
| |
| <table> | | <table> |
| <tr valign="top"> | | <tr valign="top"> |
| <td width=10>[[image:DotPoint.JPG|10px|link=]]</td> | | <td width=10>[[image:DotPoint.JPG|10px|link=]]</td> |
| <td>If the brush is small then the scrapbook contents will be compressed closer together</td> | | <td>On the right of each data entry box is a pair of '''Up/Down''' arrow controls. <span style="font-weight: 700; font-size: 15px; background-color: lightcyan;"> Left Click and Drag </span> up or down on these to adjust the value in smaller increments</td> |
| </tr> | | </tr> |
| <tr valign="top"> | | <tr valign="top"> |
| <td>[[image:DotPoint.JPG|10px|link=]]</td> | | <td>[[image:DotPoint.JPG|10px|link=]]</td> |
| <td>If the brush is large then the contents will be spaced further apart</td> | | <td>Each data entry box has a drop down menu list of options. <span style="font-weight: 700; font-size: 15px; background-color: lightcyan;"> Right Click </span> inside the box to open its menu list - see [[image:PageLink.PNG|link=]] '''[[#Info Settings Menu|Info Settings Menu]]''' above for the details</td> |
| </tr> | | </tr> |
| <tr valign="top">
| | </table> |
| <td>[[image:DotPoint.JPG|10px|link=]]</td>
| | </td> |
| <td>Every <span style="font-weight: 700; font-size: 15px; background-color: lightcyan;"> Left Click </span> will paste another complete scrapbook copy</td>
| |
| </tr> | | </tr> |
| <tr valign="top">
| | </table> |
| <td>[[image:DotPoint.JPG|10px|link=]]</td>
| | </td> |
| <td>The <span style="font-weight: 700; font-size: 15px; color: gold; background-color: black;"> Scale </span> setting in the <span style="font-weight: 700; font-size: 15px; color: white; background-color: #797979;"> Tool Options Palette </span> is ignored.</td>
| |
| </tr> | | </tr> |
| </table> | | </table> |
| </td> | | </td> |
| </tr> | | </tr> |
| | </table> |
| | <br> |
| | <table bgcolor=#ff0000 cellpadding=2> |
| <tr valign="top"> | | <tr valign="top"> |
| <td colspan=2>[[image:BrushActionIcon_S20.png|link=]] <span style="font-size: 15px; font-weight: 700; color: white; background-color: black;"> Scrapbook Clone </span> will paste the scrapbook sized according to the <span style="font-weight: 700; font-size: 15px; color: white; background-color: #797979;"> Tool Options Palette </span> <span style="font-weight: 700; font-size: 15px; color: gold; background-color: black;"> Scale </span> setting ('''100%''' = original size)
| |
| <table>
| |
| <tr valign="top">
| |
| <td width=10>[[image:DotPoint.JPG|10px|link=]]</td>
| |
| <td>If the brush is the same size as the scaled scrapbook then a single exact copy will be painted</td>
| |
| </tr>
| |
| <tr valign="top">
| |
| <td>[[image:DotPoint.JPG|10px|link=]]</td>
| |
| <td>If the brush is smaller than the scaled scrapbook in size then only the central part of the scrapbook will be revealed and more will be added when the brush is moved around until the "painted" area covers the same area as the scaled scrapbook. Further painting will clone or tile the scrapbook contents</td>
| |
| </tr>
| |
| <tr valign="top">
| |
| <td>[[image:DotPoint.JPG|10px|link=]]</td>
| |
| <td>If the brush is larger than the scaled scrapbook in size then the contents will be cloned or tiled to fill the set brush radius</td>
| |
| </tr>
| |
| <tr valign="top">
| |
| <td colspan=2>See [[image:PageLink.PNG|link=]] '''[[#Paint Clone|Using the Scrapbook Clone Brush]]''' below for examples and more information</td>
| |
| </tr>
| |
| <tr valign="top">
| |
| <td> </td>
| |
| <td> | | <td> |
| <table bgcolor=#fcbcbc cellpadding=2> | | <table bgcolor=#fcbcbc cellpadding=2> |
| <tr valign="top"> | | <tr valign="top"> |
| <td>[[image:Stop.PNG|link=]]</td> | | <td>[[image:Stop.PNG|link=]]</td> |
| <td><span style="font-size: 15px; font-weight: 700;">WARNING:</span><br> | | <td><span style="font-size: 15px; font-weight: 700;">Warning:</span><br> |
| Take care if setting both the <span style="font-weight: 700; font-size: 15px; color: gold; background-color: black;"> Scale </span> and <span style="font-weight: 700; font-size: 15px; color: gold; background-color: black;"> Radius </span>. Using extreme values for both, such as a very large brush radius and a very small scale value, can cause performance issues (i.e. long delays) while the program attempts to scale and clone the scrapbook contents (see [[image:PageLink.PNG|link=]] '''[[#Paint Clone|Using the Scrapbook Clone Brush]]''' for more details)</td>
| | Setting both a large <span style="font-weight: 700; font-size: 15px; color: gold; background-color: black;"> Radius </span> and a small <span style="font-weight: 700; font-size: 15px; color: gold; background-color: black;"> Scale </span> will cause performance issues</td> |
| </tr> | | </tr> |
| </table> | | </table> |
| Line 3,840: |
Line 3,969: |
| </table> | | </table> |
| </td> | | </td> |
| | </tr> |
| | </table> |
| | <br> |
| | <table cellpadding=2 bgcolor="Aquamarine"> |
| | <tr valign="top"> |
| | <td>[[image:LinkWiki.PNG|link=]]</td> |
| | <td>More examples and more detailed descriptions of the '''Tool Options Palette Active Controls''' can be found on the '''Trainz Wiki''' at:- |
| | <table> |
| | <tr valign="top"> |
| | <td>[[image:BlackDot10x10.png|link=]]</td> |
| | <td>'''[[How_to_Use_S20_Tools#The Brush Tool|How to Use S20 Tools: The Brush Tool]]'''</td> |
| </tr> | | </tr> |
| </table> | | </table> |
| Line 3,846: |
Line 3,986: |
| </table> | | </table> |
| <br> | | <br> |
| <table width=1000> <!-- BEGIN Section Nav Buttons --> | | <table width=1000> <!-- BEGIN Nav Buttons Table --> |
| <tr valign="top"> | | <tr valign="top"> |
| <td width=629><span id="Scrapbook Tool Options"></span> | | <td width=629><span id="stepAssets"></span> |
| ===<span style="font-weight: 700; font-size: 17px; color: white; background-color: blue;"> Scrapbook Brush Tool Options </span>=== | | ='''The Assets Palette'''= |
| </td> | | </td> |
| <td width=50> </td> | | <td width=50>[[image:SkipDown.png|link=#skip Using Assets|Skip Down]]</td> |
| <td width=50> </td> | | <td width=50>[[image:SkipUp.png|link=#skip Tool Options Active Controls|Skip Up]]</td> |
| <td width=46>[[image:SkipMinorDown.png|link=#Paint Scrapbook|Down]][[image:SkipMinorUp.png|link=#Scrapbook Brush|Up]]</td> <!-- for Top and Minor Up/Down --> | | <td width=46>[[image:BackToTop.png|link=#top|alt=Top|Top]]</td> |
| <td width=75> </td> | | <td width=75>[[image:NextUp.png|link=#stepOptions|alt=Next Up|Next Up]]</td> |
| <td width=75> </td> | | <td width=75>[[image:NextDown.png|link=#stepFilter|alt=Next Down|Next Down]]</td> |
| <td width=75> </td> <!-- for Bottom -->
| | <td width=75>[[image:BackToBottom.png|link=#bottom|alt=Bottom|Bottom]]</td> |
| </tr> | | </tr> |
| </table> <!-- END Section Nav Buttons --> | | </table> <!-- END Nav Buttons Table --> |
|
| |
|
| <table width=1000 bgcolor=#000000 cellpadding=2> | | <table width=1000 bgcolor=#ffffb0 cellpadding=2> |
| <tr valign="top"> | | <tr valign="top"> |
| <td> | | <td><span style="font-weight: 700; font-size: 15px;">This is a <span style="color: white; background-color: blue;"> Surveyor Only </span> palette</span></td> |
| <table bgcolor=#ffffb0 cellpadding=2> | |
| <tr valign="top">
| |
| <td width=25>[[image:NotePad.PNG|link=]]</td>
| |
| <td width=970><span style="font-size: 17px; font-weight: 700;">Notes: Tool Options Palette Controls</span><br>
| |
| ----</td>
| |
| </tr> | | </tr> |
| | </table> |
| | <br> |
| | <table width=1000 bgcolor="lightcyan" cellpadding=2> |
| <tr valign="top"> | | <tr valign="top"> |
| <td width=10>[[image:DotPoint.JPG|10px|link=]]</td> | | <td width=10>[[image:BlueDot10x10.png|link=]]</td> |
| <td>The active scrapbook brush options for each action are shown in the <span style="font-weight: 700; font-size: 15px; color: white; background-color: #797979;"> Tool Options Palette </span> with a <span style="font-size: 15px; font-weight: 700; color: gold; background-color: black;"> Gold </span> coloured icon next to their names. Those options that have their icon greyed out will be ignored by the selected action, but they can still be edited.</td> | | <td>The <span style="font-weight: 700; font-size: 15px; color: white; background-color: #797979;"> Assets Palette </span> provides lists of assets that can be used with the '''Placement Tool''', [[image:S20_FreeMoveToolIcon.png|link=|20px]] '''Free Move Tool''', [[image:S20_FineAdjustmentToolIcon.png|link=|20px]] '''Fine Adjustment Tool''', '''Marquee Tool''' and the '''Eyedropper Tool'''.</td> |
| </tr> | | </tr> |
| <tr valign="top"> | | <tr valign="top"> |
| <td width=10>[[image:DotPoint.JPG|10px|link=]]</td> | | <td>[[image:BlueDot10x10.png|link=]]</td> |
| <td>Most of the data entry boxes in the <span style="font-weight: 700; font-size: 15px; color: white; background-color: #797979;"> Tool Options Palette </span> have a '''Popup Menu''' (<span style="font-weight: 700; font-size: 15px; background-color: lightcyan;">Right Click</span> inside the box) that can be used to collect and distribute data - see the Wiki Page [[image:WikiLink.PNG|link=]] '''[[How to Use S20 Palettes#Tool Options Popups|How to Use the Surveyor 2.0 Palettes]]''' for more details.</td> | | <td>The <span style="font-weight: 700; font-size: 15px; color: white; background-color: #797979;"> Filter Palette </span> provides the tools used to narrow down the lists provided by the <span style="font-weight: 700; font-size: 15px; color: white; background-color: #797979;"> Assets Palette </span>.</td> |
| | </tr> |
| | </table> |
| | <br> |
| | <table width=1000 bgcolor=#000000> |
| | <tr valign="top"> |
| | <td> |
| | <table width=996 bgcolor=#ffe89a cellpadding=2> |
| | <tr valign="middle"> |
| | <td width=45>[[image:PalettesIcon_S20.png|link=]]</td> |
| | <td>If the <span style="font-weight: 700; font-size: 15px; color: white; background-color: #797979;"> Assets Palette </span> and the <span style="font-weight: 700; font-size: 15px; color: white; background-color: #797979;"> Filter Palette </span> are not visible on the screen then refer to [[image:PageLink.PNG|link=]] '''[[#Hiding and Showing Palettes and Windows|Hiding and Showing Palettes and Windows]]''' at the top of this document.</td> |
| </tr> | | </tr> |
| </table> | | </table> |
| Line 3,882: |
Line 4,030: |
| </table> | | </table> |
| <br> | | <br> |
| <table width=1000> | | <table bgcolor=#000000 width=1000 cellpadding=2> |
| <tr valign="top"> | | <tr valign="top"> |
| <td> | | <td> |
| <table> | | <table bgcolor=#ffffe0 width=996 cellpadding=2> |
| <tr valign="top" align="center">
| |
| <td width=210><span style="font-size: 15px; font-weight: 700; color: white; background-color: black;"> Scrapbook Brush </span><br>[[image:BrushToolsScrapBrush_S20.png|link=|alt=Brush options]]</td>
| |
| <td width=210><span style="font-size: 15px; font-weight: 700; color: white; background-color: black;"> Scrapbook Clone </span><br>[[image:BrushToolsScrapClone_S20.png|link=|alt=Clone options]]</td>
| |
| </tr>
| |
| <tr valign="top"> | | <tr valign="top"> |
| <td colspan=2> | | <td>[[image:PencilTips.PNG|link=]]</td> |
| <table width=420 bgcolor=#000000 cellpadding=2>
| | <td>When using the '''Eyedropper''' - either the '''Eyedropper Tool''' (press <span style="font-weight: 700; font-size: 15px; color: white; background-color: black;"> R </span>) or the '''Eyedropper Icon''' (press and hold down the <span style="font-weight: 700; font-size: 15px; color: white; background-color: black;"> Alt </span> key) - the <span style="font-weight: 700; font-size: 15px; color: white; background-color: #797979;"> Filter Palette </span> is used to restrict the eyedropper to only "seeing" and selecting certain objects or types of objects.</td> |
| <tr valign="top">
| |
| <td colspan=2>
| |
| <table width=416 bgcolor=#ffffe0 cellpadding=2>
| |
| <tr valign="top" align="left">
| |
| <td width=25>[[image:PencilTips.PNG|link=]]</td>
| |
| <td>On the right of each data entry box is a pair of '''Up/Down''' arrow controls. <span style="font-weight: 700; font-size: 15px; background-color: lightcyan;">Left Click and Drag</span> up or down on these to adjust the value in smaller increments</td> | |
| </tr> | | </tr> |
| </table> | | </table> |
| Line 3,904: |
Line 4,042: |
| </tr> | | </tr> |
| </table> | | </table> |
| | <br> |
| | <table width=1000> <!-- BEGIN Nav Buttons Table --> |
| | <tr valign="top"> |
| | <td width=629><span id="skip Using Assets"></span> |
| | =='''Using the Assets Palette'''== |
| </td> | | </td> |
| | <td width=50>[[image:SkipDown.png|link=#skip Expanding the Assets List View|Skip Down]]</td> |
| | <td width=50>[[image:SkipUp.png|link=#stepAssets|Skip Up]]</td> |
| | <td width=46> </td> |
| | <td width=75>[[image:HeadingUp.png|link=#stepAssets|alt=Heading|To Heading]]</td> |
| | <td width=75> </td> |
| | <td width=75> </td> |
| | </tr> |
| | </table> <!-- END Nav Buttons Table --> |
| | |
| | <table width=1000> |
| | <tr valign="top"> |
| | <td>When used by itself, the <span style="font-weight: 700; font-size: 15px; color: white; background-color: #797979;"> Assets Palette </span> will be restricted to showing the list of assets for the asset type currently selected in the <span style="font-weight: 700; font-size: 15px; color: white; background-color: #797979;"> Filter Palette </span>, regardless of whether the <span style="font-weight: 700; font-size: 15px; color: white; background-color: #797979;"> Filter Palette </span> is visible or not. The default asset type shown in the <span style="font-weight: 700; font-size: 15px; color: white; background-color: #797979;"> Assets Palette </span> for a displayed, or minimised, unedited <span style="font-weight: 700; font-size: 15px; color: white; background-color: #797979;"> Filter Palette </span> will be '''Ground Textures'''. However, if the <span style="font-weight: 700; font-size: 15px; color: white; background-color: #797979;"> Filter Palette </span> is '''closed''' (<span style="font-weight: 700; font-size: 15px; background-color: lightcyan;"> Left Click </span> on its menu bar <span style="font-weight: 700; font-size: 15px; color: white; background-color: black;"> x </span> icon) then the <span style="font-weight: 700; font-size: 15px; color: white; background-color: #797979;"> Assets Palette </span> will default to displaying the list of '''ALL''' installed assets</td> |
| </tr> | | </tr> |
| </table> | | </table> |
| </td>
| |
| <td width=580>
| |
| <br> | | <br> |
| <table bgcolor=#000000 width=580 cellpadding=2> | | <table width=1000> |
| <tr valign="top"> | | <tr valign="top"> |
| | <td>[[image:AssetsPaletteNew_S20.png|link=]]</td> |
| <td> | | <td> |
| <table bgcolor=#ffffff width=576 align="left"> | | <table bgcolor=#ffffff cellpadding=2> |
| | <tr valign="top"> |
| | <td>At the top of the palette is the '''Search Box''' is where you can enter text, such as the name or part of the name of an asset. '''UPPER/lower''' case is not important. The search will return all assets that contain the entered text in their names or descriptions. |
| | <table bgcolor=#000000 cellpadding=2> |
| <tr valign="top"> | | <tr valign="top"> |
| <td width=90><span style="font-size: 15px; font-weight: 700; color: gold; background-color: black;"> Radius </span></td> | | <td> |
| <td width=486>the brush radius (metres)</td>
| | <table bgcolor=#ffffe0 cellpadding=2> |
| </tr>
| |
| <tr valign="top"> | | <tr valign="top"> |
| <td colspan=2> | | <td>[[image:PencilTips.PNG|link=]]</td> |
| <table bgcolor=#ffffb0> | | <td>The '''Search Box''' will also accept a list of '''<kuid> codes''' separated by commas that can be created by '''Content Manager'''. |
| | <table bgcolor=#ffffff cellpadding=2> |
| <tr valign="top"> | | <tr valign="top"> |
| <td width=90 align="right">'''Range:''' </td> | | <td colspan=2><span style="font-weight: 700; font-size: 15px;">Steps: To Use <kuid> Codes in the Search Box:-</span></td> |
| <td width=486>for '''5m Resolution''' and '''10m Resolution''' see '''Notes:''' below<br>
| |
| '''0.12m''' and above for '''HD Resolution''' (<span style="background-color: yellow;">in '''Trainz Plus''' only</span>)</td>
| |
| </tr> | | </tr> |
| </table> | | <tr valign="top"> |
| </td> | | <td width=25>[[image:DotPoint1.JPG|link=]]</td> |
| | <td>In '''Content Manager''' select each of the the assets to be included in the search</td> |
| </tr> | | </tr> |
| <tr valign="top"> | | <tr valign="top"> |
| <td width=90><span style="font-size: 15px; font-weight: 700; color: gold; background-color: black;"> Sensitivity </span></td> | | <td>[[image:DotPoint2.JPG|link=]]</td> |
| <td width=486>if the <span style="font-weight: 700; font-size: 15px; color: white; background-color: black;"> Ground Height </span> option has been enabled in the <span style="font-weight: 700; font-size: 15px; color: white; background-color: #797979;"> Scrapbook Palette </span> filter settings, then this will set the rate or speed at which the ground height will change under the brush</td> | | <td><span style="font-weight: 700; font-size: 15px; background-color: lightcyan;"> Right Click </span> on one of the assets and select the <span style="font-weight: 700; font-size: 15px; color: white; background-color: black;"> List Assets in New Window </span> option</td> |
| </tr> | | </tr> |
| <tr valign="top"> | | <tr valign="top"> |
| <td colspan=2> | | <td>[[image:DotPoint3.JPG|link=]]</td> |
| <table bgcolor=#ffffb0> | | <td>In '''Content Manager''' <span style="font-weight: 700; font-size: 15px; background-color: lightcyan;"> Left Click </span> inside the '''Asset KUID''' list of the new window and press <span style="font-weight: 700; font-size: 15px;"><span style="color: white; background-color: black;"> Ctrl </span> + <span style="color: white; background-color: black;"> A </span></span> to highlight all the asset '''<kuid> codes''' and then press <span style="font-weight: 700; font-size: 15px;"><span style="color: white; background-color: black;"> Ctrl </span> + <span style="color: white; background-color: black;"> C </span></span> to copy them into your system clipboard</td> |
| | </tr> |
| <tr valign="top"> | | <tr valign="top"> |
| <td width=90 align="right">'''Range:''' </td> | | <td>[[image:DotPoint4.JPG|link=]]</td> |
| <td width=486>'''1%''' = slowest<br> | | <td>Back in '''Surveyor''' <span style="font-weight: 700; font-size: 15px; background-color: lightcyan;"> Left Click </span> inside the <span style="font-weight: 700; font-size: 15px; color: white; background-color: #797979;"> Assets Palette </span> <span style="font-weight: 700; font-size: 15px; color: white; background-color: black;"> Search </span> box and press <span style="font-weight: 700; font-size: 15px;"><span style="color: white; background-color: black;"> Ctrl </span> + <span style="color: white; background-color: black;"> V </span></span> to paste the '''<kuid> codes'''</td> |
| '''100%''' = fastest</td> | | </tr> |
| | </table> |
| | |
| | Only those assets in the '''<kuid> codes''' list that match the current <span style="font-weight: 700; font-size: 15px; color: white; background-color: #797979;"> Filter Palette </span> settings will be shown in the asset list.</td> |
| </tr> | | </tr> |
| </table> | | </table> |
| </td> | | </td> |
| </tr> | | </tr> |
| <tr valign="top">
| | </table> |
| <td><span style="font-size: 15px; font-weight: 700; color: gold; background-color: black;"> Rotation </span></td>
| | </td> |
| <td>initial rotation angle (degrees) - see '''Notes:''' below</td>
| |
| </tr> | |
| <tr valign="top">
| |
| <td colspan=2>
| |
| <table bgcolor=#ffffb0>
| |
| <tr valign="top">
| |
| <td width=90 align="right">'''Range:''' </td>
| |
| <td width=486>'''0°''' to '''±359°''' (larger angles can be entered)</td>
| |
| </tr> | | </tr> |
| </table> | | </table> |
| </td> | | </td> |
| </tr> | | </tr> |
| | </table> |
| | <br> |
| | <table width=1000> |
| <tr valign="top"> | | <tr valign="top"> |
| <td><span style="font-size: 15px; font-weight: 700; color: gold; background-color: black;"> Scale </span></td> | | <td>[[image:AssetsPaletteNewPBRAsphalt_S20.png|link=]]</td> |
| <td>the scrapbook scaling factor ('''Scrapbook Clone''' brush action only) - see '''Notes:''' below</td>
| | <td> </td> |
| </tr>
| | <td> |
| <tr valign="top">
| | <table> |
| <td colspan=2>
| |
| <table bgcolor=#ffffb0>
| |
| <tr valign="top">
| |
| <td width=90 align="right">'''Range:''' </td>
| |
| <td width=486>'''0.01%''' = smallest<br>
| |
| '''100%''' = full size<br>
| |
| '''>100%''' larger than full size</td>
| |
| </tr>
| |
| </table>
| |
| </td>
| |
| </tr>
| |
| <tr valign="top">
| |
| <td><span style="font-size: 15px; font-weight: 700; color: gold; background-color: black;"> Shape </span></td>
| |
| <td>brush shape</td>
| |
| </tr>
| |
| <tr valign="top">
| |
| <td colspan=2>
| |
| <table bgcolor=#ffffb0>
| |
| <tr valign="top">
| |
| <td width=90 align="right">'''Options:''' </td>
| |
| <td width=145>[[image:BrushToolsScrapShapes_S20.png|link=]]</td>
| |
| <td><span style="font-weight: 700; font-size: 15px; color: white; background-color: black;"> Circle </span> and <span style="font-weight: 700; font-size: 15px; color: white; background-color: black;"> Square </span> will set the brush to the selected shape with the <span style="font-size: 15px; font-weight: 700; color: gold; background-color: black;"> Radius </span> setting the brush size</td> | |
| </tr> | |
| <tr valign="top"> | | <tr valign="top"> |
| | <td>[[image:AssetsPaletteNewKUID_S20.png|link=]]</td> |
| <td> </td> | | <td> </td> |
| <td colspan=2><span style="font-weight: 700; font-size: 15px; color: white; background-color: black;"> Natural </span> will set the brush to the same shape as the '''Marquee''' that created the scrapbook, which may be rectangular. The <span style="font-size: 15px; font-weight: 700; color: gold; background-color: black;"> Radius </span> setting will scale the brush size</td> | | <td> |
| </tr>
| | <table bgcolor=#000000 cellpadding=2> |
| </table>
| |
| </td>
| |
| </tr>
| |
| <tr valign="top"> | | <tr valign="top"> |
| <td colspan=2> | | <td> |
| <table bgcolor=#ffffb0 cellpadding=2> | | <table bgcolor=#ffffb0 cellpadding=2> |
| <tr valign="top"> | | <tr valign="top"> |
| <td width=25>[[image:NotePad.PNG|link=]]</td> | | <td width=25>[[image:NotePad.PNG|link=]]</td> |
| <td align="left">The <span style="font-weight: 700; font-size: 15px; color: gold; background-color: black;"> Height </span> setting has no effect on the '''Scrapbook'''. This feature is controlled by the <span style="font-weight: 700; font-size: 15px; color: white; background-color: #797979;"> Scrapbook Palette </span> '''Filter''' <span style="font-weight: 700; font-size: 15px; color: white; background-color: black;"> Ground Height </span> options.</td> | | <td>In each case the search results shown in the <span style="font-weight: 700; font-size: 15px; color: white; background-color: #797979;"> Assets Palette </span> will be taken from the list already created by the filter set in the <span style="font-weight: 700; font-size: 15px; color: white; background-color: #797979;"> Filter Palette </span>. In the examples shown on the left this starting list is the '''Ground Textures'''.<br><br> |
| | To change the starting list you must change the filter in the <span style="font-weight: 700; font-size: 15px; color: white; background-color: #797979;"> Filter Palette </span></td> |
| </tr> | | </tr> |
| </table> | | </table> |
| Line 4,011: |
Line 4,142: |
| </table> | | </table> |
| <br> | | <br> |
| <table width=1000 bgcolor=#000000 cellpadding=2> | | <table width=1000> |
| | <tr valign="top"> |
| | <td> |
| | <table width=496 bgcolor=#000000 cellpadding=2> |
| <tr valign="top"> | | <tr valign="top"> |
| <td> | | <td> |
| <table width=996 bgcolor=#ffffb0 cellpadding=2> | | <table width=496 bgcolor=#ffffff cellpadding=2> |
| <tr valign="top"> | | <tr valign="top"> |
| <td width=25>[[image:NotePad.PNG|link=]]</td> | | <td colspan=2><span style="font-weight: 700; font-size: 15px;">Steps: To Select an Asset from the List View:-</span></td> |
| <td><span style="font-size: 17px; font-weight: 700;">Notes:</span><br>
| |
| ----
| |
| </td> | |
| </tr> | | </tr> |
| <tr valign="top"> | | <tr valign="top"> |
| <td >[[image:DotPoint.JPG|10px|link=]]</td> | | <td width=25>[[image:DotPoint1.JPG|link=]]</td> |
| <td>Unlike '''Surveyor Classic''', there is no upper limit to the brush <span style="font-size: 15px; font-weight: 700; color: gold; background-color: black;"> Radius </span>. Brushes of hundreds of metres (even kilometres) in size are possible. However, the performance will '''decrease''' as the brush radius '''increases'''.</td> | | <td><span style="font-weight: 700; font-size: 15px; background-color: lightcyan;"> Left Click </span> on its name in the list |
| | <table> |
| | <tr valign="top"> |
| | <td width=10>[[image:DotPoint.JPG|10px|link=]]</td> |
| | <td>the asset name will be highlighted with a <span style="font-weight: 700; font-size: 15px; color: black; background-color: lightgrey;"> Light Grey </span> background</td> |
| </tr> | | </tr> |
| <tr valign="top"> | | <tr valign="top"> |
| <td >[[image:DotPoint.JPG|10px|link=]]</td> | | <td>[[image:DotPoint.JPG|10px|link=]]</td> |
| <td>There is a lower limit to the brush <span style="font-size: 15px; font-weight: 700; color: gold; background-color: black;"> Radius </span> that is dictated by the baseboard resolution ('''10m''', '''5m''' or '''HD'''). For small brushes using the '''5m''' and '''10m Resolutions''' the scrapbook is not confined to the grid lines or intersections unlike small '''Ground Height''' and '''Ground Texture''' brushes. For the '''HD Resolution''' the minimum brush radius is '''0.12m'''.</td> | | <td>the correct '''Tool''' or '''Brush Target''' in the <span style="font-weight: 700; font-size: 15px; color: white; background-color: #797979;"> Tools Palette </span> will be automatically selected</td> |
| </tr> | | </tr> |
| <tr valign="top"> | | <tr valign="top"> |
| <td >[[image:DotPoint.JPG|10px|link=]]</td> | | <td>[[image:DotPoint.JPG|10px|link=]]</td> |
| <td>Painting with a small brush size using the '''Scrapbook Brush''' target will compress the entire scrapbook into the brush size.</td> | | <td>you can then immediately place or paint the asset in your '''Trainz World'''</td> |
| </tr> | | </tr> |
| </table> | | </table> |
| Line 4,037: |
Line 4,172: |
| </tr> | | </tr> |
| </table> | | </table> |
| <br>
| |
| <table width=1000> <!-- BEGIN Section Nav Buttons -->
| |
| <tr valign="top">
| |
| <td width=629><span id="Paint Scrapbook"></span>
| |
| ===<span style="font-size: 17px; color: white; background-color: blue;"> Painting with the Scrapbook Brush </span>===
| |
| </td> | | </td> |
| <td width=50> </td>
| |
| <td width=50> </td>
| |
| <td width=46>[[image:SkipMinorDown.png|link=#Paint Scrapbook Tips|Down]][[image:SkipMinorUp.png|link=#Scrapbook Tool Options|Up]]</td> <!-- for Top and Minor Up/Down -->
| |
| <td width=75> </td>
| |
| <td width=75> </td>
| |
| <td width=75> </td> <!-- for Bottom -->
| |
| </tr> | | </tr> |
| </table> <!-- END Section Nav Buttons --> | | </table> |
| | | </td> |
| <table width=1000> | | <td> |
| | <table width=496 bgcolor=#000000 cellpadding=2> |
| <tr valign="top"> | | <tr valign="top"> |
| <td width=495> | | <td> |
| <table bgcolor=#000000 width=495 cellpadding=2> | | <table bgcolor=#ffffe0 cellpadding=2> |
| <tr valign="top"> | | <tr valign="top"> |
| | <td width=25>[[image:PencilTips.PNG|link=]]</td> |
| <td> | | <td> |
| <table bgcolor=#ffffff width=491 cellpadding=2> | | <table> |
| <tr valign="top"> | | <tr valign="top"> |
| <td colspan=2><span style="font-weight: 700; font-size: 15px;">Steps:</span> To "paint" with a '''Scrapbook''' asset:-</td> | | <td colspan=2>More than one asset can be selected (see '''Note''' below)</td> |
| | </tr> |
| | <tr valign="top"> |
| | <td>[[image:DotPoint.JPG|10px|link=]]</td> |
| | <td>To select multiple assets in the list use <span style="font-weight: 700; font-size: 15px;"><span style="color: white; background-color: black;"> Shift </span> + <span style="background-color: lightcyan;"> Left Click </span></span> or <span style="font-weight: 700; font-size: 15px;"><span style="color: white; background-color: black;"> Ctrl </span> + <span style="background-color: lightcyan;"> Left Click </span></span></td> |
| | </tr> |
| | <tr valign="top"> |
| | <td>[[image:DotPoint.JPG|10px|link=]]</td> |
| | <td>To select the entire list select one asset first then use <span style="font-weight: 700; font-size: 15px;"><span style="color: white; background-color: black;"> Ctrl </span> + <span style="color: white; background-color: black;"> A </span></span></td> |
| | </tr> |
| | </table> |
| | </td> |
| </tr> | | </tr> |
| <tr valign="top"> | | <tr valign="top"> |
| <td colspan=2> | | <td colspan=2> |
| <table bgcolor=#ffffe0 cellpadding=2> | | <table bgcolor=#ffffb0 cellpadding=2> |
| <tr valign="top"> | | <tr valign="top"> |
| <td width=25>[[image:PencilTips.PNG|link=]]</td> | | <td width=25>[[image:NotePad.PNG|link=]]</td> |
| <td>The '''minimum''' steps needed to paint the scrapbook currently shown as a thumbnail in the <span style="font-weight: 700; font-size: 15px; color: white; background-color: #797979;"> Scrapbook Palette </span> are <span style="font-weight: 700; font-size: 15px; color: white; background-color: red;"> 1 </span> <span style="font-weight: 700; font-size: 15px; color: white; background-color: red;"> 2 </span> <span style="font-weight: 700; font-size: 15px; color: white; background-color: red;"> 3 </span> and <span style="font-weight: 700; font-size: 15px; color: white; background-color: red;"> 7 </span>. This will paint using the current settings in the '''Scrapbook Filter''' and the <span style="font-weight: 700; font-size: 15px; color: white; background-color: #797979;"> Tool Options Palette </span>. The <span style="font-weight: 700; font-size: 15px; color: white; background-color: #797979;"> Scrapbook Palette </span> does not have to be visible on the screen</td> | | <td>Selecting multiple assets will not allow you to place all those assets in your '''Trainz World''' with a single click. Only the first selected asset will be added.<br> |
| | The reasons for selecting multiple assets would be to add them all to a '''Picklist''', or to your OS clipboard, or to display them in a '''Content Manager''' window</td> |
| | </tr> |
| | </table> |
| | </td> |
| | </tr> |
| | </table> |
| | </td> |
| </tr> | | </tr> |
| </table> | | </table> |
| </td> | | </td> |
| </tr> | | </tr> |
| | </table> |
| | <br> |
| | <table width=1000> |
| <tr valign="top"> | | <tr valign="top"> |
| <td width=20>[[image:DotPoint1.JPG|link=]]</td> | | <td colspan=2>Each asset in the list has a '''Popup Menu'''. <span style="font-weight: 700; font-size: 15px; background-color: lightcyan;"> Right Click </span> on an asset to open its menu. You can also select multiple assets as described above and then <span style="font-weight: 700; font-size: 15px; background-color: lightcyan;"> Right Click </span> on any of the selected assets to open the common popup menu.</td> |
| <td>In the <span style="font-weight: 700; font-size: 15px; color: white; background-color: #797979;"> Tools Palette </span> <span style="font-weight: 700; font-size: 15px; background-color: lightcyan;"> Left Click </span> on the [[image:S20_BrushToolIcon.png|link=|20px]] '''Brush Tool''' or press the <span style="font-weight: 700; font-size: 15px; color: white; background-color: black;"> W </span> key</td>
| |
| </tr> | | </tr> |
| <tr valign="top"> | | <tr valign="top"> |
| <td>[[image:DotPoint2.JPG|link=]]</td> | | <td width=600> |
| <td>select the [[image:BrushTargetIcon_S20.png|link=]] <span style="font-weight: 700; font-size: 15px; color: white; background-color: black;"> Scrapbook Data </span> target from the [[image:S20_BrushToolIcon.png|link=|20px]] '''Brush Tool''' first drop down menu</td> | | <table bgcolor=#000000 cellpadding=2> |
| </tr> | | <tr valign="top"> |
| | <td> |
| | <table bgcolor=#ffffff cellpadding=2> |
| | <tr valign="top"> |
| | <td>The options that are available are:- |
| | <table> |
| <tr valign="top"> | | <tr valign="top"> |
| <td>[[image:DotPoint3.JPG|link=]]</td> | | <td><span style="font-weight: 700; font-size: 15px; color: white; background-color: black;"> Copy </span></td> |
| <td>select a brush action ([[image:BrushActionIcon_S20.png|link=]] <span style="font-weight: 700; font-size: 15px; color: white; background-color: black;"> Scrapbook Brush </span> <span style="font-weight: 700; font-size: 15px;">OR</span><br>
| | <td>to copy the details ('''<kuid> code''' and '''name''') of the selected asset or assets into your system clipboard</td> |
| [[image:BrushActionIcon_S20.png|link=]] <span style="font-weight: 700; font-size: 15px; color: white; background-color: black;"> Scrapbook Clone </span>) from the second drop down menu</td>
| |
| </tr> | | </tr> |
| | </table> |
| | <table> |
| <tr valign="top"> | | <tr valign="top"> |
| <td>[[image:DotPoint4.JPG|link=]]</td> | | <td width=210><span style="font-weight: 700; font-size: 15px; color: white; background-color: black;"> List Assets in New Window </span></td> |
| <td>In the <span style="font-weight: 700; font-size: 15px; color: white; background-color: #797979;"> Scrapbook Palette </span> select a '''Scrapbook''' asset to be painted (see [[image:PageLink.PNG|link=]] '''[[#Scrapbook Palette|The Scrapbook Palette]]''' below)</td>
| | <td>will open a '''Content Manager''' window to display the details of the selected asset or assets</td> |
| </tr> | | </tr> |
| | </table> |
| | <table> |
| <tr valign="top"> | | <tr valign="top"> |
| <td>[[image:DotPoint5.JPG|link=]]</td> | | <td width=130><span style="font-weight: 700; font-size: 15px; color: white; background-color: black;"> Add to Picklist > </span></td> |
| <td>In the <span style="font-weight: 700; font-size: 15px; color: white; background-color: #797979;"> Scrapbook Palette </span> open the '''Scrapbook Filter''' and select the features to be painted and the method used (see [[image:PageLink.PNG|link=]] '''[[#Scrapbook Filters|Scrapbook Filters]]''' below)</td>
| | <td>you will be asked to select an existing '''Picklist''' or create a new one. The selected asset or assets will be added to that '''Picklist'''</td> |
| </tr> | | </tr> |
| | </table> |
| | If the list you have opened is a '''Picklist''' then the last option shown will be:- |
| | <table> |
| <tr valign="top"> | | <tr valign="top"> |
| <td>[[image:DotPoint6.JPG|link=]]</td> | | <td width=170><span style="font-weight: 700; font-size: 15px; color: white; background-color: black;"> Remove from Picklist </span></td> |
| <td>In the <span style="font-weight: 700; font-size: 15px; color: white; background-color: #797979;"> Tool Options Palette </span> set any '''Brush''' controls such as the <span style="font-weight: 700; font-size: 15px; color: gold; background-color: black;"> Radius </span></td>
| | <td>the selected asset or assets will be removed from the '''Picklist'''. See the '''Known Issue''' note on the right.</td> |
| </tr> | | </tr> |
| <tr valign="top">
| | </table> |
| <td>[[image:DotPoint7.JPG|link=]]</td>
| | </td> |
| <td><span style="font-weight: 700; font-size: 15px; background-color: lightcyan;"> Left Click </span> or <span style="font-weight: 700; font-size: 15px; background-color: lightcyan;">Left Click and Drag</span> (depending on your brush selection in <span style="font-weight: 700;">Step <span style="font-size: 15px; color: white; background-color: red;"> 3 </span></span>) on the terrain to paint with the scrapbook asset</td>
| |
| </tr> | | </tr> |
| </table> | | </table> |
| Line 4,106: |
Line 4,262: |
| </table> | | </table> |
| </td> | | </td> |
| <td width=10> </td> | | <td> |
| <td width=495> | | <table width=400 cellpadding=2 bgcolor=#ff0000> |
| <table width=495 bgcolor=#000000 cellpadding=2>
| |
| <tr valign="top"> | | <tr valign="top"> |
| <td> | | <td> |
| <table bgcolor=#ffffb0 cellpadding=2> | | <table cellpadding=2 bgcolor=#ffffff> |
| <tr valign="top">
| |
| <td width=25>[[image:NotePad.PNG|link=]]</td>
| |
| <td><span style="font-size: 17px; font-weight: 700;">Notes:</span><br>
| |
| ----</td>
| |
| </tr>
| |
| <tr>
| |
| <td colspan=2>
| |
| '''Scrapbooks''', when painted or pasted, can contain any combinations of:-</td>
| |
| </tr>
| |
| <tr valign="top">
| |
| <td width=10>[[image:DotPoint.JPG|10px|link=]]</td>
| |
| <td>'''Ground Heights'''</td>
| |
| </tr>
| |
| <tr valign="top"> | | <tr valign="top"> |
| <td>[[image:DotPoint.JPG|10px|link=]]</td> | | <td>[[image:Bug.png|link=]]</td> |
| <td>'''Ground Textures'''</td> | | <td><span style="font-size: 15px; font-weight: 700;">Known Issue:'''</span><br> |
| | There is a bug that greys out the <span style="font-weight: 700; font-size: 15px; color: white; background-color: black;"> Remove from Picklist </span> option so it cannot be selected.</td> |
| </tr> | | </tr> |
| <tr valign="top"> | | <tr valign="top"> |
| <td>[[image:DotPoint.JPG|10px|link=]]</td> | | <td colspan=2>'''Workarounds:''' Two alternative solutions are available:- |
| <td>'''TurfFX/Clutter Effect Layers'''</td>
| | # Use '''Content Manager''' to remove assets from a Picklist |
| </tr>
| | # Use the working <span style="font-weight: 700; font-size: 15px; color: white; background-color: black;"> Remove from Picklist </span> option in the '''Filter Palette''' - see [[image:PageLink.PNG|link=]] '''[[#stepFilter|The Filter Palette]]''' for the details</td> |
| <tr valign="top">
| |
| <td>[[image:DotPoint.JPG|10px|link=]]</td>
| |
| <td>'''Scenery Objects (Meshes)''' - individual buildings, trees, signals, etc</td>
| |
| </tr>
| |
| <tr valign="top"> | |
| <td>[[image:DotPoint.JPG|10px|link=]]</td>
| |
| <td>'''Scenery Splines''' - roads, track, fences, etc</td>
| |
| </tr>
| |
| <tr valign="top">
| |
| <td colspan=2>You have options in [[image:PageLink.PNG|link=]] '''[[#Scrapbook Filters|The Scrapbook Filters]]''' that will control which of these data types are added to your '''Trainz World''' and how they are added.</td>
| |
| </tr> | | </tr> |
| </table> | | </table> |
| Line 4,155: |
Line 4,288: |
| <tr valign="top"> | | <tr valign="top"> |
| <td> | | <td> |
| <table bgcolor=#ffffb0 cellpadding=2> | | <table width=996 bgcolor=#ffffe0 cellpadding=2> |
| <tr valign="top"> | | <tr valign="top"> |
| <td width=25>[[image:NotePad.PNG|link=]]</td> | | <td width=25>[[image:PencilTips.PNG|link=]]</td> |
| <td><span style="font-size: 17px; font-weight: 700;">Notes:</span><br> | | <td>To get a better view or more details about an asset, choose one of the following:-<br> |
| ----
| | <span style="font-weight: 700; font-size: 15px;;">Options:</span></td> |
| </td> | |
| </tr> | | </tr> |
| <tr valign="top"> | | <tr valign="top"> |
| Line 4,166: |
Line 4,298: |
| <table> | | <table> |
| <tr valign="top"> | | <tr valign="top"> |
| <td width=10>[[image:DotPoint.JPG|10px|link=]]</td> | | <td width=25>[[image:Ablue.png|link=]]</td> |
| <td>Unlike '''Surveyor Classic''', there is no upper limit to the brush <span style="font-size: 15px; font-weight: 700; color: gold; background-color: black;"> Radius </span>. Brushes of hundreds of metres (even kilometres) in size are possible. However, the performance will '''decrease''' as the brush radius '''increases'''</td> | | <td><span style="font-weight: 700; font-size: 15px; background-color: lightcyan;">Double Left Click</span> on an asset name to open its '''Asset Properties''' window, <span style="font-weight: 700; font-size: 15px;">OR</span></td> |
| </tr> | | </tr> |
| <tr valign="top"> | | <tr valign="top"> |
| <td>[[image:DotPoint.JPG|10px|link=]]</td> | | <td>[[image:Bblue.png|link=]]</td> |
| <td>The <span style="font-size: 15px; font-weight: 700; color: gold; background-color: black;"> Rotation </span> control in the <span style="font-weight: 700; font-size: 15px; color: white; background-color: #797979;"> Tool Options Palette </span> sets the starting angle for painting the scrapbook objects and you can adjust that angle in increments of 1°</td> | | <td>Open the '''Asset Preview Palette''' and then <span style="font-weight: 700; font-size: 15px; background-color: lightcyan;"> Left Click </span> on an asset name in the <span style="font-weight: 700; font-size: 15px; color: white; background-color: #797979;"> Assets Palette </span>. This will create a rotating image of the asset in the '''Preview Palette'''. The '''Preview Palette''' can be resized.</td> |
| </tr> | | </tr> |
| <tr valign="top"> | | <tr valign="top"> |
| <td>[[image:DotPoint.JPG|10px|link=]]</td> | | <td>[[image:Cblue.png|link=]]</td> |
| <td>The <span style="font-size: 15px; font-weight: 700; color: white; background-color: black;"> [ </span> and <span style="font-size: 15px; font-weight: 700; color: white; background-color: black;"> ] </span> keys will rotate the angle for painting the scrapbook objects in increments of 10° <span style="font-weight: 700; font-size: 15px;">BUT</span> unlike painting with a '''Ground Texture''' you '''CANNOT''' hold down these keys to continuously rotate the brush while painting with a Scrapbook. The best option while painting is to periodically release the mouse, tap one of the rotation keys and then resume painting - repeat as necessary</td> | | <td><span style="font-weight: 700; font-size: 15px; background-color: lightcyan;"> Left Click </span> on the '''Thumbnail''' icon [[image:AssetsPaletteListToggleViewIcon S20.png|link=]] at the end of the <span style="font-weight: 700; font-size: 15px; color: white; background-color: black;"> Name Search </span> box. See [[image:PageLink.PNG|link=]] '''[[#skip Thumbnail View|Thumbnail View]]''' below for more details.</td> |
| </tr>
| |
| <tr valign="top">
| |
| <td>[[image:DotPoint.JPG|10px|link=]]</td>
| |
| <td>The <span style="font-weight: 700; font-size: 15px; color: white; background-color: black;"> Ground Height </span> options in the '''Scrapbook Filters''' controls how the terrain heights in the '''Scrapbook''' are applied. The <span style="font-weight: 700; font-size: 15px; color: gold; background-color: black;"> Height </span> setting in the <span style="font-weight: 700; font-size: 15px; color: white; background-color: #797979;"> Tool Options Palette </span> will be ignored</td>
| |
| </tr>
| |
| <tr valign="top">
| |
| <td>[[image:DotPoint.JPG|10px|link=]]</td>
| |
| <td>Setting extreme values for the <span style="font-weight: 700; font-size: 15px; color: gold; background-color: black;"> Scale </span> and <span style="font-weight: 700; font-size: 15px; color: gold; background-color: black;"> Radius </span> when using the [[image:BrushActionIcon_S20.png|link=]] <span style="font-weight: 700; font-size: 15px; color: white; background-color: black;"> Scrapbook Clone </span> brush action can cause performance issues (i.e. long delays, even "freezing") while the program attempts to scale and clone the scrapbook contents into the route (see [[image:PageLink.PNG|link=]] '''[[#Paint Clone|Using the Scrapbook Clone Brush]]''' for more details)</td>
| |
| </tr> | | </tr> |
| </table> | | </table> |
| Line 4,193: |
Line 4,317: |
| </table> | | </table> |
| <br> | | <br> |
| <table width=1000 bgcolor=#000000 cellpadding=2> | | <table width=1000> <!-- BEGIN Section Nav Buttons --> |
| <tr valign="top"> | | <tr valign="top"> |
| <td> | | <td width=629><span id="skip Expanding the Assets List View"></span> |
| <table width=996 bgcolor=#ffffe0 cellpadding=2> | | =='''Expanding the Assets List View'''== |
| | </td> |
| | <td width=50>[[image:SkipDown.png|link=#skip Thumbnail View|Skip Down]]</td> |
| | <td width=50>[[image:SkipUp.png|link=#skip Using Assets|Skip Up]]</td> |
| | <td width=46> </td> <!-- for Top --> |
| | <td width=75>[[image:HeadingUp.png|link=#stepAssets|alt=Heading|To Heading]]</td> |
| | <td width=75> </td> <!-- for Next Down --> |
| | <td width=75> </td> <!-- for Bottom --> |
| | </tr> |
| | </table> <!-- END Section Nav Buttons --> |
| | |
| | <table width=1000> |
| <tr valign="top"> | | <tr valign="top"> |
| <td width=25>[[image:PencilTips.PNG|link=]]</td> | | <td>The <span style="font-weight: 700; font-size: 15px; color: white; background-color: #797979;"> Assets Palette </span> can be expanded to provide more information about each listed asset. See [[image:PageLink.PNG|link=]] '''[[#Docking and Undocking Palettes|Docking and Undocking Palettes]]''' and [[image:PageLink.PNG|link=]] '''[[#skipResizing|Resizing Palettes and Windows]]''' at the top of this document.</td> |
| <td>If you have set the <span style="font-weight: 700; font-size: 15px; color: white; background-color: black;"> Ground Height </span> '''Scrapbook Filter Option''' to '''Add''' or '''Overwrite''' (see [[image:PageLink.PNG|link=]] '''[[#Scrapbook Filters|Scrapbook Filters]]''' below) then the rate or speed at which the ground height changes will be controlled by the <span style="font-weight: 700; font-size: 15px; color: white; background-color: #797979;"> Tool Options Palette </span> <span style="font-weight: 700; font-size: 15px; color: gold; background-color: black;"> Sensitivity </span> setting<table cellpadding=2 bgcolor=#ffffff>
| |
| <tr>
| |
| <td colspan="2">
| |
| ----</td>
| |
| </tr> | | </tr> |
| | </table> |
| | <br> |
| | <table width=1000> |
| <tr valign="top"> | | <tr valign="top"> |
| <td>[[image:Gears.PNG|link=]]</td> | | <td width=595>[[image:AssetsPaletteListExtended_S20.png|link=]]<br><br> |
| <td><span style="font-weight: 700; font-size: 15px;"><span style="color: gold; background-color: black;"> Sensitivity </span> Settings:'''</span> | | <table bgcolor=#000000 cellpadding=2> |
| <table>
| |
| <tr valign="top"> | | <tr valign="top"> |
| <td width=10>[[image:BlackDot10x10.png|link=]]</td> | | <td> |
| <td>'''1%''' for the smallest possible change with each sweep of the brush</td> | | <table bgcolor=#ffffff cellpadding=2> |
| </tr>
| |
| <tr valign="top"> | | <tr valign="top"> |
| <td>[[image:BlackDot10x10.png|link=]]</td> | | <td colspan=2><span style="font-weight: 700; font-size: 15px;">Steps: To Move and Resize Columns:-</span></td> |
| <td>'''100%''' for the largest possible change with each sweep of the brush</td>
| |
| </tr> | | </tr> |
| <tr valign="top"> | | <tr valign="top"> |
| <td colspan=2>Values between these two limits will give intermediate changes with each sweep of the brush over the same area</td> | | <td width=20>[[image:DotPoint1.JPG|link=]]</td> |
| </tr> | | <td>'''To Move:''' <span style="font-weight: 700; font-size: 15px; background-color: lightcyan;"> Left Click and Drag </span> the column heading left or right to a new position</td> |
| </table> | |
| </td> | |
| </tr> | | </tr> |
| <tr valign="top"> | | <tr valign="top"> |
| <td colspan="2"> | | <td width=20>[[image:DotPoint2.JPG|link=]]</td> |
| ----</td> | | <td>'''To Resize:''' <span style="font-weight: 700; font-size: 15px; background-color: lightcyan;"> Left Click and Drag </span> the dividing line between two column headings left or right to reduce or increase the column width</td> |
| </tr> | | </tr> |
| </table> | | </table> |
| Line 4,231: |
Line 4,360: |
| </table> | | </table> |
| </td> | | </td> |
| | <td width=10> </td> |
| | <td> |
| | <table bgcolor=#000000 cellpadding=2> |
| | <tr valign="top"> |
| | <td> |
| | <table bgcolor=#ffffff cellpadding=2> |
| | <tr valign="top"> |
| | <td colspan=2><span style="font-weight: 700; font-size: 15px;">Steps: To Sort the Data in a Column:-</span></td> |
| </tr> | | </tr> |
| </table>
| |
| <br>
| |
| <table width=1000>
| |
| <tr valign="top"> | | <tr valign="top"> |
| <td><span id="Paint Clone"></span> | | <td width=25>[[image:DotPoint1.JPG|link=]]</td> |
| ====Using the Scrapbook Clone Brush====
| | <td>resize the '''undocked''' <span style="font-weight: 700; font-size: 15px; color: white; background-color: #797979;"> Assets Palette </span> by dragging its right edge further out to the right. This will reveal additional columns of data in an identical display to what you would see in '''Content Manager'''</td> |
| </td> | |
| </tr> | | </tr> |
| </table> <!-- END Section Nav Buttons -->
| |
|
| |
| <table width=1000>
| |
| <tr valign="top"> | | <tr valign="top"> |
| <td> | | <td>[[image:DotPoint2.JPG|link=]]</td> |
| When using the [[image:BrushActionIcon_S20.png|link=]] <span style="font-size: 15px; font-weight: 700; color: white; background-color: black;"> Scrapbook Clone </span> brush action the <span style="font-weight: 700; font-size: 15px; color: gold; background-color: black;"> Radius </span> and <span style="font-weight: 700; font-size: 15px; color: gold; background-color: black;"> Scale </span> settings in the <span style="font-weight: 700; font-size: 15px; color: white; background-color: #797979;"> Tool Options Palette </span> are important.</td>
| | <td>to sort the data in a column, <span style="font-weight: 700; font-size: 15px; background-color: lightcyan;"> Left Click </span> on the column heading. Each <span style="font-weight: 700; font-size: 15px; background-color: lightcyan;"> Left Click </span> will cycle through different sorting options</td> |
| | </tr> |
| | </table> |
| | </td> |
| </tr> | | </tr> |
| </table> | | </table> |
| <br>
| | Just like in '''Content Manager''', additional columns can be added, removed, resized and moved to a different position. |
| <table width=1000 bgcolor=#000000 cellpadding=2> | | <table bgcolor=#000000 cellpadding=2> |
| <tr valign="top"> | | <tr valign=2> |
| <td> | | <td> |
| <table bgcolor=#ffffff cellpadding=2> | | <table bgcolor=#ffffff cellpadding=2> |
| <tr valign="top"> | | <tr valign="top"> |
| <td colspan=2><span style="font-weight: 700; font-size: 15px;">For Example:</span> Two trees as shown below are captured as a Scrapbook with a size of 2x1 grid squares.</td> | | <td colspan=2><span style="font-weight: 700; font-size: 15px;">Steps: To Add New Columns:-</span></td> |
| </tr> | | </tr> |
| <tr valign="top"> | | <tr valign="top"> |
| <td width=300>[[image:ScrapbookCloneBrushOriginal.png|link=]]</td> | | <td width=25>[[image:DotPoint1.JPG|link=]]</td> |
| <td><br> | | <td><span style="font-weight: 700; font-size: 15px; background-color: lightcyan;"> Right Click </span> on a column heading where you want to insert a new column<br> |
| The [[image:BrushTargetIcon_S20.png|link=]] '''Brush Target''' is set to '''Scrapbook Data''' and its action set to [[image:BrushActionIcon_S20.png|link=]] '''Scrapbook Clone'''. The effects of different <span style="font-weight: 700; font-size: 15px; color: gold; background-color: black;"> Radius </span> and <span style="font-weight: 700; font-size: 15px; color: gold; background-color: black;"> Scale </span> settings in the <span style="font-weight: 700; font-size: 15px; color: white; background-color: #797979;"> Tool Options Palette </span> are shown below.</td>
| | [[image:AssetsPaletteListAddColumn_S20.png|link=]]</td> |
| </tr> | | </tr> |
| <tr valign="top"> | | <tr valign="top"> |
| <td colspan=2> | | <td>[[image:DotPoint2.JPG|link=]]</td> |
| <table> | | <td>Select the option <span style="font-weight: 700; font-size: 15px; color: white; background-color: black;"> Insert Column </span> and then select the column to be added</td> |
| <tr valign="top"> | |
| <td colspan=2>The '''Scrapbook Clone''' brush action will normally show the '''scaled size''' and '''shape''' of the scrapbook within the brush shape itself, in this case a circle.</td> | |
| </tr> | | </tr> |
| <tr valign="top"> | | <tr valign="top"> |
| <td width=420>[[image:ScrapbookCloneBrushCircle01.png|link=]]</td> | | <td colspan=2><span style="font-weight: 700; font-size: 15px;">Steps: To Remove a Column:-</span></td> |
| <td><br>
| |
| [[image:DotPoint1.JPG|link=]] When the brush radius is the same as the scaled scrapbook size then a single copy of the scrapbook will be painted into the brush.<br><br>
| |
| An exception will occur when the scrapbook and the brush do not have matching sizes and shapes, as shown on the left. In these cases some of the scrapbook may be cloned and painted in the spaces on each side of the marked scrapbook shape but this will depend on the contents of the scrapbook. In this situation it may be better to select the <span style="font-weight: 700; font-size: 15px; color: gold; background-color: black;"> Natural </span> brush shape in the <span style="font-weight: 700; font-size: 15px; color: white; background-color: #797979;"> Tool Options Palette </span>.
| |
| <table>
| |
| <tr valign="top">
| |
| <td>
| |
| <table>
| |
| <tr valign="top">
| |
| <td width=10>[[image:DotPoint.JPG|10px|link=]]</td>
| |
| <td>A single <span style="font-weight: 700; font-size: 15px; background-color: lightcyan;"> Left Click </span> will paint the entire scrapbook within the brush shape.</td>
| |
| </tr> | | </tr> |
| <tr valign="top"> | | <tr valign="top"> |
| <td>[[image:DotPoint.JPG|10px|link=]]</td> | | <td>[[image:DotPoint1.JPG|link=]]</td> |
| <td>A <span style="font-weight: 700; font-size: 15px; background-color: lightcyan;"> Left Click and Drag </span> will paint and clone the scrapbook as the mouse moves across the terrain.</td> | | <td><span style="font-weight: 700; font-size: 15px; background-color: lightcyan;"> Right Click </span> on the column heading and select the option <span style="font-weight: 700; font-size: 15px; color: white; background-color: black;"> Remove Column </span></td> |
| </tr> | | </tr> |
| </table> | | </table> |
| </td>
| |
| <td width=200>[[image:ScrapbookCloneBrushNatural01.png|link=]]<br>
| |
| Using the <span style="font-weight: 700; font-size: 15px; color: gold; background-color: black;"> Natural </span> brush shape
| |
| </td> | | </td> |
| </tr> | | </tr> |
| Line 4,293: |
Line 4,411: |
| </td> | | </td> |
| </tr> | | </tr> |
| | </table> |
| | <br> |
| | <table bgcolor=#000000 width=1000 cellpadding=2> |
| <tr valign="top"> | | <tr valign="top"> |
| <td>[[image:ScrapbookCloneBrushCircle03.png|link=]]</td> | | <td> |
| <td><br> | | <table bgcolor=#ffffb0 width=996 cellpadding=2> |
| [[image:DotPoint2.JPG|link=]] By reducing the brush radius or increasing its scale (or both) then only part of the scrapbook will fit into the brush (no scrapbook brush outline will be shown)
| | <tr valign="top"> |
| <table> | | <td width=25>[[image:NotePad.PNG|link=]]</td> |
| | <td><span style="font-size: 17px; font-weight: 700;">Notes:'''</span><br> |
| | ----</td> |
| | </tr> |
| <tr valign="top"> | | <tr valign="top"> |
| <td width=10>[[image:DotPoint.JPG|10px|link=]]</td> | | <td>[[image:DotPoint.JPG|10px|link=]]</td> |
| <td>A single <span style="font-weight: 700; font-size: 15px; background-color: lightcyan;"> Left Click </span> will only paint the central part of the scrapbook.</td> | | <td>If the palette is docked to another it will be resized to the same width as the palette it is docked to.</td> |
| </tr> | | </tr> |
| <tr valign="top"> | | <tr valign="top"> |
| <td>[[image:DotPoint.JPG|10px|link=]]</td> | | <td>[[image:DotPoint.JPG|10px|link=]]</td> |
| <td>A <span style="font-weight: 700; font-size: 15px; background-color: lightcyan;"> Left Click and Drag </span> will paint and reveal more of the scrapbook as the mouse moves across the terrain.</td> | | <td>You can hide, and even close, the palette and its new size and position will be restored when it is made visible again. <span style="font-weight: 700; font-size: 15px; background-color: lightcyan;"> Left Click </span> on its '''Minimise''' <span style="font-weight: 700; font-size: 15px; color: white; background-color: black;"> - </span> or '''Close''' <span style="font-weight: 700; font-size: 15px; color: white; background-color: black;"> x </span> icon on its top menu bar, and then restore it to the screen using the [[image:SurveyorWindowIcon.png|link=]] '''Window Menu'''. See [[image:PageLink.PNG|link=]] '''[[#Minimise Maximise Close|Minimise Maximise Close]]''' at the top of this document.</td> |
| </tr> | | </tr> |
| </table> | | </table> |
| </td> | | </td> |
| </tr> | | </tr> |
| | </table> |
| | <br> |
| | <table width=1000> <!-- BEGIN Section Nav Buttons --> |
| <tr valign="top"> | | <tr valign="top"> |
| <td>[[image:ScrapbookCloneBrushCircle02.png|link=]]</td> | | <td width=629><span id="skip Thumbnail View"></span> |
| <td><br> | | =='''Thumbnail View'''== |
| [[image:DotPoint3.JPG|link=]] By increasing the brush radius or reducing its scale (or both) then the scrapbook will be cloned so that several copies will be painted into the brush.<br> | | </td> |
| These are shown as additional scrapbook shapes within the brush area.
| | <td width=50>[[image:SkipDown.png|link=#skip Font Size|Skip Down]]</td> |
| <table> | | <td width=50>[[image:SkipUp.png|link=#skip Expanding the Assets List View|Skip Up]]</td> |
| | <td width=46> </td> <!-- for Top --> |
| | <td width=75>[[image:HeadingUp.png|link=#stepAssets|alt=Heading|To Heading]]</td> |
| | <td width=75> </td> <!-- for Next Down --> |
| | <td width=75> </td> <!-- for Bottom --> |
| | </tr> |
| | </table> <!-- END Section Nav Buttons --> |
| | |
| | <table width=1000> |
| <tr valign="top"> | | <tr valign="top"> |
| <td width=10>[[image:DotPoint.JPG|10px|link=]]</td> | | <td>As an alternative to the list view of assets there is a thumbnail view option. This works best when the <span style="font-weight: 700; font-size: 15px; color: white; background-color: #797979;"> Assets Palette </span> has been undocked. See [[image:PageLink.PNG|link=]] '''[[#Docking and Undocking Palettes|Docking and Undocking Palettes]]''' at the top of this document.</td> |
| <td>A single <span style="font-weight: 700; font-size: 15px; background-color: lightcyan;"> Left Click </span> will paint multiple copies of the scrapbook within the brush shape as shown below.</td>
| |
| </tr> | | </tr> |
| </table> | | </table> |
| <br> | | <br> |
| [[image:ScrapbookCloneBrushCircle02P.png|link=]]</td> | | <table width=1000> |
| | <tr valign="top"> |
| | <td width=495>[[image:AssetsPaletteNewPBRAsphaltThumbnail_S20.png|link=]]</td> |
| | <td width=10> </td> |
| | <td> |
| | <table width=495 bgcolor=#000000 cellpadding=2> |
| | <tr valign="top"> |
| | <td> |
| | <table bgcolor=#ffffff cellpadding=2> |
| | <tr valign="top"> |
| | <td colspan=2><span style="font-weight: 700; font-size: 15px;">Steps: To Switch to the Thumbnail View:-</span></td> |
| </tr> | | </tr> |
| <tr valign="top"> | | <tr valign="top"> |
| <td>[[image:ScrapbookCloneBrushCircle04.png|link=]]</td> | | <td width=25>[[image:DotPoint1.JPG|link=]]</td> |
| <td><br> | | <td>undock and resize the <span style="font-weight: 700; font-size: 15px; color: white; background-color: #797979;"> Assets Palette </span> as described in [[image:PageLink.PNG|link=]] '''[[#Docking and Undocking Palettes|Docking and Undocking Palettes]]''' and [[image:PageLink.PNG|link=]] '''[[#skipResizing|Resizing Palettes and Windows]]''' above.</td> |
| [[image:DotPoint4.JPG|link=]] By reducing the brush scale to an extreme (e.g. 1%) then the scrapbook will be cloned hundreds (or even thousands) of times within the brush area. | | </tr> |
| <table> | | <tr valign="top"> |
| <tr valign="top"> | | <td>[[image:DotPoint2.JPG|link=]]</td> |
| <td width=10>[[image:DotPoint.JPG|10px|link=]]</td> | | <td><span style="font-weight: 700; font-size: 15px; background-color: lightcyan;"> Left Click </span> the '''Thumbnail''' icon [[image:AssetsPaletteListToggleViewIcon S20.png|link=]] at the end of the <span style="font-weight: 700; font-size: 15px; color: white; background-color: black;"> Name Search </span> box</td> |
| <td>A single <span style="font-weight: 700; font-size: 15px; background-color: lightcyan;"> Left Click </span> will fill '''each individual''' "micro-grid" inside the brush shape (shown as a "mesh pattern" in the image) with a scaled down but complete copy of the entire scrapbook.</td> | | </tr> |
| | <tr valign="top"> |
| | <td colspan=2><span style="font-weight: 700; font-size: 15px;">Steps: To Switch Back to the List View:-</span></td> |
| | </tr> |
| | <tr valign="top"> |
| | <td>[[image:DotPoint1.JPG|link=]]</td> |
| | <td><span style="font-weight: 700; font-size: 15px; background-color: lightcyan;"> Left Click </span> the '''Thumbnail''' icon [[image:AssetsPaletteListToggleViewIcon S20.png|link=]] at the end of the <span style="font-weight: 700; font-size: 15px; color: white; background-color: black;"> Name Search </span> box</td> |
| | </tr> |
| | </table> |
| | </td> |
| </tr> | | </tr> |
| </table> | | </table> |
| <br> | | <br> |
| This will almost certainly cause performance issues (long delays, "freezing") as the program attempts to both scale and clone the scrapbook. The end result is shown below.<br>
| | <table bgcolor=#000000 cellpadding=2> |
| [[image:ScrapbookCloneBrushCircle04P.png|link=]]</td> | | <tr valign="top"> |
| | <td> |
| | <table bgcolor=#ffffb0 cellpadding=2> |
| | <tr valign="top"> |
| | <td width=25>[[image:NotePad.PNG|link=]]</td> |
| | <td>If the <span style="font-weight: 700; font-size: 15px; color: white; background-color: #797979;"> Filter Palette </span> is '''closed''' then the <span style="font-weight: 700; font-size: 15px; color: white; background-color: #797979;"> Assets Palette </span> will default to displaying the list of '''ALL''' installed assets</td> |
| </tr> | | </tr> |
| </table> | | </table> |
| Line 4,345: |
Line 4,503: |
| </table> | | </table> |
| <br> | | <br> |
| <table width=1000> <!-- BEGIN Section Nav Buttons -->
| |
| <tr valign="top">
| |
| <td width=629><span id="Paint Scrapbook Tips"></span>
| |
| ===<span style="font-size: 17px; color: white; background-color: blue;"> Scrapbook Painting Tips </span>===
| |
| </td>
| |
| <td width=50> </td>
| |
| <td width=50> </td>
| |
| <td width=46>[[image:SkipMinorDown.png|link=#Scrapbook Palette|Down]][[image:SkipMinorUp.png|link=#Paint Scrapbook|Up]]</td> <!-- for Top and Minor Up/Down -->
| |
| <td width=75> </td>
| |
| <td width=75> </td>
| |
| <td width=75> </td> <!-- for Bottom -->
| |
| </tr>
| |
| </table> <!-- END Section Nav Buttons -->
| |
|
| |
| <table width=1000 bgcolor=#000000 cellpadding=2> | | <table width=1000 bgcolor=#000000 cellpadding=2> |
| <tr valign="top"> | | <tr valign="top"> |
| <td> | | <td> |
| <table width=996 bgcolor=#ffffe0 cellpadding=2> | | <table width=996 bgcolor=#ffffff cellpadding=2> |
| | <tr valign="top"> |
| | <td colspan=2><span style="font-weight: 700; font-size: 15px;">Steps: To Select an Asset from the Thumbnails to be Placed in Your Trainz World:-</span></td> |
| | </tr> |
| <tr valign="top"> | | <tr valign="top"> |
| <td width=25>[[image:PencilTips.PNG|link=]]</td> | | <td width=25>[[image:DotPoint1.JPG|link=]]</td> |
| <td><span style="font-weight: 700; font-size: 15px;">Add Variety to Painting a Scrapbook</span> | | <td><span style="font-weight: 700; font-size: 15px; background-color: lightcyan;"> Left Click </span> on its thumbnail |
| <table> | | <table> |
| <tr valign="top"> | | <tr valign="top"> |
| <td>A single scrapbook can be reused many times in a layout but each instance can have variations that will make it different from the others. Use the following techniques:-</td> | | <td width=10>[[image:DotPoint.JPG|10px|link=]]</td> |
| </tr> | | <td>the thumbnail will be surrounded by a blue border or it will have a blue background</td> |
| </table>
| |
| </td> | |
| </tr> | | </tr> |
| <tr valign="top"> | | <tr valign="top"> |
| <td colspan=2> | | <td>[[image:DotPoint.JPG|10px|link=]]</td> |
| <table bgcolor=#ffffff cellpadding=2>
| | <td>the correct '''Tool''' or '''Brush Target''' in the <span style="font-weight: 700; font-size: 15px; color: white; background-color: #797979;"> Tools Palette </span> will be automatically selected</td> |
| <tr valign="top"> | |
| <td colspan=2><span style="font-weight: 700; font-size: 15px;">Steps:</span> To add variety to Painting a Scrapbook:-</td> | |
| </tr> | | </tr> |
| <tr valign="top"> | | <tr valign="top"> |
| <td width=20>[[image:DotPoint1.JPG|link=]]</td> | | <td>[[image:DotPoint.JPG|10px|link=]]</td> |
| <td>Use the [[image:PageLink.PNG|link=]] '''[[#Scrapbook Filters|Scrapbook Filters]]''' to change the elements that are placed into the route (e.g. Ground, Scenery, Textures, Splines, Effect Layers) and how they are added (None, Add, Overwrite) each time it is painted</td> | | <td>you can then immediately place or paint the asset in your '''Trainz World'''</td> |
| </tr> | | </tr> |
| <tr valign="top">
| | </table> |
| <td>[[image:DotPoint2.JPG|link=]]</td>
| | </td> |
| <td>In the <span style="font-weight: 700; font-size: 15px; color: white; background-color: #797979;"> Tool Options Palette </span> alter the <span style="font-weight: 700; font-size: 15px; color: gold; background-color: black;"> Scale </span> and <span style="font-weight: 700; font-size: 15px; color: gold; background-color: black;"> Rotation </span> settings . This works best when the '''Ground Height''' and '''Effect Layers''' scrapbook filter options have been set to <span style="font-weight: 700; font-size: 15px; color: white; background-color: black;"> None </span></td>
| |
| </tr> | | </tr> |
| </table> | | </table> |
| </td> | | </td> |
| </tr> | | </tr> |
| | </table> |
| | <br> |
| | <table width=1000 bgcolor=#000000 cellpadding=2> |
| <tr valign="top"> | | <tr valign="top"> |
| <td colspan=2> </td> | | <td> |
| | <table width=996 bgcolor=#ffffe0 cellpadding=2> |
| | <tr valign="top"> |
| | <td width=25>[[image:PencilTips.PNG|link=]]</td> |
| | <td>To get a better view or more details about an asset, choose one of the following:-<br> |
| | <span style="font-weight: 700; font-size: 15px;;">Options:</span></td> |
| </tr> | | </tr> |
| <tr valign="top"> | | <tr valign="top"> |
| <td colspan=2> | | <td colspan=2> |
| <table bgcolor=#ffffff cellpadding=2> | | <table> |
| <tr valign="top"> | | <tr valign="top"> |
| <td colspan=2><span style="font-weight: 700; font-size: 15px;">Steps:</span> To avoid repetition patterns forming when painting with a scrapbook:-</td> | | <td width=25>[[image:Ablue.png|link=]]</td> |
| | <td><span style="font-weight: 700; font-size: 15px; background-color: lightcyan;">Double Left Click</span> on an asset name to open its '''Asset Properties''' window, <span style="font-weight: 700; font-size: 15px;">OR</span></td> |
| </tr> | | </tr> |
| <tr valign="top"> | | <tr valign="top"> |
| <td width=20>[[image:DotPoint1.JPG|link=]]</td> | | <td>[[image:Bblue.png|link=]]</td> |
| <td>Press the <span style="font-weight: 700; font-size: 15px; color: white; background-color: black;"> [ </span> or <span style="font-weight: 700; font-size: 15px; color: white; background-color: black;"> ] </span> rotation keys between mouse clicks. Each key press will rotate the brush by 10°. <span style="font-weight: 700; background-color: yellow;"> NOTE: Unlike painting a ground texture, you cannot hold down these keys while painting with a scrapbook </span></td> | | <td>Open the '''Asset Preview Palette''' and then <span style="font-weight: 700; font-size: 15px; background-color: lightcyan;"> Left Click </span> on an asset name in the <span style="font-weight: 700; font-size: 15px; color: white; background-color: #797979;"> Assets Palette </span>. This will create a rotating image of the asset in the '''Preview Palette'''. The '''Preview Palette''' can be resized.</td> |
| </tr> | | </tr> |
| </table> | | </table> |
| Line 4,411: |
Line 4,562: |
| </table> | | </table> |
| <br> | | <br> |
| <table width=1000> <!-- BEGIN Section Nav Buttons --> | | <table width=1000 bgcolor=#000000 cellpadding=2> |
| <tr valign="top"> | | <tr valign="top"> |
| <td width=629><span id="Scrapbook Palette"></span> | | <td> |
| ===<span style="font-size: 17px; color: white; background-color: blue;"> The Scrapbook Palette </span>===
| | <table width=996 bgcolor=#ffffb0 cellpadding=2> |
| </td>
| |
| <td width=50> </td>
| |
| <td width=50> </td>
| |
| <td width=46>[[image:SkipMinorDown.png|link=#Scrapbook Filters|Down]][[image:SkipMinorUp.png|link=#Paint Scrapbook Tips|Up]]</td> <!-- for Top and Minor Up/Down -->
| |
| <td width=75> </td>
| |
| <td width=75> </td>
| |
| <td width=75> </td> <!-- for Bottom -->
| |
| </tr>
| |
| </table> <!-- END Section Nav Buttons -->
| |
| | |
| <table width=1000 bgcolor="lightcyan" cellpadding=2> | |
| <tr valign="top"> | | <tr valign="top"> |
| <td width=10>[[image:BlueDot10x10.png|link=]]</td> | | <td width=25>[[image:NotePad.PNG|link=]]</td> |
| <td>This palette selects the scrapbook to be painted or pasted as well as performing a very limited range of management tasks</td> | | <td><span style="font-size: 17px; font-weight: 700;">Notes:'''</span><br> |
| </tr> | | ---- |
| </table> | | <table> |
| <br> | | <tr valign="top"> |
| <table width=1000> | | <td width=10>[[image:DotPoint.JPG|10px|link=]]</td> |
| | <td>If the assets in the list are constructed from 3D meshes then their thumbnail views will be built from the meshes and their textures. If they are ground textures then the actual textures will be shown. The '''thumbnail.jpg''' image that should be supplied with each asset is not be used - the exceptions are assets with no meshes and no textures. This overcomes common problems caused by missing, generic, incorrect or confusing thumbnails that give you no useful information about each asset. Some actual examples from the '''DLS''':- |
| | <table> |
| <tr valign="top"> | | <tr valign="top"> |
| <td> | | <td> |
| <table width=600> | | <table width=450> |
| <tr valign="top"> | | <tr valign="top"> |
| <td>[[image:ScrapbookToolsTop_S20.png|link=]]</td> | | <td align="center" colspan=2>'''Scenery Mesh Asset'''</td> |
| </tr> | | </tr> |
| </table>
| |
| <table width=1000 bgcolor=#000000 cellpadding=2>
| |
| <tr valign="top"> | | <tr valign="top"> |
| <td> | | <td align="center">[[image:AssetsPaletteRoadsignImages_S20.png|link=|96px]]</td> |
| <table width=996 bgcolor=#ffffff cellpadding=2>
| | <td align="center">[[image:AssetsPaletteRoadsignThumbnail_S20.png|link=]]</td> |
| <tr valign="top">
| |
| <td>[[image:ScrapbookPinnedIcon_S20.png|link=]][[image:ScrapbookUnPinnedIcon_S20.png|link=]]</td>
| |
| <td><span style="font-weight: 700; font-size: 15px; background-color: lightcyan;"> Left Click </span> on the pin icon to '''Lock''' (blue pin) and '''Unlock''' (white pin) the scrapbook. Locked scrapbooks are permanent (but can still be deleted). Unlocked scrapbooks will "expire" (self delete) after 5 days</td> | |
| </tr> | | </tr> |
| <tr valign="top"> | | <tr valign="top"> |
| <td>[[image:DeleteIcon_S20.png|link=]]</td> | | <td align="center">'''Supplied Thumbnail'''</td> |
| <td><span style="font-weight: 700; font-size: 15px; background-color: lightcyan;"> Left Click </span> on the delete icon to delete the current scrapbook - most scrapbooks can be deleted (see '''Notes: Deleting Built-in Scrapbooks''' below on how to deal with the exceptions to this)<br>
| | <td align="center">'''Palette Displayed Thumbnail'''</td> |
| <table bgcolor=#ffffb0 cellpadding=2> | |
| <tr valign="top">
| |
| <td width=25>[[image:NotePad.PNG|link=]]</td>
| |
| <td>Deleting a scrapbook '''WILL NOT''' delete any objects that it has painted or pasted into the route. The scrapbook simply identifies the objects, it has no control over them after they have been added to the route.</td>
| |
| </tr> | | </tr> |
| </table> | | </table> |
| </td> | | </td> |
| | <td width=50> </td> |
| | <td> |
| | <table width=450> |
| | <tr valign="top"> |
| | <td align="center" colspan=2>'''Ground Texture Asset'''</td> |
| </tr> | | </tr> |
| <tr valign="top"> | | <tr valign="top"> |
| <td>[[image:ScrapbookThumbnail_S20.png|link=]]</td> | | <td align="center">[[image:AssetsPaletteGroundThumbnailJPG_S20.png|link=|98px]]</td> |
| <td>The thumbnail of the currently displayed scrapbook and the one that will be painted or pasted into the route</td> | | <td align="center">[[image:AssetsPaletteGroundThumbnailAsset_S20.png|link=]]</td> |
| </tr> | | </tr> |
| <tr valign="top"> | | <tr valign="top"> |
| <td>[[image:ScrapbookCounter_S20.png|link=]]</td> | | <td align="center">'''Supplied Thumbnail'''</td> |
| <td>Identifies the currently displayed scrapbook (the first number) and the total number of stored scrapbooks (the second number)</td> | | <td align="center">'''Palette Displayed Thumbnail'''</td> |
| | </tr> |
| | </table> |
| | </td> |
| </tr> | | </tr> |
| <tr valign="top">
| | </table> |
| <td>[[image:ScrapbookLeftRight_S20.png|link=]]</td>
| | </td> |
| <td><span style="font-weight: 700; font-size: 15px; background-color: lightcyan;"> Left Click </span> on the <span style="font-weight: 700; font-size: 15px; color: white; background-color: black;"> < </span> or <span style="font-weight: 700; font-size: 15px; color: white; background-color: black;"> > </span> to move forwards or backwards through the stored scrapbooks to select the scrapbook that will be added to the route. A scrapbook will be selected when its name and thumbnail appear in the palette</td>
| |
| </tr> | | </tr> |
| <tr valign="top"> | | <tr valign="top"> |
| <td> </td> | | <td>[[image:DotPoint.JPG|10px|link=]]</td> |
| <td>The scrapbook name can be edited. Simply <span style="font-weight: 700; font-size: 15px; background-color: lightcyan;"> Left Click </span> inside the name box to edit or replace the current name then <span style="font-weight: 700; font-size: 15px; background-color: lightcyan;"> Left Click </span> on the image <span style="font-weight: 700; font-size: 15px;">OR</span> press the <span style="font-weight: 700; font-size: 15px; color: white; background-color: black;"> Enter </span> key to confirm the edit</td> | | <td>If the asset is animated then its animation will play in the thumbnail</td> |
| </tr> | | </tr> |
| </table> | | </table> |
| Line 4,483: |
Line 4,623: |
| </table> | | </table> |
| <br> | | <br> |
| <table width=1000 bgcolor=#000000 cellpadding=2> | | <table width=1000> <!-- BEGIN Section Nav Buttons --> |
| <tr valign="top"> | | <tr valign="top"> |
| <td> | | <td width=629><span id="skip Font Size"></span> |
| <table width=996 bgcolor=#ffffb0 cellpadding=2>
| | =='''Font Size and Preferred Language'''== |
| <tr valign="top"> | | </td> |
| <td> | | <td width=50>[[image:SkipDown.png|link=#skip Picklists and Search Filters|Skip Down]]</td> |
| <table> | | <td width=50>[[image:SkipUp.png|link=#skip Thumbnail View|Skip Up]]</td> |
| <tr valign="top"> | | <td width=46> </td> <!-- for Top --> |
| <td width=25>[[image:NotePad.PNG|link=]]</td> | | <td width=75>[[image:HeadingUp.png|link=#stepAssets|alt=Heading|To Heading]]</td> |
| <td><span style="font-size: 17px; font-weight: 700;">Notes: Deleting Built-in Scrapbooks'''</span><br> | | <td width=75> </td> <!-- for Next Down --> |
| ----</td> | | <td width=75> </td> <!-- for Bottom --> |
| </tr> | | </tr> |
| <tr> | | </table> <!-- END Section Nav Buttons --> |
| <td colspan=2>Some scrapbooks are installed with '''Trainz''' and cannot be deleted. These scrapbooks have the label '''Prefab''' at the front of their names (you may have to scroll to the front of the name to see it). While they cannot be deleted they can be "disabled" so that they won't appear as an installed scrapbook. Unlocking them will not cause them to "expire" - after 5 days they will just become locked again.</td> | | |
| </tr>
| | <table width=1000 bgcolor="lightcyan" cellpadding=2> |
| <tr> | |
| <td colspan=2>
| |
| <table bgcolor=#ffffff>
| |
| <tr valign="top"> | | <tr valign="top"> |
| <td colspan=2><span style="font-weight: 700; font-size: 15px;">Steps:</span> To disable built-in scrapbooks</td> | | <td width=10>[[image:BlueDot10x10.png|link=]]</td> |
| | <td>You can display the asset names using a larger font that will make them easier to read</td> |
| </tr> | | </tr> |
| <tr valign="top"> | | <tr valign="top"> |
| <td width=20>[[image:DotPoint1.JPG|link=]]</td> | | <td>[[image:BlueDot10x10.png|link=]]</td> |
| <td>Open '''Content Manager''' and locate the "permanent" scrapbook or scrapbooks.<br> | | <td>Asset names along with all menus, option boxes, command lists can be displayed in another language</td> |
| '''Search Tips:''' '''Name:''' starts with "'''Prefab'''"; '''Status:''' is '''Built-in'''; '''Type:''' is '''Misc'''</td>
| |
| </tr> | | </tr> |
| | </table> |
| | <br> |
| | <table width=1000> |
| <tr valign="top"> | | <tr valign="top"> |
| <td>[[image:DotPoint2.JPG|link=]]</td> | | <td colspan=3>You can enlarge the font size used in the asset names to make them easier to read. From the <span style="font-weight: 700; font-size: 15px;">Trainz Launcher</span> select <span style="font-weight: 700; font-size: 15px;">Trainz Settings</span>.<br> |
| <td>Highlight (select) the scrapbook assets individually or as a group</td>
| | See the '''Wiki Page''' at [[image:WikiLink.PNG|link=]] '''[[How_to_Configure_Trainz_Settings|How to Configure Trainz Settings]]''' for the details.</td> |
| </tr> | | </tr> |
| <tr valign="top"> | | <tr valign="top"> |
| <td>[[image:DotPoint3.JPG|link=]]</td> | | <td>[[image:General-FontNormal.png|link=]]<br> |
| <td>Open the '''Content''' menu and select the <span style="font-weight: 700; font-size: 15px; color: white; background-color: black;"> Disable </span> option</td>
| | '''Assets Palette Standard Font'''</td> |
| | <td width=100> </td> |
| | <td>[[image:General-FontLarge.png|link=]]<br> |
| | '''Assets Palette Large Font'''</td> |
| </tr> | | </tr> |
| </table> | | </table> |
| You can reverse this and enable any or all of these scrapbooks at any time if you need them. When enabled they will reappear in the palette</td> | | <br> |
| </tr> | | <table width=1000> |
| </table> | | <tr valign="top"> |
| </td> | | <td>You can set the '''Preferred Language''' for all menus, option boxes, and command lists. Asset names will also be shown in the preferred language <span style="font-weight: 700; font-size: 15px;">IF</span> that language has been added to the assets properties.<br> |
| </tr> | | [[image:General-FrenchLauncherMenu.png|link=]] [[image:General-French.png|link=]]<br> |
| </table> | | From the <span style="font-weight: 700; font-size: 15px;">Trainz Launcher</span> select <span style="font-weight: 700; font-size: 15px;">Trainz Settings</span> and see the '''Wiki Page''' at [[image:WikiLink.PNG|link=]] '''[[How_to_Configure_Trainz_Settings|How to Configure Trainz Settings]]''' for the details.</td> |
| </td> | |
| </tr> | | </tr> |
| </table> | | </table> |
| <br> | | <br> |
| <table width=1000> <!-- BEGIN Section Nav Buttons --> | | <table width=1000> <!-- BEGIN Section Nav Buttons --> |
| <tr valign="top"> | | <tr valign="top"> |
| <td width=629><span id="Scrapbook Filters"></span> | | <td width=629><span id="skip Picklists and Search Filters"></span> |
| ===<span style="font-size: 17px; color: white; background-color: blue;"> The Scrapbook Filters </span>=== | | =='''Picklists and Search Filters'''== |
| </td> | | </td> |
| <td width=50> </td> | | <td width=50>[[image:SkipDown.png|link=#stepFilter|Skip Down]]</td> |
| <td width=50> </td> | | <td width=50>[[image:SkipUp.png|link=#skip Font Size|Skip Up]]</td> |
| <td width=46>[[image:SkipMinorDown.png|link=#skip Effect Layers|Down]][[image:SkipMinorUp.png|link=#Scrapbook Palette|Up]]</td> <!-- for Top and Minor Up/Down -->
| | <td width=46> </td> <!-- for Top --> |
| <td width=75> </td> | | <td width=75>[[image:HeadingUp.png|link=#stepAssets|alt=Heading|To Heading]]</td> |
| <td width=75> </td> | | <td width=75> </td> <!-- for Next Down --> |
| <td width=75> </td> <!-- for Bottom --> | | <td width=75> </td> <!-- for Bottom --> |
| </tr> | | </tr> |
| Line 4,545: |
Line 4,687: |
| <tr valign="top"> | | <tr valign="top"> |
| <td width=10>[[image:BlueDot10x10.png|link=]]</td> | | <td width=10>[[image:BlueDot10x10.png|link=]]</td> |
| <td>The filters control which elements in the scrapbook are added to the route and how they are added.</td> | | <td>the <span style="font-weight: 700; font-size: 15px; color: white; background-color: #797979;"> Assets Palette </span> also manages your saved '''Picklists''' and gives you access to your saved '''Search Filters'''</td> |
| </tr> | | </tr> |
| </table> | | </table> |
| | <br> |
| | ===<span style="font-weight: 700; font-size: 17px; color: white; background-color: blue"> Using Search Filters and Picklists </span>=== |
|
| |
|
| <table width=1000 bgcolor=#000000 cellpadding=2> | | <table width=1000> |
| <tr valign="top"> | | <tr valign="top"> |
| | <td width=205>[[image:FilterPaletteOpenSelections_S20.png|link=]]</td> |
| <td> | | <td> |
| <table width=996 bgcolor=#ffffff cellpadding=2> | | <table> |
| <tr valign="top"> | | <tr valign="top"> |
| <td colspan=2><span style="font-weight: 700; font-size: 15px;">Step:</span> To Open the Scrapbook Filters</td> | | <td colspan=2><span style="font-weight: 700; font-size: 15px;">Steps: To Access Your Picklists and Search Filters:-</span></td> |
| </tr> | | </tr> |
| <tr valign="top"> | | <tr valign="top"> |
| <td width=25>[[image:DotPoint1.JPG|link=]]</td> | | <td width=25>[[image:DotPoint1.JPG|link=]]</td> |
| <td><span style="font-weight: 700; font-size: 15px; background-color: lightcyan;"> Left Click </span> on the '''arrowhead''' next to the <span style="font-weight: 700; font-size: 15px; color: white; background-color: black;"> Filters: </span> label below the scrapbook image to open the scrapbook filters.</td> | | <td>In the <span style="font-weight: 700; font-size: 15px; color: white; background-color: #797979;"> Filter Palette </span> <span style="font-weight: 700; font-size: 15px; background-color: lightcyan;"> Left Click </span> on the '''Asset Type''' data box (showing '''Ground Textures''' in the image on the left) or on the double arrowhead as shown on its right to open up its lists of filters.<br> |
| | <br> |
| | The currently selected '''Asset Type''' (e.g. '''Ground Textures'''), '''Search Filter''' or '''Picklist''' will have a [[image:BulletTick.png|link=]] in front of its name in the drop down list.</td> |
| </tr> | | </tr> |
| </table> | | </table> |
| Line 4,567: |
Line 4,714: |
| <table width=1000> | | <table width=1000> |
| <tr valign="top"> | | <tr valign="top"> |
| <td width=600>[[image:ScrapbookToolsBottom_S20.png|link=]]<br> | | <td>[[image:FilterListSurveyorColourCoded_S20.png|link=]]</td> |
| <br> | | <td> |
| <table bgcolor=#000000 width=600 cellpadding=2> | | <table> |
| <tr valign="top"> | | <tr valign="top"> |
| <td> | | <td> |
| <table bgcolor=#ffffff width=596 cellpadding=2> | | <table bgcolor=#000000 cellpadding=2> |
| <tr valign="top"> | | <tr valign="top"> |
| <td colspan=3> | | <td> |
| <table bgcolor=#ffffe0 width=592 cellpadding=2> | | <table bgcolor=#ffffff cellpadding=2> |
| <tr>
| |
| <td width=25>[[image:PencilTips.PNG|link=]]</td>
| |
| <td><span style="font-weight: 700; font-size: 15px;">Sample Filter Settings:-</span><br>
| |
| You can vary the appearance of the scrapbook when added to a route by painting or pasting it with different filter combinations. For example:-</td>
| |
| </tr>
| |
| </table>
| |
| </td>
| |
| </tr>
| |
| <tr valign="top"> | | <tr valign="top"> |
| <td width=150><span style="font-weight: 700; font-size: 15px;"> Ground Height: </span></td> | | <td>The drop down list shows all the:- |
| <td><span style="font-weight: 700; font-size: 15px; color: white; background-color: black;"> None </span></td>
| | <table> |
| <td>ground height data will not be pasted and the ground heights already in the target area will be used</td>
| |
| </tr>
| |
| <tr valign="top">
| |
| <td><span style="font-weight: 700; font-size: 15px;"> Ground Texture:</span></td>
| |
| <td><span style="font-weight: 700; font-size: 15px; color: white; background-color: black;"> Overwrite </span></td>
| |
| <td>textures present in the scrapbook will replace those already in the target area</td>
| |
| </tr>
| |
| <tr valign="top">
| |
| <td><span style="font-weight: 700; font-size: 15px;"> Meshes:</span></td>
| |
| <td><span style="font-weight: 700; font-size: 15px; color: white; background-color: black;"> Add </span></td>
| |
| <td>scenery objects in the scrapbook will be added to those already in the target area</td>
| |
| </tr> | |
| <tr valign="top"> | | <tr valign="top"> |
| <td><span style="font-weight: 700; font-size: 15px;"> Splines:</span></td> | | <td width=25>[[image:DotPoint.JPG|link=]]</td> |
| <td><span style="font-weight: 700; font-size: 15px; color: white; background-color: black;"> Add </span></td>
| | <td>'''Asset Types''' in the top section will list all the installed assets sorted by their '''Asset Type'''. These '''Types''' are built into '''Trainz''' and cannot be altered</td> |
| <td>scenery splines in the scrapbook will be added to those already in the target area</td> | |
| </tr> | | </tr> |
| <tr valign="top"> | | <tr valign="top"> |
| <td><span style="font-weight: 700; font-size: 15px;"> Effect Layers: </span></td> | | <td>[[image:DotPointBlueSquare.png|link=]]</td> |
| <td><span style="font-weight: 700; font-size: 15px; color: white; background-color: black;"> None </span></td>
| | <td>'''Search Filters''' in the middle section will list all the '''Search Filters''', both built in (such as '''Faulty''' and '''Open for Editing''') and those that you have created and saved yourself</td> |
| <td>effect layers in the scrapbook will not be pasted and any already in the target area will be used</td> | |
| </tr> | | </tr> |
| <tr valign="top"> | | <tr valign="top"> |
| <td colspan=3> | | <td>[[image:DotPointGreenSquare.png|link=]]</td> |
| <table bgcolor=#ffffe0 width=594 cellpadding=2>
| | <td>'''Picklists''' in the lower section will list all the '''Picklist''', both built in (the '''Default Picklist''') and those that you have created and saved yourself</td> |
| <tr valign="top">
| |
| <td width=25>[[image:PencilTips.PNG|link=]]</td>
| |
| <td>You can also add more variety when painting a '''Scrapbook''' by changing its <span style="font-weight: 700; font-size: 15px; color: white; background-color: #797979;"> Tool Options Palette </span> <span style="font-weight: 700; font-size: 15px; color: gold; background-color: black;"> Scale </span> and <span style="font-weight: 700; font-size: 15px; color: gold; background-color: black;"> Rotation </span> settings in combination with different '''Filter''' selections (as shown above). These settings have no effect when pasting a Scrapbook</td> | |
| </tr> | | </tr> |
| </table> | | </table> |
| Line 4,623: |
Line 4,745: |
| </tr> | | </tr> |
| </table> | | </table> |
| </td>
| | |
| <td width=400>
| | <table cellpadding=2> |
| <table bgcolor=#000000 width=400 cellpadding=2> | |
| <tr valign="top"> | | <tr valign="top"> |
| <td> | | <td width=25>[[image:DotPoint2.JPG|link=]]</td> |
| <table bgcolor=#ffffff width=396 cellpadding=2> | | <td>to select and open a specific '''Asset Type''', '''Search Filter''' or '''Picklist''' <span style="font-weight: 700; font-size: 15px; background-color: lightcyan;"> Left Click </span> on its name in the list</td> |
| | </tr> |
| <tr valign="top"> | | <tr valign="top"> |
| <td align="center" colspan=3> | | <td>[[image:DotPoint3.JPG|link=]]</td> |
| <span style="font-size: 15px; font-weight: 700; color: white; background-color: black;"> Scrapbook Painting/Pasting Options </span></td> | | <td>the <span style="font-weight: 700; font-size: 15px; color: white; background-color: #797979;"> Assets Palette </span> list will then show all those assets that match the selected '''Asset Type''', '''Search Filter''' or '''Picklist'''</td> |
| </tr> | | </tr> |
| | </table> |
| | <br> |
| | <table> |
| | <tr valign="top"> |
| | <td>[[image:FilterNamesOz_S20.png|link=]]</td> |
| | <td>For example, selecting the saved Picklist '''Oz Houses''' will list all the assets that have been added to that particular Picklist. Likewise, selecting the saved Search Filter '''Updates Available''' will display all the assets that return a positive match for that filter |
| | <br> |
| | <table bgcolor=#000000 cellpadding=2> |
| <tr valign="top"> | | <tr valign="top"> |
| <td bgcolor="yellow" colspan=3><span style="font-weight: 700; font-size: 15px;"> What Data to Transfer </span></td> | | <td> |
| | <table bgcolor=#ffffe0 cellpadding=2> |
| | <tr valign="top"> |
| | <td>[[image:PencilTips.PNG|link=]]</td> |
| | <td>The assets found by the Search Filter or in the Picklist can be narrowed down further by entering a text string in the '''Search''' box. For example typing '''house''' ('''UPPER/lower''' case is not important) will restrict the list to only showing those assets containing the text string "house" in their names or descriptions</td> |
| </tr> | | </tr> |
| <tr valign="top">
| | </table> |
| <td>  </td>
| | </td> |
| <td width=130><span style="font-size: 15px; font-weight: 700; color: white; background-color: black;"> Ground Height </span></td>
| |
| <td>terrain height(s) used in the scrapbook</td>
| |
| </tr> | | </tr> |
| <tr valign="top">
| | </table> |
| <td>  </td>
| | </td> |
| <td><span style="font-size: 15px; font-weight: 700; color: white; background-color: black;"> Texture </span></td>
| |
| <td>ground textures used in the scrapbook</td>
| |
| </tr> | | </tr> |
| <tr valign="top">
| | </table> |
| <td>  </td>
| | </td> |
| <td><span style="font-size: 15px; font-weight: 700; color: white; background-color: black;"> Meshes </span></td>
| |
| <td>scenery objects (e.g. trees, buildings) used in the scrapbook</td>
| |
| </tr> | | </tr> |
| <tr valign="top">
| | </table> |
| <td>  </td>
| | </td> |
| <td><span style="font-size: 15px; font-weight: 700; color: white; background-color: black;"> Splines </span></td>
| |
| <td>spline objects used in the scrapbook</td>
| |
| </tr> | | </tr> |
| | </table> |
| | |
| | <table width=1000> |
| <tr valign="top"> | | <tr valign="top"> |
| <td>  </td> | | <td>At the bottom of the drop down list (you may have to scroll down to see it) is an option <span style="font-weight: 700; font-size: 15px; color: white; background-color: black;"> Edit Filters and Picklists... </span>. This option will allow you to select and edit a '''Picklist''' or '''Search Filter'''.</td> |
| <td><span style="font-size: 15px; font-weight: 700; color: white; background-color: black;"> Effect Layers </span></td>
| |
| <td>'''TurfFX/Clutter Effect Layers''' used in the scrapbook</td>
| |
| </tr> | | </tr> |
| | </table> |
| | <br> |
| | <table width=1000 bgcolor=#000000 cellpadding=2> |
| <tr valign="top"> | | <tr valign="top"> |
| <td bgcolor="yellow" colspan=3><span style="font-weight: 700; font-size: 15px;"> How to Transfer the Data</span></td> | | <td> |
| </tr>
| | <table width=996 bgcolor=#ffffb0 cellpadding=2> |
| <tr valign="top"> | | <tr valign="top"> |
| <td>  </td> | | <td width=25>[[image:NotePad.PNG|link=]]</td> |
| <td><span style="font-size: 15px; font-weight: 700; color: white; background-color: black;"> None </span></td> | | <td>For more detailed instructions on creating and editing '''Picklists''' and '''Search Filters''' in '''Surveyor 2.0''' and '''Content Manager''' see the '''Trainz Wiki Page [[image:WikiLink.PNG|link=]] [[How_to_Manage_Filters_and_Picklists#skipEditingFiltersS20|How to Manage Filters and Picklists]]'''</td> |
| <td>do not paint/paste this data</td>
| |
| </tr> | | </tr> |
| <tr valign="top">
| | </table> |
| <td>  </td>
| | </td> |
| <td><span style="font-size: 15px; font-weight: 700; color: white; background-color: black;"> Add </span></td>
| |
| <td>add this data to that already present</td>
| |
| </tr> | | </tr> |
| | </table> |
| | <br> |
| | ===<span style="font-weight: 700; font-size: 17px; color: white; background-color: blue"> Creating and Editing a Picklist </span>=== |
| | |
| | <table width=1000 bgcolor="lightcyan" cellpadding=2> |
| <tr valign="top"> | | <tr valign="top"> |
| <td>  </td> | | <td width=10>[[image:BlueDot10x10.png|link=]]</td> |
| <td ><span style="font-size: 15px; font-weight: 700; color: white; background-color: black;"> Overwrite </span></td> | | <td>'''Picklists''' can be created and edited directly from the <span style="font-weight: 700; font-size: 15px; color: white; background-color: #797979;"> Assets Palette </span></td> |
| <td>replace the data already present</td>
| |
| </tr> | | </tr> |
| <tr valign="top"> | | <tr valign="top"> |
| <td bgcolor="lightyellow" colspan=3>For the '''Ground Height''':-</td> | | <td>[[image:BlueDot10x10.png|link=]]</td> |
| | <td>There are other more limited editing options available in the <span style="font-weight: 700; font-size: 15px; color: white; background-color: #797979;"> Assets Palette </span> <span style="font-weight: 700; font-size: 15px; color: white; background-color: black;"> Edit Filters and Picklists... </span> option</td> |
| </tr> | | </tr> |
| | </table> |
| | <br> |
| | To create a new picklist, or add assets to an existing picklist, the first step is to select the asset or assets to be added. |
| | |
| | <table width=1000 cellpadding=2> |
| <tr valign="top"> | | <tr valign="top"> |
| <td>  </td> | | <td colspan=2><span style="font-weight: 700; font-size: 15px;">Steps: To Create a New Picklist or to Add Assets to an Existing Picklist:-</span></td> |
| <td><span style="font-size: 15px; font-weight: 700; color: white; background-color: black;"> None </span></td>
| |
| <td>do not paint/paste the scrapbook ground heights, use the existing ground heights instead</td>
| |
| </tr> | | </tr> |
| <tr valign="top"> | | <tr valign="top"> |
| <td>  </td> | | <td width=25>[[image:DotPoint1.JPG|link=]]</td> |
| <td><span style="font-size: 15px; font-weight: 700; color: white; background-color: black;"> Absolute </span></td> | | <td>In the <span style="font-weight: 700; font-size: 15px; color: white; background-color: #797979;"> Filter Palette </span> select the type of asset that will be added to the new or existing Picklist</td> |
| <td>use the ground heights in the scrapbook to replace the existing ground heights</td>
| |
| </tr> | | </tr> |
| <tr valign="top"> | | <tr valign="top"> |
| <td>  </td> | | <td colspan=2> |
| <td><span style="font-size: 15px; font-weight: 700; color: white; background-color: black;"> Relative </span></td> | | <table> |
| <td>use the '''difference''' between the existing ground heights and those used in the scrapbook</td>
| | <tr valign="top"> |
| | <td> |
| | <table> |
| | <tr valign="top"> |
| | <td width=25>[[image:DotPoint2.JPG|link=]]</td> |
| | <td>In the <span style="font-weight: 700; font-size: 15px; color: white; background-color: #797979;"> Assets Palette </span> select the asset or assets to be added.</td> |
| </tr> | | </tr> |
| </table> | | <tr valign="top"> |
| </td> | | <td> </td> |
| </tr> | | <td>To select just a single asset:-</td> |
| </table> | |
| </td> | |
| </tr> | | </tr> |
| </table>
| |
| <br>
| |
| <table width=1000> <!-- BEGIN Section Nav Buttons -->
| |
| <tr valign="top"> | | <tr valign="top"> |
| <td width=629><span id="skip Effect Layers"></span> | | <td> </td> |
| =='''Effect Layers'''==
| | <td> |
| </td>
| |
| <td width=50>[[image:SkipDown.png|link=#skip Edit Effect|Skip Down]]</td>
| |
| <td width=50>[[image:SkipUp.png|link=#skip Scrapbook Data|Skip Up]]</td>
| |
| <td width=46>[[image:SkipMinorDown.png|link=#Select Effect Layer|Down]][[image:SkipMinorUp.png|link=#Scrapbook Filters|Up]]</td> <!-- for Top and Minor Up/Down -->
| |
| <td width=75>[[image:HeadingUp.png|link=#stepBrush|alt=Heading|To Heading]]</td>
| |
| <td width=75> </td>
| |
| <td width=75> </td> <!-- for Bottom --> | |
| </tr>
| |
| </table> <!-- END Section Nav Buttons -->
| |
|
| |
|
| <table> | | <table> |
| <tr valign="top"> | | <tr valign="top"> |
| <td>[[image:BrushTarget_PaintEffect.png|link=]]</td> | | <td width=10>[[image:DotPoint.JPG|10px|link=]]</td> |
| | <td><span style="font-weight: 700; font-size: 15px; background-color: lightcyan;"> Right Click </span> on the asset name</td> |
| </tr> | | </tr> |
| </table> | | </table> |
| | | </td> |
| <table width=1000 bgcolor="lightcyan" cellpadding=2>
| |
| <tr valign="top">
| |
| <td width=10>[[image:BlueDot10x10.png|link=]]</td>
| |
| <td>This '''Brush Target''' paints a selected '''Effect Layer''' into your '''Trainz World'''. The name of the selected layer will appear next to the '''Brush Tool''' icon</td>
| |
| </tr> | | </tr> |
| </table> | | </table> |
| <br> | | </td> |
| <table bgcolor=#000000 cellpadding=2> | | <td> |
| | <table width=500 bgcolor=#000000 cellpadding=2> |
| <tr valign="top"> | | <tr valign="top"> |
| <td> | | <td> |
| <table bgcolor=#ffffb0 cellpadding=2> | | <table bgcolor=#ffffe0 cellpadding=2> |
| <tr valign="top"> | | <tr valign="top"> |
| <td width=25>[[image:NotePad.PNG|link=]]</td> | | <td>[[image:PencilTips.PNG|link=]]</td> |
| <td>You must have '''Effect Layers''' already installed in '''Surveyor''' for this '''Brush Target''' to be selected.</td> | | <td>The '''Thumbnail''' icon [[image:AssetsPaletteListToggleViewIcon S20.png|link=]] next to the '''Search''' box will toggle the list of assets between text and thumbnail views. But the thumbnail view works best when the <span style="font-weight: 700; font-size: 15px; color: white; background-color: #797979;"> Assets Palette </span> is undocked and resized. See [[image:PageLink.PNG|link=]] '''[[#skip Thumbnail View|Thumbnail View]]''' above for more information</td> |
| </tr> | | </tr> |
| </table> | | </table> |
| Line 4,744: |
Line 4,867: |
| </tr> | | </tr> |
| </table> | | </table> |
| <br>
| | </td> |
| <table width=1000 bgcolor=#000000 cellpadding=2>
| |
| <tr valign="top">
| |
| <td>
| |
| <table width=996 bgcolor=#ffffff cellpadding=2>
| |
| <tr valign="top">
| |
| <td colspan=2>
| |
| <table>
| |
| <tr valign="middle">
| |
| <td width=35>[[image:Information.png|35px|link=]]</td>
| |
| <td>'''Effect Layers''' allow you to create and add special scenery effects to your '''Trainz World'''. Depending on your '''Trainz''' version, operating system and hardware there are four different types of '''Effect Layers''' you can add:-</td>
| |
| </tr> | | </tr> |
| </table> | | </table> |
| Line 4,760: |
Line 4,873: |
| </tr> | | </tr> |
| <tr valign="top"> | | <tr valign="top"> |
| <td width=10>[[image:DotPoint.JPG|10px|link=]]</td> | | <td> </td> |
| <td><span style="font-weight: 700; font-size: 15px;">TurfFX</span> - <span style="background-color: yellow;"> only available for '''Nvidia graphic cards''' and '''Windows''' systems </span>. TurfFX consists of 3D animated (e.g. swaying in a breeze) plants that can be used to cover areas of terrain. An example would be a wheat crop. TurfFX layers are painted onto the terrain like a texture and will follow the terrain shape. You can have multiple TurfFX layers.</td> | | <td>To select multiple assets:-</td> |
| </tr> | | </tr> |
| <tr valign="top"> | | <tr valign="top"> |
| <td>[[image:DotPoint.JPG|10px|link=]]</td> | | <td> </td> |
| <td><span style="font-weight: 700; font-size: 15px;">Clutter</span> - similar to '''TurfFX''' but restricted to smaller objects such as ground cover plants and small rocks. Clutter layers are painted onto the terrain like a texture and will follow the terrain shape. You can have multiple Clutter layers.</td> | | <td> |
| </tr> | | <table> |
| <tr valign="top"> | | <tr valign="top"> |
| <td>[[image:DotPoint.JPG|10px|link=]]</td> | | <td width=10>[[image:DotPoint.JPG|10px|link=]]</td> |
| <td><span style="font-weight: 700; font-size: 15px;">Water</span> - when added a '''Water Effect Layer''' will cover the entire layout and will normally sit below the terrain surface (default height is 0m). Areas of a water layer can be raised up to become visible to form a stream, lake, pond or an ocean. You can have multiple water layers each with different water colours and surface effects (calm, ripples, stormy).</td> | | <td><span style="font-weight: 700; font-size: 15px;"><span style="color: white; background-color: black;"> Shift </span> + <span style="color: black; background-color: lightcyan;"> Left Click </span></span> on the '''first''' and '''last''' asset names in a sequence of multiple assets to be added. Then <span style="font-weight: 700; font-size: 15px; background-color: lightcyan;"> Right Click </span> on one of the selected assets, <span style="font-weight: 700; font-size: 15px;">OR</span></td> |
| </tr> | | </tr> |
| <tr valign="top"> | | <tr valign="top"> |
| <td>[[image:DotPoint.JPG|10px|link=]]</td> | | <td>[[image:DotPoint.JPG|10px|link=]]</td> |
| <td><span style="font-weight: 700; font-size: 15px;">Color</span> - <span style="background-color: yellow;"> only available in '''Trainz Plus when using HD Terrain'''</span>. The Color Layer allows you to add color tints and lightening/darkening effects to different areas of the terrain. The Color layer sits on the terrain surface but is only visible when it is painted. Only a single Color Layer can be added but it can be painted with different colour effects in different areas.</td> | | <td><span style="font-weight: 700; font-size: 15px;"><span style="color: white; background-color: black;"> Ctrl </span> + <span style="color: black; background-color: lightcyan;"> Left Click </span></span> on the names of any number of individual assets to be added. Then <span style="font-weight: 700; font-size: 15px; background-color: lightcyan;"> Right Click </span> on one of the selected assets</td> |
| </tr> | | </tr> |
| </table> | | </table> |
| Line 4,780: |
Line 4,893: |
| </table> | | </table> |
| <br> | | <br> |
| <table bgcolor=#000000 width=1000 cellpadding=2> | | <table width=1000 cellpadding=2> |
| <tr valign="top"> | | <tr valign="top"> |
| <td> | | <td width=25>[[image:DotPoint3.JPG|link=]]</td> |
| <table bgcolor=#ffffb0 width=996 cellpadding=2> | | <td>A popup menu will appear. <span style="font-weight: 700; font-size: 15px; background-color: lightcyan;"> Left Click </span> on the option <span style="font-weight: 700; font-size: 15px; color: white; background-color: black;"> Add to Picklist > </span>. A new popup menu will appear |
| <tr valign="top"> | | <br> |
| <td> | |
| <table> | | <table> |
| <tr valign="top"> | | <tr valign="top"> |
| <td width=25>[[image:NotePad.PNG|link=]]</td> | | <td width=290>[[image:PickListFromAssets_S20.png|link=]]</td> |
| <td><span style="font-size: 17px; font-weight: 700;">Notes:</span><br> | | <td>The menu will list the options '''Default Picklist''' (which may be empty), '''New Picklist...''' and any Picklists that you have created ('''Rail Yard Clutter''' in the example image shown).</td> |
| ----
| | </tr> |
| | </table> |
| </td> | | </td> |
| </tr> | | </tr> |
| <tr valign="top"> | | <tr valign="top"> |
| <td>[[image:DotPoint.JPG|10px|link=]]</td> | | <td colspan=2> |
| <td>'''Effect Layers''' are created using the '''Edit Effect Layers''' options found in both the [[image:SurveyorEditIcon.png|link=]] '''Surveyor Edit Menu''' at the top of the screen and also in the [[image:S20_BrushToolIcon.png|link=|20px]] '''Brush Tool''' Action Drop Down Menu. They can also be loaded from '''.cdp''' files and installed from the '''DLS''' (Download Station)</td> | | <table> |
| | <tr valign="top"> |
| | <td width=25>[[image:DotPoint4.JPG|link=]]</td> |
| | <td>To '''Add''' the selected asset or assets to an existing Picklist, <span style="font-weight: 700; font-size: 15px; background-color: lightcyan;"> Left Click </span> on the name of the Picklist in the new popup menu <span style="font-weight: 700; font-size: 15px;">OR</span></td> |
| </tr> | | </tr> |
| <tr valign="top"> | | <tr valign="top"> |
| <td>[[image:DotPoint.JPG|10px|link=]]</td> | | <td> </td> |
| <td>Once created '''Effect Layers''' can be saved as '''Presets''' to be used in other routes</td> | | <td>To '''Create a New Picklist''' and add the selected asset or assets to that list, <span style="font-weight: 700; font-size: 15px; background-color: lightcyan;"> Left Click </span> on the option <span style="font-weight: 700; font-size: 15px; color: white; background-color: black;"> New Picklist... </span>. You will be asked to enter a name for the new Picklist</td> |
| </tr> | | </tr> |
| </table> | | </table> |
| Line 4,805: |
Line 4,921: |
| </tr> | | </tr> |
| </table> | | </table> |
| </td> | | <br> |
| | ===<span style="font-weight: 700; font-size: 17px; color: white; background-color: blue"> Editing a Search Filter </span>=== |
| | |
| | <table width=1000 bgcolor="lightcyan" cellpadding=2> |
| | <tr valign="top"> |
| | <td width=10>[[image:BlueDot10x10.png|link=]]</td> |
| | <td>'''Search Filters''' can be created and edited using the <span style="font-weight: 700; font-size: 15px; color: white; background-color: #797979;"> Assets Palette </span> <span style="font-weight: 700; font-size: 15px; color: white; background-color: black;"> Edit Filters and Picklists... </span> option</td> |
| | </tr> |
| | </table> |
| | <br> |
| | <table width=1000> |
| | <tr valign="top"> |
| | <td>A summary of the editing process for '''Search Filters''' is provided here. For the full details see the '''Trainz Wiki Page [[image:WikiLink.PNG|link=]] [[How_to_Manage_Filters_and_Picklists#skipEditingFiltersS20|How to Manage Filters and Picklists]]'''</td> |
| </tr> | | </tr> |
| </table> | | </table> |
| Line 4,814: |
Line 4,942: |
| <table width=996 bgcolor=#ffffff cellpadding=2> | | <table width=996 bgcolor=#ffffff cellpadding=2> |
| <tr valign="top"> | | <tr valign="top"> |
| <td colspan=2> | | <td colspan=2><span style="font-weight: 700; font-size: 15px;">Steps: To Edit a Search Filter:-</span></td> |
| <table> | | </tr> |
| <tr valign="middle"> | | <tr valign="top"> |
| <td width=35>[[image:Information.png|35px|link=]]</td> | | <td width=25>[[image:DotPoint1.JPG|link=]]</td> |
| <td><span style="font-weight: 700; font-size: 15px;">Each effect layer that you add or create will be saved as a seperate layer in the Effect Layers Group in the <span style="font-weight: 700; font-size: 15px; color: white; background-color: #797979;"> Layers Palette </span></span></td> | | <td><span style="font-weight: 700; font-size: 15px; background-color: lightcyan;"> Left Click </span> on the <span style="font-weight: 700; font-size: 15px; color: white; background-color: #797979;"> Filter Palette </span> '''Asset Type''' drop down menu to open the list of '''Asset Types''', '''Search Filters''' and '''Picklists'''</td> |
| | </tr> |
| | <tr valign="top"> |
| | <td>[[image:DotPoint2.JPG|link=]]</td> |
| | <td>Scroll down the list to locate and <span style="font-weight: 700; font-size: 15px; background-color: lightcyan;"> Left Click </span> on the <span style="font-weight: 700; font-size: 15px; color: white; background-color: black;"> Edit Filters and Picklists... </span> option. This will open a window listing all the installed and saved '''Search Filters''' and '''Picklists''' |
| | <table width=XXX-4 bgcolor=#ffffe0 cellpadding=2> |
| | <tr valign="top"> |
| | <td width=25>[[image:PencilTips.PNG|link=]]</td> |
| | <td><span style="font-weight: 700; font-size: 15px; background-color: lightcyan;"> Left Click </span> on the column heading and select '''Insert Column''' to add a new column that will identify the list type - '''Picklist''' or '''Search Filter'''</td> |
| </tr> | | </tr> |
| </table> | | </table> |
| Line 4,824: |
Line 4,960: |
| </tr> | | </tr> |
| <tr valign="top"> | | <tr valign="top"> |
| <td width=10>[[image:DotPoint.JPG|10px|link=]]</td> | | <td>[[image:DotPoint3.JPG|link=]]</td> |
| <td>The '''Effects Layer Group''' cannot be renamed, deleted, moved or merged with any other layer</td> | | <td><span style="font-weight: 700; font-size: 15px; background-color: lightcyan;"> Right Click </span> on a '''Search Filter''' to be edited and select, <span style="font-weight: 700; font-size: 15px; background-color: lightcyan;"> Left Click </span> on, the <span style="font-weight: 700; font-size: 15px; color: white; background-color: black;"> Edit </span> option </td> |
| </tr> | | </tr> |
| <tr valign="top"> | | <tr valign="top"> |
| <td>[[image:DotPoint.JPG|10px|link=]]</td> | | <td colspan=2>This will display '''Data Fields''' and '''Data Values''' for the selected '''Search Filter''' |
| <td>Individual effect layers can be renamed, deleted and edited, but not moved or merged with any other layer group</td> | | <table> |
| | <tr valign="top"> |
| | <td>[[image:FilterEditMenu03_S20.png|link=]]</td> |
| | <td>Filter lines can be:- |
| | :[[image:DotPoint.JPG|10px|link=]] '''Added''' |
| | :[[image:DotPoint.JPG|10px|link=]] '''Deleted''' |
| | :[[image:DotPoint.JPG|10px|link=]] '''Changed''' |
| | A <span style="font-weight: 700; font-size: 15px; background-color: lightcyan;"> Left Click </span> on the <span style="font-weight: 700; font-size: 15px;">Save</span> button will save the edited filter using the same name.</td> |
| </tr> | | </tr> |
| <tr valign="top">
| | </table> |
| <td>[[image:DotPoint.JPG|10px|link=]]</td>
| | </td> |
| <td>All effect layer edits are performed using the [[image:S20_BrushToolIcon.png|link=|20px]] '''Brush Tool''', or by selecting the layer in the <span style="font-weight: 700; font-size: 15px; color: white; background-color: #797979;"> Layers Palette </span>, or from the [[image:SurveyorEditIcon.png|link=]] '''Surveyor Edit Menu'''</td>
| |
| </tr> | | </tr> |
| </table> | | </table> |
| Line 4,840: |
Line 4,982: |
| </table> | | </table> |
| <br> | | <br> |
| <table width=1000> <!-- BEGIN Section Nav Buttons --> | | <table width=1000> <!-- BEGIN Nav Buttons Table --> |
| <tr valign="top"> | | <tr valign="top"> |
| <td width=629><span id="Select Effect Layer"></span> | | <td width=629><span id="stepFilter"></span> |
| ===<span style="font-weight: 700; font-size: 17px; color: white; background-color: blue;"> Selecting an Existing Effect Layer </span>=== | | ='''The Filter Palette'''= |
| </td> | | </td> |
| <td width=50> </td> | | <td width=50>[[image:SkipDown.png|link=#skipFilterActions|Skip Down]]</td> <!-- skip Down --> |
| <td width=50> </td> | | <td width=50>[[image:SkipUp.png|link=#skip Picklists and Search Filters|Skip Up]]</td> |
| <td width=46>[[image:SkipMinorDown.png|link=#Load Preset|Down]][[image:SkipMinorUp.png|link=#skip Effect Layers|Up]]</td> <!-- for Top and Minor Up/Down --> | | <td width=46>[[image:BackToTop.png|link=#top|alt=Top|Top]]</td> |
| <td width=75> </td> | | <td width=75>[[image:NextUp.png|link=#stepAssets|alt=Next Up|Next Up]]</td> |
| <td width=75> </td> | | <td width=75>[[image:NextDown.png|link=#stepLayers|alt=Next Down|Next Down]]</td> |
| <td width=75> </td> <!-- for Bottom -->
| | <td width=75>[[image:BackToBottom.png|link=#bottom|alt=Bottom|Bottom]]</td> |
| </tr> | | </tr> |
| </table> <!-- END Section Nav Buttons --> | | </table> <!-- END Nav Buttons Table --> |
|
| |
|
| <table width=1000> | | <table width=1000 bgcolor=#ffffb0 cellpadding=2> |
| <tr valign="top"> | | <tr valign="top"> |
| <td>'''Effect Layers''' that you have created for the current route (see [[image:PageLink.PNG|link=]] '''[[#Edit Effect Layers...|Edit Effect Layers]]''') or installed into the current route (see [[image:PageLink.PNG|link=]] '''[[#Load Preset|Loading Preset Effect Layers]]''') will be listed in both the <span style="font-weight: 700; font-size: 15px; color: white; background-color: #797979;"> Layers Palette </span> and in the [[image:S20_BrushToolIcon.png|link=|20px]] '''Brush Tool''' Action Drop Down Menu.</td> | | <td><span style="font-weight: 700; font-size: 15px;">This is a <span style="color: white; background-color: blue;"> Surveyor Only </span> palette</span></td> |
| </tr> | | </tr> |
| </table> | | </table> |
| <br> | | <br> |
| [[image:Ablue.png|link=]] <span style="font-weight: 700; font-size: 15px;">Selecting an Effect Layer from the Brush Tool:</span>
| | <table width=1000 bgcolor=#000000> |
| <br>
| |
| <table width=1000 cellpadding=2> | |
| <tr valign="top">
| |
| <td width=440>[[image:BrushToolsLoadedEffectLayers_S20.png|link=]]</td>
| |
| <td width=560>
| |
| <table bgcolor=#000000 cellpadding=2>
| |
| <tr valign="top"> | | <tr valign="top"> |
| <td> | | <td> |
| <table bgcolor=#ffffff cellpadding=2> | | <table width=996 bgcolor=#ffe89a cellpadding=2> |
| <tr valign="top"> | | <tr valign="middle"> |
| <td colspan=2><span style="font-weight: 700; font-size: 15px;">Step:</span> To select an '''Effect Layer''' as the brush tool:-</td> | | <td width=45>[[image:PalettesIcon_S20.png|link=]]</td> |
| </tr>
| | <td>If the <span style="font-weight: 700; font-size: 15px; color: white; background-color: #797979;"> Filter Palette </span> and the <span style="font-weight: 700; font-size: 15px; color: white; background-color: #797979;"> Assets Palette </span> are not visible on the screen then refer to [[image:PageLink.PNG|link=]] '''[[#Hiding and Showing Palettes and Windows|Hiding and Showing Palettes and Windows]]''' at the top of this document. The <span style="font-weight: 700; font-size: 15px; color: white; background-color: #797979;"> Filter Palette </span> and <span style="font-weight: 700; font-size: 15px; color: white; background-color: #797979;"> Assets Palette </span> are used together.</td> |
| <tr valign="top">
| |
| <td width=20>[[image:DotPoint1.JPG|link=]]</td> | |
| <td><span style="font-weight: 700; font-size: 15px; background-color: lightcyan;"> Left Click </span> on an '''Effect Layer''' name in the '''Brush Target List''' and immediately start painting with the brush using the current <span style="font-weight: 700; font-size: 15px; color: white; background-color: #797979;"> Tool Options Palette </span> settings. More details are shown below.</td>
| |
| </tr> | | </tr> |
| </table> | | </table> |
| Line 4,882: |
Line 5,015: |
| </table> | | </table> |
| <br> | | <br> |
| <table bgcolor=#000000 cellpadding=2> | | The <span style="font-weight: 700; font-size: 15px; color: white; background-color: #797979;"> Filter Palette </span> made its appearence in Trainz in the July 2024 quarterly update to '''Trainz Plus''' and in '''TRS22PE SP4'''.<br> |
| | |
| | <table width=1000 bgcolor="lightcyan" cellpadding=2> |
| <tr valign="top"> | | <tr valign="top"> |
| <td> | | <td colspan=2>This palette is used to:-</td> |
| <table bgcolor=#ffffb0 cellpadding=2> | | </tr> |
| <tr valign="top"> | | <tr valign="top"> |
| <td width=25>[[image:NotePad.PNG|link=]]</td> | | <td width=10>[[image:BlueDot10x10.png|link=]]</td> |
| <td>If no named '''Effect Layers''' are present in the '''Brush Target List''' then none have been created or loaded</td> | | <td>search the installed assets to provide asset lists for the tools in the <span style="font-weight: 700; font-size: 15px; color: white; background-color: #797979;"> Tools Palette </span></td> |
| </tr> | | </tr> |
| </table> | | <tr valign="top"> |
| </td> | | <td>[[image:BlueDot10x10.png|link=]]</td> |
| </tr> | | <td>in '''Trainz Plus''' bulk replace objects in your '''Trainz World''' with assets selected from the <span style="font-weight: 700; font-size: 15px; color: white; background-color: #797979;"> Assets Palette </span></td> |
| </table> | |
| </td> | |
| </tr> | | </tr> |
| </table> | | </table> |
| <br>
| |
| [[image:Bblue.png|link=]] <span style="font-weight: 700; font-size: 15px;">Selecting an Effect Layer from the Layers Palette:</span>
| |
| <br> | | <br> |
| <table width=1000> | | <table width=1000> |
| | <tr valign="middle"> |
| | <td width=400>[[image:FilterPalette_S20.png|link=]]</td> |
| | <td> |
| | The <span style="font-weight: 700; font-size: 15px; color: white; background-color: #797979;"> Filter Palette </span> has three parts. Each is explained in the following sections:- |
| | <table> |
| <tr valign="top"> | | <tr valign="top"> |
| <td width=270>[[image:AssetsPaletteEffectLayers_S20.png|link=]]</td> | | <td width=10>[[image:DotPoint.JPG|10px|link=]]</td> |
| <td width=730> | | <td width=130>'''[[#skipFilterActions|Filter Actions]]'''</td> |
| <table bgcolor=#000000 cellpadding=2>
| | <td>controls how the filter is applied</td> |
| <tr valign="top">
| |
| <td> | |
| <table bgcolor=#ffffff cellpadding=2>
| |
| <tr valign="top">
| |
| <td colspan=2><span style="font-weight: 700; font-size: 15px;">Step:</span> To select an '''Effect Layer''' as the brush tool:-</td> | |
| </tr> | | </tr> |
| <tr valign="top"> | | <tr valign="top"> |
| <td width=20>[[image:DotPoint1.JPG|link=]]</td> | | <td>[[image:DotPoint.JPG|10px|link=]]</td> |
| <td>In the <span style="font-weight: 700; font-size: 15px; color: white; background-color: #797979;"> Layers Palette </span> <span style="font-weight: 700; font-size: 15px; background-color: lightcyan;"> Left Click </span> on an '''Effect Layer''' name. You can immediately start painting the effect layer using the current <span style="font-weight: 700; font-size: 15px; color: white; background-color: #797979;"> Tool Options Palette </span> settings. More details are shown below.</td> | | <td>'''[[#skipFilterSelections|Filter Selections]]'''</td> |
| </tr> | | <td>sets the search parameters</td> |
| </table>
| |
| </td> | |
| </tr> | | </tr> |
| </table>
| |
| <br>
| |
| <table bgcolor=#000000 cellpadding=2>
| |
| <tr valign="top"> | | <tr valign="top"> |
| <td> | | <td>[[image:DotPoint.JPG|10px|link=]]</td> |
| <table bgcolor=#ffffb0 cellpadding=2>
| | <td>'''[[#skipFilterToggles|Filter Toggles]]'''</td> |
| <tr valign="top">
| | <td>identifies the objects that will be replaced with the '''Bulk Replace Assets Tool'''</td> |
| <td width=25>[[image:NotePad.PNG|link=]]</td>
| |
| <td>If no named '''Effect Layers''' are present in the <span style="font-weight: 700; font-size: 15px; color: white; background-color: #797979;"> Layers Palette </span> then none have been created or loaded</td> | |
| </tr> | | </tr> |
| </table> | | </table> |
| </td> | | All three, particularly the last two, communicate with the <span style="font-weight: 700; font-size: 15px; color: white; background-color: #797979;"> Assets Palette </span></td> |
| </tr>
| |
| </table> | |
| </td> | |
| </tr> | | </tr> |
| </table> | | </table> |
| <br> | | <br> |
| <table width=1000> <!-- BEGIN Section Nav Buttons --> | | <table width=1000> <!-- BEGIN Nav Buttons Table SKIPS NO SECTIONS --> |
| <tr valign="top"> | | <tr valign="top"> |
| <td width=629><span id="Load Preset"></span> | | <td width=629><span id="skipFilterActions"></span> |
| ===<span style="font-weight: 700; font-size: 17px; color: white; background-color: blue;"> Loading Preset Effect Layers </span>=== | | =='''Filter Actions'''== |
| </td> | | </td> |
| <td width=50> </td> | | <td width=50>[[image:SkipDown.png|link=#skipFilterSelections|Skip Down]]</td> <!-- skip Down --> |
| <td width=50> </td>
| | <td width=50>[[image:SkipUp.png|link=#stepFilter|Skip Up]]</td> <!-- skip Up --> |
| <td width=46>[[image:SkipMinorDown.png|link=#Effect Layer Tools|Down]][[image:SkipMinorUp.png|link=#Select Effect Layer|Up]]</td> <!-- for Top and Minor Up/Down -->
| | <td width=46> </td> <!-- Top --> |
| <td width=75> </td> | | <td width=75> </td> |
| <td width=75> </td> | | <td width=75> </td> <!-- Next Down --> |
| <td width=75> </td> <!-- for Bottom --> | | <td width=75> </td> <!-- Bottom --> |
| </tr> | | </tr> |
| </table> <!-- END Section Nav Buttons --> | | </table> <!-- END Nav Buttons Table --> |
|
| |
|
| <table width=1000 bgcolor="lightcyan" cellpadding=2> | | <table width=1000 bgcolor="lightcyan" cellpadding=2> |
| <tr valign="top"> | | <tr valign="top"> |
| <td width=10>[[image:BlueDot10x10.png|link=]]</td> | | <td width=10>[[image:BlueDot10x10.png|link=]]</td> |
| <td>'''Preset''' effect layers are layers that have been created in other routes and saved into '''Content Manager''' or downloaded from the '''DLS'''</td> | | <td>The '''Filter Actions''' control how the '''Filter Selections''' affect the visibility and accessability of objects in your '''Trainz World'''</td> |
| </tr>
| |
| <tr valign="top">
| |
| <td width=10>[[image:BlueDot10x10.png|link=]]</td>
| |
| <td>Preset effect layers can be added to your existing route</td>
| |
| </tr> | | </tr> |
| </table> | | </table> |
| <br> | | <br> |
| For instructions on saving an effect layer as a '''Preset''', see [[image:PageLink.PNG|link=]] '''[[#Save Preset|Save a Layer as a Preset]]''' below.
| | <table width=1000> |
| <br><br>
| |
| <table width=1000 bgcolor=#000000 cellpadding=2> | |
| <tr valign="top"> | | <tr valign="top"> |
| <td> | | <td colspan=3>The '''Filter Actions''' drop down list controls how the filters are applied. To open the list <span style="font-weight: 700; font-size: 15px; background-color: lightcyan;"> Left Click </span> on the drop down box or on the double arrows on its right.</td> |
| <table width=996 bgcolor=#ffffff cellpadding=2>
| |
| <tr valign="middle">
| |
| <td width=35>[[image:Information.png|35px|link=]]</td>
| |
| <td>The quickest method of loading a '''Preset''' into a route is to use the <span style="font-weight: 700; font-size: 15px; color: white; background-color: #797979;"> Filter Palette </span> and <span style="font-weight: 700; font-size: 15px; color: white; background-color: #797979;"> Assets Palette </span>. Both must be visible on your screen.</td>
| |
| </tr>
| |
| </table>
| |
| </td> | |
| </tr> | | </tr> |
| </table>
| |
| <br>
| |
| <table width=1000 bgcolor=#000000 cellpadding=2>
| |
| <tr valign="top"> | | <tr valign="top"> |
| <td> | | <td width=205>[[image:FilterPaletteOpenActions_S20.png|link=]]</td> |
| <table width=996 bgcolor=#ffffff cellpadding=2> | | <td width=350>The top drop down box will provide four actions:-<br> |
| | <table> |
| <tr valign="top"> | | <tr valign="top"> |
| <td colspan=2><span style="font-weight: 700; font-size: 15px;">Steps:</span> To load a Preset into a route:-</td> | | <td width=10>[[image:BulletTick.png|link=]]</td> |
| | <td>'''Filter Disabled'''</td> |
| </tr> | | </tr> |
| <tr valign="top"> | | <tr valign="top"> |
| <td width=25>[[image:DotPoint1.JPG|link=]]</td> | | <td>[[image:BulletTick.png|link=]]</td> |
| <td>In the <span style="font-weight: 700; font-size: 15px; color: white; background-color: #797979;"> Filter Palette </span> select the '''Presets''' icon [[image:PresetFilter_S20.png|link=]] (the last icon in the list) or select '''Presets''' from the '''Content Drop Down Menu''' below the icons</td> | | <td>'''Filter List'''</td> |
| </tr> | | </tr> |
| <tr valign="top"> | | <tr valign="top"> |
| <td colspan=2> | | <td>[[image:BulletTick.png|link=]]</td> |
| <table> | | <td>'''Filter Selection'''</td> |
| | </tr> |
| <tr valign="top"> | | <tr valign="top"> |
| <td width=335>[[image:FilterPalettePresetsSelected_S20.png|link=]]</td> | | <td>[[image:BulletTick.png|link=]]</td> |
| <td>The <span style="font-weight: 700; font-size: 15px; color: white; background-color: #797979;"> Assets Palette </span> display is controlled by the selections made in the <span style="font-weight: 700; font-size: 15px; color: white; background-color: #797979;"> Filter Palette </span>. Selecting '''Presets''' in the <span style="font-weight: 700; font-size: 15px; color: white; background-color: #797979;"> Filter Palette </span> the <span style="font-weight: 700; font-size: 15px; color: white; background-color: #797979;"> Assets Palette </span> will display a list of all the installed effect layers. For more information about the <span style="font-weight: 700; font-size: 15px; color: white; background-color: #797979;"> Assets Palette </span> see the '''Trainz Wiki Page [[image:WikiLink.PNG|link=]] [[How to Use S20 Palettes#The Assets Palette|How to Use the Surveyor 2.0 Palettes - Assets Palette]]'''</td> | | <td>'''Filter Visibility'''</td> |
| </tr> | | </tr> |
| </table> | | </table> |
| </td> | | </td> |
| | <td> |
| | <br> |
| | [[image:FilterPaletteActions_S20.png|link=]]</td> |
| </tr> | | </tr> |
| | </table> |
| | <br> |
| | <table width=1000> |
| <tr valign="top"> | | <tr valign="top"> |
| <td colspan=2> | | <td>These actions will affect the display and selection of objects in your '''Trainz World'''<br> |
| <table> | | <table bgcolor=#000000> |
| | <tr valign="top"> |
| | <td> |
| | <table bgcolor=#ffffff> |
| | <tr valign="top"> |
| | <td><span style="font-weight: 700; font-size: 17px;">Filter Actions:</span></td> |
| | </tr> |
| <tr valign="top"> | | <tr valign="top"> |
| <td> | | <td> |
| <table> | | <table> |
| <tr valign="top"> | | <tr valign="top"> |
| <td>[[image:DotPoint2.JPG|link=]]</td> | | <td><span style="font-weight: 700; font-size: 15px; color: white; background-color: black;"> Filter Disabled </span></td> |
| <td>In the <span style="font-weight: 700; font-size: 15px; color: white; background-color: #797979;"> Assets Palette </span> you can optionally narrow the search results by adding a text string to the <span style="font-weight: 700; font-size: 15px; color: white; background-color: black;"> Search </span> box</td> | | <td>this action disables the <span style="font-weight: 700; font-size: 15px; color: white; background-color: #797979;"> Filter Palette </span> so that it has no filtering effect on the <span style="font-weight: 700; font-size: 15px; color: white; background-color: #797979;"> Assets Palette </span> which will then display '''All (Installed) Content''' including those assets that are '''Obsolete''' or '''Disabled'''. Its main use is in the '''Bulk Replace Assets Tool''' (available in <span style="font-weight:700; background-color: yellow;"> Trainz Plus only</span>) but it can also be used to temporarily switch off the filters without having to delete them</td> |
| | </tr> |
| | </table> |
| | </td> |
| </tr> | | </tr> |
| <tr valign="top"> | | <tr valign="top"> |
| <td>[[image:DotPoint3.JPG|link=]]</td> | | <td> |
| <td>In the <span style="font-weight: 700; font-size: 15px; color: white; background-color: #797979;"> Assets Palette </span> when the required preset effect layer is shown in the list <span style="font-weight: 700; font-size: 15px; background-color: lightcyan;"> Left Click </span> on its name to select it. The [[image:S20_BrushToolIcon.png|link=|20px]] '''Brush Tool''' will also be selected and its '''Brush Target''' will be set to the selected effect layer so you can immediately start painting using the current <span style="font-weight: 700; font-size: 15px; color: white; background-color: #797979;"> Tool Options Palette </span> settings</td> | | <table> |
| | <tr valign="top"> |
| | <td><span style="font-weight: 700; font-size: 15px; color: white; background-color: black;"> Filter List </span></td> |
| | <td>this action is the default setting for the <span style="font-weight: 700; font-size: 15px; color: white; background-color: #797979;"> Filter Palette </span> and displays, in both the <span style="font-weight: 700; font-size: 15px; color: white; background-color: #797979;"> Filter Palette </span> and the <span style="font-weight: 700; font-size: 15px; color: white; background-color: #797979;"> Assets Palette </span>, all the '''installed''' assets that match any search entered using the '''Filter Selection Options''' (the '''Asset Type''' icons and the '''Drop Down List''' of asset types, search filters and picklists). It has no effect on the operation of the tools in the <span style="font-weight: 700; font-size: 15px; color: white; background-color: #797979;"> Tools Palette </span> or on the objects displayed on the screen in your '''Trainz World'''</td> |
| | </tr> |
| | </table> |
| | </td> |
| </tr> | | </tr> |
| <tr valign="top"> | | <tr valign="top"> |
| <td colspan=2>As soon as you start painting the new effect layer will be added to the '''Effect Layers''' group in the <span style="font-weight: 700; font-size: 15px; color: white; background-color: #797979;"> Layers Palette </span>.<br> | | <td> |
| <table> | | <table> |
| <tr valign="top"> | | <tr valign="top"> |
| <td width=195>[[image:LayersPaletteEffectLayerRemove_S20.png]]</td> | | <td><span style="font-weight: 700; font-size: 15px; color: white; background-color: black;"> Filter Selection </span></td> |
| <td><br>
| | <td>this action will restrict the tools in the <span style="font-weight: 700; font-size: 15px; color: white; background-color: #797979;"> Tools Palette </span> to only working on those objects that are in the <span style="font-weight: 700; font-size: 15px; color: white; background-color: #797979;"> Assets Palette </span> filtered list. Objects that are not in the filtered list will still be visible in your '''Trainz World''' but cannot be selected</td> |
| To remove the new '''Effect Layer''', or any '''Effect Layer''', from the <span style="font-weight: 700; font-size: 15px; color: white; background-color: #797979;"> Layers Palette </span> <span style="font-weight: 700; font-size: 15px; background-color: lightcyan;">Right Click</span> on the layers name and select <span style="font-weight: 700; font-size: 15px; color: white; background-color: black;"> Delete Layer </span> from the pop-up menu.<br>
| |
| <table bgcolor=#fcbcbc cellpadding=2>
| |
| <tr valign="top">
| |
| <td>[[image:Stop.PNG|link=]]</td>
| |
| <td><span style="font-size: 15px; font-weight: 700;">WARNING:</span><br>
| |
| Deleting an Effect Layer will delete it from your route</td>
| |
| </tr> | | </tr> |
| </table> | | </table> |
| <br> | | </td> |
| The other options allow you to '''Rename''' and '''Edit''' the selected '''Effect Layer'''</td>
| | </tr> |
| | <tr valign="top"> |
| | <td> |
| | <table> |
| | <tr valign="top"> |
| | <td><span style="font-weight: 700; font-size: 15px; color: white; background-color: black;"> Filter Visibility </span></td> |
| | <td>this action will '''hide''' all objects in your '''Trainz World''' that are not in the <span style="font-weight: 700; font-size: 15px; color: white; background-color: #797979;"> Assets Palette </span> filtered list which also means that they cannot be selected. The only exceptions are '''Ground Textures''' and '''Effect Layers''' which will be visible but, unless they are also in the filtered list, cannot selected.</td> |
| </tr> | | </tr> |
| </table> | | </table> |
| Line 5,033: |
Line 5,162: |
| </table> | | </table> |
| </td> | | </td> |
| <td width=195>[[image:AssetsPalettePresetsSelected_S20.png|link=]]</td>
| |
| </tr> | | </tr> |
| </table> | | </table> |
| Line 5,039: |
Line 5,167: |
| </tr> | | </tr> |
| </table> | | </table> |
| </td> | | |
| | <table width=1000> |
| | <tr valign="top"> |
| | <td>For examples of how the '''Filter Actions''' are used to restrict the selection and/or visibility of objects in a '''Trainz World''' see the '''Trainz Wiki Page [[image:WikiLink.PNG|link=]] [[How_to_Use_S20_Tools#skip Narrowing the Search|How to Use S20 Tools - Narrowing the Search]]'''</td> |
| </tr> | | </tr> |
| </table> | | </table> |
| <br> | | <br> |
| <table width=1000> <!-- BEGIN Section Nav Buttons --> | | <table width=1000> <!-- BEGIN Nav Buttons Table SKIPS NO SECTIONS --> |
| <tr valign="top"> | | <tr valign="top"> |
| <td width=629><span id="Effect Layer Tools"></span> | | <td width=629><span id="skipFilterSelections"></span> |
| ===<span style="font-weight: 700; font-size: 17px; color: white; background-color: blue;"> Effect Layer Tool Options </span>=== | | =='''Filter Selections'''== |
| </td> | | </td> |
| <td width=50> </td> | | <td width=50>[[image:SkipDown.png|link=#skipFilterToggles|Skip Down]]</td> <!-- skip Down --> |
| <td width=50> </td> | | <td width=50>[[image:SkipUp.png|link=#skipFilterActions|Skip Up]]</td> <!-- skip Up --> |
| <td width=46>[[image:SkipMinorDown.png|link=#TurfFX and Clutter|Down]][[image:SkipMinorUp.png|link=#Load Preset|Up]][[image:SkipMinorBlank.png|link=]]</td> <!-- for Top and Minor Up/Down --> | | <td width=46>[[image:SkipMinorDown.png|link=#FP: Filter+Assets]][[image:SkipMinorBlank.png|link=]]</td> <!-- for Top and Minor Up/Down --> |
| <td width=75> </td> | | <td width=75>[[image:HeadingUp.png|link=#stepFilter|alt=Heading|To Heading]]</td> |
| <td width=75> </td> | | <td width=75> </td> <!-- Next Down --> |
| <td width=75> </td> <!-- for Bottom --> | | <td width=75> </td> <!-- Bottom --> |
| </tr> | | </tr> |
| </table> <!-- END Section Nav Buttons --> | | </table> <!-- END Nav Buttons Table --> |
|
| |
|
| <table width=1000 bgcolor="lightcyan" cellpadding=2> | | <table width=1000 bgcolor="lightcyan" cellpadding=2> |
| <tr valign="top"> | | <tr valign="top"> |
| <td width=10>[[image:BlueDot10x10.png|link=]]</td> | | <td width=10>[[image:BlueDot10x10.png|link=]]</td> |
| <td>You can control how an effect layer is painted into your '''Trainz World''' through the settings in the <span style="font-weight: 700; font-size: 15px; color: white; background-color: #797979;"> Tool Options Palette </span></td> | | <td>The '''Filter Selections''' identify the ''type'' of assets that will be listed by the filter</td> |
| </tr> | | </tr> |
| </table> | | </table> |
| <br> | | <br> |
| <table width=1000 bgcolor=#000000> | | <table width=1000> |
| <tr valign="top"> | | <tr valign="top"> |
| <td>
| | <td>The '''Filter Selections''' are activated by either a <span style="font-weight: 700; font-size: 15px; background-color: lightcyan;"> Left Click </span> on a icon that represents a type of asset (e.g. Trains), or by selecting the type of asset from a drop down list. The drop down box also provides additional selections that are not available in the icons.</td> |
| <table width=996 bgcolor=#ffe89a cellpadding=2>
| |
| <tr valign="middle">
| |
| <td width=45>[[image:PalettesIcon_S20.png|link=]]</td>
| |
| <td>The Effect Layer brush tool uses the <span style="font-weight: 700; font-size: 15px; color: white; background-color: #797979;"> Tool Options Palette </span>. If this palette is not visible on the screen then refer to [[image:PageLink.PNG|link=]] '''[[#Notes_Palettes|Notes: Palettes]]''' at the top of this document.</td> | |
| </tr>
| |
| </table>
| |
| </td> | |
| </tr> | | </tr> |
| </table> | | </table> |
| <br> | | <br> |
| <table width=1000 bgcolor=#000000 cellpadding=2> | | <span style="font-weight: 700; font-size: 15px;">Options:</span> Choose from:-<br> |
| | <table width=1000> |
| <tr valign="top"> | | <tr valign="top"> |
| <td> | | <td> |
| <table bgcolor=#ffffb0 cellpadding=2> | | <table width=300 bgcolor=#0000ff> |
| <tr valign="top"> | | <tr valign="top"> |
| <td width=25>[[image:NotePad.PNG|link=]]</td> | | <td> |
| <td width=970><span style="font-size: 17px; font-weight: 700;">Notes: Tool Options Palette Controls</span><br> | | <table width=296 bgcolor=#ffffff> |
| ----</td>
| |
| </tr>
| |
| <tr valign="top"> | | <tr valign="top"> |
| <td width=10>[[image:DotPoint.JPG|10px|link=]]</td> | | <td width=296>[[image:Ablue.png|link=]] <span style="font-weight: 700; font-size: 15px; background-color: lightcyan;"> Left Click </span> on an asset selection icon</td> |
| <td>The active effect layer brush options for each action are shown in the <span style="font-weight: 700; font-size: 15px; color: white; background-color: #797979;"> Tool Options Palette </span> with a <span style="font-size: 15px; font-weight: 700; color: gold; background-color: black;"> Gold </span> coloured icon next to their names. Those options that have their icon greyed out will be ignored by the selected action, but they can still be edited.</td>
| |
| </tr> | | </tr> |
| <tr valign="top"> | | <tr valign="top"> |
| <td width=10>[[image:DotPoint.JPG|10px|link=]]</td> | | <td align="center">[[image:FilterPaletteOpenSelectionIcons_S20.png|link=|alt=Filter Icons]]</td> |
| <td>Most of the data entry boxes in the <span style="font-weight: 700; font-size: 15px; color: white; background-color: #797979;"> Tool Options Palette </span> have a '''Popup Menu''' (<span style="font-weight: 700; font-size: 15px; background-color: lightcyan;">Right Click</span> inside the box) that can be used to collect and distribute data - see the Wiki Page [[image:WikiLink.PNG|link=]] '''[[How to Use S20 Palettes#Tool Options Popups|How to Use the Surveyor 2.0 Palettes]]''' for more details.</td>
| |
| </tr> | | </tr> |
| </table>
| |
| </td>
| |
| </tr>
| |
| </table>
| |
| <br>
| |
| <table width=1000>
| |
| <tr valign="top">
| |
| <td width=210 align="center"><span style="font-weight: 700; font-size: 15px; color: white; background-color: black;"> TurfFX and Clutter </span><br>
| |
| [[image:BrushToolsEffectLayer_S20.png|link=]]</td>
| |
| <td width=210 align="center"><span style="font-weight: 700; font-size: 15px; color: white; background-color: black;"> Water </span><br>
| |
| [[image:BrushToolsWaterLayer_S20.png|link=]]<br>
| |
| <table bgcolor=#000000 cellpadding=2>
| |
| <tr valign="top"> | | <tr valign="top"> |
| <td> | | <td> |
| <table bgcolor=#ffffb0 cellpadding=2> | | <table> |
| <tr valign="top"> | | <tr valign="top"> |
| <td align="left">[[image:NotePad.PNG|link=]] '''Water Effect Grade'''<br> | | <td>[[image:GroundTextureFilter_S20.png|link=]]</td> |
| The '''Water Effect Layer''' <span style="font-weight: 700; font-size: 15px; color: gold; background-color: black;"> Grade </span> and <span style="font-weight: 700; font-size: 15px; color: gold; background-color: black;"> Angle </span> settings are only active if the <span style="font-weight: 700; font-size: 15px; color: white; background-color: black;"> Grade </span> '''Brush Action''' has been selected.</td>
| | <td>all ground textures</td> |
| | </tr> |
| | <tr valign="top"> |
| | <td>[[image:SceneryMeshFilter_S20.png|link=]]</td> |
| | <td>all non-spline scenery assets</td> |
| | </tr> |
| | <tr valign="top"> |
| | <td>[[image:ScenerySplineFilter_S20.png|link=]]</td> |
| | <td>all spline scenery assets</td> |
| | </tr> |
| | <tr valign="top"> |
| | <td>[[image:TrackSplineFilter_S20.png|link=]]</td> |
| | <td>all track spline assets</td> |
| | </tr> |
| | <tr valign="top"> |
| | <td>[[image:TrackMeshFilter_S20.png|link=]]</td> |
| | <td>all track (non spline) assets (signals, etc)</td> |
| | </tr> |
| | <tr valign="top"> |
| | <td>[[image:TrainFilter_S20.png|link=]]</td> |
| | <td>all rolling stock assets</td> |
| | </tr> |
| | <tr valign="top"> |
| | <td>[[image:PresetFilter_S20.png|link=]]</td> |
| | <td>all '''Effect Layer''' presets</td> |
| </tr> | | </tr> |
| </table> | | </table> |
| Line 5,118: |
Line 5,251: |
| </table> | | </table> |
| </td> | | </td> |
| <td width=210 align="center"><span style="font-weight: 700; font-size: 15px; color: white; background-color: black;"> Color </span><br> | | </tr> |
| [[image:BrushToolsColorLayer_S20.png|link=]]</td>
| | </table> |
| | </td> |
| | <td width=50 align="center"><span style="font-size: 17px; font-weight: 700;">OR</span></td> |
| <td> | | <td> |
| <br> | | <table bgcolor=#0000ff> |
| <table bgcolor=#000000 cellpadding=2> | | <tr valign="top"> |
| | <td> |
| | <table bgcolor=#ffffff> |
| | <tr valign="top"> |
| | <td>[[image:Bblue.png|link=]] <span style="font-weight: 700; font-size: 15px; background-color: lightcyan;"> Left Click </span> the '''Content Drop-down Box'''<br> |
| | [[image:FilterPaletteOpenSelections_S20.png|link=|alt=Filter List]]<br> |
| | Then select the asset type you want |
| | <table> |
| <tr valign="top"> | | <tr valign="top"> |
| | <td>[[image:FilterSelectSceneryObject_S20.png|link=]]</td> |
| <td> | | <td> |
| <table bgcolor=#ffffb0 cellpadding=2> | | <table bgcolor=#ffffb0 cellpadding=2> |
| <tr valign="top"> | | <tr valign="top"> |
| <td width=25>[[image:NotePad.PNG|link=]]</td> | | <td width=25>[[image:NotePad.PNG|link=]]</td> |
| <td width=975><span style="font-size: 17px; font-weight: 700;">Notes:'''</span><br> | | <td><span style="font-size: 17px;">'''Notes:'''</span><br> |
| ---- | | ---- |
| </td> | | </td> |
| | </tr> |
| | <tr valign="top"> |
| | <td colspan=2>The '''All Content''' option at the top of the menu will show:-</td> |
| | </tr> |
| | <tr valign="top"> |
| | <td width=10>[[image:DotPoint.JPG|10px|link=]]</td> |
| | <td>'''ALL''' the installed assets (in white), and</td> |
| </tr> | | </tr> |
| <tr valign="top"> | | <tr valign="top"> |
| <td>[[image:DotPoint.JPG|10px|link=]]</td> | | <td>[[image:DotPoint.JPG|10px|link=]]</td> |
| <td>The '''Color Effect Layer''' is only available in '''Trainz Plus''' and it will only appear when '''HD Terrain''' is in use</td> | | <td>'''ALL''' the installed '''Obsolete''' or '''Disabled''' assets (in grey)</td> |
| </tr> | | </tr> |
| <tr valign="top"> | | <tr valign="top"> |
| <td>[[image:DotPoint.JPG|10px|link=]]</td> | | <td colspan=2>If you are going to be using this option then it is recommended that you undock and enlarge the <span style="font-weight: 700; font-size: 15px; color: white; background-color: #797979;"> Assets Palette </span> to show the '''Status''' column.<br> |
| <td>The '''Water Effect Layer''' properties of colour and surface effect (calm, ripples, etc) are created using the '''Edit Effect Layer...''' controls - see '''[[#Edit Water|Edit Water Layer]]''' below</td>
| | See [[image:PageLink.PNG|link=]] '''[[#skip Expanding the Assets List View|Expanding the Assets List View]]''' for the details</td> |
| </tr> | | </tr> |
| </table> | | </table> |
| Line 5,144: |
Line 5,294: |
| </tr> | | </tr> |
| </table> | | </table> |
| <br>
| | </td> |
| <table bgcolor=#000000 cellpadding=2>
| |
| <tr valign="top">
| |
| <td>
| |
| <table bgcolor=#ffffe0 cellpadding=2>
| |
| <tr valign="top" align="left">
| |
| <td width=25>[[image:PencilTips.PNG|link=]]</td>
| |
| <td>On the right of each data entry box is a pair of '''Up/Down''' arrow controls. <span style="font-weight: 700; font-size: 15px; background-color: lightcyan;">Left Click and Drag</span> up or down on these to adjust the value in smaller increments</td>
| |
| </tr> | | </tr> |
| </table> | | </table> |
| Line 5,160: |
Line 5,303: |
| </tr> | | </tr> |
| </table> | | </table> |
| | | <br> |
| <table bgcolor=#000000 width=750 cellpadding=2> | | <table bgcolor=#000000 cellpadding=2> |
| <tr valign="top"> | | <tr valign="top"> |
| <td> | | <td> |
| <table bgcolor=#ffffff width=746 align="left"> | | <table bgcolor=#ffffe0 cellpadding=2> |
| <tr valign="top"> | | <tr valign="top"> |
| <td width=90><span style="font-size: 15px; font-weight: 700; color: gold; background-color: black;"> Radius </span></td> | | <td width=25>[[image:PencilTips.PNG|link=]]</td> |
| <td width=656>the brush radius (metres)</td> | | <td>If you need to display more than one ''type'' of asset (e.g. '''track splines''' and '''track objects''') in the same list then make a '''Picklist'''.<br> |
| </tr>
| | See the '''Trainz Wiki Page [[image:WikiLink.PNG|link=]] [[How_to_Manage_Filters_and_Picklists#skipEditingFiltersS20|How to Manage Filters and Picklists]]''' for the details</td> |
| <tr valign="top">
| |
| <td colspan=2>
| |
| <table bgcolor=#ffffb0>
| |
| <tr valign="top">
| |
| <td width=90 align="right">'''Range:''' </td>
| |
| <td width=656>Will depend on the effect layer being added. See '''Notes:''' below</td>
| |
| </tr> | | </tr> |
| </table> | | </table> |
| </td> | | </td> |
| </tr> | | </tr> |
| | </table> |
| | <br> |
| | <table width=1000> |
| <tr valign="top"> | | <tr valign="top"> |
| <td><span style="font-size: 15px; font-weight: 700; color: gold; background-color: black;"> Height </span></td> | | <td>[[image:FilterPaletteAssetsEnabled_S20.png|link=]]</td> |
| <td>'''Water Effect Layer''' only - the height of the layer (in metres) as painted by the brush</td> | | <td>Below the icons and selection box the '''Filter Toggle''' will report the number of assets that will be present in the list returned by the filter. In this case, selecting '''Scenery Splines''' has returned a list containing 4374 assets, but the exact figure will vary between users and installs.</td> |
| </tr> | | </tr> |
| | </table> |
| | <br> |
| | <table width=1000> <!-- BEGIN Nav Buttons Table SKIPS NO SECTIONS --> |
| <tr valign="top"> | | <tr valign="top"> |
| <td colspan=2> | | <td width=629><span id="FP: Filter+Assets"></span> |
| <table bgcolor=#ffffb0> | | ==='''Using the Filter and Assets Palettes'''=== |
| <tr valign="top"> | | </td> |
| <td width=90 align="right">'''Range:''' </td>
| | <td width=50> </td> |
| <td width=656>'''-3000m''' to '''+3000m'''</td> | | <td width=50> </td> |
| </tr> | | <td width=46>[[image:SkipMinorDown.png|link=#skipFilterToggles]][[image:SkipMinorUp.png|link=#skipFilterSelections]]</td> <!-- for Top and Minor Up/Down --> |
| </table> | | <td width=75> </td> |
| </td> | | <td width=75> </td> <!-- Next Down --> |
| | <td width=75> </td> <!-- Bottom --> |
| </tr> | | </tr> |
| | </table> <!-- END Nav Buttons Table --> |
| | |
| | <table width=1000 bgcolor="lightcyan" cellpadding=2> |
| <tr valign="top"> | | <tr valign="top"> |
| <td><span style="font-size: 15px; font-weight: 700; color: gold; background-color: black;"> Sensitivity </span></td> | | <td width=10>[[image:BlueDot10x10.png|link=]]</td> |
| <td>the rate at which the '''Intensity''' (TurfFX, Clutter, Color) or '''Height''' (Water) setting changes under the brush</td>
| | <td>The <span style="font-weight: 700; font-size: 15px; color: white; background-color: #797979;"> Filter Palette </span> is always used with the <span style="font-weight: 700; font-size: 15px; color: white; background-color: #797979;"> Assets Palette </span></td> |
| </tr> | | </tr> |
| | </table> |
| | <br> |
| | <table width=1000 bgcolor=#000000 cellpadding=2> |
| <tr valign="top"> | | <tr valign="top"> |
| <td colspan=2> | | <td> |
| <table bgcolor=#ffffb0> | | <table width=996 bgcolor=#ffffe0 cellpadding=2> |
| <tr valign="top"> | | <tr valign="top"> |
| <td width=90 align="right">'''Range:''' </td> | | <td width=25>[[image:PencilTips.PNG|link=]]</td> |
| <td width=656>'''1%''' (very slowly) to<br> | | <td>The most useful way to use filters to locate assets is to dock the <span style="font-weight: 700; font-size: 15px; color: white; background-color: #797979;"> Filter Palette </span> and the <span style="font-weight: 700; font-size: 15px; color: white; background-color: #797979;"> Assets Palette </span> together. Once docked both the palettes can be resized if needed - resizing one will also resize the other. See the sections on [[image:PageLink.PNG|link=]] '''[[#skipDocking|Docking Palettes]]''' and [[image:PageLink.PNG|link=]] '''[[#skipResizing|Resizing Palettes and Windows]]''' for more information.</td> |
| '''100%''' (very quickly)</td> | |
| </tr> | | </tr> |
| </table> | | </table> |
| </td> | | </td> |
| </tr> | | </tr> |
| | </table> |
| | <br> |
| | <table width=1000> |
| <tr valign="top"> | | <tr valign="top"> |
| <td><span style="font-size: 15px; font-weight: 700; color: gold; background-color: black;"> Intensity </span></td> | | <td width=332>[[image:FilterAssetsPaletteScenerySplines_S20.png|link=]]</td> |
| <td>effect density or coverage within the brush</td>
| | <td>The image on the left shows the docked '''Filter''' and '''Assets Palettes''' displaying the filtered list for a Scenery Splines filter.<br> |
| | Using the '''Asset Filter''' search text box, as described in the [[image:PageLink.PNG|link=]] '''[[#stepAssets|Assets Palette]]''' section above, the list can be cut down or "refined" by entering a search term.<br><br> |
| | In the example shown below, the search has been refined by adding the text "fence" ('''UPPER/lower''' case is not important). The list will now only contain assets that have the text "fence" in their names or descriptions.<br> |
| | |
| | [[image:FilterAssetsPaletteSceneryFenceSplines_S20.png|link=]]<br> |
| | |
| | <br> |
| | <table bgcolor=#000000 cellpadding=2> |
| | <tr valign="top"> |
| | <td> |
| | <table bgcolor=#ffffff cellpadding=2> |
| | <tr valign="top"> |
| | <td colspan=2><span style="font-weight: 700; font-size: 15px;">Steps: To Select an Asset from the List to be Placed in Your Trainz World:-</span></td> |
| </tr> | | </tr> |
| <tr valign="top"> | | <tr valign="top"> |
| <td colspan=2> | | <td width=25>[[image:DotPoint1.JPG|link=]]</td> |
| <table bgcolor=#ffffb0> | | <td><span style="font-weight: 700; font-size: 15px; background-color: lightcyan;"> Left Click </span> on its name in the list |
| | <table> |
| <tr valign="top"> | | <tr valign="top"> |
| <td width=90 align="right">'''Range:''' </td> | | <td width=10>[[image:DotPoint.JPG|10px|link=]]</td> |
| <td width=656>'''1%''' (almost none) to<br> | | <td>the asset name will be highlighted with a <span style="font-weight: 700; font-size: 15px; color: black; background-color: lightgrey;"> Light Grey </span> background</td> |
| '''100%''' (maximum)</td>
| |
| </tr> | | </tr> |
| </table> | | <tr valign="top"> |
| </td> | | <td>[[image:DotPoint.JPG|10px|link=]]</td> |
| | <td>the correct '''Tool''' or '''Brush Target''' in the <span style="font-weight: 700; font-size: 15px; color: white; background-color: #797979;"> Tools Palette </span> will be automatically selected</td> |
| </tr> | | </tr> |
| <tr valign="top"> | | <tr valign="top"> |
| <td><span style="font-size: 15px; font-weight: 700; color: gold; background-color: black;"> Grade </span></td> | | <td>[[image:DotPoint.JPG|10px|link=]]</td> |
| <td>'''Water Effect Layer''' only - the slope gradient. See '''Notes:''' below</td> | | <td>you can then immediately place or paint the asset in your '''Trainz World'''</td> |
| </tr> | | </tr> |
| <tr valign="top"> | | </table> |
| <td colspan=2>
| | </td> |
| <table bgcolor=#ffffb0>
| |
| <tr valign="top">
| |
| <td width=90 align="right">'''Range:''' </td>
| |
| <td width=656>'''0%''' (flat) to<br>
| |
| '''100%''' (steep but not vertical)</td>
| |
| </tr> | | </tr> |
| </table> | | </table> |
| </td> | | </td> |
| </tr> | | </tr> |
| <tr valign="top">
| | </table> |
| <td><span style="font-size: 15px; font-weight: 700; color: gold; background-color: black;"> Angle </span></td>
| | </td> |
| <td>'''Water Effect Layer''' only - the grade direction (compass degrees)</td>
| |
| </tr> | | </tr> |
| | </table> |
| | <br> |
| | <table width=1000 bgcolor=#000000 cellpadding=2> |
| <tr valign="top"> | | <tr valign="top"> |
| <td colspan=2> | | <td> |
| <table bgcolor=#ffffb0> | | <table width=996 bgcolor=#ffffe0 cellpadding=2> |
| <tr valign="top"> | | <tr valign="top"> |
| <td width=90 align="right">'''Range:''' </td> | | <td width=25>[[image:PencilTips.PNG|link=]]</td> |
| <td width=656>'''0°''' (North) to '''±359°'''<br> | | <td colspan=2><span style="font-weight: 700; font-size: 15px;">Thumbnails and Font Size</span></td> |
| a negative value reverses the grade direction</td>
| |
| </tr> | | </tr> |
| </table> | | <tr valign="top"> |
| </td> | | <td colspan=2>Like in the <span style="font-weight: 700; font-size: 15px; color: white; background-color: #797979;"> Assets Palette </span> you can display the <span style="font-weight: 700; font-size: 15px; color: white; background-color: #797979;"> Filter Palette </span> assets as thumbnails and the names in a larger font.</td> |
| </tr> | | </tr> |
| <tr valign="top"> | | <tr valign="top"> |
| <td><span style="font-size: 15px; font-weight: 700; color: gold; background-color: black;"> Color </span></td> | | <td width=10>[[image:DotPoint.JPG|10px|link=]]</td> |
| <td>'''Color Effect Layer''' only - the colour selection ('''RGB''' and '''Brightness''' values) - <span style="font-weight: 700; background-color: yellow;"> in Trainz Plus only and it will only be visible when HD Terrain is being used </span></td>
| | <td><span style="font-weight: 700; font-size: 15px; background-color: lightcyan;"> Left Click </span> on the [[image:AssetsPaletteListToggleViewIcon_S20.png|link=]] Thumbnail icon in the <span style="font-weight: 700; font-size: 15px; color: white; background-color: #797979;"> Filter Palette </span> to display the thumbnails.<br> |
| | Another <span style="font-weight: 700; font-size: 15px; background-color: lightcyan;"> Left Click </span> on the icon will restore the list of asset names.</td> |
| </tr> | | </tr> |
| <tr valign="top"> | | <tr valign="top"> |
| <td colspan=2> | | <td>[[image:DotPoint.JPG|10px|link=]]</td> |
| <table bgcolor=#ffffb0> | | <td>You can enlarge the font used in the asset names to make them easier to read. From the <span style="font-weight: 700; font-size: 15px;">Trainz Launcher</span> select <span style="font-weight: 700; font-size: 15px;">Trainz Settings</span>.<br> |
| <tr valign="top"> | | See the '''Wiki Page''' at [[image:WikiLink.PNG|link=]] '''[[How_to_Configure_Trainz_Settings|How to Configure Trainz Settings]]''' for the details.</td> |
| <td width=90 align="right">'''Range:''' </td> | | </tr> |
| <td width=656> | | </table> |
| <table> | | </td> |
| | </tr> |
| | </table> |
| | <br> |
| | <table bgcolor=#000000 width=1000 cellpadding=2> |
| <tr valign="top"> | | <tr valign="top"> |
| <td>[[image:BrushToolsColorLayerPicker_S20.png|link=]]</td>
| |
| <td> | | <td> |
| <table> | | <table bgcolor=#ffffe0 width=996 cellpadding=2> |
| <tr valign="top"> | | <tr valign="top"> |
| <td colspan=2><span style="font-weight: 700; font-size: 15px; background-color: lightcyan;"> Left Click </span> on the coloured box next to the title '''Color''' to open the colour selector.<br> | | <td width=25>[[image:PencilTips.PNG|link=]]</td> |
| <span style="font-weight: 700; font-size: 15px;">Set a Colour:</span> Select a colour by either:-</td> | | <td><span style="font-weight: 700; font-size: 15px;">Search Options:</span></td> |
| </tr> | | </tr> |
| <tr valign="top"> | | <tr valign="top"> |
| <td width=10>[[image:DotPoint.JPG|10px|link=]]</td> | | <td colspan=2> |
| <td>a <span style="font-weight: 700; font-size: 15px; background-color: lightcyan;"> Left Click </span> on the colour in the colour picker device, <span style="font-weight: 700; font-size: 15px;">OR</span> </td>
| | <table> |
| </tr> | |
| <tr valign="top"> | | <tr valign="top"> |
| <td>[[image:DotPoint.JPG|10px|link=]]</td> | | <td>[[image:DotPoint.JPG|10px|link=]]</td> |
| <td>enter its '''RGB''' value in '''Hexadecimal'''</td> | | <td>The '''Search Box''' will also accept a list of '''<kuid> codes''' separated by commas. This list can be created by '''Content Manager''' by selecting the assets then the <span style="font-weight: 700; font-size: 15px; color: white; background-color: black;"> List Assets in New Window </span> option. Copy the assets list from '''Content Manager''' into your system clipboard, then paste it into the '''Assets Palette Search Box'''. Only those assets in the '''<kuid> codes''' that match the current '''Filter Selection''' will be shown in the asset list.</td> |
| </tr> | | </tr> |
| <tr valign="top"> | | <tr valign="top"> |
| <td colspan=2><span style="font-weight: 700; font-size: 15px;">Optionally:</span> Set a brightness value for the selected colour by moving the slider up or down</td> | | <td>[[image:DotPoint.JPG|10px|link=]]</td> |
| </tr>
| | <td>You can enter a search text without selecting an asset type. In the '''Selection Drop Down''' box select the option <span style="font-weight: 700; font-size: 15px; color: white; background-color: black;"> All Content </span>. The filter will search through all the assets types to find matches with your entered search.</td> |
| <tr valign="top">
| |
| <td colspan=2><span style="font-weight: 700; font-size: 15px;">Reset:</span> <span style="font-weight: 700; font-size: 15px; background-color: lightcyan;"> Left Click </span> the '''Reset button''' (the circular arrow on the bottom right) to cancel your changes and reset the colour to its default value. This default value is set using the '''Edit Effect Layer...''' - see '''[[#Edit Color|Edit Color Effect Layer]]''' below</td> | |
| </tr> | | </tr> |
| </table> | | </table> |
| Line 5,293: |
Line 5,455: |
| </tr> | | </tr> |
| </table> | | </table> |
| | <br> |
| | <table width=1000> <!-- BEGIN Nav Buttons Table SKIPS NO SECTIONS --> |
| | <tr valign="top"> |
| | <td width=629><span id="skipFilterToggles"></span> |
| | =='''Filter Toggles'''== |
| </td> | | </td> |
| | <td width=50>[[image:SkipDown.png|link=#skipBulkReplace|Skip Down]]</td> <!-- skip Down --> |
| | <td width=50>[[image:SkipUp.png|link=#skipFilterSelections|Skip Up]]</td> <!-- skip Up --> |
| | <td width=46> </td> <!-- for Top and Minor Up/Down --> |
| | <td width=75>[[image:HeadingUp.png|link=#stepFilter|alt=Heading|To Heading]]</td> |
| | <td width=75> </td> <!-- Next Down --> |
| | <td width=75> </td> <!-- Bottom --> |
| </tr> | | </tr> |
| | </table> <!-- END Nav Buttons Table --> |
| | |
| | <table width=1000 bgcolor="lightcyan" cellpadding=2> |
| <tr valign="top"> | | <tr valign="top"> |
| <td colspan=2> | | <td width=10>[[image:BlueDot10x10.png|link=]]</td> |
| <table bgcolor=#ffffb0 cellpadding=2> | | <td>The '''Filter Toggles''' are used to identify object to be replaced using the [[image:PageLink.PNG|link=]] '''[[#skipBulkReplace|Bulk Asset Replace Tool]]''' found in '''Trainz Plus'''</td> |
| | </tr> |
| <tr valign="top"> | | <tr valign="top"> |
| <td width=25>[[image:NotePad.PNG|link=]]</td> | | <td>[[image:BlueDot10x10.png|link=]]</td> |
| <td>The <span style="font-weight: 700; font-size: 15px; color: gold; background-color: black;"> Height </span> setting is ignored for '''TurfFX''', '''Clutter''' and '''Color''' effect layers because these layers will be painted at the existing ground surface height.</td> | | <td>They can be used to further reduce the size of the '''Assets Filtered List'''</td> |
| </tr> | | </tr> |
| </table> | | </table> |
| </td> | | <br> |
| | <table width=1000> |
| | <tr valign="top"> |
| | <td colspan=2>In the <span style="font-weight: 700; font-size: 15px; color: white; background-color: #797979;"> Filter Palette </span> open the '''Filter Toggles''' by a <span style="font-weight: 700; font-size: 15px; background-color: lightcyan;"> Left Click </span> on either the small arrowhead on the left of the '''Enabled''' box or on the "Enabled" message itself.</td> |
| </tr> | | </tr> |
| </table> | | <tr valign="top"> |
| | <td width=205><br> |
| | [[image:FilterPaletteClickToggleListOpen_S20.png|link=]]</td> |
| | <td><br> |
| | This will open the <span style="font-weight: 700; font-size: 15px; color: white; background-color: #797979;"> Filter Palette </span> '''Toggle List''' of assets and a separate <span style="font-weight: 700; font-size: 15px; color: white; background-color: black;"> Search </span> text box. The '''Toggle List''' list is identical to the list shown in the <span style="font-weight: 700; font-size: 15px; color: white; background-color: #797979;"> Assets Palette </span> except that each item can be toggled or switched '''ON''' or '''OFF''' by the check mark on its left. |
| </td> | | </td> |
| </tr> | | </tr> |
| </table> | | </table> |
| <br> | | <br> |
| <table bgcolor=#000000 width=1000 cellpadding=2> | | <table width=1000> |
| <tr valign="top"> | | <tr valign="top"> |
| | <td width=335>[[image:FilterPaletteToggleListOpen_S20.png|link=]]</td> |
| <td> | | <td> |
| <table bgcolor=#ffffb0 width=996 cellpadding=2> | | <table bgcolor=#000000 cellpadding=2> |
| <tr valign="top"> | | <tr valign="top"> |
| <td> | | <td> |
| <table width=996> | | <table bgcolor=#ffffff cellpadding=2> |
| <tr valign="top"> | | <tr valign="top"> |
| <td width=25>[[image:NotePad.PNG|link=]]</td> | | <td colspan=2>Once it has been opened:-</td> |
| <td><span style="font-size: 17px; font-weight: 700;">Notes:</span><br>
| |
| ----
| |
| </td> | |
| </tr> | | </tr> |
| </table>
| |
| <table width=996>
| |
| <tr valign="top"> | | <tr valign="top"> |
| <td width=10>[[image:DotPoint.JPG|10px|link=]]</td> | | <td width=10>[[image:DotPoint.JPG|10px|link=]]</td> |
| <td>Unlike '''Surveyor Classic''', there is no upper limit to the brush <span style="font-size: 15px; font-weight: 700; color: gold; background-color: black;"> Radius </span>. Brushes of hundreds of metres (even kilometres) in size are possible. However, the performance will '''decrease''' as the brush radius '''increases'''</td> | | <td>the palette can be '''Expanded''' to reveal additional columns. The columns can be moved, resized, deleted and extra columns added. See [[image:PageLink.PNG|link=]] '''[[#skip Expanding the Assets List View|Expanding the Assets List View]]''' for the details</td> |
| </tr> | | </tr> |
| <tr valign="top"> | | <tr valign="top"> |
| <td>[[image:DotPoint.JPG|10px|link=]]</td> | | <td >[[image:DotPoint.JPG|10px|link=]]</td> |
| <td>The '''minimum''' brush <span style="font-size: 15px; font-weight: 700; color: gold; background-color: black;"> Radius </span> for a '''TurfFX''' and '''Clutter Effect Layer''' will depend on its configuration settings - the asset density, the resources used, etc. This minimum size will be different for different '''Effect Layers'''. If the <span style="font-size: 15px; font-weight: 700; color: gold; background-color: black;"> Radius </span> value is below the required '''minimum''' for the selected '''TurfFX''' or '''Clutter Effect Layer''' then the brush circle will turn <span style="font-weight: 700; color: red;">RED</span> and it will not paint</td> | | <td>each column can be '''Sorted''' by a <span style="font-weight: 700; font-size: 15px; background-color: lightcyan;"> Left Click </span> on a column heading. Each <span style="font-weight: 700; font-size: 15px; background-color: lightcyan;"> Left Click </span> will cycle through different sorting options</td> |
| </tr>
| |
| <tr valign="top">
| |
| <td>[[image:DotPoint.JPG|10px|link=]]</td>
| |
| <td>The <span style="font-size: 15px; font-weight: 700; color: gold; background-color: black;"> Grade </span> is defined as '''vertical rise''' divided by '''horizontal distance''' converted to a percentage figure. So a grade of 100% (the maximum allowed) would mean a slope formed by the height and distance both being the same value (e.g. a height increase of 50m over a distance of 50m). A vertical slope (a cliff) would have an infinite grade (cliff height divided by 0) which is currently impossible in Surveyor.</td>
| |
| </tr>
| |
| </table>
| |
| </td> | |
| </tr> | | </tr> |
| </table> | | </table> |
| Line 5,345: |
Line 5,518: |
| </table> | | </table> |
| <br> | | <br> |
| <table width=1000> <!-- BEGIN Section Nav Buttons --> | | The <span style="font-weight: 700; font-size: 15px; color: white; background-color: #797979;"> Filter Palette </span> and the <span style="font-weight: 700; font-size: 15px; color: white; background-color: #797979;"> Assets Palette </span> are normally linked so that the list of toggled assets in the <span style="font-weight: 700; font-size: 15px; color: white; background-color: #797979;"> Filter Palette </span> is duplicated in the <span style="font-weight: 700; font-size: 15px; color: white; background-color: #797979;"> Assets Palette </span>.<br> |
| | If an asset is:- |
| | *toggled '''OFF''' in the <span style="font-weight: 700; font-size: 15px; color: white; background-color: #797979;"> Filter Palette </span> it will disappear from the list in the <span style="font-weight: 700; font-size: 15px; color: white; background-color: #797979;"> Assets Palette </span> |
| | *If it is toggled back '''ON''' it will reappear in the <span style="font-weight: 700; font-size: 15px; color: white; background-color: #797979;"> Assets Palette </span> list |
| | <br> |
| | <table bgcolor=#000000 cellpadding=2> |
| <tr valign="top"> | | <tr valign="top"> |
| <td width=629><span id="TurfFX and Clutter"></span> | | <td> |
| ===<span style="font-weight: 700; font-size: 17px; color: white; background-color: blue;"> TurfFX and Clutter Effect Layers </span>===
| | <table bgcolor=#ffffff cellpadding=2> |
| </td>
| |
| <td width=50> </td>
| |
| <td width=50> </td>
| |
| <td width=46>[[image:SkipMinorDown.png|link=#Water Effect Layer|Down]][[image:SkipMinorUp.png|link=#Effect Layer Tools|Up]]</td> <!-- for Top and Minor Up/Down -->
| |
| <td width=75> </td>
| |
| <td width=75> </td>
| |
| <td width=75> </td> <!-- for Bottom -->
| |
| </tr>
| |
| </table> <!-- END Section Nav Buttons -->
| |
| | |
| <table width=1000 bgcolor="lightcyan" cellpadding=2> | |
| <tr valign="top"> | | <tr valign="top"> |
| <td width=10>[[image:BlueDot10x10.png|link=]]</td> | | <td colspan=2>Items in the '''Toggle List''' can be selected (highlighted)</td> |
| <td>'''TurfFX''' and '''Clutter''' are '''Effect Layers''' that can quickly add vegetation and other ground "artifacts" (e.g. weeds, crops, stones, etc) over large areas</td>
| |
| </tr> | | </tr> |
| <tr valign="top"> | | <tr valign="top"> |
| <td>[[image:BlueDot10x10.png|link=]]</td> | | <td width=10>[[image:DotPoint.JPG|10px|link=]]</td> |
| <td>In a future "soon to be released" <sup>'''TM'''</sup> version of '''Trainz''', '''TurfFX''' will be removed as a separate effect layer and become part of an updated '''Clutter''' effect layer</td> | | <td>To select a single item in the list <span style="font-weight: 700; font-size: 15px; background-color: lightcyan;"> Left Click </span> on its name</td> |
| </tr> | | </tr> |
| </table>
| |
| <br>
| |
| <table width=1000 bgcolor=#ff0000 cellpadding=2>
| |
| <tr valign="top"> | | <tr valign="top"> |
| <td>
| | <td>[[image:DotPoint.JPG|10px|link=]]</td> |
| <table bgcolor=#fcbcbc cellpadding=2>
| | <td>To select multiple items in the list use <span style="font-weight: 700; font-size: 15px;"><span style="color: white; background-color: black;"> Shift </span> + <span style="background-color: lightcyan;"> Left Click </span></span> or <span style="font-weight: 700; font-size: 15px;"><span style="color: white; background-color: black;"> Ctrl </span> + <span style="background-color: lightcyan;"> Left Click </span></span></td> |
| <tr valign="top">
| |
| <td>[[image:Stop.PNG|link=]]</td> | |
| <td><span style="font-size: 15px; font-weight: 700;">CAUTION:</span><br> | |
| The '''TurfFX''' Effect Layer is:-
| |
| <table>
| |
| <tr valign="top"> | |
| <td width=10>[[image:DotPoint.JPG|10px|link=]]</td> | |
| <td>an '''Nvidia''' product (it is not from '''N3V''') and requires the presence of an '''Nvidia GPU''' such as a '''GTX''' or '''RTX''' video graphics card. The '''TurfFX''' Effect Layer will not appear on systems that do not have an '''Nvidia''' video card</td> | |
| </tr> | | </tr> |
| <tr valign="top"> | | <tr valign="top"> |
| <td>[[image:DotPoint.JPG|10px|link=]]</td> | | <td>[[image:DotPoint.JPG|10px|link=]]</td> |
| <td>only supported on '''MS Windows'''. It will not work on '''MacOS''' systems</td> | | <td>To select the entire list <span style="font-weight: 700; font-size: 15px; background-color: lightcyan;"> Left Click </span> on one of the asset names then press the <span style="font-weight: 700; font-size: 15px;"><span style="color: white; background-color: black;"> Ctrl </span> + <span style="color: white; background-color: black;"> A </span></span> keys</td> |
| </tr> | | </tr> |
| </table> | | </table> |
| Line 5,400: |
Line 5,555: |
| <table width=996 bgcolor=#ffffff cellpadding=2> | | <table width=996 bgcolor=#ffffff cellpadding=2> |
| <tr valign="top"> | | <tr valign="top"> |
| <td width=150>[[image:BrushActionIcon_S20.png|link=]] <span style="font-weight: 700; font-size: 15px; color: white; background-color: black;"> Brush Actions </span></td> | | <td colspan=2>Each asset in the list has a:-</td> |
| <td>When a '''TurfFX''' or '''Clutter''' '''Effect Layer''' has been selected as the '''Target''', the second drop down box will give a choice of three '''actions'''.</td>
| |
| </tr> | | </tr> |
| </table>
| |
| </td>
| |
| </tr>
| |
| </table>
| |
|
| |
| <table width=1000>
| |
| <tr valign="top"> | | <tr valign="top"> |
| <td colspan=2>The '''actions''' are:- </td> | | <td width=100>'''Toggle Button'''</td> |
| </tr> | | <td>that can be toggled '''ON''' or '''OFF''' for the '''Bulk Replace Assets Tool'''. |
| | <table> |
| <tr valign="top"> | | <tr valign="top"> |
| <td width=260>
| | <td width=10>[[image:DotPoint.JPG|10px|link=]]</td> |
| <table width=260>
| | <td>You can toggle an individual asset, '''ON/OFF''' by a <span style="font-weight: 700; font-size: 15px; background-color: lightcyan;"> Left Click </span> on its toggle icon</td> |
| <tr valign="top">
| |
| <td width=120>
| |
| <table width=120>
| |
| <tr valign="top">
| |
| <td width=10>[[image:BulletTick.png|link=]]</td> | |
| <td width=110>'''Increase'''</td> | |
| </tr> | | </tr> |
| <tr valign="top"> | | <tr valign="top"> |
| <td>[[image:BulletTick.png|link=]]</td> | | <td>[[image:DotPoint.JPG|10px|link=]]</td> |
| <td>'''Decrease'''</td> | | <td>You can toggle a group of selected assets '''ON/OFF''' by a <span style="font-weight: 700; font-size: 15px; background-color: lightcyan;"> Left Click </span> on the toggle icon of any selected asset</td> |
| </tr>
| |
| <tr valign="top">
| |
| <td>[[image:BulletTick.png|link=]]</td>
| |
| <td>'''Set Intensity'''</td>
| |
| </tr> | | </tr> |
| </table> | | </table> |
| </td> | | </td> |
| <td width=140>[[image:EffectLayerActions_S20.png|link=]]</td>
| |
| </tr> | | </tr> |
| <tr valign="top"> | | <tr valign="top"> |
| <td colspan=2> | | <td>'''Popup Menu'''</td> |
| <table bgcolor=#000000 cellpadding=2> | | <td><span style="font-weight: 700; font-size: 15px; background-color: lightcyan;"> Right Click </span> on an asset to open its menu. The available options are:- |
| | <table> |
| <tr valign="top"> | | <tr valign="top"> |
| <td> | | <td><span style="font-weight: 700; font-size: 15px; color: white; background-color: black;"> Copy </span></td> |
| <table bgcolor=#ffffe0 cellpadding=2>
| | <td>to copy the details ('''<kuid> code''' and '''name''') of the selected asset or assets into your system clipboard</td> |
| <tr valign="top">
| |
| <td width=25>[[image:PencilTips.PNG|link=]]</td>
| |
| <td>Use the <span style="font-weight: 700; font-size: 15px; color: white; background-color: #797979;"> Tool Options Palette </span> <span style="font-weight: 700; font-size: 15px; color: gold; background-color: black;"> Intensity </span> and <span style="font-weight: 700; font-size: 15px; color: gold; background-color: black;"> Sensitivity </span> settings to control how the '''Effect Layer''' is applied to the terrain by the brush</td>
| |
| </tr> | | </tr> |
| </table> | | </table> |
| </td> | | <table> |
| | <tr valign="top"> |
| | <td><span style="font-weight: 700; font-size: 15px; color: white; background-color: black;"> List Assets in New Window </span></td> |
| | <td>will open a '''Content Manager''' window to display the details of the selected asset or assets</td> |
| </tr> | | </tr> |
| </table> | | </table> |
| </td> | | <table> |
| | <tr valign="top"> |
| | <td><span style="font-weight: 700; font-size: 15px; color: white; background-color: black;"> Add to Picklist > </span></td> |
| | <td>you will be asked to select an existing Picklist or create a new one. The selected asset or assets will be added to that '''Picklist'''</td> |
| </tr> | | </tr> |
| </table> | | </table> |
| </td>
| | If the list you have opened is a '''Picklist''' then the last option shown will be:- |
| <td>
| | <table> |
| <table width=740 bgcolor=#000000 cellpadding=2> | |
| <tr valign="top"> | | <tr valign="top"> |
| <td> | | <td><span style="font-weight: 700; font-size: 15px; color: white; background-color: black;"> Remove from Picklist </span></td> |
| <table bgcolor=#ffffff cellpadding=2>
| | <td>the selected asset or assets will be removed from the '''Picklist'''</td> |
| <tr valign="top">
| |
| <td colspan=2><span style="font-weight: 700; font-size: 17px;">TurfFX and Clutter Effect Layer Actions:</span></td>
| |
| </tr>
| |
| <tr valign="top">
| |
| <td width=150>[[image:BrushActionIcon_S20.png|link=]] <span style="font-weight: 700; font-size: 15px; color: white; background-color: black;"> Increase </span></td>
| |
| <td>increases the <span style="font-weight: 700; font-size: 15px; color: white; background-color: #797979;"> Tool Options Palette </span> <span style="font-weight: 700; font-size: 15px; color: gold; background-color: black;"> Intensity </span> of the effect layer at a rate controlled by the <span style="font-weight: 700; font-size: 15px; color: gold; background-color: black;"> Sensitivity </span> setting, upto a maximum of '''100%'''. Each time the brush is moved over the same area the '''Intensity''' or '''Density''' of the effect layer is increased</td> | |
| </tr>
| |
| <tr valign="top">
| |
| <td>[[image:BrushActionIcon_S20.png|link=]] <span style="font-weight: 700; font-size: 15px; color: white; background-color: black;"> Decrease </span></td>
| |
| <td>decreases the <span style="font-weight: 700; font-size: 15px; color: white; background-color: #797979;"> Tool Options Palette </span> <span style="font-weight: 700; font-size: 15px; color: gold; background-color: black;"> Intensity </span> of the effect layer at a rate controlled by the <span style="font-weight: 700; font-size: 15px; color: gold; background-color: black;"> Sensitivity </span> setting. Each time the brush is moved over the same area the '''Intensity''' or '''Density''' of the effect layer is decreased</td>
| |
| </tr>
| |
| <tr valign="top">
| |
| <td>[[image:BrushActionIcon_S20.png|link=]] <span style="font-weight: 700; font-size: 15px; color: white; background-color: black;"> Set Intensity </span></td>
| |
| <td>will paint the effect layer in one sweep using the full <span style="font-weight: 700; font-size: 15px; color: white; background-color: #797979;"> Tool Options Palette </span> <span style="font-weight: 700; font-size: 15px; color: gold; background-color: black;"> Intensity </span> setting</td>
| |
| </tr> | | </tr> |
| </table> | | </table> |
| Line 5,480: |
Line 5,607: |
| </table> | | </table> |
| <br> | | <br> |
| <table width=1000 bgcolor=#000000 cellpadding=2> | | <table width=1000> <!-- BEGIN Nav Buttons Table SKIPS NO SECTIONS --> |
| <tr valign="top"> | | <tr valign="top"> |
| <td> | | <td width=629><span id="skipBulkReplace"></span> |
| <table bgcolor=#ffffff cellpadding=2> | | =='''Bulk Replace Asset Tool (Trainz Plus Only)'''== |
| | </td> |
| | <td width=50>[[image:SkipDown.png|link=#stepLayers|Skip Down]]</td> <!-- skip Down --> |
| | <td width=50>[[image:SkipUp.png|link=#skipFilterToggles|Skip Up]]</td> <!-- skip Up --> |
| | <td width=46>[[image:SkipMinorDown.png|link=#BR: 1]][[image:SkipMinorBlank.png|link=]]</td> <!-- for Top and Minor Up/Down --> |
| | <td width=75>[[image:HeadingUp.png|link=#stepFilter|alt=Heading|To Heading]]</td> |
| | <td width=75> </td> <!-- Next Down --> |
| | <td width=75> </td> <!-- Bottom --> |
| | </tr> |
| | </table> <!-- END Nav Buttons Table --> |
| | |
| | <table width=1000 bgcolor="lightcyan" cellpadding=2> |
| <tr valign="top"> | | <tr valign="top"> |
| <td><span style="font-weight: 700; font-size: 15px;">Steps:</span> To paint with a '''TurfFX''' or '''Clutter Effect Layer''':-<br> | | <td width=10>[[image:BlueDot10x10.png|link=]]</td> |
| <table> | | <td>This tool is available in '''Trainz Plus''' only</td> |
| | </tr> |
| <tr valign="top"> | | <tr valign="top"> |
| <td width=20>[[image:DotPoint1.JPG|link=]]</td> | | <td>[[image:BlueDot10x10.png|link=]]</td> |
| <td>In the <span style="font-weight: 700; font-size: 15px; color: white; background-color: #797979;"> Tools Palette </span> select the [[image:S20_BrushToolIcon.png|link=|20px]] '''Brush Tool''' or press the <span style="font-weight: 700; font-size: 15px; color: white; background-color: black;"> W </span> key</td> | | <td>It will replace '''ALL''' seleted objects with a single selected replacement asset</td> |
| </tr> | | </tr> |
| <tr valign="top"> | | <tr valign="top"> |
| <td>[[image:DotPoint2.JPG|link=]]</td> | | <td >[[image:BlueDot10x10.png|link=]]</td> |
| <td>select the '''<TurfFX effect layer name>''' or the '''<Clutter effect layer name>''' from the Brush '''Target''' drop down menu. If there are no '''TurfFX/Clutter Effect Layers''' listed then none have been created or installed for this route</td> | | <td>All objects, and its replacement, must be the same '''Asset Type'''</td> |
| </tr> | | </tr> |
| <tr valign="top"> | | <tr valign="top"> |
| <td colspan=2> | | <td>[[image:BlueDot10x10.png|link=]]</td> |
| <table bgcolor=#ffffe0 cellpadding=2> | | <td>You will have the options of replacing assets in the entire route; in the current baseboard; or in a marked selection area</td> |
| | </tr> |
| | </table> |
| | <br> |
| | <table width=1000 bgcolor=#000000 cellpadding=2> |
| | <tr valign="top"> |
| | <td> |
| | <table width=996 bgcolor=#ffffff cellpadding=2> |
| <tr valign="top"> | | <tr valign="top"> |
| <td width=25>[[image:PencilTips.PNG|link=]]</td> | | <td align="center"><span style="font-weight: 700; font-size: 15px; background-color: yellow;">Available in Trainz Plus only</span><br> |
| <td>You can also perform the above two steps in a single step by selecting the named '''Effect Layer''' in the <span style="font-weight: 700; font-size: 15px; color: white; background-color: #797979;"> Layers Palette </span></td> | | <span style="font-weight: 700; font-size: 15px;">In TRS22PE use the Surveyor Classic <span style="color: white; background-color: black;"> Bulk Asset Update/Replace </span> option</span></td> |
| </tr> | | </tr> |
| </table> | | </table> |
| </td> | | </td> |
| | </tr> |
| | </table> |
| | <br> |
| | <table width=1000> |
| | <tr valign="top"> |
| | <td>This tool uses the '''Filter Toggles''' described above to identify the object or objects in your '''Trainz World''' that will be replaced by a single selected asset.<br> |
| | |
| | The process involves following a set sequence of steps:- |
| | <table> |
| | <tr valign="top"> |
| | <td width=25>[[image:DotPoint1.JPG|link=]]</td> |
| | <td>[[image:PageLink.PNG|link=]] '''[[#BR: 1|Check the Compatibility]]''' of the objects being replaced and their replacement asset</td> |
| | </tr> |
| | <tr valign="top"> |
| | <td>[[image:DotPoint2.JPG|link=]]</td> |
| | <td>Use the <span style="font-weight: 700; font-size: 15px; color: white; background-color: #797979;"> Filter Palette </span> toggles to [[image:PageLink.PNG|link=]] '''[[#BR: 2|Identify the Objects to be Replaced]]'''</td> |
| </tr> | | </tr> |
| <tr valign="top"> | | <tr valign="top"> |
| <td>[[image:DotPoint3.JPG|link=]]</td> | | <td>[[image:DotPoint3.JPG|link=]]</td> |
| <td>select a Brush action from the second Drop Down Menu (<span style="font-weight: 700; font-size: 15px; color: white; background-color: black;"> Increase </span>, <span style="font-weight: 700; font-size: 15px; color: white; background-color: black;"> Decrease </span> or <span style="font-weight: 700; font-size: 15px; color: white; background-color: black;"> Set Intensity </span>)</td> | | <td>[[image:PageLink.PNG|link=]] '''[[#BR: 3|Disable the Filter Action]]''' to allow the replacement asset to be selected</td> |
| </tr> | | </tr> |
| <tr valign="top"> | | <tr valign="top"> |
| <td>[[image:DotPoint4.JPG|link=]]</td> | | <td>[[image:DotPoint4.JPG|link=]]</td> |
| <td>In the <span style="font-weight: 700; font-size: 15px; color: white; background-color: #797979;"> Tool Options Palette </span> set any required Brush settings - <span style="font-weight: 700; font-size: 15px; color: gold; background-color: black;"> Radius </span>, <span style="font-weight: 700; font-size: 15px; color: gold; background-color: black;"> Intensity </span> and <span style="font-weight: 700; font-size: 15px; color: gold; background-color: black;"> Sensitivity </span></td> | | <td>[[image:PageLink.PNG|link=]] '''[[#BR: 4|Identify the Replacement Asset]]''' using the <span style="font-weight: 700; font-size: 15px; color: white; background-color: #797979;"> Assets Palette </span></td> |
| </tr> | | </tr> |
| <tr valign="top"> | | <tr valign="top"> |
| <td>[[image:DotPoint5.JPG|link=]]</td> | | <td>[[image:DotPoint5.JPG|link=]]</td> |
| <td><span style="font-weight: 700; font-size: 15px; background-color: lightcyan;"> Left Click </span> or <span style="font-weight: 700; font-size: 15px; background-color: lightcyan;">Left Click and Drag</span> on the terrain to paint with the selected '''Effect Layer'''. <span style="font-weight: 700; background-color: yellow;"> Note: If the brush painting circle is <span style="font-size: 15px; color: red;">RED</span> then the effect layer will not paint because the brush <span style="font-size: 15px; background-color: black; color: gold;"> Radius </span> is too small </span></td> | | <td>[[image:PageLink.PNG|link=]] '''[[#BR: 5|Mark Out the Selection Area (Optional)]]''' <span style="font-weight: 700; font-size: 15px;">IF</span> you are <span style="font-weight: 700; font-size: 15px;">ONLY</span> going to replace assets <span style="font-weight: 700; font-size: 15px;">WITHIN A SET AREA</span> (apart from everywhere in the current baseboard) then use the [[image:S20_MarqueeToolIcon.png|link=]] '''Marquee Tool''' to draw or mark out the area</td> |
| </tr> | | </tr> |
| <tr valign="top"> | | <tr valign="top"> |
| <td colspan=2> | | <td>[[image:DotPoint6.JPG|link=]]</td> |
| <table bgcolor=#ffffe0 cellpadding=2>
| | <td>Perform the [[image:PageLink.PNG|link=]] '''[[#BR: 6|Bulk Replace]]''' operation</td> |
| <tr valign="top"> | |
| <td width=25>[[image:PencilTips.PNG|link=]]</td> | |
| <td>Both '''TurfFX''' and '''Clutter''' use '''LOD''' data so their visual effect will decrease the further away they are from your point of view. So there is no advantage, but there is a possible performance disadvantage, in painting these effect layers right out to the horizon</td>
| |
| </tr> | | </tr> |
| </table> | | </table> |
| Line 5,528: |
Line 5,687: |
| </tr> | | </tr> |
| </table> | | </table> |
| | <br> |
| | <table width=1000> <!-- BEGIN Nav Buttons Table SKIPS NO SECTIONS --> |
| | <tr valign="top"> |
| | <td width=629><span id="BR: 1"></span> |
| | ==='''1. Check the Compatibility'''=== |
| </td> | | </td> |
| | <td width=50> </td> |
| | <td width=50> </td> |
| | <td width=46>[[image:SkipMinorDown.png|link=#BR: 2]][[image:SkipMinorUp.png|link=#skipBulkReplace]]</td> <!-- for Top and Minor Up/Down --> |
| | <td width=75> </td> |
| | <td width=75> </td> <!-- Next Down --> |
| | <td width=75> </td> <!-- Bottom --> |
| </tr> | | </tr> |
| </table> | | </table> <!-- END Nav Buttons Table --> |
| </td> | | |
| </tr>
| |
| </table>
| |
| <br>
| |
| <table width=1000 bgcolor=#000000 cellpadding=2> | | <table width=1000 bgcolor=#000000 cellpadding=2> |
| <tr valign="top"> | | <tr valign="top"> |
| <td> | | <td> |
| <table width=996 bgcolor=#ffffb0 cellpadding=2> | | <table width=996 bgcolor=#ffffff cellpadding=2> |
| <tr valign="top"> | | <tr valign="top"> |
| <td width=25>[[image:NotePad.PNG|link=]]</td> | | <td colspan=3 bgcolor="lightgreen"><span style="font-weight: 700; font-size: 15px;">You <span style="font-size: 17px;">can</span> bulk replace:-</span></td> |
| <td><span style="font-size: 17px; font-weight: 700;">Notes:'''</span><br>
| |
| ----
| |
| </td> | |
| </tr> | | </tr> |
| <tr valign="top"> | | <tr valign="top"> |
| <td>[[image:DotPoint.JPG|10px|link=]]</td> | | <td width=32>[[image:Tick.PNG|link=]]</td> |
| <td>The density or coverage of the '''TurfFX''' and '''Clutter''' ground effects within the brush area is controlled by the <span style="font-weight: 700; font-size: 15px; color: white; background-color: #797979;"> Tool Options Palette </span> <span style="font-weight: 700; font-size: 15px; color: gold; background-color: black;"> Intensity </span> setting.<br> | | <td width=25>[[image:GroundTextureFilter_S20.png|link=]]</td> |
| <table cellpadding=2 bgcolor=#ffffff>
| | <td>one or more different '''Ground Textures''' with a single '''Ground Texture''' and <span style="font-weight: 700; font-size: 15px;">NOT</span> with any other type of asset</td> |
| <tr>
| |
| <td colspan="2">
| |
| ----</td>
| |
| </tr> | | </tr> |
| <tr valign="top"> | | <tr valign="top"> |
| <td>[[image:Gears.PNG|link=]]</td> | | <td>[[image:Tick.PNG|link=]]</td> |
| <td><span style="font-weight: 700; font-size: 15px;"><span style="color: gold; background-color: black;"> Intensity </span> Settings:'''</span> | | <td>[[image:SceneryMeshFilter_S20.png|link=]]</td> |
| <table> | | <td>one or more different '''Scenery Meshes''' with a single '''Scenery Mesh''' and <span style="font-weight: 700; font-size: 15px;">NOT</span> with any other type of asset. <span style="font-weight: 700; background-color: #fcbcbc;">None of the meshes can include track‡</span></td> |
| | </tr> |
| <tr valign="top"> | | <tr valign="top"> |
| <td width=10>[[image:BlackDot10x10.png|link=]]</td> | | <td>[[image:Tick.PNG|link=]]</td> |
| <td>'''1%''' to apply the effect very lightly</td> | | <td>[[image:ScenerySplineFilter_S20.png|link=]]</td> |
| | <td>one or more different '''Scenery Splines''' with a single '''Scenery Spline''' and <span style="font-weight: 700; font-size: 15px;">NOT</span> with any other type of asset. <span style="font-weight: 700; background-color: #fcbcbc;">None of the splines can include track‡</span></td> |
| </tr> | | </tr> |
| <tr valign="top"> | | <tr valign="top"> |
| <td>[[image:BlackDot10x10.png|link=]]</td> | | <td>[[image:Tick.PNG|link=]]</td> |
| <td>'''100%''' to apply the effect at full density</td> | | <td>[[image:TrackSplineFilter_S20.png|link=]]</td> |
| | <td>one or more different '''Track Splines''' with a single '''Track Spline''' and <span style="font-weight: 700; font-size: 15px;">NOT</span> with any other type of asset. <span style="font-weight: 700; background-color: yellow;">Fixed Track assets are NOT track splines</span></td> |
| </tr> | | </tr> |
| <tr valign="top"> | | <tr valign="top"> |
| <td colspan=2>Values between these two limits will give intermediate changes with each sweep of the brush over the same area</td> | | <td width=10>[[image:Tick.PNG|link=]]</td> |
| </tr> | | <td>[[image:TrackMeshFilter_S20.png|link=]]</td> |
| </table> | | <td>one or more different '''Track Objects''' with a single '''Track Object''' and <span style="font-weight: 700; font-size: 15px;">NOT</span> with any other type of asset</td> |
| </td> | |
| </tr>
| |
| <tr>
| |
| <td colspan="2"> | |
| ----</td> | |
| </tr> | |
| </table>
| |
| </td> | |
| </tr> | | </tr> |
| <tr valign="top"> | | <tr valign="top"> |
| <td>[[image:DotPoint.JPG|10px|link=]]</td> | | <td colspan=3 align="right">'''‡''' this includes fixed assets and splines with built-in track (e.g. industries, bridges, tunnels)</td> |
| <td>The rate or speed at which the '''TurfFX''' and '''Clutter''' ground effects change when using the <span style="font-weight: 700; font-size: 15px; color: white; background-color: black;"> Increase </span> or <span style="font-weight: 700; font-size: 15px; color: white; background-color: black;"> Decrease </span> brush actions is controlled by the <span style="font-weight: 700; font-size: 15px; color: white; background-color: #797979;"> Tool Options Palette </span> <span style="font-weight: 700; font-size: 15px; color: gold; background-color: black;"> Sensitivity </span> setting.<br>
| |
| <table cellpadding=2 bgcolor=#ffffff>
| |
| <tr>
| |
| <td colspan="2">
| |
| ----</td>
| |
| </tr> | | </tr> |
| <tr valign="top"> | | <tr valign="top"> |
| <td>[[image:Gears.PNG|link=]]</td> | | <td colspan=3 bgcolor=#fcbcbc><span style="font-weight: 700; font-size: 15px;">You <span style="font-size: 17px;">cannot</span> bulk replace:-</span></td> |
| <td><span style="font-weight: 700; font-size: 15px;"><span style="color: gold; background-color: black;"> Sensitivity </span> Settings:'''</span>
| |
| <table>
| |
| <tr valign="top">
| |
| <td width=10>[[image:BlackDot10x10.png|link=]]</td>
| |
| <td>'''1%''' to increase/decrease the application of the ground effect very slowly when you move the brush</td>
| |
| </tr> | | </tr> |
| <tr valign="top"> | | <tr valign="top"> |
| <td>[[image:BlackDot10x10.png|link=]]</td> | | <td width=32>[[image:Cross.PNG|link=]]</td> |
| <td>'''100%''' increase/decrease the application of the ground effect at the maximum possible rate when you move the brush</td> | | <td>[[image:TrainFilter_S20.png|link=]]</td> |
| | <td>'''Rolling Stock''' (locomotives, wagons)</td> |
| </tr> | | </tr> |
| <tr valign="top"> | | <tr valign="top"> |
| <td colspan=2>Values between these two limits will give intermediate changes with each sweep of the brush over the same area</td> | | <td>[[image:Cross.PNG|link=]]</td> |
| | <td>[[image:PresetFilter_S20.png|link=]]</td> |
| | <td>'''Presets''' (effect layers)</td> |
| </tr> | | </tr> |
| </table> | | </table> |
| </td> | | </td> |
| </tr>
| |
| <tr>
| |
| <td colspan="2">
| |
| ----</td>
| |
| </tr> | | </tr> |
| </table> | | </table> |
| | <br> |
| | <table width=1000> <!-- BEGIN Nav Buttons Table SKIPS NO SECTIONS --> |
| | <tr valign="top"> |
| | <td width=629><span id="BR: 2"></span> |
| | ==='''2. Identify the Objects to be Replaced'''=== |
| </td> | | </td> |
| | <td width=50> </td> |
| | <td width=50> </td> |
| | <td width=46>[[image:SkipMinorDown.png|link=#BR: 3]][[image:SkipMinorUp.png|link=#BR: 1]]</td> <!-- for Top and Minor Up/Down --> |
| | <td width=75> </td> |
| | <td width=75> </td> <!-- Next Down --> |
| | <td width=75> </td> <!-- Bottom --> |
| | </tr> |
| | </table> <!-- END Nav Buttons Table --> |
| | |
| | <table width=1000 bgcolor=#000000 cellpadding=2> |
| | <tr valign="top"> |
| | <td> |
| | <table width=996 bgcolor=#ffffe0 cellpadding=2> |
| | <tr valign="top"> |
| | <td width=25>[[image:PencilTips.PNG|link=]]</td> |
| | <td>Before you proceed any further it would be a good idea to either know the exact name of the asset you will be using as the replacement or have it visible in the Surveyor '''Trainz World View''' to identify it with the '''Eyedropper'''</td> |
| </tr> | | </tr> |
| </table> | | </table> |
| Line 5,616: |
Line 5,782: |
| </table> | | </table> |
| <br> | | <br> |
| | The '''Filter Selection''' and '''Filter Toggle''' tools are used to identify the object or objects in the route that you want to replace. |
| | |
| <table width=1000 bgcolor=#000000 cellpadding=2> | | <table width=1000 bgcolor=#000000 cellpadding=2> |
| <tr valign="top"> | | <tr valign="top"> |
| <td> | | <td> |
| <table width=996 bgcolor=#ffffb0 cellpadding=2> | | <table width=996 bgcolor=#ffffff cellpadding=2> |
| <tr valign="top"> | | <tr valign="top"> |
| <td> | | <td colspan=2><span style="font-weight: 700; font-size: 15px;">Steps: To Find the Type of Object to be Replaced:-</span></td> |
| <table width=996>
| |
| <tr valign="top">
| |
| <td width=25>[[image:NotePad.PNG|link=]]</td>
| |
| <td width=971><span style="font-size: 17px; font-weight: 700;">Notes: "Floating Turf"'''</span>
| |
| ----
| |
| When painting with a '''TurfFX Effect Layer''' or a '''Clutter Effect Layer''' brush, care must be taken when near the edge of the route. Painting over the edge will create "floating" effect layer artifacts. This can occur in both '''Surveyor 2.0''' and '''Surveyor Classic'''. The same effect will occur if an effect layer is painted over a dig-hole, such as those used at tunnel entrances.</td>
| |
| </tr>
| |
| </table>
| |
| <table width=996>
| |
| <tr valign="top">
| |
| <td>[[image:EffectLayerHeightArtifact.png|link=]]</td>
| |
| <td>In the image on the left, a '''TurfFX Effect Layer''' brush has been used near the boundary of the route. Some of the brush has strayed over that boundary edge into the empty space beyond.<br><br>
| |
| | |
| The result is a "floating" section of TurfFX or Clutter hovering "off the grid" and sometimes high above the terrain, as shown in the image. The height of the floating region will depend on the ground height, the '''World Origin''' height and other mysterious factors.<br><br>
| |
| | |
| <span style="font-weight: 700; font-size: 15px;">The Solution:</span> '''(The Lawn Mower)''' | |
| | |
| <table bgcolor=#ffffff>
| |
| <tr valign="top">
| |
| <td colspan=2><span style="font-weight: 700; font-size: 15px;">Steps:</span> To remove "floating" '''TurFX''' and '''Clutter''':-</td>
| |
| </tr> | | </tr> |
| <tr valign="top"> | | <tr valign="top"> |
| <td width=25>[[image:DotPoint1.JPG|link=]]</td> | | <td width=25>[[image:DotPoint1.JPG|link=]]</td> |
| <td>In the <span style="font-weight: 700; font-size: 15px; color: white; background-color: #797979;"> Tools Palette </span> set the '''Effect Brush Tool''' action to <span style="font-weight: 700; font-size: 15px; color: white; background-color: black;"> Decrease </span></td> | | <td>In the <span style="font-weight: 700; font-size: 15px; color: white; background-color: #797979;"> Filter Palette </span> set the '''Filter Action''' to <span style="font-weight: 700; font-size: 15px; color: white; background-color: black;"> Filter List </span></td> |
| </tr> | | </tr> |
| <tr valign="top"> | | <tr valign="top"> |
| <td>[[image:DotPoint2.JPG|link=]]</td> | | <td>[[image:DotPoint2.JPG|link=]]</td> |
| <td>In the <span style="font-weight: 700; font-size: 15px; color: white; background-color: #797979;"> Tool Options Palette </span> set both the <span style="font-weight: 700; font-size: 15px; color: gold; background-color: black;"> Intensity </span> and <span style="font-weight: 700; font-size: 15px; color: gold; background-color: black;"> Sensitivity </span> settings to '''100%'''</td> | | <td>Use the '''Filter Selections''' (the row of icons or the drop down list) to select the '''type''' of object that you want to replace remembering the '''Compatibility Rules''' listed above. All objects must be of the same ''type'' (e.g. all scenery meshes or all track objects) and not a mixture such as scenery meshes and track objects.</td> |
| </tr> | | </tr> |
| <tr valign="top">
| | </table> |
| <td>[[image:DotPoint3.JPG|link=]]</td>
| | </td> |
| <td>In the <span style="font-weight: 700; font-size: 15px; color: white; background-color: #797979;"> Layers Palette </span> select the same '''Effect Layer''' that created the problem, repaint over the floating '''Effect Layer''' areas. This will also remove some of the effect layer from the edges of the boundary baseboards.</td>
| |
| </tr> | | </tr> |
| </table> | | </table> |
| <br> | | <br> |
| <table bgcolor=#ffffe0 cellpadding=2> | | <table width=1000> |
| | <tr valign="top"> |
| | <td>Use the '''Toggles''' and, if applicable, the '''Filter Toggle''' <span style="font-weight: 700; font-size: 15px; color: white; background-color: black;"> Search </span> box to narrow down the list.</td> |
| | </tr> |
| | </table> |
| | |
| | <table width=1000 bgcolor=#000000 cellpadding=2> |
| | <tr valign="top"> |
| | <td> |
| | <table width=996 bgcolor=#ffffff cellpadding=2> |
| | <tr valign="top"> |
| | <td colspan=2><span style="font-weight: 700; font-size: 15px;">Steps: To Refine the Search:-</span></td> |
| | </tr> |
| <tr valign="top"> | | <tr valign="top"> |
| <td width=25>[[image:PencilTips.PNG|link=]]</td> | | <td> |
| <td><span style="font-weight: 700; font-size: 15px;">Prevention:</span>
| |
| <table> | | <table> |
| <tr valign="top"> | | <tr valign="top"> |
| <td width=10>[[image:DotPoint.JPG|10px|link=]]</td> | | <td width=25>[[image:DotPoint1.JPG|link=]]</td> |
| <td>'''DO NOT''' paint '''TurfFX''' and '''Clutter Effect Layers''' right up to the edges of boundary baseboards</td> | | <td>In the <span style="font-weight: 700; font-size: 15px; color: white; background-color: #797979;"> Filter Palette </span> open the <span style="font-weight: 700; font-size: 15px; color: white; background-color: black;"> Filter Toggles </span> by a <span style="font-weight: 700; font-size: 15px; background-color: lightcyan;"> Left Click </span> on the '''arrowhead''' or on the "№ of assets enabled" counter</td> |
| </tr> | | </tr> |
| <tr valign="top"> | | <tr valign="top"> |
| <td>[[image:DotPoint.JPG|10px|link=]]</td> | | <td>[[image:DotPoint2.JPG|link=]]</td> |
| <td>'''TurfFX''' and '''Clutter Layers''' do not detect and avoid dig-holes such as those used at tunnel entrances. Use the steps listed above to remove effect layers from dig-holes</td> | | <td>'''Optional:''' In the <span style="font-weight: 700; font-size: 15px; color: white; background-color: #797979;"> Filter Palette </span> enter a search term in the <span style="font-weight: 700; font-size: 15px; color: white; background-color: black;"> Search </span> box located just below the asset enabled count. This will narrow the list of toggled items. The rules for entering a search are exactly the same as used in the <span style="font-weight: 700; font-size: 15px; color: white; background-color: #797979;"> Assets Palette </span> <span style="font-weight: 700; font-size: 15px; color: white; background-color: black;"> Search </span> box |
| | <table bgcolor=#ffffe0 cellpadding=2> |
| | <tr valign="top"> |
| | <td width=25>[[image:PencilTips.PNG|link=]]</td> |
| | <td>If there are many assets to be selected or the list of possible assets is still very long then creating a '''Picklist''' with the required assets may be a better option</td> |
| </tr> | | </tr> |
| </table> | | </table> |
| </td> | | </td> |
| </tr> | | </tr> |
| </table> | | <tr valign="top"> |
| </td> | | <td>[[image:DotPoint3.JPG|link=]]</td> |
| | <td>In the '''Toggle List''' toggle '''ON''' all the objects that you want to be replaced and toggle '''OFF''' those that you do not want to replace |
| | <table bgcolor=#ffffb0 cellpadding=2> |
| | <tr valign="top"> |
| | <td width=25>[[image:NotePad.PNG|link=]]</td> |
| | <td>See the '''Example''' below for tips on how to select blocks of assets to be toggled and how to quickly set multiple toggles '''ON''' or '''OFF''' simultaneously</td> |
| </tr> | | </tr> |
| </table> | | </table> |
| Line 5,681: |
Line 5,848: |
| </table> | | </table> |
| </td> | | </td> |
| | <td width=320>[[image:FilterPaletteSearchBox_S20.png|link=]]<br><br> |
| | [[image:FilterPaletteToggleList_S20.png|link=]]</td> |
| </tr> | | </tr> |
| </table> | | </table> |
| <br>
| |
| <table width=1000> <!-- BEGIN Section Nav Buttons -->
| |
| <tr valign="top">
| |
| <td width=629><span id="Water Effect Layer"></span>
| |
| ===<span style="font-weight: 700; font-size: 17px; color: white; background-color: blue;"> Water Effect Layer </span>===
| |
| </td> | | </td> |
| <td width=50> </td>
| |
| <td width=50> </td>
| |
| <td width=46>[[image:SkipMinorDown.png|link=#Water Effect Tips|Down]][[image:SkipMinorUp.png|link=#TurfFX and Clutter|Up]]</td> <!-- for Top and Minor Up/Down -->
| |
| <td width=75> </td>
| |
| <td width=75> </td>
| |
| <td width=75> </td> <!-- for Bottom -->
| |
| </tr>
| |
| </table> <!-- END Section Nav Buttons -->
| |
|
| |
| <table width=1000 bgcolor="lightcyan" cellpadding=2>
| |
| <tr valign="top">
| |
| <td width=10>[[image:BlueDot10x10.png|link=]]</td>
| |
| <td>The '''Water Effect Layer''' will cover the entire route but different parts can be raised above the ground to reveal the water where required</td>
| |
| </tr>
| |
| <tr valign="top">
| |
| <td width=10>[[image:BlueDot10x10.png|link=]]</td>
| |
| <td>You can have more than one '''Water Effect Layer''' each with a different colour and/or surface effect (calm, ripples, rough) to simulate different water features (e.g. pond, lake, stream, ocean)</td>
| |
| </tr>
| |
| <tr valign="top">
| |
| <td>[[image:BlueDot10x10.png|link=]]</td>
| |
| <td>The '''Ground Height''' can also be raised or lowered to hide and reveal the water layer where required</td>
| |
| </tr> | | </tr> |
| </table> | | </table> |
| Line 5,716: |
Line 5,859: |
| <tr valign="top"> | | <tr valign="top"> |
| <td> | | <td> |
| <table width=996 bgcolor=#ffffff cellpadding=2> | | <table width=996 bgcolor=#ffffe0 cellpadding=2> |
| | <tr valign="top"> |
| | <td> |
| | <table> |
| <tr valign="top"> | | <tr valign="top"> |
| <td width=150>[[image:BrushActionIcon_S20.png|link=]] <span style="font-weight: 700; font-size: 15px; color: white; background-color: black;"> Brush Actions </span></td> | | <td><span style="font-weight: 700; font-size: 17px; color: white; background-color: black;"> Example: </span></td> |
| <td>When a '''Water Effect Layer''' has been selected as the '''Target''', the second drop down box will give a choice of five '''actions'''. These '''actions''' are identical to those found in the <span style="font-weight: 700; font-size: 15px; color: white; background-color: black;"> Ground Height </span> '''Target''' plus a new action:-</td> | | <td><span style="font-weight: 700; font-size: 15px;">Preparing to bulk replace multiple narrow gauge tracks with a different track of the same gauge</span></td> |
| </tr> | | </tr> |
| </table> | | </table> |
| | <table> |
| | <tr valign="top"> |
| | <td width=25>[[image:DotPoint1.JPG|link=]]</td> |
| | <td>In the <span style="font-weight: 700; font-size: 15px; color: white; background-color: #797979;"> Filter Palette </span> set the In the <span style="font-weight: 700; font-size: 15px; color: white; background-color: #000000;"> Filter Selection </span> to [[image:TrackSplineFilter_S20.png|link=]] <span style="font-weight: 700; font-size: 15px; color: white; background-color: black;"> Track </span> |
| | <br> |
| | [[image:FilterPaletteBulkReplaceExample_1_S20.png|link=]] |
| | <br> |
| | In this case there are 781 assets of type '''Track''' installed so the search will need to be refined further |
| | <br> |
| </td> | | </td> |
| </tr> | | </tr> |
| </table> | | <tr valign="top"> |
| | <td>[[image:DotPoint2.JPG|link=]]</td> |
| | <td><span style="font-weight: 700; font-size: 15px;">Refine the search</span> |
| | <br> |
| | The track splines to be replaced all have the text '''NG42''' in their names so this is the obvious search text to use. '''NG42''' has been entered into the <span style="font-weight: 700; font-size: 15px; color: white; background-color: #797979;"> Filter Palette </span> <span style="font-weight: 700; font-size: 15px; color: white; background-color: black;"> Search </span> box, not the one in the <span style="font-weight: 700; font-size: 15px; color: white; background-color: #797979;"> Assets Palette </span>, to locate all assets that use that text in their names or descriptions. |
| | <br> |
| | [[image:FilterPaletteBulkReplaceExample_2_S20.png|link=]] |
|
| |
|
| <table width=1000> | | <br> |
| <tr valign="top"> | | The 781 assets have now been reduced to just 18. |
| <td colspan=2>The '''actions''' are:- </td>
| | <br> |
| | </td> |
| </tr> | | </tr> |
| <tr valign="top"> | | <tr valign="top"> |
| <td width=260> | | <td width=25>[[image:DotPoint3.JPG|link=]]</td> |
| <table width=260> | | <td><span style="font-weight: 700; font-size: 15px;">Toggle the assets</span> |
| | <br> |
| | If your search returns only a few assets then it may be quicker to individually toggle '''OFF''' the assets you don't want replaced. Otherwise the following method may be suitable:- |
| | |
| | <table bgcolor=#ffffff> |
| <tr valign="top"> | | <tr valign="top"> |
| <td width=120> | | <td colspan=2>'''Steps:'''</td> |
| <table width=120> | | </tr> |
| <tr valign="top"> | | <tr valign="top"> |
| <td width=10>[[image:BulletTick.png|link=]]</td> | | <td width=25>[[image:DotPoint1Blue.png|link=]]</td> |
| <td width=110>'''Height Up'''</td> | | <td>In the '''Toggle List''' select one of the assets</td> |
| </tr> | | </tr> |
| <tr valign="top"> | | <tr valign="top"> |
| <td>[[image:BulletTick.png|link=]]</td> | | <td>[[image:DotPoint2Blue.png|link=]]</td> |
| <td>'''Height Down'''</td> | | <td>Press <span style="font-weight: 700; font-size: 15px;"><span style="color: white; background-color: black;"> Ctrl </span> + <span style="color: white; background-color: black;"> A </span></span> to highlight them all</td> |
| | </tr> |
| | <tr valign="top"> |
| | <td>[[image:DotPoint3Blue.png|link=]]</td> |
| | <td><span style="font-weight: 700; font-size: 15px; background-color: lightcyan;"> Left Click </span> on the '''Toggle''' icon of any one of the assets to set them all to '''OFF'''</td> |
| | </tr> |
| | </table> |
| | <br> |
| | [[image:FilterPaletteBulkReplaceExample_4_S20.png|link=]] |
| | <br> |
| | <table bgcolor=#ffffff> |
| | <tr valign="top"> |
| | <td width=25>[[image:DotPoint4Blue.png|link=]]</td> |
| | <td>Select the assets to be replaced.<br> |
| | Start with a <span style="font-weight: 700; font-size: 15px; background-color: lightcyan;"> Left Click </span> on the '''name''' of the first asset to be replaced. This will also clear the highlighting on all the other assets. |
| | <table> |
| | <tr valign="top"> |
| | <td colspan=2>If multiple assets are to be selected then:-</td> |
| </tr> | | </tr> |
| <tr valign="top"> | | <tr valign="top"> |
| <td>[[image:BulletTick.png|link=]]</td> | | <td width=10>[[image:DotPoint.JPG|10px|link=]]</td> |
| <td>'''Set Height'''</td> | | <td>if all the assets are in a single block then use <span style="font-weight: 700; font-size: 15px;"><span style="color: white; background-color: black;"> Shift </span> + <span style="background-color: lightcyan;"> Left Click </span></span> on the name of the last asset of the group</td> |
| </tr> | | </tr> |
| <tr valign="top"> | | <tr valign="top"> |
| <td>[[image:BulletTick.png|link=]]</td> | | <td>[[image:DotPoint.JPG|10px|link=]]</td> |
| <td>'''Grade'''</td> | | <td>if the assets are scattered throughout the list then use <span style="font-weight: 700; font-size: 15px;"><span style="color: white; background-color: black;"> Ctrl </span> + <span style="background-color: lightcyan;"> Left Click </span></span> on the name of each additional asset</td> |
| </tr> | | </tr> |
| <tr valign="top"> | | <tr valign="top"> |
| <td>[[image:BulletTick.png|link=]]</td> | | <td colspan=2>[[image:FilterPaletteBulkReplaceExample_6_S20.png|link=]]</td> |
| <td>'''Bulk Adjust'''</td>
| |
| </tr> | | </tr> |
| </table> | | </table> |
| </td> | | </td> |
| <td width=140>[[image:BrushToolsWaterEffect_S20.png|link=]]</td>
| |
| </tr> | | </tr> |
| <tr valign="top"> | | <tr valign="top"> |
| <td colspan=2> | | <td width=25>[[image:DotPoint5Blue.png|link=]]</td> |
| <table bgcolor=#000000 cellpadding=2> | | <td><span style="font-weight: 700; font-size: 15px; background-color: lightcyan;"> Left Click </span> on the '''Toggle''' icon of any one of the selected assets to set them all to '''ON'''</td> |
| <tr valign="top"> | | </tr> |
| <td> | |
| <table bgcolor=#ffffe0 cellpadding=2> | |
| <tr valign="top"> | | <tr valign="top"> |
| <td width=25>[[image:PencilTips.PNG|link=]]</td> | | <td colspan=2>[[image:FilterPaletteBulkReplaceExample_7_S20.png|link=]]</td> |
| <td>Use the <span style="font-weight: 700; font-size: 15px; color: white; background-color: #797979;"> Tool Options Palette </span> <span style="font-weight: 700; font-size: 15px; color: gold; background-color: black;"> Sensitivity </span> <span style="font-weight: 700; font-size: 15px; color: gold; background-color: black;"> Height </span> <span style="font-weight: 700; font-size: 15px; color: gold; background-color: black;"> Grade </span> and <span style="font-weight: 700; font-size: 15px; color: gold; background-color: black;"> Angle </span> settings to control how the '''Water Effect Layer''' is applied</td>
| |
| </tr> | | </tr> |
| </table> | | </table> |
| Line 5,774: |
Line 5,952: |
| </tr> | | </tr> |
| </table> | | </table> |
| | <br> |
| | This <span style="font-weight: 700; font-size: 15px; color: white; background-color: black;"> Example </span> continues in the next section. |
| | <br> |
| </td> | | </td> |
| </tr> | | </tr> |
| </table> | | </table> |
| </td> | | </td> |
| <td>
| |
| <table width=740 bgcolor=#000000 cellpadding=2>
| |
| <tr valign="top">
| |
| <td>
| |
| <table bgcolor=#ffffff width=736 cellpadding=2>
| |
| <tr valign="top">
| |
| <td colspan=2><span style="font-weight: 700; font-size: 17px;">Water Effect Layer Actions:</span></td>
| |
| </tr> | | </tr> |
| | </table> |
| | <br> |
| | <table width=1000> <!-- BEGIN Nav Buttons Table SKIPS NO SECTIONS --> |
| <tr valign="top"> | | <tr valign="top"> |
| <td width=150>[[image:BrushActionIcon_S20.png|link=]] <span style="font-weight: 700; font-size: 15px; color: white; background-color: black;"> Height Up </span><br>[[image:BrushActionIcon_S20.png|link=]] <span style="font-weight: 700; font-size: 15px; color: white; background-color: black;"> Height Down </span></td> | | <td width=629><span id="BR: 3"></span> |
| <td>raises/lowers the water layer at a rate controlled by the <span style="font-weight: 700; font-size: 15px; color: white; background-color: #797979;"> Tool Options Palette </span> <span style="font-weight: 700; font-size: 15px; color: gold; background-color: black;"> Sensitivity </span> setting</td> | | ==='''3. Disable the Filter Action'''=== |
| | </td> |
| | <td width=50> </td> |
| | <td width=50> </td> |
| | <td width=46>[[image:SkipMinorDown.png|link=#BR: 4]][[image:SkipMinorUp.png|link=#BR: 2]]</td> <!-- for Top and Minor Up/Down --> |
| | <td width=75> </td> |
| | <td width=75> </td> <!-- Next Down --> |
| | <td width=75> </td> <!-- Bottom --> |
| </tr> | | </tr> |
| | </table> <!-- END Nav Buttons Table --> |
| | |
| | In the <span style="font-weight: 700; font-size: 15px; color: white; background-color: #797979;"> Filter Palette </span> select <span style="font-weight: 700; font-size: 15px; color: white; background-color: black;"> Filter Disabled </span> from the '''Filter Actions''' drop down menu. |
| | <br> |
| | <table width=1000 bgcolor=#000000 cellpadding=2> |
| <tr valign="top"> | | <tr valign="top"> |
| <td>[[image:BrushActionIcon_S20.png|link=]] <span style="font-weight: 700; font-size: 15px; color: white; background-color: black;"> Set Height </span></td> | | <td> |
| <td>will "plateau" the water level to the <span style="font-weight: 700; font-size: 15px; color: white; background-color: #797979;"> Tool Options Palette </span> <span style="font-weight: 700; font-size: 15px; color: gold; background-color: black;"> Height </span> setting at a rate controlled by the <span style="font-weight: 700; font-size: 15px; color: gold; background-color: black;"> Sensitivity </span> setting</td> | | <table width=996 bgcolor=#ffffff cellpadding=2> |
| </tr>
| |
| <tr valign="top"> | | <tr valign="top"> |
| <td>[[image:BrushActionIcon_S20.png|link=]] <span style="font-weight: 700; font-size: 15px; color: white; background-color: black;"> Grade </span></td> | | <td>This will break the connection between the <span style="font-weight: 700; font-size: 15px; color: white; background-color: #797979;"> Filter Palette </span> and the <span style="font-weight: 700; font-size: 15px; color: white; background-color: #797979;"> Assets Palette </span>. The <span style="font-weight: 700; font-size: 15px; color: white; background-color: #797979;"> Assets Palette </span> will be set to show <span style="font-weight: 700; font-size: 15px; color: white; background-color: black;"> All Content </span></td> |
| <td>creates a smooth water slope at the <span style="font-weight: 700; font-size: 15px; color: white; background-color: #797979;"> Tool Options Palette </span> <span style="font-weight: 700; font-size: 15px; color: gold; background-color: black;"> Grade </span> and <span style="font-weight: 700; font-size: 15px; color: gold; background-color: black;"> Angle </span> settings at a rate controlled by the <span style="font-weight: 700; font-size: 15px; color: gold; background-color: black;"> Sensitivity </span> setting - see '''Notes:''' below</td>
| |
| </tr>
| |
| <tr valign="top">
| |
| <td>[[image:BrushActionIcon_S20.png|link=]] <span style="font-weight: 700; font-size: 15px; color: white; background-color: black;"> Bulk Adjust </span></td>
| |
| <td>will move the entire water layer up or down - see '''Notes:''' below</td>
| |
| </tr>
| |
| </table>
| |
| </td> | |
| </tr> | | </tr> |
| </table> | | </table> |
| Line 5,810: |
Line 5,990: |
| </table> | | </table> |
| <br> | | <br> |
| <table width=1000> | | <table bgcolor=#000000 cellpadding=2> |
| <tr valign="top"> | | <tr valign="top"> |
| <td> | | <td> |
| <table width=495 bgcolor=#000000 cellpadding=2> | | <table bgcolor=#ffffe0 cellpadding=2> |
| <tr valign="top"> | | <tr valign="top"> |
| <td> | | <td> |
| <table width=491 bgcolor=#ffffff cellpadding=2>
| |
| <tr valign="top">
| |
| <td><span style="font-weight: 700; font-size: 15px;">Steps:</span> To paint with a '''Water Effect Layer''':-<br>
| |
| <table> | | <table> |
| <tr valign="top"> | | <tr valign="top"> |
| <td width=20>[[image:DotPoint1.JPG|link=]]</td> | | <td><span style="font-weight: 700; font-size: 17px; color: white; background-color: black;"> Example: </span></td> |
| <td>In the <span style="font-weight: 700; font-size: 15px; color: white; background-color: #797979;"> Tools Palette </span> select the [[image:S20_BrushToolIcon.png|link=|20px]] '''Brush Tool''' or press the <span style="font-weight: 700; font-size: 15px; color: white; background-color: black;"> W </span> key</td>
| | <td><span style="font-weight: 700; font-size: 15px;">Continued</span></td> |
| </tr> | | </tr> |
| | </table> |
| | |
| | <table> |
| <tr valign="top"> | | <tr valign="top"> |
| <td>[[image:DotPoint2.JPG|link=]]</td> | | <td width=25>[[image:DotPoint4.JPG|link=]]</td> |
| <td>select the '''<water effect layer name>''' from the Brush '''Target''' drop down menu. If there are no '''Water Effect Layers''' listed then none have been created or installed for this route</td> | | <td><span style="font-weight: 700; font-size: 15px;">Disable the Filter Action</span><br> |
| </tr> | | In the <span style="font-weight: 700; font-size: 15px; color: white; background-color: #797979;"> Filter Palette </span> <span style="font-weight: 700; font-size: 15px; color: white; background-color: #000000;"> Filter Action </span> drop down menu select the first option <span style="font-weight: 700; font-size: 15px; color: white; background-color: black;"> Filter Disabled </span> |
| <tr valign="top"> | | <br> |
| <td colspan=2> | | [[image:FilterPaletteBulkReplaceExample_8_S20.png|link=]] |
| <table bgcolor=#ffffe0 cellpadding=2> | | <br> |
| <tr valign="top"> | | <br> |
| <td width=25>[[image:PencilTips.PNG|link=]]</td> | | This only affects the <span style="font-weight: 700; font-size: 15px; color: white; background-color: #797979;"> Assets Palette </span> filtered list which will be reset to display '''All Content'''. |
| <td>You can also perform the above two steps in a single step by selecting the named '''Effect Layer''' in the <span style="font-weight: 700; font-size: 15px; color: white; background-color: #797979;"> Layers Palette </span></td> | | <br> |
| | [[image:FilterPaletteBulkReplaceExample_9_S20.png|link=]]<br> |
| | |
| | '''Note:''' The assets shown as greyed out are installed but '''obsolete''', '''disabled''' or otherwise unavailable for use.</td> |
| </tr> | | </tr> |
| </table> | | </table> |
| | <br> |
| | This <span style="font-weight: 700; font-size: 15px; color: white; background-color: black;"> Example </span> continues in the next section. |
| | <br> |
| </td> | | </td> |
| </tr> | | </tr> |
| | </table> |
| | </td> |
| | </tr> |
| | </table> |
| | <br> |
| | <table width=1000> <!-- BEGIN Nav Buttons Table SKIPS NO SECTIONS --> |
| <tr valign="top"> | | <tr valign="top"> |
| <td>[[image:DotPoint3.JPG|link=]]</td> | | <td width=629><span id="BR: 4"></span> |
| <td>select a [[image:BrushActionIcon_S20.png|link=]] '''Brush Action''' from the second Drop Down Menu (<span style="font-weight: 700; font-size: 15px; color: white; background-color: black;"> Height Up </span>, <span style="font-weight: 700; font-size: 15px; color: white; background-color: black;"> Height Down </span>, <span style="font-weight: 700; font-size: 15px; color: white; background-color: black;"> Set Height </span>, <span style="font-weight: 700; font-size: 15px; color: white; background-color: black;"> Grade </span> or <span style="font-weight: 700; font-size: 15px; color: white; background-color: black;"> Set Bulk Adjust </span>)</td>
| | ==='''4. Identify the Replacement Asset'''=== |
| | </td> |
| | <td width=50> </td> |
| | <td width=50> </td> |
| | <td width=46>[[image:SkipMinorDown.png|link=#BR: 5]][[image:SkipMinorUp.png|link=#BR: 3]]</td> <!-- for Top and Minor Up/Down --> |
| | <td width=75> </td> |
| | <td width=75> </td> <!-- Next Down --> |
| | <td width=75> </td> <!-- Bottom --> |
| </tr> | | </tr> |
| | </table> <!-- END Nav Buttons Table --> |
| | |
| | <table width=1000> |
| <tr valign="top"> | | <tr valign="top"> |
| <td>[[image:DotPoint4.JPG|link=]]</td> | | <td>Only a single asset has to be selected from the <span style="font-weight: 700; font-size: 15px; color: white; background-color: #797979;"> Assets Palette </span> and it must be the '''same type''' of asset as those selected for replacement.</td> |
| <td>In the <span style="font-weight: 700; font-size: 15px; color: white; background-color: #797979;"> Tool Options Palette </span> set any required Brush settings - <span style="font-weight: 700; font-size: 15px; color: gold; background-color: black;"> Radius </span>, <span style="font-weight: 700; font-size: 15px; color: gold; background-color: black;"> Height </span>, <span style="font-weight: 700; font-size: 15px; color: gold; background-color: black;"> Sensitivity </span>, <span style="font-weight: 700; font-size: 15px; color: gold; background-color: black;"> Grade </span> and <span style="font-weight: 700; font-size: 15px; color: gold; background-color: black;"> Angle </span></td>
| |
| </tr> | | </tr> |
| | </table> |
| | <br> |
| | <table width=750 bgcolor=#000000 cellpadding=2> |
| <tr valign="top"> | | <tr valign="top"> |
| <td colspan=2> | | <td> |
| <table bgcolor=#ffffb0 cellpadding=2> | | <table width=746 bgcolor=#ffffe0 cellpadding=2> |
| | <tr valign="top"> |
| | <td width=25>[[image:PencilTips.PNG|link=]]</td> |
| | <td>After you have disabled the '''Filter Action''', there is a quick way to identify the replacement asset if it is already present in your '''Trainz World''' |
| | <table bgcolor=#ffffff cellpadding=2> |
| <tr valign="top"> | | <tr valign="top"> |
| <td width=25>[[image:NotePad.PNG|link=]]</td> | | <td colspan=2><span style="font-weight: 700; font-size: 15px;">Steps: To Quickly Identify the Replacement Asset in your Trainz World:-</span></td> |
| <td>The colour and surface effect (calm, ripples, rough) of a '''Water Effect Layer''' are set in its properties (see [[image:PageLink.PNG|link=]] '''[[#Edit Water|Water Layer Edit Controls]]''' below)</td>
| |
| </tr> | | </tr> |
| </table> | | <tr valign="top"> |
| </td> | | <td width=25>[[image:DotPoint1.JPG|link=]]</td> |
| | <td>move the mouse pointer onto the object to be selected as the '''Replacement'''</td> |
| </tr> | | </tr> |
| <tr valign="top"> | | <tr valign="top"> |
| <td>[[image:DotPoint5.JPG|link=]]</td> | | <td>[[image:DotPoint2.JPG|link=]]</td> |
| <td><span style="font-weight: 700; font-size: 15px; background-color: lightcyan;"> Left Click </span> or <span style="font-weight: 700; font-size: 15px; background-color: lightcyan;">Left Click and Drag</span> on the terrain to paint with the '''Effect Layer'''</td> | | <td>hold down the <span style="font-weight: 700; font-size: 15px; color: white; background-color: black;"> Alt </span> key and <span style="font-weight: 700; font-size: 15px; background-color: lightcyan;"> Left Click </span> on the object</td> |
| </tr> | | </tr> |
| </table> | | </table> |
| | |
| | This will immediately select the replacement asset in the <span style="font-weight: 700; font-size: 15px; color: white; background-color: #797979;"> Assets Palette </span>. |
| </td> | | </td> |
| </tr> | | </tr> |
| Line 5,867: |
Line 6,077: |
| </tr> | | </tr> |
| </table> | | </table> |
| </td> | | <br> |
| <td width=10> </td> | | <table width=750 bgcolor=#000000 cellpadding=2> |
| <td>
| |
| <table>
| |
| <tr valign="top"> | | <tr valign="top"> |
| <td> | | <td> |
| <table width=495 bgcolor=#000000 cellpadding=2> | | <table width=746 bgcolor=#ffffe0 cellpadding=2> |
| <tr valign="top"> | | <tr valign="top"> |
| <td> | | <td> |
| <table width=491 bgcolor=#ffffb0 cellpadding=2> | | <table> |
| <tr valign="top"> | | <tr valign="top"> |
| <td width=25>[[image:NotePad.PNG|link=]]</td> | | <td><span style="font-weight: 700; font-size: 17px; color: white; background-color: black;"> Example: </span></td> |
| <td width=465><span style="font-size: 17px; font-weight: 700;">Notes:'''</span><br>
| | <td><span style="font-weight: 700; font-size: 15px;">Continued</span></td> |
| ----
| |
| The rate or speed at which the '''Water Effect''' Layer height changes under the brush is controlled by the <span style="font-weight: 700; font-size: 15px; color: white; background-color: #797979;"> Tool Options Palette </span> <span style="font-weight: 700; font-size: 15px; color: gold; background-color: black;"> Sensitivity </span> setting
| |
| <table cellpadding=2 bgcolor=#ffffff>
| |
| <tr>
| |
| <td colspan="2">
| |
| ----</td>
| |
| </tr> | | </tr> |
| | </table> |
| | |
| | <table> |
| <tr valign="top"> | | <tr valign="top"> |
| <td>[[image:Gears.PNG|link=]]</td> | | <td width=25>[[image:DotPoint5.JPG|link=]]</td> |
| <td><span style="font-weight: 700; font-size: 15px;"><span style="color: gold; background-color: black;"> Sensitivity </span> Settings:'''</span> | | <td><span style="font-weight: 700; font-size: 15px;">Select the replacement asset</span> |
| <table> | | <table bgcolor=#ffffff> |
| <tr valign="top"> | | <tr valign="top"> |
| <td width=10>[[image:BlackDot10x10.png|link=]]</td> | | <td colspan=2><span style="font-weight: 700; font-size: 15px;">Options:</span> Choose one of:-</td> |
| <td>'''1%''' for the smallest possible change with each sweep of the brush</td>
| |
| </tr> | | </tr> |
| <tr valign="top"> | | <tr valign="top"> |
| <td>[[image:BlackDot10x10.png|link=]]</td> | | <td width=25>[[image:Ablue.png|link=]]</td> |
| <td>'''100%''' for the largest possible change with each sweep of the brush</td> | | <td>the '''Eyedropper''' method described in the '''Tips''' above. This will automatically select the asset in the filtered list, <span style="font-weight: 700; font-size: 15px;">OR</span></td> |
| </tr> | | </tr> |
| <tr valign="top"> | | <tr valign="top"> |
| <td colspan=2>Values between these two limits will give intermediate changes with each sweep of the brush over the same area</td> | | <td>[[image:Bblue.png|link=]]</td> |
| | <td>In the <span style="font-weight: 700; font-size: 15px; color: white; background-color: #797979;"> Assets Palette </span> enter an '''optional''' search term in the <span style="font-weight: 700; font-size: 15px; color: white; background-color: #797979;"> Assets Palette </span> <span style="font-weight: 700; font-size: 15px; color: white; background-color: black;"> Search </span> box and then <span style="font-weight: 700; font-size: 15px; background-color: lightcyan;"> Left Click </span> on the asset name in the <span style="font-weight: 700; font-size: 15px; color: white; background-color: #797979;"> Assets Palette </span> filtered list</td> |
| </tr> | | </tr> |
| </table> | | </table> |
| | <br> |
| | In this example a search term is used to find the replacement. |
| | <br> |
| | [[image:FilterPaletteBulkReplaceExample_10_S20.png|link=]] |
| </td> | | </td> |
| </tr>
| |
| <tr valign="top">
| |
| <td colspan="2">
| |
| ----</td>
| |
| </tr> | | </tr> |
| </table> | | </table> |
| | <br> |
| | Perform the '''Bulk Replace Assets''' operation described in the next section to complete this <span style="font-weight: 700; font-size: 15px; color: white; background-color: black;"> Example </span> |
| | <br> |
| </td> | | </td> |
| </tr> | | </tr> |
| Line 5,916: |
Line 6,124: |
| </tr> | | </tr> |
| </table> | | </table> |
| | <br> |
| | |
| | <table width=1000> <!-- BEGIN Nav Buttons Table SKIPS NO SECTIONS --> |
| | <tr valign="top"> |
| | <td width=629><span id="BR: 5"></span> |
| | ==='''5. Mark Out the Replacement Area'''=== |
| </td> | | </td> |
| | <td width=50> </td> |
| | <td width=50> </td> |
| | <td width=46>[[image:SkipMinorDown.png|link=#BR: 6]][[image:SkipMinorUp.png|link=#BR: 4]]</td> <!-- for Top and Minor Up/Down --> |
| | <td width=75> </td> |
| | <td width=75> </td> <!-- Next Down --> |
| | <td width=75> </td> <!-- Bottom --> |
| </tr> | | </tr> |
| </table> | | </table> |
| </td> | | |
| | <table width=1000> |
| | <tr valign="top"> |
| | <td><span style="font-weight: 700; font-size: 15px;">IF</span> you are <span style="font-weight: 700; font-size: 15px;">ONLY</span> going to replace assets <span style="font-weight: 700; font-size: 15px;">WITHIN A SET AREA</span> (apart from everywhere in the current baseboard) then use the [[image:S20_MarqueeToolIcon.png|link=]] '''Marquee Tool''' to draw or mark out the area.</td> |
| </tr> | | </tr> |
| </table> | | </table> |
| <br> | | |
| <table bgcolor=#000000 width=1000 cellpadding=2> | | <table width=1000> <!-- BEGIN Nav Buttons Table SKIPS NO SECTIONS --> |
| | <tr valign="top"> |
| | <td width=629><span id="BR: 6"></span> |
| | ==='''6. Bulk Replace Assets'''=== |
| | </td> |
| | <td width=50> </td> |
| | <td width=50> </td> |
| | <td width=46>[[image:SkipMinorDown.png|link=#stepLayers]][[image:SkipMinorUp.png|link=#BR: 5]]</td> <!-- for Top and Minor Up/Down --> |
| | <td width=75> </td> |
| | <td width=75> </td> <!-- Next Down --> |
| | <td width=75> </td> <!-- Bottom --> |
| | </tr> |
| | </table> <!-- END Nav Buttons Table --> |
| | |
| | <table width=1000 bgcolor=#000000 cellpadding=2> |
| <tr valign="top"> | | <tr valign="top"> |
| <td> | | <td> |
| <table bgcolor=#ffffb0 width=996 cellpadding=2> | | <table width=996 bgcolor=#ffffff cellpadding=2> |
| | <tr valign="top"> |
| | <td colspan=2><span style="font-weight: 700; font-size: 15px;">Steps: To Bulk Replace Assets:-</span></td> |
| | </tr> |
| <tr valign="top"> | | <tr valign="top"> |
| <td> | | <td> |
| <table> | | <table> |
| <tr valign="top"> | | <tr valign="top"> |
| <td width=25>[[image:NotePad.PNG|link=]]</td> | | <td> |
| <td width=970><span style="font-size: 17px; font-weight: 700;">Notes:</span><br>
| | <table width=750> |
| ----
| |
| </td>
| |
| </tr>
| |
| </table>
| |
| <table width=996> | |
| <tr valign="top"> | | <tr valign="top"> |
| <td width=10>[[image:DotPoint.JPG|10px|link=]]</td> | | <td> |
| <td>It is '''NOT''' recommended that you use both '''Water Effect Layers''' and the original '''Legacy Water''' in the same route. Use one or the other but, where possible, avoid using both.</td> | | <table width=600> |
| </tr>
| |
| <tr valign="top"> | | <tr valign="top"> |
| <td>[[image:DotPoint.JPG|10px|link=]]</td> | | <td width=25>[[image:DotPoint1.JPG|link=]]</td> |
| <td>The <span style="font-weight: 700; font-size: 15px; color: gold; background-color: black;"> Grade </span> setting is the '''vertical rise''' divided by '''horizontal distance''' converted to a percentage figure. So a grade of 100% (the maximum allowed) would mean a slope formed by the height and distance both being the same value (e.g. a height increase of 50m over a distance of 50m). A vertical slope (e.g. a waterfall) would have an infinite grade (cliff height divided by 0) which is currently impossible in Surveyor.</td> | | <td>In the <span style="font-weight: 700; font-size: 15px; color: white; background-color: #797979;"> Assets Palette </span> filtered list <span style="font-weight: 700; font-size: 15px; background-color: lightcyan;"> Right Click </span> on the replacement asset to open its menu</td> |
| </tr> | | </tr> |
| <tr valign="top"> | | <tr valign="top"> |
| <td>[[image:DotPoint.JPG|10px|link=]]</td> | | <td>[[image:DotPoint2.JPG|link=]]</td> |
| <td>The [[image:BrushActionIcon_S20.png|link=]] <span style="font-weight: 700; font-size: 15px; color: white; background-color: black;"> Bulk Adjust </span> brush action is not fully intuitive and will require some experimentation. It will raise and lower the water effect layer in the baseboard where the <span style="font-weight: 700; font-size: 15px; background-color: lightcyan;">Left Click and Drag</span> was executed. Areas within that baseboard where the water effect layer had previously been set to a different height will not be affected until the water level reaches the same height. The Water Effect Layer in surrounding baseboards will also start to move when the level reaches their current heights. Also note that the speed at which the layer moves up or down will decrease as the size of the route increases. In a very large route there may not be any noticeable movement at all. In this case it may be easier to delete the '''Water Effect Layer''' and create another one at the new height</td> | | <td>Select the last item, <span style="font-weight: 700; font-size: 15px; color: white; background-color: black;"> Bulk Replace Filtered Assets </span><br> |
| | <br> |
| | This will open a new menu.</td> |
| </tr> | | </tr> |
| </table> | | </table> |
| </td> | | </td> |
| | <td width=200>[[image:FilterPaletteBulkReplaceExample_11_S20.png|link=]]</td> |
| </tr> | | </tr> |
| </table> | | </table> |
| Line 5,957: |
Line 6,194: |
| </tr> | | </tr> |
| </table> | | </table> |
| <br>
| |
| <span style="font-weight: 700; font-size: 15px;">Water Effect Layer Example</span>
| |
|
| |
| <table width=1000> | | <table width=1000> |
| <tr valign="top"> | | <tr valign="top"> |
| <td width=700>[[image:EffectLayerAddWaterLayer_S20.png|700px|link=]]</td> | | <td width=25>[[image:DotPoint3.JPG|link=]]</td> |
| <td>A water layer has been lifted above the terrain by using the <span style="font-weight: 700; font-size: 15px; color: white; background-color: #797979;"> Tools Palette </span>:-<br> | | <td>'''Selecting:-'''</td> |
| | </tr> |
| | <tr valign="top"> |
| | <td colspan=2> |
| <table> | | <table> |
| <tr valign="top"> | | <tr valign="top"> |
| <td width=10>[[image:DotPoint.JPG|10px|link=]]</td> | | <td width=160 rowspan=3>[[image:FilterPaletteBulkReplaceExample_13_S20.png|link=]]</td> |
| <td>The [[image:BrushTargetIcon_S20.png|link=]] '''Brush Target''' is set to the selected '''Water Layer'''</td>
| | <td width=200><span style="font-weight: 700; font-size: 15px;color: white; background-color: black;"> Everywhere in the Route </span></td> |
| </tr>
| | <td>will bulk replace throughout the entire route. This is the same as in the current version of '''Trainz Plus'''.</td> |
| <tr valign="top">
| |
| <td>[[image:DotPoint.JPG|10px|link=]]</td> | |
| <td>The [[image:BrushActionIcon_S20.png|link=]] <span style="font-weight: 700; font-size: 15px; color: white; background-color: black;"> Set Height </span> action has been selected from the second drop down menu</td>
| |
| </tr> | | </tr> |
| <tr valign="top"> | | <tr valign="top"> |
| <td colspan=2>... and</td> | | <!-- <td>row</td> --> |
| | <td><span style="font-weight: 700; font-size: 15px;color: white; background-color: black;"> In Current Baseboard </span></td> |
| | <td>will bulk replace only in the current baseboard (where the '''Compass Rose''' is located).</td> |
| </tr> | | </tr> |
| <tr valign="top"> | | <tr valign="top"> |
| <td>[[image:DotPoint.JPG|10px|link=]]</td> | | <!-- <td>row</td> --> |
| <td>The <span style="font-weight: 700; font-size: 15px; color: white; background-color: #797979;"> Tool Options Palette </span> <span style="font-weight: 700; font-size: 15px; color: gold; background-color: black;"> Height </span> is set, for example, to a few metres above the terrain height</td> | | <td><span style="font-weight: 700; font-size: 15px;color: white; background-color: black;"> In Selection </span></td> |
| | <td>will bulk replace in the '''Marquee Selection Area'''. This option is only available if the [[image:S20_MarqueeToolIcon.png|link=]] '''Marquee Tool''' has been used to mark the area where the bulk replacement will occur.</td> |
| </tr> | | </tr> |
| </table> | | </table> |
| The brush painting action is then used to paint the water at the set height.</td>
| | </td> |
| </tr> | | </tr> |
| </table>
| |
| <br>
| |
| <table width=1000> <!-- BEGIN Section Nav Buttons -->
| |
| <tr valign="top"> | | <tr valign="top"> |
| <td width=629><span id="Water Effect Tips"></span> | | <td colspan=2>With the exception of unusually small replacement areas, a progress bar will be shown. For entire routes or large replacement areas the process may take a few minutes. |
| ===<span style="font-weight: 700; font-size: 17px; color: white; background-color: blue;"> Water Effect Layer Tips </span>===
| | <table> |
| | <tr valign="top"> |
| | <td>[[image:FilterPaletteBulkReplaceExample_12_S20.png|link=]]<br><br> |
| </td> | | </td> |
| <td width=50> </td>
| |
| <td width=50> </td>
| |
| <td width=46>[[image:SkipMinorDown.png|link=#Color Effect Layer|Down]][[image:SkipMinorUp.png|link=#Water Effect Layer|Up]]</td> <!-- for Top and Minor Up/Down -->
| |
| <td width=75> </td>
| |
| <td width=75> </td>
| |
| <td width=75> </td> <!-- for Bottom -->
| |
| </tr>
| |
| </table> <!-- END Section Nav Buttons -->
| |
|
| |
| <table width=1000 bgcolor=#000000 cellpadding=2>
| |
| <tr valign="top">
| |
| <td> | | <td> |
| <table bgcolor=#ffffe0 width=996 cellpadding=2> | | <table bgcolor=#ffffb0 cellpadding=2> |
| <tr valign="top"> | | <tr valign="top"> |
| <td width=25>[[image:PencilTips.PNG|link=]]</td> | | <td width=25>[[image:NotePad.PNG|link=]]</td> |
| <td>The first step with using a Water Effect Layer is to create it at the correct height | | <td><span style="font-size: 17px;">'''Notes:'''</span><br> |
| <table>
| | ---- |
| <tr valign="top"> | | </td> |
| <td>See [[image:PageLink.PNG|link=]] '''[[#Edit Water|Edit a Water Effect Layer]]''' below for the details on creating a '''Water Effect Layer'''.
| | </tr> |
| <table> | |
| <tr valign="top"> | | <tr valign="top"> |
| <td width=10>[[image:DotPoint.JPG|10px|link=]]</td> | | <td width=10>[[image:DotPoint.JPG|10px|link=]]</td> |
| <td>When you create a new '''Water Effect Layer''' it will cover the entire route at the default height of '''0 metres'''. Depending on the starting height of your route (which is set in the very first baseboard) this may be too high and place the water layer above the route and drown everything.</td> | | <td>Clicking the <span style="font-weight: 700; font-size: 15px; color: white; background-color: black;"> Cancel </span> button will terminate the replacement process at the point shown by the position of the progress bar. So some, or many, of the replacements will have already been made.</td> |
| </tr> | | </tr> |
| <tr valign="top"> | | <tr valign="top"> |
| <td>[[image:DotPoint.JPG|10px|link=]]</td> | | <td>[[image:DotPoint.JPG|10px|link=]]</td> |
| <td>Once you create a '''Water Effect Layer''' its height cannot be altered by editing its properties (see [[image:PageLink.PNG|link=]] '''[[#Edit Water|Edit a Water Effect Layer]]''' below) and the <span style="font-weight: 700; font-size: 15px; color: white; background-color: black;"> Bulk Adjust </span> option in the '''Brush Actions''' for the '''Water Effect Layer''' is extremely slow and inefficient when used on large routes.</td> | | <td>After termination, or after the replacement process has been completed, pressing the <span style="font-weight: 700; font-size: 15px;"><span style="color: white; background-color: black;"> Ctrl </span> + <span style="color: white; background-color: black;"> Z </span></span> keys will '''Undo''' all the replacements</td> |
| </tr> | | </tr> |
| <tr valign="top"> | | </table> |
| <td colspan=2>
| | </td> |
| <table bgcolor=#ffffff cellpadding=2>
| |
| <tr valign="top">
| |
| <td colspan=2><span style="font-weight: 700; font-size: 15px;">Steps:</span> When creating a new '''Water Effect Layer''':-</td>
| |
| </tr>
| |
| <tr valign="top">
| |
| <td width=25>[[image:DotPoint1.JPG|link=]]</td>
| |
| <td>Locate the lowest ground height in your route. Take note of its altitude by placing the '''Compass''' on the lowest spot and read its height value in the <span style="font-weight: 700; font-size: 15px; color: white; background-color: #797979;"> Info Palette</span></td>
| |
| </tr>
| |
| <tr valign="top">
| |
| <td>[[image:DotPoint2.JPG|link=]]</td>
| |
| <td>Set the default water height in the '''Water Effect Layer Edit Properties''' window to slightly below (e.g. 1 metre below) that height. If the minimum ground height is above '''0 metres''' then you can safely leave the default height at '''0 metres'''</td>
| |
| </tr> | | </tr> |
| </table> | | </table> |
| Line 6,041: |
Line 6,254: |
| </td> | | </td> |
| </tr> | | </tr> |
| | </table> |
| | <br> |
| | <table width=1000> <!-- BEGIN Nav Buttons Table --> |
| <tr valign="top"> | | <tr valign="top"> |
| <td colspan=2> | | <td width=629><span id="stepLayers"></span> |
| ----
| | ='''The Layers Palette'''= |
| </td> | | </td> |
| | <td width=50>[[image:SkipDown.png|link=#skip Lock Route Layer Group|Skip Down]]</td> |
| | <td width=50>[[image:SkipUp.png|link=#skipBulkReplace|Skip Up]]</td> |
| | <td width=46>[[image:BackToTop.png|link=#top|alt=Top|Top]]</td> |
| | <td width=75>[[image:NextUp.png|link=#stepFilter|alt=Next Up|Next Up]]</td> |
| | <td width=75>[[image:NextDown.png|link=#stepScrapbook|alt=Next Down|Next Down]]</td> |
| | <td width=75>[[image:BackToBottom.png|link=#bottom|alt=Bottom|Bottom]]</td> |
| </tr> | | </tr> |
| | </table> <!-- END Nav Buttons Table --> |
| | |
| | <table width=1000 bgcolor=#ffffb0 cellpadding=2> |
| <tr valign="top"> | | <tr valign="top"> |
| <td width=25>[[image:PencilTips.PNG|link=]]</td> | | <td><span style="font-weight: 700; font-size: 15px;">This is a <span style="color: white; background-color: blue;"> Surveyor Only </span> palette</span></td> |
| <td>To create a flat water layer at a set height use the following technique:-
| |
| <table bgcolor=#ffffff cellpadding=2>
| |
| <tr valign="top">
| |
| <td colspan=2><span style="font-weight: 700; font-size: 15px;">Steps:</span> To Create a Flat Water Surface:-</td>
| |
| </tr> | | </tr> |
| | </table> |
| | <br> |
| | <table width=1000 bgcolor=#000000> |
| <tr valign="top"> | | <tr valign="top"> |
| <td width=25>[[image:DotPoint1.JPG|link=]]</td> | | <td> |
| <td>Select the '''Water Effect Layer''' in the <span style="font-weight: 700; font-size: 15px; color: white; background-color: #797979;"> Layers Palette</span>. This will also select that same layer in the [[image:S20_BrushToolIcon.png|link=|20px]] '''Brush Tool'''</td> | | <table width=996 bgcolor=#ffe89a cellpadding=2> |
| </tr>
| | <tr valign="middle"> |
| <tr valign="top"> | | <td width=45>[[image:PalettesIcon_S20.png|link=]]</td> |
| <td>[[image:DotPoint2.JPG|link=]]</td> | | <td>If the <span style="font-weight: 700; font-size: 15px; color: white; background-color: #797979;"> Layers Palette </span> is not visible on the screen then refer to [[image:PageLink.PNG|link=]] '''[[#Hiding and Showing Palettes and Windows|Hiding and Showing Palettes and Windows]]''' at the top of this document |
| <td>In the <span style="font-weight: 700; font-size: 15px; color: white; background-color: #797979;"> Tools Palette </span> select the <span style="font-weight: 700; font-size: 15px; color: white; background-color: black;"> Set Height </span> brush action rather than <span style="font-weight: 700; font-size: 15px; color: white; background-color: black;"> Height Up/Height Down </span> actions</td> | | </td> |
| </tr>
| |
| <tr valign="top">
| |
| <td>[[image:DotPoint3.JPG|link=]]</td>
| |
| <td>In the <span style="font-weight: 700; font-size: 15px; color: white; background-color: #797979;"> Tool Options Palette </span> set the <span style="font-weight: 700; font-size: 15px; color: gold; background-color: black;"> Height </span> to the required value so that the water will be visible above the ground surface and the <span style="font-weight: 700; font-size: 15px; color: gold; background-color: black;"> Sensitivity </span> to '''100%'''</td>
| |
| </tr>
| |
| <tr valign="top">
| |
| <td>[[image:DotPoint4.JPG|link=]]</td>
| |
| <td>Paint with the brush to bring the '''Water Effect Layer''' up to the set height</td>
| |
| </tr> | | </tr> |
| </table> | | </table> |
| </td> | | </td> |
| </tr> | | </tr> |
| | </table> |
| | <br> |
| | <table width=1000 bgcolor="lightcyan" cellpadding=2> |
| <tr valign="top"> | | <tr valign="top"> |
| <td colspan=2> | | <td width=10>[[image:BlueDot10x10.png|link=]]</td> |
| ----
| | <td>This palette is used to manage layers, both object (route and session) and effect (TurfFX, clutter, water and color) layers</td> |
| </td> | |
| </tr> | | </tr> |
| <tr valign="top"> | | <tr valign="top"> |
| <td width=25>[[image:PencilTips.PNG|link=]]</td> | | <td>[[image:BlueDot10x10.png|link=]]</td> |
| <td>To create a sloping water layer use the following technique:- | | <td>It can create, rename, merge, delete, move, hide/show and lock/unlock layers and set the '''Active Layer'''</td> |
| <table bgcolor=#ffffff cellpadding=2>
| |
| <tr valign="top">
| |
| <td width=25>[[image:DotPoint1.JPG|link=]]</td>
| |
| <td>Select the '''Water Effect Layer''' in the <span style="font-weight: 700; font-size: 15px; color: white; background-color: #797979;"> Layers Palette</span>. This will also select that same effect layer in the [[image:S20_BrushToolIcon.png|link=|20px]] '''Brush Tool'''</td>
| |
| </tr> | | </tr> |
| | </table> |
| | |
| | <table width=1000> |
| <tr valign="top"> | | <tr valign="top"> |
| <td>[[image:DotPoint2.JPG|link=]]</td> | | <td>[[image:LayersPalette_S20_ListsClosed.png|link=|alt=Layers Palette in S20]]</td> |
| <td>In the <span style="font-weight: 700; font-size: 15px; color: white; background-color: #797979;"> Tools Palette </span> select the <span style="font-weight: 700; font-size: 15px; color: white; background-color: black;"> Grade </span> brush action</td> | | <td>The <span style="font-weight: 700; font-size: 15px; color: white; background-color: #797979;"> Layers Palette </span> will show all the layers in their groups ('''Effect''', '''Route''' and '''Session''') plus the '''Ground Height''' and '''Ground Textures''' special "layers". In the image on the left all the Layer Groups have been minimised (the arrowhead symbol to the left of each group name is pointing to the right). |
| </tr> | | <table> |
| <tr valign="top"> | | <tr valign="top"> |
| <td>[[image:DotPoint3.JPG|link=]]</td> | | <td width=10>[[image:DotPoint.JPG|10px|link=]]</td> |
| <td>In the <span style="font-weight: 700; font-size: 15px; color: white; background-color: #797979;"> Tool Options Palette </span> set the <span style="font-weight: 700; font-size: 15px; color: gold; background-color: black;"> Grade </span> and the <span style="font-weight: 700; font-size: 15px; color: gold; background-color: black;"> Angle </span> to the required values</td> | | <td>The <span style="font-weight: 700; font-size: 15px; color: white; background-color: black;"> Route Layers Group </span>, along with the '''Ground Height''', '''Ground Textures''' and '''Effect Layers Group''', are saved and loaded with the Route</td> |
| </tr> | | </tr> |
| <tr valign="top"> | | <tr valign="top"> |
| <td>[[image:DotPoint4.JPG|link=]]</td> | | <td>[[image:DotPoint.JPG|10px|link=]]</td> |
| <td>Paint with the brush to create the '''Water Effect Layer''' surface at the set gradient adjusting the slope direction (<span style="font-weight: 700; font-size: 15px; color: gold; background-color: black;"> Angle </span>) when required</td> | | <td>The <span style="font-weight: 700; font-size: 15px; color: white; background-color: black;"> Session Layers </span> group, along with any '''Session Rules''' and '''commodity''' settings, is saved and loaded with the Session. A '''Session Layers''' group, but one without any stored objects and using the Session '''default settings''', will always be present when a Route is loaded without a Session</td> |
| </tr>
| |
| </table>
| |
| </td> | |
| </tr> | | </tr> |
| </table> | | </table> |
| Line 6,105: |
Line 6,319: |
| </table> | | </table> |
| <br> | | <br> |
| <table width=1000> <!-- BEGIN Section Nav Buttons --> | | <table width=1000> <!-- BEGIN Section Nav Buttons --> |
| <tr valign="top"> | | <tr valign="top"> |
| <td width=629><span id="Color Effect Layer"></span> | | <td width=629><span id="skip Lock Route Layer Group"></span> |
| ===<span style="font-weight: 700; font-size: 17px; color: white; background-color: blue;"> Color Effect Layer </span>=== | | =='''Lock the Route Layer Group'''== |
| </td> | | </td> |
| <td width=50> </td> | | <td width=50>[[image:SkipDown.png|link=#skip Open a Layer Group|Skip Down]]</td> |
| <td width=50> </td>
| | <td width=50>[[image:SkipUp.png|link=#stepLayers|Skip Up]]</td> |
| <td width=46>[[image:SkipMinorDown.png|link=#skip Edit Effect|Down]][[image:SkipMinorUp.png|link=#Water Effect Tips|Up]]</td> <!-- for Top and Minor Up/Down -->
| | <td width=46> </td> <!-- for Top --> |
| <td width=75> </td> | | <td width=75>[[image:HeadingUp.png|link=#stepLayers|alt=Heading|To Heading]]</td> |
| <td width=75> </td> | | <td width=75> </td> <!-- for Next Down --> |
| <td width=75> </td> <!-- for Bottom --> | | <td width=75> </td> <!-- for Bottom --> |
| </tr> | | </tr> |
| Line 6,122: |
Line 6,336: |
| <tr valign="top"> | | <tr valign="top"> |
| <td width=10>[[image:BlueDot10x10.png|link=]]</td> | | <td width=10>[[image:BlueDot10x10.png|link=]]</td> |
| <td>The '''Color Effect Layer''' is only available to '''Trainz Plus''' subscribers and can only be applied to routes using '''HD''' grid</td> | | <td colspan=2>All the '''Route Layers''' can be locked against accidental alteration.</td> |
| </tr> | | </tr> |
| | </table> |
| | |
| | The '''Route Layers Group''' has a open padlock icon next to its name - shown as [[image:LayerUnLocked_S20.png|link=]] (unlocked). |
| | <table bgcolor=#000000 cellpadding=2> |
| <tr valign="top"> | | <tr valign="top"> |
| <td width=10>[[image:BlueDot10x10.png|link=]]</td> | | <td> |
| <td>The '''Color Effect Layer''' adds a "tinting effect" to selected areas of the route</td> | | <table bgcolor=#ffffff cellpadding=2> |
| | <tr valign="top"> |
| | <td colspan=2><span style="font-weight: 700; font-size: 15px;">Steps: To Lock/Unlock All the Route Layers:-</span></td> |
| </tr> | | </tr> |
| <tr valign="top"> | | <tr valign="top"> |
| <td width=10>[[image:BlueDot10x10.png|link=]]</td> | | <td width=20>[[image:DotPoint1.JPG|link=]]</td> |
| <td>Only one '''Color Effect Layer''' can be added to a route but it can have different colours in different parts of the route</td> | | <td><span style="font-weight: 700; font-size: 15px; background-color: lightcyan;"> Left Click </span> on the '''unlocked''' (open padlock) icon to lock '''ALL''' the '''Route Layers'''<br> |
| | The icon will change to [[image:LayerLocked_S20.png|link=]] (locked)</td> |
| </tr> | | </tr> |
| </table>
| |
| <br>
| |
| <table width=1000 bgcolor=#000000 cellpadding=2>
| |
| <tr valign="top"> | | <tr valign="top"> |
| <td> | | <td>[[image:DotPoint2.JPG|link=]]</td> |
| <table width=996 bgcolor=#ffffff cellpadding=2>
| | <td><span style="font-weight: 700; font-size: 15px; background-color: lightcyan;"> Left Click </span> on the '''locked''' (closed padlock) icon to unlock '''ALL''' the route layers<br> |
| <tr valign="top">
| | The icon will change to [[image:LayerUnLocked_S20.png|link=]] (unlocked)</td> |
| <td width=150>[[image:BrushActionIcon_S20.png|link=]] <span style="font-weight: 700; font-size: 15px; color: white; background-color: black;"> Brush Actions </span></td>
| |
| <td>When the '''Color Effect Layer''' has been selected as the '''Brush Target''', the second drop down box will be blank as there are no brush actions for this effect layer.</td>
| |
| </tr> | | </tr> |
| </table> | | </table> |
| Line 6,147: |
Line 6,363: |
| </table> | | </table> |
| <br> | | <br> |
| <table width=1000 bgcolor=#000000 cellpadding=2> | | <table width=1000> <!-- BEGIN Section Nav Buttons --> |
| | <tr valign="top"> |
| | <td width=629><span id="skip Open a Layer Group"></span> |
| | =='''Open a Layer Group'''== |
| | </td> |
| | <td width=50>[[image:SkipDown.png|link=#skip Add a New Layer|Skip Down]]</td> |
| | <td width=50>[[image:SkipUp.png|link=#skip Lock Route Layer Group|Skip Up]]</td> |
| | <td width=46> </td> <!-- for Top --> |
| | <td width=75>[[image:HeadingUp.png|link=#stepLayers|alt=Heading|To Heading]]</td> |
| | <td width=75> </td> <!-- for Next Down --> |
| | <td width=75> </td> <!-- for Bottom --> |
| | </tr> |
| | </table> <!-- END Section Nav Buttons --> |
| | |
| | To the left of each group name is a small arrowhead pointing to the right. <span style="font-weight: 700; font-size: 15px; background-color: lightcyan;"> Left Click </span> on the arrowhead to open up the group.<br> |
| | <table width=1000> |
| | <tr valign="top"> |
| | <td>[[image:LayersPalette_S20_SessionLayersOpen.png|link=|alt=Layers palette with session layers open]]</td> |
| | <td>The image on the left shows that the '''Session Layers''' is open and its individual layers are now displayed. To close or minimise the group <span style="font-weight: 700; font-size: 15px; background-color: lightcyan;"> Left Click </span> on the arrowhead again.<br> |
| | The image shows that the '''Session Layers''' contains 3 individual layers:- |
| | <table> |
| | <tr valign="top"> |
| | <td width=10>[[image:DotPoint.JPG|10px|link=]]</td> |
| | <td>the top layer in the '''Session Layers''' group is always named '''session-layer'''. It is possible to rename this layer and move it to a new position but those actions are '''NOT''' recommended for the '''session-layer'''.</td> |
| | </tr> |
| | <tr valign="top"> |
| | <td>[[image:DotPoint.JPG|10px|link=]]</td> |
| | <td>likewise, the top layer in the '''Route Layers Group''' is always named '''route-layer'''. It is also possible to rename this layer and move it to a new position but again those actions are '''NOT''' recommended for the '''route-layer'''.</td> |
| | </tr> |
| <tr valign="top"> | | <tr valign="top"> |
| <td> | | <td>[[image:DotPoint.JPG|10px|link=]]</td> |
| <table bgcolor=#ffffb0 cellpadding=2> | | <td>there are two additional user created layers in the '''Session Layers''' group. They are named '''Track Markers''' and '''Rail Workers''' - layer names are chosen by the creator and do not necessarily indicate their contents or purpose</td> |
| | </tr> |
| <tr valign="top"> | | <tr valign="top"> |
| <td width=25>[[image:NotePad.PNG|link=]]</td> | | <td>[[image:DotPoint.JPG|10px|link=]]</td> |
| <td width=975><span style="font-size: 17px; font-weight: 700;">Notes:'''</span><br> | | <td>the '''Rail Workers''' layer is highlighted with <span style="font-weight: 700; font-size: 15px; color: black; background-color: lightgrey;"> Light Grey </span> background which means that it has been selected by a <span style="font-weight: 700; font-size: 15px; background-color: lightcyan;"> Left Click </span> and is now the '''Active Layer''' where any newly placed assets will be added</td> |
| ---- | |
| The '''Color Effect Layer''' is only available in routes using '''HD Resolution'''. You can add the effect layer to a route that uses '''5m Resolution''' and/or '''10m Resolution''' but the layer will only appear if the route is converted to '''HD Resolution'''</td>
| |
| </tr> | | </tr> |
| </table> | | </table> |
| Line 6,162: |
Line 6,405: |
| </table> | | </table> |
| <br> | | <br> |
| <table width=1000 bgcolor=#000000 cellpadding=2> | | <table width=1000> <!-- BEGIN Section Nav Buttons --> |
| <tr valign="top"> | | <tr valign="top"> |
| <td> | | <td width=629><span id="skip Add a New Layer"></span> |
| <table bgcolor=#ffffe0 cellpadding=2> | | =='''Add a New Layer'''== |
| | </td> |
| | <td width=50>[[image:SkipDown.png|link=#skip Renaming a Layer|Skip Down]]</td> |
| | <td width=50>[[image:SkipUp.png|link=#skip Open a Layer Group|Skip Up]]</td> |
| | <td width=46> </td> <!-- for Top --> |
| | <td width=75>[[image:HeadingUp.png|link=#stepLayers|alt=Heading|To Heading]]</td> |
| | <td width=75> </td> <!-- for Next Down --> |
| | <td width=75> </td> <!-- for Bottom --> |
| | </tr> |
| | </table> <!-- END Section Nav Buttons --> |
| | |
| | <table width=1000 bgcolor="lightcyan" cellpadding=2> |
| <tr valign="top"> | | <tr valign="top"> |
| <td width=25>[[image:PencilTips.PNG|link=]]</td> | | <td width=10>[[image:BlueDot10x10.png|link=]]</td> |
| <td>You can think of the '''Color Effect Layer''' as a transparent "skin" that covers the ground texture throughout the layout. You can add different colours (or "tints") to the skin at different places to alter the appearance of the ground texture below.</td> | | <td>You cannot create new Layer Groups but you can add new layers to a existing group.</td> |
| </tr> | | </tr> |
| </table> | | </table> |
| </td> | | |
| | <table width=1000> |
| | <tr valign="top"> |
| | <td>Each Layer Group has a [[image:LayerAdd_S20.png|link=]] icon next to its name. <span style="font-weight: 700; font-size: 15px; background-color: lightcyan;"> Left Click </span> on the icon to add and name a new layer to that group. If you are adding a new '''Effect Layer''' then you will also have to identify the type of effect - '''TurfFX''', '''Clutter''', '''Water''' or (in '''Trainz Plus''' only) '''Color'''.</td> |
| </tr> | | </tr> |
| </table> | | </table> |
| <br> | | <br> |
| | <table width=1000> <!-- BEGIN Section Nav Buttons --> |
| | <tr valign="top"> |
| | <td width=629><span id="skip Renaming a Layer"></span> |
| | =='''Renaming a Layer'''== |
| | </td> |
| | <td width=50>[[image:SkipDown.png|link=#skip Deleting a Layer|Skip Down]]</td> |
| | <td width=50>[[image:SkipUp.png|link=#skip Add a New Layer|Skip Up]]</td> |
| | <td width=46> </td> <!-- for Top --> |
| | <td width=75>[[image:HeadingUp.png|link=#stepLayers|alt=Heading|To Heading]]</td> |
| | <td width=75> </td> <!-- for Next Down --> |
| | <td width=75> </td> <!-- for Bottom --> |
| | </tr> |
| | </table> <!-- END Section Nav Buttons --> |
| | |
| <table width=1000> | | <table width=1000> |
| <tr valign="top"> | | <tr valign="top"> |
| <td width=200>[[image:BrushToolsColorLayer_S20.png|link=]]</td> | | <td width=120>[[image:LayerRename_S20.png|link=]]</td> |
| <td> | | <td> |
| <table width=400 bgcolor=#000000 cellpadding=2> | | <table bgcolor=#000000 cellpadding=2> |
| <tr valign="top"> | | <tr valign="top"> |
| <td> | | <td> |
| <table bgcolor=#ffffff cellpadding=2> | | <table bgcolor=#ffffff cellpadding=2> |
| <tr valign="top"> | | <tr valign="top"> |
| <td><span style="font-weight: 700; font-size: 15px;">Steps:</span> To paint with a '''Color Effect Layer''':-<br> | | <td colspan=2><span style="font-weight: 700; font-size: 15px;">Steps: To Rename a Layer:-</span></td> |
| <table> | | </tr> |
| <tr valign="top"> | | <tr valign="top"> |
| <td width=20>[[image:DotPoint1.JPG|link=]]</td> | | <td width=25>[[image:DotPoint1.JPG|link=]]</td> |
| <td>In the <span style="font-weight: 700; font-size: 15px; color: white; background-color: #797979;"> Tools Palette </span> select the [[image:S20_BrushToolIcon.png|link=|20px]] '''Brush Tool''' or press the <span style="font-weight: 700; font-size: 15px; color: white; background-color: black;"> W </span> key</td> | | <td><span style="font-weight: 700; font-size: 15px; background-color: lightcyan;"> Right Click </span> on a layer name and select <span style="font-weight: 700; font-size: 15px; color: white; background-color: black;"> Rename Layer.. </span> from the popup menu. You cannot rename a '''Layer Group'''.</td> |
| </tr> | | </tr> |
| <tr valign="top"> | | <tr valign="top"> |
| <td>[[image:DotPoint2.JPG|link=]]</td> | | <td>[[image:DotPoint2.JPG|link=]]</td> |
| <td>select the '''<color effect layer name>''' from the Brush '''Target''' drop down menu. If there are no '''Color Effect Layers''' listed then none have been created or installed for this route</td> | | <td>You will be asked to enter a new name for the layer.</td> |
| </tr> | | </tr> |
| <tr valign="top"> | | </table> |
| <td colspan=2>
| | </td> |
| <table bgcolor=#ffffe0 cellpadding=2>
| |
| <tr valign="top">
| |
| <td width=25>[[image:PencilTips.PNG|link=]]</td>
| |
| <td>You can also perform the above two steps in a single step by selecting the named '''Effect Layer''' in the <span style="font-weight: 700; font-size: 15px; color: white; background-color: #797979;"> Layers Palette </span></td>
| |
| </tr> | | </tr> |
| </table> | | </table> |
| </td> | | </td> |
| </tr> | | </tr> |
| | </table> |
| | <br> |
| | <table bgcolor=#000000 width=1000 cellpadding=2> |
| <tr valign="top"> | | <tr valign="top"> |
| <td>[[image:DotPoint3.JPG|link=]]</td> | | <td> |
| <td>In the <span style="font-weight: 700; font-size: 15px; color: white; background-color: #797979;"> Tool Options Palette </span> set any required Brush settings - <span style="font-weight: 700; font-size: 15px; color: gold; background-color: black;"> Radius </span>, <span style="font-weight: 700; font-size: 15px; color: gold; background-color: black;"> Sensitivity </span> and <span style="font-weight: 700; font-size: 15px; color: gold; background-color: black;"> Color </span>
| | <table bgcolor=#ffffe0 width=1000 cellpadding=2> |
| <table bgcolor=#ffffb0 cellpadding=2> | |
| <tr valign="top"> | | <tr valign="top"> |
| <td width=25>[[image:NotePad.PNG|link=]]</td> | | <td>[[image:PencilTips.PNG|link=]]</td> |
| <td>The <span style="font-weight: 700; font-size: 15px; color: gold; background-color: black;"> Color </span> setting will open the '''color picker''' to select the colour to be painted. See [[image:PageLink.PNG|link=]] '''[[#Effect Layer Tools|Effect Layer Tool Options]]''' above.</td> | | <td>While you are free to rename any layers (but not the '''Layer Group''' names), it is '''recommended''' that you '''DO NOT''' rename two specific layers:-<br> |
| | [[image:DotPoint.JPG|10px|link=]] '''route-layer'''<br> |
| | [[image:DotPoint.JPG|10px|link=]] '''session-layer'''<br> |
| | These layers are used to store critical objects (track and track objects in the case of the '''route-layer''' and (optionally) rolling stock in the case of the '''session-layer'''). Using these two layer names in every '''Trainz World''' can make it easier (and less confusing) to manage those assets. But this is a '''recommendation''' only. |
| | </td> |
| </tr> | | </tr> |
| </table> | | </table> |
| </td> | | </td> |
| </tr> | | </tr> |
| | </table> |
| | <br> |
| | <table width=1000> <!-- BEGIN Section Nav Buttons --> |
| <tr valign="top"> | | <tr valign="top"> |
| <td>[[image:DotPoint4.JPG|link=]]</td> | | <td width=629><span id="skip Deleting a Layer"></span> |
| <td><span style="font-weight: 700; font-size: 15px; background-color: lightcyan;"> Left Click </span> or <span style="font-weight: 700; font-size: 15px; background-color: lightcyan;">Left Click and Drag</span> on the terrain to paint the '''Effect Layer''' with the selected colour</td> | | =='''Deleting a Layer'''== |
| | </td> |
| | <td width=50>[[image:SkipDown.png|link=#skip Moving a Layer|Skip Down]]</td> |
| | <td width=50>[[image:SkipUp.png|link=#skip Renaming a Layer|Skip Up]]</td> |
| | <td width=46> </td> <!-- for Top --> |
| | <td width=75>[[image:HeadingUp.png|link=#stepLayers|alt=Heading|To Heading]]</td> |
| | <td width=75> </td> <!-- for Next Down --> |
| | <td width=75> </td> <!-- for Bottom --> |
| </tr> | | </tr> |
| </table> | | </table> <!-- END Section Nav Buttons --> |
| | |
| | <table bgcolor=#ff0000 ellpadding=2> |
| | <tr valign="top"> |
| | <td> |
| | <table bgcolor=#fcbcbc cellpadding=2> |
| | <tr valign="top"> |
| | <td>[[image:Stop.PNG|link=]]</td> |
| | <td><span style="font-size: 15px; font-weight: 700;">Warning:</span> '''Deleting a Layer will delete every object that has been assigned to that layer''' |
| </td> | | </td> |
| </tr> | | </tr> |
| Line 6,226: |
Line 6,517: |
| </tr> | | </tr> |
| </table> | | </table> |
| </td> | | <br> |
| | <table width=1000> |
| | <tr valign="top"> |
| | <td width=120>[[image:LayerDelete_S20.png|link=]]</td> |
| <td> | | <td> |
| <table width=400 bgcolor=#000000 cellpadding=2> | | <table bgcolor=#000000 cellpadding=2> |
| <tr valign="top"> | | <tr valign="top"> |
| <td> | | <td> |
| <table width=396 bgcolor=#ffffb0 cellpadding=2> | | <table bgcolor=#ffffff cellpadding=2> |
| <tr valign="top"> | | <tr valign="top"> |
| <td width=25>[[image:NotePad.PNG|link=]]</td> | | <td colspan=2><span style="font-weight: 700; font-size: 15px;">Steps: To Delete a Layer:-</span></td> |
| <td width=370><span style="font-size: 17px; font-weight: 700;">Notes:'''</span><br>
| |
| ----
| |
| </td> | |
| </tr> | | </tr> |
| <tr valign="top"> | | <tr valign="top"> |
| <td>[[image:DotPoint.JPG|10px|link=]]</td> | | <td width=20>[[image:DotPoint1.JPG|link=]]</td> |
| <td>The rate or speed at which the colour changes under the brush is controlled by the <span style="font-weight: 700; font-size: 15px; color: white; background-color: #797979;"> Tool Options Palette </span> <span style="font-weight: 700; font-size: 15px; color: gold; background-color: black;"> Sensitivity </span> setting | | <td><span style="font-weight: 700; font-size: 15px; background-color: lightcyan;"> Right Click </span> on a layer name and select <span style="font-weight: 700; font-size: 15px; color: white; background-color: black;"> Delete Layer </span> from the popup menu. You cannot select a '''Layer Group''' name to be deleted.<br> |
| <table cellpadding=2 bgcolor=#ffffff>
| | You will be given a warning that you are about to delete a layer.</td> |
| <tr> | |
| <td colspan="2">
| |
| ----</td>
| |
| </tr> | | </tr> |
| <tr valign="top"> | | <tr valign="top"> |
| <td>[[image:Gears.PNG|link=]]</td> | | <td>[[image:DotPoint2.JPG|link=]]</td> |
| <td><span style="font-weight: 700; font-size: 15px;"><span style="color: gold; background-color: black;"> Sensitivity </span> Settings:'''</span> | | <td>if you confirm the delete order then the layer and <span style="font-weight: 700; font-size: 15px; background-color: #fcbcbc;"> ALL OF ITS CONTENTS </span> will be deleted</td> |
| <table>
| |
| <tr valign="top">
| |
| <td width=10>[[image:BlackDot10x10.png|link=]]</td>
| |
| <td>'''1%''' for the smallest possible change with each sweep of the brush</td>
| |
| </tr> | | </tr> |
| <tr valign="top"> | | <tr valign="top"> |
| <td>[[image:BlackDot10x10.png|link=]]</td> | | <td>[[image:DotPoint3.JPG|link=]]</td> |
| <td>'''100%''' for the largest possible change with each sweep of the brush</td> | | <td>depending on the contents of the layer and the size of the '''Trainz World''', the process may take some time. You will be shown a progress bar in a message window during the delete operation</td> |
| </tr> | | </tr> |
| <tr valign="top"> | | <tr valign="top"> |
| <td colspan=2>Values between these two limits will give intermediate changes with each sweep of the brush over the same area</td> | | <td> </td> |
| </tr> | | <td>[[image:LayersDelete_S20.png|link=]]</td> |
| </table>
| |
| </td> | |
| </tr> | | </tr> |
| <tr valign="top"> | | <tr valign="top"> |
| <td colspan="2"> | | <td>[[image:DotPoint4.JPG|link=]]</td> |
| ----</td> | | <td>when the message <span style="font-weight: 700; font-size: 15px; color: white; background-color: black;"> Operation complete, layers updated successfully </span> appears close the message window</td> |
| </tr> | | </tr> |
| </table> | | <tr> |
| | <td colspan=2>The deleted layer and its contents can be restored (after the delete has completed) using the <span style="font-weight: 700; font-size: 15px;"><span style="color: white; background-color: black;"> Ctrl </span> + <span style="color: white; background-color: black;"> Z </span></span> keys |
| </td> | | </td> |
| </tr>
| |
| <tr valign="top">
| |
| <td>[[image:DotPoint.JPG|10px|link=]]</td>
| |
| <td>Applying a '''Color Effect Layer''' will only affect the appearance (colours) of the '''ground textures''' in the painted area. It will not affect the appearance of any objects placed on the ground in that area</td>
| |
| </tr> | | </tr> |
| </table> | | </table> |
| Line 6,283: |
Line 6,562: |
| </table> | | </table> |
| <br> | | <br> |
| <table width=1000> | | <table width=1000> <!-- BEGIN Section Nav Buttons --> |
| <tr valign="top"> | |
| <td align="center">'''No color effect layer applied'''</td>
| |
| <td align="center">'''Color effect layer applied'''</td>
| |
| </tr>
| |
| <tr valign="top">
| |
| <td align="center">[[image:ColorEffectLayerNoTint.png|link=]]</td>
| |
| <td align="center">[[image:ColorEffectLayerTint.png|link=]]</td>
| |
| </tr>
| |
| <tr valign="top"> | | <tr valign="top"> |
| <td colspan=2 align="center">Cricket pitch scene before and after applying a color effect layer that gives the impression of "wear and tear" around the pitch area</td>
| | <td width=629><span id="skip Moving a Layer"></span> |
| </tr>
| | =='''Moving a Layer'''== |
| </table>
| |
| <br>
| |
| <table width=1000> <!-- BEGIN Section Nav Buttons -->
| |
| <tr valign="top">
| |
| <td width=629><span id="skip Edit Effect"></span> | |
| =='''Edit Effect Layers...'''== | |
| </td> | | </td> |
| <td width=50>[[image:SkipDown.png|link=#stepPlacement|Skip Down]]</td> | | <td width=50>[[image:SkipDown.png|link=#skip Merging a Layer|Skip Down]]</td> |
| <td width=50>[[image:SkipUp.png|link=#skip Effect Layers|Skip Up]]</td> | | <td width=50>[[image:SkipUp.png|link=#skip Deleting a Layer|Skip Up]]</td> |
| <td width=46>[[image:SkipMinorDown.png|link=#Save Preset|Down]][[image:SkipMinorUp.png|link=#Color Effect Layer|Up]]</td> <!-- for Top and Minor Up/Down --> | | <td width=46> </td> <!-- for Top --> |
| <td width=75>[[image:HeadingUp.png|link=#stepBrush|alt=Heading|To Heading]]</td> | | <td width=75>[[image:HeadingUp.png|link=#stepLayers|alt=Heading|To Heading]]</td> |
| <td width=75> </td> | | <td width=75> </td> <!-- for Next Down --> |
| <td width=75> </td> <!-- for Bottom --> | | <td width=75> </td> <!-- for Bottom --> |
| </tr> | | </tr> |
| </table> <!-- END Section Nav Buttons --> | | </table> <!-- END Section Nav Buttons --> |
|
| |
|
| <table width=1000> | | <table width=1000 bgcolor="lightcyan" cellpadding=2> |
| <tr valign="top"> | | <tr valign="top"> |
| <td>When this '''Brush Target''' is selected, the '''Edit Effect Layer''' dialogue box will appear. This is the same as selecting <span style="font-weight: 700; font-size: 15px; color: white; background-color: black;"> Edit Effect Layers ... </span> from the [[image:SurveyorEditIcon.png|link=]] '''Surveyor Edit Menu'''.</td> | | <td width=10>[[image:BlueDot10x10.png|link=]]</td> |
| | <td>Layers can be individually moved up and down within the same Layer Group or between the '''Route Layers Group''' and the '''Session Layers Group'''.</td> |
| </tr> | | </tr> |
| </table> | | </table> |
| <br> | | <br> |
| <table width=1000 bgcolor=#000000 cellpadding=2> | | |
| | <table bgcolor=#000000 width=1000 cellpadding=2> |
| <tr valign="top"> | | <tr valign="top"> |
| <td> | | <td> |
| <table width=996 bgcolor=#ffffff cellpadding=2> | | <table bgcolor=#ffffb0 width=996 cellpadding=2> |
| | <tr valign="top"> |
| | <td>[[image:NotePad.PNG|link=]]</td> |
| | <td><span style="font-size: 17px; font-weight: 700;">Notes:'''</span><br> |
| | ---- |
| | </td> |
| | </tr> |
| | <tr valign="top"> |
| | <td colspan=2> |
| | <table bgcolor=#fcbcbc cellpadding=2> |
| | <tr valign="top"> |
| | <td>[[image:Stop.PNG|link=]]</td> |
| | <td><span style="font-size: 15px; font-weight: 700;">Warning:</span> Moving layers between the '''Session Layers Group''' and the '''Route Layers Group''' will move the contents of those layers from one Layer Group to the other. This will change where the layers and their contents are saved (in the '''Route''' or in the '''Session''') |
| | </td> |
| | </tr> |
| <tr valign="top"> | | <tr valign="top"> |
| <td width=150>[[image:BrushActionIcon_S20.png|link=]] <span style="font-weight: 700; font-size: 15px; color: white; background-color: black;"> Brush Actions </span></td> | | <td>[[image:Stop.PNG|link=]]</td> |
| <td>When the <span style="font-weight: 700; font-size: 15px; color: white; background-color: black;"> Edit Effect Layers... </span> '''Target''' is selected, the second drop down box will be disabled - there are no actions for this brush target.</td> | | <td><span style="font-size: 15px; font-weight: 700;">Warning:</span> Layers containing '''Track Objects''' (signals, switches, buffers, track signs, etc) cannot be moved to a position that is '''above''' the layer containing the track |
| | </td> |
| </tr> | | </tr> |
| </table> | | </table> |
| </td> | | </td> |
| </tr> | | </tr> |
| </table>
| |
| <br>
| |
| You will have only one available option if no '''Effect Layers''' are present in '''Surveyor''' or two options if '''Effect Layers''' are present.
| |
| <br>
| |
| <table width=1000>
| |
| <tr valign="top"> | | <tr valign="top"> |
| <td>[[image:EditMenuSelectEffectLayers.png|link=|alt=Open effect layers]]</td> | | <td>[[image:DotPoint.JPG|10px|link=]]</td> |
| <td><span style="font-weight: 700; font-size: 15px;">Option [[image:Ablue.png|link=]] Create a New Effect Layer</span> | | <td>there is '''NO ADVANTAGE''' in moving a layer '''within''' the same Layer Group except if you are preparing for a layer merge operation (see [[image:PageLink.PNG|link=]] '''[[#skip Merging a Layer|Merging a Layer]]''' below)</td> |
| <table> | | </tr> |
| <tr valign="top"> | | <tr valign="top"> |
| <td colspan=2>If no Effect Layers are present then you can create a new one</td> | | <td>[[image:DotPoint.JPG|10px|link=]]</td> |
| | <td>layers cannot be moved into or out of the '''Effect Layers''' group</td> |
| </tr> | | </tr> |
| <tr valign="top"> | | <tr valign="top"> |
| <td colspan=2> | | <td>[[image:DotPoint.JPG|10px|link=]]</td> |
| <table> | | <td>the '''Ground Height''' and '''Texture''' layers are special "single layer" groups, not groups of layers, and cannot be moved or have other layers added to them</td> |
| | </tr> |
| | </table> |
| | </td> |
| | </tr> |
| | </table> |
| | <br> |
| | |
| | <table width=1000> |
| <tr valign="top"> | | <tr valign="top"> |
| <td>[[image:NewEffectLayerEntry.png|link=|alt=New effect layer]]</td> | | <td width=200>[[image:LayersMove1_S20.png|link=]]</td> |
| <td> | | <td width=800> |
| <table bgcolor=#000000 cellpadding=2> | | <table width=796 bgcolor=#000000 cellpadding=2> |
| <tr valign="top"> | | <tr valign="top"> |
| <td> | | <td> |
| <table bgcolor=#ffffff cellpadding=2> | | <table width=794 bgcolor=#ffffff cellpadding=2> |
| <tr valign="top"> | | <tr valign="top"> |
| <td colspan=2><span style="font-weight: 700; font-size: 15px;">Steps:</span> To create your first effect layer:-</td> | | <td colspan=2><span style="font-weight: 700; font-size: 15px;">Steps: To Move a Layer:-</span></td> |
| </tr> | | </tr> |
| <tr valign="top"> | | <tr valign="top"> |
| <td width=25>[[image:DotPoint1.JPG|link=]]</td> | | <td width=25>[[image:DotPoint1.JPG|link=]]</td> |
| <td><span style="font-weight: 700; font-size: 15px; background-color: lightcyan;"> Left Click </span> in the <span style="font-weight: 700; color: white; background-color: black;"> Effect Name </span> text box and enter a name for your new '''Effect Layer'''</td> | | <td><span style="font-weight: 700; font-size: 15px; background-color: lightcyan;"> Left Click and Drag </span> the layer name up or down to its new position. '''Note:''' You cannot move a '''Layer Group'''.<br><br> |
| | In the image on the left the '''Rail Workers''' layer is being moved up from the '''Session Layers Group''' into the '''Route Layers Group'''. This will also change where the assets in that layer are saved from the '''Session''' to the '''Route'''</td> |
| </tr> | | </tr> |
| <tr valign="top"> | | <tr valign="top"> |
| <td>[[image:DotPoint2.JPG|link=]]</td> | | <td>[[image:DotPoint2.JPG|link=]]</td> |
| <td><span style="font-weight: 700; font-size: 15px; background-color: lightcyan;"> Left Click </span> on the <span style="font-weight: 700; color: white; background-color: black;"> Effect Type </span> drop down box and select the type of '''Effect Layer''' to be created - <span style="font-weight: 700; font-size: 15px; color: white; background-color: black;"> TurfFX </span> <span style="font-weight: 700; font-size: 15px; color: white; background-color: black;"> Clutter </span> <span style="font-weight: 700; font-size: 15px; color: white; background-color: black;"> Water </span> or <span style="font-weight: 700; font-size: 15px; color: white; background-color: black;"> Color </span> | | <td>release the layer in its new position.</td> |
| | </tr> |
| | <tr valign="top"> |
| | <td>[[image:DotPoint3.JPG|link=]]</td> |
| | <td>depending on the contents of the layer and the size of the '''Trainz World''', the process may take some time. You will be shown a progress bar in a message window during the move operation</td> |
| | </tr> |
| | <tr valign="top"> |
| | <td>[[image:DotPoint4.JPG|link=]]</td> |
| | <td>at the conclusion, hopefully, you will be shown a message "'''Operation complete'''" |
| | <table> |
| | <tr valign="top"> |
| | <td>[[image:LayersMoveSuccess_S20.png|link=]]</td> |
| | <td> |
| <table bgcolor=#ffffb0 cellpadding=2> | | <table bgcolor=#ffffb0 cellpadding=2> |
| <tr valign="top"> | | <tr valign="top"> |
| <td width=25>[[image:NotePad.PNG|link=]]</td> | | <td width=25>[[image:NotePad.PNG|link=]]</td> |
| <td>The '''Color Effect Layer''' is only available in '''Trainz Plus'''</td> | | <td>If instead you get an '''error message''' then the most likely cause will be moving a layer containing '''Track Objects''' to a position that is above the layer containing the track</td> |
| | </tr> |
| | </table> |
| | </td> |
| </tr> | | </tr> |
| </table> | | </table> |
| Line 6,369: |
Line 6,671: |
| </tr> | | </tr> |
| <tr valign="top"> | | <tr valign="top"> |
| <td>[[image:DotPoint3.JPG|link=]]</td> | | <td>[[image:DotPoint5.JPG|link=]]</td> |
| <td><span style="font-weight: 700; font-size: 15px; background-color: lightcyan;"> Left Click </span> on the [[image:Tick.PNG|link=]] icon</td> | | <td>close the progress message window</td> |
| </tr> | | </tr> |
| <tr valign="top"> | | <tr valign="top"> |
| <td colspan=2>You will then be presented with '''Option''' [[image:Bblue.png|link=]] as shown below. You will probably need to edit your new '''Effect Layer'''</td> | | <td colspan=2>The move can be reversed (after it has completed) by using the <span style="font-weight: 700; font-size: 15px;"><span style="color: white; background-color: black;"> Ctrl </span> + <span style="color: white; background-color: black;"> Z </span></span> keys |
| </tr> | |
| </table> | |
| </td> | | </td> |
| </tr> | | </tr> |
| Line 6,385: |
Line 6,685: |
| </tr> | | </tr> |
| </table> | | </table> |
| </td> | | <br> |
| | <table bgcolor=#000000 width=1000 cellpadding=2> |
| | <tr valign="top"> |
| | <td> |
| | <table bgcolor=#ffffb0 width=996 cellpadding=2> |
| | <tr valign="top"> |
| <td> | | <td> |
| | <table> |
| | <tr valign="top"> |
| | <td width=25>[[image:NotePad.PNG|link=]]</td> |
| | <td width=995><span style="font-size: 17px; font-weight: 700;">Notes: Moving Layers - What Could Possibly Go Wrong?''' 😀</span><br> |
| | ---- |
| </td> | | </td> |
| </tr> | | </tr> |
| </table> | | </table> |
| | | <table width=996> |
| <table width=1000> | |
| <tr valign="top"> | | <tr valign="top"> |
| <td colspan=2><span style="font-weight: 700; font-size: 15px;">Option [[image:Bblue.png|link=]] Edit an Existing Effect Layer</span></td> | | <td>Well, a great deal it seems. You may get a different message during the layer move operation.<br> |
| | [[image:LayersMoveFailure_S20.png|link=]]</td> |
| </tr> | | </tr> |
| <tr valign="top"> | | <tr valign="top"> |
| <td colspan=2>If '''Effect Layers''' are present (including the one you just created in '''Option''' [[image:Ablue.png|link=]] above) then select an '''Effect Layer''' from the '''Layer''' drop down box to edit, save or delete, or create another new one</td> | | <td>The most common error when moving layers is, as the message above states, an '''invalid hierarchy''' ('''Translation:''' "The layers are in the wrong order"). This occurs when a layer is moved to an incorrect level for the type of objects it contains. It is '''Track Splines''' and '''Track Objects''' (e.g. signals, switches, speed signs, etc) that cause this problem.</td> |
| </tr> | | </tr> |
| <tr valign="top"> | | <tr valign="top"> |
| <td width=469> | | <td>The situation that created the error messages shown above is shown in the image below left:- |
| <table bgcolor=#000000 cellpadding=2> | | <table> |
| <tr valign="top"> | | <tr valign="top"> |
| | <td width=260>[[image:LayersMoveFail_S20.png|link=]]</td> |
| <td> | | <td> |
| <table bgcolor=#ffffff cellpadding=2> | | <table> |
| <tr valign="top"> | | <tr valign="top"> |
| <td>[[image:PlusIcon.png|link=]]</td> | | <td width=10>[[image:DotPoint.JPG|10px|link=]]</td> |
| <td><span style="font-weight: 700; font-size: 15px; background-color: lightcyan;"> Left Click </span> on this icon to create a new effect layer then follow the steps in '''Option''' [[image:Ablue.png|link=]] above</td> | | <td>all the track splines, the <span style="font-weight: 700; font-size: 15px; color: white; background-color: black;"> parent track </span> identified in the error messages, are in the '''route-layer'''</td> |
| </tr> | | </tr> |
| <tr valign="top"> | | <tr valign="top"> |
| <td><span style="font-weight: 700; font-size: 15px; color: white; background-color: black;"> Layer: </span><br> | | <td>[[image:DotPoint.JPG|10px|link=]]</td> |
| [[image:PickerIcon.png|link=]]</td> | | <td>track objects, in this case signals but any track objects could have been used, have been placed in the '''Signals''' layer. This layer, according to the order of the layers from the top to the bottom, is one layer '''below''' the '''route-layer''' that contains the track where the signals are attached. In this position, physically below the '''route-layer''', the '''Signals''' layer and the track objects it contains will cause no problems</td> |
| <td>to select an existing layer to edit, save or delete, either select its name from the <span style="font-weight: 700; font-size: 15px; color: white; background-color: black;"> Layer: </span> drop down box <span style="font-weight: 700; font-size: 15px;">OR</span> <span style="font-weight: 700; font-size: 15px; background-color: lightcyan;"> Left Click </span> on the '''Picker''' icon and select the '''Effect Layer''' from the '''Trainz World'''</td> | |
| </tr> | | </tr> |
| <tr valign="top"> | | <tr valign="top"> |
| <td>[[image:DeleteIcon.png|link=]]</td> | | <td>[[image:DotPoint.JPG|10px|link=]]</td> |
| <td><span style="font-weight: 700; font-size: 15px; background-color: lightcyan;"> Left Click </span> on this icon to delete a selected '''Effect Layer''' from the route</td> | | <td>the '''Signals''' layer is being moved up to a position shown by the dashed red line. The new position, again according to the order of the layers from the top to the bottom, is one layer '''above''' the '''route-layer'''.</td> |
| </tr> | | </tr> |
| <tr valign="top"> | | <tr valign="top"> |
| <td><span style="font-weight: 700; font-size: 15px; color: white; background-color: black;"> Preset: </span></td> | | <td colspan=2> |
| <td><span style="font-weight: 700; font-size: 15px; background-color: lightcyan;"> Left Click </span> inside the '''Preset''' dropdown box to select an '''Effect Layer''' that is currently stored in '''Content Manager''' to add it to the route</td> | | <table bgcolor=#ffffe0 cellpadding=2> |
| </tr>
| |
| <tr valign="top"> | | <tr valign="top"> |
| <td>[[image:SavePresetIcon.png|link=]]</td> | | <td>[[image:PencilTips.PNG|link=]]</td> |
| <td><span style="font-weight: 700; font-size: 15px; background-color: lightcyan;"> Left Click </span> on this icon to save the selected '''Effect Layer''' as a '''Preset''' in '''Content Manager''' so that it can be loaded into other routes or uploaded to the '''DLS'''</td> | | <td>The final error message shown is confusing and, from a commonsense point of view, incorrect.<br> |
| | <span style="font-weight: 700; font-size: 15px; color: white; background-color: black;"> Trackside objects cannot be in a layer below the layer their track is in. </span><br> |
| | '''Best Advice:''' Ignore the word <span style="font-weight: 700; font-size: 15px;">below</span> and replace it with the word <span style="font-weight: 700; font-size: 15px;">above</span> so the message reads<br> |
| | <span style="font-weight: 700; font-size: 15px; color: white; background-color: black;"> Trackside objects cannot be in a layer <span style="color: yellow;">above</span> the layer their track is in. </span><br> |
| | </td> |
| </tr> | | </tr> |
| <tr valign="top">
| | </table> |
| <td width=35>[[image:EditSwitchIcon.png|link=]]</td>
| | </td> |
| <td><span style="font-weight: 700; font-size: 15px; background-color: lightcyan;"> Left Click </span> on this icon to open the '''Edit Effect Layer''' dialogue window for the selected '''Effect Layer'''. This icon will also close the dialogue window. Always edit with <span style="font-weight: 700; font-size: 15px; background-color: #ffffb0;"> CAUTION </span></td>
| |
| </tr> | | </tr> |
| </table> | | </table> |
| Line 6,433: |
Line 6,745: |
| </tr> | | </tr> |
| </table> | | </table> |
| </td> | | <span style="font-weight: 700; font-size: 15px;">Solutions to This Problem:</span> |
| <td width=531>[[image:EditEffectLayersMenu.png|link=|alt=Edit effect layers]]<br><br> | | <table> |
| <table bgcolor=#000000 cellpadding=2> | | <tr> |
| | <td colspan=2><span style="font-weight: 700; font-size: 15px;">Options:</span> </td> |
| | </tr> |
| <tr valign="top"> | | <tr valign="top"> |
| <td> | | <td width=25>[[image:Ablue.png|link=]]</td> |
| | <td>use the '''route-layer''' to hold the track splines and never move any layer containing track objects, or any layer at all to be absolutely safe, above this layer |
| <table bgcolor=#ffffe0 cellpadding=2> | | <table bgcolor=#ffffe0 cellpadding=2> |
| <tr valign="top"> | | <tr valign="top"> |
| <td width=25>[[image:PencilTips.PNG|link=]]</td> | | <td width=25>[[image:PencilTips.PNG|link=]]</td> |
| <td>'''Effect Layers''' are created for each route. You can load a '''Preset Effect Layer''' or edit an existing one rather than having to recreate the entire effect each time.</td> | | <td>Always keep the '''route-layer''' containing all the track at the '''very top''' of the '''Route Layers Group'''</td> |
| </tr> | | </tr> |
| </table> | | </table> |
| </td> | | <span style="font-weight: 700; font-size: 15px;">OR</span></td> |
| </tr> | | </tr> |
| </table>
| |
| <br>
| |
| <table>
| |
| <tr valign="top"> | | <tr valign="top"> |
| <td colspan=2>When you have finished creating or editing an '''Effect Layer''' click either the:-</td> | | <td>[[image:Bblue.png|link=]]</td> |
| | <td>use the '''route-layer''' to hold the track splines and '''ALL''' track objects</td> |
| </tr> | | </tr> |
| <tr valign="top"> | | <tr> |
| <td> | | <td colspan=2>Track objects such as '''Trackmarks''' and '''Triggers''' that are needed for a Session but not the Route can still be placed in the '''Session Layers''' group as long as the layer used remains in the '''Session Layers''' group</td> |
| <table>
| | </tr> |
| <tr valign="top">
| | </table> |
| <td width=33>[[image:Tick.PNG|link=]]</td>
| | </td> |
| <td>icon to '''accept''' your changes</td>
| |
| <td width=40 align="center"><span style="font-weight: 700; font-size: 15px;">OR</span></td>
| |
| <td width=33>[[image:Cross.PNG|link=]]</td>
| |
| <td>icon to '''reject''' your changes</td>
| |
| </tr> | | </tr> |
| </table> | | </table> |
| Line 6,470: |
Line 6,779: |
| </table> | | </table> |
| <br> | | <br> |
| <table width=1000> <!-- BEGIN Section Nav Buttons --> | | <table width=1000> <!-- BEGIN Section Nav Buttons --> |
| <tr valign="top"> | | <tr valign="top"> |
| <td width=629><span id="Save Preset"></span> | | <td width=629><span id="skip Merging a Layer"></span> |
| ===<span style="font-weight: 700; font-size: 17px; color: white; background-color: blue;"> Save a Layer as a Preset </span>=== | | =='''Merging a Layer'''== |
| </td> | | </td> |
| <td width=50> </td> | | <td width=50>[[image:SkipDown.png|link=#skip Hiding Layers|Skip Down]]</td> |
| <td width=50> </td>
| | <td width=50>[[image:SkipUp.png|link=#skip Moving a Layer|Skip Up]]</td> |
| <td width=46>[[image:SkipMinorDown.png|link=#Edit TurfFX|Down]][[image:SkipMinorUp.png|link=#skip Edit Effect|Up]]</td> <!-- for Top and Minor Up/Down -->
| | <td width=46> </td> <!-- for Top --> |
| <td width=75> </td> | | <td width=75>[[image:HeadingUp.png|link=#stepLayers|alt=Heading|To Heading]]</td> |
| <td width=75> </td> | | <td width=75> </td> <!-- for Next Down --> |
| <td width=75> </td> <!-- for Bottom --> | | <td width=75> </td> <!-- for Bottom --> |
| </tr> | | </tr> |
| Line 6,487: |
Line 6,796: |
| <tr valign="top"> | | <tr valign="top"> |
| <td width=10>[[image:BlueDot10x10.png|link=]]</td> | | <td width=10>[[image:BlueDot10x10.png|link=]]</td> |
| <td>A '''Preset''' is an edited or created effect layer that has been saved so that it can be reused in other routes</td> | | <td>A layer can be merged with the layer immediately above it</td> |
| </tr> | | </tr> |
| </table> | | </table> |
| | | <br> |
| <table width=1000>
| | <table> |
| <tr valign="top">
| |
| <td>Once an effect layer has been created or edited, it can be saved and will appear as a new asset in '''Content Manager'''. It can be loaded into other routes (see [[image:PageLink.PNG|link=]] '''[[#Load Preset|Loading Preset Effect Layers]]''' above), saved as a '''.cdp''' file and uploaded to the '''DLS'''.</td>
| |
| </tr>
| |
| </table>
| |
| | |
| <table width=1000> | |
| <tr valign="top"> | | <tr valign="top"> |
| <td width=531>[[image:EditEffectLayersMenu.png|link=|alt=Edit effect layers]]</td> | | <td width=120>[[image:LayerMerge_S20.png|link=]]</td> |
| <td> | | <td> |
| <table bgcolor=#000000 cellpadding=2> | | <table bgcolor=#000000 cellpadding=2> |
| Line 6,506: |
Line 6,809: |
| <table bgcolor=#ffffff cellpadding=2> | | <table bgcolor=#ffffff cellpadding=2> |
| <tr valign="top"> | | <tr valign="top"> |
| <td colspan=2><span style="font-weight: 700; font-size: 15px;">Steps:</span> To save an effect layer as a '''Preset''':-</td> | | <td colspan=2><span style="font-weight: 700; font-size: 15px;">Steps: To Merge Two Layers:-</span></td> |
| </tr> | | </tr> |
| <tr valign="top"> | | <tr valign="top"> |
| <td width=25>[[image:DotPoint1.JPG|link=]]</td> | | <td width=25>[[image:DotPoint1.JPG|link=]]</td> |
| <td>Open the '''Effect Layers''' window and select the effect layer to be saved</td> | | <td><span style="font-weight: 700; font-size: 15px; background-color: lightcyan;"> Right Click </span> on a layer name in the <span style="font-weight: 700; font-size: 15px; color: white; background-color: #797979;"> Layers Palette </span></td> |
| </tr> | | </tr> |
| <tr valign="top"> | | <tr valign="top"> |
| <td>[[image:DotPoint2.JPG|link=]]</td> | | <td>[[image:DotPoint2.JPG|link=]]</td> |
| <td><span style="font-weight: 700; font-size: 15px; background-color: lightcyan;"> Left Click </span> on the [[image:SavePresetIcon.png|link=]] icon. The effect layer will be saved using the name you entered for the layer ('''Grass Short Dry''' in the example shown on the left)</td> | | <td>select the <span style="font-weight: 700; font-size: 15px; color: white; background-color: black;"> Merge Layer Up </span> option from the popup menu</td> |
| </tr> | | </tr> |
| </table> | | </table> |
| Line 6,523: |
Line 6,826: |
| </tr> | | </tr> |
| </table> | | </table> |
| | | <br> |
| <table width=1000 bgcolor=#000000 cellpadding=2> | | <table bgcolor=#000000 width=1000 cellpadding=2> |
| <tr valign="top"> | | <tr valign="top"> |
| <td> | | <td> |
| <table width=996 bgcolor=#ffffb0 cellpadding=2> | | <table bgcolor=#ffffb0 width=996 cellpadding=2> |
| <tr valign="top"> | | <tr valign="top"> |
| <td width=25>[[image:NotePad.PNG|link=]]</td> | | <td width=25>[[image:NotePad.PNG|link=]]</td> |
| <td width=975><span style="font-size: 17px; font-weight: 700;">Notes:'''</span><br> | | <td><span style="font-size: 17px; font-weight: 700;">Notes:'''</span><br> |
| ---- | | ----</td> |
| A '''Preset''' can be deleted from the current route (<span style="font-weight: 700; font-size: 15px; background-color: lightcyan;"> Left Click </span> on the [[image:DeleteIcon.png|link=]] icon) but it will remain as a saved asset in '''Content Manager''' and can be reloaded if needed. To permanently delete a preset it must be deleted using '''Content Manager'''</td>
| | </tr> |
| | <tr valign="top"> |
| | <td width=10>[[image:DotPoint.JPG|10px|link=]]</td> |
| | <td>the selected layer will be merged with the layer '''immediately above''' it</td> |
| | </tr> |
| | <tr valign="top"> |
| | <td>[[image:DotPoint.JPG|10px|link=]]</td> |
| | <td>you may need to move the layer being merged into the correct position before the merge (see [[image:PageLink.PNG|link=]] '''[[#skip Moving a Layer|Moving a Layer]]''' above)</td> |
| | </tr> |
| | <tr valign="top"> |
| | <td>[[image:DotPoint.JPG|10px|link=]]</td> |
| | <td>depending on the contents of the layer, the process may take some time. You will be shown a progress bar in a message window during the merge operation</td> |
| | </tr> |
| | <tr valign="top"> |
| | <td>[[image:DotPoint.JPG|10px|link=]]</td> |
| | <td>the merged layers and their contents can be restored (after the merge has completed) back into two separate layers by using the <span style="font-weight: 700; font-size: 15px;"><span style="color: white; background-color: black;"> Ctrl </span> + <span style="color: white; background-color: black;"> Z </span></span> |
| | keys</td> |
| | </tr> |
| | <tr valign="top"> |
| | <td>[[image:DotPoint.JPG|10px|link=]]</td> |
| | <td>layers in the '''Effect Layers Group''' cannot be merged. In place of <span style="font-weight: 700; font-size: 15px; color: white; background-color: black;"> Merge Layer Up </span> the popup menu for an '''Effect Layer''' will have an <span style="font-weight: 700; font-size: 15px; color: white; background-color: black;"> Edit Layer </span> option |
| | </td> |
| </tr> | | </tr> |
| </table> | | </table> |
| Line 6,539: |
Line 6,863: |
| </table> | | </table> |
| <br> | | <br> |
| <table width=1000> <!-- BEGIN Section Nav Buttons --> | | <table width=1000> <!-- BEGIN Section Nav Buttons --> |
| <tr valign="top"> | | <tr valign="top"> |
| <td width=629><span id="Edit TurfFX"></span> | | <td width=629><span id="skip Hiding Layers"></span> |
| ===<span style="font-weight: 700; font-size: 17px; color: white; background-color: blue;"> TurfFX Layer Edit Controls </span>=== | | =='''Hiding Layers'''== |
| </td> | | </td> |
| <td width=50> </td> | | <td width=50>[[image:SkipDown.png|link=#skip Locking Layers|Skip Down]]</td> |
| <td width=50> </td>
| | <td width=50>[[image:SkipUp.png|link=#skip Merging a Layer|Skip Up]]</td> |
| <td width=46>[[image:SkipMinorDown.png|link=#Edit Clutter|Down]][[image:SkipMinorUp.png|link=#Save Preset|Up]]</td> <!-- for Top and Minor Up/Down -->
| | <td width=46> </td> <!-- for Top --> |
| <td width=75> </td> | | <td width=75>[[image:HeadingUp.png|link=#stepLayers|alt=Heading|To Heading]]</td> |
| <td width=75> </td> | | <td width=75> </td> <!-- for Next Down --> |
| <td width=75> </td> <!-- for Bottom --> | | <td width=75> </td> <!-- for Bottom --> |
| </tr> | | </tr> |
| </table> <!-- END Section Nav Buttons --> | | </table> <!-- END Section Nav Buttons --> |
|
| |
|
| <table width=1000 cellpadding=2> | | <table width=1000 bgcolor="lightcyan" cellpadding=2> |
| <tr valign="top"> | | <tr valign="top"> |
| <td width=570>[[image:EditEffectLayerTurfFX_S20.png|link=]]</td> | | <td width=10>[[image:BlueDot10x10.png|link=]]</td> |
| <td> | | <td>Each individual layer has an '''Eye''' icon that controls the state ('''visible''' or '''hidden''') of that layer</td> |
| <table bgcolor=#ff0000 cellpadding=2> | | </tr> |
| | </table> |
| | <br> |
| | <table width=1000> |
| <tr valign="top"> | | <tr valign="top"> |
| <td> | | <td><span style="font-weight: 700; font-size: 15px; background-color: lightcyan;"> Left Click </span> on the '''Eye''' icon to toggle its state between '''visible''' and '''hidden'''. |
| <table width=430 bgcolor=#fcbcbc cellpadding=2> | | <table width=400> |
| <tr valign="top"> | | <tr valign="top"> |
| <td>[[image:Stop.PNG|link=]]</td> | | <td colspan=2>If the '''Eye''' icon is:-</td> |
| <td ><span style="font-size: 17px; font-weight: 700;">WARNING:</span><br>
| | </tr> |
| <span style="font-weight: 700; font-size: 15px;">Always edit these values with caution</span><br>
| |
| The '''TurfFX''' Effect Layer is:-
| |
| <table> | |
| <tr valign="top"> | | <tr valign="top"> |
| <td width=10>[[image:DotPoint.JPG|10px|link=]]</td> | | <td width=25>[[image:LayerEyeOpen_S20.png|link=]]</td> |
| <td>an '''Nvidia''' product (it is not from '''N3V''') and requires the presence of an '''Nvidia GPU''' such as a '''GTX''' or '''RTX''' video graphics card. The '''TurfFX''' Effect Layer will not appear on systems that do not have an '''Nvidia''' video card</td> | | <td>'''Open''' then layer is '''visible''' in both Surveyor and Driver</td> |
| </tr> | | </tr> |
| <tr valign="top"> | | <tr valign="top"> |
| <td>[[image:DotPoint.JPG|10px|link=]]</td> | | <td>[[image:LayerEyeClosed_S20.png|link=]]</td> |
| <td>only supported on '''MS Windows'''. It will not work on '''MacOS''' systems</td> | | <td>'''Closed''' then layer is '''hidden''' in both Surveyor and Driver</td> |
| </tr>
| |
| </table></td>
| |
| </tr> | | </tr> |
| </table> | | </table> |
| </td> | | </td> |
| </tr> | | <td> |
| </table> | | <table bgcolor=#000000 width=600 cellpadding=2> |
| <br> | | <tr valign="top"> |
| <table bgcolor=#000000 cellpadding=2> | | <td> |
| | <table bgcolor=#ffffb0 width=596 cellpadding=2> |
| <tr valign="top"> | | <tr valign="top"> |
| <td> | | <td> |
| <table bgcolor=#ffffb0 cellpadding=2> | | <table> |
| <tr valign="top"> | | <tr valign="top"> |
| <td width=25>[[image:NotePad.PNG|link=]]</td> | | <td width=25>[[image:NotePad.PNG|link=]]</td> |
| <td><span style="font-size: 17px;">'''Notes:'''</span><br> | | <td width=570><span style="font-size: 17px; font-weight: 700;">Notes:'''</span><br> |
| ---- | | ---- |
| </td> | | </td> |
| </tr> | | </tr> |
| | </table> |
| | <table> |
| <tr valign="top"> | | <tr valign="top"> |
| <td>[[image:DotPoint.JPG|10px|link=]]</td> | | <td width=10>[[image:DotPoint.JPG|10px|link=]]</td> |
| <td>Many of the entered values will alter the appearance of the asset. Features such as the ground coverage (density) of the plants, their heights, stem and leaf thickness, density of seed heads, etc, etc</td> | | <td>Hiding a layer will protect its objects from being selected, deleted and moved</td> |
| | </tr> |
| | <tr valign="top"> |
| | <td>[[image:DotPoint.JPG|10px|10px|link=]]</td> |
| | <td>New assets can be added to a hidden layer by confirming the action in a dialogue window which will make the layer visible</td> |
| </tr> | | </tr> |
| </table> | | <tr valign="top"> |
| </td> | | <td>[[image:DotPoint.JPG|10px|10px|link=]]</td> |
| | <td>Objects can be assigned to a hidden layer using the <span style="font-weight: 700; font-size: 15px; color: white; background-color: #797979;"> Info Palette </span></td> |
| </tr> | | </tr> |
| </table>
| |
| <br>
| |
| <table cellpadding=2 bgcolor="Aquamarine">
| |
| <tr valign="top"> | | <tr valign="top"> |
| <td>[[image:LinkWiki.PNG|link=]]</td> | | <td>[[image:DotPoint.JPG|10px|link=]]</td> |
| <td> | | <td>Hidden layers can still be deleted, renamed, moved and merged</td> |
| A detailed (but incomplete) description of the TurfFX Effect Layer controls can be found on the '''Trainz Wiki''' at:-<br>
| |
| :'''[[TurfFX_Effect_Layer]]'''
| |
| </td> | |
| </tr> | | </tr> |
| </table> | | </table> |
| <br>
| | </td> |
| <table bgcolor=#000000 cellpadding=2>
| |
| <tr valign="top">
| |
| <td>
| |
| <table bgcolor=#ffffe0 cellpadding=2>
| |
| <tr valign="top">
| |
| <td width=25>[[image:PencilTips.PNG|link=]]</td>
| |
| <td>The best way to learn how to create and edit an effect layer is to set up a single baseboard and experiment with the various options and controls. If your experiments create an effect layer that you like then save it as a '''Preset''' so that it can be used in another route.</td>
| |
| </tr> | | </tr> |
| </table> | | </table> |
| Line 6,627: |
Line 6,944: |
| </table> | | </table> |
| <br> | | <br> |
| <table width=1000> <!-- BEGIN Section Nav Buttons --> | | <table width=1000> <!-- BEGIN Section Nav Buttons --> |
| <tr valign="top"> | | <tr valign="top"> |
| <td width=629><span id="Edit Clutter"></span> | | <td width=629><span id="skip Locking Layers"></span> |
| ===<span style="font-weight: 700; font-size: 17px; color: white; background-color: blue;"> Clutter Layer Edit Controls </span>=== | | =='''Locking Layers'''== |
| </td> | | </td> |
| <td width=50> </td> | | <td width=50>[[image:SkipDown.png|link=#skip Setting the Active Layer|Skip Down]]</td> |
| <td width=50> </td>
| | <td width=50>[[image:SkipUp.png|link=#skip Hiding Layers|Skip Up]]</td> |
| <td width=46>[[image:SkipMinorDown.png|link=#Edit Water|Down]][[image:SkipMinorUp.png|link=#Edit TurfFX|Up]]</td> <!-- for Top and Minor Up/Down -->
| | <td width=46> </td> <!-- for Top --> |
| <td width=75> </td> | | <td width=75>[[image:HeadingUp.png|link=#stepLayers|alt=Heading|To Heading]]</td> |
| <td width=75> </td> | | <td width=75> </td> <!-- for Next Down --> |
| <td width=75> </td> <!-- for Bottom --> | | <td width=75> </td> <!-- for Bottom --> |
| </tr> | | </tr> |
| </table> <!-- END Section Nav Buttons --> | | </table> <!-- END Section Nav Buttons --> |
|
| |
|
| <table width=1000 cellpadding=2> | | <table width=1000 bgcolor="lightcyan" cellpadding=2> |
| <tr valign="top"> | | <tr valign="top"> |
| <td width=570>[[image:EditEffectLayerClutter_S20.png|link=]]</td> | | <td width=10>[[image:BlueDot10x10.png|link=]]</td> |
| <td> | | <td>Each individual layer has a '''Padlock''' icon that controls the state ('''locked''' or '''unlocked''') of that layer</td> |
| <table bgcolor=#ff0000 cellpadding=2> | | </tr> |
| <tr valign="top"> | | <tr valign="top"> |
| <td> | | <td width=10>[[image:BlueDot10x10.png|link=]]</td> |
| <table width=430 bgcolor=#fcbcbc cellpadding=2>
| | <td>The '''Route Layers Group''' has a '''Padlock''' icon that controls the state ('''locked''' or '''unlocked''') of '''ALL''' the '''Route Layers'''</td> |
| <tr valign="top">
| |
| <td>[[image:Stop.PNG|link=]]</td>
| |
| <td><span style="font-size: 17px; font-weight: 700;">WARNING:</span><br> | |
| <span style="font-weight: 700; font-size: 15px;">Always edit these values with caution</span></td>
| |
| </tr> | | </tr> |
| | </table> |
| | <br> |
| | <table width=1000> |
| <tr valign="top"> | | <tr valign="top"> |
| <td colspan=2>The scenery assets you select to be included in a '''Clutter Effect Layer''':- | | <td><span style="font-weight: 700; font-size: 15px; background-color: lightcyan;"> Left Click </span> on the '''Padlock''' icon to toggle its state between '''locked''' and '''unlocked''' |
| <table> | | <table width=250> |
| <tr valign="top"> | | <tr valign="top"> |
| <td width=10>[[image:DotPoint.JPG|10px|link=]]</td> | | <td colspan=2>If the '''Padlock''' icon is:-</td> |
| <td>should be small. Ideally they should fit inside a 1m cube</td>
| |
| </tr> | | </tr> |
| <tr valign="top"> | | <tr valign="top"> |
| <td>[[image:DotPoint.JPG|10px|link=]]</td> | | <td width=25>[[image:LayerUnLocked_S20.png|link=]]</td> |
| <td>'''MUST''' have '''LOD''' (Levels Of Detail) built-in. Assets with no LOD or poor LOD will cause performance issues.</td> | | <td>'''Open''' then layer is '''unlocked'''</td> |
| </tr> | | </tr> |
| <tr valign="top"> | | <tr valign="top"> |
| <td colspan=2>'''Built-in''' scenery assets that contain the word '''clutter''' in their names (such as shown in the image on the left) will meet the above two requirements</td> | | <td>[[image:LayerLocked_S20.png|link=]]</td> |
| | <td>'''Closed''' then layer is '''locked'''</td> |
| </tr> | | </tr> |
| </table> | | </table> |
| </td> | | </td> |
| </tr> | | <td> |
| </table> | | <table bgcolor=#000000 width=600 cellpadding=2> |
| </td> | | <tr valign="top"> |
| </tr>
| | <td> |
| </table> | | <table bgcolor=#ffffb0 width=596 cellpadding=2> |
| <br>
| |
| <table bgcolor=#000000 cellpadding=2> | |
| <tr valign="top"> | | <tr valign="top"> |
| <td> | | <td> |
| <table bgcolor=#ffffb0 cellpadding=2> | | <table> |
| <tr valign="top"> | | <tr valign="top"> |
| <td width=25>[[image:NotePad.PNG|link=]]</td> | | <td width=25>[[image:NotePad.PNG|link=]]</td> |
| <td><span style="font-size: 17px;">'''Notes:'''</span><br> | | <td width=570><span style="font-size: 17px; font-weight: 700;">Notes:'''</span><br> |
| ---- | | ---- |
| </td> | | </td> |
| </tr> | | </tr> |
| | </table> |
| | <table> |
| <tr valign="top"> | | <tr valign="top"> |
| <td>[[image:DotPoint.JPG|10px|link=]]</td> | | <td width=10>[[image:DotPoint.JPG|10px|link=]]</td> |
| <td>Each added '''Mesh Asset''' (e.g. plant asset or rock asset) will increase the resources used by this layer and that may have an effect on performance.</td> | | <td>Locking a layer will protect its objects from being deleted and moved</td> |
| </tr> | | </tr> |
| <tr valign="top"> | | <tr valign="top"> |
| <td>[[image:DotPoint.JPG|10px|link=]]</td> | | <td>[[image:DotPoint.JPG|10px|10px|link=]]</td> |
| <td>The sliders next to each '''Mesh Asset''' control the density (frequency) of that asset in the layer. | | <td>New assets can be added to a locked layer by confirming the action in a dialogue window which will unlock the layer</td> |
| <table>
| |
| <tr valign="top">
| |
| <td width=100>'''Extreme Left'''</td>
| |
| <td>not displayed at all. This will add a '''Delete''' icon to the end of the slider which will allow that asset to be removed from the layer</td>
| |
| </tr> | | </tr> |
| <tr valign="top"> | | <tr valign="top"> |
| <td>'''Extreme Right'''</td> | | <td>[[image:DotPoint.JPG|10px|10px|link=]]</td> |
| <td>displayed with maximum coverage</td> | | <td>Objects can be assigned to a locked layer using the <span style="font-weight: 700; font-size: 15px; color: white; background-color: #797979;"> Info Palette </span></td> |
| </tr> | | </tr> |
| <tr valign="top"> | | <tr valign="top"> |
| <td colspan=2>Intermediate positions along a slider will give effects between these two extremes</td> | | <td>[[image:DotPoint.JPG|10px|link=]]</td> |
| | <td>Locked layers can still be deleted, renamed, moved and merged</td> |
| </tr> | | </tr> |
| </table> | | </table> |
| Line 6,712: |
Line 7,025: |
| </tr> | | </tr> |
| </table> | | </table> |
| <br>
| |
| <table cellpadding=2 bgcolor="Aquamarine">
| |
| <tr valign="top">
| |
| <td>[[image:LinkWiki.PNG|link=]]</td>
| |
| <td>
| |
| A detailed description of the Clutter Effect Layer controls can be found on the '''Trainz Wiki''' at:-<br>
| |
| :'''[[Clutter_Effect_Layer]]'''
| |
| </td> | | </td> |
| </tr> | | </tr> |
| </table> | | </table> |
| <br> | | <br> |
| <table bgcolor=#000000 cellpadding=2> | | <table width=1000> <!-- BEGIN Section Nav Buttons --> |
| <tr valign="top"> | | <tr valign="top"> |
| <td> | | <td width=629><span id="skip Setting the Active Layer"></span> |
| <table bgcolor=#ffffe0 cellpadding=2>
| | =='''Setting the Active Layer'''== |
| <tr valign="top"> | |
| <td width=25>[[image:PencilTips.PNG|link=]]</td>
| |
| <td>The best way to learn how to create and edit an effect layer is to set up a single baseboard and experiment with the various options and controls. If your experiments create an effect layer that you like then save it as a '''Preset''' so that it can be used in another route</td>
| |
| </tr>
| |
| </table>
| |
| </td> | | </td> |
| </tr> | | <td width=50>[[image:SkipDown.png|link=#skip Move an Object to Another Layer|Skip Down]]</td> |
| </table>
| | <td width=50>[[image:SkipUp.png|link=#skip Locking Layers|Skip Up]]</td> |
| </td>
| | <td width=46> </td> <!-- for Top --> |
| </tr>
| | <td width=75>[[image:HeadingUp.png|link=#stepLayers|alt=Heading|To Heading]]</td> |
| </table>
| | <td width=75> </td> <!-- for Next Down --> |
| <br>
| |
| <table width=1000> <!-- BEGIN Section Nav Buttons -->
| |
| <tr valign="top">
| |
| <td width=629><span id="Edit Water"></span>
| |
| ===<span style="font-weight: 700; font-size: 17px; color: white; background-color: blue;"> Water Layer Edit Controls </span>===
| |
| </td> | |
| <td width=50> </td> | |
| <td width=50> </td> | |
| <td width=46>[[image:SkipMinorDown.png|link=#Edit Color|Down]][[image:SkipMinorUp.png|link=#Edit Clutter|Up]]</td> <!-- for Top and Minor Up/Down --> | |
| <td width=75> </td> | |
| <td width=75> </td> | |
| <td width=75> </td> <!-- for Bottom --> | | <td width=75> </td> <!-- for Bottom --> |
| </tr> | | </tr> |
| Line 6,756: |
Line 7,046: |
| <tr valign="top"> | | <tr valign="top"> |
| <td width=10>[[image:BlueDot10x10.png|link=]]</td> | | <td width=10>[[image:BlueDot10x10.png|link=]]</td> |
| <td>The '''Water Effect Layer''' has been introduced mainly for '''Surveyor 2.0''' although an older and more restricted version is available in '''TRS19 SP4'''</td> | | <td>The '''Active Layer''' is the layer where new objects will be automatically added when using the '''Placement Tool'''</td> |
| | </tr> |
| | <tr valign="top"> |
| | <td>[[image:BlueDot10x10.png|link=]]</td> |
| | <td>Only '''Route''' and '''Session''' layers can be selected as the '''Active Layer'''</td> |
| </tr> | | </tr> |
| </table> | | </table> |
| <br>
| | |
| <table width=1000> | | <table width=1000> |
| <tr valign="top"> | | <tr> |
| <td>In '''Surveyor 2.0''' you can have more than one '''Water Effect Layer'''. Each can have a different combination of water colour and surface effects (calm, ripples, rough). Each can be raised above the ground height to present a different water surface in different locations.</td> | | <td>The active layer is shown in the palette with its name on a <span style="font-weight: 700; font-size: 15px; color: black; background-color: lightgrey;"> Light Grey </span> background. The name of the current '''Active Layer''' is also shown in the '''Layer Palette Title Bar'''. In the images below the '''Rail Workers''' layer from the '''Session Layers Group''' is the current '''Active Layer'''.</td> |
| </tr> | | </tr> |
| </table> | | </table> |
| <br>
| | <table width=1000> |
| <table width=1000 cellpadding=2> | |
| <tr valign="top"> | | <tr valign="top"> |
| <td width=570>[[image:EditEffectLayerWater_S20.png|link=]] | | <td width=200>[[image:LayersPalette_S20_ActiveLayer.png|link=]]</td> |
| <br> | | <td width=10> </td> |
| <table cellpadding=2 bgcolor=#000000> | | <td width=200>[[image:LayersPalette_S20_ActiveLayer2.png|link=]]</td> |
| | <td> |
| | <table bgcolor=#000000 cellpadding=2> |
| <tr valign="top"> | | <tr valign="top"> |
| <td> | | <td> |
| <table cellpadding=2 bgcolor=#ffffff> | | <table bgcolor=#ffffff cellpadding=2> |
| <tr valign="top"> | | <tr valign="top"> |
| <td>[[image:Gears.PNG|link=]]</td> | | <td colspan=2><span style="font-weight: 700; font-size: 15px;">Steps: To Set a New Active Layer:-</span></td> |
| <td><span style="font-weight: 700; font-size: 15px;">Settings:'''</span>
| |
| <table>
| |
| <tr valign="top">
| |
| <td width=10>[[image:BlackDot10x10.png|link=]]</td>
| |
| <td>The <span style="font-weight: 700; font-size: 15px; color: white; background-color: black;"> Default Value </span> control sets the initial height or altitude in metres of the entire water effect layer. This is initially set to '''0m''' but you can change this to any positive (above) or negative (below) value '''BUT''' this must be set when the layer is created, not edited afterwards when it will have no effect</td>
| |
| </tr> | | </tr> |
| <tr valign="top"> | | <tr valign="top"> |
| <td>[[image:BlackDot10x10.png|link=]]</td> | | <td width=20>[[image:DotPoint1.JPG|link=]]</td> |
| <td>The <span style="font-weight: 700; font-size: 15px; color: white; background-color: black;"> Constant Value </span> controls set the colour of the entire water effect layer. Enter the '''RGB''' colour values ('''0.000''' to '''1.000''') for the required colour</td> | | <td><span style="font-weight: 700; font-size: 15px; background-color: lightcyan;"> Left Click </span> on the layer name. |
| | </td> |
| </tr> | | </tr> |
| </table> | | </table> |
| Line 6,793: |
Line 7,084: |
| </tr> | | </tr> |
| </table> | | </table> |
| </td>
| | <br> |
| <td>
| |
| <table bgcolor=#ff0000 cellpadding=2>
| |
| <tr valign="top">
| |
| <td>
| |
| <table width=430 bgcolor=#fcbcbc cellpadding=2>
| |
| <tr valign="top">
| |
| <td>[[image:Stop.PNG|link=]]</td>
| |
| <td><span style="font-size: 17px; font-weight: 700;">WARNING:</span><br>
| |
| <span style="font-weight: 700; font-size: 15px;">Always edit these values with caution</span><br>
| |
| A Water Effect Layer will:-
| |
| <table>
| |
| <tr valign="top">
| |
| <td width=10>[[image:DotPoint.JPG|10px|link=]]</td>
| |
| <td>will be automatically added at an altitude of '''0m''' (the <span style="font-weight: 700; font-size: 15px; color: white; background-color: black;"> Default Value </span>) when you create a new Route</td>
| |
| </tr>
| |
| <tr valign="top">
| |
| <td>[[image:DotPoint.JPG|10px|link=]]</td>
| |
| <td>will appear if you lower the ground surface below the altitude of the layer</td>
| |
| </tr>
| |
| </table>
| |
| </td>
| |
| </tr>
| |
| </table>
| |
| </td>
| |
| </tr>
| |
| </table>
| |
| <br>
| |
| <table cellpadding=2 bgcolor="Aquamarine">
| |
| <tr valign="top">
| |
| <td>[[image:LinkWiki.PNG|link=]]</td>
| |
| <td>
| |
| The '''Trainz Wiki''' has an old ('''TRS19''') and very incomplete description of the Water Effect Layer controls at:-<br>
| |
| :'''[[Water_Effect_Layer]]'''
| |
| </td>
| |
| </tr>
| |
| </table>
| |
| <br> | |
| <table bgcolor=#000000 cellpadding=2> | | <table bgcolor=#000000 cellpadding=2> |
| <tr valign="top"> | | <tr valign="top"> |
| Line 6,836: |
Line 7,090: |
| <table bgcolor=#ffffe0 cellpadding=2> | | <table bgcolor=#ffffe0 cellpadding=2> |
| <tr valign="top"> | | <tr valign="top"> |
| <td width=25>[[image:PencilTips.PNG|link=]]</td> | | <td>[[image:PencilTips.PNG|link=]]</td> |
| <td>The best way to learn how to create and edit an effect layer is to set up a single baseboard and experiment with the various options and controls. If your experiments create an effect layer that you like then save it as a '''Preset''' so that it can be used in another route.</td> | | <td>You can also use the <span style="font-weight: 700; font-size: 15px; color: white; background-color: #797979;"> Info Palette </span> to set the layer occupied by a selected object as the '''Active Layer'''</td> |
| </tr>
| |
| </table>
| |
| </td> | |
| </tr> | | </tr> |
| </table> | | </table> |
| Line 6,847: |
Line 7,098: |
| </table> | | </table> |
| <br> | | <br> |
| <table width=1000> <!-- BEGIN Section Nav Buttons --> | | <table width=1000> <!-- BEGIN Section Nav Buttons --> |
| <tr valign="top"> | | <tr valign="top"> |
| <td width=629><span id="Edit Color"></span> | | <td width=629><span id="skip Move an Object to Another Layer"></span> |
| ===<span style="font-weight: 700; font-size: 17px; color: white; background-color: blue;"> Color Layer Edit Controls </span>=== | | =='''Move an Object to Another Layer'''== |
| </td> | | </td> |
| <td width=50> </td> | | <td width=50>[[image:SkipDown.png|link=#stepScrapbook|Skip Down]]</td> |
| <td width=50> </td>
| | <td width=50>[[image:SkipUp.png|link=#skip Setting the Active Layer|Skip Up]]</td> |
| <td width=46>[[image:SkipMinorDown.png|link=#stepPlacement|Down]][[image:SkipMinorUp.png|link=#Edit Water|Up]]</td> <!-- for Top and Minor Up/Down -->
| | <td width=46> </td> <!-- for Top --> |
| <td width=75> </td> | | <td width=75>[[image:HeadingUp.png|link=#stepLayers|alt=Heading|To Heading]]</td> |
| <td width=75> </td> | | <td width=75> </td> <!-- for Next Down --> |
| <td width=75> </td> <!-- for Bottom --> | | <td width=75> </td> <!-- for Bottom --> |
| </tr> | | </tr> |
| Line 6,864: |
Line 7,115: |
| <tr valign="top"> | | <tr valign="top"> |
| <td width=10>[[image:BlueDot10x10.png|link=]]</td> | | <td width=10>[[image:BlueDot10x10.png|link=]]</td> |
| <td>The '''Color Effect Layer''' is only available to '''Trainz Plus''' subscribers</td> | | <td>Use the <span style="font-weight: 700; font-size: 15px; color: white; background-color: #797979;"> Info Palette </span> to move objects to another layer.</td> |
| </tr> | |
| <tr valign="top">
| |
| <td width=10>[[image:BlueDot10x10.png|link=]]</td> | |
| <td>It can only be used in routes built with '''HD Resolution'''</td>
| |
| </tr> | | </tr> |
| </table> | | </table> |
| <br>
| | |
| <table width=1000> | | <table cellpadding=2 bgcolor=#ffffff width=1000> |
| <tr valign="top"> | | <tr valign="top"> |
| <td>You can only have one '''Color Effect Layer''' but through the <span style="font-weight: 700; font-size: 15px; color: white; background-color: #797979;"> Tool Options Palette </span> it can be given different colours in different locations.</td> | | <td colspan=2>The <span style="font-weight: 700; font-size: 15px; color: white; background-color: #797979;"> Info Palette </span> will show the layer assigned to the currently selected object. An object is selected by using the [[image:S20_FreeMoveToolIcon.png|link=|20px]] '''Free Move Tool''' (the <span style="font-weight:700; font-size: 17px; color: white; background-color: black;"> S </span> key) or the [[image:S20_FineAdjustmentToolIcon.png|link=|20px]] '''Fine Adjustment Tool''' (the <span style="font-weight:700; font-size: 17px; color: white; background-color: black;"> D </span> key) found in the <span style="font-weight: 700; font-size: 15px; color: white; background-color: #797979;"> Tools Palette </span>.<br> |
| | </td> |
| </tr> | | </tr> |
| </table>
| |
| <br>
| |
| <table width=1000 cellpadding=2>
| |
| <tr valign="top"> | | <tr valign="top"> |
| <td width=570>[[image:EditEffectLayerColor_S20.png|link=]] | | <td width=400> |
| <br> | | [[image:TrackmarkInfo_S20.png|link=|alt=Info palette]]<br><br> |
| <table bgcolor=#000000 cellpadding=2> | | [[image:TrackmarkLayerInfo_S20.png|link=|alt=Layer control]] |
| | </td> |
| | <td> |
| | <table width=600 bgcolor=#000000 cellpadding=2> |
| <tr valign="top"> | | <tr valign="top"> |
| <td> | | <td> |
| <table bgcolor=#ffffb0 cellpadding=2> | | <table width=596 bgcolor=#ffffff cellpadding=2> |
| | <tr valign="top"> |
| | <td colspan=2><span style="font-weight: 700; font-size: 15px;">Steps: To Assign a Selected Object to a Layer:-</span></td> |
| | </tr> |
| <tr valign="top"> | | <tr valign="top"> |
| <td width=25>[[image:NotePad.PNG|link=]]</td> | | <td width=20>[[image:DotPoint1.JPG|link=]]</td> |
| <td width=975><span style="font-size: 17px; font-weight: 700;">Notes:'''</span><br> | | <td>Switch to the <span style="font-weight: 700; font-size: 15px; color: white; background-color: #797979;"> Info Palette </span>. If this palette is not visible then refer to [[image:PageLink.PNG|link=]] '''[[#Hiding and Showing Palettes and Windows|Hiding and Showing Palettes and Windows]]''' at the top of this document</td> |
| ----
| |
| </td> | |
| </tr> | | </tr> |
| <tr valign="top"> | | <tr valign="top"> |
| <td width=10>[[image:DotPoint.JPG|10px|link=]]</td> | | <td>[[image:DotPoint2.JPG|link=]]</td> |
| <td>The <span style="font-weight: 700; font-size: 15px; color: white; background-color: black;"> Default Value </span> '''RGB''' colours will set the initial colour used and the colour that will be set if the '''Reset''' button is clicked in the <span style="font-weight: 700; font-size: 15px; color: white; background-color: #797979;"> Tool Options Palette </span> while painting a colour. Enter the '''RGB''' colour values ('''0.000''' to '''1.000''') for the required colour</td> | | <td><span style="font-weight: 700; font-size: 15px; background-color: lightcyan;"> Left Click </span> on the small arrowhead next to the layer name. This will open the layer properties for the selected object</td> |
| </tr> | | </tr> |
| <tr valign="top"> | | <tr valign="top"> |
| <td>[[image:DotPoint.JPG|10px|link=]]</td> | | <td>[[image:DotPoint3.JPG|link=]]</td> |
| <td>The '''Color Effect Layer''' can be created in a route that uses '''5m Resolution''' or '''10m Resolution''' but it will only appear if the entire route is converted to '''HD Resolution'''. See [[image:PageLink.PNG|link=]] '''[[#stepUpgrading|Converting to HD]]'''</td> | | <td><span style="font-weight: 700; font-size: 15px; background-color: lightcyan;"> Left Click </span> the '''Layer''' drop down box to select a new layer for the object |
| | <table bgcolor=#fcbcbc cellpadding=2> |
| | <tr valign="top"> |
| | <td>[[image:Stop.PNG|link=]]</td> |
| | <td><span style="font-size: 15px; font-weight: 700;">Warning:</span> You cannot move '''Track Objects''' (signals, switches, buffers, track signs, etc) into a layer that is '''above''' the layer that contains the track</td> |
| </tr> | | </tr> |
| </table> | | </table> |
| </td> | | </td> |
| </tr> | | </tr> |
| </table>
| |
| </td>
| |
| <td>
| |
| <table bgcolor=#ff0000 cellpadding=2>
| |
| <tr valign="top"> | | <tr valign="top"> |
| <td>
| | <td>[[image:DotPoint4.JPG|link=]]</td> |
| <table width=430 bgcolor=#fcbcbc cellpadding=2>
| | <td>if required, <span style="font-weight: 700; font-size: 15px; background-color: lightcyan;"> Left Click </span> the '''Binding''' drop down box to select a new binding layer for the object. See the section [[image:PageLink.PNG|link=]] '''[[#Assigning Objects to a Binding Layer|Assigning Objects to a Binding Layer]]''' for more information on '''Binding''' objects to layers</td> |
| <tr valign="top">
| |
| <td>[[image:Stop.PNG|link=]]</td> | |
| <td><span style="font-size: 17px; font-weight: 700;">WARNING:</span><br> | |
| <span style="font-weight: 700; font-size: 15px;">Always edit these values with caution</span><br>
| |
| <table>
| |
| <tr valign="top">
| |
| <td width=10>[[image:DotPoint.JPG|10px|link=]]</td>
| |
| <td>only one color effect layer can be added to a Route</td>
| |
| </tr> | | </tr> |
| <tr valign="top"> | | <tr valign="top"> |
| <td>[[image:DotPoint.JPG|10px|link=]]</td> | | <td>[[image:DotPoint5.JPG|link=]]</td> |
| <td>the color effect layer only works when using '''HD''' resolution</td> | | <td>if required, <span style="font-weight: 700; font-size: 15px; background-color: lightcyan;"> Left Click </span> the <span style="font-weight: 700; font-size: 17px; color: white; background-color: black;"> Lock Layer </span> button to lock the selected layer. If the layer is already locked then this will be shown as an <span style="font-weight: 700; font-size: 17px; color: white; background-color: black;"> Unlock Layer </span> button |
| </tr> | |
| </table> | |
| </td> | | </td> |
| </tr> | | </tr> |
| Line 6,931: |
Line 7,170: |
| </table> | | </table> |
| <br> | | <br> |
| <table cellpadding=2 bgcolor="Aquamarine"> | | <table bgcolor=#000000 width=600 cellpadding=2> |
| <tr valign="top"> | | <tr valign="top"> |
| <td>[[image:LinkWiki.PNG|link=]]</td>
| |
| <td> | | <td> |
| A more detailed description of the Color Effect Layer controls can be found on the '''Trainz Wiki''' at:-<br>
| | <table bgcolor=#ffffe0 width=596 cellpadding=2> |
| :'''[[Color_effect_layer]]'''
| |
| </td>
| |
| </tr>
| |
| </table>
| |
| <br>
| |
| <table bgcolor=#000000 cellpadding=2> | |
| <tr valign="top"> | | <tr valign="top"> |
| <td> | | <td>[[image:PencilTips.PNG|link=]]</td> |
| <table bgcolor=#ffffe0 cellpadding=2>
| | <td>Multiple objects from the same layer can be selected and assigned to another layer</td> |
| <tr valign="top">
| |
| <td width=25>[[image:PencilTips.PNG|link=]]</td>
| |
| <td>The best way to learn how to create and edit an effect layer is to set up a single baseboard and experiment with the various options and controls. If your experiments create an effect layer that you like then save it as a '''Preset''' so that it can be used in another route.</td> | |
| </tr> | | </tr> |
| </table> | | </table> |
| Line 6,957: |
Line 7,186: |
| </table> | | </table> |
| <br> | | <br> |
| <!-- Placement Section -->
| |
| <table width=1000> <!-- BEGIN Nav Buttons Table --> | | <table width=1000> <!-- BEGIN Nav Buttons Table --> |
| <tr valign="top"> | | <tr valign="top"> |
| <td width=629><span id="stepPlacement"></span> | | <td width=629><span id="stepScrapbook"></span> |
| ='''The Placement Tool'''= | | ='''The Scrapbook Palette'''= |
| </td> | | </td> |
| <td width=50>[[image:SkipDown.png|link=#skip Placement: Setting an Objects Layer|Skip Down]]</td> | | <td width=50>[[image:SkipDown.png|link=#skip Creating a New Scrapbook|Skip Down]]</td> |
| <td width=50>[[image:SkipUp.png|link=#skip Edit Effect|Skip Up]]</td> | | <td width=50>[[image:SkipUp.png|link=#skip Move an Object to Another Layer|Skip Up]]</td> |
| <td width=46>[[image:BackToTop.png|link=#top|alt=Top|Top]]</td> | | <td width=46>[[image:BackToTop.png|link=#top|alt=Top|Top]]</td> |
| <td width=75>[[image:NextUp.png|link=#stepBrush|alt=Next Up|Top]]</td> | | <td width=75>[[image:NextUp.png|link=#stepLayers|alt=Next Up|Next Up]]</td> |
| <td width=75>[[image:NextDown.png|link=#stepEyedropper|alt=Next Down|Next Down]]</td> | | <td width=75>[[image:NextDown.png|link=#stepPreview|alt=Next Down|Next Down]]</td> |
| <td width=75>[[image:BackToBottom.png|link=#bottom|alt=Bottom|Bottom]]</td> | | <td width=75>[[image:BackToBottom.png|link=#bottom|alt=Bottom|Bottom]]</td> |
| </tr> | | </tr> |
| </table> <!-- END Nav Buttons Table --> | | </table> <!-- END Nav Buttons Table --> |
|
| |
|
| <table width=1000> | | <table width=1000 bgcolor=#ffffb0 cellpadding=2> |
| <tr valign="top"> | | <tr valign="top"> |
| <td> | | <td><span style="font-weight: 700; font-size: 15px;">This is a <span style="color: white; background-color: blue;"> Surveyor Only </span> palette</span></td> |
| <table width=214 bgcolor=#000000 cellpadding=2>
| |
| <tr valign="top">
| |
| <td>
| |
| <table width=210 bgcolor=#ffffff cellpadding=2>
| |
| <tr valign="top">
| |
| <td width=40>[[image:S20_PlacementToolIcon.png|link=]]</td>
| |
| <td width=170>'''Keyboard Shortcut:''' <span style="color: white; background-color: black; font-weight: 700; font-size: 17px;"> E </span></td>
| |
| </tr>
| |
| </table>
| |
| </td>
| |
| </tr>
| |
| </table>
| |
| </td>
| |
| <td width=786 bgcolor="lightcyan"><span style="font-weight: 700; font-size: 15px;">The <span style="color: white; background-color: black;"> Placement Tool </span> adds selected assets to a '''Trainz World'''</span></td>
| |
| </tr> | | </tr> |
| </table> | | </table> |
| Line 6,998: |
Line 7,212: |
| <tr valign="middle"> | | <tr valign="middle"> |
| <td width=45>[[image:PalettesIcon_S20.png|link=]]</td> | | <td width=45>[[image:PalettesIcon_S20.png|link=]]</td> |
| <td>Various function of this tool use the <span style="font-weight: 700; font-size: 15px; color: white; background-color: #797979;"> Tool Options Palette </span> <span style="font-weight: 700; font-size: 15px; color: white; background-color: #797979;"> Layers Palette </span> <span style="font-weight: 700; font-size: 15px; color: white; background-color: #797979;"> Info Palette </span> <span style="font-weight: 700; font-size: 15px; color: white; background-color: #797979;"> Filter Palette </span> and the <span style="font-weight: 700; font-size: 15px; color: white; background-color: #797979;"> Assets Palette </span>. If these palettes are not visible on the screen when required then refer to [[image:PageLink.PNG|link=]] '''[[#Notes_Palettes|Notes: Palettes]]''' at the top of this document.</td> | | <td>If the <span style="font-weight: 700; font-size: 15px; color: white; background-color: #797979;"> Scrapbook Palette </span> is not visible on the screen then refer to [[image:PageLink.PNG|link=]] '''[[#Hiding and Showing Palettes and Windows|Hiding and Showing Palettes and Windows]]''' at the top of this document. Some <span style="font-weight: 700; font-size: 15px; color: white; background-color: #797979;"> Scrapbook Palette </span> functions will also require the <span style="font-weight: 700; font-size: 15px; color: white; background-color: #797979;"> Tool Options Palette </span>. |
| | </td> |
| </tr> | | </tr> |
| </table> | | </table> |
| Line 7,005: |
Line 7,220: |
| </table> | | </table> |
| <br> | | <br> |
| <table width=1000 bgcolor=#000000 cellpadding=2> | | <table width=1000 bgcolor="lightcyan" cellpadding=2> |
| | <tr valign="top"> |
| | <td width=10>[[image:BlueDot10x10.png|link=]]</td> |
| | <td>This palette manages the '''Scrapbooks''' that you have created yourself, installed from other sources (such as the '''DLS''') or came installed with Trainz. It also controls which parts of a scrapbook are pasted or painted into the '''Trainz World'''. |
| | </td> |
| | </tr> |
| | </table> |
| | |
| | <table width=1000> |
| <tr valign="top"> | | <tr valign="top"> |
| <td> | | <td> |
| <table width=996 bgcolor=#ffffff cellpadding=2> | | <table width=500 bgcolor=#000000 cellpadding=2> |
| <tr valign="top"> | | <tr valign="top"> |
| <td width=200>[[image:PlacementTools_S20.png|link=|alt=Placement Tools]]</td>
| |
| <td> | | <td> |
| <table width=800 cellpadding=2> | | <table width=496 bgcolor=#ffffb0 cellpadding=2> |
| | <tr valign="top"> |
| | <td width=25>[[image:NotePad.PNG|link=]]</td> |
| | <td><span style="font-size: 17px; font-weight: 700;">Notes:'''</span><br> |
| | ----</td> |
| | </tr> |
| | <tr> |
| | <td colspan=2>'''Scrapbooks''', when created, will contain:-</td> |
| | </tr> |
| <tr valign="top"> | | <tr valign="top"> |
| <td bgcolor=#ffffb0><span style="font-weight: 700; font-size: 15px; color: white; background-color: black;"> Tool Targets </span> The '''Placement Tool''' has no '''Target''' options so it has no drop down menu list</td> | | <td>[[image:DotPoint.JPG|10px|link=]]</td> |
| | <td>'''Ground Heights'''</td> |
| </tr> | | </tr> |
| <tr valign="top"> | | <tr valign="top"> |
| <td> | | <td>[[image:DotPoint.JPG|10px|link=]]</td> |
| <table> | | <td>'''Ground Textures'''</td> |
| | </tr> |
| <tr valign="top"> | | <tr valign="top"> |
| <td width=10>[[image:DotPoint.JPG|10px|link=]]</td> | | <td>[[image:DotPoint.JPG|10px|link=]]</td> |
| <td>When selected, this tool has a distinctive pointer icon which makes it easy to identify that the '''Placement Tool''' is active [[image:PlacementToolPointer_S20.png|link=]]</td> | | <td>'''Effect Layers''' - if present</td> |
| </tr> | | </tr> |
| <tr valign="top"> | | <tr valign="top"> |
| <td>[[image:DotPoint.JPG|10px|link=]]</td> | | <td>[[image:DotPoint.JPG|10px|link=]]</td> |
| <td>Selecting an asset in the <span style="font-weight: 700; font-size: 15px; color: white; background-color: #797979;"> Assets Palette </span> or an effect layer in the <span style="font-weight: 700; font-size: 15px; color: white; background-color: #797979;"> Layers Palette </span> will automatically activate the '''Placement Tool'''</td> | | <td>'''Selected Objects''' - scenery, splines, track, signals, etc</td> |
| </tr> | | </tr> |
| </table> | | <tr valign="top"> |
| </td> | | <td>[[image:DotPoint.JPG|10px|link=]]</td> |
| | <td><span style="font-weight: 700; font-size: 15px;">But <span style="background-color: yellow;"> <span style="text-decoration: underline;">NOT</span> Rolling Stock (Trains) </span></span></td> |
| </tr> | | </tr> |
| <tr valign="top"> | | <tr valign="top"> |
| <td bgcolor=#ffffb0><span style="font-weight: 700; font-size: 15px; color: white; background-color: black;"> Tool Actions </span> The '''Placement Tool''' has no '''Action''' options so it has no drop down menu list</td> | | <td colspan=2>Ground heights, textures and effect layers are always included in a scrapbook but you can control which scenery objects are added by manually selecting them or using the filter controls in the <span style="font-weight: 700; font-size: 15px; color: white; background-color: #797979;"> Assets Palette </span></td> |
| </tr> | | </tr> |
| </table> | | </table> |
| Line 7,038: |
Line 7,271: |
| </table> | | </table> |
| </td> | | </td> |
| </tr> | | <td> |
| </table>
| | <table width=500 bgcolor=#000000 cellpadding=2> |
| <br>
| |
| <table bgcolor=#000000 width=1000 cellpadding=2> | |
| <tr valign="top"> | | <tr valign="top"> |
| <td> | | <td> |
| <table bgcolor=#ffffe0 width=996 cellpadding=2> | | <table width=496 bgcolor=#ffffb0 cellpadding=2> |
| <tr valign="top"> | | <tr valign="top"> |
| <td width=25>[[image:PencilTips.PNG|link=]]</td> | | <td width=25>[[image:NotePad.PNG|link=]]</td> |
| <td><span style="font-weight: 700; font-size: 15px;">More Placement Options</span></td> | | <td><span style="font-size: 17px; font-weight: 700;">Notes:'''</span><br> |
| | ----</td> |
| | </tr> |
| | <tr> |
| | <td colspan=2> |
| | '''Scrapbooks''', when painted or pasted, can contain any combinations of:-</td> |
| </tr> | | </tr> |
| <tr valign="top"> | | <tr valign="top"> |
| <td colspan=2>After an object has been placed in a route its position and/or height can be changed by choosing one of the following:-</td> | | <td width=10>[[image:DotPoint.JPG|10px|link=]]</td> |
| | <td>'''Ground Heights'''</td> |
| </tr> | | </tr> |
| <tr> | | <tr valign="top"> |
| <td colspan=2><span style="font-weight: 700; font-size: 15px;">Options:</span> </td> | | <td>[[image:DotPoint.JPG|10px|link=]]</td> |
| | <td>'''Ground Textures'''</td> |
| </tr> | | </tr> |
| <tr valign="top"> | | <tr valign="top"> |
| <td width=25>[[image:Ablue.png|link=]]</td> | | <td>[[image:DotPoint.JPG|10px|link=]]</td> |
| <td>using the [[image:S20_FreeMoveToolIcon.png|link=|20px]] '''[[#The Free Move Tool|Free Move Tool]]''' <span style="font-weight: 700; font-size: 15px;">OR</span></td> | | <td>'''Effect Layers'''</td> |
| </tr> | | </tr> |
| <tr valign="top"> | | <tr valign="top"> |
| <td>[[image:Bblue.png|link=]]</td> | | <td>[[image:DotPoint.JPG|10px|link=]]</td> |
| <td>using the [[image:S20_FineAdjustmentToolIcon.png|link=|20px]] '''[[#The Fine Adjustment Tool|Fine Adjustment Tool]]''' <span style="font-weight: 700; font-size: 15px;">OR</span></td> | | <td>'''Scenery Objects (Meshes)''' - individual buildings, trees, signals, etc</td> |
| </tr> | | </tr> |
| <tr valign="top"> | | <tr valign="top"> |
| <td>[[image:Cblue.png|link=]]</td> | | <td>[[image:DotPoint.JPG|10px|link=]]</td> |
| <td>editing its <span style="font-size: 15px; font-weight: 700; color: white; background-color: black;"> x: </span> <span style="font-size: 15px; font-weight: 700; color: white; background-color: black;"> y: </span> <span style="font-size: 15px; font-weight: 700; color: white; background-color: black;"> z: </span> settings in [[image:PageLink.PNG|link=]] '''[[#The Info Palette|The Info Palette]]''' <span style="font-weight: 700; font-size: 15px;">OR</span></td> | | <td>'''Scenery Splines''' - roads, track, fences, etc</td> |
| </tr> | | </tr> |
| <tr valign="top"> | | <tr valign="top"> |
| <td>[[image:Dblue.png|link=]]</td> | | <td colspan=2>You have options that will control which of these data categories are transferred and how they are transferred from the scrapbook into the '''Trainz World'''.</td> |
| <td>selecting the <span style="font-size: 15px; font-weight: 700; color: white; background-color: black;"> Apply Height </span> option in its '''Context Menu'''. This will apply the <span style="font-weight: 700; font-size: 15px; color: gold; background-color: black;"> Height </span> value stored in the <span style="font-weight: 700; font-size: 15px; color: white; background-color: #797979;"> Tool Options Palette </span> to the object</td>
| | </tr> |
| | </table> |
| | </td> |
| </tr> | | </tr> |
| </table> | | </table> |
| Line 7,076: |
Line 7,316: |
| </table> | | </table> |
| <br> | | <br> |
| <table width=1000> <!-- BEGIN Nav Buttons Table SKIPS NO SECTIONS --> | | |
| | <table width=1000> |
| | <tr valign="top"> |
| | <td> |
| | <table width=600> |
| <tr valign="top"> | | <tr valign="top"> |
| <td width=629><span id="skip Placement: Setting an Objects Layer"></span> | | <td>[[image:ScrapbookToolsTop_S20.png|link=]]</td> |
| =='''Placement: Setting an Objects Name and Layer'''==
| |
| </td>
| |
| <td width=50>[[image:SkipDown.png|link=#skip Placement: Scenery Mesh Objects|Skip Down]]</td> <!-- skip Down -->
| |
| <td width=50>[[image:SkipUp.png|link=#stepPlacement|Skip Up]]</td> <!-- skip Up -->
| |
| <td width=46>[[image:SkipMinorDown.png|link=#PT: Set Layer|Down]][[image:SkipMinorBlank.png|link=]]</td> <!-- Top -->
| |
| <td width=75> </td>
| |
| <td width=75> </td> <!-- Next Down -->
| |
| <td width=75> </td> <!-- Bottom -->
| |
| </tr> | | </tr> |
| </table> <!-- END Nav Buttons Table --> | | </table> |
| | | <table width=900 bgcolor=#000000 cellpadding=2> |
| <table width=1000 bgcolor=#000000 cellpadding=2> | |
| <tr valign="top"> | | <tr valign="top"> |
| <td> | | <td> |
| <table width=996 bgcolor=#ffffff cellpadding=2> | | <table width=896 bgcolor=#ffffff cellpadding=2> |
| | <tr valign="top"> |
| | <td>[[image:ScrapbookPinnedIcon_S20.png|link=]][[image:ScrapbookUnPinnedIcon_S20.png|link=]]</td> |
| | <td><span style="font-weight: 700; font-size: 15px; background-color: lightcyan;"> Left Click </span> on the pin icon to Lock (blue pin) and Unlock (white pin) the scrapbook. Locked scrapbooks are permanent (but can still be deleted). Unlocked scrapbooks will "expire" (self delete) after 5 days</td> |
| | </tr> |
| | <tr valign="top"> |
| | <td>[[image:DeleteIcon_S20.png|link=]]</td> |
| | <td><span style="font-weight: 700; font-size: 15px; background-color: lightcyan;"> Left Click </span> on the delete icon to delete the current scrapbook - most scrapbooks can be deleted (see '''Notes: Deleting Built-in Scrapbooks''' below on how to deal with the exceptions to this)<br> |
| | <table bgcolor=#ffffb0 cellpadding=2> |
| <tr valign="top"> | | <tr valign="top"> |
| <td colspan=2>
| | <td width=25>[[image:NotePad.PNG|link=]]</td> |
| <table>
| | <td>Deleting a scrapbook '''WILL NOT''' delete any objects that it has painted or pasted into the route. The scrapbook simply identifies the objects, it has no control over them after they have been added to the route.</td> |
| <tr valign="middle">
| |
| <td width=35>[[image:Information.png|35px|link=]]</td> | |
| <td>All scenery objects can be given names and can be assigned to layers</td> | |
| </tr> | | </tr> |
| </table> | | </table> |
| Line 7,105: |
Line 7,345: |
| </tr> | | </tr> |
| <tr valign="top"> | | <tr valign="top"> |
| <td width=10>[[image:DotPoint.JPG|10px|link=]]</td> | | <td>[[image:ScrapbookThumbnail_S20.png|link=]]</td> |
| <td>For some objects a name is needed for the operation of a '''Session''' but for most objects a name is optional.</td> | | <td>The thumbnail of the currently displayed scrapbook and the one that will be painted or pasted into the '''Trainz World'''</td> |
| | </tr> |
| | <tr valign="top"> |
| | <td>[[image:ScrapbookCounter_S20.png|link=]]</td> |
| | <td>Identifies the currently displayed scrapbook (the first number) and the total number of stored scrapbooks (the second number)</td> |
| | </tr> |
| | <tr valign="top"> |
| | <td>[[image:ScrapbookLeftRight_S20.png|link=]]</td> |
| | <td><span style="font-weight: 700; font-size: 15px; background-color: lightcyan;"> Left Click </span> on the <span style="font-weight: 700; font-size: 15px; color: white; background-color: black;"> < </span> or <span style="font-weight: 700; font-size: 15px; color: white; background-color: black;"> > </span> to move forwards or backwards through the stored scrapbooks to select the scrapbook that will be added to the '''Trainz World'''</td> |
| </tr> | | </tr> |
| <tr valign="top"> | | <tr valign="top"> |
| <td>[[image:DotPoint.JPG|10px|link=]]</td> | | <td> </td> |
| <td>At the very basic level the layer assigned to an object will decide whether it is saved as part of the '''Route''' or as part of a '''Session'''.</td> | | <td>The scrapbook name can be edited. Simply <span style="font-weight: 700; font-size: 15px; background-color: lightcyan;"> Left Click </span> inside the name box to edit or replace the current name then <span style="font-weight: 700; font-size: 15px; background-color: lightcyan;"> Left Click </span> on the image <span style="font-weight: 700; font-size: 15px;">OR</span> press the <span style="font-weight: 700; font-size: 15px; color: white; background-color: black;"> Enter </span> key</td> |
| | </tr> |
| | </table> |
| | </td> |
| </tr> | | </tr> |
| </table> | | </table> |
| Line 7,117: |
Line 7,368: |
| </table> | | </table> |
| <br> | | <br> |
| <table width=1000> <!-- BEGIN Section Nav Buttons --> | | <table bgcolor=#000000 width=900 cellpadding=2> |
| <tr valign="top"> | | <tr valign="top"> |
| <td width=629><span id="PT: Set Name"></span> | | <td> |
| ===<span style="font-weight: 700; font-size: 17px; color: white; background-color: blue;"> Setting an Objects Name </span>===
| | <table bgcolor=#ffffb0 width=896 cellpadding=2> |
| </td>
| |
| <td width=50> </td>
| |
| <td width=50> </td>
| |
| <td width=46>[[image:SkipMinorDown.png|link=#PT: Set Layer|Down]][[image:SkipMinorBlank.png|link=]]</td> <!-- for Top and Minor Up/Down -->
| |
| <td width=75> </td>
| |
| <td width=75> </td>
| |
| <td width=75> </td> <!-- for Bottom -->
| |
| </tr>
| |
| </table> <!-- END Section Nav Buttons -->
| |
| | |
| <table width=1000 bgcolor="lightcyan" cellpadding=2>
| |
| <tr valign="top"> | | <tr valign="top"> |
| <td width=10>[[image:BlueDot10x10.png|link=]]</td> | | <td> |
| <td>Object names are optional but for some objects they are essential for running a session</td>
| | <table> |
| </tr>
| |
| </table>
| |
| | |
| <table width=1000> | |
| <tr valign="top"> | | <tr valign="top"> |
| <td>You can give any object in your route an identifying name. In some cases a name is vital for '''AI''' and session operations, in other cases it will be needed as a display feature - for example: to be shown on a station nameboard. A name also makes it easier to search for a particular object using the '''Find Tool''' (<span style="font-weight: 700; font-size: 15px;"><span style="color: white; background-color: black;"> Ctrl </span> + <span style="color: white; background-color: black;"> F </span></span> keys). You must have an object selected before it can be named</td> | | <td width=25>[[image:NotePad.PNG|link=]]</td> |
| | <td><span style="font-size: 17px; font-weight: 700;">Notes: Deleting Built-in Scrapbooks'''</span><br> |
| | ----</td> |
| </tr> | | </tr> |
| </table>
| | <tr> |
| <br>
| | <td colspan=2>Some scrapbooks are installed with '''Trainz''' and cannot be deleted. These scrapbooks have the label '''Prefab''' at the front of their names (you may have to scroll to the front of the name to see it). While they cannot be deleted they can be "disabled" so that they won't appear as an installed scrapbook. Unlocking them will not cause them to "expire" - after 5 days they will just become locked again.</td> |
| <table width=1000 bgcolor=#000000 cellpadding=2>
| |
| <tr valign="top"> | |
| <td> | |
| <table width=996 bgcolor=#ffe89a cellpadding=2>
| |
| <tr valign="middle">
| |
| <td width=45>[[image:PalettesIcon_S20.png|link=]]</td>
| |
| <td>If the <span style="font-weight: 700; font-size: 15px; color: white; background-color: #797979;"> Info Palette </span> is not visible on the screen then refer to [[image:PageLink.PNG|link=]] '''[[#Notes_Palettes|Notes: Palettes]]''' at the top of this document.</td>
| |
| </tr> | | </tr> |
| </table> | | <tr> |
| </td> | | <td colspan=2> |
| </tr>
| | <table bgcolor=#ffffff> |
| </table>
| |
| <br>
| |
| <table width=1000> | |
| <tr valign="top"> | | <tr valign="top"> |
| <td width=225>[[image:InfoPaletteObjectName_S20.png|link=]]</td>
| | <td colspan=2><span style="font-weight: 700; font-size: 15px;">Steps: To Disable Built-in Scrapbooks:-</span></td> |
| <td>
| |
| <table bgcolor=#000000 cellpadding=2>
| |
| <tr valign="top">
| |
| <td>
| |
| <table bgcolor=#ffffff cellpadding=2>
| |
| <tr valign="top">
| |
| <td colspan=2><span style="font-weight: 700; font-size: 15px;">Steps:</span> To name (or rename) a selected object:-</td> | |
| </tr> | | </tr> |
| <tr valign="top"> | | <tr valign="top"> |
| <td colspan=2><span style="font-weight: 700; background-color: yellow;"> Note: </span> This must be performed immediately after the object has been placed while it is still highlighted (selected). If the object is not highlighted then select it with the [[image:S20_FreeMoveToolIcon.png|link=|20px]] '''[[#The Free Move Tool|Free Move Tool]]''' or the [[image:S20_FineAdjustmentToolIcon.png|link=|20px]] '''[[#The Fine Adjustment Tool|Fine Adjustment Tool]]'''.</td> | | <td width=20>[[image:DotPoint1.JPG|link=]]</td> |
| </tr>
| | <td>Open '''Content Manager''' and locate the "permanent" scrapbook or scrapbooks.<br> |
| <tr valign="top">
| | '''Search Tips:''' '''Name:''' starts with "'''Prefab'''"; '''Status:''' is '''Built-in'''; '''Type:''' is '''Misc'''</td> |
| <td width=25>[[image:DotPoint1.JPG|link=]]</td>
| |
| <td>In the <span style="font-weight: 700; font-size: 15px; color: white; background-color: #797979;"> Info Palette </span> <span style="font-weight: 700; font-size: 15px; background-color: lightcyan;"> Left Click </span> inside the '''Name''' text entry box</td>
| |
| </tr> | | </tr> |
| <tr valign="top"> | | <tr valign="top"> |
| <td>[[image:DotPoint2.JPG|link=]]</td> | | <td>[[image:DotPoint2.JPG|link=]]</td> |
| <td>Enter a name</td> | | <td>Highlight (select) the scrapbook assets individually or as a group</td> |
| </tr> | | </tr> |
| <tr valign="top"> | | <tr valign="top"> |
| <td>[[image:DotPoint3.JPG|link=]]</td> | | <td>[[image:DotPoint3.JPG|link=]]</td> |
| <td>Press the <span style="font-weight: 700; font-size: 15px; color: white; background-color: black;"> Enter </span> key</td> | | <td>Open the '''Content''' menu and select the <span style="font-weight: 700; font-size: 15px; color: white; background-color: black;"> Disable </span> option</td> |
| | </tr> |
| | </table> |
| | You can reverse this and enable any or all of these scrapbooks at any time if you need them. When enabled they will reappear in the palette</td> |
| </tr> | | </tr> |
| </table> | | </table> |
| Line 7,191: |
Line 7,413: |
| </table> | | </table> |
| <br> | | <br> |
| <table width=1000 cellpadding=2> | | <table width=1000> <!-- BEGIN Section Nav Buttons --> |
| | <tr valign="top"> |
| | <td width=629><span id="skip Creating a New Scrapbook"></span> |
| | =='''Creating a New Scrapbook'''== |
| | </td> |
| | <td width=50>[[image:SkipDown.png|link=#skip Painting or Pasting a Scrapbook|Skip Down]]</td> |
| | <td width=50>[[image:SkipUp.png|link=#stepScrapbook|Skip Up]]</td> |
| | <td width=46> </td> <!-- for Top --> |
| | <td width=75>[[image:HeadingUp.png|link=#stepScrapbook|alt=Heading|To Heading]]</td> |
| | <td width=75> </td> <!-- for Next Down --> |
| | <td width=75> </td> <!-- for Bottom --> |
| | </tr> |
| | </table> <!-- END Section Nav Buttons --> |
| | |
| | <table width=1000 bgcolor=#000000 cellpadding=2> |
| <tr valign="top"> | | <tr valign="top"> |
| <td width=420>[[image:ObjectsUsingSameName.png|link=]]</td>
| |
| <td> | | <td> |
| <table width=580 bgcolor=#000000 cellpadding=2> | | <table width=996 bgcolor=#ffffff cellpadding=2> |
| <tr valign="top"> | | <tr valign="top"> |
| <td> | | <td colspan=2>A new scrapbook can be created by either:-</td> |
| <table width=576 bgcolor=#ffffff cellpadding=2>
| |
| <tr valign="middle">
| |
| <td width=35>[[image:Information.png|35px|link=]]</td>
| |
| <td align="center"><span style="font-weight: 700; font-size: 15px;">There is no ban on two or more objects using the same name</span></td>
| |
| </tr> | | </tr> |
| </table> | | <tr> |
| </td> | | <td colspan=2><span style="font-weight: 700; font-size: 15px;">Options:</span> </td> |
| </tr> | | </tr> |
| </table>
| |
| <br>
| |
| In the image shown on the left there are 4 objects all named '''Old Orroroo Rd'''.<br>
| |
| <br>
| |
| This will not cause any problems for scenery objects apart from finding the ''exact'' one you want with the '''Find Tool''' (<span style="font-weight: 700; font-size: 15px;"><span style="color: white; background-color: black;"> Ctrl </span> + <span style="color: white; background-color: black;"> F </span></span> keys) as shown in the image on the left - Which of the 4 "Old Orroroo Rd" objects is the one that I need?<br>
| |
| <br>
| |
| <table bgcolor=#ff0000 cellpadding=2>
| |
| <tr valign="top"> | | <tr valign="top"> |
| <td> | | <td width=25>[[image:Ablue.png|link=]]</td> |
| <table bgcolor=#fcbcbc cellpadding=2>
| | <td>Individually selecting one or more objects <span style="font-weight: 700; font-size: 15px;">OR</span></td> |
| <tr valign="top">
| |
| <td>[[image:Stop.PNG|link=]]</td>
| |
| <td><span style="font-size: 15px; font-weight: 700;">WARNING:</span><br> | |
| '''Duplicate names''' will cause problems for '''Industries''' (including passenger enabled stations), '''Locomotives''', '''Track Marks''', '''Triggers''', '''Switches''', '''Signals''', etc that have to be identified to control the operation of a session.</td>
| |
| </tr> | | </tr> |
| <tr valign="top"> | | <tr valign="top"> |
| <td colspan=2 align="center"><span style="font-weight: 700; font-size: 15px;">These objects must have unique names</span></td> | | <td>[[image:Bblue.png|link=]]</td> |
| | <td>Drawing a '''Marquee Selection Area''' around one or more objects and:-'''</td> |
| </tr> | | </tr> |
| </table> | | <tr> |
| </td> | | <td colspan=2>Then choose one of the following:-</td> |
| </tr> | | </tr> |
| </table> | | <tr valign="top"> |
| </td> | | <td>[[image:Ablue.png|link=]]</td> |
| | <td>press <span style="font-weight: 700; font-size: 15px;"><span style="color: white; background-color: black;"> Ctrl </span> + <span style="color: white; background-color: black;"> C </span></span> to '''copy''' the selection to a new scrapbook <span style="font-weight: 700; font-size: 15px;">OR</span></td> |
| </tr> | | </tr> |
| </table>
| |
| <br>
| |
| <table width=1000> <!-- BEGIN Section Nav Buttons -->
| |
| <tr valign="top"> | | <tr valign="top"> |
| <td width=629><span id="PT: Set Layer"></span> | | <td>[[image:Bblue.png|link=]]</td> |
| ===<span style="font-weight: 700; font-size: 17px; color: white; background-color: blue;"> Setting an Objects Layer </span>===
| | <td>press <span style="font-weight: 700; font-size: 15px;"><span style="color: white; background-color: black;"> Ctrl </span> + <span style="color: white; background-color: black;"> X </span></span> to '''cut''' the selection to a new scrapbook - the object or objects will be removed from the '''Trainz World''' <span style="font-weight: 700; font-size: 15px;">OR</span></td> |
| </td>
| |
| <td width=50> </td>
| |
| <td width=50> </td>
| |
| <td width=46>[[image:SkipMinorDown.png|link=#skip Placement: Scenery Mesh Objects|Down]][[image:SkipMinorUp.png|link=#skip Placement: Setting an Objects Layer|Up]]</td> <!-- for Top and Minor Up/Down -->
| |
| <td width=75> </td>
| |
| <td width=75> </td>
| |
| <td width=75> </td> <!-- for Bottom --> | |
| </tr> | | </tr> |
| </table> <!-- END Section Nav Buttons -->
| |
|
| |
| <table width=1000 bgcolor="lightcyan" cellpadding=2>
| |
| <tr valign="top"> | | <tr valign="top"> |
| <td width=10>[[image:BlueDot10x10.png|link=]]</td> | | <td>[[image:Cblue.png|link=]]</td> |
| <td>All objects in the '''Trainz World''' are in layers. For '''scenery objects''' you can set and change the layers where they are placed</td> | | <td>open the [[image:SurveyorEditIcon.png|link=]] '''Surveyor Edit Menu''' and select <span style="font-weight: 700; font-size: 15px; color: white; background-color: black;"> Cut </span> or <span style="font-weight: 700; font-size: 15px; color: white; background-color: black;"> Copy </span></td> |
| </tr> | | </tr> |
| </table>
| |
|
| |
| <table width=1000 bgcolor=#000000 cellpadding=2>
| |
| <tr valign="top"> | | <tr valign="top"> |
| <td> | | <td colspan=2> |
| <table width=996 bgcolor=#ffffff cellpadding=2> | | <table bgcolor=#ffffb0 cellpadding=2> |
| <tr valign="top"> | | <tr valign="top"> |
| <td colspan=2>
| | <td width=25>[[image:NotePad.PNG|link=]]</td> |
| <table>
| | <td><span style="font-size: 17px; font-weight: 700;">Notes:'''</span><br> |
| <tr valign="middle">
| | ----</td> |
| <td width=35>[[image:Information.png|35px|link=]]</td> | |
| <td>Layers are an essential feature of '''Trainz''' for managing different objects in '''Surveyor'''. Layers can be:-</td> | |
| </tr> | |
| </table>
| |
| </td> | |
| </tr> | | </tr> |
| <tr valign="top"> | | <tr valign="top"> |
| <td width=10>[[image:DotPoint.JPG|10px|link=]]</td> | | <td width=10>[[image:DotPoint.JPG|10px|link=]]</td> |
| <td>locked to prevent the accidental deletion, movement or alteration of the objects they contain</td> | | <td>'''Rolling Stock Objects''' cannot be added to a '''Scrapbook''' but they can be saved as a '''Consist Asset''' in the <span style="font-weight: 700; font-size: 15px; color: white; background-color: #797979;"> Assets Palette </span></td> |
| </tr> | | </tr> |
| <tr valign="top"> | | <tr valign="top"> |
| <td>[[image:DotPoint.JPG|10px|link=]]</td> | | <td>[[image:DotPoint.JPG|10px|link=]]</td> |
| <td>hidden to remove their objects from view so that other nearby objects can be manipulated</td> | | <td>Regardless of how it is created, the ground height, ground textures and, if present, effect layers under the selected objects will always be added to the scrapbook.</td> |
| </tr>
| |
| <tr valign="top">
| |
| <td colspan=2>Layers can also be used in '''Driver''' to hide and reveal objects during ganeplay.<br><br>
| |
| See [[image:WikiLink.PNG|link=]] '''[[How_to_Use_Layers|How to Use Layers]]''' for detailed information on '''Layers'''</td>
| |
| </tr> | | </tr> |
| </table> | | </table> |
| Line 7,283: |
Line 7,480: |
| </tr> | | </tr> |
| </table> | | </table> |
| <br>
| | </td> |
| <table width=1000>
| |
| <tr valign="top">
| |
| <td>An object will always be placed in the currently set '''Active Layer'''. The active layer can be changed before the object has been added and objects can be moved to different layers at any time.</td>
| |
| </tr> | | </tr> |
| </table> | | </table> |
| Line 7,293: |
Line 7,487: |
| <tr valign="top"> | | <tr valign="top"> |
| <td> | | <td> |
| <table width=996 bgcolor=#ffe89a cellpadding=2> | | <table bgcolor=#ffffe0 cellpadding=2> |
| <tr valign="middle"> | | <tr valign="top"> |
| <td width=45>[[image:PalettesIcon_S20.png|link=]]</td> | | <td>[[image:PencilTips.PNG|link=]]</td> |
| <td>If the <span style="font-weight: 700; font-size: 15px; color: white; background-color: #797979;"> Layers Palette </span> and the <span style="font-weight: 700; font-size: 15px; color: white; background-color: #797979;"> Info Palette </span> are not visible on the screen then refer to [[image:PageLink.PNG|link=]] '''[[#Notes_Palettes|Notes: Palettes]]''' at the top of this document.</td> | | <td>You don't have to use the '''Marquee Tool''' to create a new '''Scrapbook'''. You can use the [[image:S20_FreeMoveToolIcon.png|link=|20px]] '''Free Move Tool''' or the [[image:S20_FineAdjustmentToolIcon.png|link=|20px]] '''Fine Adjustment Tool''' to select any number of objects and then press <span style="font-weight: 700; font-size: 15px;"><span style="color: white; background-color: black;"> Ctrl </span> + <span style="color: white; background-color: black;"> C </span></span>. The selected objects, along with the ground height, ground textures, and any effect layers that are below them, will be copied into a new '''Scrapbook'''</td> |
| </tr> | | </tr> |
| </table> | | </table> |
| Line 7,305: |
Line 7,499: |
| <table width=1000> | | <table width=1000> |
| <tr valign="top"> | | <tr valign="top"> |
| <td>[[image:LayersPalette_S20_ActiveLayer3.png|link=]]</td> | | <td colspan=2>When a new '''Scrapbook''' is created by a <span style="font-weight: 700; font-size: 15px; color: white; background-color: black;"> Cut </span> or <span style="font-weight: 700; font-size: 15px; color: white; background-color: black;"> Copy </span>, it will appear in the '''Scrapbook''' palette with some basic details.</td> |
| <td>
| |
| <table>
| |
| <tr valign="top">
| |
| <td>The '''Active Layer''' (shown left named '''route-layer PQ''') is indicated by a light grey "highlight" in the list and its name will appear in the <span style="font-weight: 700; font-size: 15px; color: white; background-color: #797979;"> Layers Palette </span> title. <span style="font-weight: 700; background-color: yellow;"> This is the layer where all objects added by the '''Placement Tool''' and the '''Scrapbook''' will be placed </span></td>
| |
| </tr> | | </tr> |
| </table>
| |
| <br>
| |
| <table bgcolor=#000000 cellpadding=2>
| |
| <tr valign="top"> | | <tr valign="top"> |
| <td> | | <td width=500>[[image:ScrapbookNew_S20.png|link=]]</td> |
| <table bgcolor=#ffffff cellpadding=2> | | <td width=500> |
| | <table width=500> |
| <tr valign="top"> | | <tr valign="top"> |
| <td colspan=2><span style="font-weight: 700; font-size: 15px;">Step:</span> To set the '''Active Layer''':-</td> | | <td colspan=2>The newly created scrapbook will be given:-</td> |
| </tr> | | </tr> |
| <tr valign="top"> | | <tr valign="top"> |
| <td width=25>[[image:DotPoint1.JPG|link=]]</td> | | <td width=10>[[image:DotPoint.JPG|10px|link=]]</td> |
| <td>In the <span style="font-weight: 700; font-size: 15px; color: white; background-color: #797979;"> Layers Palette </span> <span style="font-weight: 700; font-size: 15px; background-color: lightcyan;"> Left Click </span> on the layer name. That layer is now the '''Active Layer''' where all objects placed in the Route or Session will be added. You can change the '''Active Layer''' at any time. | | <td>a name consisting of the date and time of its creation</td> |
| <table bgcolor=#ffffb0 cellpadding=2>
| | </tr> |
| <tr valign="top"> | | <tr valign="top"> |
| <td width=25>[[image:NotePad.PNG|link=]]</td> | | <td>[[image:DotPoint.JPG|10px|link=]]</td> |
| <td>Changing the '''Active Layer''' will not change the assigned layers of any existing objects. It merely sets the default layer that will be used for new added objects</td> | | <td>a thumbnail</td> |
| </tr> | | </tr> |
| </table> | | <tr valign="top"> |
| </td>
| | <td colspan=2> |
| </tr>
| |
| </table> | |
| </td>
| |
| </tr>
| |
| </table>
| |
| <br>
| |
| <table bgcolor=#000000 cellpadding=2> | | <table bgcolor=#000000 cellpadding=2> |
| <tr valign="top"> | | <tr valign="top"> |
| <td> | | <td> |
| <table bgcolor=#ffffb0 cellpadding=2> | | <table bgcolor=#ffffe0 cellpadding=2> |
| <tr valign="top"> | | <tr valign="top"> |
| <td width=25>[[image:NotePad.PNG|link=]]</td> | | <td>[[image:PencilTips.PNG|link=]]</td> |
| <td>The '''Ground Height''', '''Ground Texture''' and '''Effect Layers''' are special. They cannot be set as the '''Active Layer''' and scenery objects and splines cannot be moved into them.</td> | | <td>The thumbnail image will be taken using the current camera '''POV''' (point of view). Move the compass position and zoom in/out to get the best possible shot of the '''Scrapbook''' objects before giving the <span style="font-weight: 700; font-size: 15px; color: white; background-color: black;"> Cut </span> or <span style="font-weight: 700; font-size: 15px; color: white; background-color: black;"> Copy </span> options |
| | </td> |
| </tr> | | </tr> |
| </table> | | </table> |
| Line 7,349: |
Line 7,532: |
| </table> | | </table> |
| </td> | | </td> |
| | </tr> |
| | <tr valign="top"> |
| | <td>[[image:DotPoint.JPG|10px|link=]]</td> |
| | <td>a scrapbook number (it will be inserted as '''№1''' scrapbook)</td> |
| | </tr> |
| | <tr valign="top"> |
| | <td>[[image:DotPoint.JPG|10px|link=]]</td> |
| | <td>an expiry date which will be set 5 days after its creation - this will countdown each day until '''0''' when the new scrapbook will be deleted</td> |
| </tr> | | </tr> |
| </table> | | </table> |
| <br>
| | </td> |
| <table width=1000 bgcolor="lightcyan" cellpadding=2>
| |
| <tr valign="top">
| |
| <td width=10>[[image:BlueDot10x10.png|link=]]</td>
| |
| <td>After an object has been placed into a layer in the '''Trainz World''' it can be moved to a different layer</td>
| |
| </tr> | | </tr> |
| </table> | | </table> |
| <br> | | <br> |
| <table width=1000> | | <table width=1000 bgcolor=#000000 cellpadding=2> |
| <tr valign="top"> | | <tr valign="top"> |
| <td colspan=2>If an object is still selected (highlighted) by the '''Placement Tool''' then you can change its assigned layer as often as you like. If it is not selected then you must first select it using either the [[image:S20_FreeMoveToolIcon.png|link=|20px]] '''[[#The Free Move Tool|Free Move Tool]]''' or the [[image:S20_FineAdjustmentToolIcon.png|link=|20px]] '''[[#The Fine Adjustment Tool|Fine Adjustment Tool]]'''.</td>
| |
| </tr>
| |
| <tr valign="top">
| |
| <td width=320>[[image:InfoLayerSetNew.png|link=]]</td>
| |
| <td> | | <td> |
| <table width=680 bgcolor=#000000 cellpadding=2> | | <table bgcolor=#ffffb0 cellpadding=2> |
| <tr valign="top"> | | <tr valign="top"> |
| <td> | | <td> |
| <table bgcolor=#ffffff cellpadding=2> | | <table> |
| <tr valign="top">
| |
| <td colspan=2><span style="font-weight: 700; font-size: 15px;">Steps:</span> To move a placed object to another layer:-</td>
| |
| </tr>
| |
| <tr valign="top">
| |
| <td width=25>[[image:DotPoint1.JPG|link=]]</td>
| |
| <td>In the <span style="font-weight: 700; font-size: 15px; color: white; background-color: #797979;"> Info Palette </span> <span style="font-weight: 700; font-size: 15px; background-color: lightcyan;"> Left Click </span> on the Layer arrowhead icon (circled in red in the image left). This will open up the layer controls for the selected object</td>
| |
| </tr>
| |
| <tr valign="top">
| |
| <td>[[image:DotPoint2.JPG|link=]]</td>
| |
| <td>the drop down menu box labelled '''Layer''' shows the currently assigned layer for that object. <span style="font-weight: 700; font-size: 15px; background-color: lightcyan;"> Left Click </span> on the '''Up/Down''' arrows to open the list of all available layers.</td>
| |
| </tr>
| |
| <tr valign="top">
| |
| <td>[[image:DotPoint3.JPG|link=]]</td>
| |
| <td>select the destination layer from the list. The object will then be moved to the selected layer - you will be given a warning if the move has failed (usually because the objects layer is locked)</td>
| |
| </tr>
| |
| <tr valign="top">
| |
| <td colspan=2>
| |
| | |
| <table bgcolor=#ffffb0 cellpadding=2>
| |
| <tr valign="top"> | | <tr valign="top"> |
| <td width=25>[[image:NotePad.PNG|link=]]</td> | | <td width=25>[[image:NotePad.PNG|link=]]</td> |
| <td><span style="font-weight: 700; font-size: 15px;">Also see:-</span> | | <td><span style="font-size: 17px; font-weight: 700;">Notes:'''</span><br> |
| <table> | | ----</td> |
| <tr valign="top">
| |
| <td>[[image:PageLink.PNG|link=]] '''[[#skip Assigning Objects to a Different Layer|Assigning Objects to a Different Layer]]''' for more details on the '''Layer Controls''' in the <span style="font-weight: 700; font-size: 15px; color: white; background-color: #797979;"> Info Palette </span></td>
| |
| </tr> | | </tr> |
| <tr valign="top"> | | <tr valign="top"> |
| <td>[[image:WikiLink.PNG|link=]] '''[[How_to_Use_Layers|How to Use Layers]]''' for detailed information on '''Layers'''</td> | | <td>[[image:DotPoint.JPG|10px|link=]]</td> |
| </tr> | | <td>'''Scrapbooks''' use very little memory so there is no real limit to how many you can store in the palette but finding the one you want will be more difficult as the list grows longer</td> |
| </table> | | </tr><tr valign="top"> |
| </td> | | <td>[[image:DotPoint.JPG|10px|link=]]</td> |
| </tr> | | <td>'''Rolling Stock Objects''' cannot be added to a '''Scrapbook''' but they can be saved as a '''Consist Asset''' in the <span style="font-weight: 700; font-size: 15px; color: white; background-color: #797979;"> Assets Palette </span></td> |
| </table> | |
| </td> | |
| </tr> | | </tr> |
| </table> | | </table> |
| Line 7,413: |
Line 7,573: |
| </table> | | </table> |
| <br> | | <br> |
| <table width=1000 bgcolor=#ff0000 cellpadding=2> | | <table width=1000 bgcolor=#000000 cellpadding=2> |
| <tr valign="top"> | | <tr valign="top"> |
| <td> | | <td> |
| <table width=996 bgcolor=#fcbcbc cellpadding=2> | | <table bgcolor=#ffffe0 cellpadding=2> |
| <tr valign="top"> | | <tr valign="top"> |
| <td>[[image:Stop.PNG|link=]]</td> | | <td>[[image:PencilTips.PNG|link=]]</td> |
| <td colspan=2><span style="font-size: 15px; font-weight: 700;">CAUTION: Take Care when assigning objects to layers</span></td> | | <td> |
| </tr> | | <table> |
| <tr valign="top"> | | <tr valign="top"> |
| <td width=10>[[image:DotPoint.JPG|10px|link=]]</td> | | <td width=10>[[image:DotPoint.JPG|10px|link=]]</td> |
| <td>Placing an object in the <span style="font-weight: 700; font-size: 15px; color: white; background-color: black;"> Route Layer Group </span> will save it in the '''Route''' and it will appear in every '''Session''' based on that '''Route'''</td> | | <td>Most scrapbooks, old and new, can be deleted at any time by a <span style="font-weight: 700; font-size: 15px; background-color: lightcyan;"> Left Click </span> on the '''Delete''' [[image:DeleteIcon_S20.png|link=]] icon. See '''Notes: Deleting Built-in Scrapbooks''' in the section above for the exceptions</td> |
| </tr> | | </tr> |
| <tr valign="top"> | | <tr valign="top"> |
| <td>[[image:DotPoint.JPG|10px|link=]]</td> | | <td>[[image:DotPoint.JPG|10px|link=]]</td> |
| <td>Placing an object in the <span style="font-weight: 700; font-size: 15px; color: white; background-color: black;"> Session Layer Group </span> will save it in the '''Session''' and it will only appear in the currently loaded '''Session'''</td> | | <td>Deleting a '''Scrapbook''' after it has been pasted does not delete the objects that it has added to the '''Trainz World'''</td> |
| </tr> | | </tr> |
| </table> | | </table> |
| Line 7,433: |
Line 7,593: |
| </tr> | | </tr> |
| </table> | | </table> |
| <br>
| |
| <table width=1000> <!-- BEGIN Section Nav Buttons -->
| |
| <tr valign="top">
| |
| <td width=629><span id="skip Placement: Scenery Mesh Objects"></span>
| |
| =='''Placement: Scenery Mesh Objects'''==
| |
| </td> | | </td> |
| <td width=50>[[image:SkipDown.png|link=#skip Placement: Spline Objects|Skip Down]]</td>
| |
| <td width=50>[[image:SkipUp.png|link=#skip Placement: Setting an Objects Layer|Skip Up]]</td>
| |
| <td width=46>[[image:SkipMinorDown.png|link=#PT: Add Mesh|Down]][[image:SkipMinorUp.png|link=#PT: Set Layer|Up]]</td> <!-- for Top and Minor Up/Down -->
| |
| <td width=75>[[image:HeadingUp.png|link=#stepPlacement|alt=Heading|To Heading]]</td>
| |
| <td width=75> </td>
| |
| <td width=75> </td> <!-- for Bottom -->
| |
| </tr> | | </tr> |
| </table> <!-- END Section Nav Buttons --> | | </table> |
| | | <br> |
| <table width=1000> | | <table width=1000> |
| <tr valign="top"> | | <tr valign="top"> |
| <td align="center">[[image:MeshObjectExamples.png|link=]]<br> | | <td width=790> |
| '''Typical Scenery Mesh Objects'''<br>
| | <table bgcolor=#000000 cellpadding=2> |
| Buildings, trees, bushes, vehicles, people, "clutter"</td>
| | <tr valign="top"> |
| | <td> |
| | <table bgcolor=#ffffff cellpadding=2> |
| | <tr valign="top"> |
| | <td colspan=2>There are two changes that can be made to the new scrapbook:-</td> |
| </tr> | | </tr> |
| </table>
| |
| <br>
| |
| <table width=1000> <!-- BEGIN Section Nav Buttons -->
| |
| <tr valign="top"> | | <tr valign="top"> |
| <td width=629><span id="PT: Add Mesh"></span> | | <td width=10>[[image:DotPoint.JPG|10px|link=]]</td> |
| ===<span style="font-weight: 700; font-size: 17px; color: white; background-color: blue;"> Placement: Add a Scenery Mesh Object </span>===
| | <td>'''Give it a name''' - <span style="font-weight: 700; font-size: 15px; background-color: lightcyan;"> Left Click </span> inside the '''Name Text Box''' and type a new name. To set its new name <span style="font-weight: 700; font-size: 15px; background-color: lightcyan;"> Left Click </span> on the image <span style="font-weight: 700; font-size: 15px;">OR</span> press the <span style="font-weight: 700; font-size: 15px; color: white; background-color: black;"> Enter </span> key</td> |
| </td> | |
| <td width=50> </td>
| |
| <td width=50> </td>
| |
| <td width=46>[[image:SkipMinorDown.png|link=#PT: Move Mesh|Down]][[image:SkipMinorUp.png|link=#skip Placement: Scenery Mesh Objects]]</td> <!-- for Top and Minor Up/Down --> | |
| <td width=75> </td>
| |
| <td width=75> </td>
| |
| <td width=75> </td> <!-- for Bottom -->
| |
| </tr> | | </tr> |
| </table> <!-- END Section Nav Buttons -->
| |
|
| |
| <table width=1000 bgcolor="lightcyan" cellpadding=2>
| |
| <tr valign="top"> | | <tr valign="top"> |
| <td width=10>[[image:BlueDot10x10.png|link=]]</td> | | <td>[[image:DotPoint.JPG|10px|link=]]</td> |
| <td>Individual "non-spline" scenery objects that are not attached to track are often referred to in '''Trainz''' terminology as <span style="font-weight: 700; font-size: 15px;">Scenery Mesh Objects</span>.</td> | | <td>'''Make it permanent''' - <span style="font-weight: 700; font-size: 15px; background-color: lightcyan;"> Left Click </span> the white '''Pin''' icon ([[image:ScrapbookUnPinnedIcon_S20.png|link=]]) to change it to blue. The scrapbook will no longer expire but it can still be deleted at any time</td> |
| </tr> | | </tr> |
| <tr valign="top"> | | <tr valign="top"> |
| <td width=10>[[image:BlueDot10x10.png|link=]]</td> | | <td colspan=2>'''Pinned''' scrapbooks are always shown with a '''blue''' pin icon [[image:ScrapbookPinnedIcon_S20.png|link=]] and the words "pinned, no expiry" displayed next to their scrapbook '''№''' |
| <td><span style="font-weight: 700; font-size: 15px;">Scenery Mesh Objects</span> include single (non-spline) scenery items such as buildings, trees, road signs, cars (non moving), people and animals</td> | | <br> |
| | <table bgcolor=#ffffe0 cellpadding=2> |
| | <tr valign="top"> |
| | <td>[[image:PencilTips.PNG|link=]]</td> |
| | <td>The '''Pinning''' of any scrapbook can be reversed so that it will expire in 5 days time. Simply <span style="font-weight: 700; font-size: 15px; background-color: lightcyan;"> Left Click </span> the '''Blue''' pin icon to change it back to '''White'''.</td> |
| | </tr> |
| | </table> |
| | </td> |
| </tr> | | </tr> |
| </table> | | </table> |
| <br>
| | </td> |
| <table width=1000 bgcolor=#000000 cellpadding=2>
| |
| <tr valign="top">
| |
| <td>
| |
| <table width=996 bgcolor=#ffe89a cellpadding=2>
| |
| <tr valign="middle">
| |
| <td width=45>[[image:PalettesIcon_S20.png|link=]]</td>
| |
| <td>If the <span style="font-weight: 700; font-size: 15px; color: white; background-color: #797979;"> Filter Palette </span> and <span style="font-weight: 700; font-size: 15px; color: white; background-color: #797979;"> Assets Palette </span> are not visible on the screen then refer to [[image:PageLink.PNG|link=]] '''[[#Notes_Palettes|Notes: Palettes]]''' at the top of this document.</td>
| |
| </tr> | | </tr> |
| </table> | | </table> |
| </td> | | </td> |
| | <td width=210>[[image:ScrapbookNewNamedPinned_S20.png|link=]]</td> |
| </tr> | | </tr> |
| </table> | | </table> |
| <br> | | <br> |
| <table width=1000> | | <table width=1000 bgcolor="lightcyan" cellpadding=2> |
| <tr valign="top"> | | <tr valign="top"> |
| <td><span style="font-weight: 700; font-size: 15px;">Steps:</span> To add a '''Scenery Mesh Object''' the first step is to identify the exact asset you want to add.</td> | | <td width=10>[[image:BlueDot10x10.png|link=]]</td> |
| | <td>Once a scrapbook has been '''Pinned''' it becomes an asset and will appear in '''Content Manager'''</td> |
| </tr> | | </tr> |
| </table> | | </table> |
| Line 7,502: |
Line 7,644: |
| <table width=1000> | | <table width=1000> |
| <tr valign="top"> | | <tr valign="top"> |
| <td width=25>[[image:DotPoint1.JPG|link=]]</td> | | <td width=570>[[image:ScrapbookEntryCM_S20.png|link=]]</td> |
| <td>In the <span style="font-weight: 700; font-size: 15px; color: white; background-color: #797979;"> Filter Palette </span> choose one of the following:- | | <td> |
| <table width=1000> | | <table width=430 bgcolor=#000000 cellpadding=2> |
| <tr>
| |
| <td><span style="font-weight: 700; font-size: 15px;">Options:</span> </td>
| |
| </tr>
| |
| <tr valign="top"> | | <tr valign="top"> |
| <td> | | <td> |
| <table width=250 bgcolor=#0000ff> | | <table width=426 bgcolor=#ffffb0 cellpadding=2> |
| <tr valign="top"> | | <tr valign="top"> |
| <td> | | <td> |
| <table width=246 bgcolor=#ffffff> | | <table> |
| <tr valign="top"> | | <tr valign="top"> |
| <td width=246 align="center"><span style="font-weight: 700; font-size: 15px; background-color: lightcyan;"> Left Click </span> on the '''Scenery Mesh''' icon<br> | | <td width=25>[[image:NotePad.PNG|link=]]</td> |
| [[image:FilterPaletteSceneryObjectsSelected_S20.png|link=]]
| | <td width=400><span style="font-size: 17px; font-weight: 700;">Notes:'''</span><br> |
| | ---- |
| | </td> |
| | </tr> |
| | </table> |
| <table> | | <table> |
| <tr valign="top" align="left"> | | <tr valign="top"> |
| <td>[[image:GroundTextureFilter_S20.png|link=]]</td> | | <td width=10>[[image:DotPoint.JPG|10px|link=]]</td> |
| <td>all ground textures</td> | | <td>If a '''Pinned''' scrapbook is deleted from the <span style="font-weight: 700; font-size: 15px; color: white; background-color: #797979;"> Scrapbook Palette </span> then it will also be deleted as an asset from '''Content Manager'''</td> |
| </tr> | | </tr> |
| <tr valign="top" align="left">
| |
| <td colspan=2>
| |
| <table bgcolor=#000000 cellpadding=2>
| |
| <tr valign="top"> | | <tr valign="top"> |
| <td> | | <td>[[image:DotPoint.JPG|10px|link=]]</td> |
| <table bgcolor=#ffffff cellpadding=2> | | <td>If a scrapbook asset is deleted (or disabled) in '''Content Manager''' then it will also be deleted from the <span style="font-weight: 700; font-size: 15px; color: white; background-color: #797979;"> Scrapbook Palette </span></td> |
| | </tr> |
| <tr valign="top"> | | <tr valign="top"> |
| <td>[[image:SceneryMeshFilter_S20.png|link=]]</td> | | <td>[[image:DotPoint.JPG|10px|link=]]</td> |
| <td>all non-spline scenery assets</td> | | <td>Deleting a scrapbook, from '''Content Manager''' or from the <span style="font-weight: 700; font-size: 15px; color: white; background-color: #797979;"> Scrapbook Palette </span>, '''WILL NOT''' delete any of its contents that have been painted or pasted in a Route or Session</td> |
| </tr> | | </tr> |
| </table> | | </table> |
| Line 7,538: |
Line 7,679: |
| </td> | | </td> |
| </tr> | | </tr> |
| <tr valign="top" align="left">
| | </table> |
| <td>[[image:ScenerySplineFilter_S20.png|link=]]</td>
| |
| <td>all spline scenery assets</td>
| |
| </tr>
| |
| <tr valign="top" align="left">
| |
| <td>[[image:TrackSplineFilter_S20.png|link=]]</td>
| |
| <td>all track spline assets</td>
| |
| </tr>
| |
| <tr valign="top" align="left">
| |
| <td>[[image:TrackMeshFilter_S20.png|link=]]</td>
| |
| <td>all track (non spline) assets (signals, etc)</td>
| |
| </tr>
| |
| <tr valign="top" align="left">
| |
| <td>[[image:TrainFilter_S20.png|link=]]</td>
| |
| <td>all rolling stock assets</td>
| |
| </tr>
| |
| <tr valign="top" align="left">
| |
| <td>[[image:PresetFilter_S20.png|link=]]</td>
| |
| <td>all '''Effect Layer''' presets</td>
| |
| </tr>
| |
| </table> | |
| </td> | | </td> |
| </tr> | | </tr> |
| </table> | | </table> |
| </td> | | <br> |
| </tr> | | The scrapbook asset can be saved as a '''CDP''' file and uploaded to the '''DLS'''.<br> |
| </table> | | <br> |
| </td> | | <table bgcolor=#000000 width=900 cellpadding=2> |
| <td width=50 align="center"><span style="font-size: 17px; font-weight: 700;">OR</span></td>
| |
| <td>
| |
| <table width=250 bgcolor=#0000ff>
| |
| <tr valign="top"> | | <tr valign="top"> |
| <td> | | <td> |
| <table width=246 bgcolor=#ffffff> | | <table bgcolor=#ffffe0 width=896 cellpadding=2> |
| <tr valign="top"> | | <tr valign="top"> |
| <td align="center"><span style="font-weight: 700; font-size: 15px; background-color: lightcyan;"> Left Click </span> the '''Content Drop Down Menu'''<br> | | <td>[[image:PencilTips.PNG|link=]]</td> |
| [[image:FilterPaletteNoIconSelected_S20.png|link=]]<br>
| | <td>You can archive your scrapbooks as '''CDP''' files to keep the number of installed scrapbooks to a minimum. If an archived scrapbook is needed then you can use the '''Import Content Files''' option in '''Content Manager''' to add it to the <span style="font-weight: 700; font-size: 15px; color: white; background-color: #797979;"> Scrapbook Palette </span>. It can be deleted from the palette later, when no longer needed.</td> |
| Then select '''Scenery Objects'''<br>
| |
| [[image:FilterSelectSceneryObject_S20.png|link=|alt=Scenery Objects]]
| |
| </td> | |
| </tr> | | </tr> |
| </table> | | </table> |
| Line 7,583: |
Line 7,698: |
| </tr> | | </tr> |
| </table> | | </table> |
| | <br> |
| | <table width=1000> <!-- BEGIN Section Nav Buttons --> |
| | <tr valign="top"> |
| | <td width=629><span id="skip Painting or Pasting a Scrapbook"></span> |
| | =='''Painting or Pasting a Scrapbook'''== |
| </td> | | </td> |
| <td width=50 align="center"><span style="font-size: 17px; font-weight: 700;">OR</span></td> | | <td width=50>[[image:SkipDown.png|link=#stepPreview|Skip Down]]</td> |
| <td> | | <td width=50>[[image:SkipUp.png|link=#skip Creating a New Scrapbook|Skip Up]]</td> |
| <table bgcolor=#000000 width=400 cellpadding=2> | | <td width=46>[[image:SkipMinorDown.png|link=#Paint Scrapbook]][[image:SkipMinorBlank.png|link=]]</td> <!-- for Top and Minor Up/Down --> |
| | <td width=75>[[image:HeadingUp.png|link=#stepScrapbook|alt=Heading|To Heading]]</td> |
| | <td width=75> </td> <!-- for Next Down --> |
| | <td width=75> </td> <!-- for Bottom --> |
| | </tr> |
| | </table> <!-- END Section Nav Buttons --> |
| | |
| | <table width=1000 bgcolor="lightcyan" cellpadding=2> |
| <tr valign="top"> | | <tr valign="top"> |
| <td> | | <td width=10>[[image:BlueDot10x10.png|link=]]</td> |
| <table bgcolor=#ffffe0 width=396 cellpadding=2>
| | <td>Scrapbooks can be '''Pasted''' into your '''Trainz World''' using the normal paste <span style="font-weight: 700; font-size: 15px;"><span style="color: white; background-color: black;"> Ctrl </span> + <span style="color: white; background-color: black;"> V </span></span> keys</td> |
| <tr valign="top">
| |
| <td colspan=2>[[image:PencilTips.PNG|link=]] <span style="font-size: 15px; font-weight: 700; color: white; background-color: blue;"> Shortcut </span><br>
| |
| <table bgcolor=#ffffff>
| |
| <tr valign="top">
| |
| <td colspan=2><span style="font-weight: 700; font-size: 15px;">Steps:</span> If you already have the same object placed in your route then:-</td>
| |
| </tr> | | </tr> |
| <tr valign="top"> | | <tr valign="top"> |
| <td width=20>[[image:DotPoint1RedC.png|link=]]</td> | | <td>[[image:BlueDot10x10.png|link=]]</td> |
| <td>move the tool pointer over the object to be selected and hold down the <span style="font-weight: 700; font-size: 15px; color: white; background-color: black;"> Alt </span> key. The object name will appear in a <span style="font-weight: 700; font-size: 15px; color: white; background-color: black;"> ToolTip </span> attached to the pointer</td> | | <td>Scrapbooks can be '''Painted''' into your '''Trainz World''' using the '''Brush Tool'''</td> |
| </tr> | | </tr> |
| <tr valign="top"> | | <tr valign="top"> |
| <td>[[image:DotPoint2RedC.png|link=]]</td> | | <td>[[image:BlueDot10x10.png|link=]]</td> |
| <td>while holding down the <span style="font-weight: 700; font-size: 15px; color: white; background-color: black;"> Alt </span> key <span style="font-weight: 700; font-size: 15px; background-color: lightcyan;"> Left Click </span> on the object. This will automatically select it in the <span style="font-weight: 700; font-size: 15px; color: white; background-color: #797979;"> Assets Palette </span> and it will also select the '''Placement Tool'''. Release the key</td> | | <td>In both cases the contents of the scrapbook that will be pasted/painted and how they will be pasted/painted are controlled by the '''Filter Settings''' in the '''Scrapbook Palette''' </td> |
| </tr> | | </tr> |
| </table> | | </table> |
| | <br> |
| | <table width=1000> <!-- BEGIN Section Nav Buttons --> |
| | <tr valign="top"> |
| | <td width=629><span id="Paint Scrapbook"></span> |
| | ==='''Painting a Scrapbook'''=== |
| </td> | | </td> |
| | <td width=50> </td> |
| | <td width=50> </td> |
| | <td width=46>[[image:SkipMinorDown.png|link=#skip Paint Clone]][[image:SkipMinorUp.png|link=#skip Painting or Pasting a Scrapbook]]</td> <!-- for Top and Minor Up/Down --> |
| | <td width=75> </td> |
| | <td width=75> </td> |
| | <td width=75> </td> <!-- for Bottom --> |
| </tr> | | </tr> |
| | </table> <!-- END Section Nav Buttons --> |
| | |
| | <table width=1000> |
| <tr valign="top"> | | <tr valign="top"> |
| <td colspan=2>Jump to '''Step''' [[image:DotPoint4.JPG|link=]] below</td> | | <td>Existing '''Scrapbooks''' can be painted into the '''Trainz World''' using the '''Brush Tool''' (see the '''Trainz Wiki''' page [[image:WikiLink.PNG|link=]] '''[[How_to_Use_S20_Tools#The Tools Palette|How to Use the Surveyor 2.0 Tools]]''').<br><br> |
| | |
| | When the '''Brush Tool''' <span style="font-weight: 700; font-size: 15px; color: white; background-color: black;"> Scrapbook Data </span> '''Target''' is selected, a second drop down box will give a choice of two brush '''Actions''' that control how the scrapbook will be applied.</td> |
| </tr> | | </tr> |
| </table> | | </table> |
| </td> | | |
| | <table width=1000> |
| | <tr valign="top"> |
| | <td colspan=2>The '''actions''' are:- </td> |
| </tr> | | </tr> |
| </table> | | <tr valign="top"> |
| </td> | | <td width=200> |
| | <table> |
| | <tr valign="top"> |
| | <td width=10>[[image:BulletTick.png|link=]]</td> |
| | <td>'''Scrapbook Brush'''</td> |
| </tr> | | </tr> |
| </table> | | <tr valign="top"> |
| </td> | | <td>[[image:BulletTick.png|link=]]</td> |
| | <td>'''Scrapbook Clone'''</td> |
| </tr> | | </tr> |
| </table> | | </table> |
| <br> | | </td> |
| <table width=1000 bgcolor=#000000 cellpadding=2> | | <td width=200>[[image:BrushToolsScrapbookOptions_S20.png|link=]]</td> |
| | <td width=600> |
| | <table width=600 bgcolor=#000000 cellpadding=2> |
| <tr valign="top"> | | <tr valign="top"> |
| <td> | | <td> |
| <table bgcolor=#ffffff cellpadding=2> | | <table width=596 bgcolor=#ffffff cellpadding=2> |
| <tr valign="top"> | | <tr valign="top"> |
| <td width=10>[[image:DotPoint.JPG|10px|link=]]</td> | | <td><span style="font-weight: 700; font-size: 17px;">Scrapbook Brush Actions:</span></td> |
| <td>In the <span style="font-weight: 700; font-size: 15px; color: white; background-color: #797979;"> Filter Palette </span> the '''Scenery Objects''' icon will be shown in blue when it is selected and the name '''Scenery Objects''' will appear in the drop down box below the icons. For more information about the <span style="font-weight: 700; font-size: 15px; color: white; background-color: #797979;"> Filter Palette </span> see the '''Trainz Wiki Page [[image:WikiLink.PNG|link=]] [[How to Use S20 Palettes#The Filter Palette|How to Use the Surveyor 2.0 Palettes - Filter Palette]]'''</td>
| |
| </tr> | | </tr> |
| <tr valign="top"> | | <tr valign="top"> |
| <td>[[image:DotPoint.JPG|10px|link=]]</td> | | <td> |
| <td>The <span style="font-weight: 700; font-size: 15px; color: white; background-color: #797979;"> Assets Palette </span> display is controlled by the selections made in the <span style="font-weight: 700; font-size: 15px; color: white; background-color: #797979;"> Filter Palette </span>. Selecting <span style="font-weight: 700; font-size: 15px; color: white; background-color: black;"> Scenery Object </span> in the <span style="font-weight: 700; font-size: 15px; color: white; background-color: #797979;"> Filter Palette </span> will produce a list of all the installed '''Scenery Objects''' in the <span style="font-weight: 700; font-size: 15px; color: white; background-color: #797979;"> Assets Palette </span>. For more information about the <span style="font-weight: 700; font-size: 15px; color: white; background-color: #797979;"> Assets Palette </span> see the '''Trainz Wiki Page [[image:WikiLink.PNG|link=]] [[How to Use S20 Palettes#The Assets Palette|How to Use the Surveyor 2.0 Palettes - Assets Palette]]'''</td>
| | <table> |
| </tr>
| |
| </table>
| |
| </td>
| |
| </tr>
| |
| </table>
| |
| <br>
| |
| <table width=1000> | |
| <tr valign="top"> | | <tr valign="top"> |
| <td width=25>[[image:DotPoint2.JPG|link=]]</td> | | <td width=150><span style="font-weight: 700; font-size: 15px; color: white; background-color: black;"> Scrapbook Brush </span></td> |
| <td>In the <span style="font-weight: 700; font-size: 15px; color: white; background-color: #797979;"> Assets Palette </span> you have the '''option''' to narrow down the filtered list. Type the assets name or part of the name into the <span style="font-weight: 700; font-size: 15px; color: white; background-color: black;"> Search </span> box. For example if you have selected '''Scenery Objects''' and want to find "wooden barns", then type "wooden barn" ('''UPPER/lower''' case does not matter) - the part names "wooden" or "barn" would also work but will produce longer lists.<br><br> | | <td>will '''resize''' the scrapbook contents to fit the <span style="font-weight: 700; font-size: 15px; color: white; background-color: #797979;"> Tool Options Palette </span> <span style="font-weight: 700; font-size: 15px; color: gold; background-color: black;"> Shape </span> and <span style="font-weight: 700; font-size: 15px; color: gold; background-color: black;"> Radius </span> settings</td> |
| This will list all the '''Scenery Objects''' containing the text "wooden barn" in their names or descriptions.</td>
| |
| </tr> | | </tr> |
| </table>
| |
|
| |
| <table width=1000>
| |
| <tr valign="top"> | | <tr valign="top"> |
| <td width=245>[[image:AssetsPaletteMeshSearchWoodenBarn_S20.png|link=]]</td> | | <td><span style="font-weight: 700; font-size: 15px; color: white; background-color: black;"> Scrapbook Clone </span></td> |
| <td><br>
| | <td>will paint the scrapbook sized according to the <span style="font-weight: 700; font-size: 15px; color: white; background-color: #797979;"> Tool Options Palette </span> <span style="font-weight: 700; font-size: 15px; color: gold; background-color: black;"> Scale </span> and <span style="font-weight: 700; font-size: 15px; color: gold; background-color: black;"> Radius </span> settings. See '''Notes''' below</td> |
| <table width=755>
| |
| <tr valign="top">
| |
| <td width=25>[[image:DotPoint3.JPG|link=]]</td>
| |
| <td>In the <span style="font-weight: 700; font-size: 15px; color: white; background-color: #797979;"> Assets Palette </span> <span style="font-weight: 700; font-size: 15px; background-color: lightcyan;"> Left Click </span> on the required item in the list. When selected the asset will be highlighted with a light grey background.</td>
| |
| </tr>
| |
| <tr valign="top">
| |
| <td colspan=2>
| |
| <table bgcolor=#000000 cellpadding=2>
| |
| <tr valign="top">
| |
| <td>
| |
| <table bgcolor=#ffffb0 cellpadding=2>
| |
| <tr valign="top">
| |
| <td width=25>[[image:NotePad.PNG|link=]]</td>
| |
| <td width=975><span style="font-size: 17px; font-weight: 700;">Notes:'''</span><br>
| |
| ----
| |
| A <span style="font-weight: 700; font-size: 15px; background-color: lightcyan;"> Left Click </span> on an asset in the <span style="font-weight: 700; font-size: 15px; color: white; background-color: #797979;"> Assets Palette </span> filtered list will automatically activate the '''Placement Tool''' so the next <span style="font-weight: 700; font-size: 15px; background-color: lightcyan;"> Left Click </span> will place that asset in your '''Trainz World'''.</td>
| |
| </tr> | | </tr> |
| </table> | | </table> |
| Line 7,678: |
Line 7,798: |
| </table> | | </table> |
| <br> | | <br> |
| <table width=1000 bgcolor=#000000 cellpadding=2> | | <table width=1000 bgcolor=#000000> |
| <tr valign="top"> | | <tr valign="top"> |
| <td> | | <td> |
| <table width=996 bgcolor=#ffffe0 cellpadding=2> | | <table width=996 bgcolor=#ffffb0> |
| | <tr valign="top"> |
| | <td width=25>[[image:NotePad.PNG|link=]]</td> |
| | <td><span style="font-size: 17px; font-weight: 700;">Notes:</span><br> |
| | ---- |
| | </td> |
| | </tr> |
| <tr valign="top"> | | <tr valign="top"> |
| <td width=25>[[image:PencilTips.PNG|link=]]</td> | | <td colspan=2><span style="font-size: 15px; font-weight: 700; color: white; background-color: black;"> Scrapbook Brush </span> will '''resize''' the scrapbook contents to fit the selected brush shape and size. |
| <td>If you are not certain that a selected asset is the right one then try the following:-<br>
| |
| <span style="font-weight: 700; font-size: 15px;">Options: </span> | |
| <table> | | <table> |
| <tr valign="top"> | | <tr valign="top"> |
| <td width=25>[[image:Ablue.png|link=]]</td> | | <td width=10>[[image:DotPoint.JPG|10px|link=]]</td> |
| <td><span style="font-weight: 700; font-size: 15px; background-color: lightcyan;">Double Left Click</span> on the name in the '''Asset List''' to bring up its image and description, <span style="font-weight: 700; font-size: 15px;">OR</span></td> | | <td>If the brush is small then the scrapbook contents will be compressed closer together</td> |
| </tr> | | </tr> |
| <tr valign="top"> | | <tr valign="top"> |
| <td>[[image:Bblue.png|link=]]</td> | | <td>[[image:DotPoint.JPG|10px|link=]]</td> |
| <td>view its rotating and resizeable 3D image in the '''Preview Palette''', <span style="font-weight: 700; font-size: 15px;">OR</span></td> | | <td>If the brush is large then the contents will be spaced further apart</td> |
| </tr> | | </tr> |
| <tr valign="top"> | | <tr valign="top"> |
| <td>[[image:Cblue.png|link=]]</td> | | <td>[[image:DotPoint.JPG|10px|link=]]</td> |
| <td>switch the asset list to '''Thumbnail View''' (<span style="font-weight: 700; font-size: 15px; background-color: lightcyan;"> Left Click </span> the [[image:AssetsPaletteListToggleViewIcon_S20.png|link=]] icon). In this view the palette is best used undocked and enlarged - see the '''Wiki Page''' at [[image:WikiLink.PNG|link=]] '''[[How_to_Use_S20_Palettes#Thumbnail View|How to Use the Surveyor 2.0 Palettes]]''' for instructions on undocking and enlarging palettes.</td> | | <td>Every <span style="font-weight: 700; font-size: 15px; background-color: lightcyan;"> Left Click </span> will paste another complete scrapbook copy</td> |
| </tr> | | </tr> |
| </table> | | <tr valign="top"> |
| </td> | | <td>[[image:DotPoint.JPG|10px|link=]]</td> |
| | <td>The <span style="font-weight: 700; font-size: 15px; color: gold; background-color: black;"> Scale </span> setting in the <span style="font-weight: 700; font-size: 15px; color: white; background-color: #797979;"> Tool Options Palette </span> is ignored.</td> |
| </tr> | | </tr> |
| </table> | | </table> |
| </td> | | </td> |
| </tr> | | </tr> |
| </table>
| |
| <br>
| |
| <table width=1000>
| |
| <tr valign="top"> | | <tr valign="top"> |
| <td width=25>[[image:DotPoint4.JPG|link=]]</td> | | <td colspan=2><span style="font-size: 15px; font-weight: 700; color: white; background-color: black;"> Scrapbook Clone </span> will paste the scrapbook sized according to the <span style="font-weight: 700; font-size: 15px; color: gold; background-color: black;"> Scale </span> setting ('''100%''' = original size) |
| <td>The final step is to place the selected asset into the route.</td> | | <table> |
| | <tr valign="top"> |
| | <td width=10>[[image:DotPoint.JPG|10px|link=]]</td> |
| | <td>If the brush is the same size as the scaled scrapbook then a single exact copy will be pasted</td> |
| </tr> | | </tr> |
| <tr valign="top"> | | <tr valign="top"> |
| <td colspan=2> | | <td>[[image:DotPoint.JPG|10px|link=]]</td> |
| <br>
| | <td>If the brush is smaller than the scaled scrapbook in size then only the central part of the scrapbook will be revealed and more will be added when the brush is moved around until the "painted" area covers the same area as the scaled scrapbook. Further painting will clone or tile the scrapbook contents</td> |
| <table>
| |
| <tr valign="top">
| |
| <td> | |
| <table width=500 bgcolor=#000000 cellpadding=2>
| |
| <tr valign="top">
| |
| <td> | |
| <table width=496 bgcolor=#ffffff cellpadding=2>
| |
| <tr valign="top">
| |
| <td colspan=2><span style="font-weight: 700; font-size: 15px;">Steps:</span></td>
| |
| </tr> | | </tr> |
| <tr valign="top"> | | <tr valign="top"> |
| <td width=20>[[image:DotPoint1RedC.png|link=]]</td> | | <td>[[image:DotPoint.JPG|10px|link=]]</td> |
| <td>In the <span style="font-weight: 700; font-size: 15px; color: white; background-color: #797979;"> Tools Palette </span> if, for some reason, the '''Placement Tool''' is not selected then <span style="font-weight: 700; font-size: 15px; background-color: lightcyan;"> Left Click </span> on its icon [[image:S20_PlacementToolIcon.png|link=|20px]] or press the <span style="color: white; background-color: black; font-weight: 700; font-size: 15px;"> E </span> key</td> | | <td>If the brush is larger than the scaled scrapbook in size then the contents will be cloned or tiled to fill the set brush radius</td> |
| </tr> | | </tr> |
| <tr valign="top"> | | <tr valign="top"> |
| <td>[[image:DotPoint2RedC.png|link=]]</td> | | <td> </td> |
| <td><span style="font-weight: 700; font-size: 15px; background-color: lightcyan;"> Left Click </span> at the spot where you want to place the asset
| | <td> |
| <br> | | <table bgcolor=#fcbcbc cellpadding=2> |
| <table bgcolor=#ffffe0 cellpadding=2> | |
| <tr valign="top"> | | <tr valign="top"> |
| <td width=25>[[image:PencilTips.PNG|link=]]</td> | | <td>[[image:Stop.PNG|link=]]</td> |
| <td>Holding down the <span style="font-weight: 700; font-size: 15px; color: white; background-color: black;"> Ctrl </span> key when you <span style="font-weight: 700; font-size: 15px; background-color: lightcyan;"> Left Click </span> at the spot will allow you to drag the object to a different position before it is released</td> | | <td><span style="font-size: 15px; font-weight: 700;">WARNING:</span><br> |
| | Take care if setting both the <span style="font-weight: 700; font-size: 15px; color: gold; background-color: black;"> Scale </span> and the <span style="font-weight: 700; font-size: 15px; color: gold; background-color: black;"> Radius </span>. Using extreme values for both, such as a very large brush radius and a very small scale value, can cause performance issues (i.e. long delays) while the program attempts to scale and clone the scrapbook contents |
| | </td> |
| </tr> | | </tr> |
| </table> | | </table> |
| Line 7,746: |
Line 7,863: |
| </table> | | </table> |
| </td> | | </td> |
| <td> | | </tr> |
| <table bgcolor=#000000 width=500 cellpadding=2> | | </table> |
| | <br> |
| | <table width=1000 bgcolor=#000000 cellpadding=2> |
| <tr valign="top"> | | <tr valign="top"> |
| <td> | | <td> |
| <table bgcolor=#ffffb0 width=496 cellpadding=2> | | <table bgcolor=#ffffe0 cellpadding=2> |
| <tr valign="top"> | | <tr valign="top"> |
| <td> | | <td>[[image:PencilTips.PNG|link=]]</td> |
| <table>
| | <td><span style="font-weight: 700; font-size: 15px;">Tool Options Palette Controls</span></td> |
| <tr valign="top">
| |
| <td width=25>[[image:NotePad.PNG|link=]]</td>
| |
| <td><span style="font-size: 17px; font-weight: 700;">Notes:</span><br> | |
| ----
| |
| </td> | |
| </tr> | | </tr> |
| </table>
| |
| <table>
| |
| <tr valign="top"> | | <tr valign="top"> |
| <td width=10>[[image:DotPoint.JPG|10px|link=]]</td> | | <td width=10>[[image:DotPoint.JPG|10px|link=]]</td> |
| <td>the '''Placement Tool''' will remain on and active until another tool has been selected. So everytime you <span style="font-weight: 700; font-size: 15px; background-color: lightcyan;"> Left Click </span> another copy of the asset (or another asset if you change your selection) will be added to the route</td> | | <td>The active scrapbook brush options for each action are shown in the <span style="font-weight: 700; font-size: 15px; color: white; background-color: #797979;"> Tool Options Palette </span> with a <span style="font-size: 15px; font-weight: 700; color: gold; background-color: black;"> Gold </span> coloured icon next to their names. Those options that have their icon greyed out will be ignored by the selected action, but they can still be edited.</td> |
| </tr> | | </tr> |
| <tr valign="top"> | | <tr valign="top"> |
| <td>[[image:DotPoint.JPG|10px|link=]]</td> | | <td width=10>[[image:DotPoint.JPG|10px|link=]]</td> |
| <td>the last object placed will be highlighted (covered in "green/yellow"). This will be the selected object if you switch control to the [[image:S20_FreeMoveToolIcon.png|link=|20px]] '''[[#The Free Move Tool|Free Move Tool]]''' or the [[image:S20_FineAdjustmentToolIcon.png|link=|20px]] '''[[#The Fine Adjustment Tool|Fine Adjustment Tool]]'''</td> | | <td>Most of the data entry boxes in the <span style="font-weight: 700; font-size: 15px; color: white; background-color: #797979;"> Tool Options Palette </span> have a '''Popup Menu''' (<span style="font-weight: 700; font-size: 15px; background-color: lightcyan;"> Right Click </span> inside the box) that can be used to collect and distribute data - see the Wiki Page [[image:WikiLink.PNG|link=]] '''[[How to Use S20 Palettes#Tool Options Popups|How to Use the Surveyor 2.0 Palettes]]''' for more details.</td> |
| </tr> | | </tr> |
| </table> | | </table> |
| Line 7,774: |
Line 7,886: |
| </tr> | | </tr> |
| </table> | | </table> |
| </td> | | <br> |
| </tr>
| | <table width=1000> <!-- BEGIN Section Nav Buttons --> |
| </table>
| |
| </td>
| |
| </tr>
| |
| </table>
| |
| </td>
| |
| </tr>
| |
| </table>
| |
| | |
| <table width=1000> <!-- BEGIN Section Nav Buttons --> | |
| <tr valign="top"> | | <tr valign="top"> |
| <td> | | <td width=629><span id="skip Paint Clone"></span> |
| ===='''Content Manager in a Palette'''==== | | ====<span style="font-weight: 700; font-size: 17px; color: white; background-color: blue;"> Using the Scrapbook Clone Brush </span>==== |
| </td> | | </td> |
| | <td width=50> </td> |
| | <td width=50> </td> |
| | <td width=46>[[image:SkipMinorDown.png|link=#skip Scrapbook Options]][[image:SkipMinorUp.png|link=#Paint Scrapbook]]</td> <!-- for Top and Minor Up/Down --> |
| | <td width=75> </td> |
| | <td width=75> </td> |
| | <td width=75> </td> <!-- for Bottom --> |
| </tr> | | </tr> |
| </table> <!-- END Section Nav Buttons --> | | </table> <!-- END Section Nav Buttons --> |
| Line 7,794: |
Line 7,903: |
| <table width=1000> | | <table width=1000> |
| <tr valign="top"> | | <tr valign="top"> |
| <td>The '''Assets Palette''' can be expanded to provide more information, like in '''Content Manager''', about each listed asset.</td> | | <td> |
| | When using the <span style="font-size: 15px; font-weight: 700; color: white; background-color: black;"> Scrapbook Clone </span> brush its <span style="font-weight: 700; font-size: 15px; color: gold; background-color: black;"> Radius </span> and <span style="font-weight: 700; font-size: 15px; color: gold; background-color: black;"> Scale </span> settings in the <span style="font-weight: 700; font-size: 15px; color: white; background-color: #797979;"> Tool Options Palette </span> are important.</td> |
| </tr> | | </tr> |
| </table> | | </table> |
| <br> | | <br> |
| <table width=1000> | | <table width=1000 bgcolor=#000000 cellpadding=2> |
| <tr valign="top">
| |
| <td width=595>[[image:AssetsPaletteListExtended_S20.png|link=]]<br><br>
| |
| <table bgcolor=#000000 cellpadding=2>
| |
| <tr valign="top"> | | <tr valign="top"> |
| <td> | | <td> |
| <table bgcolor=#ffffff cellpadding=2> | | <table bgcolor=#ffffff cellpadding=2> |
| <tr valign="top"> | | <tr valign="top"> |
| <td colspan=2><span style="font-weight: 700; font-size: 15px;">Steps:</span> To move and resize columns:-</td> | | <td><span style="font-weight: 700; font-size: 15px;">For Example:</span> Two trees as shown below are captured as a Scrapbook with a size of 2x1 baseboard squares. |
| </tr> | | <table> |
| <tr valign="top"> | | <tr valign="top"> |
| <td width=20>[[image:DotPoint1.JPG|link=]]</td> | | <td>[[image:ScrapbookCloneBrushOriginal.png|link=]]</td> |
| <td>'''To Move:''' <span style="font-weight: 700; font-size: 15px; background-color: lightcyan;">Left Click and Drag</span> the column heading left or right to a new position</td> | | <td> |
| </tr>
| | <table bgcolor=#ffffb0 cellpadding=2> |
| <tr valign="top"> | | <tr valign="top"> |
| <td width=20>[[image:DotPoint2.JPG|link=]]</td> | | <td width=25>[[image:NotePad.PNG|link=]]</td> |
| <td>'''To Resize:''' <span style="font-weight: 700; font-size: 15px; background-color: lightcyan;">Left Click and Drag</span> the dividing line between two column headings left or right to reduce or increase the column width</td> | | <td width=975><span style="font-size: 17px; font-weight: 700;">When Using the Clone Brush Remember:'''</span><br> |
| </tr>
| | ---- |
| </table>
| |
| </td> | | </td> |
| </tr> | | </tr> |
| </table>
| |
| </td>
| |
| <td width=10> </td>
| |
| <td>
| |
| <table bgcolor=#000000 cellpadding=2>
| |
| <tr valign="top"> | | <tr valign="top"> |
| <td> | | <td colspan=2> |
| <table bgcolor=#ffffff cellpadding=2> | | <table> |
| <tr valign="top"> | | <tr valign="top"> |
| <td colspan=2><span style="font-weight: 700; font-size: 15px;">Steps:</span> To sort the data in a column:-</td> | | <td width=10>[[image:DotPoint.JPG|10px|link=]]</td> |
| | <td>If the brush is the same size as the scaled scrapbook then a single exact copy will be painted</td> |
| </tr> | | </tr> |
| <tr valign="top"> | | <tr valign="top"> |
| <td width=25>[[image:DotPoint1.JPG|link=]]</td> | | <td>[[image:DotPoint.JPG|10px|link=]]</td> |
| <td>resize the '''undocked''' '''Assets Palette''' by dragging its right edge further out to the right. This will reveal additional columns of data in an identical display to what you would see in '''Content Manager'''</td> | | <td>If the brush is smaller than the scaled scrapbook then only the central part of the scrapbook will be painted and more will be added when the brush is moved around until the "painted" area covers the same area as the scaled scrapbook</td> |
| </tr> | | </tr> |
| <tr valign="top"> | | <tr valign="top"> |
| <td>[[image:DotPoint2.JPG|link=]]</td> | | <td>[[image:DotPoint.JPG|10px|link=]]</td> |
| <td>to sort the data in a column, <span style="font-weight: 700; font-size: 15px; background-color: lightcyan;">Left Click</span> on the column heading. Each <span style="font-weight: 700; font-size: 15px; background-color: lightcyan;">Left Click</span> will cycle through different sorting options</td> | | <td>If the brush is larger than the scaled scrapbook in size then the contents will be cloned or tiled to fill the set brush radius</td> |
| </tr> | | </tr> |
| </table>
| |
| </td>
| |
| </tr>
| |
| </table>
| |
| Just like in '''Content Manager''', additional columns can be added, removed, resized and moved to a different position.
| |
| <table bgcolor=#000000 cellpadding=2>
| |
| <tr valign=2>
| |
| <td>
| |
| <table bgcolor=#ffffff cellpadding=2>
| |
| <tr valign="top"> | | <tr valign="top"> |
| <td colspan=2><span style="font-weight: 700; font-size: 15px;">Steps:</span> To add new columns</td> | | <td colspan=2>In all cases continuing to sweep with the brush will clone the scrapbook into the new areas<br></td> |
| </tr> | | </tr> |
| <tr valign="top"> | | <tr valign="top"> |
| <td width=25>[[image:DotPoint1.JPG|link=]]</td> | | <td colspan=2> |
| <td><span style="font-weight: 700; font-size: 15px; background-color: lightcyan;">Right Click</span> on a column heading where you want to insert a new column<br> | | <table bgcolor=#fcbcbc cellpadding=2> |
| [[image:AssetsPaletteListAddColumn_S20.png|link=]]</td>
| |
| </tr>
| |
| <tr valign="top"> | | <tr valign="top"> |
| <td>[[image:DotPoint2.JPG|link=]]</td> | | <td>[[image:Stop.PNG|link=]]</td> |
| <td>Select the option <span style="font-weight: 700; font-size: 15px; color: white; background-color: black;"> Insert Column </span> and then select the column to be added</td> | | <td><span style="font-size: 15px; font-weight: 700;">WARNING:</span><br> |
| | Take care if setting both the <span style="font-weight: 700; font-size: 15px; color: gold; background-color: black;"> Scale </span> and the <span style="font-weight: 700; font-size: 15px; color: gold; background-color: black;"> Radius </span>. Using extreme values for both, such as a very large brush radius and a very small scale value, can cause performance issues (i.e. long delays) while the program attempts to scale and clone the scrapbook contents |
| | </td> |
| </tr> | | </tr> |
| <tr valign="top">
| | </table> |
| <td colspan=2><span style="font-weight: 700; font-size: 15px;">Steps:</span> To remove a column</td>
| | </td> |
| </tr>
| |
| <tr valign="top">
| |
| <td>[[image:DotPoint1.JPG|link=]]</td>
| |
| <td><span style="font-weight: 700; font-size: 15px; background-color: lightcyan;">Right Click</span> on the column heading and select the option <span style="font-weight: 700; font-size: 15px; color: white; background-color: black;"> Remove Column </span></td>
| |
| </tr> | | </tr> |
| </table> | | </table> |
| Line 7,874: |
Line 7,963: |
| </table> | | </table> |
| <br> | | <br> |
| <table width=1000> <!-- BEGIN Section Nav Buttons --> | | The '''Brush Tool''' target is set to '''Scrapbook Data''' and its action set to '''Scrapbook Clone'''. The effects of different <span style="font-weight: 700; font-size: 15px; color: gold; background-color: black;"> Radius </span> and <span style="font-weight: 700; font-size: 15px; color: gold; background-color: black;"> Scale </span> settings in the <span style="font-weight: 700; font-size: 15px; color: white; background-color: #797979;"> Tool Options Palette </span> are shown below. |
| | <br> |
| | <table> |
| <tr valign="top"> | | <tr valign="top"> |
| <td width=629><span id="PT: Move Mesh"></span> | | <td colspan=2>The '''Scrapbook Clone''' brush action will normally show the '''scaled size''' and '''shape''' of the scrapbook within the brush shape itself, in this case a circle.</td> |
| ===<span style="font-size: 17px; color: white; background-color: blue;"> Placement: Move a Scenery Mesh Object </span>===
| |
| </td>
| |
| <td width=50> </td>
| |
| <td width=50> </td>
| |
| <td width=46>[[image:SkipMinorDown.png|link=#PT: Delete Mesh|Down]][[image:SkipMinorUp.png|link=#PT: Add Mesh|Up]]</td> <!-- for Top and Minor Up/Down -->
| |
| <td width=75> </td>
| |
| <td width=75> </td>
| |
| <td width=75> </td> <!-- for Bottom -->
| |
| </tr> | | </tr> |
| </table> <!-- END Section Nav Buttons --> | | <tr valign="top"> |
| | | <td width=420>[[image:ScrapbookCloneBrushCircle01.png|link=]]</td> |
| <table bgcolor=#ff0000 cellpadding=2> | | <td><br> |
| | [[image:DotPoint1.JPG|link=]] When the brush radius is the same as the scaled scrapbook size then a single copy of the scrapbook will be painted into the brush.<br><br> |
| | An exception will be when the scrapbook is not square, as shown, in which case some of the scrapbook may be cloned and painted in the spaces on each side of the marked scrapbook shape but this will depend on the contents of the scrapbook. In this situation it may be better to select the <span style="font-weight: 700; font-size: 15px; color: gold; background-color: black;"> Natural </span> brush shape in the <span style="font-weight: 700; font-size: 15px; color: white; background-color: #797979;"> Tool Options Palette </span>. |
| | <table> |
| <tr valign="top"> | | <tr valign="top"> |
| <td> | | <td> |
| <table bgcolor=#fcbcbc> | | <table> |
| <tr valign="top"> | | <tr valign="top"> |
| <td colspan=2><span style="font-size: 17px; font-weight: 700;">Warning:</span></td> | | <td width=10>[[image:DotPoint.JPG|10px|link=]]</td> |
| | <td>A single <span style="font-weight: 700; font-size: 15px; background-color: lightcyan;"> Left Click </span> will paint the entire scrapbook within the brush shape.</td> |
| </tr> | | </tr> |
| <tr valign="top"> | | <tr valign="top"> |
| <td>[[image:Stop.PNG|link=]]</td> | | <td>[[image:DotPoint.JPG|10px|link=]]</td> |
| <td>To move a scenery mesh object <span style="font-weight: 700; font-size: 15px;"><span style="color: white; background-color: red;"> DO NOT </span> click on it</span> with the '''Placement Tool''' as this will just add another object</td> | | <td>A <span style="font-weight: 700; font-size: 15px; background-color: lightcyan;"> Left Click and Drag </span> will paint and clone the scrapbook as the mouse moves across the terrain.</td> |
| </tr> | | </tr> |
| </table> | | </table> |
| | </td> |
| | <td width=200>[[image:ScrapbookCloneBrushNatural01.png|link=]]<br> |
| | Using the <span style="font-weight: 700; font-size: 15px; color: gold; background-color: black;"> Natural </span> brush shape |
| </td> | | </td> |
| </tr> | | </tr> |
| </table> | | </table> |
| <br> | | </td> |
| <table width=1000 bgcolor=#000000 cellpadding=2> | | </tr> |
| <tr valign="top"> | | <tr valign="top"> |
| <td> | | <td>[[image:ScrapbookCloneBrushCircle03.png|link=]]</td> |
| <table width=996 bgcolor=#ffffe0 cellpadding=2> | | <td><br> |
| | [[image:DotPoint2.JPG|link=]] By reducing the brush radius or increasing its scale (or both) then only part of the scrapbook will fit into the brush (no scrapbook brush outline will be shown) |
| | <table> |
| | <tr valign="top"> |
| | <td width=10>[[image:DotPoint.JPG|10px|link=]]</td> |
| | <td>A single <span style="font-weight: 700; font-size: 15px; background-color: lightcyan;"> Left Click </span> will only paint the central part of the scrapbook.</td> |
| | </tr> |
| <tr valign="top"> | | <tr valign="top"> |
| <td width=25>[[image:PencilTips.PNG|link=]]</td> | | <td>[[image:DotPoint.JPG|10px|link=]]</td> |
| <td>To move scenery mesh objects you must switch to either the [[image:S20_FreeMoveToolIcon.png|link=|20px]] '''[[#The Free Move Tool|Free Move Tool]]''' <span style="font-weight: 700; font-size: 15px;">OR</span> the [[image:S20_FineAdjustmentToolIcon.png|link=|20px]] '''[[#The Fine Adjustment Tool|Fine Adjustment Tool]]'''</td> | | <td>A <span style="font-weight: 700; font-size: 15px; background-color: lightcyan;"> Left Click and Drag </span> will paint and reveal more of the scrapbook as the mouse moves across the terrain.</td> |
| </tr> | | </tr> |
| </table> | | </table> |
| </td> | | </td> |
| | </tr> |
| | <tr valign="top"> |
| | <td>[[image:ScrapbookCloneBrushCircle02.png|link=]]</td> |
| | <td><br> |
| | [[image:DotPoint3.JPG|link=]] By increasing the brush radius or reducing its scale (or both) then the scrapbook will be cloned so that several copies will be painted into the brush.<br> |
| | These are shown as additional scrapbook shapes within the brush area. |
| | <table> |
| | <tr valign="top"> |
| | <td width=10>[[image:DotPoint.JPG|10px|link=]]</td> |
| | <td>A single <span style="font-weight: 700; font-size: 15px; background-color: lightcyan;"> Left Click </span> will paint multiple copies of the scrapbook within the brush shape as shown below.</td> |
| </tr> | | </tr> |
| </table> | | </table> |
| <br> | | <br> |
| <table width=1000 bgcolor=#000000 cellpadding=2>
| | [[image:ScrapbookCloneBrushCircle02P.png|link=]]</td> |
| <tr valign="top">
| |
| <td>
| |
| <table width=996 bgcolor=#ffffff cellpadding=2>
| |
| <tr valign="top">
| |
| <td colspan=2><span style="font-weight: 700; font-size: 15px;">Steps:</span> To move a scenery mesh object</td>
| |
| </tr> | | </tr> |
| <tr valign="top"> | | <tr valign="top"> |
| <td width=20>[[image:DotPoint1.JPG|link=]]</td> | | <td>[[image:ScrapbookCloneBrushCircle04.png|link=]]</td> |
| <td>In the <span style="font-weight: 700; font-size: 15px; color: white; background-color: #797979;"> Tools Palette </span> <span style="font-weight: 700; font-size: 15px; background-color: lightcyan;"> Left Click </span> on either the [[image:S20_FreeMoveToolIcon.png|link=|20px]] '''[[#The Free Move Tool|Free Move Tool]]''' (or press the <span style="font-weight: 700; font-size: 15px; color: white; background-color: black;"> S </span> key) or the [[image:S20_FineAdjustmentToolIcon.png|link=|20px]] '''[[#The Fine Adjustment Tool|Fine Adjustment Tool]]''' (or press the <span style="font-weight: 700; font-size: 15px; color: white; background-color: black;"> D </span> key)</td> | | <td><br> |
| </tr> | | [[image:DotPoint4.JPG|link=]] By reducing the brush scale to an extreme (e.g. 1%) then the scrapbook will be cloned multiple times. |
| | <table> |
| <tr valign="top"> | | <tr valign="top"> |
| <td>[[image:DotPoint2.JPG|link=]]</td> | | <td width=10>[[image:DotPoint.JPG|10px|link=]]</td> |
| <td>Select (<span style="font-weight: 700; font-size: 15px; background-color: lightcyan;"> Left Click </span>) on the object to be moved. To select multiple objects use <span style="font-weight: 700; font-size: 15px;"><span style="color: white; background-color: black;"> Shift </span> + <span style="background-color: lightcyan;"> Left Click </span></span> on each object</td> | | <td>A single <span style="font-weight: 700; font-size: 15px; background-color: lightcyan;"> Left Click </span> will fill '''each individual''' "micro-grid" inside the brush shape (shown as a "mesh pattern" in the image) with a scaled down but complete copy of the entire scrapbook.</td> |
| </tr> | | </tr> |
| <tr valign="top"> | | </table> |
| <td>[[image:DotPoint3.JPG|link=]]</td>
| | <br> |
| <td><span style="font-weight: 700; font-size: 15px; background-color: lightcyan;"> Left Click and Drag </span> the object(s) in the required direction</td>
| | This will almost certainly cause performance issues (long delays, "freezing") as the program attempts to both scale and clone the scrapbook. The end result is shown below.<br> |
| | [[image:ScrapbookCloneBrushCircle04P.png|link=]]</td> |
| </tr> | | </tr> |
| <tr valign="top"> | | </table> |
| <td colspan=2>For more information see the sections [[image:PageLink.PNG|link=]] '''[[#Free Move: Move a Scenery Mesh Object|Free Move: Scenery Mesh Objects]]''' or [[image:PageLink.PNG|link=]] '''[[#Fine Adjustment: Move a Scenery Mesh Object|Fine Adjustment: Scenery Mesh Objects]]'''</td>
| | </td> |
| </tr> | | </tr> |
| </table> | | </table> |
| Line 7,946: |
Line 8,049: |
| <table width=1000> <!-- BEGIN Section Nav Buttons --> | | <table width=1000> <!-- BEGIN Section Nav Buttons --> |
| <tr valign="top"> | | <tr valign="top"> |
| <td width=629><span id="PT: Delete Mesh"></span> | | <td width=629><span id="skip Scrapbook Options"></span> |
| ===<span style="font-size: 17px; color: white; background-color: blue;"> Placement: Delete a Scenery Mesh Object </span>=== | | ====<span style="font-weight: 700; font-size: 17px; color: white; background-color: blue;"> Scrapbook Tool Options Settings </span>==== |
| </td> | | </td> |
| <td width=50> </td> | | <td width=50> </td> |
| <td width=50> </td> | | <td width=50> </td> |
| <td width=46>[[image:SkipMinorDown.png|link=#PT: Height Mesh|Down]][[image:SkipMinorUp.png|link=#PT: Move Mesh|Up]]</td> <!-- for Top and Minor Up/Down --> | | <td width=46>[[image:SkipMinorDown.png|link=#Pasting Scrapbook]][[image:SkipMinorUp.png|link=#skip Paint Clone]]</td> <!-- for Top and Minor Up/Down --> |
| <td width=75> </td> | | <td width=75> </td> |
| <td width=75> </td> | | <td width=75> </td> |
| Line 7,959: |
Line 8,062: |
|
| |
|
| <table width=1000> | | <table width=1000> |
| | <tr valign="top" align="center"> |
| | <td width=210><span style="font-size: 15px; font-weight: 700; color: white; background-color: black;"> Scrapbook Brush </span><br>[[image:BrushToolsScrapBrush_S20.png|link=|alt=Brush options]]</td> |
| | <td width=210><span style="font-size: 15px; font-weight: 700; color: white; background-color: black;"> Scrapbook Clone </span><br>[[image:BrushToolsScrapClone_S20.png|link=|alt=Clone options]]</td> |
| | <td width=580 rowspan=2> |
| | <br> |
| | <table bgcolor=#000000 width=580 cellpadding=2> |
| <tr valign="top"> | | <tr valign="top"> |
| <td colspan=2>To delete a scenery mesh object (or any object) that has just been added by the [[image:S20_PlacementToolIcon.png|link=|20px]] '''Placement Tool''' and is still highlighted, choose one of the following:-<br> | | <td> |
| <span style="font-weight: 700; font-size: 15px;">Options:</span></td> | | <table bgcolor=#ffffff width=576 align="left"> |
| | <tr valign="top"> |
| | <td width=90><span style="font-size: 15px; font-weight: 700; color: gold; background-color: black;"> Radius </span></td> |
| | <td width=486>the brush radius (metres) - see '''Notes:''' below</td> |
| </tr> | | </tr> |
| <tr valign="top"> | | <tr valign="top"> |
| <td width=25>[[image:Ablue.png|link=]]</td> | | <td colspan=2> |
| <td>press the <span style="font-weight: 700; font-size: 15px; color: white; background-color: black;"> Delete </span> key, <span style="font-weight: 700; font-size: 15px;">OR</span></td> | | <table bgcolor=#ffffb0> |
| | <tr valign="top"> |
| | <td width=90 align="right">'''Range:''' </td> |
| | <td width=486>'''5m''' and above for '''5m''' and '''10m''' grid resolutions<br> |
| | '''0.12m''' and above for '''HD Terrain''' (available in '''Trainz Plus''' only)</td> |
| | </tr> |
| | </table> |
| | </td> |
| </tr> | | </tr> |
| <tr valign="top"> | | <tr valign="top"> |
| <td>[[image:Bblue.png|link=]]</td> | | <td width=90><span style="font-size: 15px; font-weight: 700; color: gold; background-color: black;"> Sensitivity </span></td> |
| <td>open its '''Context Menu''' (<span style="font-weight: 700; font-size: 15px; background-color: lightcyan;"> Left Click </span> on its icon or press the <span style="font-weight: 700; font-size: 15px; color: white; background-color: black;"> T </span> key) and select the option <span style="font-weight: 700; font-size: 15px; color: white; background-color: black;"> Delete </span></td>
| | <td width=486>if the <span style="font-weight: 700; font-size: 15px; color: white; background-color: black;"> Ground Height </span> option has been enabled in the <span style="font-weight: 700; font-size: 15px; color: white; background-color: #797979;"> Scrapbook Palette </span> filter settings, then this will set the rate or speed at which the ground height will change</td> |
| </tr> | | </tr> |
| <tr valign="top"> | | <tr valign="top"> |
| <td colspan=2> | | <td colspan=2> |
| <table bgcolor=#000000 cellpadding=2> | | <table bgcolor=#ffffb0> |
| <tr valign="top"> | | <tr valign="top"> |
| <td> | | <td width=90 align="right">'''Range:''' </td> |
| <table bgcolor=#ffffb0 cellpadding=2>
| | <td width=486>'''1%''' = slowest to<br> |
| <tr valign="top">
| | '''100%''' = fastest</td> |
| <td width=25>[[image:NotePad.PNG|link=]]</td>
| |
| <td>If the object is not highlighted then you must first switch to either the [[image:S20_FreeMoveToolIcon.png|link=|20px]] '''[[#The Free Move Tool|Free Move Tool]]''' or the [[image:S20_FineAdjustmentToolIcon.png|link=|20px]] '''[[#The Fine Adjustment Tool|Fine Adjustment Tool]]''', select the object and then choose one of the above options</td> | |
| </tr> | | </tr> |
| </table> | | </table> |
| </td> | | </td> |
| </tr> | | </tr> |
| </table> | | <tr valign="top"> |
| </td> | | <td><span style="font-size: 15px; font-weight: 700; color: gold; background-color: black;"> Rotation </span></td> |
| | <td>initial rotation angle (degrees) - see '''Notes:''' below</td> |
| </tr> | | </tr> |
| </table>
| |
| <br>
| |
| <table width=1000> <!-- BEGIN Section Nav Buttons -->
| |
| <tr valign="top"> | | <tr valign="top"> |
| <td width=629><span id="PT: Height Mesh"></span> | | <td colspan=2> |
| ===<span style="font-size: 17px; color: white; background-color: blue;"> Placement: Set the Height of a Scenery Mesh Object </span>===
| | <table bgcolor=#ffffb0> |
| | <tr valign="top"> |
| | <td width=90 align="right">'''Range:''' </td> |
| | <td width=486>0° to ±360° (larger angles can be entered)</td> |
| | </tr> |
| | </table> |
| </td> | | </td> |
| <td width=50> </td>
| |
| <td width=50> </td>
| |
| <td width=46>[[image:SkipMinorDown.png|link=#PT: Context Mesh|Down]][[image:SkipMinorUp.png|link=#PT: Delete Mesh|Up]]</td> <!-- for Top and Minor Up/Down -->
| |
| <td width=75> </td>
| |
| <td width=75> </td>
| |
| <td width=75> </td> <!-- for Bottom -->
| |
| </tr> | | </tr> |
| </table> <!-- END Section Nav Buttons -->
| |
| <table width=1000 bgcolor="lightcyan" cellpadding=2>
| |
| <tr valign="top"> | | <tr valign="top"> |
| <td width=10>[[image:BlueDot10x10.png|link=]]</td> | | <td><span style="font-size: 15px; font-weight: 700; color: gold; background-color: black;"> Scale </span></td> |
| <td>An object that has just been added to a route using the '''Placement Tool''' can have its height adjusted immediately after placement</td> | | <td>the scrapbook scaling factor - see '''Notes:''' below</td> |
| </tr> | | </tr> |
| <tr valign="top"> | | <tr valign="top"> |
| <td>[[image:BlueDot10x10.png|link=]]</td> | | <td colspan=2> |
| <td>or it can be adjusted at a later time using the '''Free Move''' or '''Fine Adjustment Tools'''</td> | | <table bgcolor=#ffffb0> |
| </tr>
| |
| </table>
| |
| <br>
| |
| <table width=1000 bgcolor=#000000 cellpadding=2>
| |
| <tr valign="top"> | | <tr valign="top"> |
| <td> | | <td width=90 align="right">'''Range:''' </td> |
| <table width=996 bgcolor=#ffe89a cellpadding=2>
| | <td>'''0.01%''' = smallest to<br> |
| <tr valign="middle">
| | '''100%''' = full size to<br> |
| <td width=45>[[image:PalettesIcon_S20.png|link=]]</td>
| | '''>100%''' larger than full size</td> |
| <td>If the <span style="font-weight: 700; font-size: 15px; color: white; background-color: #797979;"> Tool Options Palette </span> is not visible on the screen then refer to [[image:PageLink.PNG|link=]] '''[[#Notes_Palettes|Notes: Palettes]]''' at the top of this document.</td> | |
| </tr> | | </tr> |
| </table> | | </table> |
| </td> | | </td> |
| </tr> | | </tr> |
| </table>
| |
| <br>
| |
| <span style="font-weight: 700; font-size: 15px;">Get the Height of a Scenery Mesh Object</span>
| |
| <br>
| |
| <table width=1000 bgcolor=#000000 cellpadding=2>
| |
| <tr valign="top"> | | <tr valign="top"> |
| <td> | | <td><span style="font-size: 15px; font-weight: 700; color: gold; background-color: black;"> Shape </span></td> |
| <table bgcolor=#ffffe0 cellpadding=2> | | <td>brush shape</td> |
| | </tr> |
| <tr valign="top"> | | <tr valign="top"> |
| <td width=25>[[image:PencilTips.PNG|link=]]</td> | | <td colspan=2> |
| <td>You can copy the height of a '''selected''' scenery mesh object (e.g. a house) into the <span style="font-weight: 700; font-size: 15px; color: white; background-color: #797979;"> Tool Options Palette </span> <span style="font-weight: 700; font-size: 15px; color: gold; background-color: black;"> Height </span> setting while the '''Placement Tool''' is still active. Once it has been copied it can be applied to any other object.<br>
| | <table bgcolor=#ffffb0> |
| <table bgcolor=#ffffff> | |
| <tr valign="top"> | | <tr valign="top"> |
| <td colspan=2><span style="font-weight: 700; font-size: 15px;">Steps:</span> To copy the height of any '''selected''' object into the <span style="font-weight: 700; font-size: 15px; color: gold; background-color: black;"> Height </span> setting:-</td> | | <td width=90 align="right">'''Options:''' </td> |
| | <td width=145>[[image:BrushToolsScrapShapes_S20.png|link=]]</td> |
| | <td><span style="font-weight: 700; font-size: 15px; color: white; background-color: black;"> Circle </span> and <span style="font-weight: 700; font-size: 15px; color: white; background-color: black;"> Square </span> will set the brush to the selected shape with the <span style="font-size: 15px; font-weight: 700; color: gold; background-color: black;"> Radius </span> setting the brush size</td> |
| </tr> | | </tr> |
| <tr valign="top"> | | <tr valign="top"> |
| <td width=20>[[image:DotPoint1.JPG|link=]]</td> | | <td> </td> |
| <td>In the <span style="font-weight: 700; font-size: 15px; color: white; background-color: #797979;"> Tool Options Palette </span> <span style="font-weight: 700; font-size: 15px; background-color: lightcyan;">Right Click</span> in the <span style="font-weight: 700; font-size: 15px; color: gold; background-color: black;"> Height </span> setting</td> | | <td colspan=2><span style="font-weight: 700; font-size: 15px; color: white; background-color: black;"> Natural </span> will set the brush to the same shape as the '''Marquee''' that created the scrapbook, which may be rectangular. The <span style="font-size: 15px; font-weight: 700; color: gold; background-color: black;"> Radius </span> setting will scale the brush size</td> |
| | </tr> |
| | </table> |
| | </td> |
| </tr> | | </tr> |
| <tr valign="top"> | | <tr valign="top"> |
| <td>[[image:DotPoint2.JPG|link=]]</td> | | <td colspan=2> |
| <td>select the <span style="font-weight: 700; font-size: 15px; color: white; background-color: black;"> Get Height from Selection </span> option</td> | | <table bgcolor=#ffffb0 cellpadding=2> |
| | <tr valign="top"> |
| | <td width=25>[[image:NotePad.PNG|link=]]</td> |
| | <td align="left">The <span style="font-weight: 700; font-size: 15px; color: gold; background-color: black;"> Height </span> setting has no effect on the '''Scrapbook'''. This feature is controlled by the '''Scrapbook Palette Filter''' <span style="font-weight: 700; font-size: 15px; color: white; background-color: black;"> Ground Height </span> options.</td> |
| | </tr> |
| | </table> |
| | </td> |
| | </tr> |
| | </table> |
| | </td> |
| </tr> | | </tr> |
| </table> | | </table> |
| </td> | | </td> |
| </tr> | | </tr> |
| | </table> |
| | <br> |
| | <table width=1000 bgcolor=#000000 cellpadding=2> |
| <tr valign="top"> | | <tr valign="top"> |
| <td> </td> | | <td colspan=2> |
| | <table width=996 bgcolor=#ffffe0 cellpadding=2> |
| | <tr valign="top" align="left"> |
| | <td width=25>[[image:PencilTips.PNG|link=]]</td> |
| <td> | | <td> |
| <table> | | <table> |
| <tr valign="top"> | | <tr valign="top"> |
| <td>You can check the height of any selected object or endpoint using the <span style="font-weight: 700; font-size: 15px; color: white; background-color: #797979;"> Info Palette </span>. The height is the last value in the '''Pos:''' (Position) data set.</td> | | <td width=10>[[image:DotPoint.JPG|10px|link=]]</td> |
| | <td>On the right of each data entry box is a pair of '''Up/Down''' arrow controls. <span style="font-weight: 700; font-size: 15px; background-color: lightcyan;"> Left Click and Drag </span> up or down on these to adjust the value in smaller increments</td> |
| </tr> | | </tr> |
| <tr valign="top"> | | <tr valign="top"> |
| <td>[[image:InfoPaletteShowHeight_S20.png|link=]]</td> | | <td>[[image:DotPoint.JPG|10px|link=]]</td> |
| | <td>Each data entry box has a drop down menu list of options. <span style="font-weight: 700; font-size: 15px; background-color: lightcyan;"> Right Click </span> inside the box to open its menu list - see [[image:PageLink.PNG|link=]] '''[[#Info Settings Menu|Info Settings Menu]]''' above for the details</td> |
| </tr> | | </tr> |
| </table> | | </table> |
| Line 8,068: |
Line 8,192: |
| </table> | | </table> |
| <br> | | <br> |
| <span style="font-weight: 700; font-size: 15px;">Set the Height of a Scenery Mesh Object</span>
| | <table width=1000 bgcolor=#000000 cellpadding=2> |
| <br>
| |
| In '''Surveyor 2.0''' scenery mesh objects can be given a height that can place them above or below the ground level.
| |
| <table width=1000> | |
| <tr valign="top"> | | <tr valign="top"> |
| <td width=200>[[image:PlacementMeshHeight0_S20.png|link=]]</td>
| |
| <td width=200>[[image:PlacementMeshHeight3_S20.png|link=]]</td>
| |
| <td> | | <td> |
| <table width=600 bgcolor=#000000 cellpadding=2> | | <table width=996 bgcolor=#ffffb0 cellpadding=2> |
| <tr valign="top"> | | <tr valign="top"> |
| <td> | | <td> |
| <table width=596 bgcolor=#ffffff cellpadding=2> | | <table> |
| <tr valign="top"> | | <tr valign="top"> |
| <td colspan=2>To set the '''height''' of a '''selected''' scenery mesh object, choose one of the following:-<br> | | <td width=25>[[image:NotePad.PNG|link=]]</td> |
| <span style="font-weight: 700; font-size: 15px;">Options:</span> </td> | | <td><span style="font-size: 17px; font-weight: 700;">Notes:'''</span><br> |
| | ---- |
| | </td> |
| </tr> | | </tr> |
| | </table> |
| | <table width=996> |
| <tr valign="top"> | | <tr valign="top"> |
| <td width=25>[[image:Ablue.png|link=]]</td> | | <td width=10>[[image:DotPoint.JPG|10px|link=]]</td> |
| <td>In the <span style="font-weight: 700; font-size: 15px; color: white; background-color: #797979;"> Tool Options Palette </span> <span style="font-size: 15px; font-weight: 700; color: gold; background-color: black;"> Height </span> setting, enter a value followed by the <span style="font-weight: 700; font-size: 15px; color: white; background-color: black;"> Enter </span> key <span style="font-size: 15px; font-weight: 700;">OR</span></td> | | <td>Unlike '''Surveyor Classic''', there is no upper limit to the brush <span style="font-size: 15px; font-weight: 700; color: gold; background-color: black;"> Radius </span>. Brushes of hundreds of metres (even kilometres) in size are possible. However, the performance will '''decrease''' as the brush radius '''increases'''.</td> |
| </tr> | | </tr> |
| <tr valign="top"> | | <tr valign="top"> |
| <td>[[image:Bblue.png|link=]]</td> | | <td>[[image:DotPoint.JPG|10px|link=]]</td> |
| <td>In the <span style="font-weight: 700; font-size: 15px; color: white; background-color: #797979;"> Tool Options Palette </span> <span style="font-size: 15px; font-weight: 700; color: gold; background-color: black;"> Height </span> setting, enter a value then <span style="font-weight: 700; font-size: 15px; background-color: lightcyan;">Right Click</span> and select <span style="font-weight: 700; font-size: 15px; color: white; background-color: black;"> Set Height to Selection </span> <span style="font-size: 15px; font-weight: 700;">OR</span></td> | | <td>The <span style="font-size: 15px; font-weight: 700; color: gold; background-color: black;"> Rotation </span> controls the starting angle for pasting the scrapbook objects. In '''Surveyor Classic''' you could only rotate and paste in 90° increments. In '''S20''' you can rotate and paste at any angle.</td> |
| </tr> | | </tr> |
| <tr valign="top"> | | <tr valign="top"> |
| <td>[[image:Cblue.png|link=]]</td> | | <td>[[image:DotPoint.JPG|10px|link=]]</td> |
| <td>from the objects '''Context Menu''' select the <span style="font-size: 15px; font-weight: 700; color: white; background-color: black;"> Apply Height </span> option to apply an existing height setting, <span style="font-size: 15px; font-weight: 700;">OR</span></td> | | <td>The <span style="font-weight: 700; font-size: 15px; color: white; background-color: black;"> Ground Height </span> options in the '''Scrapbook Filters''' control how the terrain heights in the '''Scrapbook''' are applied</td> |
| </tr> | | </tr> |
| <tr valign="top"> | | <tr valign="top"> |
| <td>[[image:Dblue.png|link=]]</td> | | <td>[[image:DotPoint.JPG|10px|link=]]</td> |
| <td>in the <span style="font-weight: 700; font-size: 15px; color: white; background-color: #797979;"> Info Palette </span> enter a value in the objects <span style="font-size: 15px; font-weight: 700; color: white; background-color: black;"> Pos: </span> <span style="font-size: 15px; font-weight: 700; color: white; background-color: black;"> z </span> (height) setting or <span style="font-weight: 700; font-size: 15px; background-color: lightcyan;">Left Click and Drag</span> '''Up''' or '''Down''' on the double arrowheads to its right. This can be used to set the height to '''cm''' accuracy (see [[image:PageLink.PNG|link=]] '''[[#The Info Palette|The Info Palette]]''' below).</td> | | <td>Take care if setting both the <span style="font-weight: 700; font-size: 15px; color: gold; background-color: black;"> Scale </span> and the <span style="font-weight: 700; font-size: 15px; color: gold; background-color: black;"> Radius </span>. Using extreme values for both, such as a very large brush radius and a very small scale value, can cause performance issues (i.e. long delays) while the program attempts to scale and clone the scrapbook contents</td> |
| </tr> | | </tr> |
| </table> | | </table> |
| Line 8,105: |
Line 8,228: |
| </table> | | </table> |
| </td> | | </td> |
| </tr>
| |
| <tr valign="top">
| |
| <td colspan=3>The object will be moved to the set height above (or below) the terrain. The vertical yellow line shown in the second image on the left indicates the height change. The small yellow dot at the base of the line is the terrain '''attachment point''' for the object.</td>
| |
| </tr> | | </tr> |
| </table> | | </table> |
| Line 8,113: |
Line 8,233: |
| <table width=1000> <!-- BEGIN Section Nav Buttons --> | | <table width=1000> <!-- BEGIN Section Nav Buttons --> |
| <tr valign="top"> | | <tr valign="top"> |
| <td width=629><span id="PT: Context Mesh"></span> | | <td width=629><span id="Pasting Scrapbook"></span> |
| ===<span style="font-size: 17px; color: white; background-color: blue;"> Placement: Scenery Mesh Object Context Menu </span>=== | | ==='''Pasting a Scrapbook'''=== |
| </td> | | </td> |
| <td width=50> </td> | | <td width=50> </td> |
| <td width=50> </td> | | <td width=50> </td> |
| <td width=46>[[image:SkipMinorDown.png|link=#skip Placement: Spline Objects|Down]][[image:SkipMinorUp.png|link=#PT: Height Mesh|Up]]</td> <!-- for Top and Minor Up/Down --> | | <td width=46>[[image:SkipMinorDown.png|link=#Scrapbook Filters]][[image:SkipMinorUp.png|link=#skip Scrapbook Options]]</td> <!-- for Top and Minor Up/Down --> |
| <td width=75> </td> | | <td width=75> </td> |
| <td width=75> </td> | | <td width=75> </td> |
| Line 8,125: |
Line 8,245: |
| </table> <!-- END Section Nav Buttons --> | | </table> <!-- END Section Nav Buttons --> |
|
| |
|
| <table width=1000 bgcolor=#000000 cellpadding=2> | | <table bgcolor=#000000 width=800 cellpadding=2> |
| <tr valign="top"> | | <tr valign="top"> |
| <td> | | <td> |
| <table bgcolor=#ffffff cellpadding=2> | | <table bgcolor=#ffffff width=796 cellpadding=2> |
| <tr valign="top"> | | <tr valign="top"> |
| <td colspan=2> | | <td colspan=2>The current '''Scrapbook''' can be '''Pasted''' into the '''Trainz World''' at the cursor (the '''Compass Rose''') position by either:-</td> |
| <table>
| |
| <tr valign="middle">
| |
| <td width=35>[[image:Information.png|35px|link=]]</td>
| |
| <td><span style="font-weight: 700; font-size: 17px;">Scenery Mesh Object Context Menu Options</span>
| |
| </td> | |
| </tr> | | </tr> |
| </table> | | <tr> |
| </td> | | <td colspan=2><span style="font-weight: 700; font-size: 15px;">Options:</span> </td> |
| </tr> | | </tr> |
| <tr valign="top"> | | <tr valign="top"> |
| <td colspan=2>Once a scenery mesh object has been placed you can open its '''Context Menu''' (<span style="font-weight: 700; font-size: 15px; background-color: lightcyan;"> Left Click </span> on its icon or press the <span style="font-weight: 700; font-size: 15px; color: white; background-color: black;"> T </span> key) to access a range of options and functions. The following '''Scenery Mesh Object''' specific options will appear, along with other more general options, in the objects '''Context Menu'''. | | <td width=25>[[image:Ablue.png|link=]]</td> |
| ----</td>
| | <td>pressing <span style="font-weight: 700; font-size: 15px;"><span style="color: white; background-color: black;"> Ctrl </span> + <span style="color: white; background-color: black;"> V </span></span>, <span style="font-weight: 700; font-size: 15px;">OR</span></td> |
| </tr> | | </tr> |
| <tr valign="top"> | | <tr valign="top"> |
| <td> | | <td>[[image:Bblue.png|link=]]</td> |
| <table> | | <td> selecting <span style="font-weight: 700; font-size: 15px; color: white; background-color: black;"> Paste </span> from the '''Context Menu''' of a selected object</td> |
| | </tr> |
| <tr valign="top"> | | <tr valign="top"> |
| <td><span style="font-weight: 700; font-size: 15px; color: white; background-color: black;"> Apply Height </span></td> | | <td colspan=2>In both cases the scrapbook contents will be pasted using the original scrapbooks size. It will be pasted inside a '''Marquee Selection Area''' that can be moved and resized. The objects that are pasted and how they are pasted is controlled by the current <span style="font-weight: 700; font-size: 15px; color: white; background-color: #797979;"> Scrapbook Palette </span> filter settings |
| <td>sets the height of the '''selected''' objects to the value in the <span style="font-weight: 700; font-size: 15px; color: white; background-color: #797979;"> Tool Options Palette </span> <span style="font-weight: 700; font-size: 15px; color: gold; background-color: black;"> Height </span> setting</td>
| | </td> |
| </tr> | | </tr> |
| </table> | | </table> |
| </td> | | </td> |
| </tr> | | </tr> |
| | </table> |
| | <br> |
| | <table width=1000> <!-- BEGIN Section Nav Buttons --> |
| | <tr valign="top"> |
| | <td width=629><span id="Scrapbook Filters"></span> |
| | ==='''Setting the Scrapbook Filters'''=== |
| | </td> |
| | <td width=50> </td> |
| | <td width=50> </td> |
| | <td width=46>[[image:SkipMinorDown.png|link=#stepPreview]][[image:SkipMinorUp.png|link=#Pasting Scrapbook]]</td> <!-- for Top and Minor Up/Down --> |
| | <td width=75> </td> |
| | <td width=75> </td> |
| | <td width=75> </td> <!-- for Bottom --> |
| | </tr> |
| | </table> <!-- END Section Nav Buttons --> |
| | |
| | <table bgcolor=#000000 width=1000 cellpadding=2> |
| <tr valign="top"> | | <tr valign="top"> |
| <td> | | <td> |
| <table> | | <table bgcolor=#ffffe0 width=996 cellpadding=2> |
| <tr valign="top"> | | <tr valign="top"> |
| <td><span style="font-weight: 700; font-size: 15px; color: white; background-color: black;"> Reset Object Rotation </span></td> | | <td width=25>[[image:PencilTips.PNG|link=]]</td> |
| <td>resets the rotation angle of the '''selected''' objects to their default values</td> | | <td>You will probably need to undock and resize the '''Scrapbook''' palette to make full use of its filters. Refer to [[image:PageLink.PNG|link=]] '''[[#Hiding and Showing Palettes and Windows|Hiding and Showing Palettes and Windows]]''' at the top of this document for undocking and resizing instructions</td> |
| </tr> | | </tr> |
| </table> | | </table> |
| </td> | | </td> |
| </tr> | | </tr> |
| | </table> |
| | <br> |
| | <table width=1000 bgcolor=#000000 cellpadding=2> |
| <tr valign="top"> | | <tr valign="top"> |
| <td> | | <td> |
| <table> | | <table width=996 bgcolor=#ffffff cellpadding=2> |
| <tr valign="top"> | | <tr valign="top"> |
| <td><span style="font-weight: 700; font-size: 15px; color: white; background-color: black;"> Randomise Object Rotation </span></td> | | <td colspan=2><span style="font-weight: 700; font-size: 15px;">Steps: To Open the Scrapbook Filters:-</span></td> |
| <td>applies a random rotation angle to each '''selected''' object around its vertical axis</td>
| |
| </tr> | | </tr> |
| </table> | | <tr valign="top"> |
| </td> | | <td width=25>[[image:DotPoint1.JPG|link=]]</td> |
| | <td><span style="font-weight: 700; font-size: 15px; background-color: lightcyan;"> Left Click </span> on the '''arrowhead''' next to the <span style="font-weight: 700; font-size: 15px; color: white; background-color: black;"> Filters: </span> label below the scrapbook image to open the scrapbook filters.</td> |
| </tr> | | </tr> |
| <tr valign="top"> | | <tr> |
| <td colspan=2>See [[image:PageLink.PNG|link=]] '''[[#FM: Context Mesh|Free Move: Scenery Mesh Object Context Menu]]''' for the full list of '''Context Menu''' options for '''Scenery Mesh Objects'''.</td> | | <td colspan=2>These filters control which elements in the scrapbook are added to the '''Trainz World''' and how they are added.</td> |
| </tr> | | </tr> |
| </table> | | </table> |
| Line 8,182: |
Line 8,318: |
| </table> | | </table> |
| <br> | | <br> |
| <table width=1000> <!-- BEGIN Section Nav Buttons -->
| |
| <tr valign="top">
| |
| <td width=629><span id="skip Placement: Spline Objects"></span>
| |
| =='''Placement: Spline Objects (Including Track)'''==
| |
| </td>
| |
| <td width=50>[[image:SkipDown.png|link=#skip Placement: Track Objects|Skip Down]]</td>
| |
| <td width=50>[[image:SkipUp.png|link=#skip Placement: Scenery Mesh Objects|Skip Up]]</td>
| |
| <td width=46>[[image:SkipMinorDown.png|link=#PT: Add Spline|Down]][[image:SkipMinorUp.png|link=#PT: Context Mesh|Up]]</td> <!-- for Top and Minor Up/Down -->
| |
| <td width=75>[[image:HeadingUp.png|link=#stepPlacement|alt=Heading|To Heading]]</td>
| |
| <td width=75> </td>
| |
| <td width=75> </td> <!-- for Bottom -->
| |
| </tr>
| |
| </table> <!-- END Section Nav Buttons -->
| |
|
| |
| <table width=1000> | | <table width=1000> |
| <tr valign="top"> | | <tr valign="top"> |
| <td align="center">[[image:SplineObjectExamples.png|link=]]<br> | | <td width=600>[[image:ScrapbookToolsBottom_S20.png|link=]]<br> |
| '''Typical Spline Objects'''<br>
| |
| Corrugated iron fence, hedge, sidewalk, power lines, road, rail track</td>
| |
| </tr>
| |
| </table>
| |
| <br> | | <br> |
| <table width=1000> <!-- BEGIN Section Nav Buttons --> | | <table bgcolor=#000000 width=600 cellpadding=2> |
| <tr valign="top"> | | <tr valign="top"> |
| <td width=629><span id="PT: Add Spline"></span> | | <td> |
| ===<span style="font-weight: 700; font-size: 17px; color: white; background-color: blue;"> Placement: Add a Spline Object </span>===
| | <table bgcolor=#ffffff width=596 cellpadding=2> |
| </td>
| |
| <td width=50> </td>
| |
| <td width=50> </td>
| |
| <td width=46>[[image:SkipMinorDown.png|link=#PT: Move Spline|Down]][[image:SkipMinorUp.png|link=#skip Placement: Spline Objects]]</td> <!-- for Top and Minor Up/Down -->
| |
| <td width=75> </td>
| |
| <td width=75> </td>
| |
| <td width=75> </td> <!-- for Bottom -->
| |
| </tr>
| |
| </table> <!-- END Section Nav Buttons -->
| |
| | |
| <table width=1000 bgcolor="lightcyan" cellpadding=2>
| |
| <tr valign="top"> | | <tr valign="top"> |
| <td width=10>[[image:BlueDot10x10.png|link=]]</td> | | <td colspan=3> |
| <td>Scenery splines and track splines are defined by their '''endpoints'''. Splines are usually added to a route as a series of segments joined at the endpoints.</td> | | <table bgcolor=#ffffe0 width=592 cellpadding=2> |
| </tr>
| | <tr> |
| </table>
| | <td>[[image:PencilTips.PNG|link=]]</td> |
| <br>
| | <td><span style="font-weight: 700; font-size: 15px;">Sample Filter Settings:-</span><br> |
| <table width=1000 bgcolor=#000000 cellpadding=2>
| | You can vary the appearance of the scrapbook when added to a route by painting or pasting it with different filter combinations. For example:-</td> |
| <tr valign="top">
| |
| <td>
| |
| <table width=996 bgcolor=#ffe89a cellpadding=2>
| |
| <tr valign="middle"> | |
| <td width=45>[[image:PalettesIcon_S20.png|link=]]</td> | |
| <td>If the <span style="font-weight: 700; font-size: 15px; color: white; background-color: #797979;"> Filter Palette </span> and <span style="font-weight: 700; font-size: 15px; color: white; background-color: #797979;"> Assets Palette </span> are not visible on the screen then refer to [[image:PageLink.PNG|link=]] '''[[#Notes_Palettes|Notes: Palettes]]''' at the top of this document.</td> | |
| </tr> | | </tr> |
| </table> | | </table> |
| </td> | | </td> |
| </tr> | | </tr> |
| </table>
| |
| <br>
| |
| <table width=1000>
| |
| <tr valign="top"> | | <tr valign="top"> |
| <td><span style="font-weight: 700; font-size: 15px;">Steps:</span> To add a '''Scenery Splines''' or '''Track Splines''' the first step is to identify the exact asset you want to add.</td> | | <td width=150><span style="font-weight: 700; font-size: 15px;"> Ground Height: </span></td> |
| | <td><span style="font-weight: 700; font-size: 15px; color: white; background-color: black;"> None </span></td> |
| | <td>ground height data will not be pasted and the ground heights already in the target area will be used</td> |
| </tr> | | </tr> |
| </table>
| |
| <br>
| |
| <table width=1000>
| |
| <tr valign="top"> | | <tr valign="top"> |
| <td width=25>[[image:DotPoint1.JPG|link=]]</td> | | <td><span style="font-weight: 700; font-size: 15px;"> Ground Texture:</span></td> |
| <td>In the <span style="font-weight: 700; font-size: 15px; color: white; background-color: #797979;"> Filter Palette </span> choose one of the following:-</td> | | <td><span style="font-weight: 700; font-size: 15px; color: white; background-color: black;"> Overwrite </span></td> |
| | <td>textures present in the scrapbook will replace those already in the target area</td> |
| </tr> | | </tr> |
| </table>
| |
|
| |
| <table width=1000>
| |
| <tr valign="top"> | | <tr valign="top"> |
| <td>[[image:Ablue.png|link=]] <span style="font-weight: 700; font-size: 15px; background-color: lightcyan;">For Scenery Splines</span></td> | | <td><span style="font-weight: 700; font-size: 15px;"> Meshes:</span></td> |
| | <td><span style="font-weight: 700; font-size: 15px; color: white; background-color: black;"> Add </span></td> |
| | <td>scenery objects in the scrapbook will be added to those already in the target area</td> |
| </tr> | | </tr> |
| <tr valign="top"> | | <tr valign="top"> |
| <td><span style="font-weight: 700; font-size: 15px;">Options:</span> </td> | | <td><span style="font-weight: 700; font-size: 15px;"> Splines:</span></td> |
| | <td><span style="font-weight: 700; font-size: 15px; color: white; background-color: black;"> Add </span></td> |
| | <td>scenery splines in the scrapbook will be added to those already in the target area</td> |
| </tr> | | </tr> |
| <tr valign="top"> | | <tr valign="top"> |
| <td> | | <td><span style="font-weight: 700; font-size: 15px;"> Effect Layers: </span></td> |
| <table width=250 bgcolor=#0000ff> | | <td><span style="font-weight: 700; font-size: 15px; color: white; background-color: black;"> None </span></td> |
| <tr valign="top">
| | <td>effect layers in the scrapbook will not be pasted and any already in the target area will be used</td> |
| <td> | |
| <table width=246 bgcolor=#ffffff> | |
| <tr valign="top">
| |
| <td width=246 align="center"><span style="font-weight: 700; font-size: 15px; background-color: lightcyan;"> Left Click </span> on the '''Scenery Spline''' icon<br> | |
| [[image:FilterPaletteScenerySplinesSelected_S20.png|link=]]
| |
| <table>
| |
| <tr valign="top" align="left">
| |
| <td>[[image:GroundTextureFilter_S20.png|link=]]</td>
| |
| <td>all ground textures</td> | |
| </tr> | | </tr> |
| <tr valign="top" align="left">
| |
| <td>[[image:SceneryMeshFilter_S20.png|link=]]</td>
| |
| <td>all non-spline scenery assets</td>
| |
| </tr>
| |
| <tr valign="top" align="left">
| |
| <td colspan=2>
| |
| <table bgcolor=#000000 cellpadding=2>
| |
| <tr valign="top"> | | <tr valign="top"> |
| <td> | | <td colspan=3> |
| <table bgcolor=#ffffff cellpadding=2> | | <table bgcolor=#ffffe0 width=594 cellpadding=2> |
| <tr valign="top"> | | <tr valign="top"> |
| <td>[[image:ScenerySplineFilter_S20.png|link=]]</td> | | <td>[[image:PencilTips.PNG|link=]]</td> |
| <td>all spline scenery assets</td> | | <td>You can also add more variety when painting a '''Scrapbook''' by changing its <span style="font-weight: 700; font-size: 15px; color: white; background-color: #797979;"> Tool Options Palette </span> <span style="font-weight: 700; font-size: 15px; color: gold; background-color: black;"> Scale </span> and <span style="font-weight: 700; font-size: 15px; color: gold; background-color: black;"> Rotation </span> settings in combination with different '''Filter''' selections (as shown above)</td> |
| </tr> | | </tr> |
| </table> | | </table> |
| Line 8,292: |
Line 8,375: |
| </td> | | </td> |
| </tr> | | </tr> |
| <tr valign="top" align="left"> | | </table> |
| <td>[[image:TrackSplineFilter_S20.png|link=]]</td> | | </td> |
| <td>all track spline assets</td>
| | <td width=400> |
| | <table bgcolor=#000000 width=400 cellpadding=2> |
| | <tr valign="top"> |
| | <td> |
| | <table bgcolor=#ffffff width=396 cellpadding=2> |
| | <tr valign="top"> |
| | <td align="center" colspan=3> |
| | <span style="font-size: 15px; font-weight: 700; color: white; background-color: black;"> Scrapbook Painting/Pasting Options </span></td> |
| </tr> | | </tr> |
| <tr valign="top" align="left"> | | <tr valign="top"> |
| <td>[[image:TrackMeshFilter_S20.png|link=]]</td> | | <td bgcolor="yellow" colspan=3><span style="font-weight: 700; font-size: 15px;"> What Data to Transfer </span></td> |
| <td>all track (non spline) assets (signals, etc)</td>
| |
| </tr> | | </tr> |
| <tr valign="top" align="left"> | | <tr valign="top"> |
| <td>[[image:TrainFilter_S20.png|link=]]</td> | | <td>  </td> |
| <td>all rolling stock assets</td> | | <td width=130><span style="font-size: 15px; font-weight: 700; color: white; background-color: black;"> Ground Height </span></td> |
| | <td>terrain height(s) used in the scrapbook</td> |
| </tr> | | </tr> |
| <tr valign="top" align="left"> | | <tr valign="top"> |
| <td>[[image:PresetFilter_S20.png|link=]]</td> | | <td>  </td> |
| <td>all '''Effect Layer''' presets</td> | | <td><span style="font-size: 15px; font-weight: 700; color: white; background-color: black;"> Texture </span></td> |
| | <td>textures used in the scrapbook</td> |
| </tr> | | </tr> |
| </table> | | <tr valign="top"> |
| </td> | | <td>  </td> |
| | <td><span style="font-size: 15px; font-weight: 700; color: white; background-color: black;"> Meshes </span></td> |
| | <td>scenery objects (e.g. trees, buildings) used in the scrapbook</td> |
| </tr> | | </tr> |
| </table> | | <tr valign="top"> |
| </td> | | <td>  </td> |
| | <td><span style="font-size: 15px; font-weight: 700; color: white; background-color: black;"> Splines </span></td> |
| | <td>spline objects used in the scrapbook</td> |
| </tr> | | </tr> |
| </table>
| |
| </td>
| |
| <td width=50 align="center"><span style="font-size: 17px; font-weight: 700;">OR</span></td>
| |
| <td>
| |
| <table width=250 bgcolor=#0000ff>
| |
| <tr valign="top"> | | <tr valign="top"> |
| <td> | | <td>  </td> |
| <table width=246 bgcolor=#ffffff> | | <td><span style="font-size: 15px; font-weight: 700; color: white; background-color: black;"> Effect Layers </span></td> |
| | <td>'''TurfFX/Clutter Effect Layers''' used in the scrapbook |
| | <table bgcolor=#ffffb0 cellpadding=2> |
| <tr valign="top"> | | <tr valign="top"> |
| <td align="center"><span style="font-weight: 700; font-size: 15px; background-color: lightcyan;"> Left Click </span> the '''Content Drop Down Menu'''<br> | | <td width=25>[[image:NotePad.PNG|link=]]</td> |
| [[image:FilterPaletteNoIconSelected_S20.png|link=]]<br> | | <td>'''Water''' and '''Color Effect Layers''' cannot be added to a scrapbook as they already cover the entire route</td> |
| Then select '''Scenery Splines'''<br>
| |
| [[image:FilterSelectScenerySplines_S20.png|link=]]
| |
| </td> | |
| </tr> | | </tr> |
| </table> | | </table> |
| </td> | | </td> |
| </tr> | | </tr> |
| </table>
| |
| </td>
| |
| <td width=50 align="center"><span style="font-size: 17px; font-weight: 700;">OR</span></td>
| |
| <td>
| |
| <table bgcolor=#000000 width=400 cellpadding=2>
| |
| <tr valign="top"> | | <tr valign="top"> |
| <td> | | <td bgcolor="yellow" colspan=3><span style="font-weight: 700; font-size: 15px;"> How to Transfer the Data</span></td> |
| <table bgcolor=#ffffe0 width=396 cellpadding=2> | | </tr> |
| <tr valign="top"> | | <tr valign="top"> |
| <td colspan=2>[[image:PencilTips.PNG|link=]] <span style="font-size: 15px; font-weight: 700; color: white; background-color: blue;"> Shortcut </span><br> | | <td>  </td> |
| <table bgcolor=#ffffff> | | <td><span style="font-size: 15px; font-weight: 700; color: white; background-color: black;"> None </span></td> |
| | <td>do not paint/paste this feature</td> |
| | </tr> |
| <tr valign="top"> | | <tr valign="top"> |
| <td colspan=2><span style="font-weight: 700; font-size: 15px;">Steps:</span> If you already have the same object placed in your route then:-</td> | | <td>  </td> |
| | <td><span style="font-size: 15px; font-weight: 700; color: white; background-color: black;"> Add </span></td> |
| | <td>add this feature to those already present</td> |
| </tr> | | </tr> |
| <tr valign="top"> | | <tr valign="top"> |
| <td width=20>[[image:DotPoint1RedC.png|link=]]</td> | | <td>  </td> |
| <td>move the tool pointer over the object to be selected and hold down the <span style="font-weight: 700; font-size: 15px; color: white; background-color: black;"> Alt </span> key. The object name will appear in a <span style="font-weight: 700; font-size: 15px; color: white; background-color: black;"> ToolTip </span> attached to the pointer</td> | | <td ><span style="font-size: 15px; font-weight: 700; color: white; background-color: black;"> Overwrite </span></td> |
| | <td>use this feature to replace those already present</td> |
| </tr> | | </tr> |
| <tr valign="top"> | | <tr valign="top"> |
| <td>[[image:DotPoint2RedC.png|link=]]</td> | | <td bgcolor="lightyellow" colspan=3>For the '''Ground Height''':-</td> |
| <td>while holding down the <span style="font-weight: 700; font-size: 15px; color: white; background-color: black;"> Alt </span> key <span style="font-weight: 700; font-size: 15px; background-color: lightcyan;"> Left Click </span> on the object. This will automatically select it in the <span style="font-weight: 700; font-size: 15px; color: white; background-color: #797979;"> Assets Palette </span> and it will also select the '''Placement Tool'''. Release the key</td>
| |
| </tr> | | </tr> |
| </table> | | <tr valign="top"> |
| </td> | | <td>  </td> |
| | <td><span style="font-size: 15px; font-weight: 700; color: white; background-color: black;"> None </span></td> |
| | <td>do not paste/paint the scrapbook ground heights, use the existing ground heights instead</td> |
| </tr> | | </tr> |
| <tr valign="top"> | | <tr valign="top"> |
| <td colspan=2>Jump to '''Step''' [[image:DotPoint4.JPG|link=]] below</td> | | <td>  </td> |
| | <td><span style="font-size: 15px; font-weight: 700; color: white; background-color: black;"> Absolute </span></td> |
| | <td>use the ground heights in the scrapbook to replace the existing ground heights</td> |
| | </tr> |
| | <tr valign="top"> |
| | <td>  </td> |
| | <td><span style="font-size: 15px; font-weight: 700; color: white; background-color: black;"> Relative </span></td> |
| | <td>use the '''difference''' between the existing ground heights and those used in the scrapbook</td> |
| </tr> | | </tr> |
| </table> | | </table> |
| Line 8,367: |
Line 8,464: |
| </tr> | | </tr> |
| </table> | | </table> |
| | <br> |
| | <table width=1000> <!-- BEGIN Nav Buttons Table --> |
| | <tr valign="top"> |
| | <td width=629><span id="stepPreview"></span> |
| | ='''The Asset Preview Palette'''= |
| | </td> |
| | <td width=50> </td> <!-- for Skip Down --> |
| | <td width=50>[[image:SkipUp.png|link=#skip Painting or Pasting a Scrapbook|Skip Up]]</td> |
| | <td width=46>[[image:BackToTop.png|link=#top|alt=Top|Top]]</td> |
| | <td width=75>[[image:NextUp.png|link=#stepScrapbook|alt=Next Up|Next Up]]</td> |
| | <td width=75>[[image:NextDown.png|link=#stepPackages|alt=Next Down|Next Down]]</td> |
| | <td width=75>[[image:BackToBottom.png|link=#bottom|alt=Bottom|Bottom]]</td> |
| | </tr> |
| | </table> <!-- END Nav Buttons Table --> |
|
| |
|
| <table width=1000 bgcolor=#000000 cellpadding=2> | | <table width=1000 bgcolor=#ffffb0 cellpadding=2> |
| <tr valign="top"> | | <tr valign="top"> |
| <td> | | <td><span style="font-weight: 700; font-size: 15px;">This is a <span style="color: white; background-color: blue;"> Surveyor Only </span> palette</span></td> |
| <table bgcolor=#ffffff cellpadding=2>
| |
| <tr valign="top">
| |
| <td width=10>[[image:DotPoint.JPG|10px|link=]]</td>
| |
| <td>In the <span style="font-weight: 700; font-size: 15px; color: white; background-color: #797979;"> Filter Palette </span> the '''Scenery Splines''' icon will be shown in blue when it is selected and the name '''Scenery Splines''' will appear in the drop down box below the icons. For more information about the <span style="font-weight: 700; font-size: 15px; color: white; background-color: #797979;"> Filter Palette </span> see the '''Trainz Wiki Page [[image:WikiLink.PNG|link=]] [[How to Use S20 Palettes#The Filter Palette|How to Use the Surveyor 2.0 Palettes - Filter Palette]]'''</td>
| |
| </tr> | | </tr> |
| | </table> |
| | <br> |
| | <table width=1000 bgcolor=#000000> |
| <tr valign="top"> | | <tr valign="top"> |
| <td>[[image:DotPoint.JPG|10px|link=]]</td> | | <td> |
| <td>The <span style="font-weight: 700; font-size: 15px; color: white; background-color: #797979;"> Assets Palette </span> display is controlled by the selections made in the <span style="font-weight: 700; font-size: 15px; color: white; background-color: #797979;"> Filter Palette </span>. Selecting <span style="font-weight: 700; font-size: 15px; color: white; background-color: black;"> Scenery Splines </span> in the <span style="font-weight: 700; font-size: 15px; color: white; background-color: #797979;"> Filter Palette </span> will produce a list of all the installed '''Scenery Splines''' in the <span style="font-weight: 700; font-size: 15px; color: white; background-color: #797979;"> Assets Palette </span>. For more information about the <span style="font-weight: 700; font-size: 15px; color: white; background-color: #797979;"> Assets Palette </span> see the '''Trainz Wiki Page [[image:WikiLink.PNG|link=]] [[How to Use S20 Palettes#The Assets Palette|How to Use the Surveyor 2.0 Palettes - Assets Palette]]'''</td> | | <table width=996 bgcolor=#ffe89a cellpadding=2> |
| | <tr valign="middle"> |
| | <td width=45>[[image:PalettesIcon_S20.png|link=]]</td> |
| | <td>If the '''Asset Preview Palette''' is not visible on the screen then refer to [[image:PageLink.PNG|link=]] '''[[#Hiding and Showing Palettes and Windows|Hiding and Showing Palettes and Windows]]''' at the top of this document.</td> |
| </tr> | | </tr> |
| </table> | | </table> |
| Line 8,385: |
Line 8,498: |
| </table> | | </table> |
| <br> | | <br> |
| | <table width=1000 bgcolor="lightcyan" cellpadding=2> |
| | <tr valign="top"> |
| | <td width=10>[[image:BlueDot10x10.png|link=]]</td> |
| | <td>This palette gives a rotating 3D view of an asset that has been selected in the <span style="font-weight: 700; font-size: 15px; color: white; background-color: #797979;"> Assets Palette </span>. It works with all assets '''except''' effect layers. |
| | </td> |
| | </tr> |
| | </table> |
| | |
| <table width=1000> | | <table width=1000> |
| <tr valign="top"> | | <tr valign="top"> |
| <td>[[image:Bblue.png|link=]] <span style="font-weight: 700; font-size: 15px; background-color: lightcyan;">For Track Splines</span></td> | | <td width=210>[[image:AssetPreviewPalette_S20.png|link=]]</td> |
| | <td>The '''Asset Preview Palette''' can be enlarged once it has been undocked.<br><br> |
| | |
| | The current '''Surveyor 2.0''' version has no display or control options and lacks the "zoom" and other features found in the '''Preview''' function of '''Content Manager'''.</td> |
| </tr> | | </tr> |
| | </table> |
| | <br> |
| | |
| | <table width=1000> <!-- BEGIN Nav Buttons Table --> |
| <tr valign="top"> | | <tr valign="top"> |
| <td><span style="font-weight: 700; font-size: 15px;">Options:</span> </td> | | <td width=629><span id="stepPackages"></span> |
| | ='''The Content Packages Palette'''= |
| | </td> |
| | <td width=50>[[image:SkipDown.png|link=#skip Content Package Details|Skip Down]]</td> |
| | <td width=50> </td> <!-- for Skip Up --> |
| | <td width=46>[[image:BackToTop.png|link=#top|alt=Top|Top]]</td> |
| | <td width=75>[[image:NextUp.png|link=#stepPreview|alt=Next Up|Next Up]]</td> |
| | <td width=75>[[image:NextDown.png|link=#stepDriverCenter|alt=Next Down|Next Down]]</td> |
| | <td width=75>[[image:BackToBottom.png|link=#bottom|alt=Bottom|Bottom]]</td> |
| </tr> | | </tr> |
| | </table> <!-- END Nav Buttons Table --> |
| | |
| | <table width=1000 bgcolor=#ffffb0 cellpadding=2> |
| <tr valign="top"> | | <tr valign="top"> |
| <td> | | <td><span style="font-weight: 700; font-size: 15px;">This is a <span style="color: white; background-color: blue;"> Surveyor Only </span> palette</span></td> |
| <table width=250 bgcolor=#0000ff>
| |
| <tr valign="top">
| |
| <td>
| |
| <table width=246 bgcolor=#ffffff>
| |
| <tr valign="top">
| |
| <td width=246 align="center"><span style="font-weight: 700; font-size: 15px; background-color: lightcyan;"> Left Click </span> on the '''Track Spline''' icon<br>
| |
| [[image:FilterPaletteTrackSelected_S20.png|link=]]
| |
| <table>
| |
| <tr valign="top" align="left">
| |
| <td>[[image:GroundTextureFilter_S20.png|link=]]</td>
| |
| <td>all ground textures</td>
| |
| </tr> | | </tr> |
| <tr valign="top" align="left">
| | </table> |
| <td>[[image:SceneryMeshFilter_S20.png|link=]]</td>
| | <br> |
| <td>all non-spline scenery assets</td> | | <table width=1000 bgcolor=#000000> |
| </tr> | |
| <tr valign="top" align="left">
| |
| <td>[[image:ScenerySplineFilter_S20.png|link=]]</td>
| |
| <td>all spline scenery assets</td>
| |
| </tr>
| |
| <tr valign="top" align="left">
| |
| <td colspan=2>
| |
| <table bgcolor=#000000 cellpadding=2>
| |
| <tr valign="top"> | | <tr valign="top"> |
| <td> | | <td> |
| <table bgcolor=#ffffff cellpadding=2> | | <table width=996 bgcolor=#ffe89a cellpadding=2> |
| <tr valign="top" align="left"> | | <tr valign="middle"> |
| <td>[[image:TrackSplineFilter_S20.png|link=]]</td> | | <td width=45>[[image:PalettesIcon_S20.png|link=]]</td> |
| <td>all track spline assets</td> | | <td>If the '''Content Packages Palette''' is not visible on the screen then refer to [[image:PageLink.PNG|link=]] '''[[#Hiding and Showing Palettes and Windows|Hiding and Showing Palettes and Windows]]''' at the top of this document.</td> |
| </tr> | | </tr> |
| </table> | | </table> |
| Line 8,428: |
Line 8,548: |
| </tr> | | </tr> |
| </table> | | </table> |
| </td> | | <br> |
| </tr> | | <table width=1000 bgcolor="lightcyan" cellpadding=2> |
| <tr valign="top" align="left"> | | <tr valign="top"> |
| <td>[[image:TrackMeshFilter_S20.png|link=]]</td> | | <td width=10>[[image:BlueDot10x10.png|link=]]</td> |
| <td>all track (non spline) assets (signals, etc)</td> | | <td>This palette is mainly intended for content creators, particularly '''MPS''' ('''M'''ulti '''P'''layer '''S'''urveyor) content. It helps manage, prepare and upload to the '''MPS Server''' a user created "Content Package". The web site for the '''TCCP''' ('''T'''rainz '''C'''ontent '''C'''reation '''P'''rogram), which is not '''MPS''' specific, can be found at [[image:WikiLink.PNG|link=]] '''[https://info.trainzsimulator.com/tccp info.trainzsimulator.com/tccp ]''' </td> |
| </tr>
| |
| <tr valign="top" align="left">
| |
| <td>[[image:TrainFilter_S20.png|link=]]</td>
| |
| <td>all rolling stock assets</td>
| |
| </tr>
| |
| <tr valign="top" align="left">
| |
| <td>[[image:PresetFilter_S20.png|link=]]</td>
| |
| <td>all '''Effect Layer''' presets</td>
| |
| </tr> | | </tr> |
| </table> | | </table> |
| </td> | | <br> |
| | <table width=1000 bgcolor=#000000 cellpadding=2> |
| | <tr> |
| | <td> |
| | <table width=996 bgcolor=#ffffff cellpadding=2> |
| | <tr> |
| | <td>For a more technical description of using the '''Content Packages Palette''' see the '''Trainz Wiki''' page [[image:WikiLink.PNG|link=]] '''[[Content_Packages|Content Packages]]'''</td> |
| </tr> | | </tr> |
| </table> | | </table> |
| Line 8,449: |
Line 8,567: |
| </tr> | | </tr> |
| </table> | | </table> |
| </td> | | <br> |
| <td width=50 align="center"><span style="font-size: 17px; font-weight: 700;">OR</span></td> | | <table bgcolor=#000000 width=700 cellpadding=2> |
| | <tr valign="top"> |
| <td> | | <td> |
| <table width=250 bgcolor=#0000ff> | | <table bgcolor=#ffffb0 width=696 cellpadding=2> |
| <tr valign="top"> | | <tr valign="top"> |
| <td> | | <td width=25>[[image:NotePad.PNG|link=]]</td> |
| <table width=246 bgcolor=#ffffff> | | <td><span style="font-size: 17px; font-weight: 700;">Notes:'''</span><br> |
| | ---- |
| | <table> |
| | <tr valign="top"> |
| | <td width=10>[[image:DotPoint.JPG|10px|link=]]</td> |
| | <td>The '''Content Packages Palette''' is intended for use by <span style="font-weight: 700; background-color: yellow;"> Content Creators </span>, particularly those creating <span style="font-weight: 700; background-color: yellow;"> MPS (Multi Player Surveyor) routes </span>. But it can be used by anyone to help manage installed packages and identify their details and contents.</td> |
| | </tr> |
| <tr valign="top"> | | <tr valign="top"> |
| <td align="center"><span style="font-weight: 700; font-size: 15px; background-color: lightcyan;"> Left Click </span> the '''Content Drop Down Menu'''<br> | | <td>[[image:DotPoint.JPG|10px|link=]]</td> |
| [[image:FilterPaletteNoIconSelected_S20.png|link=]]<br> | | <td>Its content creation function does not support session data''' - it is for <u>routes</u> only</td> |
| Then select '''Scenery Splines'''<br>
| | </tr> |
| [[image:FilterSelectTrack_S20.png|link=]]
| | </table> |
| </td> | | </td> |
| </tr> | | </tr> |
| Line 8,467: |
Line 8,592: |
| </tr> | | </tr> |
| </table> | | </table> |
| </td> | | <br> |
| <td width=50 align="center"><span style="font-size: 17px; font-weight: 700;">OR</span></td> | | The palette lists all the installed '''Content Packages''' that have assets available for use. Two special packages are included in the list:- |
| | <table> |
| | <tr valign="top"> |
| | <td width=20>[[image:DotPoint1Blue.png|link=]]</td> |
| | <td>'''All Installed Content''' which covers all offline ('''non-MPS''') content, and</td> |
| | </tr> |
| | <tr valign="top"> |
| | <td width=20>[[image:DotPoint2Blue.png|link=]]</td> |
| | <td>'''multiplayersurveyor''' which includes all the default content on the live '''MPS Server'''</td> |
| | </tr> |
| | </table> |
| | |
| | <table width=1000> |
| | <tr valign="top"> |
| | <td width=250>[[image:S20_PalettePackages.png|link=]]</td> |
| <td> | | <td> |
| <table bgcolor=#000000 width=400 cellpadding=2> | | <table bgcolor=#000000 cellpadding=2> |
| <tr valign="top"> | | <tr valign="top"> |
| <td> | | <td> |
| <table bgcolor=#ffffe0 width=396 cellpadding=2> | | <table bgcolor=#ffffff cellpadding=2> |
| <tr valign="top"> | | <tr valign="top"> |
| <td colspan=2>[[image:PencilTips.PNG|link=]] <span style="font-size: 15px; font-weight: 700; color: white; background-color: blue;"> Shortcut </span><br> | | <td colspan=2>Each package in the list can be individually:-</td> |
| <table bgcolor=#ffffff>
| |
| <tr valign="top">
| |
| <td colspan=2><span style="font-weight: 700; font-size: 15px;">Steps:</span> If you already have the same object placed in your route then:-</td>
| |
| </tr> | | </tr> |
| <tr valign="top"> | | <tr valign="top"> |
| <td width=20>[[image:DotPoint1RedC.png|link=]]</td> | | <td width=10>[[image:DotPoint.JPG|10px|link=]]</td> |
| <td>move the tool pointer over the object to be selected and hold down the <span style="font-weight: 700; font-size: 15px; color: white; background-color: black;"> Alt </span> key. The object name will appear in a <span style="font-weight: 700; font-size: 15px; color: white; background-color: black;"> ToolTip </span> attached to the pointer</td> | | <td>'''Enabled''' - which means its assets will be available for use in a new user created package <span style="font-weight: 700; font-size: 15px;">OR</span></td> |
| </tr> | | </tr> |
| <tr valign="top"> | | <tr valign="top"> |
| <td>[[image:DotPoint2RedC.png|link=]]</td> | | <td>[[image:DotPoint.JPG|10px|link=]]</td> |
| <td>while holding down the <span style="font-weight: 700; font-size: 15px; color: white; background-color: black;"> Alt </span> key <span style="font-weight: 700; font-size: 15px; background-color: lightcyan;"> Left Click </span> on the object. This will automatically select it in the <span style="font-weight: 700; font-size: 15px; color: white; background-color: #797979;"> Assets Palette </span> and it will also select the '''Placement Tool'''. Release the key</td> | | <td>'''Disabled''' - which means its assets will '''NOT''' be available for use in a new user created package</td> |
| </tr>
| |
| </table>
| |
| </td> | |
| </tr> | | </tr> |
| <tr valign="top"> | | <tr valign="top"> |
| <td colspan=2>Jump to '''Step''' [[image:DotPoint4.JPG|link=]] below</td> | | <td colspan=2>The top package. '''All Installed Content''' is enabled by default but it can be disabled</td> |
| </tr> | | </tr> |
| </table> | | </table> |
| Line 8,498: |
Line 8,631: |
| </tr> | | </tr> |
| </table> | | </table> |
| </td> | | <br> |
| </tr>
| | <table bgcolor=#000000 cellpadding=2> |
| </table>
| |
| | |
| <table width=1000 bgcolor=#000000 cellpadding=2> | |
| <tr valign="top"> | | <tr valign="top"> |
| <td> | | <td> |
| <table bgcolor=#ffffff cellpadding=2> | | <table bgcolor=#ffffff cellpadding=2> |
| <tr valign="top"> | | <tr valign="top"> |
| <td width=10>[[image:DotPoint.JPG|10px|link=]]</td> | | <td colspan=2><span style="font-weight: 700; font-size: 15px;">Steps: To Enable a Package:-</span></td> |
| <td>In the <span style="font-weight: 700; font-size: 15px; color: white; background-color: #797979;"> Filter Palette </span> the '''Track''' icon will be shown in blue when it is selected and the name '''Track''' will appear in the drop down box below the icons. For more information about the <span style="font-weight: 700; font-size: 15px; color: white; background-color: #797979;"> Filter Palette </span> see the '''Trainz Wiki Page [[image:WikiLink.PNG|link=]] [[How to Use S20 Palettes#The Filter Palette|How to Use the Surveyor 2.0 Palettes - Filter Palette]]'''</td> | | </tr> |
| | <tr valign="top"> |
| | <td width=25>[[image:DotPoint1.JPG|link=]]</td> |
| | <td><span style="font-weight: 700; font-size: 15px; background-color: lightcyan;"> Left Click </span> on the [[image:S20_PalettePackagesDisabled.png|link=]] ('''Disabled''' icon) after the name of the package</td> |
| | </tr> |
| | <tr valign="top"> |
| | <td colspan=2>To '''Disable''' a package:-</td> |
| </tr> | | </tr> |
| <tr valign="top"> | | <tr valign="top"> |
| <td>[[image:DotPoint.JPG|10px|link=]]</td> | | <td width=25>[[image:DotPoint2.JPG|link=]]</td> |
| <td>The <span style="font-weight: 700; font-size: 15px; color: white; background-color: #797979;"> Assets Palette </span> display is controlled by the selections made in the <span style="font-weight: 700; font-size: 15px; color: white; background-color: #797979;"> Filter Palette </span>. Selecting <span style="font-weight: 700; font-size: 15px; color: white; background-color: black;"> Track </span> in the <span style="font-weight: 700; font-size: 15px; color: white; background-color: #797979;"> Filter Palette </span> will produce a list of all the installed '''Track Splines''' in the <span style="font-weight: 700; font-size: 15px; color: white; background-color: #797979;"> Assets Palette </span>. For more information about the <span style="font-weight: 700; font-size: 15px; color: white; background-color: #797979;"> Assets Palette </span> see the '''Trainz Wiki Page [[image:WikiLink.PNG|link=]] [[How to Use S20 Palettes#The Assets Palette|How to Use the Surveyor 2.0 Palettes - Assets Palette]]'''</td> | | <td><span style="font-weight: 700; font-size: 15px; background-color: lightcyan;"> Left Click </span> on the [[image:S20_PalettePackagesEnabled.png|link=]] ('''Enabled''' icon) after the name of the package</td> |
| </tr> | | </tr> |
| </table> | | </table> |
| Line 8,519: |
Line 8,655: |
| </table> | | </table> |
| <br> | | <br> |
| | | <table bgcolor=#000000 width=750 cellpadding=2> |
| <table width=1000> | |
| <tr valign="top">
| |
| <td width=25>[[image:DotPoint2.JPG|link=]]</td>
| |
| <td>In the <span style="font-weight: 700; font-size: 15px; color: white; background-color: #797979;"> Assets Palette </span> you have the '''option''' to narrow down the filtered list. Type the assets name or part of the name into the <span style="font-weight: 700; font-size: 15px; color: white; background-color: black;"> Search </span> box. For example if you have selected '''Track''' and want to find track splines with "NG42" in their names, then type "NG42" ('''UPPER/lower''' case does not matter).<br><br>
| |
| This will list all the '''Track''' containing the text "NG42" in their names or descriptions.</td>
| |
| </tr>
| |
| </table>
| |
| | |
| <table width=1000>
| |
| <tr valign="top">
| |
| <td width=245>[[image:AssetsPaletteTrackSearchNG42_S20.png|link=]]</td>
| |
| <td><br>
| |
| <table width=755>
| |
| <tr valign="top">
| |
| <td width=25>[[image:DotPoint3.JPG|link=]]</td>
| |
| <td>In the <span style="font-weight: 700; font-size: 15px; color: white; background-color: #797979;"> Assets Palette </span> <span style="font-weight: 700; font-size: 15px; background-color: lightcyan;"> Left Click </span> on the required item in the list. When selected the asset will be highlighted with a light grey background.</td>
| |
| </tr>
| |
| <tr valign="top">
| |
| <td colspan=2>
| |
| <table bgcolor=#000000 cellpadding=2>
| |
| <tr valign="top"> | | <tr valign="top"> |
| <td> | | <td> |
| <table bgcolor=#ffffb0 cellpadding=2> | | <table bgcolor=#ffffe0 width=746 cellpadding=2> |
| <tr valign="top"> | | <tr valign="top"> |
| <td width=25>[[image:NotePad.PNG|link=]]</td> | | <td>[[image:PencilTips.PNG|link=]]</td> |
| <td width=975><span style="font-size: 17px; font-weight: 700;">Notes:'''</span><br> | | <td>Once you have enabled a package, the <span style="font-weight: 700; font-size: 15px; color: white; background-color: black;"> Revert </span> button will become active. Click it to '''Disable''' all enabled packages except the '''All Installed Content''' package (which can be disabled manually).</td> |
| ----
| |
| A <span style="font-weight: 700; font-size: 15px; background-color: lightcyan;"> Left Click </span> on an asset in the <span style="font-weight: 700; font-size: 15px; color: white; background-color: #797979;"> Assets Palette </span> filtered list will automatically activate the '''Placement Tool''' so the next <span style="font-weight: 700; font-size: 15px; background-color: lightcyan;"> Left Click </span> will place that asset in your '''Trainz World'''.</td>
| |
| </tr>
| |
| </table>
| |
| </td> | |
| </tr> | | </tr> |
| </table> | | </table> |
| Line 8,560: |
Line 8,671: |
| </table> | | </table> |
| <br> | | <br> |
| <table width=1000 bgcolor=#000000 cellpadding=2> | | <table bgcolor=#000000 width=750 cellpadding=2> |
| <tr valign="top"> | | <tr valign="top"> |
| <td> | | <td> |
| <table width=996 bgcolor=#ffffe0 cellpadding=2> | | <table bgcolor=#ffffb0 width=746 cellpadding=2> |
| <tr valign="top"> | | <tr valign="top"> |
| <td width=25>[[image:PencilTips.PNG|link=]]</td> | | <td width=25>[[image:NotePad.PNG|link=]]</td> |
| <td>If you are not certain that a selected asset is the right one then try the following:-<br> | | <td>Enabling packages in an '''MPS''' Route will prompt other users who download the Route to install the same packages</td> |
| <span style="font-weight: 700; font-size: 15px;">Options: </span>
| |
| <table>
| |
| <tr valign="top">
| |
| <td width=25>[[image:Ablue.png|link=]]</td>
| |
| <td><span style="font-weight: 700; font-size: 15px; background-color: lightcyan;">Double Left Click</span> on the name in the '''Asset List''' to bring up its image and description, <span style="font-weight: 700; font-size: 15px;">OR</span></td>
| |
| </tr>
| |
| <tr valign="top">
| |
| <td>[[image:Bblue.png|link=]]</td>
| |
| <td>view its rotating and resizeable 3D image in the '''Preview Palette''', <span style="font-weight: 700; font-size: 15px;">OR</span></td>
| |
| </tr>
| |
| <tr valign="top">
| |
| <td>[[image:Cblue.png|link=]]</td>
| |
| <td>switch the asset list to '''Thumbnail View''' (<span style="font-weight: 700; font-size: 15px; background-color: lightcyan;"> Left Click </span> the [[image:AssetsPaletteListToggleViewIcon_S20.png|link=]] icon). In this view the palette is best used undocked and enlarged - see the '''Wiki Page''' at [[image:WikiLink.PNG|link=]] '''[[How_to_Use_S20_Palettes#Thumbnail View|How to Use the Surveyor 2.0 Palettes]]''' for instructions on undocking and enlarging palettes.</td>
| |
| </tr>
| |
| </table>
| |
| </td> | |
| </tr> | | </tr> |
| </table> | | </table> |
| Line 8,589: |
Line 8,684: |
| </table> | | </table> |
| <br> | | <br> |
| <table width=1000> | | <table width=1000> <!-- BEGIN Section Nav Buttons --> |
| <tr valign="top"> | | <tr valign="top"> |
| <td width=25>[[image:DotPoint4.JPG|link=]]</td> | | <td width=629><span id="skip Content Package Details"></span> |
| <td>Place the '''starting point''' of the selected spline or track into the route.</td> | | =='''Content Package Details'''== |
| | </td> |
| | <td width=50>[[image:SkipDown.png|link=#skip Testing the Packages|Skip Down]]</td> |
| | <td width=50>[[image:SkipUp.png|link=#stepPackages|Skip Up]]</td> |
| | <td width=46> </td> <!-- for Top --> |
| | <td width=75>[[image:HeadingUp.png|link=#stepPackages|alt=Heading|To Heading]]</td> |
| | <td width=75> </td> <!-- for Next Down --> |
| | <td width=75> </td> <!-- for Bottom --> |
| </tr> | | </tr> |
| | </table> <!-- END Section Nav Buttons --> |
| | |
| | <table width=700> |
| <tr valign="top"> | | <tr valign="top"> |
| <td colspan=2> | | <td width=345>[[image:S20_PalettePackagesViewDetails.png|link=]]</td> |
| <br>
| |
| <table>
| |
| <tr valign="top"> | |
| <td> | | <td> |
| <table width=500 bgcolor=#000000 cellpadding=2> | | <table width=355 bgcolor=#000000 cellpadding=2> |
| <tr valign="top"> | | <tr valign="top"> |
| <td> | | <td> |
| <table width=496 bgcolor=#ffffff cellpadding=2> | | <table width=351 bgcolor=#ffffff cellpadding=2> |
| <tr valign="top"> | | <tr valign="top"> |
| <td colspan=2><span style="font-weight: 700; font-size: 15px;">Steps:</span></td> | | <td colspan=2><span style="font-weight: 700; font-size: 15px;">Steps: To View the Details of a Package:-</span></td> |
| </tr> | | </tr> |
| <tr valign="top"> | | <tr valign="top"> |
| <td width=20>[[image:DotPoint1RedC.png|link=]]</td> | | <td width=25>[[image:DotPoint1.JPG|link=]]</td> |
| <td>In the <span style="font-weight: 700; font-size: 15px; color: white; background-color: #797979;"> Tools Palette </span> if, for some reason, the '''Placement Tool''' is not selected then <span style="font-weight: 700; font-size: 15px; background-color: lightcyan;"> Left Click </span> on its icon [[image:S20_PlacementToolIcon.png|link=|20px]] or press the <span style="color: white; background-color: black; font-weight: 700; font-size: 15px;"> E </span> key</td> | | <td><span style="font-weight: 700; font-size: 15px; background-color: lightcyan;"> Right Click </span> on the package name</td> |
| </tr> | | </tr> |
| <tr valign="top"> | | <tr valign="top"> |
| <td>[[image:DotPoint2RedC.png|link=]]</td> | | <td>[[image:DotPoint2.JPG|link=]]</td> |
| <td><span style="font-weight: 700; font-size: 15px; background-color: lightcyan;"> Left Click </span> at the spot where you want to '''Start''' the spline | | <td>Select the option <span style="font-weight: 700; font-size: 15px; color: white; background-color: black;"> View Details </span></td> |
| <table bgcolor=#ffffe0 cellpadding=2>
| |
| <tr valign="top">
| |
| <td width=25>[[image:PencilTips.PNG|link=]]</td>
| |
| <td>If the spline starting point is on another spline and you do not want the two splines to be joined then hold down the <span style="font-weight: 700; font-size: 15px; color: white; background-color: black;"> Shift </span> key when you <span style="font-weight: 700; font-size: 15px; background-color: lightcyan;"> Left Click </span></td>
| |
| </tr> | | </tr> |
| </table> | | </table> |
| Line 8,626: |
Line 8,724: |
| </tr> | | </tr> |
| </table> | | </table> |
| </td> | | <br> |
| <td> | | Some packages will display the message [[image:S20_PalettePackagesNoDetails.png|link=]]<br> |
| <table bgcolor=#000000 width=500 cellpadding=2> | | |
| | If details are available then something like the following example will be shown.<br> |
| | <table width=1000> |
| <tr valign="top"> | | <tr valign="top"> |
| | <td width=600>[[image:S20_PalettePackagesDetailWindow.png|link=]]</td> |
| <td> | | <td> |
| <table bgcolor=#ffffb0 width=496 cellpadding=2> | | <table width=400> |
| <tr valign="top"> | | <tr valign="top"> |
| <td> | | <td colspan=2><span style="font-weight: 700; font-size: 15px;">Details:</span></td> |
| <table> | | </tr> |
| <tr valign="top"> | | <tr valign="top"> |
| <td width=25>[[image:NotePad.PNG|link=]]</td> | | <td width=10>[[image:DotPoint.JPG|10px|link=]]</td> |
| <td><span style="font-size: 17px; font-weight: 700;">Notes:</span><br> | | <td>description</td> |
| ----
| |
| </td> | |
| </tr> | | </tr> |
| </table>
| |
| <table>
| |
| <tr valign="top"> | | <tr valign="top"> |
| <td width=10>[[image:DotPoint.JPG|10px|link=]]</td> | | <td width=10>[[image:DotPoint.JPG|10px|link=]]</td> |
| <td>the '''Placement Tool''' will remain on and active until another tool has been selected. So everytime you <span style="font-weight: 700; font-size: 15px; background-color: lightcyan;"> Left Click </span> another copy of the object (or another object if you change your selection) will be added to the route</td> | | <td>status e.g. '''Purchased (installed)''', '''Purchased (update available)'''</td> |
| </tr> | | </tr> |
| <tr valign="top"> | | <tr valign="top"> |
| <td>[[image:DotPoint.JPG|10px|link=]]</td> | | <td width=10>[[image:DotPoint.JPG|10px|link=]]</td> |
| <td>the last object placed will be highlighted (covered in "green/yellow"). This will be the selected object if you switch control to the [[image:S20_FreeMoveToolIcon.png|link=|20px]] '''[[#The Free Move Tool|Free Move Tool]]''' or the [[image:S20_FineAdjustmentToolIcon.png|link=|20px]] '''[[#The Fine Adjustment Tool|Fine Adjustment Tool]]'''</td> | | <td>ID code</td> |
| </tr> | | </tr> |
| </table> | | <tr valign="top"> |
| </td> | | <td width=10>[[image:DotPoint.JPG|10px|link=]]</td> |
| | <td>version - packages that have been '''Uninstalled''' will show '''(not installed)'''</td> |
| </tr> | | </tr> |
| </table> | | </table> |
| </td> | | <br> |
| | <table width=400> |
| | <tr valign="top"> |
| | <td colspan=2><span style="font-weight: 700; font-size: 15px;">Options:</span></td> |
| </tr> | | </tr> |
| </table> | | <tr valign="top"> |
| </td> | | <td>[[image:S20_PalettePackagesUninstall.png|link=]]<br> |
| | <span style="font-weight: 700; font-size: 15px; background-color: lightcyan;"> Left Click </span> to uninstall the package but first read the '''Warning''' below</td> |
| </tr> | | </tr> |
| </table> | | <tr valign="top"> |
| </td> | | <td>[[image:S20_PalettePackagesListFeatured.png|link=]]<br> |
| | <span style="font-weight: 700; font-size: 15px; background-color: lightcyan;"> Left Click </span> to open a '''Content Manager''' window listing the contents of this package</td> |
| </tr> | | </tr> |
| </table> | | </table> |
| <br> | | <br> |
| <table width=1000> | | <table bgcolor=#000000 width=400 cellpadding=2> |
| <tr valign="top"> | | <tr valign="top"> |
| <td rowspan=2 width=420 valign="center">[[image:PlacementTrack1_S20.png|link=]]</td> | | <td> |
| <td width=25>[[image:DotPoint5.JPG|link=]]</td> | | <table bgcolor=#ffffb0 width=396 cellpadding=2> |
| <td>Move the mouse in the direction you want to lay the spline or track. The spline will follow the mouse wherever you move it.
| |
| <table>
| |
| <tr valign="top"> | | <tr valign="top"> |
| <td width=10>[[image:DotPoint.JPG|10px|link=]]</td> | | <td width=25>[[image:NotePad.PNG|link=]]</td> |
| <td>When you start adding a spline to a route it will always be placed at the height of the terrain regardless of the <span style="font-weight: 700; font-size: 15px; color: white; background-color: #797979;"> Tool Options Palette </span> <span style="font-weight: 700; font-size: 15px; color: gold; background-color: black;"> Height </span> setting.</td> | | <td>If you <span style="font-weight: 700; font-size: 15px; color: white; background-color: black;"> Uninstall </span> a package it will still appear in the palette content package list until the palette is either '''Hidden''' or '''Closed'''. Uninstalled packages can be reinstalled later using the '''Content Store'''</td> |
| </tr> | | </tr> |
| <tr valign="top">
| | </table> |
| <td>[[image:DotPoint.JPG|10px|link=]]</td>
| | </td> |
| <td>If there is a '''%''' value in the <span style="font-weight: 700; font-size: 15px; color: gold; background-color: black;"> Grade </span> setting then the spline will be laid down with a slope using that grade value starting from the terrain height at the first endpoint. If you don't want a grade and want each endpoint placed at the terrain height then delete any value stored in the <span style="font-weight: 700; font-size: 15px; color: gold; background-color: black;"> Grade </span> setting.</td>
| |
| </tr> | | </tr> |
| </table> | | </table> |
| Line 8,684: |
Line 8,784: |
| </table> | | </table> |
| <br> | | <br> |
| <table width=1000> | | <table bgcolor=#ff0000 width=1000 cellpadding=2> |
| <tr valign="top">
| |
| <td>[[image:PlacementTrack2_S20.png|link=]]</td>
| |
| <td width=20>[[image:DotPoint6.JPG|link=]]</td>
| |
| <td>When you have the tool pointer in the final position for the first spline segment, <span style="font-weight: 700; font-size: 15px; background-color: lightcyan;"> Left Click </span> again. This will anchor the second spline endpoint. The spline between the two endpoints is the first spline segment.<br>
| |
| <table bgcolor=#000000 cellpadding=2>
| |
| <tr valign="top"> | | <tr valign="top"> |
| <td> | | <td> |
| <table bgcolor=#ffffe0 cellpadding=2> | | <table bgcolor=#fcbcbc width=996 cellpadding=2> |
| <tr valign="top"> | | <tr valign="top"> |
| <td width=25>[[image:PencilTips.PNG|link=]]</td> | | <td>[[image:Stop.PNG|link=]]</td> |
| <td>If the spline end point is on another spline and you do not want the two splines to be joined then hold down the <span style="font-weight: 700; font-size: 15px; color: white; background-color: black;"> Shift </span> key when you <span style="font-weight: 700; font-size: 15px; background-color: lightcyan;"> Left Click </span></td> | | <td><span style="font-size: 15px; font-weight: 700;">Warning:</span><br> |
| | If you '''Uninstall''' a package you will also delete any '''Packaged''' assets it contains that may be needed by other assets on your system, such as routes. Packaged assets may (or may not) be found on the '''DLS''' - that is a decision made by the creator of the package. They are not '''Payware''' but come as part of an installed '''DLC''' package. Trainz has no way of knowing if a "packaged" asset it is about to delete had previously been "Installed from the DLS", and could therefore be needed elsewhere, or was only installed with the package.<br> |
| | |
| | Uninstalling a package can leave you with some (or many) "Missing dependency" error messages. The remedy is to use '''Content Manager''' to first perform a '''DBR''' (database repair) and then download the missing dependencies from the DLS <span style="font-weight: 700; font-size: 15px;">BUT</span> it is possible that some of the "missing dependencies" can only be found in the '''DLC Package''' you have just uninstalled.</td> |
| </tr> | | </tr> |
| </table> | | </table> |
| Line 8,701: |
Line 8,799: |
| </tr> | | </tr> |
| </table> | | </table> |
| The spline segment will now have three '''Context Icons''', one for each '''endpoint''' ([[image:SplineEndpointContextIcon_S20.png|link=]]) and one for the spline segment ([[image:SplineSegmentContextIcon_S20.png|link=]] or [[image:TrackSegmentContextIcon_S20.png|link=]] depending on the type of spline).<br>
| | <br> |
| | <table width=1000> <!-- BEGIN Section Nav Buttons --> |
| | <tr valign="top"> |
| | <td width=629><span id="skip Testing the Packages"></span> |
| | =='''Testing the Packages'''== |
| | </td> |
| | <td width=50>[[image:SkipDown.png|link=#skip Dealing with Unsupported Assets|Skip Down]]</td> |
| | <td width=50>[[image:SkipUp.png|link=#skip Content Package Details|Skip Up]]</td> |
| | <td width=46> </td> <!-- for Top --> |
| | <td width=75>[[image:HeadingUp.png|link=#stepPackages|alt=Heading|To Heading]]</td> |
| | <td width=75> </td> <!-- for Next Down --> |
| | <td width=75> </td> <!-- for Bottom --> |
| | </tr> |
| | </table> <!-- END Section Nav Buttons --> |
|
| |
|
| <table bgcolor=#000000 width=580 cellpadding=2> | | <table width=1000 bgcolor="lightcyan" cellpadding=2> |
| | <tr valign="top"> |
| | <td width=10>[[image:BlueDot10x10.png|link=]]</td> |
| | <td>While you can manually select the packages to be enabled, an easier option may be to let the program perform that task.</td> |
| | </tr> |
| | </table> |
| | <br> |
| | With or without any packages enabled, <span style="font-weight: 700; font-size: 15px; background-color: lightcyan;"> Left Click </span> on the icon showing 3 horizontal bars (bottom right) to open a menu.<br> |
| | [[image:S20_PalettePackagesMenu.png|link=]]<br> |
| | <table width=1000 bgcolor=#000000 cellpadding=2> |
| <tr valign="top"> | | <tr valign="top"> |
| <td> | | <td> |
| <table bgcolor=#ffffb0 width=576 cellpadding=2> | | <table width=996 bgcolor=#ffffff cellpadding=2> |
| <tr valign="top"> | | <tr valign="top"> |
| <td width=25>[[image:NotePad.PNG|link=]]</td> | | <td><span style="font-weight: 700; font-size: 15px; color: white; background-color: black;"> Automatically Enable Required Packages </span></td> |
| <td>Different context menu options are provided depending on whether you click on the icon for an '''endpoint''' or a '''segment'''. See [[image:PageLink.PNG|link=]] '''[[#FM: Context Spline|Free Move: Spline Object Context Menus]]''' for more details</td>
| | <td>attempts to automatically identify and enable the minimum number of packages required by the current route. This only affects the packages listed in the palette and nothing else</td> |
| </tr> | |
| </table>
| |
| </td> | |
| </tr>
| |
| </table>
| |
| </td> | |
| </tr> | | </tr> |
| <tr valign="top"> | | <tr valign="top"> |
| <td rowspan=2>[[image:PlacementTrack3_S20.png|link=]]</td>
| | <td><span style="font-weight: 700; font-size: 15px; color: white; background-color: black;"> List Assets Unsupported by Enabled Packages </span></td> |
| <td width=20>[[image:DotPoint7.JPG|link=]]</td>
| | <td>this will either:-</td> |
| <td><span style="font-weight: 700; font-size: 15px; background-color: lightcyan;"> Left Click </span> on the new endpoint and move the mouse in the direction you want to continue laying the spline or track. The spline will follow the mouse wherever you move it.</td> | |
| </tr> | | </tr> |
| <tr valign="top"> | | <tr valign="top"> |
| <td colspan=2> | | <td colspan=2> |
| <table bgcolor=#000000 cellpadding=2> | | <table> |
| <tr valign="top"> | | <tr valign="top"> |
| <td> | | <td width=25>[[image:Ablue.png|link=]]</td> |
| <table bgcolor=#ffffb0 cellpadding=2> | | <td>open '''Content Manager''' with a window displaying all the assets (objects) used in the current route that are not found in the enabled packages, <span style="font-weight: 700; font-size: 15px;">OR</span></td> |
| | </tr> |
| <tr valign="top"> | | <tr valign="top"> |
| <td width=25>[[image:NotePad.PNG|link=]]</td> | | <td>[[image:Bblue.png|link=]]</td> |
| <td><span style="font-size: 17px; font-weight: 700;">Notes: Curves for Trainz Geekz'''</span><br> | | <td>give the preferred result as shown in the following message<br> |
| ----</td>
| | [[image:S20_PalettePackagesAllSupported.png|link=]]</td> |
| </tr> | | </tr> |
| <tr> | | </table> |
| <td colspan=2>Splines and track splines are created and stored using '''Bezier Curves''', a mathematical formula commonly used for curves in computer graphics. Each spline segment, curved or straight, is described using just 4 points regardless of its length and complexity. This gives significant savings in storage and processing. Unfortunately, real world curves are rarely described by simple '''Bezier Curves'''. This can sometimes create difficulties when modelling curves from the real world so approximations often have to be used in the '''Trainz World'''.
| |
| </td> | | </td> |
| </tr> | | </tr> |
| Line 8,741: |
Line 8,854: |
| </tr> | | </tr> |
| </table> | | </table> |
| </td> | | <br> |
| </tr> | | <table bgcolor=#000000 cellpadding=2> |
| | <tr valign="top"> |
| | <td> |
| | <table bgcolor=#ffffff cellpadding=2> |
| <tr valign="top"> | | <tr valign="top"> |
| <td rowspan=3>[[image:PlacementTrack4_S20.png|link=]]</td> | | <td colspan=2><span style="font-weight: 700; font-size: 15px;">Steps: To identify Assets that are Required by the Current Route that are Not Supported by the Enabled Packages:-</span></td> |
| <td width=20>[[image:DotPoint8.JPG|link=]]</td>
| |
| <td>When you have the tool pointer in the final position for the second spline segment, <span style="font-weight: 700; font-size: 15px; background-color: lightcyan;"> Left Click </span> again. This will anchor the third spline endpoint and the '''Context Icons''' will move to the new segment.</td>
| |
| </tr> | | </tr> |
| <tr valign="top"> | | <tr valign="top"> |
| <td colspan=2> | | <td width=25>[[image:DotPoint1.JPG|link=]]</td> |
| <table width=480 bgcolor=#000000 cellpadding=2> | | <td>'''Disable''' all packages - the <span style="font-weight: 700; font-size: 15px; color: white; background-color: black;"> Revert </span> button will reset any enabled packages leaving only the top package enabled</td> |
| | </tr> |
| <tr valign="top"> | | <tr valign="top"> |
| <td> | | <td>[[image:DotPoint2.JPG|link=]]</td> |
| <table width=476 bgcolor=#ffffb0 cellpadding=2> | | <td>Select the menu option <span style="font-weight: 700; font-size: 15px; color: white; background-color: black;"> Automatically Enable Required Packages </span>. There may be a delay of a few seconds.</td> |
| | </tr> |
| <tr valign="top"> | | <tr valign="top"> |
| <td width=25>[[image:NotePad.PNG|link=]]</td> | | <td>[[image:DotPoint3.JPG|link=]]</td> |
| <td><span style="font-size: 17px; font-weight: 700;">Notes: Adding a Junction'''</span><br> | | <td>Select the menu option <span style="font-weight: 700; font-size: 15px; color: white; background-color: black;"> List Assets Unsupported by Enabled Packages </span></td> |
| ----
| |
| To add a junction to a spline segment <span style="font-weight: 700; font-size: 15px; background-color: lightcyan;"> Left Click </span> on it with the '''Placement Tool''' at the point where you want to insert the junction, this does not have to be an '''endpoint''', then move the pointer out from the junction. See [[image:PageLink.PNG|link=]] '''[[#Add a Spline Junction|Add a Spline Junction]]''' below</td>
| |
| </tr> | | </tr> |
| </table> | | </table> |
| Line 8,764: |
Line 8,878: |
| </tr> | | </tr> |
| </table> | | </table> |
| | <br> |
| | <table width=1000> <!-- BEGIN Section Nav Buttons --> |
| | <tr valign="top"> |
| | <td width=629><span id="skip Dealing with Unsupported Assets"></span> |
| | =='''Dealing with Unsupported Assets'''== |
| </td> | | </td> |
| | <td width=50>[[image:SkipDown.png|link=#skip Apply and Upload|Skip Down]]</td> |
| | <td width=50>[[image:SkipUp.png|link=#skip Testing the Packages|Skip Up]]</td> |
| | <td width=46> </td> <!-- for Top --> |
| | <td width=75>[[image:HeadingUp.png|link=#stepPackages|alt=Heading|To Heading]]</td> |
| | <td width=75> </td> <!-- for Next Down --> |
| | <td width=75> </td> <!-- for Bottom --> |
| </tr> | | </tr> |
| | </table> <!-- END Section Nav Buttons --> |
| | |
| | <table width=1000> |
| <tr valign="top"> | | <tr valign="top"> |
| <td colspan=2>Repeat '''Steps''' [[image:DotPoint7.JPG|link=]] and [[image:DotPoint8.JPG|link=]] above to continue laying the spline.</td> | | <td width=25>[[image:Ablue.png|link=]]</td> |
| </tr> | | <td>If you have manually selected and enabled the packages you want to include and have been shown a list of assets that are not supported by your selection, then you will need to identify the missing packages (if any) and add them manually.<br> |
| </table>
| | <table width=975 bgcolor=#000000 cellpadding=2> |
| <br> | |
| <span id="Spine Laying Tips"></span>
| |
| ====Spine Laying Tips====
| |
| <table width=1000 bgcolor=#000000 cellpadding=2> | |
| <tr valign="top"> | | <tr valign="top"> |
| <td> | | <td> |
| <table width=996 bgcolor=#ffffe0 cellpadding=2> | | <table width=971 bgcolor=#ffffff cellpadding=2> |
| <tr valign="top"> | | <tr valign="top"> |
| <td width=25>[[image:PencilTips.PNG|link=]]</td> | | <td colspan=2><span style="font-weight: 700; font-size: 15px;">Steps: To Identify and Add Missing Packages:-</span></td> |
| <td><span style="font-weight: 700; font-size: 15px;">Starting/Ending Disconnected Splines On Other Splines</span>
| | </tr> |
| <table> | |
| <tr valign="top"> | | <tr valign="top"> |
| <td width=10>[[image:BlueDot10x10.png|link=]]</td> | | <td width=25>[[image:DotPoint1.JPG|link=]]</td> |
| <td>If you start or end a spline segment on another identical or compatible spline it will form a junction (see [[image:PageLink.PNG|link=]] '''[[#Add a Spline Junction|Add a Spline Junction]]''' below) or, if close enough, it will attach itself to a nearby endpoint on that spline. This is perfect if that is what you want but it is an annoyance if it is not what you want.</td> | | <td><span style="font-weight: 700; font-size: 15px; background-color: lightcyan;"> Left Click </span> on the first asset in the '''Content Manager''' window</td> |
| </tr> | | </tr> |
| <tr valign="top"> | | <tr valign="top"> |
| <td width=10>[[image:BlueDot10x10.png|link=]]</td> | | <td>[[image:DotPoint2.JPG|link=]]</td> |
| <td>If you start or end a spline segment on an incompatible spline (e.g. placing a ruler spline endpoint on a road spline) you will receive a warning message such as <span style="font-weight: 700; font-size: 15px; color: white; background-color: black;"> Incompatible Spline </span> and you will not be able to add the segment.</td> | | <td>open the '''Content Menu''' and select the option '''Report Containing Packages'''</td> |
| </tr> | | </tr> |
| </table>
| |
| To prevent a junction/join forming or a segment being rejected, use the following technique:-
| |
| <table bgcolor=#ffffff cellpadding=2>
| |
| <tr valign="top"> | | <tr valign="top"> |
| <td width=10>[[image:DotPoint.JPG|10px|link=]]</td> | | <td>[[image:DotPoint3.JPG|link=]]</td> |
| <td>Hold down the <span style="font-weight: 700; font-size: 15px; color: white; background-color: black;"> Shift </span> key when performing the <span style="font-weight: 700; font-size: 15px; background-color: lightcyan;"> Left Click </span> (a <span style="font-weight: 700; font-size: 15px;"><span style="color: white; background-color: black;"> Shift </span> + <span style="background-color: lightcyan;"> Left Click </span></span>) on the second spline. If this is the start of a spline then once you have clicked draw the new spline out as you normally would</td> | | <td>note the ID of the package. If no ID is shown then the asset does not belong to an installed package (see option [[image:Bblue.png|link=]] below for dealing with these assets)</td> |
| </tr>
| |
| </table>
| |
| </td> | |
| </tr> | | </tr> |
| <tr valign="top"> | | <tr valign="top"> |
| <td colspan=2> | | <td>[[image:DotPoint4.JPG|link=]]</td> |
| ----
| | <td>repeat for each asset in the '''Content Manager''' list</td> |
| </td> | |
| </tr> | | </tr> |
| <tr valign="top"> | | <tr valign="top"> |
| <td width=25>[[image:PencilTips.PNG|link=]]</td> | | <td>[[image:DotPoint5.JPG|link=]]</td> |
| <td><span style="font-weight: 700; font-size: 15px;">Lay a Spline that Follows the Ground Terrain</span><br> | | <td>'''Enable''' the identified missing packages. The IDs of all the installed packages can be found by using the steps described in [[image:PageLink.PNG|link=]] '''[[#Content Package Details|Content Package Details]]''' above</td> |
| Normally splines will be laid down so that they follow the shape of the ground terrain. Occasionally they may be laid down at a set gradient that will ignore the shape of the ground terrain between the two endpoints. This can happen if you have used the '''Eyedropper Tool''' to select an existing spline object - the eyedropper will copy some of the features of the selected spline (such as its gradient) into the <span style="font-weight: 700; font-size: 15px; color: white; background-color: #797979;"> Tool Options Palette </span>. If you want the spline to follow the ground terrain, not a set gradient, then use the following:-
| |
| <table bgcolor=#ffffff cellpadding=2>
| |
| <tr valign="top">
| |
| <td width=10>[[image:DotPoint.JPG|10px|link=]]</td>
| |
| <td>In the <span style="font-weight: 700; font-size: 15px; color: white; background-color: #797979;"> Tool Options Palette </span> check the <span style="font-weight: 700; font-size: 15px; color: gold; background-color: black;"> Grade </span> setting. If it is showing a '''%''' value (e.g. '''0%''' which means "flat") then highlight the value and delete it. It should now show the <span style="font-weight: 700; font-size: 15px; color: white; background-color: black;"> - </span> character (which means "no gradient will be applied")</td>
| |
| </tr> | | </tr> |
| </table> | | </table> |
| Line 8,818: |
Line 8,929: |
| </table> | | </table> |
| </td> | | </td> |
| | </tr> |
| | <tr valign="top"> |
| | <td width=25>[[image:Bblue.png|link=]]</td> |
| | <td>If you have used the <span style="font-weight: 700; font-size: 15px; color: white; background-color: black;"> Automatically Enable Required Packages </span> option then any unsupported assets found will not belong to any installed packages. In this case you will need to create a new package using '''TCCP''' and add them to that package - see the Trainz Wiki Page at [[image:WikiLink.PNG|link=]] '''[[TCCP_Content_Creation|TCCP Content Creation]]'''. If that is not a suitable option then you will need to either remove the unsupported assets from the route or replace them with supported assets.</td> |
| </tr> | | </tr> |
| </table> | | </table> |
| <br> | | <br> |
| <table width=1000> <!-- BEGIN Section Nav Buttons --> | | <table width=1000> <!-- BEGIN Section Nav Buttons --> |
| <tr valign="top"> | | <tr valign="top"> |
| <td width=629><span id="PT: Move Spline"></span> | | <td width=629><span id="skip Apply and Upload"></span> |
| ===<span style="font-size: 17px; color: white; background-color: blue;"> Placement: Move a Spline Object </span>=== | | =='''Apply and Upload'''== |
| </td> | | </td> |
| <td width=50> </td> | | <td width=50>[[image:SkipDown.png|link=#stepDriverCenter|Skip Down]]</td> |
| <td width=50> </td>
| | <td width=50>[[image:SkipUp.png|link=#skip Dealing with Unsupported Assets|Skip Up]]</td> |
| <td width=46>[[image:SkipMinorDown.png|link=#PT: Delete Spline|Down]][[image:SkipMinorUp.png|link=#PT: Add Spline|Up]]</td> <!-- for Top and Minor Up/Down -->
| | <td width=46> </td> <!-- for Top --> |
| <td width=75> </td> | | <td width=75>[[image:HeadingUp.png|link=#stepPackages|alt=Heading|To Heading]]</td> |
| <td width=75> </td> | | <td width=75> </td> <!-- for Next Down --> |
| <td width=75> </td> <!-- for Bottom --> | | <td width=75> </td> <!-- for Bottom --> |
| </tr> | | </tr> |
| </table> <!-- END Section Nav Buttons --> | | </table> <!-- END Section Nav Buttons --> |
| | Once you have enabled the required packages, you need to prepare the route for uploading to the live '''MPS Server'''<br> |
|
| |
|
| <table bgcolor=#ff0000 cellpadding=2> | | <table bgcolor=#000000 width=1000 cellpadding=2> |
| <tr valign="top"> | | <tr valign="top"> |
| <td> | | <td> |
| <table bgcolor=#fcbcbc> | | <table bgcolor=#ffffff width=996 cellpadding=2> |
| | <tr> |
| | <td colspan=2><span style="font-weight: 700; font-size: 15px;">Steps: To Apply the Content Package Changes:-</span></td> |
| | </tr> |
| <tr valign="top"> | | <tr valign="top"> |
| <td colspan=2><span style="font-size: 17px; font-weight: 700;">Warning:</span></td> | | <td width=25>[[image:DotPoint1.JPG|link=]]</td> |
| | <td><span style="font-weight: 700; font-size: 15px; background-color: lightcyan;"> Left Click </span> the <span style="font-weight: 700; font-size: 15px; color: white; background-color: black;"> Apply </span> button at the bottom of the palette window.</td> |
| </tr> | | </tr> |
| <tr valign="top"> | | <tr valign="top"> |
| <td>[[image:Stop.PNG|link=]]</td> | | <td> </td> |
| <td>To move a spline object <span style="font-weight: 700; font-size: 15px;"><span style="color: white; background-color: red;"> DO NOT </span> click on it</span> with the '''Placement Tool''' as this will just add a junction</td> | | <td>You may be shown an error report which will list the assets, by their '''kuids''', that have failed a compliance test. In this case the package creation will not proceed. You will need to identify each asset listed in the report and take any necessary action, such as replacing the assets or removing them from the route.<br> |
| | If there is no error report then you will be shown the following message:-</td> |
| | </tr> |
| | <tr valign="top"> |
| | <td colspan=2> |
| | <table width=425> |
| | <tr valign="top"> |
| | <td width=425>[[image:S20_PalettePackagesApplyConfirm.png|link=]]</td> |
| | <td> |
| | <table bgcolor=#ffffb0 width=575 cellpadding=2> |
| | <tr valign="top"> |
| | <td width=25>[[image:NotePad.PNG|link=]]</td> |
| | <td><span style="font-size: 17px; font-weight: 700;">Note:'''</span><br> |
| | ---- |
| | If you have '''NOT''' already saved this route then it will be saved using '''"New Route"''' as its name. <span style="font-weight: 700; font-size: 15px; background-color: lightcyan;"> Left Click </span> <span style="font-weight: 700; font-size: 15px; color: white; background-color: black;"> Cancel </span>, save using your preferred route name and then return to the '''Content Packages Palette'''. |
| | </td> |
| </tr> | | </tr> |
| </table> | | </table> |
| Line 8,850: |
Line 8,985: |
| </tr> | | </tr> |
| </table> | | </table> |
| <br> | | </td> |
| <table width=1000 bgcolor=#000000 cellpadding=2> | | </tr> |
| <tr valign="top"> | | <tr valign="top"> |
| <td> | | <td>[[image:DotPoint2.JPG|link=]]</td> |
| <table width=996 bgcolor=#ffffe0 cellpadding=2>
| | <td>To accept the changes, <span style="font-weight: 700; font-size: 15px; background-color: lightcyan;"> Left Click </span> <span style="font-weight: 700; font-size: 15px; color: white; background-color: #009fe9;"> OK </span></td> |
| <tr valign="top">
| |
| <td width=25>[[image:PencilTips.PNG|link=]]</td>
| |
| <td>To move spline objects you must switch to either the [[image:S20_FreeMoveToolIcon.png|link=|20px]] '''[[#The Free Move Tool|Free Move Tool]]''' <span style="font-weight: 700; font-size: 15px;">OR</span> the [[image:PageLink.PNG|link=]] '''[[#The_Fine_Adjustment_Tool|The Fine Ajustment Tool]]'''</td> | |
| </tr> | | </tr> |
| </table> | | </table> |
| Line 8,864: |
Line 8,996: |
| </table> | | </table> |
| <br> | | <br> |
| <table width=1000> | | The next step is to upload the new package to the live '''MPS Server'''. |
| | |
| | <table width=1000 bgcolor=#000000 cellpadding=2> |
| <tr valign="top"> | | <tr valign="top"> |
| <td> | | <td> |
| <table width=490 bgcolor=#000000 cellpadding=2> | | <table bgcolor=#ffffff width=996 cellpadding=2> |
| <tr valign="top"> | | <tr valign="top"> |
| <td> | | <td colspan=2><span style="font-weight: 700; font-size: 15px;">Steps: To Upload the Package to the MPS Server:-</span></td> |
| <table bgcolor=#ffffff cellpadding=2> | | </tr> |
| <tr valign="top"> | | <tr valign="top"> |
| <td colspan=2><span style="font-weight: 700; font-size: 15px;">Steps:</span> To move a spline '''segment'''</td> | | <td width=25>[[image:DotPoint1.JPG|link=]]</td> |
| | <td>Open the [[image:SurveyorSharingIcon.png|link=]] '''Surveyor Sharing Menu''' from the '''Main Menu''' icons</td> |
| </tr> | | </tr> |
| <tr valign="top"> | | <tr valign="top"> |
| <td width=20>[[image:DotPoint1.JPG|link=]]</td> | | <td colspan=2> |
| <td>In the <span style="font-weight: 700; font-size: 15px; color: white; background-color: #797979;"> Tools Palette </span> <span style="font-weight: 700; font-size: 15px; background-color: lightcyan;"> Left Click </span> on either the [[image:S20_FreeMoveToolIcon.png|link=|20px]] '''[[#The Free Move Tool|Free Move Tool]]''' (or press the <span style="font-weight: 700; font-size: 15px; color: white; background-color: black;"> S </span> key) or the [[image:S20_FineAdjustmentToolIcon.png|link=|20px]] '''[[#The Fine Adjustment Tool|Fine Adjustment Tool]]''' (or press the <span style="font-weight: 700; font-size: 15px; color: white; background-color: black;"> D </span> key)</td> | | <table> |
| </tr> | | <tr valign="top"> |
| | <td width=170>[[image:SocialMenu.png|link=]]</td> |
| | <td> |
| | <table> |
| <tr valign="top"> | | <tr valign="top"> |
| <td>[[image:DotPoint2.JPG|link=]]</td> | | <td>[[image:DotPoint2.JPG|link=]]</td> |
| <td>Select (<span style="font-weight: 700; font-size: 15px; background-color: lightcyan;"> Left Click </span>) on the spline segment to be moved. To select multiple spline segments use <span style="font-weight: 700; font-size: 15px;"><span style="color: white; background-color: black;"> Shift </span> + <span style="background-color: lightcyan;"> Left Click </span></span> on each segment</td> | | <td>Select the option <span style="font-weight: 700; font-size: 15px; color: white; background-color: black;"> Share Route </span>. You will receive a warning that '''Session Data''' is not supported.</td> |
| </tr> | | </tr> |
| <tr valign="top"> | | <tr valign="top"> |
| <td>[[image:DotPoint3.JPG|link=]]</td> | | <td>[[image:DotPoint3.JPG|link=]]</td> |
| <td><span style="font-weight: 700; font-size: 15px; background-color: lightcyan;"> Left Click and Drag </span> the segment(s) in the required direction | | <td>To proceed <span style="font-weight: 700; font-size: 15px; background-color: lightcyan;"> Left Click </span> <span style="font-weight: 700; font-size: 15px; color: white; background-color: black;"> OK </span><br> |
| <table bgcolor=#ffffb0 cellpadding=2> | | To cancel the upload <span style="font-weight: 700; font-size: 15px; background-color: lightcyan;"> Left Click </span> <span style="font-weight: 700; font-size: 15px; color: white; background-color: black;"> Cancel </span></td> |
| <tr valign="top"> | |
| <td width=25>[[image:NotePad.PNG|link=]]</td>
| |
| <td><span style="font-weight: 700; font-size: 15px;">Note:</span> always drag on a '''segment''' not on an '''endpoint''' otherwise only the endpoint will be moved</td>
| |
| </tr> | | </tr> |
| </table> | | </table> |
| Line 8,894: |
Line 9,029: |
| </tr> | | </tr> |
| <tr valign="top"> | | <tr valign="top"> |
| <td colspan=2>For more information see the sections [[image:PageLink.PNG|link=]] '''[[#Free Move: Spline Objects|Free Move: Spline Objects]]''' or [[image:PageLink.PNG|link=]] '''[[#Fine Adjustment: Spline Objects|Fine Adjustment: Spline Objects]]'''</td> | | <td colspan=3> |
| | <table> |
| | <tr valign="top"> |
| | <td width=25>[[image:DotPoint4.JPG|link=]]</td> |
| | <td>Assuming that you selected <span style="font-weight: 700; font-size: 15px; color: white; background-color: black;"> OK </span> then the route will be packaged and uploaded to the live '''MPS Server'''. A successful upload will be indicated by the final message as shown below:-<br> |
| | <table> |
| | <tr valign="top"> |
| | <td>[[image:S20_PalettePackagesUploadCompleted.png|link=]]</td> |
| | <td>A route that has been uploaded to the '''MPS Server''' will appear with a <span style="background-color: #848dff;">            </span> colour band in the '''Surveyor Select a Route/Session''' window.</td> |
| </tr> | | </tr> |
| </table> | | </table> |
| Line 8,901: |
Line 9,044: |
| </table> | | </table> |
| </td> | | </td> |
| <td width=20> </td>
| |
| <td>
| |
| <table width=490 bgcolor=#000000 cellpadding=2>
| |
| <tr valign="top">
| |
| <td>
| |
| <table bgcolor=#ffffff cellpadding=2>
| |
| <tr valign="top">
| |
| <td colspan=2><span style="font-weight: 700; font-size: 15px;">Steps:</span> To move a spline '''endpoint'''</td>
| |
| </tr>
| |
| <tr valign="top">
| |
| <td width=20>[[image:DotPoint1.JPG|link=]]</td>
| |
| <td>In the <span style="font-weight: 700; font-size: 15px; color: white; background-color: #797979;"> Tools Palette </span> <span style="font-weight: 700; font-size: 15px; background-color: lightcyan;"> Left Click </span> on either the [[image:S20_FreeMoveToolIcon.png|link=|20px]] '''[[#The Free Move Tool|Free Move Tool]]''' (or press the <span style="font-weight: 700; font-size: 15px; color: white; background-color: black;"> S </span> key) or the [[image:S20_FineAdjustmentToolIcon.png|link=|20px]] '''[[#The Fine Adjustment Tool|Fine Adjustment Tool]]''' (or press the <span style="font-weight: 700; font-size: 15px; color: white; background-color: black;"> D </span> key)</td>
| |
| </tr>
| |
| <tr valign="top">
| |
| <td>[[image:DotPoint2.JPG|link=]]</td>
| |
| <td><span style="font-weight: 700; font-size: 15px; background-color: lightcyan;"> Left Click and Drag </span> the endpoint in the required direction</td>
| |
| </tr>
| |
| <tr valign="top">
| |
| <td colspan=2>For more information see the sections [[image:PageLink.PNG|link=]] '''[[#Free Move: Spline Objects|Free Move: Spline Objects]]''' or [[image:PageLink.PNG|link=]] '''[[#Fine Adjustment: Spline Objects|Fine Adjustment: Spline Objects]]'''</td>
| |
| </tr> | | </tr> |
| </table> | | </table> |
| Line 8,929: |
Line 9,053: |
| </table> | | </table> |
| <br> | | <br> |
| <table width=1000> <!-- BEGIN Section Nav Buttons --> | | <table width=1000> <!-- BEGIN Nav Buttons Table --> |
| <tr valign="top"> | | <tr valign="top"> |
| <td width=629><span id="PT: Delete Spline"></span> | | <td width=629><span id="stepDriverCenter"></span> |
| ===<span style="font-size: 17px; color: white; background-color: blue;"> Placement: Delete a Spline Object </span>=== | | ='''The Driver Control Center'''= |
| </td> | | </td> |
| <td width=50> </td> | | <td width=50>[[image:SkipDown.png|link=#skip Adding a Driver|Skip Down]]</td> |
| <td width=50> </td> | | <td width=50>[[image:SkipUp.png|link=#skip Apply and Upload|Skip Up]]</td> |
| <td width=46>[[image:SkipMinorDown.png|link=#PT: Add Junction Spline|Down]][[image:SkipMinorUp.png|link=#PT: Move Spline|Up]]</td> <!-- for Top and Minor Up/Down --> | | <td width=46>[[image:BackToTop.png|link=#top|alt=Top|Top]]</td> |
| <td width=75> </td> | | <td width=75>[[image:NextUp.png|link=#stepPackages|alt=Next Up|Next Up]]</td> |
| <td width=75> </td> | | <td width=75>[[image:NextDown.png|link=#stepDispatchManager|alt=Next Down|Top]]</td> |
| <td width=75> </td> <!-- for Bottom -->
| | <td width=75>[[image:BackToBottom.png|link=#bottom|alt=Bottom|Bottom]]</td> |
| </tr> | | </tr> |
| </table> <!-- END Section Nav Buttons --> | | </table> <!-- END Nav Buttons Table --> |
|
| |
|
| <table width=1000> | | <table width=1000 cellpadding=2> |
| | <tr valign="top"> |
| | <td bgcolor=#ffffb0 width=200><span style="font-weight: 700; font-size: 15px;">This is a <span style="color: white; background-color: blue;"> Surveyor </span> palette</span> </td> |
| | <td bgcolor=#33ff77><span style="font-weight: 700; font-size: 15px;">and a <span style="color: white; background-color: blue;"> Driver </span> window</span></td> |
| | </tr> |
| | </table> |
| | <br> |
| | <table bgcolor=#000000> |
| | <tr valign="top"> |
| | <td> |
| | <table bgcolor=#ffe89a cellpadding=2> |
| | <tr valign="top"> |
| | <td width=45>[[image:PalettesIcon_S20.png|link=]]</td> |
| | <td>If the '''Driver Control Center''' is not visible on the screen then choose one of:- |
| | <table bgcolor=#ffffff cellpadding=2> |
| <tr valign="top"> | | <tr valign="top"> |
| <td colspan=2>To delete a spline object (or any object) that has just been added by the '''Placement Tool''' and is still highlighted, choose one of the following:-<br> | | <td colspan=2><span style="font-weight: 700; font-size: 17px;">Options:</span></td> |
| <span style="font-weight: 700; font-size: 15px;">Options:</span></td> | |
| </tr> | | </tr> |
| <tr valign="top"> | | <tr valign="top"> |
| <td width=25>[[image:Ablue.png|link=]]</td> | | <td width=25>[[image:Ablue.png|link=]]</td> |
| <td>press the <span style="font-weight: 700; font-size: 15px; color: white; background-color: black;"> Delete </span> key, <span style="font-weight: 700; font-size: 15px;">OR</span></td> | | <td>in '''Driver''' or '''Surveyor''' open the [[image:SurveyorWindowIcon.png|link=]] '''Window Menu''' and <span style="font-weight: 700; font-size: 15px; background-color: lightcyan;"> Left Click </span> on the <span style="font-weight: 700; font-size: 15px; color: white; background-color: black;"> Driver Control Center </span> option</td> |
| </tr> | | </tr> |
| <tr valign="top"> | | <tr valign="top"> |
| <td>[[image:Bblue.png|link=]]</td> | | <td width=25>[[image:Bblue.png|link=]]</td> |
| <td>open its '''Context Menu''' (<span style="font-weight: 700; font-size: 15px; background-color: lightcyan;"> Left Click </span> on its icon or press the <span style="font-weight: 700; font-size: 15px; color: white; background-color: black;"> T </span> key) and select the option <span style="font-weight: 700; font-size: 15px; color: white; background-color: black;"> Delete </span></td> | | <td>In '''Driver''' <span style="font-weight: 700; font-size: 15px; background-color: lightcyan;"> Left Click </span> on the '''Driver Icon''' at the bottom left of the screen</td> |
| </tr> | | </tr> |
| <tr valign="top"> | | </table> |
| <td colspan=2> | | </td> |
| <table bgcolor=#000000 cellpadding=2> | | </tr> |
| | </table> |
| | </td> |
| | </tr> |
| | </table> |
| | <br> |
| | <table bgcolor=#000000 cellpadding=2> |
| <tr valign="top"> | | <tr valign="top"> |
| <td> | | <td> |
| <table bgcolor=#ffffb0 cellpadding=2> | | <table bgcolor=#ffffbo cellpadding=2> |
| <tr valign="top"> | | <tr valign="top"> |
| <td width=25>[[image:NotePad.PNG|link=]]</td> | | <td width=25>[[image:NotePad.PNG|link=]]</td> |
| <td>If the object is not highlighted then you must first switch to either the [[image:S20_FreeMoveToolIcon.png|link=|20px]] '''[[#The Free Move Tool|Free Move Tool]]''' or the [[image:S20_FineAdjustmentToolIcon.png|link=|20px]] '''[[#The Fine Adjustment Tool|Fine Adjustment Tool]]''', select the object and then choose one of the above options</td> | | <td><span style="font-size: 17px; font-weight: 700;">Notes:'''</span><br> |
| | ---- |
| | In '''Trainz Plus''' this palette/window has been redesigned for the '''Trainz Living Railroad (TLR)''' feature. |
| | <table> |
| | <tr valign="top"> |
| | <td width=10>[[image:DotPoint.JPG|10px|link=]]</td> |
| | <td>most of its features can be used without the '''TLR'''</td> |
| | </tr> |
| | <tr valign="top"> |
| | <td width=10>[[image:DotPoint.JPG|10px|link=]]</td> |
| | <td>it is '''NOT''' a replacement for the '''Driver Setup Rule''' in the '''Session Editor'''</td> |
| </tr> | | </tr> |
| </table> | | </table> |
| Line 8,974: |
Line 9,127: |
| </table> | | </table> |
| <br> | | <br> |
| <span id="Add a Spline Junction"></span>
| |
| <table width=1000> <!-- BEGIN Section Nav Buttons -->
| |
| <tr valign="top">
| |
| <td width=629><span id="PT: Add Junction Spline"></span>
| |
| ===<span style="font-size: 17px; color: white; background-color: blue;"> Placement: Add a Spline Junction </span>===
| |
| </td>
| |
| <td width=50> </td>
| |
| <td width=50> </td>
| |
| <td width=46>[[image:SkipMinorDown.png|link=#PT: Remove Junction Spline|Down]][[image:SkipMinorUp.png|link=#PT: Delete Spline|Up]]</td> <!-- for Top and Minor Up/Down -->
| |
| <td width=75> </td>
| |
| <td width=75> </td>
| |
| <td width=75> </td> <!-- for Bottom -->
| |
| </tr>
| |
| </table> <!-- END Section Nav Buttons -->
| |
|
| |
| <table width=1000 bgcolor="lightcyan" cellpadding=2> | | <table width=1000 bgcolor="lightcyan" cellpadding=2> |
| <tr valign="top"> | | <tr valign="top"> |
| <td width=10>[[image:BlueDot10x10.png|link=]]</td> | | <td width=10>[[image:BlueDot10x10.png|link=]]</td> |
| <td>A junction is formed when three spline segments are joined at an endpoint. Junctions can be formed using non identical but '''compatible''' spline objects, such as different types of track splines.</td> | | <td>This provides a full list of available drivers, their assigned trains, tasks (if any) and the tools to manage them in both '''Surveyor''' and '''Driver'''</td> |
| </tr> | | </tr> |
| </table> | | </table> |
| <br> | | <br> |
| <table width=1000 cellpadding=2> | | <table width=1000> |
| <tr valign="top"> | | <tr valign="top"> |
| <td width=425>[[image:SplineJunction_S20.png|link=]]</td> | | <td width=305>[[image:DriverPalette_S20.png|link=]] |
| <td> | | <br> |
| <table width=575 bgcolor=#000000 cellpadding=2> | | <table bgcolor=#000000 cellpadding=2> |
| <tr valign="top"> | | <tr valign="top"> |
| <td> | | <td> |
| <table width=571 bgcolor=#ffffff cellpadding=2> | | <table bgcolor=#ffffe0 cellpadding=2> |
| <tr valign="top"> | | <tr valign="top"> |
| <td colspan=2><span style="font-weight: 700; font-size: 15px;">Steps:</span> To add a junction to a spline object:-</td> | | <td>[[image:PencilTips.PNG|link=]]</td> |
| | <td>The '''Drivers Palette''' list can be scrolled up and down to reveal more available drivers.</td> |
| </tr> | | </tr> |
| <tr valign="top">
| | </table> |
| <td width=25>[[image:DotPoint1.JPG|link=]]</td>
| | </td> |
| <td>Select the spline object to be used for the junction. The easiest method is hold down the <span style="font-weight: 700; font-size: 15px; color: white; background-color: black;"> Alt </span> key and <span style="font-weight: 700; font-size: 15px; background-color: lightcyan;"> Left Click </span> on an existing spline object that you want to use. This will also select the '''Placement Tool''' in '''Step''' <span style="font-weight: 700; font-size: 15px; color: white; background-color: red;"> 2 </span> below so you can skip to '''Step''' <span style="font-weight: 700; font-size: 15px; color: white; background-color: red;"> 3 </span></td>
| |
| </tr> | | </tr> |
| | </table> |
| | </td> |
| | <td> |
| | <table> |
| <tr valign="top"> | | <tr valign="top"> |
| <td>[[image:DotPoint2.JPG|link=]]</td> | | <td colspan=2> |
| <td>In the <span style="font-weight: 700; font-size: 15px; color: white; background-color: #797979;"> Tools Palette </span> select the '''Placement Tool''' [[image:S20_PlacementToolIcon.png|link=|20px]]</td> | | <table bgcolor=#000000 cellpadding=2> |
| </tr>
| |
| <tr valign="top"> | | <tr valign="top"> |
| <td>[[image:DotPoint3.JPG|link=]]</td> | | <td> |
| <td><span style="font-weight: 700; font-size: 15px; background-color: lightcyan;"> Left Click </span> on the spline at the spot where the junction is to be created. This can be on an existing endpoint or between two endpoints where a new endpoint will be inserted</td>
| |
| </tr>
| |
| <tr valign="top">
| |
| <td colspan=2>
| |
| <table bgcolor=#ffffb0 cellpadding=2> | | <table bgcolor=#ffffb0 cellpadding=2> |
| <tr valign="top"> | | <tr valign="top"> |
| <td width=25>[[image:NotePad.PNG|link=]]</td> | | <td width=25>[[image:NotePad.PNG|link=]]</td> |
| <td>All spline junctions will be shown with a red dot ([[image:DotPoint.JPG|7px|link=]]). The only exception is for '''procedural track junctions''' where a [[image:DotPoint.JPG|7px|link=]] <span style="font-weight: 700; color: red;">red dot</span> indicates a poorly formed junction while a [[image:DotPointBlackSquare.png|7px|link=]] '''black dot''' indicates a correctly formed junction. See [[image:PageLink.PNG|link=]] '''[[#PT: Junction Track|Add a Track Junction]]''' below for more details</td> | | <td> |
| | <table> |
| | <tr valign="top"> |
| | <td width=10>[[image:DotPoint.JPG|10px|link=]]</td> |
| | <td>The driver with the current camera focus is shown on a blue background</td> |
| </tr> | | </tr> |
| </table> | | <tr valign="top"> |
| </td> | | <td>[[image:DotPoint.JPG|10px|link=]]</td> |
| | <td>In '''Surveyor''' this palette and its child windows can be minimised and resized</td> |
| </tr> | | </tr> |
| <tr valign="top"> | | <tr valign="top"> |
| <td>[[image:DotPoint4.JPG|link=]]</td> | | <td>[[image:DotPoint.JPG|10px|link=]]</td> |
| <td>move the mouse pointer out from the junction to where the next endpoint of the spline branch will be placed and <span style="font-weight: 700; font-size: 15px; background-color: lightcyan;"> Left Click </span></td> | | <td>In '''Driver''' this window can be minimised but '''NOT''' resized, however its child windows can be both minimised and resized</td> |
| </tr> | | </tr> |
| </table> | | </table> |
| Line 9,040: |
Line 9,182: |
| </tr> | | </tr> |
| </table> | | </table> |
| <br> | | </td> |
| <table width=1000 bgcolor=#000000 cellpadding=2> | | </tr> |
| | <tr valign="top"> |
| | <td colspan=2>Next to the image of each driver is:- |
| | <table> |
| | <tr valign="top"> |
| | <td width=10>[[image:DotPoint.JPG|10px|link=]]</td> |
| | <td>a thumbnail of their assigned locomotive (or '''No assigned location''')</td> |
| | </tr> |
| <tr valign="top"> | | <tr valign="top"> |
| <td> | | <td>[[image:DotPoint.JPG|10px|link=]]</td> |
| <table width=996 bgcolor=#ffffb0 cellpadding=2> | | <td>the assigned locomotives '''Object Name'''. This can be set in '''Surveyor''' using either the [[image:PageLink.PNG|link=]] '''[[#The Info Palette|Info Palette]]''' or the [[image:PageLink.PNG|link=]] '''[[#Driver Properties|Driver Properties]]''' Tool</td> |
| | </tr> |
| <tr valign="top"> | | <tr valign="top"> |
| <td width=25>[[image:NotePad.PNG|link=]]</td> | | <td>[[image:DotPoint.JPG|10px|link=]]</td> |
| <td width=975><span style="font-size: 17px; font-weight: 700;">Notes: Incompatible Splines</span><br> | | <td>the current control state of the train - the next command in their '''Driver Command List''' (driver '''Bald''' shown left), '''Manual Control''' (driver '''Aldair'''), '''Not in a Train''' (driver '''Kenny''') or '''Idle''' (driver '''Jane''')</td> |
| ----
| |
| If, when forming a join or a junction between two splines, the message <span style="font-weight: 700; font-size: 15px; color: white; background-color: black;"> Incompatible Spline </span> appears in the top right corner of the screen, then you are attempting to join two splines that are not compatible with each other. The join or junction between the splines will '''NOT''' be created.</td>
| |
| </tr> | | </tr> |
| </table> | | </table> |
| </td> | | </td> |
| </tr> | | </tr> |
| </table>
| |
| <br>
| |
| <table width=1000> <!-- BEGIN Section Nav Buttons -->
| |
| <tr valign="top"> | | <tr valign="top"> |
| <td width=629><span id="PT: Remove Junction Spline"></span> | | <td colspan=2>Above each drivers image is a '''Tool Bar''' for that driver [[image:DriverPaletteTools_S20.png|link=]]</td> |
| ===<span style="font-size: 17px; color: white; background-color: blue;"> Placement: Separate Splines </span>===
| |
| </td>
| |
| <td width=50> </td>
| |
| <td width=50> </td>
| |
| <td width=46>[[image:SkipMinorDown.png|link=#PT: Junction Track|Down]][[image:SkipMinorUp.png|link=#PT: Add Junction Spline|Up]]</td> <!-- for Top and Minor Up/Down -->
| |
| <td width=75> </td>
| |
| <td width=75> </td>
| |
| <td width=75> </td> <!-- for Bottom -->
| |
| </tr> | | </tr> |
| </table> <!-- END Section Nav Buttons -->
| |
|
| |
| <table width=1000>
| |
| <tr valign="top"> | | <tr valign="top"> |
| <td> | | <td> |
| <table width=495 bgcolor=#000000 cellpadding=2> | | <table bgcolor=#000000 cellpadding=2> |
| <tr valign="top"> | | <tr valign="top"> |
| <td> | | <td> |
| <table bgcolor=#ffffff cellpadding=2> | | <table bgcolor=#ffffff cellpadding=2> |
| <tr valign="top"> | | <tr valign="top"> |
| <td colspan=2><span style="font-weight: 700; font-size: 15px;">Steps:</span> To remove a junction or a join between splines but keep all the spline segments:-</td> | | <td> |
| | <table> |
| | <tr valign="top"> |
| | <td width=130>[[image:DriverPalettePlayerControl_S20.png|link=]]</td> |
| | <td><span style="font-weight: 700; font-size: 15px; background-color: lightcyan;"> Left Click </span> to open a drop down menu to assign this driver to:-</td> |
| </tr> | | </tr> |
| | </table> |
| | <table> |
| <tr valign="top"> | | <tr valign="top"> |
| <td width=20>[[image:DotPoint1.JPG|link=]]</td> | | <td width=35> </td> |
| <td>open the endpoint '''Context Menu''' by a <span style="font-weight: 700; font-size: 15px; background-color: lightcyan;"> Left Click </span> on its '''Context Icon''' [[image:SplineEndpointContextIcon_S20.png|link=]] or by pressing the <span style="font-weight: 700; font-size: 15px; color: white; background-color: black;"> T </span> key</td> | | <td width=165>[[image:DriverPaletteAssign_S20.png|link=]]</td> |
| | <td><span style="font-weight: 700; font-size: 15px; color: white; background-color: black;"> Not Assigned </span> (driver '''Jane''' shown left) will make the driver '''unavailable for use''' but will still remain in the driver list<br> |
| | <span style="font-weight: 700; font-size: 15px; color: white; background-color: black;"> Automatic Scheduler </span> <span style="font-weight: 700; background-color: yellow;">available in Trainz Plus only</span> this assigns control of the driver to the '''TLR''' but the '''Dispatch Status''' setting in the [[image:PageLink.PNG|link=]] '''[[#stepDispatchManager|Dispatch Manager Window]]''' must be '''Enabled''' <br> |
| | <span style="font-weight: 700; font-size: 15px; color: white; background-color: black;"> Player Controlled </span> will return the driver to '''active duty''' in the driver list<br> |
| | </td> |
| | </tr> |
| | </table> |
| | <table> |
| | <tr valign="top"> |
| | <td width=35>[[image:DriverPaletteDeleteDriver_S20.png|link=]]</td> |
| | <td><span style="font-weight: 700; font-size: 15px; background-color: lightcyan;"> Left Click </span> to '''Delete''' the current driver |
| | </td> |
| </tr> | | </tr> |
| | </table> |
| | <table> |
| <tr valign="top"> | | <tr valign="top"> |
| <td>[[image:DotPoint2.JPG|link=]]</td> | | <td width=35>[[image:DriverPaletteGetOffTrain_S20.png|link=]]</td> |
| <td>select the <span style="font-weight: 700; font-size: 15px; color: white; background-color: black;"> Separate Splines </span> menu option. This will separate '''ALL''' the spline segments that meet at that endpoint without deleting any of the segments</td> | | <td>If a driver has been assigned to a train (drivers '''Adair''' and '''Bald''') then <span style="font-weight: 700; font-size: 15px; background-color: lightcyan;"> Left Click </span> this icon to '''Remove''' the driver from this train. See [[image:PageLink.PNG|link=]] '''[[#Switching Drivers|Switching Drivers]]''' below |
| | <table> |
| | <tr valign="top"> |
| | <td width=35>[[image:DriverPaletteNotActive_S20.png|link=]]</td> |
| | <td>If the icon is greyed out and cannot be selected (driver '''Jane''') then the driver is not available for use. Drivers that are assigned to the '''Automatic Scheduler''' in <span style="font-weight: 700; background-color: yellow;">Trainz Plus</span> will also have this icon</td> |
| </tr> | | </tr> |
| </table> | | </table> |
| </td> | | </td> |
| | </tr> |
| | </table> |
| | <table> |
| | <tr valign="top"> |
| | <td width=35>[[image:DriverPaletteSwitchTo_S20.png|link=]]</td> |
| | <td>If a driver is available for use ('''Player Controlled''') but has '''NOT''' been assigned to a train (driver '''Kenny''') then <span style="font-weight: 700; font-size: 15px; background-color: lightcyan;"> Left Click </span> this icon to select a train to assign to this driver. See [[image:PageLink.PNG|link=]] '''[[#Assigning Drivers|Assigning Drivers]]''' below |
| | <table> |
| | <tr valign="top"> |
| | <td width=35>[[image:DriverPaletteNotActive2_S20.png|link=]]</td> |
| | <td>If the icon is greyed out and cannot be selected then the driver is not available for use</td> |
| </tr> | | </tr> |
| </table> | | </table> |
| </td> | | </td> |
| <td> | | </tr> |
| <table width=495 bgcolor=#000000 cellpadding=2> | | </table> |
| | <table> |
| <tr valign="top"> | | <tr valign="top"> |
| <td> | | <td width=35>[[image:DriverPaletteViewDriverDetails_S20.png|link=]]</td> |
| <table bgcolor=#ffffe0 cellpadding=2> | | <td><span style="font-weight: 700; font-size: 15px; background-color: lightcyan;"> Left Click </span> to view and edit the details for the current driver and train. See [[image:PageLink.PNG|link=]] '''[[#Driver Properties|Driver Properties]]''' below |
| | </td> |
| | </tr> |
| | </table> |
| | <table> |
| <tr valign="top"> | | <tr valign="top"> |
| <td width=25>[[image:PencilTips.PNG|link=]]</td> | | <td width=35>[[image:DriverPaletteFocusOnDriver_S20.png|link=]]</td> |
| <td> | | <td><span style="font-weight: 700; font-size: 15px; background-color: lightcyan;"> Left Click </span> this icon to change the camera focus to this driver. The blue background identifies the driver with the current camera focus |
| <table> | | <table> |
| <tr valign="top"> | | <tr valign="top"> |
| <td width=10>[[image:DotPoint.JPG|10px|link=]]</td> | | <td width=35>[[image:DriverPaletteFocusOnDriver2_S20.png|link=]]</td> |
| <td>A spline junction or join can also be removed by deleting any spline segment that connects to its endpoint</td> | | <td>If the icon is greyed out and cannot be selected (driver '''Kenny''') then the driver has not been assigned to a train</td> |
| | </tr> |
| | </table> |
| | </td> |
| </tr> | | </tr> |
| | </table> |
| | <table> |
| <tr valign="top"> | | <tr valign="top"> |
| <td>[[image:DotPoint.JPG|10px|link=]]</td> | | <td width=35>[[image:DriverPaletteAddDriverIcon_S20.png|link=]]</td> |
| <td>A junction endpoint can be moved by using the [[image:S20_FreeMoveToolIcon.png|link=|20px]] '''Free Move Tool''' or the [[image:S20_FineAdjustmentToolIcon.png|link=|20px]] '''Fine Adjustment Tool'''</td> | | <td>Located at the bottom of the driver list (you may have to scroll down) <span style="font-weight: 700; font-size: 15px; background-color: lightcyan;"> Left Click </span> to '''Add a New Driver'''. See '''Adding a Driver''' below</td> |
| | </tr> |
| | </table> |
| | </td> |
| </tr> | | </tr> |
| </table> | | </table> |
| Line 9,121: |
Line 9,301: |
| </table> | | </table> |
| <br> | | <br> |
| <table width=1000> <!-- BEGIN Section Nav Buttons --> | | <table width=1000> <!-- BEGIN Nav Buttons Table --> |
| <tr valign="top"> | | <tr valign="top"> |
| <td width=629><span id="PT: Junction Track"></span> | | <td width=629><span id="skip Adding a Driver"></span> |
| ===<span style="font-size: 17px; color: white; background-color: blue;"> Placement: Add a Track Junction </span>=== | | =='''Adding a Driver'''== |
| </td> | | </td> |
| <td width=50> </td> | | <td width=50>[[image:SkipDown.png|link=#skip Assigning Drivers|Skip Down]]</td> <!-- for Skip Down --> |
| <td width=50> </td> | | <td width=50>[[image:SkipUp.png|link=#stepDriverCenter|Skip Up]]</td> |
| <td width=46>[[image:SkipMinorDown.png|link=#PT: Height Spline|Down]][[image:SkipMinorUp.png|link=#PT: Remove Junction Spline|Up]]</td> <!-- for Top and Minor Up/Down --> | | <td width=46> </td> |
| | <td width=75>[[image:HeadingUp.png|link=#stepDriverCenter|alt=Heading|To Heading]]</td> |
| <td width=75> </td> | | <td width=75> </td> |
| <td width=75> </td> | | <td width=75> </td> |
| <td width=75> </td> <!-- for Bottom -->
| |
| </tr> | | </tr> |
| </table> <!-- END Section Nav Buttons --> | | </table> <!-- END Nav Buttons Table --> |
|
| |
|
| <table width=1000 bgcolor="lightcyan" cellpadding=2> | | <table width=1000 bgcolor="lightcyan" cellpadding=2> |
| <tr valign="top"> | | <tr valign="top"> |
| <td width=10>[[image:BlueDot10x10.png|link=]]</td> | | <td width=10>[[image:BlueDot10x10.png|link=]]</td> |
| <td>A track junction is formed using '''track splines''' in the same way as described above but track junctions have additional features</td> | | <td>New drivers can be added to the '''Drivers Palette'''</td> |
| </tr> | | </tr> |
| </table> | | </table> |
| <br> | | <br> |
| <table width=1000> | | <table width=1000 bgcolor=#000000 cellpadding=2> |
| <tr valign="top"> | | <tr valign="top"> |
| <td width=365>[[image:PlacementTrackJunction_S20.png|link=]]</td>
| |
| <td> | | <td> |
| <table bgcolor=#000000 cellpadding=2> | | <table width=996 bgcolor=#ffffb0 cellpadding=2> |
| <tr valign="top"> | | <tr valign="top"> |
| <td> | | <td> |
| <table bgcolor=#ffffff cellpadding=2> | | <table> |
| <tr valign="top"> | | <tr valign="top"> |
| <td colspan=2>
| | <td width=25>[[image:NotePad.PNG|link=]]</td> |
| <table>
| | <td width=975><span style="font-size: 17px; font-weight: 700;">Notes:'''</span><br> |
| <tr valign="middle">
| | ---- |
| <td width=35>[[image:Information.png|35px|link=]]</td> | | </td> |
| <td>When a junction is created using '''Track Spline Objects''', a junction switch will be automatically added.</td> | |
| </tr> | | </tr> |
| </table> | | </table> |
| </td> | | <table> |
| </tr>
| |
| <tr valign="top"> | | <tr valign="top"> |
| <td width=10>[[image:DotPoint.JPG|10px|link=]]</td> | | <td>A randomly selected driver will be automatically added to the '''Drivers Palette''' when a locomotive is added to your '''Trainz World''' - if this option has been set in the [[image:WikiLink.PNG|link=]] '''[[How_to_Use_Driver_Setup_Rule|Driver Setup Rule]]'''. The driver will be assigned to the new locomotive</td> |
| <td><span style="font-weight: 700; font-size: 15px;">IF</span> the '''Automatic Junction Placement Checkbox''' (in the [[image:SurveyorMainMenuIcon.png|link=]] '''Surveyor Main Menu''' - '''Settings''' option - '''Interface Settings''') has been checked '''ON'''</td>
| |
| </tr> | | </tr> |
| <tr valign="top">
| | </table> |
| <td>[[image:DotPoint.JPG|10px|link=]]</td>
| | </td> |
| <td>the switch will be the one specified in the '''Region''' listed in the '''Route Properties'''. The '''region''' and its switch can be changed by opening the [[image:SurveyorEditIcon.png|link=]] '''Surveyor Edit Menu''' and selecting <span style="font-weight: 700; font-size: 15px; color: white; background-color: black;"> Edit Route... </span>. If no region has been specified then a '''default''' switch (as shown left) will be used</td>
| |
| </tr>
| |
| <tr valign="top">
| |
| <td>[[image:DotPoint.JPG|10px|link=]]</td>
| |
| <td>use the [[image:S20_FreeMoveToolIcon.png|link=|20px]] '''[[#The Free Move Tool|Free Move Tool]]''' or the [[image:S20_FineAdjustmentToolIcon.png|link=|20px]] '''[[#The Fine Adjustment Tool|Fine Adjustment Tool]]''' to move or delete the switch and to open its '''Context Menu''' for editing</td>
| |
| </tr> | | </tr> |
| </table> | | </table> |
| Line 9,177: |
Line 9,348: |
| </table> | | </table> |
| <br> | | <br> |
| <table cellpadding=2 bgcolor="Aquamarine"> | | <table width=1000> |
| <tr valign="top"> | | <tr valign="top"> |
| <td>[[image:LinkWiki.PNG|link=]]</td> | | <td width=235>[[image:DriverPaletteAddDriverList_S20.png|link=]]</td> |
| <td> | | <td> |
| Information on creating and editing a '''Region''' can be found on the '''Trainz Wiki''' at:-<br>
| | <table bgcolor=#000000 cellpadding=2> |
| :'''[[How_to_Create_a_Region_Asset|How to Create a Region Asset]]'''
| |
| </td>
| |
| </tr>
| |
| </table>
| |
| </td>
| |
| </tr>
| |
| </table>
| |
| <br>
| |
| <table width=1000 bgcolor=#000000 cellpadding=2> | |
| <tr valign="top"> | | <tr valign="top"> |
| <td> | | <td> |
| <table bgcolor=#ffffb0 cellpadding=2> | | <table bgcolor=#ffffff cellpadding=2> |
| <tr valign="top"> | | <tr valign="top"> |
| <td width=25>[[image:NotePad.PNG|link=]]</td> | | <td colspan=2><span style="font-weight: 700; font-size: 15px;">Steps: To Add a New Driver to the Drivers Palette:-</span></td> |
| <td><span style="font-weight: 700; font-size: 15px;">Using Procedural Tracks</span><br>
| |
| If the track object used is a '''Procedural Track''' and the junction is formed with another '''Procedural Track''' then the junction endpoint dot will be coloured:-</td>
| |
| </tr> | | </tr> |
| <tr valign="top"> | | <tr valign="top"> |
| <td width=10>[[image:DotPoint.JPG|10px|link=]]</td> | | <td width=25>[[image:DotPoint1.JPG|link=]]</td> |
| <td><span style="font-weight: 700; font-size: 15px; color: red;">RED</span> (as shown above) if the junction exceeds the maximum allowed values for a procedural junction. This will not stop the junction from working but it will not display the special features only found in '''Procedural Tracks''', <span style="font-weight: 700; font-size: 15px;">OR</span></td> | | <td>scroll down the driver list to the bottom to reveal the '''Add New Driver''' button [[image:DriverPaletteAddDriverIcon_S20.png|link=]]</td> |
| </tr> | | </tr> |
| <tr valign="top"> | | <tr valign="top"> |
| <td>[[image:DotPointBlack.JPG|10px|link=]]</td> | | <td>[[image:DotPoint2.JPG|link=]]</td> |
| <td><span style="font-weight: 700; font-size: 15px;">BLACK</span> if the junction is within the maximum allowed values for a procedural junction and it will display all the '''Procedural Track''' special features</td> | | <td><span style="font-weight: 700; font-size: 15px; background-color: lightcyan;"> Left Click </span> on the button to open the '''Driver Selection''' window shown on the left</td> |
| </tr> | | </tr> |
| <tr valign="top"> | | <tr valign="top"> |
| <td colspan=2>A procedural track junction can be changed from <span style="font-weight: 700; color: red;">red</span> to '''black''' by adjusting the height and/or position (depending on the exact cause of the problem) of the junction endpoint and the endpoints on either side of the junction. See the Wiki Page [[image:WikiLink.PNG|link=]] '''[[How_to_Use_Procedural_Track|How to Use Procedural Track]]''' for more details</td> | | <td>[[image:DotPoint3.JPG|link=]]</td> |
| | <td>select (<span style="font-weight: 700; font-size: 15px; background-color: lightcyan;"> Left Click </span> on) a driver and then <span style="font-weight: 700; font-size: 15px; background-color: lightcyan;"> Left Click </span> on the tick icon [[image:Tick.PNG|link=]]</td> |
| </tr> | | </tr> |
| <tr valign="top"> | | <tr valign="top"> |
| <td colspan=2>A junction between two non-procedural tracks and between a procedural track and a non-procedural track will always have a <span style="font-weight: 700; color: red;">red</span> endpoint dot</td> | | <td colspan=2>The selected driver will be added to the end of the driver list but will be not be assigned to a train</td> |
| </tr> | | </tr> |
| </table> | | </table> |
| Line 9,218: |
Line 9,379: |
| </table> | | </table> |
| <br> | | <br> |
| <table width=1000> <!-- BEGIN Section Nav Buttons --> | | <table bgcolor=#000000 cellpadding=2> |
| | <tr valign="top"> |
| | <td> |
| | <table bgcolor=#ffffe0 cellpadding=2> |
| <tr valign="top"> | | <tr valign="top"> |
| <td width=629><span id="PT: Height Spline"></span> | | <td>[[image:PencilTips.PNG|link=]]</td> |
| ===<span style="font-size: 17px; color: white; background-color: blue;"> Placement: Set a Spline Height </span>===
| | <td>A driver can be deleted from the list at any time using the [[image:DriverPaletteDeleteDriver_S20.png|link=]] tool in the driver tool bar</td> |
| | </tr> |
| | </table> |
| </td> | | </td> |
| <td width=50> </td>
| |
| <td width=50> </td>
| |
| <td width=46>[[image:SkipMinorDown.png|link=#PT: Gradient Spline|Down]][[image:SkipMinorUp.png|link=#PT: Junction Track|Up]]</td> <!-- for Top and Minor Up/Down -->
| |
| <td width=75> </td>
| |
| <td width=75> </td>
| |
| <td width=75> </td> <!-- for Bottom -->
| |
| </tr>
| |
| </table> <!-- END Section Nav Buttons -->
| |
|
| |
| <table width=1000 bgcolor=#000000 cellpadding=2>
| |
| <tr valign="top">
| |
| <td>
| |
| <table width=996 bgcolor=#ffe89a cellpadding=2>
| |
| <tr valign="middle">
| |
| <td width=45>[[image:PalettesIcon_S20.png|link=]]</td>
| |
| <td>If the <span style="font-weight: 700; font-size: 15px; color: white; background-color: #797979;"> Tool Options Palette </span> and the <span style="font-weight: 700; font-size: 15px; color: white; background-color: #797979;"> Info Palette </span> are not visible on the screen then refer to [[image:PageLink.PNG|link=]] '''[[#Notes_Palettes|Notes: Palettes]]''' at the top of this document.</td>
| |
| </tr> | | </tr> |
| </table> | | </table> |
| Line 9,245: |
Line 9,395: |
| </table> | | </table> |
| <br> | | <br> |
| <span style="font-weight: 700; font-size: 15px;">Get the Height of a Spline Object</span>
| | <table width=1000> <!-- BEGIN Nav Buttons Table --> |
| <br>
| |
| <table width=1000 bgcolor=#000000 cellpadding=2> | |
| <tr valign="top"> | | <tr valign="top"> |
| <td> | | <td width=629><span id="skip Assigning Drivers"></span> |
| <table width=996 bgcolor=#ffffe0 cellpadding=2>
| | =='''Assigning Drivers'''== |
| <tr valign="top"> | | </td> |
| <td width=25>[[image:PencilTips.PNG|link=]]</td> | | <td width=50>[[image:SkipDown.png|link=#skip Switching Drivers|Skip Down]]</td> <!-- for Skip Down --> |
| <td>You can copy the '''height''' of a spline segment into the <span style="font-weight: 700; font-size: 15px; color: white; background-color: #797979;"> Tool Options Palette </span> <span style="font-weight: 700; font-size: 15px; color: gold; background-color: black;"> Height </span> setting. Once it has been copied it can be applied to any other object. Choose one of the following:-</td> | | <td width=50>[[image:SkipUp.png|link=#skip Adding a Driver|Skip Up]]</td> |
| | <td width=46> </td> |
| | <td width=75>[[image:HeadingUp.png|link=#stepDriverCenter|alt=Heading|To Heading]]</td> |
| | <td width=75> </td> |
| | <td width=75> </td> |
| </tr> | | </tr> |
| | </table> <!-- END Nav Buttons Table --> |
| | |
| | <table width=1000 bgcolor="lightcyan" cellpadding=2> |
| <tr valign="top"> | | <tr valign="top"> |
| <td colspan=2><span style="font-weight: 700; font-size: 15px;">Options:</span></td> | | <td width=10>[[image:BlueDot10x10.png|link=]]</td> |
| | <td>A driver that has no currently assigned train can have one assigned to them</td> |
| </tr> | | </tr> |
| <tr valign="top"> | | </table> |
| <td>[[image:Ablue.png|link=]]</td> | | <br> |
| <td>Use the '''Eyedropper''' to copy the height (and gradient) of a spline segment<br> | | <table width=1000> |
| <table> | | <tr valign="bottom"> |
| | <td> |
| | <table width=690 bgcolor=#000000 cellpadding=2> |
| <tr valign="top"> | | <tr valign="top"> |
| <td> | | <td> |
| <table width=500 bgcolor=#ffffff> | | <table width=686 bgcolor=#ffffff cellpadding=2> |
| <tr valign="top"> | | <tr valign="top"> |
| <td colspan=2><span style="font-weight: 700; font-size: 15px;">Steps:</span> To copy the '''Height''' of a spline segment:-</td> | | <td colspan=2><span style="font-weight: 700; font-size: 15px;">Steps: To Assign a Driver to a Train:-</span></td> |
| </tr> | | </tr> |
| <tr valign="top"> | | <tr valign="top"> |
| <td width=25>[[image:DotPoint1.JPG|link=]]</td> | | <td width=25>[[image:DotPoint1.JPG|link=]]</td> |
| <td>hold down the <span style="font-weight: 700; font-size: 15px; color: white; background-color: black;"> Alt </span> key and move the mouse tool pointer onto the spline segment</td> | | <td> |
| </tr> | | <table> |
| <tr valign="top"> | | <tr valign="top"> |
| <td>[[image:DotPoint2.JPG|link=]]</td> | | <td width=35>[[image:DriverPaletteSwitchTo_S20.png|link=]]</td> |
| <td>while holding down the <span style="font-weight: 700; font-size: 15px; color: white; background-color: black;"> Alt </span> key <span style="font-weight: 700; font-size: 15px; background-color: lightcyan;"> Left Click </span> on the spline segment</td> | | <td><span style="font-weight: 700; font-size: 15px; color: white; background-color: black;"> Move to Destination </span><br> |
| | You can reasign the driver by a <span style="font-weight: 700; font-size: 15px; background-color: lightcyan;"> Left Click </span> on the icon to select a new train for this driver. The '''Drivers Palette''' will change to the image shown below right</td> |
| </tr> | | </tr> |
| </table>
| |
| </td>
| |
| <td>
| |
| <table bgcolor=#ffffb0 cellpadding=2>
| |
| <tr valign="top"> | | <tr valign="top"> |
| <td width=25>[[image:NotePad.PNG|link=]]</td> | | <td colspan=2> |
| <td>
| | <table bgcolor=#ffffe0 cellpadding=2> |
| <table> | |
| <tr valign="top">
| |
| <td width=10>[[image:DotPoint.JPG|10px|link=]]</td>
| |
| <td>If the segment has a slope then the height at the point clicked with the eyedropper will be copied into the <span style="font-weight: 700; font-size: 15px; color: gold; background-color: black;"> Height </span> setting and the spline gradient will be copied into the <span style="font-weight: 700; font-size: 15px; color: gold; background-color: black;"> Grade </span> setting.</td>
| |
| </tr>
| |
| <tr valign="top"> | | <tr valign="top"> |
| <td>[[image:DotPoint.JPG|10px|link=]]</td> | | <td>[[image:PencilTips.PNG|link=]]</td> |
| <td>This will also select the clicked object in the <span style="font-weight: 700; font-size: 15px; color: white; background-color: #797979;"> Assets Palette </span> and it will become the next object added by a <span style="font-weight: 700; font-size: 15px; background-color: lightcyan;"> Left Click </span> in your '''Trainz World'''</td> | | <td>If '''Move to Destination''' cannot be selected then check if the driver has been set to <span style="font-weight: 700; font-size: 15px; color: white; background-color: black;"> Not Assigned </span> or <span style="font-weight: 700; font-size: 15px; color: white; background-color: black;"> Automatic Scheduler </span> <span style="font-weight: 700; background-color: yellow;">available in Trainz Plus only</span>. If necessary you can change the setting to <span style="font-weight: 700; font-size: 15px; color: white; background-color: black;"> Player Controlled </span> but that may affect other operations such as the '''TLR'''</td> |
| </tr> | | </tr> |
| </table> | | </table> |
| Line 9,298: |
Line 9,448: |
| </td> | | </td> |
| </tr> | | </tr> |
| </table> | | <tr valign="top"> |
| </td> | | <td>[[image:DotPoint2.JPG|link=]]</td> |
| | <td>Choose one of the following:-<br> |
| | <span style="font-weight: 700; font-size: 15px;;">Options:</span></td> |
| </tr> | | </tr> |
| <tr valign="top"> | | <tr valign="top"> |
| <td> </td> | | <td width=25>[[image:Ablue.png|link=]]</td> |
| <td><span style="font-weight: 700; font-size: 15px;">OR</span></td> | | <td><span style="font-weight: 700; font-size: 15px; background-color: lightcyan;"> Left Click </span> on a train in your '''Trainz World''' that does not already have an assigned driver. The selected driver will then be assigned to this train</td> |
| </tr> | | </tr> |
| <tr valign="top"> | | <tr valign="top"> |
| <td>[[image:Bblue.png|link=]]</td> | | <td>[[image:Bblue.png|link=]]</td> |
| <td>Use the <span style="font-weight: 700; font-size: 15px; color: gold; background-color: black;"> Height </span> setting drop down menu | | <td><span style="font-weight: 700; font-size: 15px; background-color: lightcyan;"> Left Click </span> on the [[image:DriverPaletteDeleteDriver_S20.png|link=]] icon <span style="font-weight: 700; font-size: 15px;">OR</span> press the <span style="font-weight: 700; font-size: 15px; color: white; background-color: black;"> Esc </span> key to '''Cancel''' the selection operation and return to the normal '''Drivers Palette'''</td> |
| <table>
| |
| <tr valign="top">
| |
| <td> | |
| <table bgcolor=#ffffff>
| |
| <tr valign="top">
| |
| <td colspan=2><span style="font-weight: 700; font-size: 15px;">Steps:</span> To copy the '''Height''' of the currently active (just placed) spline segment:-</td> | |
| </tr> | | </tr> |
| <tr valign="top"> | | <tr valign="top"> |
| <td width=25>[[image:DotPoint1.JPG|link=]]</td> | | <td>[[image:Cblue.png|link=]]</td> |
| <td>in the <span style="font-weight: 700; font-size: 15px; color: white; background-color: #797979;"> Tool Options Palette </span> <span style="font-weight: 700; font-size: 15px; background-color: lightcyan;">Right Click</span> inside the <span style="font-weight: 700; font-size: 15px; color: gold; background-color: black;"> Height </span> setting box</td> | | <td><span style="font-weight: 700; font-size: 15px; background-color: lightcyan;"> Left Click </span> on the '''Add New Driver''' button [[image:DriverPaletteAddDriverIcon_S20.png|link=]] to select and add a new unassigned driver to the palette as described in [[image:PageLink.PNG|link=]] '''[[#Adding a Driver|Adding a Driver]]''' above. Then repeat the process described from <span style="font-weight: 700; font-size:15;">Step <span style="font-size: 17px; color: white; background-color: red;"> 1 </span></span> above</td> |
| </tr>
| |
| <tr valign="top">
| |
| <td>[[image:DotPoint2.JPG|link=]]</td>
| |
| <td>Select the <span style="font-weight: 700; font-size: 15px; color: white; background-color: black;"> Get Height from Selection </span> option</td>
| |
| </tr> | | </tr> |
| </table> | | </table> |
| </td> | | </td> |
| <td>
| |
| <table bgcolor=#ffffb0 cellpadding=2>
| |
| <tr valign="top">
| |
| <td width=25>[[image:NotePad.PNG|link=]]</td>
| |
| <td>If the spline segment has a slope then the height at its midpoint will be used</td>
| |
| </tr> | | </tr> |
| </table> | | </table> |
| </td> | | </td> |
| | <td width=310>[[image:DriverPaletteSelectDriverLoco_S20.png|link=]]</td> |
| </tr> | | </tr> |
| </table> | | </table> |
| | <br> |
| | <table width=1000> <!-- BEGIN Nav Buttons Table --> |
| | <tr valign="top"> |
| | <td width=629><span id="skip Switching Drivers"></span> |
| | =='''Switching Drivers'''== |
| </td> | | </td> |
| | <td width=50>[[image:SkipDown.png|link=#skip Driver Properties|Skip Down]]</td> |
| | <td width=50>[[image:SkipUp.png|link=#skip Assigning Drivers|Skip Up]]</td> |
| | <td width=46> </td> |
| | <td width=75>[[image:HeadingUp.png|link=#stepDriverCenter|alt=Heading|To Heading]]</td> |
| | <td width=75> </td> |
| | <td width=75> </td> |
| </tr> | | </tr> |
| </table> | | </table> <!-- END Nav Buttons Table --> |
| </td> | | |
| | <table width=1000 bgcolor="lightcyan" cellpadding=2> |
| | <tr valign="top"> |
| | <td width=10>[[image:BlueDot10x10.png|link=]]</td> |
| | <td>A driver that is currently assigned to a train can be reassigned to a different train or to no train</td> |
| </tr> | | </tr> |
| </table> | | </table> |
| <br> | | <br> |
| <span style="font-weight: 700; font-size: 15px;">Set the Height of a Spline Object</span> | | <table width=1000> |
| <br> | | <tr valign="bottom"> |
| <table width=1000 bgcolor=#000000 cellpadding=2> | | <td> |
| | <table width=690 bgcolor=#000000 cellpadding=2> |
| <tr valign="top"> | | <tr valign="top"> |
| <td> | | <td> |
| <table width=996 bgcolor=#ffffff cellpadding=2> | | <table bgcolor=#ffffff cellpadding=2> |
| <tr> | | <tr valign="top"> |
| <td colspan=2>To set the '''height''' of a '''selected''' spline segment (including track) or endpoint, choose one of the following:-<br> | | <td colspan=2><span style="font-weight: 700; font-size: 15px;">Steps: To Switch a Driver From One Train to Another:-</span></td> |
| <span style="font-weight: 700; font-size: 15px;">Options:</span></td> | |
| </tr> | | </tr> |
| <tr valign="top"> | | <tr valign="top"> |
| <td colspan=2> | | <td width=25>[[image:DotPoint1.JPG|link=]]</td> |
| <table width=996 bgcolor=#ffffb0 cellpadding=2> | | <td> |
| | <table> |
| <tr valign="top"> | | <tr valign="top"> |
| <td width=25>[[image:NotePad.PNG|link=]]</td> | | <td width=35>[[image:DriverPaletteGetOffTrain_S20.png|link=]]</td> |
| <td width=975>If the selected spline segment has a <span style="font-weight: 700; font-size: 15px; color: gold; background-color: black;"> Grade </span> setting then '''Options [[image:Ablue.png|link=]] [[image:Bblue.png|link=]] and [[image:Dblue.png|link=]]''' will '''adjust''' the height of each endpoint so that the heights will change but the grade will remain the same. '''Option [[image:Cblue.png|link=]]''' will set both endpoints to the entered height and the grade will be removed</td> | | <td><span style="font-weight: 700; font-size: 15px; color: white; background-color: black;"> Get off Train </span><br> |
| | <span style="font-weight: 700; font-size: 15px; background-color: lightcyan;"> Left Click </span> on the icon to leave the assigned train so that the driver can be assigned to another or none</td> |
| </tr> | | </tr> |
| </table> | | </table> |
| Line 9,363: |
Line 9,518: |
| </tr> | | </tr> |
| <tr valign="top"> | | <tr valign="top"> |
| <td>[[image:Ablue.png|link=]]</td> | | <td colspan=2>Once the driver has left the train, the icon will change to a new design</td> |
| <td><span style="font-weight: 700; font-size: 15px; background-color: lightcyan;"> Left Click </span> in the <span style="font-weight: 700; font-size: 15px; color: white; background-color: #797979;"> Tool Options Palette </span> <span style="font-size: 15px; font-weight: 700; color: gold; background-color: black;"> Height </span> setting and enter a new value (or keep the existing value) then press the <span style="font-weight: 700; font-size: 15px; color: white; background-color: black;"> Enter </span> key, <span style="font-size: 15px; font-weight: 700;">OR</span></td>
| |
| </tr> | | </tr> |
| <tr valign="top"> | | <tr valign="top"> |
| <td>[[image:Bblue.png|link=]]</td> | | <td>[[image:DotPoint2.JPG|link=]]</td> |
| <td>in the <span style="font-weight: 700; font-size: 15px; color: white; background-color: #797979;"> Tool Options Palette </span> <span style="font-weight: 700; font-size: 15px; background-color: lightcyan;"> Left Click </span> inside the <span style="font-size: 15px; font-weight: 700; color: gold; background-color: black;"> Height </span> setting and enter a new value (or keep the existing value) then <span style="font-weight: 700; font-size: 15px; background-color: lightcyan;">Right Click</span> in the setting box and select the <span style="font-weight: 700; font-size: 15px; color: white; background-color: black;"> Set Height to Selection </span> option, <span style="font-weight: 700; font-size: 15px;">OR</span></td> | | <td> |
| | <table> |
| | <tr valign="top"> |
| | <td width=35>[[image:DriverPaletteSwitchTo_S20.png|link=]]</td> |
| | <td><span style="font-weight: 700; font-size: 15px; color: white; background-color: black;"> Move to Destination </span><br> |
| | This is '''optional'''. You can reasign the driver by a <span style="font-weight: 700; font-size: 15px; background-color: lightcyan;"> Left Click </span> on the icon to select a new train for this driver. The '''Drivers Palette''' will change to the image shown below right</td> |
| </tr> | | </tr> |
| <tr valign="top"> | | <tr valign="top"> |
| <td>[[image:Cblue.png|link=]]</td> | | <td colspan=2> |
| <td>from the objects '''Context Menu''' (<span style="font-weight: 700; font-size: 15px; background-color: lightcyan;"> Left Click </span> on the objects '''Context Icon''' or press the <span style="font-weight: 700; font-size: 15px; color: white; background-color: black;"> T </span> key) select the <span style="font-size: 15px; font-weight: 700; color: white; background-color: black;"> Apply Height </span> option, <span style="font-size: 15px; font-weight: 700;">OR</span></td> | | <table bgcolor=#ffffe0 cellpadding=2> |
| </tr>
| |
| <tr valign="top"> | | <tr valign="top"> |
| <td>[[image:Dblue.png|link=]]</td> | | <td>[[image:PencilTips.PNG|link=]]</td> |
| <td>in the <span style="font-weight: 700; font-size: 15px; color: white; background-color: #797979;"> Info Palette </span> enter a value in the objects <span style="font-size: 15px; font-weight: 700; color: white; background-color: black;"> Pos: </span> <span style="font-size: 15px; font-weight: 700; color: white; background-color: black;"> z </span> (height) setting or <span style="font-weight: 700; font-size: 15px; background-color: lightcyan;">Left Click and Drag</span> '''Up''' or '''Down''' on the double arrowheads to its right. This can be used to set the height to '''cm''' accuracy (see [[image:PageLink.PNG|link=]] '''[[#The Info Palette|The Info Palette]]''' below).</td> | | <td>If '''Move to Destination''' cannot be selected then check if the driver has been set to <span style="font-weight: 700; font-size: 15px; color: white; background-color: black;"> Not Assigned </span> or <span style="font-weight: 700; font-size: 15px; color: white; background-color: black;"> Automatic Scheduler </span> <span style="font-weight: 700; background-color: yellow;">available in Trainz Plus only</span>. If necessary you can change the setting to <span style="font-weight: 700; font-size: 15px; color: white; background-color: black;"> Player Controlled </span> but that may affect other operations such as the '''TLR'''</td> |
| </tr> | | </tr> |
| </table> | | </table> |
| Line 9,382: |
Line 9,540: |
| </tr> | | </tr> |
| </table> | | </table> |
| <br>
| |
| <table width=1000> <!-- BEGIN Section Nav Buttons -->
| |
| <tr valign="top">
| |
| <td width=629><span id="PT: Gradient Spline"></span>
| |
| ===<span style="font-size: 17px; color: white; background-color: blue;"> Placement: Set a Spline Gradient </span>===
| |
| </td> | | </td> |
| <td width=50> </td>
| |
| <td width=50> </td>
| |
| <td width=46>[[image:SkipMinorDown.png|link=#PT: Condition Track|Down]][[image:SkipMinorUp.png|link=#PT: Height Spline|Up]]</td> <!-- for Top and Minor Up/Down -->
| |
| <td width=75> </td>
| |
| <td width=75> </td>
| |
| <td width=75> </td> <!-- for Bottom -->
| |
| </tr> | | </tr> |
| </table> <!-- END Section Nav Buttons -->
| |
|
| |
| <table width=1000 bgcolor=#000000 cellpadding=2>
| |
| <tr valign="top"> | | <tr valign="top"> |
| <td> | | <td>[[image:DotPoint3.JPG|link=]]</td> |
| <table width=996 bgcolor=#ffe89a cellpadding=2> | | <td>Choose one of the following:-<br> |
| <tr valign="middle"> | | <span style="font-weight: 700; font-size: 15px;;">Options:</span> |
| <td width=45>[[image:PalettesIcon_S20.png|link=]]</td> | | </td> |
| <td>If the <span style="font-weight: 700; font-size: 15px; color: white; background-color: #797979;"> Tool Options Palette </span> and the <span style="font-weight: 700; font-size: 15px; color: white; background-color: #797979;"> Info Palette </span> are not visible on the screen then refer to [[image:PageLink.PNG|link=]] '''[[#Notes_Palettes|Notes: Palettes]]''' at the top of this document.</td> | | </tr> |
| | <tr valign="top"> |
| | <td colspan=2> |
| | <table> |
| | <tr valign="top"> |
| | <td width=25>[[image:Ablue.png|link=]]</td> |
| | <td><span style="font-weight: 700; font-size: 15px; background-color: lightcyan;"> Left Click </span> on a train in your '''Trainz World''' that does not already have an assigned driver. The selected driver will then be assigned to this train</td> |
| | </tr> |
| | <tr valign="top"> |
| | <td>[[image:Bblue.png|link=]]</td> |
| | <td><span style="font-weight: 700; font-size: 15px; background-color: lightcyan;"> Left Click </span> on the [[image:DriverPaletteDeleteDriver_S20.png|link=]] icon <span style="font-weight: 700; font-size: 15px;">OR</span> press the <span style="font-weight: 700; font-size: 15px; color: white; background-color: black;"> Esc </span> key to '''Cancel''' the selection operation and return to the normal '''Drivers Palette'''</td> |
| | </tr> |
| | <tr valign="top"> |
| | <td>[[image:Cblue.png|link=]]</td> |
| | <td><span style="font-weight: 700; font-size: 15px; background-color: lightcyan;"> Left Click </span> on the '''Add New Driver''' button [[image:DriverPaletteAddDriverIcon_S20.png|link=]] to select and add a new unassigned driver to the palette as described in [[image:PageLink.PNG|link=]] '''[[#Adding a Driver|Adding a Driver]]''' above. Then continue the process described from <span style="font-weight: 700; font-size:15;">Step <span style="font-size: 17px; color: white; background-color: red;"> 2 </span></span> above</td> |
| </tr> | | </tr> |
| </table> | | </table> |
| Line 9,409: |
Line 9,567: |
| </tr> | | </tr> |
| </table> | | </table> |
| <br>
| |
| <table width=1000 bgcolor=#000000 cellpadding=2>
| |
| <tr valign="top">
| |
| <td>
| |
| <table width=996 bgcolor=#ffffb0 cellpadding=2>
| |
| <tr valign="top">
| |
| <td width=25>[[image:NotePad.PNG|link=]]</td>
| |
| <td><span style="font-size: 17px; font-weight: 700;">Notes:</span><br>
| |
| ----
| |
| </td> | | </td> |
| </tr> | | </tr> |
| <tr valign="top"> | | </table> |
| <td> </td>
| | </td> |
| <td>The <span style="font-weight: 700; font-size: 15px; color: gold; background-color: black;"> Grade </span> is defined as '''vertical rise''' divided by '''horizontal distance''' converted to a percentage figure. So a grade of 100% (the maximum allowed) would mean a gradient formed by both measurements having the same value (e.g. a rise of 50m over a distance of 50m). A vertical slope (a cliff) would have an infinite grade (cliff height divided by 0) which is currently impossible in Surveyor.</td> | | <td width=310>[[image:DriverPaletteSelectDriverLoco_S20.png|link=]]</td> |
| </tr> | | </tr> |
| </table> | | </table> |
| | |
| | <table width=1000> <!-- BEGIN Nav Buttons Table --> |
| | <tr valign="top"> |
| | <td width=629><span id="skip Driver Properties"></span> |
| | =='''Driver Properties'''== |
| </td> | | </td> |
| | <td width=50>[[image:SkipDown.png|link=#skip Driver Location|Skip Down]]</td> |
| | <td width=50>[[image:SkipUp.png|link=#skip Switching Drivers|Skip Up]]</td> |
| | <td width=46>[[image:SkipMinorDown.png|link=#skip Surveyor & Driver]][[image:SkipMinorBlank.png|link=]]</td> <!-- for Top and Minor Up/Down --> |
| | <td width=75>[[image:HeadingUp.png|link=#stepDriverCenter|alt=Heading|To Heading]]</td> |
| | <td width=75> </td> |
| | <td width=75> </td> |
| </tr> | | </tr> |
| </table> | | </table> <!-- END Nav Buttons Table --> |
| <br> | | |
| <span style="font-weight: 700; font-size: 15px;">Get the Grade of a Spline Object</span>
| | <table bgcolor=#000000 cellpadding=2> |
| <br>
| |
| <table width=1000 bgcolor=#000000 cellpadding=2> | |
| <tr valign="top"> | | <tr valign="top"> |
| <td> | | <td> |
| <table width=996 bgcolor=#ffffe0 cellpadding=2> | | <table bgcolor=#ffffff cellpadding=2> |
| <tr valign="top"> | | <tr valign="top"> |
| <td width=25>[[image:PencilTips.PNG|link=]]</td> | | <td colspan=2>:-<br> |
| <td>You can copy the '''grade''' of a spline segment into the <span style="font-weight: 700; font-size: 15px; color: white; background-color: #797979;"> Tool Options Palette </span> <span style="font-weight: 700; font-size: 15px; color: gold; background-color: black;"> Grade </span> setting. Once it has been copied it can be applied to any other object. Choose one of the following:-<br>
| |
| <span style="font-weight: 700; font-size: 15px;">Options:</span></td> | | <span style="font-weight: 700; font-size: 15px;">Options:</span></td> |
| </tr> | | </tr> |
| <tr valign="top"> | | <tr valign="top"> |
| <td>[[image:Ablue.png|link=]]</td> | | <td width=25>[[image:Ablue.png|link=]]</td> |
| <td>Use the '''Eyedropper''' to copy the grade of any spline segment<br> | | <td>In '''Driver''':- |
| <table> | | <table> |
| <tr valign="top"> | | <tr valign="top"> |
| <td>
| | <td colspan=2><span style="font-weight: 700; font-size: 15px;">Steps: To Open the Driver Properties Window in Driver:-</span></td> |
| <table width=500 bgcolor=#ffffff>
| |
| <tr valign="top">
| |
| <td colspan=2><span style="font-weight: 700; font-size: 15px;">Steps:</span> To copy the '''Grade''' of a spline segment:-</td> | |
| </tr> | | </tr> |
| <tr valign="top"> | | <tr valign="top"> |
| <td width=25>[[image:DotPoint1.JPG|link=]]</td> | | <td width=25>[[image:DotPoint1.JPG|link=]]</td> |
| <td>hold down the <span style="font-weight: 700; font-size: 15px; color: white; background-color: black;"> Alt </span> key and move the mouse tool pointer onto the spline segment</td> | | <td><span style="font-weight: 700; font-size: 15px; background-color: lightcyan;"> Left Click </span> on the '''Driver Icon''' at the bottom left of the screen</td> |
| </tr> | | </tr> |
| <tr valign="top"> | | <tr valign="top"> |
| <td>[[image:DotPoint2.JPG|link=]]</td> | | <td>[[image:DotPoint2.JPG|link=]]</td> |
| <td>while holding down the <span style="font-weight: 700; font-size: 15px; color: white; background-color: black;"> Alt </span> key <span style="font-weight: 700; font-size: 15px; background-color: lightcyan;"> Left Click </span> on the spline segment</td> | | <td>select the driver from the driver list (<span style="font-weight: 700; font-size: 15px; background-color: lightcyan;"> Left Click </span> on its '''Eye''' icon if it is not the driver with the '''focus''')</td> |
| </tr>
| |
| </table>
| |
| </td>
| |
| <td>
| |
| <table bgcolor=#ffffb0 cellpadding=2>
| |
| <tr valign="top">
| |
| <td width=25>[[image:NotePad.PNG|link=]]</td>
| |
| <td>This will also change the asset selected in the <span style="font-weight: 700; font-size: 15px; color: white; background-color: #797979;"> Assets Palette </span> to the object clicked and it will become the next object added by a <span style="font-weight: 700; font-size: 15px; background-color: lightcyan;"> Left Click </span> with the '''Placement Tool'''</td>
| |
| </tr>
| |
| </table>
| |
| </td> | |
| </tr> | | </tr> |
| <tr valign="top"> | | <tr valign="top"> |
| <td colspan=2>This will also copy the '''height''' of the segment at the point it was clicked into the <span style="font-weight: 700; font-size: 15px; color: gold; background-color: black;"> Height </span> setting</td> | | <td>[[image:DotPoint3.JPG|link=]]</td> |
| | <td><span style="font-weight: 700; font-size: 15px; background-color: lightcyan;"> Left Click </span> on the [[image:DriverPaletteViewDriverDetails_S20.png|link=]] '''View Driver Properties''' Tool for that driver</td> |
| </tr> | | </tr> |
| </table> | | </table> |
| Line 9,476: |
Line 9,620: |
| </tr> | | </tr> |
| <tr valign="top"> | | <tr valign="top"> |
| <td> </td> | | <td width=25>[[image:Bblue.png|link=]]</td> |
| <td><span style="font-weight: 700; font-size: 15px;">OR</span></td> | | <td>In '''Driver''' and '''Surveyor''':- |
| </tr> | | <table> |
| <tr valign="top"> | | <tr valign="top"> |
| <td>[[image:Bblue.png|link=]]</td>
| | <td colspan=2><span style="font-weight: 700; font-size: 15px;">Steps: To Open the Driver Properties Window in Surveyor:-</span></td> |
| <td>Use the <span style="font-weight: 700; font-size: 15px; color: gold; background-color: black;"> Grade </span> setting drop down menu<br>
| |
| <table bgcolor=#ffffff>
| |
| <tr valign="top">
| |
| <td colspan=2><span style="font-weight: 700; font-size: 15px;">Steps:</span> To copy the '''Grade''' of the currently active (just placed) spline segment:-</td> | |
| </tr> | | </tr> |
| <tr valign="top"> | | <tr valign="top"> |
| <td width=25>[[image:DotPoint1.JPG|link=]]</td> | | <td width=25>[[image:DotPoint1.JPG|link=]]</td> |
| <td>in the <span style="font-weight: 700; font-size: 15px; color: white; background-color: #797979;"> Tool Options Palette </span> <span style="font-weight: 700; font-size: 15px; background-color: lightcyan;">Right Click</span> inside the <span style="font-weight: 700; font-size: 15px; color: gold; background-color: black;"> Grade </span> setting box</td> | | <td>Open the [[image:SurveyorWindowIcon.png|link=]] '''Window Menu''' and select <span style="font-weight: 700; font-size: 15px; color: white; background-color: black;"> Driver Control Center </span></td> |
| </tr> | | </tr> |
| <tr valign="top"> | | <tr valign="top"> |
| <td>[[image:DotPoint2.JPG|link=]]</td> | | <td>[[image:DotPoint2.JPG|link=]]</td> |
| <td>Select the <span style="font-weight: 700; font-size: 15px; color: white; background-color: black;"> Get Grade from Selection </span> option</td> | | <td>select the driver from the driver list (<span style="font-weight: 700; font-size: 15px; background-color: lightcyan;"> Left Click </span> on its '''Eye''' icon if it is not the driver with the '''focus''') |
| </tr> | | </td> |
| </table> | | </tr> |
| | <tr valign="top"> |
| | <td>[[image:DotPoint3.JPG|link=]]</td> |
| | <td><span style="font-weight: 700; font-size: 15px; background-color: lightcyan;"> Left Click </span> on the [[image:DriverPaletteViewDriverDetails_S20.png|link=]] '''View Driver Properties''' Tool for that driver</td> |
| | </tr> |
| | </table> |
| </td> | | </td> |
| </tr> | | </tr> |
| Line 9,502: |
Line 9,647: |
| </table> | | </table> |
| <br> | | <br> |
| <span style="font-weight: 700; font-size: 15px;">Set the Grade of a Spline Object</span> | | <table width=1000> <!-- BEGIN Nav Buttons Table --> |
| <br> | | <tr valign="top"> |
| | <td width=629><span id="skip Surveyor & Driver"></span> |
| | ===<span style="font-weight: 700; font-size: 15px; color: white; background-color: blue;"> In Surveyor and Driver </span>=== |
| | </td> |
| | <td width=50> </td> |
| | <td width=50> </td> |
| | <td width=46>[[image:SkipMinorDown.png|link=#skip Driver]][[image:SkipMinorUp.png|link=#skip Driver Properties]]</td> <!-- for Top and Minor Up/Down --> |
| | <td width=75> </td> |
| | <td width=75> </td> |
| | <td width=75> </td> |
| | </tr> |
| | </table> <!-- END Nav Buttons Table --> |
| | |
| <table width=1000 bgcolor=#000000 cellpadding=2> | | <table width=1000 bgcolor=#000000 cellpadding=2> |
| <tr valign="top"> | | <tr valign="top"> |
| <td> | | <td> |
| <table width=996 bgcolor=#ffffff cellpadding=2> | | <table bgcolor=#ffffb0 cellpadding=2> |
| <tr> | | <tr valign="top"> |
| <td colspan=2>To set the '''gradient''' of a '''selected''' spline segment (including track) '''<u>after it has been laid</u>''' by the '''Placement Tool''', choose one of the following:-<br> | | <td width=25>[[image:NotePad.PNG|link=]]</td> |
| <span style="font-weight: 700; font-size: 15px;">Options:</span></td> | | <td width=975><span style="font-size: 17px; font-weight: 700;">Notes: Surveyor or Driver</span><br> |
| | ---- |
| | </td> |
| </tr> | | </tr> |
| <tr valign="top"> | | <tr valign="top"> |
| <td width=25>[[image:Ablue.png|link=]]</td> | | <td colspan=2> |
| <td>in the <span style="font-weight: 700; font-size: 15px; color: white; background-color: #797979;"> Tool Options Palette </span> <span style="font-weight: 700; font-size: 15px; background-color: lightcyan;"> Left Click </span> inside the <span style="font-size: 15px; font-weight: 700; color: gold; background-color: black;"> Grade </span> setting and enter a new value (or keep the existing value) then press the <span style="font-weight: 700; font-size: 15px; color: white; background-color: black;"> Enter </span> key. This works even if the <span style="font-size: 15px; font-weight: 700; color: gold; background-color: black;"> Grade </span> icon is not coloured <span style="font-weight: 700; font-size: 15px; color: gold; background-color: black;"> Gold </span>. <span style="font-size: 15px; font-weight: 700;">OR</span></td> | | <table> |
| | <tr valign="top"> |
| | <td width=10>[[image:DotPoint.JPG|10px|link=]]</td> |
| | <td>In '''Driver''' the data displayed in the '''Driver Properties Window''' is dynamic. It will change as consists move around the route loading and unloading products and obeying commands</td> |
| </tr> | | </tr> |
| <tr valign="top"> | | <tr valign="top"> |
| <td>[[image:Bblue.png|link=]]</td> | | <td>[[image:DotPoint.JPG|10px|link=]]</td> |
| <td>select the <span style="font-size: 15px; font-weight: 700; color: white; background-color: black;"> Apply Grade to this Spline Endpoint </span> option from the '''Context Menu''' for the '''segment endpoint''' (not the segment context icon) - <span style="font-weight: 700; font-size: 15px; background-color: lightcyan;"> Left Click </span> on the endpoint '''Context Icon''' [[image:SplineEndpointContextIcon_S20.png|link=]] to apply the existing grade value. The '''endpoint''' that has been selected will be the starting point of the grade.</td> | | <td>In '''Surveyor''' the data displayed in the '''Driver Properties Window''' is static and will show the situation that exists at the start (if you loaded the session directly into Surveyor - '''see point below''') or at the instant when you switched, via the [[image:WikiLink.PNG|link=]] '''[[How to Use the UDS Interface|UDS]]''', from '''Driver''' to '''Surveyor'''</td> |
| </tr> | | </tr> |
| <tr valign="top"> | | <tr valign="top"> |
| <td colspan=2> | | <td>[[image:DotPoint.JPG|10px|link=]]</td> |
| <table bgcolor=#ffffe0 cellpadding=2>
| | <td>If you opened the session directly into '''Surveyor''' before using '''Driver''' then no driver names will be assigned to any of the trains (this is done by the '''Driver Setup Rule''' which runs in '''Driver'''). Locomotives, without driver names, will be shown labelled as "Consist nn". Once '''Driver''' has been started and you use the [[image:WikiLink.PNG|link=]] '''[[How to Use the UDS Interface|UDS]]''' to switch to '''Surveyor''' then the names of all the assigned drivers will be shown.</td> |
| <tr valign="top">
| |
| <td width=25>[[image:PencilTips.PNG|link=]]</td>
| |
| <td>You can lay a spline object without any applied gradient so that it will follow the existing terrain height. Simply delete its <span style="font-weight: 700; font-size: 15px; color: gold; background-color: black;"> Grade </span> value so it resets to the default <span style="font-weight: 700; font-size: 15px; color: white; background-color: black;"> - </span> character</td> | |
| </tr> | | </tr> |
| </table> | | </table> |
| Line 9,535: |
Line 9,694: |
| </table> | | </table> |
| <br> | | <br> |
| <span style="font-weight: 700; font-size: 15px;">Adding Spline Segments at a Set Gradient</span> | | <table width=1000> |
| <table width=1000 bgcolor=#000000 cellpadding=2> | | <tr valign="top"> |
| | <td colspan=2>After selecting the [[image:DriverPaletteViewDriverDetails_S20.png|link=]] '''View Driver Properties''' Tool, the following '''Properties''' window will open</td> |
| | </tr> |
| | </table> |
| | <br> |
| | <table width=1000> |
| | <tr valign="top"> |
| | <td width=440> |
| | <table bgcolor=#000000 cellpadding=2> |
| <tr valign="top"> | | <tr valign="top"> |
| <td> | | <td> |
| <table width=996 bgcolor=#ffffff cellpadding=2> | | <table bgcolor=#ffffff cellpadding=2> |
| <tr> | | <tr valign="middle"> |
| <td colspan=2>To set and use the '''gradient''' of a spline object (including track) '''<u>before it has been laid</u>''' by the '''Placement Tool''' so that all the spline segments will be added with the set gradient in place, until it is changed or cancelled, then:-<br> | | <td width=35>[[image:Information35.png|link=]]</td> |
| <span style="font-weight: 700; font-size: 15px;">Steps:</span> To lay a spline sequence with a preset gradient:-</td> | | <td><span style="font-weight: 700; font-size: 15px; color: white; background-color: black;"> Map </span></td> |
| | </tr> |
| | <tr valign="top"> |
| | <td colspan=2>This shows the location of the driver in the route. It is "zoomable". |
| | <table cellpadding=2> |
| | <tr valign="top"> |
| | <td colspan=2><span style="font-weight: 700; font-size: 15px;">Steps: To Zoom the Map In/Out:-</span></td> |
| </tr> | | </tr> |
| <tr valign="top"> | | <tr valign="top"> |
| <td width=25>[[image:DotPoint1.JPG|link=]]</td> | | <td width=25>[[image:DotPoint1.JPG|link=]]</td> |
| <td>in the <span style="font-weight: 700; font-size: 15px; color: white; background-color: #797979;"> Assets Palette </span> <span style="font-weight: 700; font-size: 15px; background-color: lightcyan;"> Left Click </span> on the spline asset to be added</td> | | <td>Move the mouse pointer onto the map area</td> |
| </tr> | | </tr> |
| <tr valign="top"> | | <tr valign="top"> |
| <td>[[image:DotPoint2.JPG|link=]]</td> | | <td>[[image:DotPoint2.JPG|link=]]</td> |
| <td><span style="font-weight: 700; font-size: 15px; background-color: lightcyan;"> Left Click </span> in the <span style="font-weight: 700; font-size: 15px; color: white; background-color: #797979;"> Tool Options Palette </span> <span style="font-size: 15px; font-weight: 700; color: gold; background-color: black;"> Grade </span> setting and enter a new value (or keep the existing value) then press the <span style="font-weight: 700; font-size: 15px; color: white; background-color: black;"> Enter </span> key. This works even if the <span style="font-size: 15px; font-weight: 700; color: gold; background-color: black;"> Grade </span> icon is not coloured <span style="font-weight: 700; font-size: 15px; color: gold; background-color: black;"> Gold </span></td> | | <td>Rotate the mouse <span style="font-weight: 700; font-size: 15px; background-color: lightcyan;"> Scroll Wheel </span> forward to '''Zoom In''' and back to '''Zoom Out'''</td> |
| </tr> | | </tr> |
| <tr valign="top"> | | <tr valign="top"> |
| <td>[[image:DotPoint3.JPG|link=]]</td> | | <td>[[image:DotPoint3.JPG|link=]]</td> |
| <td><span style="font-weight: 700; font-size: 15px; background-color: lightcyan;"> Left Click </span> in the '''Surveyor World''' and draw out each spline segment as normal. Each segment will have the height of its second endpoint increased (or reduced for a negative grade) by an amount controlled by the <span style="font-size: 15px; font-weight: 700; color: gold; background-color: black;"> Grade </span> setting</td> | | <td>The map will always remain centered on the selected driver</td> |
| </tr>
| |
| <tr valign="top">
| |
| <td colspan=2>
| |
| <table bgcolor=#ffffe0 cellpadding=2>
| |
| <tr valign="top">
| |
| <td width=25>[[image:PencilTips.PNG|link=]]</td>
| |
| <td>You can cancel or change the gradient at any time. The change will only affect any selected spline segment and any additional segments that are added after the change. Simply delete its <span style="font-weight: 700; font-size: 15px; color: gold; background-color: black;"> Grade </span> value so it resets to the default <span style="font-weight: 700; font-size: 15px; color: white; background-color: black;"> - </span> or enter a new value</td>
| |
| </tr> | | </tr> |
| </table> | | </table> |
| Line 9,571: |
Line 9,737: |
| </table> | | </table> |
| <br> | | <br> |
| <table width=1000> <!-- BEGIN Section Nav Buttons --> | | <table bgcolor=#000000 cellpadding=2> |
| <tr valign="top"> | | <tr valign="top"> |
| <td width=629><span id="PT: Condition Track"></span> | | <td> |
| ===<span style="font-size: 17px; color: white; background-color: blue;"> Placement: Set Track Condition and Superelevation </span>===
| | <table bgcolor=#ffffff cellpadding=2> |
| </td>
| | <tr valign="middle"> |
| <td width=50> </td> | | <td width=35>[[image:Information35.png|link=]]</td> |
| <td width=50> </td>
| | <td><span style="font-weight: 700; font-size: 15px; color: white; background-color: black;"> Command Status </span></td> |
| <td width=46>[[image:SkipMinorDown.png|link=#PT: Context Spline|Down]][[image:SkipMinorUp.png|link=#PT: Gradient Spline|Up]]</td> <!-- for Top and Minor Up/Down --> | |
| <td width=75> </td>
| |
| <td width=75> </td>
| |
| <td width=75> </td> <!-- for Bottom -->
| |
| </tr> | | </tr> |
| </table> <!-- END Section Nav Buttons -->
| |
|
| |
| <table width=1000 bgcolor="lightcyan" cellpadding=2>
| |
| <tr valign="top"> | | <tr valign="top"> |
| <td width=10>[[image:BlueDot10x10.png|link=]]</td> | | <td colspan=2>This shows the command queue for this driver. If the '''Player Assignment''' for the driver has been set to the '''Automatic Scheduler''' <span style="font-weight: 700; background-color: yellow;">in Trainz Plus only</span> then the driver commands will be added by the '''TLR''' (Trainz Living Railroad) |
| <td>The '''Track Condition''' sets the "smoothness" of the ride over a track segment. The default is '''50%''' which is '''Average'''</td>
| | <table> |
| </tr> | |
| <tr valign="top"> | | <tr valign="top"> |
| <td>[[image:BlueDot10x10.png|link=]]</td> | | <td width=10>[[image:DotPoint.JPG|10px|link=]]</td> |
| <td>The '''Track Superelevation''' sets the height difference (as a angle) between the inner and outer rail lines on a curve</td> | | <td>For drivers under '''Player Control''' you can add, edit and delete driver commands. The '''Add Command''' icon will be shown (indicated by the arrow in the image below) and the driver commands can be edited<br> |
| | [[image:DispatchManagerCommandStatusManual_S20.png|link=]]</td> |
| </tr> | | </tr> |
| <tr valign="top"> | | <tr valign="top"> |
| <td>[[image:BlueDot10x10.png|link=]]</td> | | <td>[[image:DotPoint.JPG|10px|link=]]</td> |
| <td>'''Track Condition''' and '''Superelevation''' are only available for '''Track Splines'''</td> | | <td>For drivers under the control of the '''TLR''' no '''Add Command''' icon will be shown and the commands cannot be edited<br> |
| | [[image:DispatchManagerCommandStatusTLR_S20.png|link=]]</td> |
| </tr> | | </tr> |
| </table> | | </table> |
| <br>
| | </td> |
| <span style="font-weight: 700; font-size: 17px;">Track Condition</span><br>
| |
| | |
| <table width=1000 bgcolor=#000000 cellpadding=2>
| |
| <tr valign="top">
| |
| <td>
| |
| <table width=996 bgcolor=#ffe89a cellpadding=2>
| |
| <tr valign="middle">
| |
| <td width=45>[[image:PalettesIcon_S20.png|link=]]</td>
| |
| <td>If the <span style="font-weight: 700; font-size: 15px; color: white; background-color: #797979;"> Tool Options Palette </span> is not visible on the screen then refer to [[image:PageLink.PNG|link=]] '''[[#Notes_Palettes|Notes: Palettes]]''' at the top of this document.</td>
| |
| </tr> | | </tr> |
| </table> | | </table> |
| Line 9,614: |
Line 9,765: |
| </tr> | | </tr> |
| </table> | | </table> |
| | </td> |
| | <td width=10> </td> |
| | <td width=550>[[image:DispatchManagerShowDriverLevi_S20.png|550px|link=]] |
| <br> | | <br> |
| There are '''three different methods''' available for setting the track condition of a track segment.
| | <table> |
| <br>
| |
| <table width=1000> | |
| <tr valign="top"> | | <tr valign="top"> |
| <td width=25>[[image:Ablue.png|link=]]</td> | | <td>[[image:DispatchManagerInfo_S20.png|link=]]</td> |
| <td>The <span style="font-weight: 700; font-size: 15px; color: white; background-color: #797979;"> Tool Options Palette </span> has a '''Condition''' setting that only applies to '''track spline segments'''. This can be set for a segment that has just been added and is still highlighted.</td> | | <td><span style="font-weight: 700; font-size: 15px; background-color: lightcyan;"> Left Click </span> on the <span style="font-weight: 700; font-size: 15px;">i</span> button for a brief description of the options in each section</td> |
| </tr> | | </tr> |
| </table> | | </table> |
| | | <br> |
| <table width=1000>
| | <table bgcolor=#000000 cellpadding=2> |
| <tr valign="top">
| |
| <td width=200>[[image:PlacementSplineTools_S20.png|link=]]</td> | |
| <td>
| |
| <table bgcolor=#000000 width=800 cellpadding=2> | |
| <tr valign="top"> | | <tr valign="top"> |
| <td> | | <td> |
| <table bgcolor=#ffffff width=796 cellpadding=2> | | <table bgcolor=#ffffff cellpadding=2> |
| <tr valign="top"> | | <tr valign="middle"> |
| <td width=90><span style="font-size: 15px; font-weight: 700; color: gold; background-color: black;"> Condition </span></td> | | <td width=35>[[image:Information35.png|link=]]</td> |
| <td width=706>this applies to '''Track Spline''' objects and sets the track '''condition''' (or "ride comfort") for each segment</td>
| | <td><span style="font-weight: 700; font-size: 15px; color: white; background-color: black;"> Activity Log </span></td> |
| </tr> | | </tr> |
| <tr valign="top"> | | <tr valign="top"> |
| <td colspan=2> | | <td colspan=2>This shows the event history for this driver. The displayed list can be filtered using the same methods described above at [[image:PageLink.PNG|link=]] '''[[#DispatchFilters|Dispatch Filters]]'''</td> |
| <table bgcolor=#ffffb0>
| |
| <tr valign="top">
| |
| <td width=90 align="right">'''Range:''' </td>
| |
| <td width=706>'''1%''' (terrible track condition) to<br>
| |
| '''50%''' (average track condition - the default setting) to<br>
| |
| '''100%''' (perfect track condition)<br>
| |
| </td> | |
| </tr> | | </tr> |
| </table> | | </table> |
| Line 9,654: |
Line 9,795: |
| </table> | | </table> |
| <br> | | <br> |
| <table bgcolor=#000000 cellpadding=2> | | <table width=1000 bgcolor=#000000 cellpadding=2> |
| <tr valign="top"> | | <tr valign="top"> |
| <td> | | <td> |
| <table bgcolor=#ffffe0 cellpadding=2> | | <table width=996 bgcolor=#ffffff cellpadding=2> |
| | <tr valign="middle"> |
| | <td width=35>[[image:Information35.png|link=]]</td> |
| | <td><span style="font-weight: 700; font-size: 15px; color: white; background-color: black;"> Driver Settings </span></td> |
| | </tr> |
| <tr valign="top"> | | <tr valign="top"> |
| <td width=25>[[image:PencilTips.PNG|link=]]</td> | | <td colspan=2>These options set how this driver will be controlled</td> |
| <td>If the track segment is not highlighted you must switch to the [[image:S20_FreeMoveToolIcon.png|link=|20px]] '''[[#The Free Move Tool|Free Move Tool]]''' or the '''Fine Ajustment Tool''' and then select the segment or multiple segments.</td>
| |
| </tr> | | </tr> |
| </table> | | </table> |
| </td> | | </td> |
| | </tr> |
| | </table> |
| | |
| | <table width=1000> |
| | <tr valign="top"> |
| | <td>Each '''Driver Setting''' has a '''sub menu''' as shown in the image below. <span style="font-weight: 700; font-size: 15px; background-color: lightcyan;"> Left Click </span> on the down arrowhead of a setting to open its sub menu</td> |
| | </tr> |
| | <tr valign="top" align="center"> |
| | <td>[[image:DispatchManagerDriverSettingsOptions_S20.png|link=]]</td> |
| </tr> | | </tr> |
| </table> | | </table> |
| <br> | | <br> |
| <table bgcolor=#000000 cellpadding=2> | | <table width=1000 bgcolor=#000000 cellpadding=2> |
| <tr valign="top"> | | <tr valign="top"> |
| <td> | | <td> |
| <table bgcolor=#ffffff cellpadding=2> | | <table bgcolor=#ffffff cellpadding=2> |
| | <tr valign="middle"> |
| | <td width=35>[[image:Information35.png|link=]]</td> |
| | <td><span style="font-weight: 700; font-size: 17px;">Driver Settings Menu Options</span></td> |
| | </tr> |
| <tr valign="top"> | | <tr valign="top"> |
| <td colspan=2><span style="font-weight: 700; font-size: 15px;">Steps:</span> To set '''Track Condition''':-</td> | | <td colspan=2><span style="font-weight: 700; font-size: 15px;"> Driver Camera View: </span></td> |
| </tr> | | </tr> |
| <tr valign="top"> | | <tr valign="top"> |
| <td width=25>[[image:DotPoint1.JPG|link=]]</td> | | <td colspan=2> |
| <td>Enter a value from '''1''' to '''100''' in the <span style="font-weight: 700; font-size: 15px; color: white; background-color: #797979;"> Tool Options Palette </span> <span style="font-weight: 700; font-size: 15px; color: gold; background-color: black;"> Condition </span> setting</td>
| | <table> |
| </tr> | |
| <tr valign="top"> | | <tr valign="top"> |
| <td>[[image:DotPoint2.JPG|link=]]</td> | | <td width=25> </td> |
| <td>Press the <span style="font-weight: 700; font-size: 15px; color: white; background-color: black;"> Enter </span> key</td>
| | <td>[[image:DriverCameraIcon_S20.png|link=]] <span style="font-weight: 700; font-size: 15px; background-color: lightcyan;"> Left Click </span> on this icon to move the camera '''POV''' (Point of View) to this driver</td> |
| </tr> | | </tr> |
| </table> | | </table> |
| </td> | | </td> |
| </tr> | | </tr> |
| </table> | | <tr valign="top"> |
| | | <td colspan=2><span style="font-weight: 700; font-size: 15px;"> Driver Location: </span></td> |
| | </tr> |
| | <tr valign="top"> |
| | <td colspan=2> |
| <table> | | <table> |
| <tr valign="top"> | | <tr valign="top"> |
| <td>There will be no visible change to the track appearance, not even for a 1% setting, as this change would have to be built into the track mesh. Instead when a consist moves over the track there will be a visible change in its rocking or swaying motion.</td> | | <td width=25> </td> |
| | <td><span style="font-weight: 700; font-size: 15px; color: white; background-color: black;"> Move to Train </span></td> |
| | <td>The player takes control of this train. Only selectable if the driver is not assigned to the '''Automatic Scheduler''' <span style="font-weight: 700; background-color: yellow;">in Trainz Plus only</span></td> |
| </tr> | | </tr> |
| </table> | | </table> |
| </td> | | <table> |
| | <tr valign="top"> |
| | <td width=25> </td> |
| | <td><span style="font-weight: 700; font-size: 15px; color: white; background-color: black;"> Get off Train </span></td> |
| | <td>The player releases control of this train. Only selectable if the driver is not assigned to the '''Automatic Scheduler''' <span style="font-weight: 700; background-color: yellow;">in Trainz Plus only</span></td> |
| </tr> | | </tr> |
| </table> | | </table> |
| <br>
| | <table> |
| <table width=1000> | |
| <tr valign="top"> | | <tr valign="top"> |
| <td width=25>[[image:Bblue.png|link=]]</td> | | <td width=25> </td> |
| <td>A second method of setting the '''Track Condition''' of a newly placed track segment is to use its '''Track Segment Context Menu'''.</td> | | <td><span style="font-weight: 700; font-size: 15px; color: white; background-color: black;"> Show <name_of_loco (Consist nn)> </span></td> |
| | <td>opens the dialogue window for this locomotive</td> |
| </tr> | | </tr> |
| </table> | | </table> |
| | | </td> |
| <table width=1000>
| |
| <tr valign="top">
| |
| <td width=220>[[image:ContextMenuSplineSegment_S20.png|link=]]</td>
| |
| <td>
| |
| <table bgcolor=#000000 cellpadding=2>
| |
| <tr valign="top">
| |
| <td>
| |
| <table bgcolor=#ffffff cellpadding=2>
| |
| <tr valign="top">
| |
| <td colspan=2><span style="font-weight: 700; font-size: 15px;">Steps:</span> To set the '''Track Condition''' of a newly placed track segment:-</td>
| |
| </tr> | | </tr> |
| <tr valign="top"> | | <tr valign="top"> |
| <td width=25>[[image:DotPoint1.JPG|link=]]</td> | | <td colspan=2><span style="font-weight: 700; font-size: 15px;"> Player Assignment: </span></td> |
| <td><span style="font-weight: 700; font-size: 15px; background-color: lightcyan;"> Left Click </span> on the [[image:TrackSegmentContextIcon_S20.png|link=]] '''Track Segment Context Icon''' to open its menu</td>
| |
| </tr> | | </tr> |
| <tr valign="top"> | | <tr valign="top"> |
| <td>[[image:DotPoint2.JPG|link=]]</td> | | <td colspan=2> |
| <td><span style="font-weight: 700; font-size: 15px; background-color: lightcyan;"> Left Click </span> on the <span style="font-weight: 700; font-size: 15px; color: white; background-color: black;"> Edit Details </span> option at the bottom of the list</td>
| | <table> |
| </tr> | |
| <tr valign="top"> | | <tr valign="top"> |
| <td>[[image:DotPoint3.JPG|link=]]</td> | | <td width=25> </td> |
| <td>Enter a track condition as a '''%''' value where it shows '''Default'''. The description on the right will change to show the effect of the new value<br> | | <td><span style="font-weight: 700; font-size: 15px; color: white; background-color: black;"> Not Assigned </span></td> |
| [[image:TrackConditionSetting_S20.png|link=]]</td>
| | <td>no driver will be assigned to this train. <span style="font-weight: 700; background-color: yellow;">In Trainz Plus</span> this will cancel the '''Automatic Scheduler''' and remove the train from the '''TLR'''</td> |
| </tr> | | </tr> |
| | </table> |
| | <table> |
| <tr valign="top"> | | <tr valign="top"> |
| <td>[[image:DotPoint4.JPG|link=]]</td> | | <td width=25> </td> |
| <td>Click <span style="font-weight: 700; font-size: 15px; color: white; background-color: black;"> Save Changes </span> to set the new value and exit or <span style="font-weight: 700; font-size: 15px; color: white; background-color: black;"> Cancel </span> to cancel the new value and exit</td> | | <td><span style="font-weight: 700; font-size: 15px; color: white; background-color: black;"> Automatic Scheduler <span style="color: black; background-color: yellow;"> in Trainz Plus only</span></span></td> |
| | <td>train will be under the control of the '''TLR''' (Trainz Living Railroad)</td> |
| </tr> | | </tr> |
| </table> | | </table> |
| </td> | | <table> |
| | <tr valign="top"> |
| | <td width=25> </td> |
| | <td><span style="font-weight: 700; font-size: 15px; color: white; background-color: black;"> Player Controlled </span></td> |
| | <td>train will be available for control by the player either manually or by using AI driver commands. <span style="font-weight: 700; background-color: yellow;">In Trainz Plus</span> this will cancel the '''Automatic Scheduler''' and remove the train from the '''TLR'''</td> |
| </tr> | | </tr> |
| </table> | | </table> |
| </td> | | </td> |
| </tr> | | </tr> |
| </table>
| |
| <br>
| |
| <table width=1000>
| |
| <tr valign="top"> | | <tr valign="top"> |
| <td width=25>[[image:Cblue.png|link=]]</td> | | <td colspan=2><span style="font-weight: 700; font-size: 15px;"> Train Classification: </span> These options control the running lights displayed on the leading locomotive if that locomotive has been configured correctly</td> |
| <td>A third method of setting the '''Track Condition''' is to use the '''Placement Tool''' to place an invisible track "bump" object on a track segment.</td>
| |
| </tr> | | </tr> |
| </table>
| |
|
| |
| <table width=1000 cellpadding=2>
| |
| <tr valign="top"> | | <tr valign="top"> |
| <td width=220 align="center">[[image:TrackBumpObject.png|link=]]<br> | | <td colspan=2> |
| '''The "Track Bump" Object'''</td>
| | <table> |
| <td>
| |
| <table bgcolor=#000000 cellpadding=2> | |
| <tr valign="top"> | | <tr valign="top"> |
| <td> | | <td width=25> </td> |
| <table bgcolor=#ffffff cellpadding=2>
| | <td><span style="font-weight: 700; font-size: 15px; color: white; background-color: black;"> Timetabled Train (Off) </span></td> |
| <tr valign="top"> | | <td>sets the running lights for a normal scheduled train service</td> |
| <td colspan=2><span style="font-weight: 700; font-size: 15px;">Steps:</span> To add a '''Track Bump Object''' to a track segment:-</td> | |
| </tr> | | </tr> |
| <tr valign="top">
| | </table> |
| <td width=25>[[image:DotPoint1.JPG|link=]]</td>
| |
| <td>Use the <span style="font-weight: 700; font-size: 15px; color: white; background-color: #797979;"> Filter Palette </span> and the <span style="font-weight: 700; font-size: 15px; color: white; background-color: #797979;"> Assets Palette </span> to locate the '''Invisible Bump Object'''.<br>
| |
| <table> | | <table> |
| <tr valign="top"> | | <tr valign="top"> |
| <td width=10>[[image:DotPoint.JPG|10px|link=]]</td> | | <td width=25> </td> |
| <td>In the <span style="font-weight: 700; font-size: 15px; color: white; background-color: #797979;"> Filter Palette </span> select the [[image:TrackMeshFilter_S20.png|link=]] icon or the asset type '''Track Objects''' in the drop down list</td> | | <td><span style="font-weight: 700; font-size: 15px; color: white; background-color: black;"> Extra Train (White) </span></td> |
| | <td>sets the running lights to indicate that this is an additional (not regularly scheduled) train service</td> |
| </tr> | | </tr> |
| | </table> |
| | <table> |
| <tr valign="top"> | | <tr valign="top"> |
| <td>[[image:DotPoint.JPG|10px|link=]]</td> | | <td width=25> </td> |
| <td>In the <span style="font-weight: 700; font-size: 15px; color: white; background-color: #797979;"> Assets Palette </span> enter the search text '''Track Bump'''</td> | | <td><span style="font-weight: 700; font-size: 15px; color: white; background-color: black;"> Train with following section (Green)''' </span></td> |
| </tr>
| | <td>sets the running lights to indicate that this service has an additional (or "second division") service following. That following service should be set to show the '''Extra Train''' running lights</td> |
| <tr valign="top">
| |
| <td>[[image:DotPoint.JPG|10px|link=]]</td>
| |
| <td><span style="font-weight: 700; font-size: 15px; background-color: lightcyan;"> Left Click </span> on the '''Invisible Track Bump''' asset in the asset list</td> | |
| </tr> | | </tr> |
| </table> | | </table> |
| Line 9,778: |
Line 9,926: |
| </tr> | | </tr> |
| <tr valign="top"> | | <tr valign="top"> |
| <td>[[image:DotPoint2.JPG|link=]]</td> | | <td colspan=2><span style="font-weight: 700; font-size: 15px;"> Dispatch Status: <span style="background-color: yellow;"> available in Trainz Plus only</span></span></td> |
| <td>Place the object on a track segment</td> | |
| </tr> | | </tr> |
| <tr valign="top"> | | <tr valign="top"> |
| <td>[[image:DotPoint3.JPG|link=]]</td> | | <td colspan=2> |
| <td>Open its '''Context Menu''' and select the last option <span style="font-weight: 700; font-size: 15px; color: white; background-color: black;"> Edit Details </span></td> | | <table bgcolor=#ffffb0 cellpadding=2> |
| | <tr valign="top"> |
| | <td width=25>[[image:NotePad.PNG|link=]]</td> |
| | <td>In <span style="font-weight: 700; background-color: yellow;">Trainz Plus</span> the <span style="font-weight: 700; font-size: 15px; color: white; background-color: black;"> Dispatch Manager </span> <span style="font-weight: 700; font-size: 15px; color: white; background-color: black;"> Dispatch Status </span> setting must be '''Enabled''' for these options to be available. See '''[[image:PageLink.PNG|link=]] [[#stepDispatchManager|Dispatch Manager]]''' for more details</td> |
| </tr> | | </tr> |
| | </table> |
| | <table> |
| <tr valign="top"> | | <tr valign="top"> |
| <td>[[image:DotPoint4.JPG|link=]]</td> | | <td width=25> </td> |
| <td>Enter values for the "bumpy track" settings required | | <td><span style="font-weight: 700; font-size: 15px; color: white; background-color: black;"> Claim Task </span></td> |
| <table> | | <td>this will cancel the '''Automatic Scheduler''' if it has been set, and you, the player, will be given control of the train. Any driver commands in the '''Command Status''' will be cleared. |
| | <table bgcolor=#ffffb0 cellpadding=2> |
| <tr valign="top"> | | <tr valign="top"> |
| <td width=295>[[image:TrackBumpSettings.png|link=]]</td> | | <td width=25>[[image:NotePad.PNG|link=]]</td> |
| <td><br><br> | | <td>If the current driver has already been '''Claimed''' then <span style="font-weight: 700; font-size: 15px; color: white; background-color: black;"> Assign to Automatic Scheduler </span> will appear instead of the <span style="font-weight: 700; font-size: 15px; color: white; background-color: black;"> Claim Task </span> option. Selecting '''Assign to Automatic Scheduler''' will return the driver to the '''TLR'''</td> |
| '''pitch = forward/backward'''<br> | |
| '''roll = side to side'''</td> | |
| </tr> | | </tr> |
| </table> | | </table> |
| </td> | | </td> |
| </tr> | | </tr> |
| | </table> |
| | <table> |
| <tr valign="top"> | | <tr valign="top"> |
| <td>[[image:DotPoint5.JPG|link=]]</td> | | <td width=25> </td> |
| <td>Click <span style="font-weight: 700; font-size: 15px; color: white; background-color: black;"> Save Changes </span> to set the new values and exit or <span style="font-weight: 700; font-size: 15px; color: white; background-color: black;"> Cancel </span> to cancel the new values and exit</td> | | <td><span style="font-weight: 700; font-size: 15px; color: white; background-color: black;"> Pause Task </span></td> |
| | <td>the current '''TLR''' tasks for this driver will be paused and the train will be halted. No other drivers will be affected. |
| | <table bgcolor=#ffffb0 cellpadding=2> |
| | <tr valign="top"> |
| | <td width=25>[[image:NotePad.PNG|link=]]</td> |
| | <td>The '''Pause Task''' option will not appear if the '''Claim Task''' option has been selected.<br> |
| | If the current driver has been put on '''Pause''' then <span style="font-weight: 700; font-size: 15px; color: white; background-color: black;"> Resume Task </span> will appear instead of the <span style="font-weight: 700; font-size: 15px; color: white; background-color: black;"> Pause Task </span> option. Selecting '''Resume Task''' will return the driver to the '''TLR''' to continue its normal operations</td> |
| </tr> | | </tr> |
| </table> | | </table> |
| Line 9,806: |
Line 9,965: |
| </tr> | | </tr> |
| </table> | | </table> |
| </td> | | <table> |
| | <tr valign="top"> |
| | <td width=25> </td> |
| | <td><span style="font-weight: 700; font-size: 15px; color: white; background-color: black;"> Cancel Task </span></td> |
| | <td>the '''current''' driver commands in the '''Command Status''' will be terminated. The '''TLR''' will then allocate new tasks to this driver</td> |
| </tr> | | </tr> |
| </table> | | </table> |
| <br>
| | <table> |
| <span style="font-weight: 700; font-size: 17px;">Track Superelevation</span><br>
| |
| | |
| <table width=1000> | |
| <tr valign="top"> | | <tr valign="top"> |
| <td>The '''Track Superelevation''' can only be set through the '''Track Endpoint Context Menu'''. You can have a different value set for each endpoint that will reflect the changes that can take place around a curve. For more information on how to calculate and use '''Superelevation''' see the '''Trainz Wiki Page [[image:WikiLink.PNG|link=]] [[HowTo/Use_Superelevation|How to Use Superelevation]]'''</td> | | <td width=25> </td> |
| | <td><span style="font-weight: 700; font-size: 15px; color: lightgrey; background-color: black;"> Show <driver_name> </span></td> |
| | <td>not selectable because you are already in the '''Driver Properties Window'''</td> |
| </tr> | | </tr> |
| <tr valign="top"> | | </table> |
| <td>
| |
| <table> | | <table> |
| <tr valign="top"> | | <tr valign="top"> |
| <td width=220>[[image:ContextMenuSplineEndPoint_S20.png|link=]]</td> | | <td width=25> </td> |
| <td> | | <td><span style="font-weight: 700; font-size: 15px; color: white; background-color: black;"> Show <industry_name_1> </span></td> |
| <table bgcolor=#000000 cellpadding=2>
| | <td>this will open the '''Industry Manager''' window for the industry currently being serviced (i.e. where the train is loading/unloading) or, if the train is moving towards its next industry task, the industry that the driver has just departed - see [[image:PageLink.PNG|link=]] '''[[#skipManageIndustry|Manage Industries]]''' for more information</td> |
| <tr valign="top">
| |
| <td>
| |
| <table bgcolor=#ffffff cellpadding=2>
| |
| <tr valign="top">
| |
| <td colspan=2><span style="font-weight: 700; font-size: 15px;">Steps:</span> To set the '''Superelevation''' for an endpoint of a newly placed track segment:-</td>
| |
| </tr> | | </tr> |
| <tr valign="top">
| | </table> |
| <td width=25>[[image:DotPoint1.JPG|link=]]</td>
| |
| <td><span style="font-weight: 700; font-size: 15px; background-color: lightcyan;"> Left Click </span> on the [[image:SplineSegmentContextIcon_S20.png|link=]] '''Track Spline Endpoint Context Icon''' to open its menu</td>
| |
| </tr>
| |
| <tr valign="top">
| |
| <td>[[image:DotPoint2.JPG|link=]]</td>
| |
| <td><span style="font-weight: 700; font-size: 15px; background-color: lightcyan;"> Left Click </span> on the <span style="font-weight: 700; font-size: 15px; color: white; background-color: black;"> Edit Details </span> option at the bottom of the list</td>
| |
| </tr>
| |
| <tr valign="top">
| |
| <td>[[image:DotPoint3.JPG|link=]]</td>
| |
| <td>Enter a '''Superelevation Degree''' as an angle (in degrees) - this is the superelevation angle at this vertex (endpoint) per degree of curvature where '''0 = none'''</td>
| |
| </tr>
| |
| <tr valign="top">
| |
| <td colspan=2>
| |
| <table> | | <table> |
| <tr valign="top"> | | <tr valign="top"> |
| <td width=265>[[image:TrackSuperElevationSetting_S20.png|link=]]</td> | | <td width=25> </td> |
| <td>The '''Superelevation Angle''' is calculated using the radius of the curve, the maximum track speed and the track gauge.<br> | | <td><span style="font-weight: 700; font-size: 15px; color: white; background-color: black;"> Show <industry_name_2> </span></td> |
| See the '''Trainz Wiki Page [[image:WikiLink.PNG|link=]] [[HowTo/Use_Superelevation|How to Use Superelevation]]''' for the formula</td>
| | <td>this will open the '''Industry Manager''' window for the next industry to be serviced by the train (i.e. its destination) - see [[image:PageLink.PNG|link=]] '''[[#skipManageIndustry|Manage Industries]]''' for more information</td> |
| </tr> | | </tr> |
| </table> | | </table> |
| </td> | | <table> |
| </tr>
| |
| <tr valign="top"> | | <tr valign="top"> |
| <td>[[image:DotPoint4.JPG|link=]]</td> | | <td width=25> </td> |
| <td>Enter a '''Superelevation Limit''' as an angle (in degrees) - this is the '''maximum''' allowed superelevation angle at this vertex (endpoint)</td>
| | <td><span style="font-weight: 700; font-size: 15px; color: white; background-color: black;"> Show Dispatch Manager </span></td> |
| </tr>
| | <td>if you have closed the '''Dispatch Manager''' window, or minimised it to free up screen space, then this will return it to the screen</td> |
| <tr valign="top">
| |
| <td>[[image:DotPoint5.JPG|link=]]</td> | |
| <td>Click <span style="font-weight: 700; font-size: 15px; color: white; background-color: black;"> Save Changes </span> to set the new values and exit or <span style="font-weight: 700; font-size: 15px; color: white; background-color: black;"> Cancel </span> to cancel the new values and exit</td>
| |
| </tr>
| |
| <tr valign="top">
| |
| <td colspan=2>'''Repeat the above steps for each endpoint'''</td> | |
| </tr>
| |
| </table>
| |
| </td> | |
| </tr> | | </tr> |
| </table> | | </table> |
| Line 9,874: |
Line 10,007: |
| </table> | | </table> |
| <br> | | <br> |
| <table width=1000> <!-- BEGIN Section Nav Buttons --> | | <table width=1000> <!-- BEGIN Nav Buttons Table --> |
| <tr valign="top"> | | <tr valign="top"> |
| <td width=629><span id="PT: Context Spline"></span> | | <td width=629><span id="skip Driver"></span> |
| ===<span style="font-size: 17px; color: white; background-color: blue;"> Placement: Spline Object Context Menu </span>=== | | ===<span style="font-weight: 700; font-size: 15px; color: white; background-color: blue;"> In Driver </span>=== |
| </td> | | </td> |
| <td width=50> </td> | | <td width=50> </td> |
| <td width=50> </td> | | <td width=50> </td> |
| <td width=46>[[image:SkipMinorDown.png|link=#skip Placement: Track Objects|Down]][[image:SkipMinorUp.png|link=#PT: Condition Track|Up]]</td> <!-- for Top and Minor Up/Down --> | | <td width=46>[[image:SkipMinorDown.png|link=#skip Driver Location]][[image:SkipMinorUp.png|link=#skip Surveyor & Driver]]</td> <!-- for Top and Minor Up/Down --> |
| | <td width=75> </td> |
| <td width=75> </td> | | <td width=75> </td> |
| <td width=75> </td> | | <td width=75> </td> |
| <td width=75> </td> <!-- for Bottom -->
| |
| </tr> | | </tr> |
| </table> <!-- END Section Nav Buttons --> | | </table> <!-- END Nav Buttons Table --> |
|
| |
|
| <table width=1000 bgcolor=#000000 cellpadding=2> | | <table width=1000> |
| | <tr valign="top"> |
| | <td colspan=2><span style="font-weight: 700; font-size: 15px; background-color: yellow;">Available in Trainz Plus only</span> When used in '''Driver Mode''' a coloured line will appear above the track showing the path, or possible paths, when the next command in the '''Command Status''' queue is a movement command, such as '''Drive To...''', '''Navigate To...''' or '''Couple To...'''. The path lines will not be shown when these commands are not being executed. The colour of the path lines are '''Blue''', '''Green''', '''Orange''' and '''Red'''.</td> |
| | </tr> |
| <tr valign="top"> | | <tr valign="top"> |
| | <td width=600>[[image:DriverPaletteTrainPath_S20.png|link=]]</td> |
| <td> | | <td> |
| <table bgcolor=#ffffff cellpadding=2> | | <table bgcolor=#000000 cellpadding=2> |
| <tr valign="top"> | | <tr valign="top"> |
| <td> | | <td> |
| <table> | | <table bgcolor=#ffffb0 cellpadding=2> |
| <tr valign="middle"> | | <tr valign="top"> |
| <td width=35>[[image:Information.png|35px|link=]]</td> | | <td width=25>[[image:NotePad.PNG|link=]]</td> |
| <td><span style="font-weight: 700; font-size: 17px;">Spline Object Context Menu Options</span><br> | | <td><span style="font-size: 17px; font-weight: 700;">Notes:'''</span> <span style="font-weight: 700; font-size: 15px;">Path Colours:-</span><br> |
| Once a spline segment has been placed you can open its '''Context Menus'''. It has separate menus and menu icons:-</td>
| | ---- |
| </tr> | |
| </table>
| |
| </td> | | </td> |
| </tr> | | </tr> |
| <tr valign="top"> | | <tr valign="top"> |
| <td> | | <td colspan=2>These colours identify the type of service and are a "Work In Progress". They may change in future releases</td> |
| <table> | | </tr> |
| <tr valign="top"> | | <tr valign="top"> |
| <td width=10>[[image:DotPoint.JPG|10px|link=]]</td> | | <td bgcolor="red">  </td> |
| <td>[[image:SplineSegmentContextIcon_S20.png|link=]] or [[image:TrackSegmentContextIcon_S20.png|link=]] (depending on the type of spline) for the spline segment, and</td> | | <td>'''Locomotive only'''</td> |
| </tr> | | </tr> |
| <tr valign="top"> | | <tr valign="top"> |
| <td>[[image:DotPoint.JPG|10px|link=]]</td> | | <td bgcolor="blue">  </td> |
| <td>[[image:SplineEndpointContextIcon_S20.png|link=]] for the endpoints</td> | | <td>'''Passenger''' (not yet implemented)</td> |
| </tr> | | </tr> |
| </table> | | <tr valign="top"> |
| <br> | | <td bgcolor="orange">  </td> |
| <span style="font-weight: 700; font-size: 15px; background-color: lightcyan;"> Left Click </span> on one of the icons to open its menu or press the <span style="font-weight: 700; font-size: 15px; color: white; background-color: black;"> T </span> key to open the menu for the spline segment. The following '''Spline Object''' specific options will appear, along with other more general options, in the '''Context Menu'''.
| | <td>'''Freight'''</td> |
| ----</td>
| |
| </tr> | | </tr> |
| <tr valign="top"> | | <tr valign="top"> |
| <td> | | <td bgcolor="lightgreen">  </td> |
| <table>
| | <td>'''Active Path''' (for the selected driver)</td> |
| <tr valign="top">
| |
| <td><span style="font-weight: 700; font-size: 15px; color: white; background-color: black;"> Straighten Spline </span></td>
| |
| <td>forces a straight line (as far as possible) between the endpoints of a single segment. This option will be [[image:Tick.PNG|link=]] ticked if the segment has already been straightened in which case selecting this option will "un-straighten" the segment and remove the tick</td> | |
| </tr> | | </tr> |
| </table> | | </table> |
| </td> | | </td> |
| </tr> | | </tr> |
| <tr valign="top"> | | </table> |
| | <br> |
| | <span style="font-weight: 700; font-size: 15px; background-color: lightcyan;"> Left Click </span> on the <span style="font-weight: 700; font-size: 15px; color: white; background-color: black;"> Close </span> button to close the window and return to the '''Drivers Palette''' or '''Driver Control Center'''.</td> |
| | </tr> |
| | </table> |
| | <br> |
| | <table width=800 bgcolor=#000000 cellpadding=2> |
| | <tr valign="top"> |
| <td> | | <td> |
| <table> | | <table width=796 bgcolor=#ffffb0 cellpadding=2> |
| <tr valign="top">
| |
| <td><span style="font-weight: 700; font-size: 15px; color: white; background-color: black;"> Separate Splines </span></td>
| |
| <td>breaks two spline segments into two separate (independent) splines at the '''selected''' endpoint
| |
| <table bgcolor=#ffffb0 cellpadding=2>
| |
| <tr valign="top"> | | <tr valign="top"> |
| <td width=25>[[image:NotePad.PNG|link=]]</td> | | <td width=25>[[image:NotePad.PNG|link=]]</td> |
| <td>If multiple segments have been selected then this option will break '''ALL''' the selected segments into separate (independent) splines</td> | | <td><span style="font-size: 17px; font-weight: 700;">Notes:'''</span><br> |
| </tr> | | ---- |
| </table>
| |
| </td> | | </td> |
| </tr> | | </tr> |
| <tr valign="top"> | | <tr valign="top"> |
| <td><span style="font-weight: 700; font-size: 15px; color: white; background-color: black;"> Merge Splines </span></td> | | <td colspan=2> |
| <td>removes the '''selected''' endpoint between two segments and merges the segments into one. Two segments can also be merged by deleting a '''selected''' endpoint with the <span style="font-weight: 700; font-size: 15px; color: white; background-color: black;"> Delete </span> key</td>
| |
| </tr>
| |
| </table>
| |
| </td>
| |
| </tr>
| |
| <tr valign="top">
| |
| <td>
| |
| <table> | | <table> |
| <tr valign="top"> | | <tr valign="top"> |
| <td><span style="font-weight: 700; font-size: 15px; color: white; background-color: black;"> Insert Spline Point Here </span></td> | | <td width=10>[[image:DotPoint.JPG|10px|link=]]</td> |
| <td>inserts a new endpoint in a segment at the point where it was clicked. This will create a new segment at the endpoint</td> | | <td>The signals and switches along the path may not be correctly set until the train approaches and activates them</td> |
| </tr> | | </tr> |
| </table> | | <tr valign="top"> |
| See [[image:PageLink.PNG|link=]] '''[[#FM: Context Spline|Free Move: Spline Object Context Menus]]''' for the full list of '''Context Menu''' options for '''Spline Objects'''.</td>
| | <td>[[image:DotPoint.JPG|10px|link=]]</td> |
| | <td>The path options are controlled from the Main '''Display Menu''', as shown below, and are independent of the '''Driver Properties''' window<br> |
| | [[image:DisplayMenuTrackPaths.png|link=]]</td> |
| </tr> | | </tr> |
| </table> | | </table> |
| Line 9,964: |
Line 10,092: |
| </tr> | | </tr> |
| </table> | | </table> |
| <br>
| |
| <table width=1000> <!-- BEGIN Section Nav Buttons -->
| |
| <tr valign="top">
| |
| <td width=629><span id="skip Placement: Track Objects"></span>
| |
| =='''Placement: Track Objects'''==
| |
| </td> | | </td> |
| <td width=50>[[image:SkipDown.png|link=#skip Placement: Rolling Stock Objects|Skip Down]]</td>
| |
| <td width=50>[[image:SkipUp.png|link=#skip Placement: Spline Objects|Skip Up]]</td>
| |
| <td width=46>[[image:SkipMinorDown.png|link=#PT: Add TObject|Down]][[image:SkipMinorUp.png|link=#PT: Context Spline|Up]]</td> <!-- for Top and Minor Up/Down -->
| |
| <td width=75>[[image:HeadingUp.png|link=#stepPlacement|alt=Heading|To Heading]]</td>
| |
| <td width=75> </td>
| |
| <td width=75> </td> <!-- for Bottom -->
| |
| </tr>
| |
| </table> <!-- END Section Nav Buttons -->
| |
|
| |
| <table width=1000>
| |
| <tr valign="top">
| |
| <td align="center">[[image:TrackObjectExamples.png|link=]]<br>
| |
| '''Typical Track Objects'''<br>
| |
| Track marks, speed signs, signals (visible and invisible), switches, buffer stops</td>
| |
| </tr> | | </tr> |
| </table> | | </table> |
| <br> | | <br> |
| <table width=1000> <!-- BEGIN Section Nav Buttons --> | | <table width=1000> <!-- BEGIN Nav Buttons Table --> |
| <tr valign="top"> | | <tr valign="top"> |
| <td width=629><span id="PT: Add TObject"></span> | | <td width=629><span id="skip Driver Location"></span> |
| ===<span style="font-size: 17px; color: white; background-color: blue;"> Placement: Add a Track Object </span>=== | | =='''Driver Location'''== |
| </td> | | </td> |
| <td width=50> </td> | | <td width=50>[[image:SkipDown.png|link=#skip Player Assignment|Skip Down]]</td> |
| <td width=50> </td> | | <td width=50>[[image:SkipUp.png|link=#skip Driver Properties|Skip Up]]</td> |
| <td width=46>[[image:SkipMinorDown.png|link=#PT: Move TObject|Down]][[image:SkipMinorUp.png|link=#skip Placement: Track Objects]]</td> <!-- for Top and Minor Up/Down --> | | <td width=46>[[image:SkipMinorDown.png|link=#skip Train Properties]][[image:SkipMinorUp.png|link=#skip Driver]]</td> <!-- for Top and Minor Up/Down --> |
| | <td width=75>[[image:HeadingUp.png|link=#stepDriverCenter|alt=Heading|To Heading]]</td> |
| <td width=75> </td> | | <td width=75> </td> |
| <td width=75> </td> | | <td width=75> </td> |
| <td width=75> </td> <!-- for Bottom -->
| |
| </tr> | | </tr> |
| </table> <!-- END Section Nav Buttons --> | | </table> <!-- END Nav Buttons Table --> |
|
| |
|
| <table width=1000 bgcolor="lightcyan" cellpadding=2> | | <table width=1000 bgcolor="lightcyan" cellpadding=2> |
| <tr valign="top"> | | <tr valign="top"> |
| <td width=10>[[image:BlueDot10x10.png|link=]]</td> | | <td width=10>[[image:BlueDot10x10.png|link=]]</td> |
| <td>'''Track Objects''' (e.g. signals, speed signs, switches, etc), both visible and invisible, can only be attached to track splines.</td> | | <td>This allows you to move the driver to a new train and to view/edit the details of their current train</td> |
| </tr> | | </tr> |
| </table> | | </table> |
| | | <br> |
| <table bgcolor=#000000 width=600 cellpadding=2> | | <table> |
| <tr valign="top"> | | <tr valign="top"> |
| | <td width=285>[[image:DriverPaletteLocation_S20.png|link=]]</td> |
| <td> | | <td> |
| <table bgcolor=#ffffb0 width=596 cellpadding=2> | | <table bgcolor=#000000 cellpadding=2> |
| <tr valign="top"> | | <tr valign="top"> |
| <td width=25>[[image:NotePad.PNG|link=]]</td> | | <td> |
| <td><span style="font-size: 17px; font-weight: 700;">Notes:</span><br> | | <table bgcolor=#ffffff cellpadding=2> |
| ----
| |
| <table>
| |
| <tr valign="top"> | | <tr valign="top"> |
| | <td colspan=2><span style="font-weight: 700; font-size: 15px;">Steps: To Edit the Driver Location:-</span></td> |
| </tr> | | </tr> |
| </table>
| |
| <table>
| |
| <tr valign="top"> | | <tr valign="top"> |
| <td colspan=2>'''Visible''' examples of track objects include:-</td> | | <td width=25>[[image:DotPoint1.JPG|link=]]</td> |
| | <td><span style="font-weight: 700; font-size: 15px; background-color: lightcyan;"> Left Click </span> on the white '''Down Arrowhead''' following the name of the assigned locomotive</td> |
| </tr> | | </tr> |
| <tr valign="top"> | | <tr valign="top"> |
| <td width=10>[[image:DotPoint.JPG|10px|link=]]</td> | | <td>[[image:DotPoint2.JPG|link=]]</td> |
| <td>Signals, speed signs, end buffers, switches</td>
| | <td>select an option from the drop down menu</td> |
| </tr>
| |
| <tr valign="top">
| |
| <td colspan=2>'''Invisible''' examples of track objects include:-</td>
| |
| </tr>
| |
| <tr valign="top">
| |
| <td width=10>[[image:DotPoint.JPG|10px|link=]]</td>
| |
| <td>Trackmarks, triggers, direction and priority markers. Plus invisible trackside objects such as signals, switches and speed signs</td> | |
| </tr> | | </tr> |
| </table> | | </table> |
| Line 10,046: |
Line 10,147: |
| <tr valign="top"> | | <tr valign="top"> |
| <td> | | <td> |
| <table width=996 bgcolor=#ffe89a cellpadding=2> | | <table bgcolor=#ffffff cellpadding=2> |
| <tr valign="middle"> | | <tr valign="top"> |
| <td width=45>[[image:PalettesIcon_S20.png|link=]]</td> | | <td>Choose one of the following:-<br> |
| <td>If the <span style="font-weight: 700; font-size: 15px; color: white; background-color: #797979;"> Filter Palette </span> and <span style="font-weight: 700; font-size: 15px; color: white; background-color: #797979;"> Assets Palette </span> are not visible on the screen then refer to [[image:PageLink.PNG|link=]] '''[[#Notes_Palettes|Notes: Palettes]]''' at the top of this document.</td>
| | <span style="font-weight: 700; font-size: 15px;;">Options:</span></td> |
| </tr> | | </tr> |
| </table> | | <tr valign="top"> |
| </td> | | <td> |
| | <table> |
| | <tr valign="top"> |
| | <td width=25>[[image:Ablue.png|link=]]</td> |
| | <td width=125><span style="font-weight: 700; font-size: 15px; color: white; background-color: black;"> Move to Train... </span></td> |
| | <td>performs the same task as shown in [[image:PageLink.PNG|link=]] '''[[#Switching Drivers|Switching Drivers]]''' above. This option will not be available if the '''Player Assignment''' has been set to <span style="font-weight: 700; font-size: 15px; color: white; background-color: black;"> Automatic Sheduler </span> (<span style="font-weight: 700; background-color: yellow;">available in Trainz Plus only</span>), <span style="font-weight: 700; font-size: 15px;">OR</span></td> |
| </tr> | | </tr> |
| </table> | | </table> |
| <br>
| | <table> |
| <table width=1000> | |
| <tr valign="top"> | | <tr valign="top"> |
| <td><span style="font-weight: 700; font-size: 15px;">Steps:</span> To add a '''Track Object''' the first step is to identify the exact asset you want to add.</td> | | <td> |
| | <table> |
| | <tr valign="top"> |
| | <td width=25>[[image:Bblue.png|link=]]</td> |
| | <td width=125><span style="font-weight: 700; font-size: 15px; color: white; background-color: black;"> Get off Train </span></td> |
| | <td>the driver assignment to this train will be terminated. This option will not be available if the '''Player Assignment''' has been set to <span style="font-weight: 700; font-size: 15px; color: white; background-color: black;"> Automatic Sheduler </span> (<span style="font-weight: 700; background-color: yellow;">available in Trainz Plus only</span>), <span style="font-weight: 700; font-size: 15px;">OR</span></td> |
| </tr> | | </tr> |
| </table> | | </table> |
| <br>
| |
| [[image:DotPoint1.JPG|link=]] In the <span style="font-weight: 700; font-size: 15px; color: white; background-color: #797979;"> Filter Palette </span> choose one of the following:-
| |
| <table width=1000>
| |
| <tr>
| |
| <td><span style="font-weight: 700; font-size: 15px;">Options:</span> </td>
| |
| </tr>
| |
| <tr valign="top">
| |
| <td>
| |
| <table width=250 bgcolor=#0000ff>
| |
| <tr valign="top">
| |
| <td>
| |
| <table width=246 bgcolor=#ffffff>
| |
| <tr valign="top">
| |
| <td width=246 align="center"><span style="font-weight: 700; font-size: 15px; background-color: lightcyan;"> Left Click </span> on the '''Track Object''' icon<br>
| |
| [[image:FilterPaletteTrackObjectsSelected_S20.png|link=]]
| |
| <table> | | <table> |
| <tr valign="top" align="left">
| |
| <td>[[image:GroundTextureFilter_S20.png|link=]]</td>
| |
| <td>all ground textures</td>
| |
| </tr>
| |
| <tr valign="top" align="left">
| |
| <td>[[image:SceneryMeshFilter_S20.png|link=]]</td>
| |
| <td>all non-spline scenery assets</td>
| |
| </tr>
| |
| <tr valign="top" align="left">
| |
| <td>[[image:ScenerySplineFilter_S20.png|link=]]</td>
| |
| <td>all spline scenery assets</td>
| |
| </tr>
| |
| <tr valign="top" align="left">
| |
| <td>[[image:TrackSplineFilter_S20.png|link=]]</td>
| |
| <td>all track spline assets</td>
| |
| </tr>
| |
| <tr valign="top" align="left">
| |
| <td colspan=2>
| |
| <table bgcolor=#000000 cellpadding=2>
| |
| <tr valign="top"> | | <tr valign="top"> |
| <td> | | <td>[[image:Cblue.png|link=]]</td> |
| <table bgcolor=#ffffff cellpadding=2> | | <td width=175><span style="font-weight: 700; font-size: 15px; color: white; background-color: black;"> Show <name of loco> </span></td> |
| <tr valign="top" align="left"> | | <td>this will open a new '''Properties''' window showing details of the assigned train. Some of those details can be edited. See '''Train Properties''' below</td> |
| <td>[[image:TrackMeshFilter_S20.png|link=]]</td> | |
| <td>all track (non spline) assets (signals, etc)</td> | |
| </tr> | | </tr> |
| </table> | | </table> |
| Line 10,108: |
Line 10,182: |
| </table> | | </table> |
| </td> | | </td> |
| </tr>
| |
| <tr valign="top" align="left">
| |
| <td>[[image:TrainFilter_S20.png|link=]]</td>
| |
| <td>all rolling stock assets</td>
| |
| </tr>
| |
| <tr valign="top" align="left">
| |
| <td>[[image:PresetFilter_S20.png|link=]]</td>
| |
| <td>all '''Effect Layer''' presets</td>
| |
| </tr> | | </tr> |
| </table> | | </table> |
| Line 10,121: |
Line 10,187: |
| </tr> | | </tr> |
| </table> | | </table> |
| </td> | | <br> |
| | <table width=1000> |
| | <tr valign="top"> |
| | <td><span style="font-weight: 700; font-size: 15px; background-color: lightcyan;"> Left Click </span> on the <span style="font-weight: 700; font-size: 15px; color: white; background-color: black;"> Close </span> button to close the window and return to the '''Drivers Palette'''.</td> |
| </tr> | | </tr> |
| </table> | | </table> |
| </td> | | <br> |
| <td width=50 align="center"><span style="font-size: 17px; font-weight: 700;">OR</span></td> | | <table width=1000> <!-- BEGIN Nav Buttons Table --> |
| <td>
| |
| <table width=250 bgcolor=#0000ff>
| |
| <tr valign="top">
| |
| <td>
| |
| <table width=246 bgcolor=#ffffff>
| |
| <tr valign="top"> | | <tr valign="top"> |
| <td align="center"><span style="font-weight: 700; font-size: 15px; background-color: lightcyan;"> Left Click </span> the '''Content Drop Down Menu'''<br> | | <td width=629><span id="skip Train Properties"></span> |
| [[image:FilterPaletteNoIconSelected_S20.png|link=]]<br>
| | ===<span style="font-weight: 700; font-size: 15px; color: white; background-color: blue;"> Train Properties </span>=== |
| Then select '''Track Objects'''<br>
| |
| [[image:FilterSelectTrackObjects_S20.png|link=]]
| |
| </td> | | </td> |
| | <td width=50> </td> |
| | <td width=50> </td> |
| | <td width=46>[[image:SkipMinorDown.png|link=#skip Script Properties]][[image:SkipMinorUp.png|link=#skip Driver Location]]</td> <!-- for Top and Minor Up/Down --> |
| | <td width=75> </td> |
| | <td width=75> </td> |
| | <td width=75> </td> |
| </tr> | | </tr> |
| </table> | | </table> <!-- END Nav Buttons Table --> |
| </td> | | |
| | <table> |
| | <tr valign="top"> |
| | <td>The <span style="font-weight: 700; font-size: 15px; color: white; background-color: black;">Show <name of loco></span> option will open the '''Train Properties''' window</td> |
| </tr> | | </tr> |
| </table> | | </table> |
| </td> | | <br> |
| <td width=50 align="center"><span style="font-size: 17px; font-weight: 700;">OR</span></td>
| | <table width=1000> |
| <td>
| |
| <table bgcolor=#000000 width=400 cellpadding=2> | |
| <tr valign="top"> | | <tr valign="top"> |
| <td> | | <td width=485>[[image:DriverPaletteTrainDetailsWindow_S20.png|link=]]</td> |
| <table bgcolor=#ffffe0 width=396 cellpadding=2> | | <td>There are a number of control and display options built into this window. |
| | <table> |
| <tr valign="top"> | | <tr valign="top"> |
| <td colspan=2>[[image:PencilTips.PNG|link=]] <span style="font-size: 15px; font-weight: 700; color: white; background-color: blue;"> Shortcut </span><br> | | <td colspan=2><span style="font-weight: 700; font-size: 15px;">Train Priority:</span></td> |
| <table bgcolor=#ffffff> | | </tr> |
| <tr valign="top"> | | <tr valign="top"> |
| <td colspan=2><span style="font-weight: 700; font-size: 15px;">Steps:</span> If you already have the same object placed in your route then:-</td> | | <td width=205>[[image:DriverPaletteShowPriority_S20.png|link=]]</td> |
| | <td><span style="font-weight: 700; font-size: 15px; background-color: lightcyan;"> Left Click </span> the white down arrowhead next to the label '''Priority''' and select a priority value <span style="font-weight: 700; font-size: 15px; color: white; background-color: black;"> 1 </span>, <span style="font-weight: 700; font-size: 15px; color: white; background-color: black;"> 2 </span> or <span style="font-weight: 700; font-size: 15px; color: white; background-color: black;"> 3 </span> to assign to this train</td> |
| </tr> | | </tr> |
| | </table> |
| | <table> |
| <tr valign="top"> | | <tr valign="top"> |
| <td width=20>[[image:DotPoint1RedC.png|link=]]</td> | | <td colspan=2><span style="font-weight: 700; font-size: 15px;">Classification:</span></td> |
| <td>move the tool pointer over the object to be selected and hold down the <span style="font-weight: 700; font-size: 15px; color: white; background-color: black;"> Alt </span> key. The object name will appear in a <span style="font-weight: 700; font-size: 15px; color: white; background-color: black;"> ToolTip </span> attached to the pointer</td>
| |
| </tr> | | </tr> |
| <tr valign="top"> | | <tr valign="top"> |
| <td>[[image:DotPoint2RedC.png|link=]]</td> | | <td width=320>[[image:DriverPaletteShowClassification_S20.png|link=]]</td> |
| <td>while holding down the <span style="font-weight: 700; font-size: 15px; color: white; background-color: black;"> Alt </span> key <span style="font-weight: 700; font-size: 15px; background-color: lightcyan;"> Left Click </span> on the object. This will automatically select it in the <span style="font-weight: 700; font-size: 15px; color: white; background-color: #797979;"> Assets Palette </span> and it will also select the '''Placement Tool'''. Release the key</td> | | <td><span style="font-weight: 700; font-size: 15px; background-color: lightcyan;"> Left Click </span> the white down arrowhead and select a running classification for this train</td> |
| </tr> | | </tr> |
| </table> | | </table> |
| </td> | | <table> |
| | <tr valign="top"> |
| | <td colspan=2><span style="font-weight: 700; font-size: 15px;">Driver:</span></td> |
| </tr> | | </tr> |
| <tr valign="top"> | | <tr valign="top"> |
| <td colspan=2>Jump to '''Step''' [[image:DotPoint4.JPG|link=]] below</td> | | <td width=125>[[image:DriverPaletteShowDriver_S20.png|link=]]</td> |
| | <td><span style="font-weight: 700; font-size: 15px; background-color: lightcyan;"> Left Click </span> the white down arrowhead just below the '''Driver Image''' and select an option<br> |
| | <span style="font-weight: 700; font-size: 15px; color: white; background-color: black;"> Show Driver <Name of Driver> </span> will re-open the '''Train Properties''' window if it had been closed or minimised<br> |
| | <span style="font-weight: 700; font-size: 15px; color: white; background-color: black;"> Move to Train... </span> and <span style="font-weight: 700; font-size: 15px; color: white; background-color: black;"> Get off Train </span> are the same as described above</td> |
| </tr> | | </tr> |
| </table> | | </table> |
| Line 10,173: |
Line 10,250: |
| </tr> | | </tr> |
| </table> | | </table> |
| </td> | | <br> |
| </tr>
| | <table width=1000> |
| </table>
| |
| | |
| <table width=1000 bgcolor=#000000 cellpadding=2> | |
| <tr valign="top"> | | <tr valign="top"> |
| <td> | | <td> |
| <table bgcolor=#ffffff cellpadding=2>
| | <span style="font-weight: 700; font-size: 15px; background-color: lightcyan;"> Left Click </span> on the <span style="font-weight: 700; font-size: 15px; color: white; background-color: black;"> Close </span> button to close the window and return to the '''Driver Properties''' window.</td> |
| <tr valign="top">
| |
| <td width=10>[[image:DotPoint.JPG|10px|link=]]</td>
| |
| <td>In the <span style="font-weight: 700; font-size: 15px; color: white; background-color: #797979;"> Filter Palette </span> the '''Track Objects''' icon will be shown in blue when it is selected and the name '''Track Objects''' will appear in the drop down box below the icons. For more information about the <span style="font-weight: 700; font-size: 15px; color: white; background-color: #797979;"> Filter Palette </span> see the '''Trainz Wiki Page [[image:WikiLink.PNG|link=]] [[How to Use S20 Palettes#The Filter Palette|How to Use the Surveyor 2.0 Palettes - Filter Palette]]'''</td>
| |
| </tr>
| |
| <tr valign="top">
| |
| <td>[[image:DotPoint.JPG|10px|link=]]</td>
| |
| <td>The <span style="font-weight: 700; font-size: 15px; color: white; background-color: #797979;"> Assets Palette </span> display is controlled by the selections made in the <span style="font-weight: 700; font-size: 15px; color: white; background-color: #797979;"> Filter Palette </span>. Selecting '''Scenery Objects''' in the <span style="font-weight: 700; font-size: 15px; color: white; background-color: #797979;"> Filter Palette </span> will produce a list of all the installed '''Track Objects''' in the <span style="font-weight: 700; font-size: 15px; color: white; background-color: #797979;"> Assets Palette </span>. For more information about the <span style="font-weight: 700; font-size: 15px; color: white; background-color: #797979;"> Assets Palette </span> see the '''Trainz Wiki Page [[image:WikiLink.PNG|link=]] [[How to Use S20 Palettes#The Assets Palette|How to Use the Surveyor 2.0 Palettes - Assets Palette]]'''</td>
| |
| </tr>
| |
| </table>
| |
| </td> | |
| </tr> | | </tr> |
| </table> | | </table> |
| <br> | | <br> |
| <table width=1000> | | <table width=1000> <!-- BEGIN Nav Buttons Table --> |
| <tr valign="top"> | | <tr valign="top"> |
| <td width=25>[[image:DotPoint2.JPG|link=]]</td> | | <td width=629><span id="skip Script Properties"></span> |
| <td>In the <span style="font-weight: 700; font-size: 15px; color: white; background-color: #797979;"> Assets Palette </span> you have the '''option''' to narrow down the filtered list. Type the assets name or part of the name into the <span style="font-weight: 700; font-size: 15px; color: white; background-color: black;"> Search </span> box. For example if you have selected '''Track Objects''' and want to find track objects named "speed board 50", then type "speedboard50" ('''UPPER/lower''' case and spaces between words do not matter).<br><br>
| | ===<span style="font-weight: 700; font-size: 15px; color: white; background-color: blue;"> Script Properties </span>=== |
| This will list all the '''Track Objects''' containing variations of the texts "speed" + "board" + "50" in their names or descriptions as shown in the image below.</td>
| | </td> |
| | <td width=50> </td> |
| | <td width=50> </td> |
| | <td width=46>[[image:SkipMinorDown.png|link=#skip Player Assignment]][[image:SkipMinorUp.png|link=#skip Train Properties]]</td> <!-- for Top and Minor Up/Down --> |
| | <td width=75> </td> |
| | <td width=75> </td> |
| | <td width=75> </td> |
| </tr> | | </tr> |
| </table> | | </table> <!-- END Nav Buttons Table --> |
|
| |
|
| <table width=1000> | | <table width=1000> |
| <tr valign="top"> | | <tr valign="top"> |
| <td width=245>[[image:AssetsPaletteTrackObjectSearchSpeed_S20.png|link=]]</td> | | <td width=265>[[image:DriverPaletteScriptProperties_S20.png|link=]]</td> |
| <td><br> | | <td> |
| <table width=755>
| |
| <tr valign="top">
| |
| <td valign="middle">[[image:DotPoint3.JPG|link=]] <span style="font-weight: 700; font-size: 15px; background-color: lightcyan;"> Left Click </span> on the required item in the list.<br><br>
| |
| When selected the asset will be highlighted with a light grey background.<br>
| |
| <br>
| |
| <table bgcolor=#000000 cellpadding=2> | | <table bgcolor=#000000 cellpadding=2> |
| <tr valign="top"> | | <tr valign="top"> |
| <td> | | <td> |
| <table bgcolor=#ffffb0 cellpadding=2> | | <table bgcolor=#ffffff cellpadding=2> |
| | <tr valign="top"> |
| | <td colspan=3><span style="font-weight: 700; font-size: 15px;">Steps: To Display the Legacy Script Properties of the Locomotive:-</span></td> |
| | </tr> |
| <tr valign="top"> | | <tr valign="top"> |
| <td width=25>[[image:NotePad.PNG|link=]]</td> | | <td width=25>[[image:DotPoint1.JPG|link=]]</td> |
| <td width=975><span style="font-size: 17px; font-weight: 700;">Notes:'''</span><br> | | <td colspan=2><span style="font-weight: 700; font-size: 15px; background-color: lightcyan;"> Left Click </span> on the window icon [[image:DriverPaletteScriptPropertiesIcon_S20.png|link=]] to open the '''Script Properties''' window</td> |
| ----
| |
| A <span style="font-weight: 700; font-size: 15px; background-color: lightcyan;"> Left Click </span> on an object in the <span style="font-weight: 700; font-size: 15px; color: white; background-color: #797979;"> Assets Palette </span> filtered list will automatically activate the '''Placement Tool''' so the next <span style="font-weight: 700; font-size: 15px; background-color: lightcyan;"> Left Click </span> in your '''Trainz World''' will place that object in the scene.</td>
| |
| </tr> | | </tr> |
| </table> | | <tr valign="top"> |
| </td> | | <td>[[image:DotPoint2.JPG|link=]]</td> |
| | <td width=325>[[image:DriverPaletteScriptPropertiesWindow_S20.png|link=]]</td> |
| | <td><span style="font-weight: 700; font-size: 15px; background-color: lightcyan;"> Left Click </span> the [[image:Cross.PNG|link=]] button to close the window</td> |
| </tr> | | </tr> |
| </table> | | </table> |
| Line 10,232: |
Line 10,300: |
| </table> | | </table> |
| <br> | | <br> |
| <table width=1000 bgcolor=#000000 cellpadding=2> | | <table width=1000> |
| | <tr valign="top"> |
| | <td colspan=2> |
| | <table> |
| | <tr valign="top">You can edit the '''Script Properties''' of a locomotive. |
| | <td> |
| | <table> |
| | <tr valign="top"> |
| | <td>[[image:DriverPaletteScriptPropertiesEnableEditing_S20.png|link=]]<br><br> |
| | [[image:DriverPaletteScriptPropertiesWindowEdit_S20.png|link=]]</td> |
| | <td> |
| | <table bgcolor=#000000 cellpadding=2> |
| <tr valign="top"> | | <tr valign="top"> |
| <td> | | <td> |
| <table width=996 bgcolor=#ffffe0 cellpadding=2> | | <table bgcolor=#ffffff cellpadding=2> |
| <tr valign="top"> | | <tr valign="top"> |
| <td width=25>[[image:PencilTips.PNG|link=]]</td> | | <td colspan=2><span style="font-weight: 700; font-size: 15px;">Steps: To Edit the Script Properties:-</span></td> |
| <td>If you are not certain that a selected asset is the right one then try the following:-<br>
| | </tr> |
| <span style="font-weight: 700; font-size: 15px;">Options: </span> | |
| <table> | |
| <tr valign="top"> | | <tr valign="top"> |
| <td width=25>[[image:Ablue.png|link=]]</td> | | <td width=25>[[image:DotPoint1.JPG|link=]]</td> |
| <td><span style="font-weight: 700; font-size: 15px; background-color: lightcyan;">Double Left Click</span> on the name in the '''Asset List''' to bring up its image and description, <span style="font-weight: 700; font-size: 15px;">OR</span></td> | | <td><span style="font-weight: 700; font-size: 15px; background-color: lightcyan;"> Left Click </span> on the <span style="font-weight: 700; font-size: 15px; color: white; background-color: black;"> Enable Editing </span> button</td> |
| </tr> | | </tr> |
| <tr valign="top"> | | <tr valign="top"> |
| <td>[[image:Bblue.png|link=]]</td> | | <td>[[image:DotPoint2.JPG|link=]]</td> |
| <td>view its rotating and resizeable 3D image in the '''Preview Palette''', <span style="font-weight: 700; font-size: 15px;">OR</span></td> | | <td>All the script controlled properties of that particular locomotive, as shown left, can be opened (<span style="font-weight: 700; font-size: 15px; background-color: lightcyan;"> Left Click </span> on the link) and edited</td> |
| </tr> | | </tr> |
| <tr valign="top"> | | <tr valign="top"> |
| <td>[[image:Cblue.png|link=]]</td> | | <td>[[image:DotPoint3.JPG|link=]]</td> |
| <td>switch the asset list to '''Thumbnail View''' (<span style="font-weight: 700; font-size: 15px; background-color: lightcyan;"> Left Click </span> the [[image:AssetsPaletteListToggleViewIcon_S20.png|link=]] icon). In this view the palette is best used undocked and enlarged - see the '''Wiki Page''' at [[image:WikiLink.PNG|link=]] '''[[How_to_Use_S20_Palettes#Thumbnail View|How to Use the Surveyor 2.0 Palettes]]''' for instructions on undocking and enlarging palettes.</td> | | <td>To '''Save''' your edits <span style="font-weight: 700; font-size: 15px; background-color: lightcyan;"> Left Click </span> on the <span style="font-weight: 700; font-size: 15px; color: white; background-color: black;"> Save Changes </span> button, <span style="font-weight: 700; font-size: 15px;">OR</span><br> |
| | To '''Cancel''' your edits <span style="font-weight: 700; font-size: 15px; background-color: lightcyan;"> Left Click </span> on the <span style="font-weight: 700; font-size: 15px; color: white; background-color: black;"> Cancel </span> button</td> |
| </tr> | | </tr> |
| </table> | | </table> |
| Line 10,260: |
Line 10,338: |
| </tr> | | </tr> |
| </table> | | </table> |
| <br>
| | </td> |
| <table width=1000>
| |
| <tr valign="top">
| |
| <td width=25>[[image:DotPoint4.JPG|link=]]</td>
| |
| <td>The final step is to place the selected object into the route.</td>
| |
| </tr> | | </tr> |
| </table> | | </table> |
| | </td> |
| | </tr> |
| | </table> |
| | <br> |
| | <table width=1000> <!-- BEGIN Nav Buttons Table --> |
| | <tr valign="top"> |
| | <td width=629><span id="skip Player Assignment"></span> |
| | =='''Player Assignment'''== |
| | </td> |
| | <td width=50>[[image:SkipDown.png|link=#skip Command Status|Skip Down]]</td> |
| | <td width=50>[[image:SkipUp.png|link=#skip Driver Location|Skip Up]]</td> |
| | <td width=46>[[image:SkipMinorBlank.png|link=]][[image:SkipMinorUp.png|link=#skip Script Properties]]</td> <!-- for Top and Minor Up/Down --> |
| | <td width=75>[[image:HeadingUp.png|link=#stepDriverCenter|alt=Heading|To Heading]]</td> |
| | <td width=75> </td> |
| | <td width=75> </td> |
| | </tr> |
| | </table> <!-- END Nav Buttons Table --> |
|
| |
|
| <table width=1000> | | <table width=1000 bgcolor="lightcyan" cellpadding=2> |
| | <tr valign="top"> |
| | <td width=10>[[image:BlueDot10x10.png|link=]]</td> |
| | <td>This allows you to set the driver control assignment</td> |
| | </tr> |
| | </table> |
| | <br> |
| | <table> |
| <tr valign="top"> | | <tr valign="top"> |
| | <td width=250>[[image:DriverPaletteAssign2_S20.png|link=]]</td> |
| <td> | | <td> |
| <table width=500 bgcolor=#000000 cellpadding=2> | | <table bgcolor=#000000 cellpadding=2> |
| <tr valign="top"> | | <tr valign="top"> |
| <td> | | <td> |
| <table width=496 bgcolor=#ffffff cellpadding=2> | | <table bgcolor=#ffffff cellpadding=2> |
| <tr valign="top"> | | <tr valign="top"> |
| <td colspan=2><span style="font-weight: 700; font-size: 15px;">Steps:</span></td> | | <td colspan=2><span style="font-weight: 700; font-size: 15px;">Steps: To Change a Driver Assignment:-</span></td> |
| </tr> | | </tr> |
| <tr valign="top"> | | <tr valign="top"> |
| <td width=20>[[image:DotPoint1RedC.png|link=]]</td> | | <td width=25>[[image:DotPoint1.JPG|link=]]</td> |
| <td>In the <span style="font-weight: 700; font-size: 15px; color: white; background-color: #797979;"> Tools Palette </span> if, for some reason, the '''Placement Tool''' is not selected then <span style="font-weight: 700; font-size: 15px; background-color: lightcyan;"> Left Click </span> on its icon [[image:S20_PlacementToolIcon.png|link=|20px]] or press the <span style="color: white; background-color: black; font-weight: 700; font-size: 15px;"> E </span> key</td> | | <td><span style="font-weight: 700; font-size: 15px; background-color: lightcyan;"> Left Click </span> on the white '''Down Arrowhead''' following the name of the player</td> |
| </tr> | | </tr> |
| <tr valign="top"> | | <tr valign="top"> |
| <td>[[image:DotPoint2RedC.png|link=]]</td> | | <td>[[image:DotPoint2.JPG|link=]]</td> |
| <td><span style="font-weight: 700; font-size: 15px; background-color: lightcyan;"> Left Click </span> on the track at the position where you want the '''Track Object''' to be placed. This will become the '''Anchor Point''' where the object will be attached to the track.<br> | | <td>select an option from the drop down menu</td> |
| [[image:PlacementTrackObject_S20.png|link=]]</td>
| |
| </tr> | | </tr> |
| </table> | | </table> |
| Line 10,292: |
Line 10,390: |
| </table> | | </table> |
| </td> | | </td> |
| | </tr> |
| | </table> |
| | <br> |
| | <table width=1000 bgcolor=#000000 cellpadding=2> |
| | <tr valign="top"> |
| <td> | | <td> |
| <table bgcolor=#000000 width=500 cellpadding=2> | | <table bgcolor=#ffffff cellpadding=2> |
| <tr valign="top"> | | <tr valign="top"> |
| <td> | | <td>Choose one of the following:-<br> |
| <table bgcolor=#ffffb0 width=496 cellpadding=2> | | <span style="font-weight: 700; font-size: 15px;;">Options:</span></td> |
| | </tr> |
| <tr valign="top"> | | <tr valign="top"> |
| <td> | | <td> |
| <table> | | <table> |
| <tr valign="top"> | | <tr valign="top"> |
| <td width=25>[[image:NotePad.PNG|link=]]</td> | | <td width=25>[[image:Ablue.png|link=]]</td> |
| <td><span style="font-size: 17px; font-weight: 700;">Notes:</span><br> | | <td width=125><span style="font-weight: 700; font-size: 15px; color: white; background-color: black;"> Not Assigned </span></td> |
| ---- | | <td>makes the driver '''unavailable''' but keeps them in the driver list, <span style="font-weight: 700; font-size: 15px;">OR</span></td> |
| </td> | |
| </tr> | | </tr> |
| </table> | | </table> |
| <table> | | <table> |
| <tr valign="top"> | | <tr valign="top"> |
| <td width=10>[[image:DotPoint.JPG|10px|link=]]</td> | | <td>[[image:Bblue.png|link=]]</td> |
| <td>the '''Placement Tool''' will remain on and active until another tool has been selected. So everytime you <span style="font-weight: 700; font-size: 15px; background-color: lightcyan;"> Left Click </span> another copy of the object (or another object if you change your selection) will be added to the route</td> | | <td width=175><span style="font-weight: 700; font-size: 15px; color: white; background-color: black;"> Automatic Scheduler </span></td> |
| | <td><span style="font-weight: 700; background-color: yellow;">available in Trainz Plus only</span> this assigns control of the driver to the '''TLR''' but the '''Living Railroad Dispatch''' setting must be '''Enabled''' in the [[image:PageLink.PNG|link=]] '''[[#stepDispatchManager|Dispatch Manager Window]]''', <span style="font-weight: 700; font-size: 15px;">OR</span></td> |
| </tr> | | </tr> |
| | </table> |
| | <table> |
| | <tr valign="top"> |
| | <td> |
| | <table> |
| <tr valign="top"> | | <tr valign="top"> |
| <td>[[image:DotPoint.JPG|10px|link=]]</td> | | <td>[[image:Cblue.png|link=]]</td> |
| <td>the last object placed will be highlighted (covered in "green/yellow"). This will be the selected object if you switch control to the [[image:S20_FreeMoveToolIcon.png|link=|20px]] '''Free Move Tool''' or the [[image:S20_FineAdjustmentToolIcon.png|link=|20px]] '''Fine Adjustment Tool'''</td> | | <td width=150><span style="font-weight: 700; font-size: 15px; color: white; background-color: black;"> Player Controlled </span></td> |
| | <td>returns the driver to '''active duty''' in the driver list</td> |
| | </tr> |
| | </table> |
| | </td> |
| </tr> | | </tr> |
| </table> | | </table> |
| Line 10,324: |
Line 10,437: |
| </table> | | </table> |
| <br> | | <br> |
| <table bgcolor=#000000 cellpadding=2> | | <table width=1000> |
| <tr valign="top"> | | <tr valign="top"> |
| <td> | | <td> |
| <table bgcolor=#ffffe0 cellpadding=2> | | <span style="font-weight: 700; font-size: 15px; background-color: lightcyan;"> Left Click </span> on the <span style="font-weight: 700; font-size: 15px; color: white; background-color: black;"> Close </span> button to close the window and return to the '''Drivers Palette'''.</td> |
| <tr valign="top"> | |
| <td width=25>[[image:PencilTips.PNG|link=]]</td>
| |
| <td>Certain track objects have a '''Trigger Radius''' that controls how close a consist must approach the object to trigger its action. See [[image:PageLink.PNG|link=]] '''[[#PT: Trigger TObject|Set the Trigger Radius]]''' for instructions on setting this feature.</td>
| |
| </tr>
| |
| </table>
| |
| </td>
| |
| </tr>
| |
| </table>
| |
| </td> | |
| </tr> | | </tr> |
| </table> | | </table> |
| <br> | | <br> |
| <table width=1000> <!-- BEGIN Section Nav Buttons --> | | <table width=1000> <!-- BEGIN Nav Buttons Table --> |
| <tr valign="top"> | | <tr valign="top"> |
| <td width=629><span id="PT: Move TObject"></span> | | <td width=629><span id="skip Command Status"></span> |
| ===<span style="font-weight: 700; font-size: 17px; color: white; background-color: blue;"> Placement: Move a Track Object </span>=== | | =='''Command Status'''== |
| </td> | | </td> |
| <td width=50> </td> | | <td width=50>[[image:SkipDown.png|link=#skip Activity Log|Skip Down]]</td> |
| <td width=50> </td> | | <td width=50>[[image:SkipUp.png|link=#skip Player Assignment|Skip Up]]</td> |
| <td width=46>[[image:SkipMinorDown.png|link=#PT: Delete TObject|Down]][[image:SkipMinorUp.png|link=#PT: Add TObject|Up]]</td> <!-- for Top and Minor Up/Down --> | | <td width=46> </td> |
| | <td width=75>[[image:HeadingUp.png|link=#stepDriverCenter|alt=Heading|To Heading]]</td> |
| <td width=75> </td> | | <td width=75> </td> |
| <td width=75> </td> | | <td width=75> </td> |
| <td width=75> </td> <!-- for Bottom -->
| |
| </tr> | | </tr> |
| </table> <!-- END Section Nav Buttons --> | | </table> <!-- END Nav Buttons Table --> |
|
| |
|
| <table width=1000 bgcolor="lightcyan" cellpadding=2> | | <table width=1000 bgcolor="lightcyan" cellpadding=2> |
| <tr valign="top"> | | <tr valign="top"> |
| <td width=10>[[image:BlueDot10x10.png|link=]]</td> | | <td width=10>[[image:BlueDot10x10.png|link=]]</td> |
| <td>Once a '''Track Object''' (e.g. a signal) has been placed it can be moved using the '''Placement Tool'''</td> | | <td>The '''Command Status''' displays the list of driver commands waiting for execution by the selected driver</td> |
| | </tr> |
| | <tr valign="top"> |
| | <td width=10>[[image:BlueDot10x10.png|link=]]</td> |
| | <td>New driver commands can be added and existing commands removed</td> |
| </tr> | | </tr> |
| </table> | | </table> |
| <br> | | <br> |
| <table width=1000 bgcolor=#000000 cellpadding=2> | | <table width=1000> |
| <tr valign="top"> | | <tr valign="top"> |
| <td> | | <td colspan=3 align="center"><span style="font-weight: 700; font-size: 15px;">Two sample driver command lists</span></td> |
| <table width=996 bgcolor=#ffffff cellpadding=2>
| |
| <tr valign="top">
| |
| <td colspan=2><span style="font-weight: 700; font-size: 15px;">Step:</span> To move a '''Track Object''' using the '''Placement Tool''':-</td>
| |
| </tr> | | </tr> |
| <tr valign="top"> | | <tr valign="top"> |
| <td width=20>[[image:DotPoint1.JPG|link=]]</td> | | <td width=475> |
| <td><span style="font-weight: 700; font-size: 15px; background-color: lightcyan;">Left Click and Drag</span> the '''Anchor Point''' (the small yellow dot in the middle of the track as shown in the image above) to any position along the track or to another track. | | <table bgcolor=#000000 cellpadding=2> |
| <table bgcolor=#ffffb0 cellpadding=2> | | <tr valign="top"> |
| | <td> |
| | <table bgcolor=#ffffff cellpadding=2> |
| | <tr valign="top"> |
| | <td>[[image:DriverPaletteCommandStatusList_S20.png|link=]] |
| | <table> |
| | <tr valign="top"> |
| | <td colspan=2>For a driver under '''AI control'''</td> |
| | </tr> |
| | <tr valign="top"> |
| | <td width=10>[[image:DotPoint.JPG|10px|link=]]</td> |
| | <td>The '''Add Command''' icon is shown (circled in red in the image above) at the end of the command list</td> |
| | </tr> |
| | <tr valign="top"> |
| | <td>[[image:DotPoint.JPG|10px|link=]]</td> |
| | <td>New commands can be added, existing commands can be deleted or edited</td> |
| | </tr> |
| | <tr valign="top"> |
| | <td colspan=2>For a driver under '''Player Control'''</td> |
| | </tr> |
| <tr valign="top"> | | <tr valign="top"> |
| <td width=25>[[image:NotePad.PNG|link=]]</td> | | <td>[[image:DotPoint.JPG|10px|link=]]</td> |
| <td>You can also move the object by dragging the object itself and not its '''Anchor Point'''. However, it will lose its fixed distance, both vertical and horizontal, from the centre of the track. You will then have to open its '''Context Menu''' and select the <span style="font-weight: 700; font-size: 15px; color: white; background-color: black;"> Reattach to Track </span> option to restore it to the correct distance from the track centre</td> | | <td>The '''Add Command''' icon will be present without any commands<br> |
| | </td> |
| </tr> | | </tr> |
| </table> | | </table> |
| Line 10,383: |
Line 10,508: |
| </tr> | | </tr> |
| </table> | | </table> |
| <br> | | </td> |
| | <td width=50> </td> |
| | <td width=475> |
| <table bgcolor=#000000 cellpadding=2> | | <table bgcolor=#000000 cellpadding=2> |
| <tr valign="top"> | | <tr valign="top"> |
| <td> | | <td> |
| <table bgcolor=#ffffe0 cellpadding=2> | | <table bgcolor=#ffffff cellpadding=2> |
| | <tr valign="top"> |
| | <td width=475>[[image:DriverPaletteCommandStatusList2_S20.png|link=]] |
| | <table> |
| | <tr valign="top"> |
| | <td colspan=2>For a driver under control of the '''TLR Automatic Scheduler''' <span style="font-weight: 700; background-color: yellow;">available in Trainz Plus only</span></td> |
| | </tr> |
| | <tr valign="top"> |
| | <td width=10>[[image:DotPoint.JPG|10px|link=]]</td> |
| | <td>There is no '''Add Command''' icon</td> |
| | </tr> |
| <tr valign="top"> | | <tr valign="top"> |
| <td width=25>[[image:PencilTips.PNG|link=]]</td> | | <td>[[image:DotPoint.JPG|10px|link=]]</td> |
| <td>Moving '''Track Objects''' can also be performed, with more control and additional options, using the [[image:S20_FreeMoveToolIcon.png|link=|20px]] '''[[#The Free Move Tool|Free Move Tool]]''' or the [[image:S20_FineAdjustmentToolIcon.png|link=|20px]] '''[[#The Fine Adjustment Tool|Fine Adjustment Tool]]'''.</td> | | <td>New driver commands cannot be added, existing commands cannot be deleted or edited</td> |
| | </tr> |
| | </table> |
| | </td> |
| </tr> | | </tr> |
| </table> | | </table> |
| Line 10,396: |
Line 10,536: |
| </tr> | | </tr> |
| </table> | | </table> |
| <br>
| |
| <table width=1000> <!-- BEGIN Section Nav Buttons -->
| |
| <tr valign="top">
| |
| <td width=629><span id="PT: Delete TObject"></span>
| |
| ===<span style="font-size: 17px; color: white; background-color: blue;"> Placement: Delete a Track Object </span>===
| |
| </td> | | </td> |
| <td width=50> </td>
| |
| <td width=50> </td>
| |
| <td width=46>[[image:SkipMinorDown.png|link=#PT: Height TObject|Down]][[image:SkipMinorUp.png|link=#PT: Move TObject|Up]]</td> <!-- for Top and Minor Up/Down -->
| |
| <td width=75> </td>
| |
| <td width=75> </td>
| |
| <td width=75> </td> <!-- for Bottom -->
| |
| </tr> | | </tr> |
| </table> <!-- END Section Nav Buttons --> | | </table> |
|
| |
|
| <table width=1000> | | <table width=1000> |
| <tr valign="top"> | | <tr valign="top"> |
| <td colspan=2>To delete a track object (or any object) that has just been added by the '''Placement Tool''' and is still highlighted, choose one of the following:-<br> | | <td colspan=2> |
| <table bgcolor=#000000 cellpadding=2> | | <table> |
| | <tr valign="top"> |
| | <td width=195>[[image:DriverPaletteCommandStatusAdd_S20.png|link=]]</td> |
| | <td> |
| | <table> |
| | <tr valign="top"> |
| | <td> |
| | <table width=550 bgcolor=#000000 cellpadding=2> |
| <tr valign="top"> | | <tr valign="top"> |
| <td> | | <td> |
| <table bgcolor=#ffffff cellpadding=2> | | <table bgcolor=#ffffff cellpadding=2> |
| <tr valign="top"> | | <tr valign="top"> |
| <td colspan=2><span style="font-weight: 700; font-size: 15px;">Options:</span></td> | | <td colspan=2><span style="font-weight: 700; font-size: 15px;">Steps: To Add a Command to the Driver Command List:-</span></td> |
| </tr> | | </tr> |
| <tr valign="top"> | | <tr valign="top"> |
| <td width=25>[[image:Ablue.png|link=]]</td> | | <td width=25>[[image:DotPoint1.JPG|link=]]</td> |
| <td>press the <span style="font-weight: 700; font-size: 15px; color: white; background-color: black;"> Delete </span> key, <span style="font-weight: 700; font-size: 15px;">OR</span></td> | | <td><span style="font-weight: 700; font-size: 15px; background-color: lightcyan;"> Left Click </span> on the '''Command Point''' identified by the red circle in the image above left and the red arrow in the image left</td> |
| </tr> | | </tr> |
| <tr valign="top"> | | <tr valign="top"> |
| <td>[[image:Bblue.png|link=]]</td> | | <td>[[image:DotPoint2.JPG|link=]]</td> |
| <td>open its '''Context Menu''' (<span style="font-weight: 700; font-size: 15px; background-color: lightcyan;"> Left Click </span> on its icon or press the <span style="font-weight: 700; font-size: 15px; color: white; background-color: black;"> T </span> key) and select the option <span style="font-weight: 700; font-size: 15px; color: white; background-color: black;"> Delete </span></td> | | <td>select the command from the pop up menu. Many of the commands will need you to enter data (e.g. the name of the destination)<br> |
| </tr>
| |
| <tr valign="top">
| |
| <td colspan=2>
| |
| <table bgcolor=#ffffb0 cellpadding=2> | | <table bgcolor=#ffffb0 cellpadding=2> |
| <tr valign="top"> | | <tr valign="top"> |
| <td width=25>[[image:NotePad.PNG|link=]]</td> | | <td width=25>[[image:NotePad.PNG|link=]]</td> |
| <td>If the object is not highlighted then you must first switch to either the [[image:S20_FreeMoveToolIcon.png|link=|20px]] '''[[#The Free Move Tool|Free Move Tool]]''' or the [[image:S20_FineAdjustmentToolIcon.png|link=|20px]] '''[[#The Fine Adjustment Tool|Fine Adjustment Tool]]''', select the object and then choose one of the above options</td> | | <td>The commands shown in the pop up menu are set by the [[image:WikiLink.PNG|link=]] '''[[How_to_Use_Driver_Setup_Rule#Driver_Command_Rule|Driver Command Rule]]''' in the [[image:WikiLink.PNG|link=]] '''[[How_to_Use_Session_Editor|Session Editor]]'''</td> |
| </tr> | | </tr> |
| </table> | | </table> |
| </td> | | </td> |
| | </tr> |
| | <tr valign="top"> |
| | <td>[[image:DotPoint3.JPG|link=]]</td> |
| | <td>repeat as needed for each new command</td> |
| </tr> | | </tr> |
| </table> | | </table> |
| Line 10,447: |
Line 10,584: |
| </table> | | </table> |
| <br> | | <br> |
| <table width=1000> <!-- BEGIN Section Nav Buttons --> | | <table> |
| | <tr valign="top"> |
| | <td> |
| | <table width=550 bgcolor=#000000 cellpadding=2> |
| | <tr valign="top"> |
| | <td> |
| | <table bgcolor=#ffffff cellpadding=2> |
| <tr valign="top"> | | <tr valign="top"> |
| <td width=629><span id="PT: Height TObject"></span> | | <td colspan=2><span style="font-weight: 700; font-size: 15px;">Steps: To Remove a Command from the Driver Command List:-</span></td> |
| ===<span style="font-size: 17px; color: white; background-color: blue;"> Placement: Set the Height of a Track Object </span>===
| |
| </td>
| |
| <td width=50> </td>
| |
| <td width=50> </td>
| |
| <td width=46>[[image:SkipMinorDown.png|link=#PT: Trigger TObject|Down]][[image:SkipMinorUp.png|link=#PT: Delete TObject|Up]]</td> <!-- for Top and Minor Up/Down -->
| |
| <td width=75> </td>
| |
| <td width=75> </td>
| |
| <td width=75> </td> <!-- for Bottom -->
| |
| </tr>
| |
| </table> <!-- END Section Nav Buttons -->
| |
| | |
| <table width=1000 bgcolor="lightcyan" cellpadding=2>
| |
| <tr valign="top">
| |
| <td width=10>[[image:BlueDot10x10.png|link=]]</td>
| |
| <td>An object that has just been added to a route using the '''Placement Tool''' can have its height adjusted immediately after placement</td>
| |
| </tr> | | </tr> |
| <tr valign="top"> | | <tr valign="top"> |
| <td>[[image:BlueDot10x10.png|link=]]</td> | | <td width=25>[[image:DotPoint1.JPG|link=]]</td> |
| <td>or it can be adjusted at a later time using the '''Free Move''' or '''Fine Adjustment Tools'''</td> | | <td><span style="font-weight: 700; font-size: 15px; background-color: lightcyan;"> Left Click and Drag </span> the command to be removed '''out''' of the '''Command Status''' area and release the mouse button</td> |
| </tr> | | </tr> |
| </table> | | </table> |
| <br>
| | </td> |
| <table width=1000 bgcolor=#000000 cellpadding=2>
| |
| <tr valign="top">
| |
| <td>
| |
| <table width=996 bgcolor=#ffe89a cellpadding=2>
| |
| <tr valign="middle">
| |
| <td width=45>[[image:PalettesIcon_S20.png|link=]]</td>
| |
| <td>If the <span style="font-weight: 700; font-size: 15px; color: white; background-color: #797979;"> Tool Options Palette </span> or the <span style="font-weight: 700; font-size: 15px; color: white; background-color: #797979;"> Info Palette </span> are not visible on the screen then refer to [[image:PageLink.PNG|link=]] '''[[#Notes_Palettes|Notes: Palettes]]''' at the top of this document.</td>
| |
| </tr> | | </tr> |
| </table> | | </table> |
| Line 10,485: |
Line 10,606: |
| </table> | | </table> |
| <br> | | <br> |
| <span style="font-weight: 700; font-size: 15px;">Get the Height of a Track Object</span>
| | <table width=550 bgcolor=#000000 cellpadding=2> |
| <br>
| |
| <table width=1000 bgcolor=#000000 cellpadding=2> | |
| <tr valign="top"> | | <tr valign="top"> |
| <td> | | <td> |
| <table bgcolor=#ffffe0 cellpadding=2> | | <table bgcolor=#ffffb0 cellpadding=2> |
| <tr valign="top"> | | <tr valign="top"> |
| <td width=25>[[image:PencilTips.PNG|link=]]</td> | | <td width=25>[[image:NotePad.PNG|link=]]</td> |
| <td>You can copy the height of a '''selected''' track object (e.g. a signal) into the <span style="font-weight: 700; font-size: 15px; color: white; background-color: #797979;"> Tool Options Palette </span> <span style="font-weight: 700; font-size: 15px; color: gold; background-color: black;"> Height </span> setting while the '''Placement Tool''' is still active. Once it has been copied it can be applied to any other object.<br> | | <td>The changes you make to the '''Command Status''' list will also be made in the '''Driver Command Bar''' at the bottom right of the screen</td> |
| <table bgcolor=#ffffff>
| |
| <tr valign="top">
| |
| <td colspan=2><span style="font-weight: 700; font-size: 15px;">Steps:</span> To copy the height of any '''selected''' track object into the <span style="font-weight: 700; font-size: 15px; color: gold; background-color: black;"> Height </span> setting:-</td>
| |
| </tr>
| |
| <tr valign="top">
| |
| <td width=20>[[image:DotPoint1.JPG|link=]]</td>
| |
| <td>In the <span style="font-weight: 700; font-size: 15px; color: white; background-color: #797979;"> Tool Options Palette </span> <span style="font-weight: 700; font-size: 15px; background-color: lightcyan;">Right Click</span> in the <span style="font-weight: 700; font-size: 15px; color: gold; background-color: black;"> Height </span> setting</td>
| |
| </tr>
| |
| <tr valign="top">
| |
| <td>[[image:DotPoint2.JPG|link=]]</td>
| |
| <td>select the <span style="font-weight: 700; font-size: 15px; color: white; background-color: black;"> Get Height from Selection </span> option</td>
| |
| </tr> | | </tr> |
| </table> | | </table> |
| </td> | | </td> |
| </tr>
| |
| <tr valign="top">
| |
| <td> </td>
| |
| <td>
| |
| <table>
| |
| <tr valign="top">
| |
| <td>You can check the height of any selected object or endpoint using the <span style="font-weight: 700; font-size: 15px; color: white; background-color: #797979;"> Info Palette </span>. The height is the last value in the '''Pos:''' (Position) data set.</td>
| |
| </tr>
| |
| <tr valign="top">
| |
| <td>[[image:InfoPaletteShowHeight_S20.png|link=]]</td>
| |
| </tr> | | </tr> |
| </table> | | </table> |
| Line 10,526: |
Line 10,624: |
| </tr> | | </tr> |
| </table> | | </table> |
| <br>
| |
| <span style="font-weight: 700; font-size: 15px;">Set the Height of a Track Object</span>
| |
| <br> | | <br> |
| <table width=1000> | | <table width=1000> |
| <tr valign="top"> | | <tr valign="top"> |
| <td> | | <td> |
| In '''Surveyor 2.0''' track objects can be given a height that will place them above (or below) the track. To set the '''height''' of a '''selected''' track mesh object, choose one of the following:-</td>
| | <span style="font-weight: 700; font-size: 15px; background-color: lightcyan;"> Left Click </span> on the <span style="font-weight: 700; font-size: 15px; color: white; background-color: black;"> Close </span> button to close the window and return to the '''Drivers Palette'''.</td> |
| </tr> | | </tr> |
| </table> | | </table> |
| | <br> |
| | <table width=1000> <!-- BEGIN Nav Buttons Table --> |
| | <tr valign="top"> |
| | <td width=629><span id="skip Activity Log"></span> |
| | =='''Activity Log'''== |
| | </td> |
| | <td width=50>[[image:SkipDown.png|link=#stepDispatchManager|Skip Down]]</td> |
| | <td width=50>[[image:SkipUp.png|link=#skip Command Status|Skip Up]]</td> |
| | <td width=46> </td> |
| | <td width=75>[[image:HeadingUp.png|link=#stepDriverCenter|alt=Heading|To Heading]]</td> |
| | <td width=75> </td> |
| | <td width=75> </td> |
| | </tr> |
| | </table> <!-- END Nav Buttons Table --> |
|
| |
|
| <table width=1000 bgcolor=#000000 cellpadding=2> | | <table width=1000 bgcolor="lightcyan" cellpadding=2> |
| | <tr valign="top"> |
| | <td width=10>[[image:BlueDot10x10.png|link=]]</td> |
| | <td>This allows you to monitor the activity and progress of a driver</td> |
| | </tr> |
| | </table> |
| | <br> |
| | <table width=1000> |
| | <tr valign="top"> |
| | <td width=500>[[image:DriverPaletteDriverActivityLog_S20.png|link=]]</td> |
| | <td>This gives a detailed list of every operation started and completed by the selected driver. In the example shown on the left this includes gaining and releasing "permits" (access or permission) for each junction switch along the drivers path.<br><br> |
| | <table bgcolor=#000000 cellpadding=2> |
| <tr valign="top"> | | <tr valign="top"> |
| <td> | | <td> |
| <table width=996 bgcolor=#ffffff cellpadding=2> | | <table bgcolor=#ffffff cellpadding=2> |
| <tr valign="top"> | | <tr valign="top"> |
| <td colspan=2><span style="font-weight: 700; font-size: 15px;">Options:</span> </td> | | <td width=10>[[image:DotPoint.JPG|10px|link=]]</td> |
| | <td>the display area has a vertical scroll bar on the right for longer reports</td> |
| </tr> | | </tr> |
| <tr valign="top"> | | <tr valign="top"> |
| <td width=25>[[image:Ablue.png|link=]]</td> | | <td>[[image:DotPoint.JPG|10px|link=]]</td> |
| <td>in the <span style="font-weight: 700; font-size: 15px; color: white; background-color: #797979;"> Tool Options Palette </span> <span style="font-size: 15px; font-weight: 700; color: gold; background-color: black;"> Height </span> setting, enter a value followed by the <span style="font-weight: 700; font-size: 15px; color: white; background-color: black;"> Enter </span> key <span style="font-size: 15px; font-weight: 700;">OR</span></td> | | <td><span style="font-weight: 700; font-size: 15px; background-color: lightcyan;"> Left Click </span> on the coloured dots to toggle them on/off and filter the log entries by message type |
| | <table> |
| | <tr valign="top"> |
| | <td>[[image:GreyDot10x10.png|link=]]</td> |
| | <td>'''Grey ON''' shows general messages: '''Grey OFF''' hides general messages</td> |
| </tr> | | </tr> |
| <tr valign="top"> | | <tr valign="top"> |
| <td>[[image:Bblue.png|link=]]</td> | | <td>[[image:YellowDot10x10.png|link=]]</td> |
| <td>in the <span style="font-weight: 700; font-size: 15px; color: white; background-color: #797979;"> Tool Options Palette </span> <span style="font-size: 15px; font-weight: 700; color: gold; background-color: black;"> Height </span> setting, enter a value then <span style="font-weight: 700; font-size: 15px; background-color: lightcyan;">Right Click</span> and select <span style="font-weight: 700; font-size: 15px; color: white; background-color: black;"> Set Height to Selection </span> <span style="font-size: 15px; font-weight: 700;">OR</span></td> | | <td>'''Yellow ON''' shows warnings: '''Yellow OFF''' hides warnings</td> |
| </tr> | | </tr> |
| <tr valign="top"> | | <tr valign="top"> |
| <td>[[image:Cblue.png|link=]]</td> | | <td>[[image:RedDot10x10.png|link=]]</td> |
| <td>from the objects '''Context Menu''' select the <span style="font-size: 15px; font-weight: 700; color: white; background-color: black;"> Apply Height </span> option to apply an existing height setting, <span style="font-size: 15px; font-weight: 700;">OR</span></td> | | <td>'''Red ON''' shows error messages: '''Red OFF''' hides error messages</td> |
| </tr> | | </tr> |
| <tr valign="top"> | | <tr valign="top"> |
| <td>[[image:Dblue.png|link=]]</td> | | <td>[[image:GreenDot10x10.png|link=]]</td> |
| <td>in the <span style="font-weight: 700; font-size: 15px; color: white; background-color: #797979;"> Info Palette </span> enter a value in the objects <span style="font-size: 15px; font-weight: 700; color: white; background-color: black;"> Pos: </span> <span style="font-size: 15px; font-weight: 700; color: white; background-color: black;"> z </span> (height) setting or <span style="font-weight: 700; font-size: 15px; background-color: lightcyan;">Left Click and Drag</span> '''Up''' or '''Down''' on the double arrowheads to its right. This can be used to set the height to '''cm''' accuracy (see [[image:PageLink.PNG|link=]] '''[[#The Info Palette|The Info Palette]]''' below).</td> | | <td>'''Green ON''' shows "task completed" messages: '''Green OFF''' hides "task completed" messages</td> |
| </tr> | | </tr> |
| </table> | | </table> |
| </td> | | </td> |
| | </tr> |
| | <tr valign="top"> |
| | <td>[[image:DotPoint.JPG|10px|link=]]</td> |
| | <td><span style="font-weight: 700; font-size: 15px; background-color: lightcyan;"> Left Click </span> in the <span style="font-weight: 700; font-size: 15px; color: white; background-color: black;"> Search </span> text box to enter a text string to filter the log entries</td> |
| </tr> | | </tr> |
| </table> | | </table> |
| <br>
| |
| <span id="Trigger Radius"></span>
| |
| <table width=1000> <!-- BEGIN Section Nav Buttons -->
| |
| <tr valign="top">
| |
| <td width=629><span id="PT: Trigger TObject"></span>
| |
| ===<span style="font-size: 17px; color: white; background-color: blue;"> Placement: Set the Trigger Radius of a Track Object </span>===
| |
| </td> | | </td> |
| <td width=50> </td>
| |
| <td width=50> </td>
| |
| <td width=46>[[image:SkipMinorDown.png|link=#PT: Context TObject|Down]][[image:SkipMinorUp.png|link=#PT: Height TObject|Up]]</td> <!-- for Top and Minor Up/Down -->
| |
| <td width=75> </td>
| |
| <td width=75> </td>
| |
| <td width=75> </td> <!-- for Bottom -->
| |
| </tr> | | </tr> |
| </table> <!-- END Section Nav Buttons --> | | </table> |
| | </td> |
| | </tr> |
| | </table> |
| | <br> |
| | <table width=1000> |
| | <tr valign="top"> |
| | <td> |
| | <span style="font-weight: 700; font-size: 15px; background-color: lightcyan;"> Left Click </span> on the <span style="font-weight: 700; font-size: 15px; color: white; background-color: black;"> Close </span> button to close the window and return to the '''Drivers Palette'''.</td> |
| | </tr> |
| | </table> |
| | <br> |
| | <table width=1000> <!-- BEGIN Nav Buttons Table --> |
| | <tr valign="top"> |
| | <td width=629><span id="stepDispatchManager"></span> |
| | ='''The Dispatch Manager Window'''= |
| | </td> |
| | <td width=50>[[image:SkipDown.png|link=#skipDispatchSettings|Skip Down]]</td> |
| | <td width=50>[[image:SkipUp.png|link=#skip Activity Log|Skip Up]]</td> |
| | <td width=46>[[image:BackToTop.png|link=#top|alt=Top|Top]]</td> |
| | <td width=75>[[image:NextUp.png|link=#stepDriverCenter|alt=Next Up|Next Up]]</td> |
| | <td width=75>[[image:NextDown.png|link=#stepManageDrivers|alt=Next Down|Next Down]]</td> |
| | <td width=75>[[image:BackToBottom.png|link=#bottom|alt=Bottom|Bottom]]</td> |
| | </tr> |
| | </table> <!-- END Nav Buttons Table --> |
|
| |
|
| | <table width=1000 cellpadding=2> |
| | <tr valign="top"> |
| | <td bgcolor=#ffffb0 width=200><span style="font-weight: 700; font-size: 15px;">This is a <span style="color: white; background-color: blue;"> Surveyor </span> window </span> </td> |
| | <td bgcolor=#33ff77><span style="font-weight: 700; font-size: 15px;">and a <span style="color: white; background-color: blue;"> Driver </span> window</span></td> |
| | <td bgcolor="yellow"><span style="font-weight: 700; font-size: 15px;"> This window is only available in Trainz Plus </span></td> |
| | </tr> |
| | </table> |
| | <br> |
| <table width=1000 bgcolor="lightcyan" cellpadding=2> | | <table width=1000 bgcolor="lightcyan" cellpadding=2> |
| <tr valign="top"> | | <tr valign="top"> |
| <td width=10>[[image:BlueDot10x10.png|link=]]</td> | | <td width=10>[[image:BlueDot10x10.png|link=]]</td> |
| <td>Certain track objects have a '''Trigger Radius''' that sets how close a consist must approach the object to trigger its action</td> | | <td>'''Dispatch Manager''' is a tool that gives you access to '''Drivers''', '''Consists''' and '''Industries''' for assigning and monitoring '''product pickup and delivery tasks'''</td> |
| </tr> | | </tr> |
| <tr valign="top"> | | <tr valign="top"> |
| <td width=10>[[image:BlueDot10x10.png|link=]]</td> | | <td>[[image:BlueDot10x10.png|link=]]</td> |
| <td>The '''Trigger Radius''' of an object can be adjusted by the '''Placement Tool''' immediately after it has been placed on a track</td> | | <td>'''Dispatch Manager''' will work with all drivers but is best used with those that have been assigned to the '''Automatic Scheduler''' placing them under the control of the '''TLR''' (Trainz Living Railroad) and drivers under '''AI''' control that are servicing (loading/unloading at) industries</td> |
| </tr> | | </tr> |
| </table> | | </table> |
| | | <br> |
| <table bgcolor=#000000 cellpadding=2> | | <table bgcolor=#000000 cellpadding=2> |
| <tr valign="top"> | | <tr valign="top"> |
| Line 10,595: |
Line 10,745: |
| <table bgcolor=#ffffff cellpadding=2> | | <table bgcolor=#ffffff cellpadding=2> |
| <tr valign="top"> | | <tr valign="top"> |
| <td>Track objects that have a '''Trigger Radius''' include:- | | <td colspan=2> |
| <table> | | <table> |
| | <tr valign="middle"> |
| | <td width=35>[[image:Information35.png|link=]]</td> |
| | <td>The '''Dispatch Manager''':-</td> |
| | </tr> |
| | </table> |
| | </td> |
| | </tr> |
| <tr valign="top"> | | <tr valign="top"> |
| <td width=10>[[image:DotPoint.JPG|10px|link=]]</td> | | <td width=10>[[image:DotPoint.JPG|10px|link=]]</td> |
| <td>Track marks such as '''Track Markers''', '''Priority Markers''' and '''Direction Markers'''</td> | | <td>is only available in <span style="font-weight: 700; font-size: 15px; background-color: yellow;">Trainz Plus</span></td> |
| </tr> | | </tr> |
| <tr valign="top"> | | <tr valign="top"> |
| <td>[[image:DotPoint.JPG|10px|link=]]</td> | | <td>[[image:DotPoint.JPG|10px|link=]]</td> |
| <td>'''Track Triggers'''</td> | | <td>is a '''Window''' in '''Surveyor Classic''', '''Surveyor 2.0''' and in '''Driver''' so it cannot be docked to other palettes</td> |
| </tr> | | </tr> |
| <tr valign="top"> | | <tr valign="top"> |
| <td>[[image:DotPoint.JPG|10px|link=]]</td> | | <td>[[image:DotPoint.JPG|10px|link=]]</td> |
| <td>'''Whistle Signs'''</td> | | <td>can be '''resized''', '''moved''' around the screen and '''minimised'''</td> |
| </tr> | | </tr> |
| </table> | | </table> |
| </td> | | </td> |
| | </tr> |
| | </table> |
| | <br> |
| | <table width=700 bgcolor=#000000 cellpadding=2> |
| | <tr valign="top"> |
| | <td> |
| | <table bgcolor=#ffffff cellpadding=2> |
| | <tr valign="top"> |
| | <td colspan=3><span style="font-weight: 700; font-size: 15px;">Steps: To Open the Dispatch Manager in Surveyor or Driver:-</span></td> |
| </tr> | | </tr> |
| <tr valign="top"> | | <tr valign="top"> |
| <td> | | <td> |
| <table bgcolor=#ffffe0 cellpadding=2> | | <table width=285> |
| | <tr valign="top"> |
| | <td width=25>[[image:DotPoint1.JPG|link=]]</td> |
| | <td>Open the [[image:SurveyorToolsIcon_S20.png|link=]] '''Tools Menu'''</td> |
| | </tr> |
| <tr valign="top"> | | <tr valign="top"> |
| <td width=25>[[image:PencilTips.PNG|link=]]</td> | | <td>[[image:DotPoint2.JPG|link=]]</td> |
| <td>It is a good idea to adjust the trigger radius of these objects so that they do not overlap a track junction</td> | | <td>Select the option <span style="font-weight: 700; font-size: 15px; color: white; background-color: black;"> Dispatch Manager </span></td> |
| </tr> | | </tr> |
| </table> | | </table> |
| </td> | | </td> |
| | <td width=215 align="center">'''Surveyor'''<br> |
| | [[image:ToolsMenuSurveyorDispatch_S20.png|link=]]</td> |
| | <td width=215 align="center">'''Driver'''<br> |
| | [[image:ToolsMenuDriverDispatch_S20.png|link=]]</td> |
| </tr> | | </tr> |
| </table> | | </table> |
| Line 10,627: |
Line 10,801: |
| </table> | | </table> |
| <br> | | <br> |
| <table width=1000> | | <table width=1000 cellpadding=2> |
| <tr valign="top"> | | <tr valign="top"> |
| <td>The current '''Trigger Radius''' of these objects is shown by the size of the "wings" ('''Red''' or '''Green''' depending on the type of object) attached to the object and, in some cases, a distance value below the name of the object. Both of these options are shown in the image below.</td> | | <td> |
| </tr>
| | <table width=500> |
| </table>
| |
| <br>
| |
| <table width=1000> | |
| <tr valign="top"> | | <tr valign="top"> |
| <td width=440>[[image:MarkerTriggerRadius_S20.png|link=]]</td> | | <td>The '''Dispatch Manager''' window will display a list of all the<br> |
| <td>On one side of the track object is a green '''Trigger Radius''' dot that allows the radius value to be adjusted up or down.<br>
| | <table> |
| | |
| <table bgcolor=#000000 cellpadding=2> | |
| <tr valign="top"> | | <tr valign="top"> |
| <td> | | <td width=10>[[image:DotPoint.JPG|10px|link=]]</td> |
| <table bgcolor=#ffffb0 cellpadding=2> | | <td>industries and their current status - loading, unloading, waiting pickup, etc</td> |
| | </tr> |
| <tr valign="top"> | | <tr valign="top"> |
| <td width=25>[[image:NotePad.PNG|link=]]</td> | | <td>[[image:DotPoint.JPG|10px|link=]]</td> |
| <td>If no '''Trigger Radius''' dot or '''Red/Green Wings''' appear on the track object then it does not have an adjustable '''Trigger Radius'''</td> | | <td>powered consists (i.e. with a loco attached) and their status - driver name, load, destination (or idle), delivering or collecting, etc</td> |
| </tr> | | </tr> |
| </table> | | <tr valign="top"> |
| </td> | | <td>[[image:DotPoint.JPG|10px|link=]]</td> |
| | <td>consists (i.e. with no loco attached) and their status - available for dispatch or not</td> |
| </tr> | | </tr> |
| </table>
| |
| <br>
| |
| <table bgcolor=#000000 cellpadding=2>
| |
| <tr valign="top"> | | <tr valign="top"> |
| <td> | | <td>[[image:DotPoint.JPG|10px|link=]]</td> |
| <table bgcolor=#ffffff cellpadding=2> | | <td>drivers and their status - available for dispatch or not assigned</td> |
| | </tr> |
| <tr valign="top"> | | <tr valign="top"> |
| <td colspan=2><span style="font-weight: 700; font-size: 15px;">Steps:</span> To adjust the '''Trigger Radius''' of a newly placed track object:-</td> | | <td colspan=2>When first displayed the window will default to showing all available consists, drivers and industries, as shown below.</td> |
| </tr> | | </tr> |
| <tr valign="top"> | | <tr valign="top"> |
| <td colspan=2> | | <td colspan=2>'''Dispatch Manager''' will allow you to perform tasks, both in '''Surveyor''' and '''Driver''', to:</td> |
| <table bgcolor=#ffffe0 cellpadding=2>
| |
| <tr valign="top">
| |
| <td width=25>[[image:PencilTips.PNG|link=]]</td>
| |
| <td>Move your camera POV (Point of View) to directly above the track object before adjusting its '''Trigger Radius'''. This will make the adjustment as quick and as smooth as possible.</td>
| |
| </tr>
| |
| </table>
| |
| </td> | |
| </tr> | | </tr> |
| <tr valign="top"> | | <tr valign="top"> |
| <td width=25>[[image:DotPoint1.JPG|link=]]</td> | | <td>[[image:DotPoint.JPG|10px|link=]]</td> |
| <td><span style="font-weight: 700; font-size: 15px; background-color: lightcyan;"> Left Click and Drag </span> forward or back on the '''Trigger Radius''' dot. The dot will not move but the "wings" that indicate the radius on the track and the displayed radius value will increase or decrease</td> | | <td>locate rolling stock for a particular product</td> |
| </tr> | | </tr> |
| <tr valign="top"> | | <tr valign="top"> |
| <td>[[image:DotPoint2.JPG|link=]]</td> | | <td>[[image:DotPoint.JPG|10px|link=]]</td> |
| <td>when the radius reaches the required size release the mouse button</td> | | <td>claim a task (take control of a particular consist) to act as the driver</td> |
| </tr> | | </tr> |
| </table> | | </table> |
| Line 10,680: |
Line 10,842: |
| </tr> | | </tr> |
| </table> | | </table> |
| <br> | | </td> |
| <table bgcolor=#000000 cellpadding=2> | | <td> |
| | <table width=500 bgcolor=#000000 cellpadding=2> |
| <tr valign="top"> | | <tr valign="top"> |
| <td> | | <td> |
| <table bgcolor=#ffffe0 cellpadding=2> | | <table bgcolor=#ffffb0 cellpadding=2> |
| <tr valign="top"> | | <tr valign="top"> |
| <td width=25>[[image:PencilTips.PNG|link=]]</td> | | <td width=25>[[image:NotePad.PNG|link=]]</td> |
| <td>This action can also be performed on existing track objects using the [[image:S20_FreeMoveToolIcon.png|link=|20px]] '''[[#The Free Move Tool|Free Move Tool]]''' and the [[image:S20_FineAdjustmentToolIcon.png|link=|20px]] '''[[#The Fine Adjustment Tool|Fine Adjustment Tool]]'''</td> | | <td width=475><span style="font-size: 17px; font-weight: 700;">Notes: Surveyor or Driver</span><br> |
| </tr> | | ---- |
| </table>
| |
| </td> | | </td> |
| </tr> | | </tr> |
| </table> | | <tr valign="top"> |
| </td> | | <td colspan=2> |
| | <table> |
| | <tr valign="top"> |
| | <td width=10>[[image:DotPoint.JPG|10px|link=]]</td> |
| | <td>In '''Driver''' the data display is dynamic. It will change as consists move around the route loading and unloading products and obeying commands</td> |
| </tr> | | </tr> |
| </table>
| |
| <br>
| |
| <table width=1000> <!-- BEGIN Section Nav Buttons -->
| |
| <tr valign="top"> | | <tr valign="top"> |
| <td width=629><span id="PT: Context TObject"></span> | | <td>[[image:DotPoint.JPG|10px|link=]]</td> |
| ===<span style="font-weight: 700; font-size: 17px; color: white; background-color: blue;"> Placement: Track Object Context Menu </span>===
| | <td>In '''Surveyor''' the data display is static and will show the situation at the start (if you loaded the session directly into Surveyor - '''see point below''') or at the instant when you switched, via the [[image:WikiLink.PNG|link=]] '''[[How to Use the UDS Interface|UDS]]''', from '''Driver''' to '''Surveyor'''</td> |
| </td> | |
| <td width=50> </td> | |
| <td width=50> </td>
| |
| <td width=46>[[image:SkipMinorDown.png|link=#skip Placement: Rolling Stock Objects|Down]][[image:SkipMinorUp.png|link=#PT: Trigger TObject|Up]]</td> <!-- for Top and Minor Up/Down -->
| |
| <td width=75> </td>
| |
| <td width=75> </td>
| |
| <td width=75> </td> <!-- for Bottom -->
| |
| </tr> | | </tr> |
| </table> <!-- END Section Nav Buttons -->
| |
|
| |
| <table width=1000 bgcolor=#000000 cellpadding=2>
| |
| <tr valign="top"> | | <tr valign="top"> |
| <td> | | <td>[[image:DotPoint.JPG|10px|link=]]</td> |
| <table bgcolor=#ffffff cellpadding=2>
| | <td>If you open '''Dispatch Manager''' in '''Surveyor''' before using '''Driver''' then no drivers will be assigned to any of the locomotives (this is done by the '''Driver Setup Rule''' which runs in '''Driver'''). Locomotives, without driver names, will be shown labelled as "Consist nn". Once '''Driver''' has been started then you can use the [[image:WikiLink.PNG|link=]] '''[[How to Use the UDS Interface|UDS]]''' to switch to '''Surveyor''' and the names of all the assigned drivers will be shown.</td> |
| <tr valign="top">
| |
| <td>
| |
| <table>
| |
| <tr valign="middle">
| |
| <td width=35>[[image:Information.png|35px|link=]]</td>
| |
| <td><span style="font-weight: 700; font-size: 17px;">Track Mesh Object Context Menu Options</span></td> | |
| </tr> | | </tr> |
| </table> | | </table> |
| </td> | | </td> |
| </tr>
| |
| <tr valign="top">
| |
| <td colspan=2>Once a track mesh object has been placed you can open its '''Context Menu''' (<span style="font-weight: 700; font-size: 15px; background-color: lightcyan;"> Left Click </span> on its icon or press the <span style="font-weight: 700; font-size: 15px; color: white; background-color: black;"> T </span> key) to access a range of options and functions. The following '''Track Object''' specific options will appear, along with other more general options, in the objects '''Context Menu'''.
| |
| ----</td>
| |
| </tr>
| |
| <tr valign="top">
| |
| <td>
| |
| <table>
| |
| <tr valign="top">
| |
| <td><span style="font-weight: 700; font-size: 15px; color: white; background-color: black;"> Rotate Trackside </span></td>
| |
| <td>swaps the position of the object to the other side of the track or reverses its direction. With some '''Track Objects''' (e.g. '''Track Marks''') the direction it is facing or pointing is not important</td>
| |
| </tr> | | </tr> |
| </table> | | </table> |
| </td> | | </td> |
| </tr>
| |
| <tr valign="top">
| |
| <td>
| |
| <table>
| |
| <tr valign="top">
| |
| <td><span style="font-weight: 700; font-size: 15px; color: white; background-color: black;"> Change Junction Direction </span></td>
| |
| <td>if the object is a track switch or junction then its switch direction will be reversed</td>
| |
| </tr> | | </tr> |
| </table> | | </table> |
| </td> | | </td> |
| </tr> | | </tr> |
| | </table> |
| | |
| | <table width=1000> |
| <tr valign="top"> | | <tr valign="top"> |
| | <td>[[image:DispatchManager_S20.png|link=]]</td> |
| <td> | | <td> |
| | <br> |
| | <br> |
| <table> | | <table> |
| <tr valign="top"> | | <tr valign="top"> |
| <td><span style="font-weight: 700; font-size: 15px; color: white; background-color: black;"> Reattach to Track </span></td> | | <td>[[image:DispatchManagerInfo_S20.png|link=]]</td> |
| <td>if the object has been moved away from the track then it will be reset to its correct position on the track. This option will be greyed out if the object is already attached to the track</td> | | <td><span style="font-weight: 700; font-size: 15px; background-color: lightcyan;"> Left Click </span> on the <span style="font-weight: 700; font-size: 15px;">i</span> button for a brief description of the options in each section</td> |
| </tr> | | </tr> |
| </table> | | </table> |
| </td> | | </td> |
| </tr> | | </tr> |
| | </table> |
| | <br> |
| | <table width=1000> <!-- BEGIN Nav Buttons Table --> |
| <tr valign="top"> | | <tr valign="top"> |
| <td colspan=2>See [[image:PageLink.PNG|link=]] '''[[#FM: Context TObject|Free Move: Track Object Context Menu]]''' for the full list of '''Context Menu''' options for '''Track Objects'''.</td> | | <td width=629><span id="skipDispatchSettings"></span> |
| </tr>
| | =='''Dispatch Settings'''== |
| </table>
| |
| </td> | | </td> |
| </tr>
| | <td width=50>[[image:SkipDown.png|link=#skipDispatchControls|Skip Down]]</td> |
| </table>
| | <td width=50>[[image:SkipUp.png|link=#stepDispatchManager|Skip Up]]</td> |
| <br>
| | <td width=46>[[image:SkipMinorDown.png|link=#skipDispatchStatus]][[image:SkipMinorBlank.png|link=]]</td> <!-- for Top and Minor Up/Down --> |
| <table width=1000> <!-- BEGIN Section Nav Buttons -->
| | <td width=75>[[image:HeadingUp.png|link=#stepDispatchManager|alt=Heading|To Heading]]</td> |
| <tr valign="top">
| | <td width=75> </td> |
| <td width=629><span id="skip Placement: Rolling Stock Objects"></span>
| |
| =='''Placement: Rolling Stock Objects'''==
| |
| </td>
| |
| <td width=50>[[image:SkipDown.png|link=#stepEyedropper|Skip Down]]</td> | |
| <td width=50>[[image:SkipUp.png|link=#skip Placement: Track Objects|Skip Up]]</td> | |
| <td width=46>[[image:SkipMinorDown.png|link=#PT: Add Rolling|Down]][[image:SkipMinorUp.png|link=#PT: Context TObject|Up]]</td> <!-- for Top and Minor Up/Down --> | |
| <td width=75>[[image:HeadingUp.png|link=#stepPlacement|alt=Heading|To Heading]]</td> | |
| <td width=75> </td> | | <td width=75> </td> |
| <td width=75> </td> <!-- for Bottom -->
| |
| </tr> | | </tr> |
| </table> <!-- END Section Nav Buttons --> | | </table> <!-- END Nav Buttons Table --> |
|
| |
|
| <table width=1000>
| | <table width=1000> <!-- BEGIN Nav Buttons Table --> |
| <tr valign="top">
| |
| <td align="center">[[image:RollingStockObjectExamples.png|link=]]<br>
| |
| '''Typical Rolling Stock Objects'''<br>
| |
| Locomotives, wagons, passenger cars</td>
| |
| </tr>
| |
| </table>
| |
| <br>
| |
| <table width=1000> <!-- BEGIN Section Nav Buttons --> | |
| <tr valign="top"> | | <tr valign="top"> |
| <td width=629><span id="PT: Add Rolling"></span> | | <td width=629><span id="skipDispatchStatus"></span> |
| ===<span style="font-weight: 700; font-size: 17px; color: white; background-color: blue;"> Placement: Add a Rolling Stock Object </span>=== | | ===<span style="font-weight: 700; font-size: 15px; color: white; background-color: blue;"> Dispatch Status </span>=== |
| </td> | | </td> |
| <td width=50> </td> | | <td width=50> </td> |
| <td width=50> </td> | | <td width=50> </td> |
| <td width=46>[[image:SkipMinorDown.png|link=#PT: Load Rolling|Down]][[image:SkipMinorUp.png|link=#skip Placement: Rolling Stock Objects]]</td> <!-- for Top and Minor Up/Down --> | | <td width=46>[[image:SkipMinorDown.png|link=#skipRestartAI]][[image:SkipMinorUp.png|link=#skipDispatchSettings]]</td> <!-- for Top and Minor Up/Down --> |
| | <td width=75> </td> |
| <td width=75> </td> | | <td width=75> </td> |
| <td width=75> </td> | | <td width=75> </td> |
| <td width=75> </td> <!-- for Bottom -->
| |
| </tr> | | </tr> |
| </table> <!-- END Section Nav Buttons --> | | </table> <!-- END Nav Buttons Table --> |
|
| |
|
| <table width=1000 bgcolor="lightcyan" cellpadding=2> | | <table width=1000 bgcolor="lightcyan" cellpadding=2> |
| <tr valign="top"> | | <tr valign="top"> |
| <td width=10>[[image:BlueDot10x10.png|link=]]</td> | | <td width=10>[[image:BlueDot10x10.png|link=]]</td> |
| <td>'''Rolling Stock Objects''' (e.g. locomotives, passenger cars and wagons) can only be attached to track splines.</td> | | <td>The '''Dispatch Status''' setting enables/disables the control of '''Dispatch Manager''' over '''ALL''' consists and industries</td> |
| </tr> | | </tr> |
| </table> | | </table> |
| <br> | | <br> |
| <table width=1000 bgcolor=#000000 cellpadding=2> | | <table width=600 bgcolor=#000000 cellpadding=2> |
| <tr valign="top"> | | <tr valign="top"> |
| <td> | | <td> |
| <table width=996 bgcolor=#ffe89a cellpadding=2> | | <table bgcolor=#ffffff cellpadding=2> |
| <tr valign="middle"> | | <tr valign="top"> |
| <td width=45>[[image:PalettesIcon_S20.png|link=]]</td> | | <td colspan=3><span style="font-weight: 700; font-size: 15px;">Steps: To Set the Dispatch Status:-</span></td> |
| <td>If the <span style="font-weight: 700; font-size: 15px; color: white; background-color: #797979;"> Filter Palette </span> and <span style="font-weight: 700; font-size: 15px; color: white; background-color: #797979;"> Assets Palette </span> are not visible on the screen then refer to [[image:PageLink.PNG|link=]] '''[[#Notes_Palettes|Notes: Palettes]]''' at the top of this document.</td>
| | </tr> |
| | <tr valign="top"> |
| | <td width=25>[[image:DotPoint1.JPG|link=]]</td> |
| | <td><span style="font-weight: 700; font-size: 15px; background-color: lightcyan;"> Left Click </span> on the down arrowhead next to the current status setting</td> |
| | <td width=300 rowspan=2>[[image:DispatchManagerDispatchStatus_S20.png|link=]]</td> |
| | </tr> |
| | <tr valign="top"> |
| | <td>[[image:DotPoint2.JPG|link=]]</td> |
| | <td>Select a new status setting from the options listed in the drop down list (see descriptions below)</td> |
| </tr> | | </tr> |
| </table> | | </table> |
| Line 10,823: |
Line 10,952: |
| </table> | | </table> |
| <br> | | <br> |
| <table width=1000> | | <table width=1000 bgcolor=#000000 cellpadding=2> |
| | <tr valign="top"> |
| | <td> |
| | <table bgcolor=#ffffff cellpadding=2> |
| <tr valign="top"> | | <tr valign="top"> |
| <td><span style="font-weight: 700; font-size: 15px;">Steps:</span> To add a '''Rolling Stock Object''' the first step is to identify the exact asset you want to add.</td> | | <td colspan=2> |
| | <table> |
| | <tr valign="middle"> |
| | <td width=35>[[image:Information35.png|link=]]</td> |
| | <td><span style="font-weight: 700; font-size: 17px;">Dispatch Status Menu Options</span> |
| | </td> |
| </tr> | | </tr> |
| </table> | | </table> |
| <br>
| | </td> |
| [[image:DotPoint1.JPG|link=]] In the <span style="font-weight: 700; font-size: 15px; color: white; background-color: #797979;"> Filter Palette </span> choose one of the following:-
| |
| <table width=1000>
| |
| <tr>
| |
| <td><span style="font-weight: 700; font-size: 15px;">Options:</span> </td>
| |
| </tr> | | </tr> |
| <tr valign="top"> | | <tr valign="top"> |
| <td> | | <td> |
| <table width=250 bgcolor=#0000ff> | | <table> |
| | <tr valign="top"> |
| | <td><span style="font-weight: 700; font-size: 15px; color: white; background-color: black;"> Enabled </span></td> |
| | <td>this is the default setting. Selecting '''Enabled''' will allow all consists, powered or not, to be accessable in '''Dispatch Manager'''</td> |
| | </tr> |
| | </table> |
| | </td> |
| | </tr> |
| <tr valign="top"> | | <tr valign="top"> |
| <td> | | <td> |
| <table width=246 bgcolor=#ffffff> | | <table> |
| | <tr valign="top"> |
| | <td><span style="font-weight: 700; font-size: 15px; color: white; background-color: black;"> Disabled </span></td> |
| | <td>selecting '''Disabled''' will not stop the running of consists under AI control or the '''TLR''' (Trainz Living Railroad) but they will no longer be under the control of the '''Dispatch Manager''' (but they can later be '''Enabled''') |
| | </td> |
| | </tr> |
| | </table> |
| | </td> |
| | </tr> |
| <tr valign="top"> | | <tr valign="top"> |
| <td width=246 align="center"><span style="font-weight: 700; font-size: 15px; background-color: lightcyan;"> Left Click </span> on the '''Trains''' icon<br> | | <td> |
| [[image:FilterPaletteTrainsSelected_S20.png|link=]]
| |
| <table> | | <table> |
| <tr valign="top" align="left"> | | <tr valign="top"> |
| <td>[[image:GroundTextureFilter_S20.png|link=]]</td> | | <td width=200><span style="font-weight: 700; font-size: 15px; color: white; background-color: black;"> Clear Cached Track Paths </span></td> |
| <td>all ground textures</td> | | <td>will clear the memory cache of all stored paths for all drivers in '''Dispatch Manager'''. The memory cache will then be rebuilt from the current driver commands. This option would be chosen if there is a problem with the cached track paths or you have edited some of the driver commands and the cache needs to be updated. The actual commands assigned to the drivers and the AI operations will not be affected. Selecting this option will produce a warning about the possible time delay needed to rebuild the cache. This option must be confirmed before it will be executed</td> |
| </tr> | | </tr> |
| <tr valign="top" align="left">
| | </table> |
| <td>[[image:SceneryMeshFilter_S20.png|link=]]</td>
| | </td> |
| <td>all non-spline scenery assets</td>
| |
| </tr> | | </tr> |
| <tr valign="top" align="left">
| | </table> |
| <td>[[image:ScenerySplineFilter_S20.png|link=]]</td>
| | </td> |
| <td>all spline scenery assets</td>
| |
| </tr> | | </tr> |
| <tr valign="top" align="left"> | | </table> |
| <td>[[image:TrackSplineFilter_S20.png|link=]]</td> | | <br> |
| <td>all track spline assets</td> | | <table width=1000> <!-- BEGIN Nav Buttons Table --> |
| | <tr valign="top"> |
| | <td width=629><span id="skipRestartAI"></span> |
| | ===<span style="font-weight: 700; font-size: 15px; color: white; background-color: blue;"> Restart Stuck AI </span>=== |
| | </td> |
| | <td width=50> </td> |
| | <td width=50> </td> |
| | <td width=46>[[image:SkipMinorDown.png|link=#skipDispatchControls]][[image:SkipMinorUp.png|link=#skipDispatchStatus]]</td> <!-- for Top and Minor Up/Down --> |
| | <td width=75> </td> |
| | <td width=75> </td> |
| | <td width=75> </td> |
| </tr> | | </tr> |
| <tr valign="top" align="left"> | | </table> <!-- END Nav Buttons Table --> |
| <td>[[image:TrackMeshFilter_S20.png|link=]]</td> | | |
| <td>all track (non spline) assets (signals, etc)</td> | | <table width=1000 bgcolor="lightcyan" cellpadding=2> |
| | <tr valign="top"> |
| | <td width=10>[[image:BlueDot10x10.png|link=]]</td> |
| | <td>This setting enables/disables the ability of the AI to find an alternative path for a consist that is currently unable to proceed to its destination</td> |
| </tr> | | </tr> |
| <tr valign="top" align="left"> | | </table> |
| <td colspan=2> | | <br> |
| <table bgcolor=#000000 cellpadding=2> | | <table width=600 bgcolor=#000000 cellpadding=2> |
| <tr valign="top"> | | <tr valign="top"> |
| <td> | | <td> |
| <table bgcolor=#ffffff cellpadding=2> | | <table bgcolor=#ffffff cellpadding=2> |
| <tr valign="top" align="left"> | | <tr valign="top"> |
| <td>[[image:TrainFilter_S20.png|link=]]</td> | | <td colspan=3><span style="font-weight: 700; font-size: 15px;">Steps: To Set the AI Restart Status:-</span></td> |
| <td>all rolling stock assets</td>
| |
| </tr> | | </tr> |
| </table> | | <tr valign="top"> |
| </td> | | <td width=25>[[image:DotPoint1.JPG|link=]]</td> |
| | <td><span style="font-weight: 700; font-size: 15px; background-color: lightcyan;"> Left Click </span> on the down arrowhead next to the current status setting</td> |
| | <td width=250 rowspan=2>[[image:DispatchManagerDispatchStuckAI_S20.png|link=]]</td> |
| </tr> | | </tr> |
| </table>
| | <tr valign="top"> |
| </td>
| | <td>[[image:DotPoint2.JPG|link=]]</td> |
| </tr>
| | <td>Select a new setting from the options listed in the drop down list (see descriptions below)</td> |
| <tr valign="top" align="left"> | |
| <td>[[image:PresetFilter_S20.png|link=]]</td> | |
| <td>all '''Effect Layer''' presets</td> | |
| </tr> | | </tr> |
| </table> | | </table> |
| Line 10,888: |
Line 11,044: |
| </tr> | | </tr> |
| </table> | | </table> |
| </td> | | <br> |
| </tr> | | <table width=1000 bgcolor=#000000 cellpadding=2> |
| </table>
| |
| </td>
| |
| <td width=50 align="center"><span style="font-size: 17px; font-weight: 700;">OR</span></td>
| |
| <td>
| |
| <table width=250 bgcolor=#0000ff>
| |
| <tr valign="top"> | | <tr valign="top"> |
| <td> | | <td> |
| <table width=246 bgcolor=#ffffff> | | <table bgcolor=#ffffff cellpadding=2> |
| <tr valign="top"> | | <tr valign="top"> |
| <td align="center"><span style="font-weight: 700; font-size: 15px; background-color: lightcyan;"> Left Click </span> the '''Content Drop Down Menu'''<br> | | <td colspan=2> |
| [[image:FilterPaletteNoIconSelected_S20.png|link=]]<br>
| | <table> |
| Then select '''Trains'''<br>
| | <tr valign="middle"> |
| [[image:FilterSelectTrains_S20.png|link=]]
| | <td width=35>[[image:Information35.png|link=]]</td> |
| | <td><span style="font-weight: 700; font-size: 17px;">Stuck AI Menu Options</span> |
| </td> | | </td> |
| </tr> | | </tr> |
| Line 10,908: |
Line 11,060: |
| </td> | | </td> |
| </tr> | | </tr> |
| </table>
| |
| </td>
| |
| <td width=50 align="center"><span style="font-size: 17px; font-weight: 700;">OR</span></td>
| |
| <td>
| |
| <table bgcolor=#000000 width=400 cellpadding=2>
| |
| <tr valign="top"> | | <tr valign="top"> |
| <td> | | <td> |
| <table bgcolor=#ffffe0 width=396 cellpadding=2> | | <table> |
| <tr valign="top">
| |
| <td colspan=2>[[image:PencilTips.PNG|link=]] <span style="font-size: 15px; font-weight: 700; color: white; background-color: blue;"> Shortcut </span><br>
| |
| <table bgcolor=#ffffff>
| |
| <tr valign="top">
| |
| <td colspan=2><span style="font-weight: 700; font-size: 15px;">Steps:</span> If you already have the same object placed in your route then:-</td>
| |
| </tr>
| |
| <tr valign="top">
| |
| <td width=20>[[image:DotPoint1RedC.png|link=]]</td>
| |
| <td>move the tool pointer over the object to be selected and hold down the <span style="font-weight: 700; font-size: 15px; color: white; background-color: black;"> Alt </span> key. The object name will appear in a <span style="font-weight: 700; font-size: 15px; color: white; background-color: black;"> ToolTip </span> attached to the pointer</td>
| |
| </tr>
| |
| <tr valign="top"> | | <tr valign="top"> |
| <td>[[image:DotPoint2RedC.png|link=]]</td> | | <td><span style="font-weight: 700; font-size: 15px; color: white; background-color: black;"> Enabled </span></td> |
| <td>while holding down the <span style="font-weight: 700; font-size: 15px; color: white; background-color: black;"> Alt </span> key <span style="font-weight: 700; font-size: 15px; background-color: lightcyan;"> Left Click </span> on the object. This will automatically select it in the <span style="font-weight: 700; font-size: 15px; color: white; background-color: #797979;"> Assets Palette </span> and it will also select the '''Placement Tool'''. Release the key</td>
| | <td>this is the default setting. Selecting '''Enabled''' will allow AI to attempt to find a solution for a consist that is unable to proceed to its destination</td> |
| </tr> | | </tr> |
| </table> | | </table> |
| Line 10,934: |
Line 11,071: |
| </tr> | | </tr> |
| <tr valign="top"> | | <tr valign="top"> |
| <td colspan=2>Jump to '''Step''' [[image:DotPoint4.JPG|link=]] below</td> | | <td> |
| | <table> |
| | <tr valign="top"> |
| | <td><span style="font-weight: 700; font-size: 15px; color: white; background-color: black;"> Disabled </span></td> |
| | <td>selecting '''Disabled''' will prevent the AI attempting to find a solution for a consist that is unable to proceed to its destination. This will allow you to take manual control of the consist to solve the problem yourself. The '''Dispatch Manager''' display will indicate which consists are "stuck" and need assistance |
| | </td> |
| </tr> | | </tr> |
| </table> | | </table> |
| Line 10,943: |
Line 11,085: |
| </tr> | | </tr> |
| </table> | | </table> |
| | | <br> |
| <table width=1000 bgcolor=#000000 cellpadding=2> | | <table width=1000> <!-- BEGIN Nav Buttons Table --> |
| <tr valign="top"> | | <tr valign="top"> |
| <td> | | <td width=629><span id="skipDispatchControls"></span> |
| <table bgcolor=#ffffff cellpadding=2> | | =='''Dispatch Controls'''== |
| | </td> |
| | <td width=50> </td> |
| | <td width=50>[[image:SkipUp.png|link=#skipDispatchSettings|Skip Up]]</td> |
| | <td width=46>[[image:SkipMinorDown.png|link=#DispatchFilters]][[image:SkipMinorUp.png|link=#skipRestartAI]]</td> <!-- for Top and Minor Up/Down --> |
| | <td width=75>[[image:HeadingUp.png|link=#stepDispatchManager|alt=Heading|To Heading]]</td> |
| | <td width=75> </td> |
| | <td width=75> </td> |
| | </tr> |
| | </table> <!-- END Nav Buttons Table --> |
| | |
| | <table width=1000 bgcolor="lightcyan" cellpadding=2> |
| | <tr valign="top"> |
| | <td colspan=2>The '''Dispatch Controls''' provide you with:-</td> |
| | </tr> |
| | <tr valign="top"> |
| | <td width=10>[[image:BlueDot10x10.png|link=]]</td> |
| | <td>data on what is happening with your consists, both powered (under TLR or AI control) and unpowered (no loco attached)</td> |
| | </tr> |
| | <tr valign="top"> |
| | <td>[[image:BlueDot10x10.png|link=]]</td> |
| | <td>data on what is happening with your industries (loads waiting and/or delivered)</td> |
| | </tr> |
| | <tr valign="top"> |
| | <td>[[image:BlueDot10x10.png|link=]]</td> |
| | <td>the ability to override the TLR/AI and take complete manual control of any driver</td> |
| | </tr> |
| <tr valign="top"> | | <tr valign="top"> |
| <td width=10>[[image:DotPoint.JPG|10px|link=]]</td> | | <td>[[image:BlueDot10x10.png|link=]]</td> |
| <td>In the <span style="font-weight: 700; font-size: 15px; color: white; background-color: #797979;"> Filter Palette </span> the '''Trains''' icon will be shown in blue when it is selected and the name '''Trains''' will appear in the drop down box below the icons. For more information about the <span style="font-weight: 700; font-size: 15px; color: white; background-color: #797979;"> Filter Palette </span> see the '''Trainz Wiki Page [[image:WikiLink.PNG|link=]] [[How to Use S20 Palettes#The Filter Palette|How to Use the Surveyor 2.0 Palettes - Filter Palette]]'''</td> | | <td>the ability to edit the product loads of any rolling stock object</td> |
| </tr> | | </tr> |
| <tr valign="top"> | | <tr valign="top"> |
| <td>[[image:DotPoint.JPG|10px|link=]]</td> | | <td>[[image:BlueDot10x10.png|link=]]</td> |
| <td>The <span style="font-weight: 700; font-size: 15px; color: white; background-color: #797979;"> Assets Palette </span> display is controlled by the selections made in the <span style="font-weight: 700; font-size: 15px; color: white; background-color: #797979;"> Filter Palette </span>. Selecting '''Scenery Objects''' in the <span style="font-weight: 700; font-size: 15px; color: white; background-color: #797979;"> Filter Palette </span> will produce a list of all the installed '''Rolling Stock Objects''' in the <span style="font-weight: 700; font-size: 15px; color: white; background-color: #797979;"> Assets Palette </span>. For more information about the <span style="font-weight: 700; font-size: 15px; color: white; background-color: #797979;"> Assets Palette </span> see the '''Trainz Wiki Page [[image:WikiLink.PNG|link=]] [[How to Use S20 Palettes#The Assets Palette|How to Use the Surveyor 2.0 Palettes - Assets Palette]]'''</td> | | <td>the ability to edit the product levels produced and consumed of any industry</td> |
| </tr> | | </tr> |
| </table> | | </table> |
| | <br> |
| | <table width=1000> <!-- BEGIN Nav Buttons Table --> |
| | <tr valign="top"> |
| | <td width=629><span id="DispatchFilters"></span> |
| | =='''Dispatch Filters'''== |
| </td> | | </td> |
| | <td width=50> </td> |
| | <td width=50>[[image:SkipUp.png|link=#skipDispatchSettings|Skip Up]]</td> |
| | <td width=46>[[image:SkipMinorDown.png|link=#skipItemStatus]][[image:SkipMinorUp.png|link=#skipDispatchControls]]</td> <!-- for Top and Minor Up/Down --> |
| | <td width=75>[[image:HeadingUp.png|link=#stepDispatchManager|alt=Heading|To Heading]]</td> |
| | <td width=75> </td> |
| | <td width=75> </td> |
| | </tr> |
| | </table> <!-- END Nav Buttons Table --> |
| | |
| | <table width=1000 bgcolor="lightcyan" cellpadding=2> |
| | <tr valign="top"> |
| | <td width=10>[[image:BlueDot10x10.png|link=]]</td> |
| | <td>Filters built into the '''Dispatch Manager''' allow the list of displayed entries to be reduced to those that interest you</td> |
| </tr> | | </tr> |
| </table> | | </table> |
| | |
| | There are some basic filter options available to reduce the quantity of data displayed. |
| <br> | | <br> |
|
| |
| <table width=1000> | | <table width=1000> |
| <tr valign="top"> | | <tr valign="top"> |
| <td width=25>[[image:DotPoint2.JPG|link=]]</td> | | <td width=300>[[image:DispatchManagerColourFilterSearch_S20.png|link=]]</td> |
| <td>In the <span style="font-weight: 700; font-size: 15px; color: white; background-color: #797979;"> Assets Palette </span> you have the '''option''' to narrow down the filtered list. Type the assets name or part of the name into the <span style="font-weight: 700; font-size: 15px; color: white; background-color: black;"> Search </span> box. For example if you have selected '''Trains''' and want to find rolling stock with "NG42" in their names, then type "NG42" ('''UPPER/lower''' case does not matter).<br><br> | | <td width=25>[[image:Ablue.png|link=]]</td> |
| This will list all the '''Rolling Stock''' containing the text "NG42" in their names or descriptions.</td>
| | <td>in the <span style="font-weight: 700; font-size: 15px; color: white; background-color: black;"> Search </span> box enter the name of a driver (e.g. '''Ami'''), a location (e.g. '''Richmond'''), an industry (e.g. '''Tipple'''), a product (e.g. '''Coal''') or a consist (e.g. '''Consist 29'''). UPPER/lower case is not important</td> |
| </tr> | | </tr> |
| </table> | | </table> |
|
| |
|
| <table width=1000> | | <table width=1000 bgcolor=#ffffff cellpadding=2> |
| | <tr valign="top"> |
| | <td width=25>[[image:Bblue.png|link=]]</td> |
| | <td>the coloured dots will filter the types of messages shown in the display. <span style="font-weight: 700; font-size: 15px; background-color: lightcyan;"> Left Click </span> on a coloured dot to toggle on/off each message type |
| | <table> |
| | <tr valign="top"> |
| | <td width=10>[[image:GreyDot10x10.png|link=]]</td> |
| | <td>'''Grey ON''' shows '''player activity''' messages (e.g. '''player <name> moved to loco <name>'''): '''Grey OFF''' hides them</td> |
| | </tr> |
| <tr valign="top"> | | <tr valign="top"> |
| <td width=245>[[image:AssetsPaletteTrainSearchNG42_S20.png|link=]]</td> | | <td>[[image:YellowDot10x10.png|link=]]</td> |
| <td><br> | | <td>'''Yellow ON''' shows '''caution warnings''' (e.g. '''<driver_name> has stopped for a red signal (Signal <name/number>)'''): '''Yellow OFF''' hides them</td> |
| <table width=755> | | </tr> |
| <tr valign="top"> | | <tr valign="top"> |
| <td valign="middle">[[image:DotPoint3.JPG|link=]] <span style="font-weight: 700; font-size: 15px; background-color: lightcyan;"> Left Click </span> on the required item in the list.<br><br> | | <td>[[image:RedDot10x10.png|link=]]</td> |
| When selected the asset will be highlighted with a light grey background.<br>
| | <td>'''Red ON''' shows '''Stuck''' and other problem messages: '''Red OFF''' hides them</td> |
| <br> | | </tr> |
| <table bgcolor=#000000 cellpadding=2> | |
| <tr valign="top"> | | <tr valign="top"> |
| <td> | | <td>[[image:GreenDot10x10.png|link=]]</td> |
| <table bgcolor=#ffffb0 cellpadding=2> | | <td>'''Green ON''' shows '''Task proceeding''' messages (e.g. '''<driver_name> is delivering coal at <Industry_name>'''): '''Green OFF''' hides them</td> |
| | </tr> |
| <tr valign="top"> | | <tr valign="top"> |
| <td width=25>[[image:NotePad.PNG|link=]]</td> | | <td colspan=2>For example: Turning '''OFF''' all the coloured dots except [[image:RedDot10x10.png|link=]] could produce the following display<br> |
| <td width=975><span style="font-size: 17px; font-weight: 700;">Notes:'''</span><br>
| | [[image:DispatchManagerRedColourFilterExample_S20.png|link=]]</td> |
| ----
| |
| A <span style="font-weight: 700; font-size: 15px; background-color: lightcyan;"> Left Click </span> on an object in the <span style="font-weight: 700; font-size: 15px; color: white; background-color: #797979;"> Assets Palette </span> filtered list will automatically activate the '''Placement Tool''' so the next <span style="font-weight: 700; font-size: 15px; background-color: lightcyan;"> Left Click </span> in your '''Trainz World''' will place that object in the scene.</td>
| |
| </tr> | | </tr> |
| </table> | | </table> |
| Line 10,993: |
Line 11,186: |
| </tr> | | </tr> |
| </table> | | </table> |
| </td> | | |
| | <table width=1000> |
| | <tr valign="top"> |
| | <td width=25>[[image:Cblue.png|link=]]</td> |
| | <td>the display can be filtered by its data categories. <span style="font-weight: 700; font-size: 15px; background-color: lightcyan;"> Left Click </span> on the down arrowhead next to the title '''Item (All)''' to reveal the different data categories |
| | <table> |
| | <tr valign="top"> |
| | <td width=140>[[image:DispatchManagerSelection_S20.png|link=]]</td> |
| | <td><span style="font-weight: 700; font-size: 15px; background-color: lightcyan;"> Left Click </span> on a category name (e.g. '''Industries''') to filter the display using that category<br> |
| | [[image:DispatchManagerShowIndustriesi_S20.png|link=]]</td> |
| </tr> | | </tr> |
| </table> | | </table> |
| </td> | | </td> |
| </tr> | | </tr> |
| </table>
| |
| <br>
| |
| <table width=1000 bgcolor=#000000 cellpadding=2>
| |
| <tr valign="top"> | | <tr valign="top"> |
| <td>
| | <td width=25>[[image:Dblue.png|link=]]</td> |
| <table width=996 bgcolor=#ffffe0 cellpadding=2>
| | <td>the above filter options can be combined. Some examples: |
| <tr valign="top">
| |
| <td width=25>[[image:PencilTips.PNG|link=]]</td> | |
| <td>If you are not certain that a selected asset is the right one then try the following:-<br> | |
| <span style="font-weight: 700; font-size: 15px;">Options: </span>
| |
| <table> | | <table> |
| <tr valign="top"> | | <tr valign="top"> |
| <td width=25>[[image:Ablue.png|link=]]</td> | | <td width=10>[[image:DotPoint.JPG|10px|link=]]</td> |
| <td><span style="font-weight: 700; font-size: 15px; background-color: lightcyan;">Double Left Click</span> on the name in the '''Asset List''' to bring up its image and description, <span style="font-weight: 700; font-size: 15px;">OR</span></td> | | <td>To display all coal industries type '''Coal''' in the search box and select the category '''Industries''' - this will exclude consists carrying coal as a product<br> |
| | [[image:DispatchManagerShowCoalIndustries_S20.png|link=]]</td> |
| </tr> | | </tr> |
| <tr valign="top"> | | <tr valign="top"> |
| <td>[[image:Bblue.png|link=]]</td> | | <td>[[image:DotPoint.JPG|10px|link=]]</td> |
| <td>view its rotating and resizeable 3D image in the '''Preview Palette''', <span style="font-weight: 700; font-size: 15px;">OR</span></td> | | <td>To display all drivers hauling lumber type '''Lumber''' in the search box and select the category '''Drivers'''<br> |
| </tr>
| | [[image:DispatchManagerShowLumberDrivers_S20.png|link=]]</td> |
| <tr valign="top">
| |
| <td>[[image:Cblue.png|link=]]</td>
| |
| <td>switch the asset list to '''Thumbnail View''' (<span style="font-weight: 700; font-size: 15px; background-color: lightcyan;"> Left Click </span> the [[image:AssetsPaletteListToggleViewIcon_S20.png|link=]] icon). In this view the palette is best used undocked and enlarged - see the '''Wiki Page''' at [[image:WikiLink.PNG|link=]] '''[[How_to_Use_S20_Palettes#Thumbnail View|How to Use the Surveyor 2.0 Palettes]]''' for instructions on undocking and enlarging palettes.</td>
| |
| </tr> | | </tr> |
| </table> | | </table> |
| Line 11,025: |
Line 11,218: |
| </tr> | | </tr> |
| </table> | | </table> |
| | <br> |
| | <table width=1000> <!-- BEGIN Nav Buttons Table --> |
| | <tr valign="top"> |
| | <td width=629><span id="skipItemStatus"></span> |
| | =='''Item Status'''== |
| </td> | | </td> |
| | <td width=50> </td> |
| | <td width=50>[[image:SkipUp.png|link=#skipDispatchSettings|Skip Up]]</td> |
| | <td width=46>[[image:SkipMinorDown.png|link=#stepManageDrivers]][[image:SkipMinorUp.png|link=#DispatchFilters]]</td> <!-- for Top and Minor Up/Down --> |
| | <td width=75>[[image:HeadingUp.png|link=#stepDispatchManager|alt=Heading|To Heading]]</td> |
| | <td width=75> </td> |
| | <td width=75> </td> |
| | </tr> |
| | </table> <!-- END Nav Buttons Table --> |
| | |
| | <table width=1000 bgcolor="lightcyan" cellpadding=2> |
| | <tr valign="top"> |
| | <td width=10>[[image:BlueDot10x10.png|link=]]</td> |
| | <td>The '''Status''' column of the display gives you access to more information about each item in the display as well as editing and control tools</td> |
| </tr> | | </tr> |
| </table> | | </table> |
| <br>
| | |
| <table width=1000> | | <table width=1000> |
| <tr valign="top"> | | <tr valign="top"> |
| <td width=25>[[image:DotPoint4.JPG|link=]]</td> | | <td>Each item in the display has a sub menu that will give you access to additional information and control options.</td> |
| <td>The final step is to place the selected object into the route.</td>
| |
| </tr> | | </tr> |
| </table> | | </table> |
|
| |
|
| | <table width=600 bgcolor=#000000 cellpadding=2> |
| | <tr valign="top"> |
| | <td> |
| | <table bgcolor=#ffffff cellpadding=2> |
| | <tr valign="top"> |
| | <td colspan=2><span style="font-weight: 700; font-size: 15px;">Steps: To Open an Item Status Sub Menu:-</span></td> |
| | </tr> |
| | <tr valign="top"> |
| | <td width=25>[[image:DotPoint1.JPG|link=]]</td> |
| | <td><span style="font-weight: 700; font-size: 15px; background-color: lightcyan;"> Left Click </span> on the down arrowhead at the end of the '''Status''' description of the required item. The options shown in a sub menu will depend on the type of item selected and if it has any active tasks</td> |
| | </tr> |
| | </table> |
| | </td> |
| | </tr> |
| | </table> |
| | <br> |
| <table width=1000> | | <table width=1000> |
| <tr valign="top"> | | <tr valign="top"> |
| <td> | | <td width=400> |
| <table width=500 bgcolor=#000000 cellpadding=2> | | <table width=400 bgcolor=#000000 cellpadding=2> |
| <tr valign="top"> | | <tr valign="top"> |
| <td> | | <td> |
| <table width=496 bgcolor=#ffffff cellpadding=2> | | <table bgcolor=#ffffff cellpadding=2> |
| <tr valign="top"> | | <tr valign="top"> |
| <td colspan=2><span style="font-weight: 700; font-size: 15px;">Steps:</span></td> | | <td>'''Example 1:''' The driver '''Levi''' has active driver commands to execute<br><br> |
| | When the sub menu is opened it will have a set of options as shown in the image below. These options will vary between specific examples<br> |
| | [[image:DispatchManagerShowStatusLevi2_S20.png|link=]]</td> |
| </tr> | | </tr> |
| | </table> |
| | </td> |
| | </tr> |
| | </table> |
| | <br> |
| | <table width=400 bgcolor=#000000 cellpadding=2> |
| <tr valign="top"> | | <tr valign="top"> |
| <td width=20>[[image:DotPoint1RedC.png|link=]]</td> | | <td> |
| <td>In the <span style="font-weight: 700; font-size: 15px; color: white; background-color: #797979;"> Tools Palette </span> if, for some reason, the '''Placement Tool''' is not selected then <span style="font-weight: 700; font-size: 15px; background-color: lightcyan;"> Left Click </span> on its icon [[image:S20_PlacementToolIcon.png|link=|20px]] or press the <span style="color: white; background-color: black; font-weight: 700; font-size: 15px;"> E </span> key</td> | | <table bgcolor=#ffffff cellpadding=2> |
| </tr>
| |
| <tr valign="top"> | | <tr valign="top"> |
| <td>[[image:DotPoint2RedC.png|link=]]</td> | | <td>'''Example 2:''' Consist 147 does not have a loco or a driver and, as a result, has not yet been assigned to a task by the Dispatcher<br><br> |
| <td><span style="font-weight: 700; font-size: 15px; background-color: lightcyan;"> Left Click </span> on the track at the position where you want to place the object. This will become the '''Anchor Point''' where the object will be attached to the track.<br>
| | When the sub menu is opened it will have a set of options as shown in the image below.<br> |
| [[image:PlacementRollingStockObject_S20.png|link=]]</td> | | [[image:DispatchManagerConsistMenu_S20.png|link=]]</td> |
| </tr> | | </tr> |
| </table> | | </table> |
| Line 11,060: |
Line 11,293: |
| </table> | | </table> |
| </td> | | </td> |
| <td> | | <td width=10> </td> |
| <table bgcolor=#000000 width=500 cellpadding=2> | | <td width=590> |
| | <table bgcolor=#000000 cellpadding=2> |
| <tr valign="top"> | | <tr valign="top"> |
| <td> | | <td> |
| <table bgcolor=#ffffb0 width=496 cellpadding=2> | | <table bgcolor=#ffffff cellpadding=2> |
| | <tr valign="middle"> |
| | <td width=35>[[image:Information35.png|link=]]</td> |
| | <td><span style="font-weight: 700; font-size: 17px;">Item Status Menu Options</span></td> |
| | </tr> |
| <tr valign="top"> | | <tr valign="top"> |
| <td> | | <td colspan=2> |
| <table> | | <table> |
| | <tr valign="top"> |
| | <td><span style="font-weight: 700; font-size: 15px; color: white; background-color: black;"> Claim Task </span></td> |
| | <td>this will cancel the '''Automatic Scheduler''' if it has been set, and you, the player, will be given control of the train. Any driver commands in the '''Command Status''' will be cleared. |
| | <table bgcolor=#ffffb0 cellpadding=2> |
| <tr valign="top"> | | <tr valign="top"> |
| <td width=25>[[image:NotePad.PNG|link=]]</td> | | <td width=25>[[image:NotePad.PNG|link=]]</td> |
| <td><span style="font-size: 17px; font-weight: 700;">Notes:</span><br> | | <td>If the current driver has already been '''Claimed''' then <span style="font-weight: 700; font-size: 15px; color: white; background-color: black;"> Assign to Automatic Scheduler </span> will appear instead of the <span style="font-weight: 700; font-size: 15px; color: white; background-color: black;"> Claim Task </span> option. Selecting '''Assign to Automatic Scheduler''' will return the driver to the '''TLR'''</td> |
| ----
| | </tr> |
| | </table> |
| </td> | | </td> |
| </tr> | | </tr> |
| Line 11,077: |
Line 11,320: |
| <table> | | <table> |
| <tr valign="top"> | | <tr valign="top"> |
| <td width=10>[[image:DotPoint.JPG|10px|link=]]</td> | | <td><span style="font-weight: 700; font-size: 15px; color: white; background-color: black;"> Pause Task </span></td> |
| <td>the '''Placement Tool''' will remain on and active until another tool has been selected. So everytime you <span style="font-weight: 700; font-size: 15px; background-color: lightcyan;"> Left Click </span> another copy of the object (or another object if you change your selection) will be added to the route</td>
| | <td>the current '''TLR''' tasks for this driver will be paused and the train will be halted. No other drivers will be affected |
| </tr> | | <table bgcolor=#ffffb0 cellpadding=2> |
| <tr valign="top"> | | <tr valign="top"> |
| <td>[[image:DotPoint.JPG|10px|link=]]</td> | | <td width=25>[[image:NotePad.PNG|link=]]</td> |
| <td>the last object placed will be highlighted (covered in "green/yellow"). This will be the selected object if you switch control to the [[image:S20_FreeMoveToolIcon.png|link=|20px]] '''Free Move Tool''' or the [[image:S20_FineAdjustmentToolIcon.png|link=|20px]] '''Fine Adjustment Tool'''</td> | | <td>The '''Pause Task''' option will not appear if the '''Claim Task''' option has been selected.<br> |
| | If the current driver has been put on '''Pause''' then <span style="font-weight: 700; font-size: 15px; color: white; background-color: black;"> Resume Task </span> will appear instead of the <span style="font-weight: 700; font-size: 15px; color: white; background-color: black;"> Pause Task </span> option. Selecting '''Resume Task''' will return the driver to the '''TLR''' to continue its normal operations</td> |
| </tr> | | </tr> |
| </table> | | </table> |
| Line 11,088: |
Line 11,332: |
| </tr> | | </tr> |
| </table> | | </table> |
| </td> | | <table> |
| | <tr valign="top"> |
| | <td><span style="font-weight: 700; font-size: 15px; color: white; background-color: black;"> Cancel Task </span></td> |
| | <td>the '''current''' driver commands in the '''Command Status''' will be terminated. The '''TLR''' will then allocate new tasks to this driver</td> |
| </tr> | | </tr> |
| </table> | | </table> |
| </td> | | <table> |
| | <tr valign="top"> |
| | <td><span style="font-weight: 700; font-size: 15px; color: white; background-color: black;"> Show <driver_name> </span></td> |
| | <td>this will open the '''Driver Manager''' window - see [[image:PageLink.PNG|link=]] '''[[#skipDispatchDriver|Manage Drivers]]''' for more information</td> |
| </tr> | | </tr> |
| </table> | | </table> |
| <br>
| | <table> |
| <table width=1000> <!-- BEGIN Section Nav Buttons --> | |
| <tr valign="top"> | | <tr valign="top"> |
| <td width=629><span id="PT: Load Rolling"></span> | | <td><span style="font-weight: 700; font-size: 15px; color: white; background-color: black;"> Show <industry_name_1> </span></td> |
| ===<span style="font-weight: 700; font-size: 17px; color: white; background-color: blue;"> Placement: Load a Rolling Stock Object </span>===
| | <td>this will open the '''Industry Manager''' window for the industry currently being serviced (i.e. where the train is loading/unloading) or, if the train is moving towards its next industry task, then it will show the industry that the driver has just departed - see [[image:PageLink.PNG|link=]] '''[[#skipManageIndustry|Manage Industries]]''' for more information</td> |
| </td>
| | </tr> |
| <td width=50> </td>
| | </table> |
| <td width=50> </td>
| | <table> |
| <td width=46>[[image:SkipMinorDown.png|link=#PT: Move Rolling|Down]][[image:SkipMinorUp.png|link=#PT: Add Rolling|Up]]</td> <!-- for Top and Minor Up/Down --> | | <tr valign="top"> |
| <td width=75> </td> | | <td><span style="font-weight: 700; font-size: 15px; color: white; background-color: black;"> Show <industry_name_2> </span></td> |
| <td width=75> </td> | | <td>this will open the '''Industry Manager''' window for the next industry to be serviced by the train (i.e. its destination) - see [[image:PageLink.PNG|link=]] '''[[#skipManageIndustry|Manage Industries]]''' for more information</td> |
| <td width=75> </td> <!-- for Bottom --> | |
| </tr> | | </tr> |
| </table> <!-- END Section Nav Buttons --> | | </table> |
| | | <table> |
| <table width=1000 bgcolor="lightcyan" cellpadding=2> | |
| <tr valign="top"> | | <tr valign="top"> |
| <td width=10>[[image:BlueDot10x10.png|link=]]</td> | | <td><span style="font-weight: 700; font-size: 15px; color: white; background-color: black;"> Show Consist <number> </span></td> |
| <td>Many rolling stock objects can carry products to be loaded and unloaded at industry objects</td> | | <td>this will open the '''Consist Manager''' window for the first wagon of the consist - see [[image:PageLink.PNG|link=]] '''[[#skipConfigureConsists|Configure Consists]]''' for more information</td> |
| | </tr> |
| | </table> |
| | </td> |
| | </tr> |
| | </table> |
| | </td> |
| </tr> | | </tr> |
| <tr valign="top">
| | </table> |
| <td>[[image:BlueDot10x10.png|link=]]</td>
| | </td> |
| <td>Passenger rolling stock objects can carry passengers who will board and leave at specific industry objects (station platforms)</td>
| |
| </tr> | | </tr> |
| </table> | | </table> |
| <br> | | <br> |
| | <table width=1000> <!-- BEGIN Nav Buttons Table --> |
| | <tr valign="top"> |
| | <td width=629><span id="stepManageDrivers"></span> |
| | ='''Managing Drivers'''= |
| | </td> |
| | <td width=50> </td> |
| | <td width=50> </td> |
| | <td width=46>[[image:BackToTop.png|link=#top|alt=Top|Top]]</td> |
| | <td width=75>[[image:NextUp.png|link=#stepDispatchManager|alt=Next Up|Next Up]]</td> |
| | <td width=75>[[image:NextDown.png|link=#stepManageIndustries|alt=Next Down|Next Down]]</td> |
| | <td width=75>[[image:BackToBottom.png|link=#bottom|alt=Bottom|Bottom]]</td> |
| | </tr> |
| | </table> <!-- END Nav Buttons Table --> |
| | |
| <table width=1000 bgcolor=#000000 cellpadding=2> | | <table width=1000 bgcolor=#000000 cellpadding=2> |
| <tr valign="top"> | | <tr valign="top"> |
| Line 11,125: |
Line 11,391: |
| <table width=996 bgcolor=#ffffff cellpadding=2> | | <table width=996 bgcolor=#ffffff cellpadding=2> |
| <tr valign="middle"> | | <tr valign="middle"> |
| <td width=35>[[image:Information.png|35px|link=]]</td> | | <td width=35>[[image:Information35.png|link=]]</td> |
| <td>'''Loading Rolling Stock''' or '''Consists''' is covered in great detail in the Wiki document [[image:WikiLink.PNG|link=]] '''[[How to Use S20 Palettes#Managing Consists|How to Use S20 Palettes]]'''</td> | | <td>'''Managing Drivers''' is best performed using the '''Driver Control Center''' palette/window described at [[image:PageLink.PNG|link=]] '''[[#stepDriverCenter|Driver Control Center]]'''.</td> |
| </tr> | | </tr> |
| </table> | | </table> |
| Line 11,133: |
Line 11,399: |
| </table> | | </table> |
| <br> | | <br> |
| <table width=1000> <!-- BEGIN Section Nav Buttons --> | | <table width=1000> <!-- BEGIN Nav Buttons Table --> |
| <tr valign="top"> | | <tr valign="top"> |
| <td width=629><span id="PT: Move Rolling"></span> | | <td width=629><span id="stepManageIndustries"></span> |
| ===<span style="font-weight: 700; font-size: 17px; color: white; background-color: blue;"> Placement: Move a Rolling Stock Object </span>=== | | ='''Managing Industries'''= |
| </td> | | </td> |
| | <td width=50>[[image:SkipDown.png|link=#skipConfigureIndustries|Skip Down]]</td> |
| <td width=50> </td> | | <td width=50> </td> |
| <td width=50> </td>
| | <td width=46>[[image:BackToTop.png|link=#top|alt=Top|Top]]</td> |
| <td width=46>[[image:SkipMinorDown.png|link=#PT: Delete Rolling|Down]][[image:SkipMinorUp.png|link=#PT: Load Rolling|Up]]</td> <!-- for Top and Minor Up/Down --> | | <td width=75>[[image:NextUp.png|link=#stepManageDrivers|alt=Next Up|Next Up]]</td> |
| <td width=75> </td> | | <td width=75>[[image:NextDown.png|link=#stepManageConsists|alt=Next Down|Next Down]]</td> |
| <td width=75> </td> | | <td width=75>[[image:BackToBottom.png|link=#bottom|alt=Bottom|Bottom]]</td> |
| <td width=75> </td> <!-- for Bottom -->
| |
| </tr> | | </tr> |
| </table> <!-- END Section Nav Buttons --> | | </table> <!-- END Nav Buttons Table --> |
|
| |
|
| <table width=1000 bgcolor="lightcyan" cellpadding=2> | | <table width=1000 bgcolor="lightcyan" cellpadding=2> |
| <tr valign="top"> | | <tr valign="top"> |
| <td width=10>[[image:BlueDot10x10.png|link=]]</td> | | <td width=10>[[image:BlueDot10x10.png|link=]]</td> |
| <td>Once a '''Rolling Stock Object''' (e.g. a wagon) has been placed it can be moved using the '''Placement Tool'''</td> | | <td>'''Industries''' are '''scenery objects''' that can load and/or unload products into/from consists</td> |
| | </tr> |
| | <tr valign="top"> |
| | <td width=10>[[image:BlueDot10x10.png|link=]]</td> |
| | <td>Not all '''scenery objects''' are '''Industries'''</td> |
| </tr> | | </tr> |
| </table> | | </table> |
| Line 11,157: |
Line 11,427: |
| <tr valign="top"> | | <tr valign="top"> |
| <td> | | <td> |
| <table width=996 bgcolor=#ffffb0 cellpadding=2> | | <table width=996 bgcolor=#ffffe0 cellpadding=2> |
| | <tr valign="top"> |
| | <td width=25>[[image:PencilTips.PNG|link=]]</td> |
| | <td>Not all objects placed in a route or assets installed in '''Trainz''' will be industries that can load and unload commodities (products). |
| | <table bgcolor=#ffffff cellpadding=2> |
| | <tr valign="top"> |
| | <td colspan=2><span style="font-weight: 700; font-size: 15px;">Steps: To Identify Industry Enabled Assets and Objects:-</span></td> |
| | </tr> |
| | <tr valign="top"> |
| | <td>[[image:Ablue.png|link=]]</td> |
| | <td><span style="font-weight: 700; font-size: 15px;">In Surveyor - In the <span style="color: white; background-color: #797979;"> Assets Palette </span></span> |
| | <table> |
| <tr valign="top"> | | <tr valign="top"> |
| <td width=25>[[image:NotePad.PNG|link=]]</td> | | <td width=25>[[image:DotPoint1.JPG|link=]]</td> |
| <td>'''Rolling Stock Objects''' are always attached to a track segment. They can be moved along the track or to a different track but they '''cannot be moved''' to a position that is to the left, right, above or below the track</td> | | <td>In the <span style="font-weight: 700; font-size: 15px; color: white; background-color: #797979;"> Assets Palette </span> select the asset to be used - you can enter text in the '''Search Box''' (e.g. '''Coal''') or use other search tools to narrow the list of assets. If the selected asset is '''Industry Enabled''' then its icon in the filtered list will resemble a factory [[image:IndustryIcon_AssetsFilter.png|link=]]</td> |
| </tr> | | </tr> |
| </table> | | </table> |
| </td> | | </td> |
| </tr> | | </tr> |
| </table>
| |
| <br>
| |
| <table width=1000 bgcolor=#000000 cellpadding=2>
| |
| <tr valign="top"> | | <tr valign="top"> |
| <td> | | <td>[[image:Bblue.png|link=]]</td> |
| <table width=996 bgcolor=#ffffff cellpadding=2> | | <td><span style="font-weight: 700; font-size: 15px;">In Surveyor - In the Route</span> |
| | <table> |
| <tr valign="top"> | | <tr valign="top"> |
| <td colspan=2><span style="font-weight: 700; font-size: 15px;">Step:</span> To move a '''Rolling Stock Object''' using the '''Placement Tool''':-</td> | | <td>[[image:DotPoint1.JPG|link=]]</td> |
| </tr> | | <td>Select the [[image:S20_FreeMoveToolIcon.png|link=|20px]] '''Free Move Tool''' or the [[image:S20_FineAdjustmentToolIcon.png|link=|20px]] '''Fine Adjustment Tool''' and <span style="font-weight: 700; font-size: 15px; background-color: lightcyan;"> Left Click </span> on an object in the scene. If the selected object is '''Industry Enabled''' then its '''Context Icon''' will resemble a factory [[image:IndustryIcon_S20.png|link=]] |
| | <table bgcolor=#ffffb0 cellpadding=2> |
| <tr valign="top"> | | <tr valign="top"> |
| <td width=20>[[image:DotPoint1.JPG|link=]]</td> | | <td width=25>[[image:NotePad.PNG|link=]]</td> |
| <td><span style="font-weight: 700; font-size: 15px; background-color: lightcyan;">Left Click and Drag</span> the '''Anchor Point''' (the small yellow dot attached to the object) to any position along the track or to another track. It can also be '''coupled''' to a consist and then '''decoupled''' by dragging the same '''Anchor Point'''.</td> | | <td>All industry enabled objects will have track attached to them. In some cases the industry will consist of track alone with no attached structures. In other cases the object may be invisible but it will have visible attachment points for normal track.</td> |
| </tr> | | </tr> |
| </table> | | </table> |
| </td> | | </td> |
| </tr> | | </tr> |
| </table>
| |
| <br>
| |
| <table bgcolor=#000000 cellpadding=2>
| |
| <tr valign="top"> | | <tr valign="top"> |
| <td> | | <td>[[image:DotPoint2.JPG|link=]]</td> |
| <table bgcolor=#ffffe0 cellpadding=2> | | <td>For additional confirmation, open its '''Context Menu''' (<span style="font-weight: 700; font-size: 15px; background-color: lightcyan;"> Left Click </span> on the icon or press the <span style="font-weight: 700; font-size: 15px; color: white; background-color: black;"> T </span> key).<br> |
| <tr valign="top"> | | The last selectable option in the menu will be <span style="font-weight: 700; font-size: 15px; color: white; background-color: black;"> Edit Details </span></td> |
| <td width=25>[[image:PencilTips.PNG|link=]]</td> | | </tr> |
| <td>Moving, coupling and decoupling '''Rolling Stock Objects''' can also be performed, with more control, using the [[image:S20_FreeMoveToolIcon.png|link=|20px]] '''[[#The Free Move Tool|Free Move Tool]]''' or the [[image:S20_FineAdjustmentToolIcon.png|link=|20px]] '''[[#The Fine Adjustment Tool|Fine Adjustment Tool]]'''.</td> | | </table> |
| | </td> |
| | </tr> |
| | <tr valign="top"> |
| | <td>[[image:Cblue.png|link=]]</td> |
| | <td><span style="font-weight: 700; font-size: 15px;">In Content Manager</span> |
| | <table> |
| | <tr valign="top"> |
| | <td>[[image:DotPoint1.JPG|link=]]</td> |
| | <td>In '''Content Manager''' set the '''Search Filter''' to '''Installed''' to locate industry assets that are already installed, or to '''Download Station''' to find those that have not been installed. You can enter text in the '''Search Box''' (e.g. '''Coal''') to narrow down the asset list. If an asset is '''Industry Enabled''' then it will have a small industry icon [[image:IndustryIcon_CM.png|link=]] at the start of its name</td> |
| | </tr> |
| | </table> |
| | </td> |
| | </tr> |
| | </table> |
| | </td> |
| </tr> | | </tr> |
| </table> | | </table> |
| Line 11,196: |
Line 11,488: |
| </table> | | </table> |
| <br> | | <br> |
| <table width=1000> <!-- BEGIN Section Nav Buttons --> | | <table width=1000> |
| | <tr valign="top"> |
| | <td>You can open the '''Industry Properties Window''' of a selected industry by one of two methods depending on your '''Trainz''' version and starting point |
| | <table> |
| <tr valign="top"> | | <tr valign="top"> |
| <td width=629><span id="PT: Delete Rolling"></span> | | <td width=25>[[image:Ablue.png|link=]]</td> |
| ===<span style="font-weight: 700; font-size: 17px; color: white; background-color: blue;"> Placement: Delete a Rolling Stock Object </span>=== | | <td width=550>from '''Surveyor''' using '''Trainz Plus''' or '''TRS22PE'''</td> |
| | <td width=25>[[image:Bblue.png|link=]]</td> |
| | <td>from '''Surveyor''' or '''Driver''' using '''Trainz Plus'''</td> |
| | </tr> |
| | </table> |
| </td> | | </td> |
| <td width=50> </td>
| |
| <td width=50> </td>
| |
| <td width=46>[[image:SkipMinorDown.png|link=#PT: Context Rolling|Down]][[image:SkipMinorUp.png|link=#PT: Move Rolling|Up]]</td> <!-- for Top and Minor Up/Down -->
| |
| <td width=75> </td>
| |
| <td width=75> </td>
| |
| <td width=75> </td> <!-- for Bottom -->
| |
| </tr> | | </tr> |
| </table> <!-- END Section Nav Buttons --> | | </table> |
|
| |
|
| <table width=1000> | | <table width=1000> |
| <tr valign="top"> | | <tr valign="top"> |
| <td colspan=2>To delete a rolling stock object (or any object) that has just been added by the [[image:S20_PlacementToolIcon.png|link=|20px]] '''Placement Tool''' and is still highlighted, choose one of the following:-<br> | | <td> |
| <span style="font-weight: 700; font-size: 15px;">Options:</span></td> | | <table width=550 bgcolor=#000000 cellpadding=2> |
| | <tr valign="top"> |
| | <td> |
| | <table bgcolor=#ffffff cellpadding=2> |
| | <tr valign="top"> |
| | <td colspan=2><span style="font-weight: 700; font-size: 15px;">Steps: To Open the Properties Window of an Industry Enabled Object in Surveyor:-</span></td> |
| | </tr> |
| | <tr valign="top"> |
| | <td colspan=2> |
| | <table> |
| | <tr valign="top"> |
| | <td> |
| | <table> |
| | <tr valign="top"> |
| | <td width=25>[[image:DotPoint1.JPG|link=]]</td> |
| | <td>Use the [[image:S20_FreeMoveToolIcon.png|link=|20px]] '''Free Move Tool''' to <span style="font-weight: 700; font-size: 15px; background-color: lightcyan;"> Left Click </span> on the industry object</td> |
| </tr> | | </tr> |
| <tr valign="top"> | | <tr valign="top"> |
| <td width=25>[[image:Ablue.png|link=]]</td> | | <td>[[image:DotPoint2.JPG|link=]]</td> |
| <td>press the <span style="font-weight: 700; font-size: 15px; color: white; background-color: black;"> Delete </span> key, <span style="font-weight: 700; font-size: 15px;">OR</span></td> | | <td>either press the <span style="font-weight: 700; font-size: 15px; color: white; background-color: black;"> T </span> key or <span style="font-weight: 700; font-size: 15px; background-color: lightcyan;"> Left Click </span> on its '''Context Icon''' [[image:IndustryIcon_S20.png|link=]]</td> |
| </tr> | | </tr> |
| <tr valign="top"> | | <tr valign="top"> |
| <td>[[image:Bblue.png|link=]]</td> | | <td width=25>[[image:DotPoint3.JPG|link=]]</td> |
| <td>open its '''Context Menu''' (<span style="font-weight: 700; font-size: 15px; background-color: lightcyan;"> Left Click </span> on its icon or press the <span style="font-weight: 700; font-size: 15px; color: white; background-color: black;"> T </span> key) and select the option <span style="font-weight: 700; font-size: 15px; color: white; background-color: black;"> Delete </span></td> | | <td>select the <span style="font-weight: 700; font-size: 15px; color: white; background-color: black;"> Edit Details </span> option</td> |
| </tr> | | </tr> |
| <tr valign="top"> | | <tr valign="top"> |
| <td colspan=2> | | <td colspan=2> |
| <table bgcolor=#000000 cellpadding=2> | | <br> |
| <tr valign="top">
| |
| <td>
| |
| <table bgcolor=#ffffb0 cellpadding=2> | | <table bgcolor=#ffffb0 cellpadding=2> |
| <tr valign="top"> | | <tr valign="top"> |
| <td width=25>[[image:NotePad.PNG|link=]]</td> | | <td width=25>[[image:NotePad.PNG|link=]]</td> |
| <td>If the object is not highlighted then you must first switch to either the [[image:S20_FreeMoveToolIcon.png|link=|20px]] '''[[#The Free Move Tool|Free Move Tool]]''' or the [[image:S20_FineAdjustmentToolIcon.png|link=|20px]] '''[[#The Fine Adjustment Tool|Fine Adjustment Tool]]''', select the object and then choose one of the above options</td> | | <td>If the <span style="font-weight: 700; font-size: 15px; color: lightgrey; background-color: black;"> Edit Details </span> option is greyed out and cannot be selected then the object is '''NOT''' an industry - it cannot load or unload products</td> |
| </tr> | | </tr> |
| </table> | | </table> |
| </td> | | </td> |
| | </tr> |
| | </table> |
| | </td> |
| | <td>[[image:ManageIndustriesContext_S20.png|250px|link=]]</td> |
| </tr> | | </tr> |
| </table> | | </table> |
| Line 11,240: |
Line 11,550: |
| </tr> | | </tr> |
| </table> | | </table> |
| <br>
| |
| <table width=1000> <!-- BEGIN Section Nav Buttons -->
| |
| <tr valign="top">
| |
| <td width=629><span id="PT: Context Rolling"></span>
| |
| ===<span style="font-weight: 700; font-size: 17px; color: white; background-color: blue;"> Placement: Rolling Stock Object Context Menu </span>===
| |
| </td> | | </td> |
| <td width=50> </td>
| |
| <td width=50> </td>
| |
| <td width=46>[[image:SkipMinorDown.png|link=#stepEyedropper|Down]][[image:SkipMinorUp.png|link=#PT: Delete Rolling|Up]]</td> <!-- for Top and Minor Up/Down -->
| |
| <td width=75> </td>
| |
| <td width=75> </td>
| |
| <td width=75> </td> <!-- for Bottom -->
| |
| </tr> | | </tr> |
| </table> <!-- END Section Nav Buttons --> | | </table> |
| | | </td> |
| <table width=1000 bgcolor=#000000 cellpadding=2> | | <td> |
| | <table width=450 bgcolor=#000000 cellpadding=2> |
| <tr valign="top"> | | <tr valign="top"> |
| <td> | | <td> |
| <table bgcolor=#ffffff cellpadding=2> | | <table bgcolor=#ffffff cellpadding=2> |
| <tr valign="top"> | | <tr valign="top"> |
| <td> | | <td colspan=2><span style="font-weight: 700; font-size: 15px;">Steps: To Open the Properties Window of a Industry Enabled Object from Dispatch Manager (<span style="background-color: yellow;">Trainz Plus only</span>):-</span></td> |
| <table>
| |
| <tr valign="middle">
| |
| <td width=35>[[image:Information.png|35px|link=]]</td>
| |
| <td><span style="font-weight: 700; font-size: 17px;">Rolling Stock Object Context Menu Options</span></td>
| |
| </tr> | |
| </table>
| |
| </td> | |
| </tr> | | </tr> |
| <tr valign="top"> | | <tr valign="top"> |
| <td>Once a rolling stock object has been placed you can open its '''Context Menu''' (<span style="font-weight: 700; font-size: 15px; background-color: lightcyan;"> Left Click </span> on its icon or press the <span style="font-weight: 700; font-size: 15px; color: white; background-color: black;"> T </span> key) to access a range of options and functions. The following '''Rolling Stock Object''' specific options will appear, along with other more general options, in the objects '''Context Menu'''. | | <td width=25>[[image:DotPoint1.JPG|link=]]</td> |
| ----</td>
| | <td>Open the [[image:SurveyorToolsIcon_S20.png|link=]] '''Tools Menu''' from the '''Surveyor/Driver Main Menu''' bar and select the '''Dispatch Manager''' option from the drop down menu</td> |
| </tr> | | </tr> |
| <tr valign="top"> | | <tr valign="top"> |
| <td> | | <td>[[image:DotPoint2.JPG|link=]]</td> |
| <table> | | <td>from the '''Dispatch Manager''' window identify the industry to be edited |
| | <table bgcolor=#ffffe0 cellpadding=2> |
| <tr valign="top"> | | <tr valign="top"> |
| <td><span style="font-weight: 700; font-size: 15px; color: white; background-color: black;"> Rotate Vehicle </span></td> | | <td width=25>[[image:PencilTips.PNG|link=]]</td> |
| <td>rotates (reverses) the facing direction of a selected rolling stock object. If more than one object has been selected then they will all have their directions reversed but they will remain in the same order</td> | | <td>Filter the items displayed using the option '''Industries'''. Only those scenery objects that are able to load/unload products will be listed</td> |
| </tr> | | </tr> |
| </table> | | </table> |
| <table>
| | </td> |
| <tr valign="top">
| |
| <td><span style="font-weight: 700; font-size: 15px; color: white; background-color: black;"> Change Consist Heading </span></td>
| |
| <td>reverses the consist heading as indicated by the directions of the red and green arrows above the start and end of the consist</td>
| |
| </tr>
| |
| </table>
| |
| <table>
| |
| <tr valign="top">
| |
| <td><span style="font-weight: 700; font-size: 15px; color: white; background-color: black;"> Rotate Consist Heading </span></td>
| |
| <td>the entire consist is reversed, both in the order of the vehicles and the direction they face</td>
| |
| </tr> | | </tr> |
| </table>
| |
| <table>
| |
| <tr valign="top"> | | <tr valign="top"> |
| <td><span style="font-weight: 700; font-size: 15px; color: white; background-color: black;"> Merge into Single Train </span></td> | | <td>[[image:DotPoint3.JPG|link=]]</td> |
| <td>when two or more separate rolling stock assets have been selected they will be coupled into a single consist. See [[image:PageLink.PNG|link=]] '''[[#FM: Couple Rolling|Coupling Rolling Stock Objects]]''' for more details</td>
| | <td><span style="font-weight: 700; font-size: 15px; background-color: lightcyan;"> Left Click </span> on the down '''Arrowhead''' icon of a product from the selected industry in the '''Status''' column<br> |
| | (e.g. [[image:DispatchManagerAwaitingCoalPickup_S20.png|link=]])<br> |
| | From the drop down menu select the <span style="font-weight: 700; font-size: 15px; color: white; background-color: black;"> Show <name_of_industry> </span> option to open the '''Industry Properties''' Window</td> |
| </tr> | | </tr> |
| </table>
| |
| <table>
| |
| <tr valign="top"> | | <tr valign="top"> |
| <td><span style="font-weight: 700; font-size: 15px; color: white; background-color: black;"> Save to Consist Asset... </span></td> | | <td>[[image:DotPoint4.JPG|link=]]</td> |
| <td>saves the selected rolling stock objects as a new consist asset in the <span style="font-weight: 700; font-size: 15px; color: white; background-color: #797979;"> Assets Palette </span></td>
| | <td>If you have opened the '''Dispatch Manager''' and '''Industry Properties''' Windows from '''Driver''' then <span style="font-weight: 700; font-size: 15px; background-color: lightcyan;"> Left Click </span> on the <span style="font-weight: 700; font-size: 15px; color: white; background-color: black;"> Enable Editing </span> button at the bottom of the '''Industry Properties''' Window</td> |
| </tr> | | </tr> |
| </table> | | </table> |
| See [[image:PageLink.PNG|link=]] '''[[#FM: Context Rolling|Rolling Stock Object Context Menu]]''' for the full list of '''Context Menu''' options for '''Rolling Stock Objects'''.</td>
| | </td> |
| </tr> | | </tr> |
| </table> | | </table> |
| Line 11,312: |
Line 11,595: |
| </table> | | </table> |
| <br> | | <br> |
| <!-- Eyedropper Tool Section -->
| | <table width=1000> |
| <table width=1000> <!-- BEGIN Nav Buttons Table --> | |
| <tr valign="top"> | | <tr valign="top"> |
| <td width=629><span id="stepEyedropper"></span> | | <td colspan=2>Four of several possible '''Industry Properties''' Windows are shown below</td> |
| ='''The Eyedropper Tool'''=
| |
| </td>
| |
| <td width=50>[[image:SkipDown.png|link=#skip Quick Steps|Skip Down]]</td>
| |
| <td width=50>[[image:SkipUp.png|link=#skip Placement: Rolling Stock Objects|Skip Up]]</td>
| |
| <td width=46>[[image:BackToTop.png|link=#top|alt=Top|Top]]</td>
| |
| <td width=75>[[image:NextUp.png|link=#stepPlacement|alt=Next Up|Top]]</td>
| |
| <td width=75>[[image:NextDown.png|link=#stepFreeMove|alt=Next Down|Next Down]]</td>
| |
| <td width=75>[[image:BackToBottom.png|link=#bottom|alt=Bottom|Bottom]]</td>
| |
| </tr> | | </tr> |
| </table> <!-- END Nav Buttons Table -->
| |
|
| |
| <table width=1000>
| |
| <tr valign="top"> | | <tr valign="top"> |
| <td> | | <td width=25>[[image:DotPoint1RedC.png|link=]]</td> |
| <table width=214 bgcolor=#000000 cellpadding=2> | | <td>'''Legacy Industry View''' - '''Industry Processes''' and/or '''Commodity Levels''' not set but Legacy View window with controls is present. See [[image:PageLink.PNG|link=]] '''[[#skipLegacyIndustries|Legacy Industries]]''' below for instructions on configuring this industry</td> |
| | </tr> |
| <tr valign="top"> | | <tr valign="top"> |
| <td> | | <td> </td> |
| <table width=210 bgcolor=#ffffff cellpadding=2> | | <td>[[image:IndustryProperties01_S20.png|link=]]</td> |
| | </tr> |
| <tr valign="top"> | | <tr valign="top"> |
| <td width=40>[[image:S20_DropperToolIcon.png|link=]]</td> | | <td colspan=2> </td> |
| <td width=170>'''Keyboard Shortcut:''' <span style="color: white; background-color: black; font-weight: 700; font-size: 17px;"> R </span></td>
| |
| </tr> | | </tr> |
| </table> | | <tr valign="top"> |
| </td> | | <td>[[image:DotPoint2RedC.png|link=]]</td> |
| | <td>'''Updated Industry View''' - '''Industry Processes''' and '''Commodity Levels''' set for at least one product. See [[image:PageLink.PNG|link=]] '''[[#skipLoadIndustries|Preload an Industry]]''' below for instructions on changing the configurion of this industry</td> |
| </tr> | | </tr> |
| </table> | | <tr valign="top"> |
| </td>
| | <td> </td> |
| <td width=786 bgcolor="lightcyan"><span style="font-weight: 700; font-size: 15px;">The <span style="color: white; background-color: black;"> Eyedropper Tool </span> identifies and selects objects in your '''Trainz World'''</span></td>
| | <td>[[image:IndustryProperties02_S20.png|link=]]</td> |
| </tr> | | </tr> |
| </table>
| |
| <br>
| |
| <table width=1000 bgcolor=#000000 cellpadding=2>
| |
| <tr valign="top"> | | <tr valign="top"> |
| <td> | | <td colspan=2> </td> |
| <table width=996 bgcolor=#ffe89a cellpadding=2>
| |
| <tr valign="middle">
| |
| <td width=45>[[image:PalettesIcon_S20.png|link=]]</td>
| |
| <td>Various function of this tool use the <span style="font-weight: 700; font-size: 15px; color: white; background-color: #797979;"> Tool Options Palette </span> <span style="font-weight: 700; font-size: 15px; color: white; background-color: #797979;"> Filter Palette </span> and the <span style="font-weight: 700; font-size: 15px; color: white; background-color: #797979;"> Assets Palette </span>. If these palettes are not visible on the screen when required then refer to [[image:PageLink.PNG|link=]] '''[[#Notes_Palettes|Notes: Palettes]]''' at the top of this document.</td>
| |
| </tr> | | </tr> |
| </table> | | <tr valign="top"> |
| </td> | | <td>[[image:DotPoint3RedC.png|link=]]</td> |
| | <td>'''Updated Passenger Industry View''' - '''Passenger Platforms''' properties set and additional legacy configuration options '''may''' be present. See [[image:PageLink.PNG|link=]] '''[[#skipLoadIndustries|Preload an Industry]]''' below for instructions on changing the configurion of this industry</td> |
| </tr> | | </tr> |
| </table>
| |
| <br>
| |
| <table width=1000 bgcolor=#000000 cellpadding=2>
| |
| <tr valign="top"> | | <tr valign="top"> |
| <td> | | <td> </td> |
| <table width=996 bgcolor=#ffffff cellpadding=2> | | <td>[[image:IndustryProperties03_S20.png|link=]]</td> |
| | </tr> |
| <tr valign="top"> | | <tr valign="top"> |
| <td width=200>[[image:EyedropperTools_S20.png|link=|alt=Eyedropper Tools]]</td> | | <td colspan=2> </td> |
| <td>
| |
| <table width=800 cellpadding=2>
| |
| <tr valign="top">
| |
| <td bgcolor=#ffffb0><span style="font-weight: 700; font-size: 15px; color: white; background-color: black;"> Tool Targets </span> The '''Eyedropper Tool''' has no '''Target''' options so it has no drop down menu list</td>
| |
| </tr> | | </tr> |
| <tr valign="top"> | | <tr valign="top"> |
| <td> | | <td>[[image:DotPoint4RedC.png|link=]]</td> |
| <table>
| | <td>'''"Probably Not an Industry View"''' - No '''Industry Processes''' and '''Commodity Levels''' present, nothing in the '''Legacy View-Details Window'''. See [[image:PageLink.PNG|link=]] '''[[#skipLegacyIndustries|Legacy Industries]]''' below for information on diagnosing this industry</td> |
| <tr valign="top">
| |
| <td width=10>[[image:DotPoint.JPG|10px|link=]]</td>
| |
| <td>When selected, this tool has a distinctive pointer icon which makes it easy to identify that the '''Eyedropper Tool''' is active [[image:EyedropperToolPointer_S20.png|link=]]</td> | |
| </tr> | | </tr> |
| <tr valign="top"> | | <tr valign="top"> |
| <td width=10>[[image:DotPoint.JPG|10px|link=]]</td> | | <td> </td> |
| <td>The '''Eyedropper''' is also available in the [[image:S20_PlacementToolIcon.png|link=|20px]] '''[[#The Placement Tool|Placement Tool]]''', [[image:S20_FreeMoveToolIcon.png|link=|20px]] '''[[#The Free Move Tool|Free Move Tool]]''', [[image:S20_FineAdjustmentToolIcon.png|link=|20px]] '''[[#The Fine Adjustment Tool|Fine Adjustment Tool]]''' and the [[image:S20_MarqueeToolIcon.png|link=|20px]] '''[[#The Marquee Tool|Marquee Tool]]''' by holding down the <span style="font-weight: 700; font-size: 15px; color: white; background-color: black;"> Alt </span> key - see below for more details</td> | | <td>[[image:IndustryProperties04_S20.png|link=]]</td> |
| </tr> | | </tr> |
| </table> | | </table> |
| | <br> |
| | <table width=1000> <!-- BEGIN Nav Buttons Table --> |
| | <tr valign="top"> |
| | <td width=629><span id="skipConfigureIndustries"></span> |
| | =='''Configuring an Industry'''== |
| </td> | | </td> |
| | <td width=50>[[image:SkipDown.png|link=#skipLoadIndustries|Skip Down]]</td> |
| | <td width=50>[[image:SkipUp.png|link=#stepManageIndustries|Skip Up]]</td> |
| | <td width=46> </td> |
| | <td width=75>[[image:HeadingUp.png|link=#stepManageIndustries|alt=Heading|To Heading]]</td> |
| | <td width=75> </td> |
| | <td width=75> </td> |
| </tr> | | </tr> |
| | </table> <!-- END Nav Buttons Table --> |
| | |
| | <table width=1000 bgcolor="lightcyan" cellpadding=2> |
| <tr valign="top"> | | <tr valign="top"> |
| <td bgcolor=#ffffb0><span style="font-weight: 700; font-size: 15px; color: white; background-color: black;"> Tool Actions </span> The '''Eyedropper Tool''' has no '''Action''' options so it has no drop down menu list</td> | | <td width=10>[[image:BlueDot10x10.png|link=]]</td> |
| </tr> | | <td>Most industries have few, if any, settings apart from product levels that can be edited</td> |
| </table>
| |
| </td>
| |
| </tr>
| |
| </table>
| |
| </td> | |
| </tr> | | </tr> |
| </table> | | </table> |
| <br> | | <br> |
| <table width=1000> <!-- BEGIN Section Nav Buttons --> | | <table bgcolor=#000000 cellpadding=2> |
| <tr valign="top"> | | <tr valign="top"> |
| <td width=629><span id="skip Quick Steps"></span> | | <td> |
| =='''Quick Steps'''==
| | <table bgcolor=#ffffff cellpadding=2> |
| </td>
| | <tr valign="middle"> |
| <td width=50>[[image:SkipDown.png|link=#skip Narrowing the Search|Skip Down]]</td> | | <td width=35>[[image:Information35.png|link=]]</td> |
| <td width=50>[[image:SkipUp.png|link=#stepEyedropper|Skip Up]]</td>
| | <td>In almost all industries the only non-product property that can be edited is the industry name</td> |
| <td width=46> </td> <!-- for Top --> | |
| <td width=75>[[image:HeadingUp.png|link=#stepEyedropper|alt=Heading|To Heading]]</td> | |
| <td width=75> </td> | |
| <td width=75> </td> <!-- for Bottom -->
| |
| </tr> | | </tr> |
| </table> <!-- END Section Nav Buttons -->
| |
|
| |
| ===From the Eyedropper Tool===
| |
|
| |
| <table width=1000>
| |
| <tr valign="top">
| |
| <td width=350>[[image:EyedropperTools_S20.png|link=|alt=Eyedropper Tools]]<br><br>
| |
| [[image:EyedropperToolAssetSelected_S20.png|link=|alt=Asset filter set by the Eyedropper in S20]]</td>
| |
| <td>
| |
| <table width=650 bgcolor=#000000 cellpadding=2>
| |
| <tr valign="top">
| |
| <td>
| |
| <table width=646 bgcolor=#ffffff cellpadding=2>
| |
| <tr valign="top"> | | <tr valign="top"> |
| <td colspan=2><span style="font-weight: 700; font-size: 15px;">Steps:</span> To use the '''Eyedropper Tool''':-</td> | | <td colspan=2><span style="font-weight: 700; font-size: 15px;">Steps: To Edit the Name of an Industry Object:-</span></td> |
| </tr> | | </tr> |
| <tr valign="top"> | | <tr valign="top"> |
| <td>
| | <td width=25>[[image:DotPoint1.JPG|link=]]</td> |
| <table>
| | <td>Select the [[image:S20_FreeMoveToolIcon.png|link=|20px]] '''Free Move Tool''' or the [[image:S20_FineAdjustmentToolIcon.png|link=|20px]] '''Fine Adjustment Tool''' and <span style="font-weight: 700; font-size: 15px; background-color: lightcyan;"> Left Click </span> on an object in the scene</td> |
| <tr valign="top">
| |
| <td width=20>[[image:DotPoint1.JPG|link=]]</td> | |
| <td>In the <span style="font-weight: 700; font-size: 15px; color: white; background-color: #797979;"> Tools Palette </span> select the [[image:S20_DropperToolIcon.png|link=|20px]] '''Eyedropper Tool''' or press the <span style="font-weight: 700; font-size: 15px; color: white; background-color: black;"> R </span> key</td> | |
| </tr> | | </tr> |
| <tr valign="top"> | | <tr valign="top"> |
| <td>[[image:DotPoint2.JPG|link=]]</td> | | <td>[[image:DotPoint2.JPG|link=]]</td> |
| <td>move the pointer, which will look like an '''Eyedropper''', over any object to reveal its name in a <span style="font-weight: 700; font-size: 15px; color: white; background-color: black;"> ToolTip </span> which will appear below the pointer</td> | | <td>Open the <span style="font-weight: 700; font-size: 15px; color: white; background-color: #797979;"> Info Palette </span></td> |
| </tr> | | </tr> |
| <tr valign="top"> | | <tr valign="top"> |
| <td>[[image:DotPoint3.JPG|link=]]</td> | | <td>[[image:DotPoint3.JPG|link=]]</td> |
| <td><span style="font-weight: 700; font-size: 15px;">Optional:</span> hold the '''eyedropper''' over any object for a few seconds to reveal more information such as its '''<kuid>''' code</td> | | <td>Edit or type the name in the <span style="font-weight: 700; font-size: 15px; color: white; background-color: black;"> Name </span> text entry box. See [[image:PageLink.PNG|link=]] '''[[#The Info Palette|Info Palette]]''' for the details</td> |
| </tr> | | </tr> |
| <tr valign="top"> | | <tr valign="top"> |
| <td>[[image:DotPoint4.JPG|link=]]</td> | | <td>[[image:DotPoint4.JPG|link=]]</td> |
| <td><span style="font-weight: 700; font-size: 15px;">Optional: <span style="background-color: lightcyan;"> Left Click </span></span> on the object to identify it in the <span style="font-weight: 700; font-size: 15px; color: white; background-color: #797979;"> Assets Palette </span> It will be highlighted in light grey [[image:AssetFilterNameHighlighted_S20.png|link=]]</td> | | <td>press the <span style="font-weight: 700; font-size: 15px; color: white; background-color: black;"> Enter </span> key</td> |
| </tr> | | </tr> |
| </table> | | </table> |
| </td> | | </td> |
| <td width=240>[[image:EyedropperToolSelect2_S20.png|link=|alt=Eyedropper]]</td>
| |
| </tr> | | </tr> |
| | </table> |
| | <br> |
| | <table width=1000> <!-- BEGIN Nav Buttons Table --> |
| | <tr valign="top"> |
| | <td width=629><span id="skipLoadIndustries"></span> |
| | =='''Preload an Industry'''== |
| | </td> |
| | <td width=50>[[image:SkipDown.png|link=#skipLegacyIndustries|Skip Down]]</td> |
| | <td width=50>[[image:SkipUp.png|link=#skipConfigureIndustries|Skip Up]]</td> |
| | <td width=46> </td> |
| | <td width=75>[[image:HeadingUp.png|link=#stepManageIndustries|alt=Heading|To Heading]]</td> |
| | <td width=75> </td> |
| | <td width=75> </td> |
| | </tr> |
| | </table> <!-- END Nav Buttons Table --> |
| | |
| | <table width=1000 bgcolor="lightcyan" cellpadding=2> |
| | <tr valign="top"> |
| | <td width=10>[[image:BlueDot10x10.png|link=]]</td> |
| | <td>An industry can be preloaded with a product, or multiple products, that were specified when the industry was created</td> |
| | </tr> |
| | <tr valign="top"> |
| | <td>[[image:BlueDot10x10.png|link=]]</td> |
| | <td>Many industries are "locked" in that only one or a few set products will be allowed</td> |
| | </tr> |
| | </table> |
| | <br> |
| | <table width=1000 bgcolor=#000000 cellpadding=2> |
| | <tr valign="top"> |
| | <td> |
| | <table width=996 bgcolor=#ffffff cellpadding=2> |
| <tr valign="top"> | | <tr valign="top"> |
| <td colspan=2> | | <td colspan=2> |
| <table> | | <table> |
| <tr valign="top"> | | <tr valign="middle"> |
| <td>[[image:DotPoint5.JPG|link=]]</td> | | <td width=35>[[image:Information35.png|link=]]</td> |
| <td><span style="font-weight: 700; font-size: 15px;">Optional: <span style="background-color: lightcyan;"> Left Click </span></span> on the asset name in the <span style="font-weight: 700; font-size: 15px; color: white; background-color: #797979;"> Assets Palette </span> list to switch control to the '''Placement Tool''' so the next <span style="font-weight: 700; font-size: 15px; background-color: lightcyan;"> Left Click </span> in your '''Trainz World''' will add the selected asset to your layout</td> | | <td>There are so many different types of industries and products available, and many variations of each, that it is impossible to cover them all in this document. A few of the more common possibilities are shown here</td> |
| </tr> | | </tr> |
| </table> | | </table> |
| Line 11,462: |
Line 11,739: |
| </table> | | </table> |
| <br> | | <br> |
| <table bgcolor=#000000 cellpadding=2> | | <table width=1000 bgcolor=#000000 cellpadding=2> |
| <tr valign="top"> | | <tr valign="top"> |
| <td> | | <td> |
| <table bgcolor=#ffffb0 cellpadding=2> | | <table width=996 bgcolor=#ffffb0 cellpadding=2> |
| <tr valign="top"> | | <tr valign="top"> |
| <td width=25>[[image:NotePad.PNG|link=]]</td> | | <td width=25>[[image:NotePad.PNG|link=]]</td> |
| <td><span style="font-size: 17px;">'''Notes:'''</span><br> | | <td>If there is nothing labelled '''Commodity Levels''' and '''Industry Processes''' in the selected objects properties then it may not be an industry or it may be a '''Legacy Industry'''. Check the section [[image:PageLink.PNG|link=]] '''[[#skipLegacyIndustries|Legacy Industries]]''' below</td> |
| ----
| | </tr> |
| | </table> |
| </td> | | </td> |
| </tr> | | </tr> |
| | </table> |
| | <br> |
| | <table width=1000 bgcolor=#000000 cellpadding=2> |
| <tr valign="top"> | | <tr valign="top"> |
| <td colspan=2>Using the '''Eyedropper Tool''' to select an object (<span style="font-weight: 700;">Step <span style="font-size: 15px; color: white; background-color: red;"> 5 </span></span> above) will also copy some of that objects properties into the <span style="font-weight: 700; font-size: 15px; color: white; background-color: #797979;"> Tool Options Palette </span>. These would include:-</td> | | <td> |
| | <table width=996 bgcolor=#ffffff cellpadding=2> |
| | <tr valign="top"> |
| | <td width=35>[[image:Information35.png|link=]]</td> |
| | <td> |
| | <table> |
| | <tr valign="top"> |
| | <td colspan=2>The <span style="font-weight: 700; font-size: 15px; color: white; background-color: black;"> Commodity Levels </span> section sets the initial or starting quantity of each product handled by that industry. After the session starts that commodity level will increase or decrease over time to new levels controlled by:-</td> |
| </tr> | | </tr> |
| <tr valign="top"> | | <tr valign="top"> |
| <td width=10>[[image:DotPoint.JPG|10px|link=]]</td> | | <td width=10>[[image:DotPoint.JPG|10px|link=]]</td> |
| <td><span style="font-weight: 700; font-size: 15px; color: gold; background-color: black;"> Height </span> for a scenery (mesh) object</td> | | <td>the '''Production''' of that commodity by the industry</td> |
| </tr> | | </tr> |
| <tr valign="top"> | | <tr valign="top"> |
| <td>[[image:DotPoint.JPG|10px|link=]]</td> | | <td>[[image:DotPoint.JPG|10px|link=]]</td> |
| <td><span style="font-weight: 700; font-size: 15px; color: gold; background-color: black;"> Scale </span> and <span style="font-weight: 700; font-size: 15px; color: gold; background-color: black;"> Rotation </span> for a ground texture</td> | | <td>the '''Consumption''' of that commodity by the industry</td> |
| </tr> | | </tr> |
| <tr valign="top"> | | <tr valign="top"> |
| <td>[[image:DotPoint.JPG|10px|link=]]</td> | | <td>[[image:DotPoint.JPG|10px|link=]]</td> |
| <td><span style="font-weight: 700; font-size: 15px; color: gold; background-color: black;"> Grade </span> and <span style="font-weight: 700; font-size: 15px; color: gold; background-color: black;"> Height </span> for a spline object. If the spline has a slope then the <span style="font-weight: 700; font-size: 15px; color: gold; background-color: black;"> Height </span> at the point clicked will be used </td> | | <td>new deliveries of that commodity by consists</td> |
| </tr> | | </tr> |
| </table> | | <tr valign="top"> |
| | <td>[[image:DotPoint.JPG|10px|link=]]</td> |
| | <td>pickups of that commodity by consists</td> |
| | </tr> |
| | <tr valign="top"> |
| | <td colspan=2>The <span style="font-weight: 700; font-size: 15px; color: white; background-color: black;"> Industry Processes </span> section sets the '''Production''' and '''Consumption''' of each product handled by that industry</td> |
| | </tr> |
| | <tr valign="top"> |
| | <td>[[image:DotPoint.JPG|10px|link=]]</td> |
| | <td>the '''Produces''' setting controls the '''Production Rate''' of that commodity by the industry</td> |
| | </tr> |
| | <tr valign="top"> |
| | <td>[[image:DotPoint.JPG|10px|link=]]</td> |
| | <td>the '''Consumes''' setting controls the '''Consumption Rate''' of that commodity by the industry</td> |
| | </tr> |
| | <tr valign="top"> |
| | <td colspan=2>The term '''Rate''' refers how much of the commodity is produced or consumed during a set time period. This period may be fixed by the industry asset and cannot be changed. However, many industry assets will allow you to set the time period in the '''Legacy Settings''' for the industry (if available). See the '''Duration''' control in <span style="font-weight: 700; font-size: 15px;">Step 3: Configure the Processes Tab</span> in the industry example at [[image:PageLink.PNG|link=]] '''[[#ConfigureIndustryExample|Legacy Industries]]''' below</td> |
| | </tr> |
| | </table> |
| </td> | | </td> |
| </tr> | | </tr> |
| Line 11,495: |
Line 11,801: |
| </table> | | </table> |
| <br> | | <br> |
| ===From the Brush, Placement, Free Move, Fine Adjustment, Marquee Tools===
| | <table width=1000> |
| | | <tr valign="top"> |
| <table width=1000 bgcolor="lightcyan" cellpadding=2> | | <td><span style="font-weight: 700; font-size: 15px;"><span style="color: white; background-color: blue;"> Example 1: </span> Single Product Industry - Input or Output Only</span></td> |
| | </tr> |
| <tr valign="top"> | | <tr valign="top"> |
| <td width=10>[[image:BlueDot10x10.png|link=]]</td> | | <td><span style="font-weight: 700; font-size: 15px;">Typical Uses:</span> Mines, locomotive coal and water towers, power stations</td> |
| <td>You can access the '''Eyedropper''' while using any of the other tools in the <span style="font-weight: 700; font-size: 15px; color: white; background-color: #797979;"> Tools Palette </span></td>
| |
| </tr> | | </tr> |
| </table> | | </table> |
| | |
| | <table width=1000> |
| | <tr valign="top"> |
| | <td width=520>[[image:ManageIndustriesCoalMine1_S20.png|link=]]<br> |
| <br> | | <br> |
| <table width=1000 bgcolor=#000000 cellpadding=2> | | <table bgcolor=#000000 cellpadding=2> |
| <tr valign="top"> | | <tr valign="top"> |
| <td> | | <td> |
| <table bgcolor=#ffffff cellpadding=2> | | <table bgcolor=#ffffe0 cellpadding=2> |
| <tr valign="top"> | | <tr valign="top"> |
| <td colspan=2><span style="font-weight: 700; font-size: 15px;">Steps:</span> To access the '''Eyedropper''' from the other tools:-</td> | | <td width=25>[[image:PencilTips.PNG|link=]]</td> |
| </tr> | | <td>To create an industry that will "forever" produce or consume an endless supply of a product:- |
| | <table> |
| <tr valign="top"> | | <tr valign="top"> |
| <td width=25>[[image:DotPoint1.JPG|link=]]</td> | | <td width=10>[[image:DotPoint.JPG|10px|link=]]</td> |
| <td>hold down the <span style="font-weight: 700; font-size: 15px; color: white; background-color: black;"> Alt </span> key. The [[image:S20_DropperToolIcon.png|link=|20px]] '''Eyedropper Tool''' will be temporarily selected in the <span style="font-weight: 700; font-size: 15px; color: white; background-color: #797979;"> Tools Palette </span></td> | | <td><span style="font-weight: 700; font-size: 15px;">For <span style=" color: white; background-color: black;"> Endless Production </span></span> set:- |
| </tr> | | <table> |
| <tr valign="top"> | | <tr valign="top"> |
| <td>[[image:DotPoint2.JPG|link=]]</td> | | <td>[[image:RedDot10x10.png|link=]]</td> |
| <td>move the '''Eyedropper''' onto an object to identify it as described above. The name and '''<kuid>''' of the object will appear in the pointer tooltip. If you release the <span style="font-weight: 700; font-size: 15px; color: white; background-color: black;"> Alt </span> key without selecting an object then you will be returned to your originally selected tool in the <span style="font-weight: 700; font-size: 15px; color: white; background-color: #797979;"> Tools Palette </span></td> | | <td>'''Commodity Level''' for that product to '''100%'''</td> |
| </tr> | | </tr> |
| <tr valign="top"> | | <tr valign="top"> |
| <td>[[image:DotPoint3.JPG|link=]]</td> | | <td>[[image:RedDot10x10.png|link=]]</td> |
| <td>while holding down the <span style="font-weight: 700; font-size: 15px; color: white; background-color: black;"> Alt </span> key <span style="font-weight: 700; font-size: 15px; background-color: lightcyan;"> Left Click </span> on the object to select it in the <span style="font-weight: 700; font-size: 15px; color: white; background-color: #797979;"> Assets Palette </span> and copy some of its properties into the <span style="font-weight: 700; font-size: 15px; color: white; background-color: #797979;"> Tool Options Palette </span> | | <td>'''Industry Process - Produces''' for that product to '''100%'''</td> |
| <table bgcolor=#ffffe0 cellpadding=2>
| |
| <tr valign="top">
| |
| <td width=25>[[image:PencilTips.PNG|link=]]</td>
| |
| <td>If you change your mind you can <span style="font-weight: 700; font-size: 15px; background-color: lightcyan;"> Left Click </span> on another object if you are still holding down the <span style="font-weight: 700; font-size: 15px; color: white; background-color: black;"> Alt </span> key. If you have already released the <span style="font-weight: 700; font-size: 15px; color: white; background-color: black;"> Alt </span> key then hold it down again to select another object</td>
| |
| </tr> | | </tr> |
| </table> | | </table> |
| </td> | | </td> |
| | </tr> |
| | </table> |
| | <table> |
| | <tr valign="top"> |
| | <td width=10>[[image:DotPoint.JPG|10px|link=]]</td> |
| | <td><span style="font-weight: 700; font-size: 15px;">For <span style=" color: white; background-color: black;"> Endless Consumption </span></span> set:- |
| | <table> |
| | <tr valign="top"> |
| | <td>[[image:RedDot10x10.png|link=]]</td> |
| | <td>'''Commodity Level''' for that product to '''0%'''</td> |
| </tr> | | </tr> |
| <tr valign="top"> | | <tr valign="top"> |
| <td>[[image:DotPoint4.JPG|link=]]</td> | | <td>[[image:RedDot10x10.png|link=]]</td> |
| <td>after a <span style="font-weight: 700; font-size: 15px; background-color: lightcyan;"> Left Click </span> on the selected object release the <span style="font-weight: 700; font-size: 15px; color: white; background-color: black;"> Alt </span> key. The '''Placement Tool''' will be selected in the <span style="font-weight: 700; font-size: 15px; color: white; background-color: #797979;"> Tools Palette </span>. This means that the next <span style="font-weight: 700; font-size: 15px; background-color: lightcyan;"> Left Click </span> in your '''Trainz World''' will add the selected asset to your layout</td> | | <td>'''Industry Process - Consumes''' for that product to '''100%'''</td> |
| </tr> | | </tr> |
| </table> | | </table> |
| Line 11,538: |
Line 11,855: |
| </tr> | | </tr> |
| </table> | | </table> |
| <br>
| |
| <table width=1000> <!-- BEGIN Section Nav Buttons -->
| |
| <tr valign="top">
| |
| <td width=629><span id="skip Narrowing the Search"></span>
| |
| =='''Narrowing the Search'''==
| |
| </td> | | </td> |
| <td width=50>[[image:SkipDown.png|link=#stepFreeMove|Skip Down]]</td>
| |
| <td width=50>[[image:SkipUp.png|link=#skip Quick Steps|Skip Up]]</td>
| |
| <td width=46> </td> <!-- for Top -->
| |
| <td width=75>[[image:HeadingUp.png|link=#stepEyedropper|alt=Heading|To Heading]]</td>
| |
| <td width=75> </td>
| |
| <td width=75> </td> <!-- for Bottom -->
| |
| </tr>
| |
| </table> <!-- END Section Nav Buttons -->
| |
|
| |
| <table width=1000 bgcolor="lightcyan" cellpadding=2>
| |
| <tr valign="top">
| |
| <td width=10>[[image:BlueDot10x10.png|link=]]</td>
| |
| <td>Sometimes (or often) a scene will be too crowded with different scenery objects to be able to use the '''Eyedropper Tool''' to easily select a single object. In these cases additional options are available to help "remove the clutter".</td>
| |
| </tr> | | </tr> |
| </table> | | </table> |
| <br>
| | </td> |
| <table width=1000 bgcolor=#000000 cellpadding=2>
| |
| <tr valign="top">
| |
| <td>
| |
| <table width=996 bgcolor=#ffe89a cellpadding=2>
| |
| <tr valign="middle">
| |
| <td width=45>[[image:PalettesIcon_S20.png|link=]]</td>
| |
| <td>If the <span style="font-weight: 700; font-size: 15px; color: white; background-color: #797979;"> Filter Palette </span> and <span style="font-weight: 700; font-size: 15px; color: white; background-color: #797979;"> Assets Palette </span> are not visible on the screen then refer to [[image:PageLink.PNG|link=]] '''[[#Notes_Palettes|Notes: Palettes]]''' at the top of this document.</td>
| |
| </tr> | | </tr> |
| </table> | | </table> |
| </td> | | </td> |
| | <td> |
| | <table> |
| | <tr valign="top"> |
| | <td colspan=2><span style="font-weight: 700; font-size: 15px; color: white; background-color: black;"> Commodity Levels </span><br> |
| | Figures are those in the example shown in the image on the left</td> |
| </tr> | | </tr> |
| </table>
| |
| <br>
| |
| <table width=1000>
| |
| <tr valign="top"> | | <tr valign="top"> |
| <td colspan=3>The <span style="font-weight: 700; font-size: 15px; color: white; background-color: #797979;"> Filter Palette </span> top Drop Down Menu, its '''Filter Actions''', controls how the filters are applied to your '''Trainz World'''. To open the list <span style="font-weight: 700; font-size: 15px; background-color: lightcyan;"> Left Click </span> on the drop down box or on the double arrows on its right.</td> | | <td width=10>[[image:DotPoint.JPG|10px|link=]]</td> |
| | <td>The product name and icon - '''Coal'''</td> |
| </tr> | | </tr> |
| <tr valign="top"> | | <tr valign="top"> |
| <td width=205>[[image:FilterPaletteOpenActions_S20.png|link=]]</td> | | <td>[[image:DotPoint.JPG|10px|link=]]</td> |
| <td width=350>The top drop down box will provide four actions:-<br> | | <td>The quantity of the product currently stored ('''500000 units''') and the maximum storage level ('''1000000 units''')</td> |
| <table> | | </tr> |
| | <tr valign="top"> |
| | <td>[[image:DotPoint.JPG|10px|link=]]</td> |
| | <td>The process used by this product ('''Output''')</td> |
| | </tr> |
| | <tr valign="top"> |
| | <td>[[image:DotPoint.JPG|10px|link=]]</td> |
| | <td>An adjustable bar graph showing the above figures as a percentage ('''50%''')</td> |
| | </tr> |
| <tr valign="top"> | | <tr valign="top"> |
| <td width=10>[[image:BulletTick.png|link=]]</td> | | <td colspan=2><span style="font-weight: 700; font-size: 15px; color: white; background-color: black;"> Industry Processes </span><br> |
| <td>'''Filter Disabled'''</td> | | Figures are those in the example shown in the image on the left</td> |
| </tr> | | </tr> |
| <tr valign="top"> | | <tr valign="top"> |
| <td>[[image:BulletTick.png|link=]]</td> | | <td>[[image:DotPoint.JPG|10px|link=]]</td> |
| <td>'''Filter List'''</td> | | <td>'''Green Arrow''' leading into the product icon plus the words "Output" and "Produces" indicates a '''Production Process'''</td> |
| </tr> | | </tr> |
| <tr valign="top"> | | <tr valign="top"> |
| <td>[[image:BulletTick.png|link=]]</td> | | <td>[[image:DotPoint.JPG|10px|link=]]</td> |
| <td>'''Filter Selection'''</td> | | <td>The quantity of the product produced every '''30 seconds''' ('''500 units''')</td> |
| </tr> | | </tr> |
| <tr valign="top"> | | <tr valign="top"> |
| <td>[[image:BulletTick.png|link=]]</td> | | <td>[[image:DotPoint.JPG|10px|link=]]</td> |
| <td>'''Filter Visibility'''</td> | | <td>An adjustable bar graph showing the above figure as a percentage ('''<1%''')</td> |
| </tr> | | </tr> |
| </table> | | <tr valign="top"> |
| </td>
| | <td>[[image:DotPoint.JPG|10px|link=]]</td> |
| <td> | | <td>The time ('''500 minutes''') needed to fill the available storage at the set production rate</td> |
| <br>
| |
| [[image:FilterPaletteActions_S20.png|link=]]</td> | |
| </tr> | | </tr> |
| </table>
| |
| <br>
| |
| <table width=1000>
| |
| <tr valign="top"> | | <tr valign="top"> |
| <td>These actions will affect the display and selection of objects in your '''Trainz World'''<br> | | <td colspan=2> |
| <table bgcolor=#000000> | | <table bgcolor=#000000 cellpadding=2> |
| <tr valign="top"> | | <tr valign="top"> |
| <td> | | <td> |
| <table bgcolor=#ffffff> | | <table bgcolor=#ffffb0 cellpadding=2> |
| <tr valign="top"> | | <tr valign="top"> |
| <td>
| | <td width=25>[[image:NotePad.PNG|link=]]</td> |
| <table>
| | <td>The length of the green bar is set by applying the percentage figure to the total width of the bar graph space, not the light grey bar behind it. The length of the green bar, but not its percentage figure, will change as the window is resized</td> |
| <tr valign="middle">
| |
| <td width=35>[[image:Information.png|35px|link=]]</td> | |
| <td><span style="font-weight: 700; font-size: 17px;">Filter Actions</span></td> | |
| </tr> | | </tr> |
| </table> | | </table> |
| </td> | | </td> |
| </tr> | | </tr> |
| <tr valign="top"> | | </table> |
| <td>
| | </td> |
| <table>
| |
| <tr valign="top">
| |
| <td><span style="font-weight: 700; font-size: 15px; color: white; background-color: black;"> Filter Disabled </span></td>
| |
| <td>this action disables the '''Filter Palette''' so that it has no filtering effect on the '''Assets Palette''' which will then display '''All (Installed) Content''' including those assets that are '''Obsolete''' or '''Disabled'''. Its main use is in the '''Bulk Replace Assets Tool''' (available in <span style="font-weight:700; background-color: yellow;"> Trainz Plus only</span>) but it can also be used to temporarily switch off the filters without having to delete them</td>
| |
| </tr> | | </tr> |
| </table> | | </table> |
| </td> | | </td> |
| </tr> | | </tr> |
| | </table> |
| | <br> |
| | <table width=1000> |
| <tr valign="top"> | | <tr valign="top"> |
| <td> | | <td> |
| <table> | | <table> |
| <tr valign="top"> | | <tr valign="top"> |
| <td><span style="font-weight: 700; font-size: 15px; color: white; background-color: black;"> Filter List </span></td> | | <td width=410>[[image:ManageIndustriesCoalMine1a_S20.png|link=]]</td> |
| <td>this action is the default setting for the <span style="font-weight: 700; font-size: 15px; color: white; background-color: #797979;"> Filter Palette </span> and displays, in both the <span style="font-weight: 700; font-size: 15px; color: white; background-color: #797979;"> Filter Palette </span> and the <span style="font-weight: 700; font-size: 15px; color: white; background-color: #797979;"> Assets Palette </span>, all the '''installed''' assets that match any search entered using the '''Filter Selection Options''' (the '''Asset Type''' icons and the '''Drop Down List''' of asset types, search filters and picklists). It has no effect on the operation of the tools in the <span style="font-weight: 700; font-size: 15px; color: white; background-color: #797979;"> Tools Palette</span> or on the objects displayed on the screen in your '''Trainz World'''</td>
| | <td> |
| </tr> | | <table bgcolor=#000000 cellpadding=2> |
| </table> | |
| </td>
| |
| </tr>
| |
| <tr valign="top"> | | <tr valign="top"> |
| <td> | | <td> |
| <table> | | <table bgcolor=#ffffff cellpadding=2> |
| <tr valign="top"> | | <tr valign="top"> |
| <td><span style="font-weight: 700; font-size: 15px; color: white; background-color: black;"> Filter Selection </span></td> | | <td colspan=2><span style="font-weight: 700; font-size: 15px;">Steps: To Alter the Stored Product Quantity:-</span></td> |
| <td>this action will restrict the tools in the <span style="font-weight: 700; font-size: 15px; color: white; background-color: #797979;"> Tools Palette </span> to those objects that are in the <span style="font-weight: 700; font-size: 15px; color: white; background-color: #797979;"> Assets Palette </span> filtered list. Objects that are not in the filtered list will still be visible in your '''Trainz World''' but cannot be selected</td>
| |
| </tr> | | </tr> |
| </table> | | <tr valign="top"> |
| </td> | | <td width=25>[[image:DotPoint1.JPG|link=]]</td> |
| | <td>move the mouse pointer into the light grey area at the end of the '''green bar''' and <span style="font-weight: 700; font-size: 15px; background-color: lightcyan;"> Left Click and Drag </span> it '''Left''' or '''Right''' to the required position. To set the '''Product Quantity''' to '''zero''' drag the bar to the extreme left</td> |
| </tr> | | </tr> |
| <tr valign="top"> | | <tr valign="top"> |
| <td> | | <td colspan=2>The figures showing the quantity stored and the time needed to fill (or empty) the storage space will be updated as the end of the bar is moved</td> |
| <table>
| |
| <tr valign="top">
| |
| <td><span style="font-weight: 700; font-size: 15px; color: white; background-color: black;"> Filter Visibility </span></td>
| |
| <td>this action will '''hide''' all objects in your '''Trainz World''' that are not in the <span style="font-weight: 700; font-size: 15px; color: white; background-color: #797979;"> Assets Palette </span> filtered list which also means that they cannot be selected. The only exceptions are '''Ground Textures''' and '''Effect Layers''' which will be visible but, unless they are also in the filtered list, cannot selected.</td>
| |
| </tr> | | </tr> |
| </table> | | </table> |
| Line 11,669: |
Line 11,956: |
| </tr> | | </tr> |
| </table> | | </table> |
| <br>
| | |
| <table bgcolor=#000000 width=1000 cellpadding=2> | | <table width=1000> |
| <tr valign="top"> | | <tr valign="top"> |
| <td> | | <td> |
| <table bgcolor=#ffffe0 width=996 cellpadding=2> | | <table> |
| <tr valign="top"> | | <tr valign="top"> |
| <td width=25>[[image:PencilTips.PNG|link=]]</td> | | <td colspan=2><br></td> |
| <td>These filter options can be used with the [[image:S20_PlacementToolIcon.png|link=|20px]] '''[[#The Placement Tool|Placement Tool]]''', [[image:S20_FreeMoveToolIcon.png|link=|20px]] '''[[#The Free Move Tool|Free Move Tool]]''', [[image:S20_FineAdjustmentToolIcon.png|link=|20px]] '''[[#The Fine Adjustment Tool|Fine Adjustment Tool]]''' and the [[image:S20_MarqueeToolIcon.png|link=|20px]] '''[[#The Marquee Tool|Marquee Tool]]'''<br>
| |
| as well as with the [[image:S20_DropperToolIcon.png|link=|20px]] '''[[#The Eyedropper Tool|Eyedropper Tool]]'''</td>
| |
| </tr> | | </tr> |
| </table>
| |
| </td>
| |
| </tr>
| |
| </table>
| |
| <br>
| |
|
| |
| As an example the following images show the progressive application of the ''' Filter Actions'''.<br>
| |
|
| |
| <table width=1100>
| |
| <tr valign="top"> | | <tr valign="top"> |
| <td>[[image:AssetsPaletteFilteredScene2_S20.png|link=]]</td> | | <td width=250>[[image:ManageIndustriesCoalMine1b_S20.png|link=]]</td> |
| <td>[[image:AssestFilteredScene1.png|link=]]</td> | | <td> |
| <td>[[image:Ablue.png|link=]] In the <span style="font-weight: 700; font-size: 15px; color: white; background-color: #797979;"> Filter Palette </span> the '''Filter Action''' has been set to <span style="font-weight: 700; font-size: 15px; color: white; background-color: black;"> Filter Selection </span> and the '''Scenery Splines''' icon has been selected. | | <table bgcolor=#000000 cellpadding=2> |
| <table> | | <tr valign="top"> |
| | <td> |
| | <table bgcolor=#ffffff cellpadding=2> |
| <tr valign="top"> | | <tr valign="top"> |
| <td width=10>[[image:DotPointBlueSquare.png|10px|link=]]</td> | | <td colspan=2><span style="font-weight: 700; font-size: 15px;">Steps: To Alter the Production Rate:-</span></td> |
| <td>All objects are visible on the Surveyor screen</td>
| |
| </tr> | | </tr> |
| <tr valign="top"> | | <tr valign="top"> |
| <td>[[image:DotPointBlueSquare.png|10px|link=]]</td> | | <td width=25>[[image:DotPoint1.JPG|link=]]</td> |
| <td>Only '''Scenery Splines''' can be selected</td> | | <td>move the mouse pointer into light grey area at the end of the '''green bar''' and <span style="font-weight: 700; font-size: 15px; background-color: lightcyan;"> Left Click and Drag </span> it '''Left''' or '''Right''' to the required position. To set the '''Production Rate''' to '''zero''' drag the bar to the extreme left. The '''green bar''' in this example is already close to the extreme left because the initial production rate (500 units/30 secs) is quite small</td> |
| </tr> | | </tr> |
| </table>
| |
| <br>
| |
| <table bgcolor=#000000 cellpadding=2>
| |
| <tr valign="top"> | | <tr valign="top"> |
| <td> | | <td colspan=2>The figures showing the time needed to fill the remaining storage space and the production rate will be updated as the end of the bar is moved</td> |
| <table bgcolor=#ffffb0 cellpadding=2>
| |
| <tr valign="top">
| |
| <td width=25>[[image:NotePad.PNG|link=]]</td>
| |
| <td>To reset the filters to allow all objects to be selected set the '''Filter Action''' in the <span style="font-weight: 700; font-size: 15px; color: white; background-color: #797979;"> Filter Palette </span> to <span style="font-weight: 700; font-size: 15px; color: white; background-color: black;"> Filter List </span></td>
| |
| </tr> | | </tr> |
| </table> | | </table> |
| Line 11,717: |
Line 11,987: |
| </td> | | </td> |
| </tr> | | </tr> |
| <tr valign="top">
| | </table> |
| <td>[[image:AssetsPaletteFilteredScene3_S20.png|link=]]</td>
| | </td> |
| <td>[[image:AssestFilteredScene2.png|link=]]</td>
| |
| <td>[[image:Bblue.png|link=]] In the <span style="font-weight: 700; font-size: 15px; color: white; background-color: #797979;"> Filter Palette </span> the '''Filter Action''' has been set to <span style="font-weight: 700; font-size: 15px; color: white; background-color: black;"> Filter Visibilty </span> and the '''Scenery Splines''' icon has been selected.
| |
| <table>
| |
| <tr valign="top">
| |
| <td width=10>[[image:DotPointBlueSquare.png|10px|link=]]</td>
| |
| <td>Only '''Scenery Splines''' are visible on the Surveyor screen - '''Ground Textures''' and '''Effect Layers''' are always visible</td>
| |
| </tr>
| |
| <tr valign="top">
| |
| <td>[[image:DotPointBlueSquare.png|10px|link=]]</td>
| |
| <td>Only '''Scenery Splines''' can be selected</td>
| |
| </tr> | | </tr> |
| </table> | | </table> |
| <br> | | <br> |
| <table bgcolor=#000000 cellpadding=2> | | <table width=1000 bgcolor=#000000 cellpadding=2> |
| <tr valign="top"> | | <tr valign="top"> |
| <td> | | <td> |
| <table bgcolor=#ffffb0 cellpadding=2> | | <table width=996 bgcolor=#ffffb0 cellpadding=2> |
| <tr valign="top"> | | <tr valign="top"> |
| <td width=25>[[image:NotePad.PNG|link=]]</td> | | <td width=25>[[image:NotePad.PNG|link=]]</td> |
| <td>To reset the filters to show and select all objects set the '''Filter Action''' in the <span style="font-weight: 700; font-size: 15px; color: white; background-color: #797979;"> Filter Palette </span> to <span style="font-weight: 700; font-size: 15px; color: white; background-color: black;"> Filter List </span></td> | | <td><span style="font-size: 17px;">'''Notes:'''</span><br> |
| </tr>
| | ---- |
| </table>
| |
| </td>
| |
| </tr>
| |
| </table>
| |
| </td> | | </td> |
| </tr> | | </tr> |
| <tr valign="top"> | | <tr valign="top"> |
| <td>[[image:AssetsPaletteFilteredScene4_S20.png|link=]]</td> | | <td width=10>[[image:DotPoint.JPG|10px|link=]]</td> |
| <td>[[image:AssestFilteredScene3.png|link=]]</td>
| | <td>Setting the '''Commodity Level''' of a product to '''zero''' will force the industry to rely on its '''Production Rate''' and on any deliveries to maintain a supply of that product. The commodity could be quickly emptied as each consist comes in to be loaded</td> |
| <td>[[image:Cblue.png|link=]] In the <span style="font-weight: 700; font-size: 15px; color: white; background-color: #797979;"> Filter Palette </span> the '''Filter Action''' has been set to <span style="font-weight: 700; font-size: 15px; color: white; background-color: black;"> Filter Visibilty </span> and the '''Scenery Splines''' icon has been selected. In the <span style="font-weight: 700; font-size: 15px; color: white; background-color: #797979;"> Assets Palette </span> the text "fence" has been added to the <span style="font-weight: 700; font-size: 15px; color: white; background-color: black;"> Search </span> box. | |
| <table>
| |
| <tr valign="top">
| |
| <td width=10>[[image:DotPointBlueSquare.png|10px|link=]]</td>
| |
| <td>Only '''Scenery Splines''' that have the text "fence" in their names or descriptions are visible on the Surveyor screen - '''Ground Textures''' and '''Effect Layers''' are always visible</td>
| |
| </tr> | | </tr> |
| <tr valign="top"> | | <tr valign="top"> |
| <td>[[image:DotPointBlueSquare.png|10px|link=]]</td> | | <td>[[image:DotPoint.JPG|10px|link=]]</td> |
| <td>Only '''Scenery Splines''' that have the text "fence" in their names or descriptions can be selected</td> | | <td>Setting the '''Production Rate''' of a product to '''zero''' will force the industry to rely on the '''Commodity Level''' that it has in storage and on any deliveries. If the commodity reaches zero when no more product will be available for loading</td> |
| </tr> | | </tr> |
| </table>
| |
| <br>
| |
| <table bgcolor=#000000 cellpadding=2>
| |
| <tr valign="top"> | | <tr valign="top"> |
| <td> | | <td>[[image:DotPoint.JPG|10px|link=]]</td> |
| <table bgcolor=#ffffb0 cellpadding=2>
| | <td>Setting the '''Consumption Rate''' of a product to '''zero''' will stop all deliveries to the industry after its '''Commodity Level''' reaches its maximum level. It will then rely on the product being removed (loaded into empty consists) before it will accept any further deliveries</td> |
| <tr valign="top">
| |
| <td width=25>[[image:NotePad.PNG|link=]]</td>
| |
| <td>To reset the filters to show and select all objects set the '''Filter Action''' in the <span style="font-weight: 700; font-size: 15px; color: white; background-color: #797979;"> Filter Palette </span> to <span style="font-weight: 700; font-size: 15px; color: white; background-color: black;"> Filter List </span> and delete the text in the <span style="font-weight: 700; font-size: 15px; color: white; background-color: black;"> Search </span> box</td> | |
| </tr> | | </tr> |
| </table> | | </table> |
| Line 11,773: |
Line 12,018: |
| </tr> | | </tr> |
| </table> | | </table> |
| </td> | | <br> |
| | <table width=1000> |
| | <tr valign="top"> |
| | <td><span style="font-weight: 700; font-size: 15px;"><span style="color: white; background-color: blue;"> Example 2: </span> Two Product Industry - Input and Output</span></td> |
| </tr> | | </tr> |
| </table>
| |
| <br>
| |
| <!-- Free Move Tool Section -->
| |
| <table width=1000> <!-- BEGIN Nav Buttons Table -->
| |
| <tr valign="top"> | | <tr valign="top"> |
| <td width=629><span id="stepFreeMove"></span> | | <td><span style="font-weight: 700; font-size: 15px;">Typical Uses:</span> Timber mill, mineral processing, factory</td> |
| ='''The Free Move Tool'''=
| |
| </td>
| |
| <td width=50>[[image:SkipDown.png|link=#skip Free Move: Selecting an Object|Skip Down]]</td>
| |
| <td width=50>[[image:SkipUp.png|link=#skip Narrowing the Search|Skip Up]]</td>
| |
| <td width=46>[[image:BackToTop.png|link=#top|alt=Top|Top]]</td>
| |
| <td width=75>[[image:NextUp.png|link=#stepEyedropper|alt=Next Up|Top]]</td>
| |
| <td width=75>[[image:NextDown.png|link=#stepFineAdjustment|alt=Next Down|Next Down]]</td>
| |
| <td width=75>[[image:BackToBottom.png|link=#bottom|alt=Bottom|Bottom]]</td>
| |
| </tr> | | </tr> |
| </table> <!-- END Nav Buttons Table --> | | </table> |
|
| |
|
| <table width=1000> | | <table width=1000> |
| <tr valign="top"> | | <tr valign="top"> |
| | <td width=520>[[image:ManageIndustriesLogging1_S20.png|link=]]</td> |
| <td> | | <td> |
| <table width=214 bgcolor=#000000 cellpadding=2> | | <table> |
| <tr valign="top"> | | <tr valign="top"> |
| <td> | | <td colspan=2><span style="font-weight: 700; font-size: 15px; color: white; background-color: black;"> Commodity Levels </span><br> |
| <table width=210 bgcolor=#ffffff cellpadding=2> | | Figures in are those in the example shown in the image on the left</td> |
| | </tr> |
| <tr valign="top"> | | <tr valign="top"> |
| <td width=40>[[image:S20_FreeMoveToolIcon.png|link=]]</td> | | <td colspan=2>'''Product 1'''</td> |
| <td width=170>'''Keyboard Shortcut:''' <span style="color: white; background-color: black; font-weight: 700; font-size: 17px;"> S </span></td>
| |
| </tr> | | </tr> |
| </table> | | <tr valign="top"> |
| </td> | | <td width=10>[[image:DotPoint.JPG|10px|link=]]</td> |
| | <td>Name and icon - '''62ft Log Load'''</td> |
| </tr> | | </tr> |
| </table> | | <tr valign="top"> |
| </td> | | <td>[[image:DotPoint.JPG|10px|link=]]</td> |
| <td width=786 bgcolor="lightcyan"><span style="font-weight: 700; font-size: 15px;">The <span style="color: white; background-color: black;"> Free Move Tool </span> moves objects around your '''Trainz World'''</span></td> | | <td>The quantity of the product currently stored ('''2 units''') and the maximum storage level ('''20 units''')</td> |
| </tr> | | </tr> |
| </table>
| |
| <br>
| |
| <table width=1000 bgcolor=#000000>
| |
| <tr valign="top"> | | <tr valign="top"> |
| <td> | | <td>[[image:DotPoint.JPG|10px|link=]]</td> |
| <table width=996 bgcolor=#ffe89a cellpadding=2>
| | <td>The process used by this product ('''Input''')</td> |
| <tr valign="middle">
| |
| <td width=45>[[image:PalettesIcon_S20.png|link=]]</td>
| |
| <td>Various function of this tool use the <span style="font-weight: 700; font-size: 15px; color: white; background-color: #797979;"> Tool Options Palette </span> <span style="font-weight: 700; font-size: 15px; color: white; background-color: #797979;"> Info Palette </span> <span style="font-weight: 700; font-size: 15px; color: white; background-color: #797979;"> Filter Palette </span> and the <span style="font-weight: 700; font-size: 15px; color: white; background-color: #797979;"> Assets Palette </span>. If these palettes are not visible on the screen when required then refer to [[image:PageLink.PNG|link=]] '''[[#Notes_Palettes|Notes: Palettes]]''' at the top of this document.</td> | |
| </tr> | | </tr> |
| </table> | | <tr valign="top"> |
| </td> | | <td>[[image:DotPoint.JPG|10px|link=]]</td> |
| | <td>An adjustable bar graph showing the above figures as a percentage ('''10%''')</td> |
| </tr> | | </tr> |
| </table>
| |
| <br>
| |
| <table width=1000 bgcolor=#000000 cellpadding=2>
| |
| <tr valign="top"> | | <tr valign="top"> |
| <td> | | <td colspan=2>'''Product 2'''</td> |
| <table width=996 bgcolor=#ffffff cellpadding=2> | | </tr> |
| <tr valign="top"> | | <tr valign="top"> |
| <td width=200>[[image:FreeMoveTools_S20.png|link=|alt=Free Move Tools]]</td> | | <td>[[image:DotPoint.JPG|10px|link=]]</td> |
| <td> | | <td>Name and icon - '''YZ Lumber Load 12ft (SDS) Lumber'''</td> |
| <table width=800 cellpadding=2>
| |
| <tr valign="top">
| |
| <td bgcolor=#ffffb0><span style="font-weight: 700; font-size: 15px; color: white; background-color: black;"> Tool Targets </span> The '''Free Move Tool''' has no '''Target''' options so it has no drop down menu list</td>
| |
| </tr> | | </tr> |
| <tr valign="top"> | | <tr valign="top"> |
| <td> | | <td>[[image:DotPoint.JPG|10px|link=]]</td> |
| <table>
| | <td>The quantity of the product currently stored ('''202 units''') and the maximum storage level ('''256 units''')</td> |
| <tr valign="top">
| |
| <td width=10>[[image:DotPoint.JPG|10px|link=]]</td>
| |
| <td>This tool is ideal for making large horizontal movements of objects</td> | |
| </tr> | | </tr> |
| <tr valign="top"> | | <tr valign="top"> |
| <td>[[image:DotPoint.JPG|10px|link=]]</td> | | <td>[[image:DotPoint.JPG|10px|link=]]</td> |
| <td>Multiple objects (of different types) can be selected for mass moves and other operations</td> | | <td>The process used by this product ('''Output''')</td> |
| </tr>
| |
| </table>
| |
| </td> | |
| </tr> | | </tr> |
| <tr valign="top"> | | <tr valign="top"> |
| <td bgcolor=#ffffb0><span style="font-weight: 700; font-size: 15px; color: white; background-color: black;"> Tool Actions </span> The '''Free Move Tool''' has no '''Action''' options so it has no drop down menu list</td> | | <td>[[image:DotPoint.JPG|10px|link=]]</td> |
| | <td>An adjustable bar graph showing the above figures as a percentage ('''78%''')</td> |
| </tr> | | </tr> |
| </table> | | </table> |
| Line 11,857: |
Line 12,079: |
| </tr> | | </tr> |
| </table> | | </table> |
| </td>
| | |
| </tr>
| | <table width=1000> |
| </table>
| |
| <br>
| |
| <table width=1000 bgcolor=#000000 cellpadding=2> | |
| <tr valign="top"> | | <tr valign="top"> |
| <td> | | <td> |
| <table width=996 bgcolor=#ffffe0 cellpadding=2> | | <table width=520> |
| <tr valign="top"> | | <tr valign="top"> |
| <td width=25>[[image:PencilTips.PNG|link=]]</td><td><span style="font-weight: 700; font-size: 15px;">Free Move Alternatives</span></td> | | <td colspan=2><span style="font-weight: 700; font-size: 15px; color: white; background-color: black;"> Industry Processes </span><br> |
| | Figures in are those in the example shown in the image above</td> |
| </tr> | | </tr> |
| <tr valign="top"> | | <tr valign="top"> |
| <td colspan=2>In addition to the '''Free Move Tool''' the position and/or height of objects can be changed by choosing one of the following:-</td> | | <td colspan=2>'''Product 2''' - '''YZ Lumber Load''' (the products will not always be in the same order as above)</td> |
| </tr> | | </tr> |
| <tr> | | <tr valign="top"> |
| <td colspan=2><span style="font-weight: 700; font-size: 15px;">Options:</span> </td> | | <td>[[image:DotPoint.JPG|10px|link=]]</td> |
| | <td>'''Green Arrow''' leading into the product icon plus the words "Output" and "Produces" indicates a '''Production Process'''</td> |
| </tr> | | </tr> |
| <tr valign="top"> | | <tr valign="top"> |
| <td width=25>[[image:Ablue.png|link=]]</td> | | <td>[[image:DotPoint.JPG|10px|link=]]</td> |
| <td>using the [[image:S20_FineAdjustmentToolIcon.png|link=|20px]] '''[[#The Fine Adjustment Tool|Fine Adjustment Tool]]''' <span style="font-weight: 700; font-size: 15px;">OR</span></td> | | <td>The quantity of the product produced every '''30 seconds''' ('''5 units''')</td> |
| </tr> | | </tr> |
| <tr valign="top"> | | <tr valign="top"> |
| <td>[[image:Bblue.png|link=]]</td> | | <td>[[image:DotPoint.JPG|10px|link=]]</td> |
| <td>editing its <span style="font-size: 15px; font-weight: 700; color: white; background-color: black;"> x: </span> <span style="font-size: 15px; font-weight: 700; color: white; background-color: black;"> y: </span> <span style="font-size: 15px; font-weight: 700; color: white; background-color: black;"> z: </span> values in [[image:PageLink.PNG|link=]] '''[[#The Info Palette|The Info Palette]]''' <span style="font-weight: 700; font-size: 15px;">OR</span></td> | | <td>An adjustable bar graph showing the above figure as a percentage ('''1%''')</td> |
| </tr> | | </tr> |
| <tr valign="top"> | | <tr valign="top"> |
| <td>[[image:Cblue.png|link=]]</td> | | <td>[[image:DotPoint.JPG|10px|link=]]</td> |
| <td>selecting the <span style="font-size: 15px; font-weight: 700; color: white; background-color: black;"> Apply Height </span> option in its '''Context Menu'''</td> | | <td>The time ('''5 minutes''') needed to fill the available storage at the set production rate</td> |
| </tr> | | </tr> |
| </table> | | <tr valign="top"> |
| </td> | | <td colspan=2>'''Product 1''' - '''62ft Log Load'''</td> |
| </tr> | | </tr> |
| </table>
| |
| <br>
| |
| <table width=1000> <!-- BEGIN Section Nav Buttons -->
| |
| <tr valign="top"> | | <tr valign="top"> |
| <td width=629><span id="skip Free Move: Selecting an Object"></span> | | <td>[[image:DotPoint.JPG|10px|link=]]</td> |
| =='''Free Move: Selecting an Object'''==
| | <td>'''Green Arrow''' leaving the product icon plus the words "Input" and "Consumes" indicates a '''Consumption Process'''</td> |
| </td>
| |
| <td width=50>[[image:SkipDown.png|link=#skip Free Move: Naming an Object|Skip Down]]</td>
| |
| <td width=50>[[image:SkipUp.png|link=#stepFreeMove|Skip Up]]</td>
| |
| <td width=46> </td> <!-- for Top --> | |
| <td width=75>[[image:HeadingUp.png|link=#stepFreeMove|alt=Heading|To Heading]]</td>
| |
| <td width=75> </td>
| |
| <td width=75> </td> <!-- for Bottom -->
| |
| </tr> | | </tr> |
| </table> <!-- END Section Nav Buttons -->
| |
|
| |
| <table width=1000 bgcolor="lightcyan" cellpadding=2>
| |
| <tr valign="top"> | | <tr valign="top"> |
| <td width=10>[[image:BlueDot10x10.png|link=]]</td> | | <td>[[image:DotPoint.JPG|10px|link=]]</td> |
| <td>The '''Free Move Tool''' can be used to select individual objects and multiple objects. The multiple objects can be of different types (e.g. spline objects and scenery objects) and in different layers</td> | | <td>The quantity of the product consumed every '''30 seconds''' ('''1 unit''')</td> |
| </tr> | | </tr> |
| </table>
| |
| <br>
| |
| <table width=1000 bgcolor=#000000 cellpadding=2>
| |
| <tr valign="top"> | | <tr valign="top"> |
| <td> | | <td>[[image:DotPoint.JPG|10px|link=]]</td> |
| <table width=996 bgcolor=#ffffff cellpadding=2> | | <td>An adjustable bar graph showing the above figure as a percentage ('''5%''')</td> |
| | </tr> |
| | <tr valign="top"> |
| | <td>[[image:DotPoint.JPG|10px|link=]]</td> |
| | <td>The time ('''1 minute''') needed to empty the available storage at the set consumption rate</td> |
| | </tr> |
| | </table> |
| | </td> |
| | <td> |
| | <table width=480 bgcolor=#000000 cellpadding=2> |
| <tr valign="top"> | | <tr valign="top"> |
| <td> | | <td> |
| <table width=590> | | <table bgcolor=#ffffb0 cellpadding=2> |
| <tr valign="top"> | | <tr valign="top"> |
| <td colspan=2><span style="font-weight: 700; font-size: 15px;">Steps:</span> To select single and multiple objects with the '''Free Move Tool''':-</td> | | <td width=25>[[image:NotePad.PNG|link=]]</td> |
| | <td><span style="font-size: 17px;">'''Notes:'''</span><br> |
| | ----</td> |
| </tr> | | </tr> |
| <tr valign="top"> | | <tr valign="top"> |
| <td width=25>[[image:DotPoint1.JPG|link=]]</td> | | <td colspan=2>The '''Commodity Level''' of a product at any time depends on its starting level, its '''Consumption Rate''', its '''Production Rate''' and any deliveries or pickups of that product made by consists.<br> |
| <td>In the <span style="font-weight: 700; font-size: 15px; color: white; background-color: #797979;"> Tools Palette </span> <span style="font-weight: 700; font-size: 15px; background-color: lightcyan;"> Left Click </span> on the [[image:S20_FreeMoveToolIcon.png|link=|20px]] '''Free Move Tool''' or press the <span style="font-weight: 700; font-size: 15px; color: white; background-color: black;"> S </span> key</td> | | Each product is completely independent of other (different) products. The commodity level, production or consumption rate of one product does not depend on the commodity level, production or consumption rate of another.<br> |
| | The exception to this is the '''Session Rule''' ('''<kuid:-25:1223> Power Station Rule''') that links the '''Commodity Level''' of coal at one industry (a power station) with the production rate of products at a list different industries (e.g. factories).</td> |
| | </tr> |
| | </table> |
| | </td> |
| | </tr> |
| | </table> |
| | </td> |
| | </tr> |
| | </table> |
| | <br> |
| | <table width=1000> |
| | <tr valign="top"> |
| | <td><span style="font-weight: 700; font-size: 15px;"><span style="color: white; background-color: blue;"> Example 3: </span> Two Product Holding Industry - Dual Input and Output</span></td> |
| </tr> | | </tr> |
| <tr valign="top"> | | <tr valign="top"> |
| <td>[[image:DotPoint2.JPG|link=]]</td> | | <td><span style="font-weight: 700; font-size: 15px;">Typical Uses:</span> Stockyards, warehouses, container depots</td> |
| <td>In the '''Surveyor''' screen <span style="font-weight: 700; font-size: 15px; background-color: lightcyan;"> Left Click </span> on the object to be selected, or the first object if multiple objects are to be selected</td>
| |
| </tr> | | </tr> |
| | </table> |
| | |
| | <table width=1000> |
| <tr valign="top"> | | <tr valign="top"> |
| <td>[[image:DotPoint3.JPG|link=]]</td> | | <td>[[image:ManageIndustriesStockyard1_S20.png|link=]]</td> |
| <td>To select additional objects, hold down the <span style="font-weight: 700; font-size: 15px; color: white; background-color: black;"> Shift </span> key and <span style="font-weight: 700; font-size: 15px; background-color: lightcyan;"> Left Click </span> on each object to be added to the selection. The additional objects do not have to be the same type or in the same layer</td>
| |
| </tr> | | </tr> |
| </table> | | </table> |
| </td> | | |
| | <table width=1000> |
| | <tr valign="top"> |
| | <td> |
| | <table width=520> |
| | <tr valign="top"> |
| | <td><span style="font-weight: 700; font-size: 15px; color: white; background-color: black;"> Commodity Levels </span><br> |
| | Figures are those in the example shown in the image above</td> |
| | </tr> |
| | <tr valign="top"> |
| <td> | | <td> |
| <table width=400 bgcolor=#ffffe0 cellpadding=2> | | <table cellpadding=2> |
| <tr valign="top"> | | <tr valign="top"> |
| <td width=25>[[image:PencilTips.PNG|link=]]</td> | | <td colspan=2>'''Product 1'''</td> |
| <td><span style="font-weight: 700; font-size: 15px; background-color: lightcyan;"> Double Left Click </span> on an object to add it and all '''nearby''' identical objects into a single selection. | | </tr> |
| <table> | | <tr valign="top"> |
| | <td width=10>[[image:DotPoint.JPG|10px|link=]]</td> |
| | <td>Name and icon - '''Bull Hereford 01a load'''</td> |
| | </tr> |
| <tr valign="top"> | | <tr valign="top"> |
| <td>[[image:DotPoint.JPG|10px|link=]]</td> | | <td>[[image:DotPoint.JPG|10px|link=]]</td> |
| <td>for a spline object all the segments up to the next junction (in both directions) will be selected</td> | | <td>The quantity of the product currently stored ('''50 units''') and the maximum storage level ('''100 units''')</td> |
| </tr> | | </tr> |
| <tr valign="top"> | | <tr valign="top"> |
| <td>[[image:DotPoint.JPG|10px|link=]]</td> | | <td>[[image:DotPoint.JPG|10px|link=]]</td> |
| <td>for a rolling stock object all the rolling stock objects in '''that consist''' will be selected</td> | | <td>The process used by this product ('''Input''' and '''Output''')</td> |
| </tr> | | </tr> |
| </table> | | <tr valign="top"> |
| </td> | | <td>[[image:DotPoint.JPG|10px|link=]]</td> |
| | <td>An adjustable bar graph showing the above figures as a percentage ('''50%''')</td> |
| </tr> | | </tr> |
| </table> | | <tr valign="top"> |
| </td> | | <td colspan=2>'''Product 2'''</td> |
| </tr> | | </tr> |
| <tr valign="top"> | | <tr valign="top"> |
| <td colspan=2> | | <td>[[image:DotPoint.JPG|10px|link=]]</td> |
| <table bgcolor=#ffffb0 cellpadding=2> | | <td>Name and icon - '''Merino Sheep Load'''</td> |
| | </tr> |
| <tr valign="top"> | | <tr valign="top"> |
| <td width=25>[[image:NotePad.PNG|link=]]</td> | | <td>[[image:DotPoint.JPG|10px|link=]]</td> |
| <td><span style="font-size: 17px;">'''Notes:'''</span><br> | | <td>The quantity of the product currently stored ('''50 units''') and the maximum storage level ('''100 units''')</td> |
| ----
| |
| </td> | |
| </tr> | | </tr> |
| <tr valign="top"> | | <tr valign="top"> |
| <td width=10>[[image:DotPoint.JPG|10px|link=]]</td> | | <td>[[image:DotPoint.JPG|10px|link=]]</td> |
| <td>To remove an object from the selection <span style="font-weight: 700; font-size: 15px; background-color: lightcyan;"> Left Click </span> on it again if it is the only selected object or <span style="font-weight: 700; font-size: 15px;"><span style="color: white; background-color: black;"> Shift </span> + <span style="background-color: lightcyan;"> Left Click </span></span> if it is one of several selected objects.<br> | | <td>The process used by this product ('''Input''' and '''Output''')</td> |
| To remove '''ALL''' objects from a selection, <span style="font-weight: 700; font-size: 15px; background-color: lightcyan;"> Left Click </span> on a '''Ground Texture''' or press the <span style="font-weight: 700; font-size: 15px;"><span style="color: white; background-color: black;"> Ctrl </span> + <span style="color: white; background-color: black;"> D </span></span> keys</td>
| |
| </tr> | | </tr> |
| <tr valign="top"> | | <tr valign="top"> |
| <td>[[image:DotPoint.JPG|10px|link=]]</td> | | <td>[[image:DotPoint.JPG|10px|link=]]</td> |
| <td>When you select an object its '''Context Icon''' will appear attached to the object. <span style="font-weight: 700; font-size: 15px; background-color: lightcyan;"> Left Click </span> on its icon or press the <span style="font-weight: 700; font-size: 15px; color: white; background-color: black;"> T </span> key to open its '''Context Menu'''. If more than one object is selected then the '''Context Icon''' will be attached to the <span style="font-weight: 700; text-decoration: underline;">last</span> object selected</td> | | <td>An adjustable bar graph showing the above figures as a percentage ('''50%''')</td> |
| </tr> | | </tr> |
| </table> | | </table> |
| Line 11,979: |
Line 12,220: |
| </table> | | </table> |
| </td> | | </td> |
| </tr> | | <td> |
| </table>
| | <table width=480 bgcolor=#000000 cellpadding=2> |
| <br>
| |
| <table width=1000 bgcolor=#000000 cellpadding=2> | |
| <tr valign="top"> | | <tr valign="top"> |
| <td> | | <td> |
| <table width=996 bgcolor=#ffffe0 cellpadding=2> | | <table bgcolor=#ffffe0 cellpadding=2> |
| <tr valign="top"> | | <tr valign="top"> |
| <td width=25>[[image:PencilTips.PNG|link=]]</td> | | <td width=25>[[image:PencilTips.PNG|link=]]</td> |
| <td><span style="font-weight: 700; font-size: 15px;">Selecting Objects From a Crowded Scene</span><br> | | <td>To create an industry that will "forever" produce '''AND''' consume an endless supply of the same product or products, set the:- |
| Sometimes the object you want to select is part of a crowded scene or is overlapped by other objects, such as splines, and this can make it difficult to select. In these situations the best solution is to use the <span style="font-weight: 700; font-size: 15px; color: white; background-color: #797979;"> Filter Palette </span> and <span style="font-weight: 700; font-size: 15px; color: white; background-color: #797979;"> Assets Palette </span> to narrow the selection to a single object or to a set of objects.<br>
| | <table> |
| See [[image:PageLink.PNG|link=]] '''[[#Narrowing the Search|Narrowing the Search]]''' for more details</td>
| | <tr valign="top"> |
| | <td width=10>[[image:RedDot10x10.png|link=]]</td> |
| | <td>starting '''Commodity Level''' for each product to '''50%''' or '''100%''' of the maximum possible</td> |
| </tr> | | </tr> |
| </table> | | <tr valign="top"> |
| </td> | | <td>[[image:RedDot10x10.png|link=]]</td> |
| | <td>'''Industry Process - Produces''' for each product to about half the '''Commodity Level''' for that product (e.g. 25% or 50%)</td> |
| </tr> | | </tr> |
| </table>
| |
| <br>
| |
| <table width=1000> <!-- BEGIN Section Nav Buttons -->
| |
| <tr valign="top"> | | <tr valign="top"> |
| <td width=629><span id="skip Free Move: Naming an Object"></span> | | <td>[[image:RedDot10x10.png|link=]]</td> |
| =='''Free Move: Naming an Object'''==
| | <td>'''Industry Process - Consumes''' for each product to about half the '''Commodity Level''' for that product</td> |
| </td>
| |
| <td width=50>[[image:SkipDown.png|link=#skip Free Move: Changing an Objects Layer|Skip Down]]</td>
| |
| <td width=50>[[image:SkipUp.png|link=#skip Free Move: Selecting an Object|Skip Up]]</td> | |
| <td width=46> </td> <!-- for Top -->
| |
| <td width=75>[[image:HeadingUp.png|link=#stepFreeMove|alt=Heading|To Heading]]</td>
| |
| <td width=75> </td>
| |
| <td width=75> </td> <!-- for Bottom -->
| |
| </tr> | | </tr> |
| </table> <!-- END Section Nav Buttons -->
| |
|
| |
| <table width=1000 bgcolor="lightcyan" cellpadding=2>
| |
| <tr valign="top"> | | <tr valign="top"> |
| <td width=10>[[image:BlueDot10x10.png|link=]]</td> | | <td colspan=2>Setting the '''Commodity Level''' value for a product at '''100%''' may mean that a delivery made within the first set '''Duration''' period (e.g. the first 30 seconds) may not unload (see [[image:PageLink.PNG|link=]] '''[[#ConfigureIndustryExample|Legacy Industries]]''' below)</td> |
| <td>Objects can be given names to help identify them with the '''Find Tool'''</td>
| |
| </tr> | | </tr> |
| <tr valign="top">
| | </table> |
| <td width=10>[[image:BlueDot10x10.png|link=]]</td>
| | </td> |
| <td>Some objects must be given '''unique''' names for display and session operations</td>
| |
| </tr> | | </tr> |
| </table> | | </table> |
| <br>
| | </td> |
| <table width=1000 bgcolor=#000000 cellpadding=2>
| |
| <tr valign="top">
| |
| <td>
| |
| <table width=996 bgcolor=#ffe89a cellpadding=2>
| |
| <tr valign="middle">
| |
| <td width=45>[[image:PalettesIcon_S20.png|link=]]</td>
| |
| <td>If the <span style="font-weight: 700; font-size: 15px; color: white; background-color: #797979;"> Info Palette </span> is not visible on the screen then refer to [[image:PageLink.PNG|link=]] '''[[#Notes_Palettes|Notes: Palettes]]''' at the top of this document.</td>
| |
| </tr> | | </tr> |
| </table> | | </table> |
| Line 12,037: |
Line 12,257: |
| <table width=1000> | | <table width=1000> |
| <tr valign="top"> | | <tr valign="top"> |
| <td width=225>[[image:InfoPaletteObjectName_S20.png|link=]]</td> | | <td colspan=2><span style="font-weight: 700; font-size: 15px; color: white; background-color: black;"> Industry Processes </span><br> |
| <td> | | Figures are those in the example shown in the image above</td> |
| <table bgcolor=#000000 cellpadding=2> | | </tr> |
| <tr valign="top"> | | <tr valign="top"> |
| <td> | | <td>[[image:DotPoint.JPG|10px|link=]]</td> |
| <table bgcolor=#ffffff cellpadding=2> | | <td>'''Product 1''' and '''Product 2''' both appear on both sides of the '''Green Arrow''' plus the term "Input/Output", and the words "consumes" and "produces", all indicating that both are '''Production''' and '''Consumption Processes'''</td> |
| | </tr> |
| <tr valign="top"> | | <tr valign="top"> |
| <td colspan=2><span style="font-weight: 700; font-size: 15px;">Steps:</span> To name (or rename) an object using the '''Free Move Tool''':-</td> | | <td>[[image:DotPoint.JPG|10px|link=]]</td> |
| | <td>The quantity of each product produced and consumed every '''30 seconds'''</td> |
| </tr> | | </tr> |
| <tr valign="top"> | | <tr valign="top"> |
| <td width=25>[[image:DotPoint1.JPG|link=]]</td> | | <td>[[image:DotPoint.JPG|10px|link=]]</td> |
| <td><span style="font-weight: 700; font-size: 15px; background-color: lightcyan;"> Left Click </span> on the object using the '''Free Move Tool'''</td> | | <td>An adjustable bar graph showing a figure ('''25%''') of unknown meaning</td> |
| | </tr> |
| | </table> |
| | |
| | <table width=1000> |
| | <tr valign="top"> |
| | <td width=10>[[image:DotPoint.JPG|10px|link=]]</td> |
| | <td>The message line <span style="font-weight: 700; font-size: 15px; color: white; background-color: black;"> Bull Hereford 01a load will run out in less than 1 minute </span> indicates the time needed for the available product to be emptied at the set consumption rate</td> |
| </tr> | | </tr> |
| <tr valign="top"> | | <tr valign="top"> |
| <td>[[image:DotPoint2.JPG|link=]]</td> | | <td>[[image:DotPoint.JPG|10px|link=]]</td> |
| <td>In the <span style="font-weight: 700; font-size: 15px; color: white; background-color: #797979;"> Info Palette </span> <span style="font-weight: 700; font-size: 15px; background-color: lightcyan;"> Left Click </span> inside the '''Name''' text entry box</td> | | <td>There is an '''Arrowhead''' icon at the start of the above line. A <span style="font-weight: 700; font-size: 15px; background-color: lightcyan;"> Left Click </span> on the arrowhead will reveal the following data.</td> |
| </tr> | | </tr> |
| <tr valign="top"> | | <tr valign="top"> |
| <td>[[image:DotPoint3.JPG|link=]]</td> | | <td colspan=2>[[image:ManageIndustriesStockyard1b_S20.png|link=]]</td> |
| <td>Enter a name and press the <span style="font-weight: 700; font-size: 15px; color: white; background-color: black;"> Enter </span> key</td>
| |
| </tr> | | </tr> |
| </table> | | <tr valign="top"> |
| </td> | | <td>[[image:DotPoint.JPG|10px|link=]]</td> |
| | <td>Both of the '''Blue''' bars ('''Consumption Rates''') and both the '''Green''' bars ('''Production Rates''') can be adjusted</td> |
| </tr> | | </tr> |
| </table> | | </table> |
| <br> | | <br> |
| <table bgcolor=#000000 cellpadding=2> | | <table width=1000> |
| <tr valign="top"> | | <tr valign="top"> |
| <td> | | <td><span style="font-weight: 700; font-size: 15px;"><span style="color: white; background-color: blue;"> Example 4: </span> Two Track Passenger Station</span></td> |
| <table bgcolor=#ffffb0 cellpadding=2> | | </tr> |
| <tr valign="top"> | | <tr valign="top"> |
| <td width=25>[[image:NotePad.PNG|link=]]</td> | | <td><span style="font-weight: 700; font-size: 15px;">Typical Uses:</span> Passenger Station</td> |
| <td>If more than one object has been selected then only the '''last selected object''', the one with the '''Context Icon''', will be named.</td>
| |
| </tr> | | </tr> |
| </table> | | </table> |
| </td>
| | |
| </tr>
| | <table width=1000> |
| </table>
| |
| </td>
| |
| </tr>
| |
| </table>
| |
| <br>
| |
| <table width=1000 cellpadding=2> | |
| <tr valign="top"> | | <tr valign="top"> |
| <td width=420>[[image:ObjectsUsingSameName.png|link=]]</td> | | <td width=645>[[image:ManageIndustriesStation2trk_S20.png|link=]]</td> |
| <td> | | <td> |
| <table width=580 bgcolor=#000000 cellpadding=2> | | <table> |
| <tr valign="top"> | | <tr valign="top"> |
| <td> | | <td colspan=2><span style="font-weight: 700; font-size: 15px; color: white; background-color: black;"> Passenger Platforms </span></td> |
| <table width=576 bgcolor=#ffffff cellpadding=2>
| |
| <tr valign="middle">
| |
| <td width=35>[[image:Information.png|35px|link=]]</td>
| |
| <td align="center"><span style="font-weight: 700; font-size: 15px;">There is no ban on two or more objects using the same name</span></td>
| |
| </tr> | | </tr> |
| </table> | | <tr valign="top"> |
| </td> | | <td colspan=2 align="center">'''Platform 1'''</td> |
| | </tr> |
| | <tr valign="top"> |
| | <td width=10>[[image:DotPoint.JPG|10px|link=]]</td> |
| | <td>'''Arriving Passenger Behaviour''' <span style="font-weight: 700; font-size: 15px; background-color: lightcyan;"> Left Click </span> on the '''Double Arrowhead''' to reveal the options<br> |
| | [[image:ManageIndustriesStationArriveProp_S20.png|link=]]</td> |
| </tr> | | </tr> |
| </table>
| |
| <br>
| |
| In the image shown on the left there are 4 objects all named '''Old Orroroo Rd'''.<br>
| |
| <br>
| |
| This will not cause any problems for scenery objects apart from finding the ''exact'' one you want with the '''Find Tool''' (<span style="font-weight: 700; font-size: 15px;"><span style="color: white; background-color: black;"> Ctrl </span> + <span style="color: white; background-color: black;"> F </span></span> keys) as shown in the image on the left - Which of the 4 "Old Orroroo Rd" objects is the one that I need?<br>
| |
| <br>
| |
| <table bgcolor=#ff0000 cellpadding=2>
| |
| <tr valign="top"> | | <tr valign="top"> |
| <td>
| | <td>[[image:DotPoint.JPG|10px|link=]]</td> |
| <table bgcolor=#fcbcbc cellpadding=2>
| | <td>'''Peak Departing Passenger Time''' <span style="font-weight: 700; font-size: 15px; background-color: lightcyan;"> Left Click </span> on the '''Double Arrowhead''' to reveal the options |
| <tr valign="top">
| | <table> |
| <td>[[image:Stop.PNG|link=]]</td> | |
| <td><span style="font-size: 15px; font-weight: 700;">WARNING:</span><br> | |
| '''Duplicate names''' will cause problems for '''Industries''' (including passenger enabled stations), '''Locomotives''', '''Track Marks''', '''Triggers''', '''Switches''', '''Signals''', etc that have to be identified to control the operation of a session.</td>
| |
| </tr> | |
| <tr valign="top"> | | <tr valign="top"> |
| <td colspan=2 align="center"><span style="font-weight: 700; font-size: 15px;">These objects must have unique names</span></td> | | <td>[[image:ManageIndustriesStationPeakProp_S20.png|link=]]</td> |
| | <td>This sets the time(s) at which the platform will have the most number of waiting passengers</td> |
| </tr> | | </tr> |
| </table> | | </table> |
| </td> | | </td> |
| </tr> | | </tr> |
| </table> | | <tr valign="top"> |
| </td> | | <td>[[image:DotPoint.JPG|10px|link=]]</td> |
| | <td>'''Peak Departing Passengers (120)''' <span style="font-weight: 700; font-size: 15px; background-color: lightcyan;"> Left Click </span> in the text box and enter the number of passengers that would be boarding during peak time(s) as set above</td> |
| | </tr> |
| | <tr valign="top"> |
| | <td>[[image:DotPoint.JPG|10px|link=]]</td> |
| | <td>'''Initial Number of Passengers (10)''' <span style="font-weight: 700; font-size: 15px; background-color: lightcyan;"> Left Click </span> in the text box and enter the starting number of passengers that will be waiting on the platform</td> |
| </tr> | | </tr> |
| </table>
| |
| <br>
| |
| <table width=1000> <!-- BEGIN Nav Buttons Table SKIPS NO SECTIONS -->
| |
| <tr valign="top"> | | <tr valign="top"> |
| <td width=629><span id="skip Free Move: Changing an Objects Layer"></span> | | <td colspan=2 align="center">'''Platform 2'''</td> |
| =='''Free Move: Changing an Objects Layer'''==
| |
| </td>
| |
| <td width=50>[[image:SkipDown.png|link=#skip Free Move: Scenery Mesh Objects|Skip Down]]</td> <!-- skip Down -->
| |
| <td width=50>[[image:SkipUp.png|link=#skip Free Move: Naming an Object|Skip Up]]</td> <!-- skip Up -->
| |
| <td width=46> </td> <!-- Top -->
| |
| <td width=75>[[image:HeadingUp.png|link=#stepFreeMove|alt=Heading|To Heading]]</td>
| |
| <td width=75> </td> <!-- Next Down -->
| |
| <td width=75> </td> <!-- Bottom -->
| |
| </tr> | | </tr> |
| </table> <!-- END Nav Buttons Table -->
| |
|
| |
| <table width=1000 bgcolor="lightcyan" cellpadding=2>
| |
| <tr valign="top"> | | <tr valign="top"> |
| <td width=10>[[image:BlueDot10x10.png|link=]]</td> | | <td colspan=2>The same sequence is repeated for each platform</td> |
| <td>All objects in the '''Trainz World''' are in layers. For '''scenery objects''' you can set and change the layers where they are placed</td> | | </tr> |
| | </table> |
| | </td> |
| </tr> | | </tr> |
| </table> | | </table> |
| Line 12,144: |
Line 12,350: |
| <tr valign="top"> | | <tr valign="top"> |
| <td> | | <td> |
| <table width=996 bgcolor=#ffffff cellpadding=2> | | <table width=996 bgcolor=#ffffb0 cellpadding=2> |
| | <tr valign="top"> |
| | <td width=25>[[image:NotePad.PNG|link=]]</td> |
| | <td width=975><span style="font-size: 17px; font-weight: 700;">Notes:'''</span><br> |
| | ----</td> |
| | </tr> |
| <tr valign="top"> | | <tr valign="top"> |
| <td colspan=2> | | <td colspan=2> |
| <table> | | <table> |
| <tr valign="middle"> | | <tr valign="top"> |
| <td width=35>[[image:Information.png|35px|link=]]</td> | | <td colspan=2>To automatically load and unload passenger consists at station platforms use the normal '''Load''' and '''Unload''' driver commands (as you would for loading/unloading cattle) but with the following differences:-</td> |
| <td>Layers are an essential feature of '''Trainz''' for managing different objects in '''Surveyor'''. Layers can be:-</td>
| |
| </tr>
| |
| </table>
| |
| </td> | |
| </tr> | | </tr> |
| <tr valign="top"> | | <tr valign="top"> |
| <td width=10>[[image:DotPoint.JPG|10px|link=]]</td> | | <td width=10>[[image:DotPoint.JPG|10px|link=]]</td> |
| <td>locked to prevent the accidental deletion, movement or alteration of the objects they contain</td> | | <td>'''Load''' will firstly unload passengers according to the option selected in the platform '''Arriving Passenger Behaviour''' (e.g. '''25%''' of passengers on board will unload using the '''Standard''' setting), and then load any waiting passengers upto the limit of each car</td> |
| </tr> | | </tr> |
| <tr valign="top"> | | <tr valign="top"> |
| <td>[[image:DotPoint.JPG|10px|link=]]</td> | | <td>[[image:DotPoint.JPG|10px|link=]]</td> |
| <td>hidden to remove their objects from view so that other nearby objects can be manipulated</td> | | <td>'''Unload''' will unload only using the selected option, it will not load any waiting passengers</td> |
| </tr> | | </tr> |
| <tr valign="top"> | | <tr valign="top"> |
| <td colspan=2>Layers can also be used in '''Driver''' to hide and reveal objects during ganeplay.<br><br> | | <td>[[image:DotPoint.JPG|10px|link=]]</td> |
| See [[image:WikiLink.PNG|link=]] '''[[How_to_Use_Layers|How to Use Layers]]''' for detailed information on '''Layers'''</td>
| | <td>To empty a passenger consist at a terminal station use the '''Unload''' command and set the '''Arriving Passenger Behaviour''' option of the platform to '''Terminus (100% Disembark)'''</td> |
| </tr> | | </tr> |
| </table> | | </table> |
| Line 12,171: |
Line 12,378: |
| </tr> | | </tr> |
| </table> | | </table> |
| <br>
| |
| <table width=1000 bgcolor=#000000 cellpadding=2>
| |
| <tr valign="top">
| |
| <td>
| |
| <table width=996 bgcolor=#ffe89a cellpadding=2>
| |
| <tr valign="middle">
| |
| <td width=45>[[image:PalettesIcon_S20.png|link=]]</td>
| |
| <td>If the <span style="font-weight: 700; font-size: 15px; color: white; background-color: #797979;"> Info Palette </span> is not visible on the screen then refer to [[image:PageLink.PNG|link=]] '''[[#Notes_Palettes|Notes: Palettes]]''' at the top of this document.
| |
| </td> | | </td> |
| </tr> | | </tr> |
| </table> | | </table> |
| | <br> |
| | <table width=1000> <!-- BEGIN Nav Buttons Table --> |
| | <tr valign="top"> |
| | <td width=629><span id="skipLegacyIndustries"></span> |
| | =='''Legacy Industries'''== |
| </td> | | </td> |
| | <td width=50>[[image:SkipDown.png|link=#stepManageConsists|Skip Down]]</td> |
| | <td width=50>[[image:SkipUp.png|link=#skipLoadIndustries|Skip Up]]</td> |
| | <td width=46> </td> |
| | <td width=75>[[image:HeadingUp.png|link=#stepManageIndustries|alt=Heading|To Heading]]</td> |
| | <td width=75> </td> |
| | <td width=75> </td> |
| </tr> | | </tr> |
| </table> | | </table> <!-- END Nav Buttons Table --> |
|
| |
|
| <table width=1000> | | <table width=1000 bgcolor="lightcyan" cellpadding=2> |
| | <tr valign="top"> |
| | <td width=10>[[image:BlueDot10x10.png|link=]]</td> |
| | <td>'''Legacy Industries''' are those that were created for older versions of '''Trainz'''</td> |
| | </tr> |
| <tr valign="top"> | | <tr valign="top"> |
| <td>An object will be added to a layer when it is placed into the '''Trainz World''' by the [[image:S20_PlacementToolIcon.png|link=|20px]] '''[[#The Placement Tool|Placement Tool]]''' and the '''Scrapbook'''. Once it has been placed it can be moved to a different layer.</td> | | <td>[[image:BlueDot10x10.png|link=]]</td> |
| | <td>Many legacy industry assets will work with the '''Industry Properties Window''' but, in general, the lower the '''Asset Build Number''' of an industry asset (i.e. the older the '''Trainz''' version it was designed for) the less likely it is that it will work correctly or at all</td> |
| | </tr> |
| | <tr valign="top"> |
| | <td>[[image:BlueDot10x10.png|link=]]</td> |
| | <td>Legacy industry assets that do not work within the '''Industry Properties Window''' can sometimes be accessed and controlled through the '''Script Properties''' section of the window</td> |
| </tr> | | </tr> |
| </table> | | </table> |
| | | <br> |
| <table width=1000> | | <table width=1000> |
| <tr valign="top"> | | <tr valign="top"> |
| <td width=320>[[image:InfoLayerSetNew.png|link=]]</td> | | <td>Often the only way to discover if an "older" or Legacy Industry asset will work in the '''Industry Properties Window''', and in the '''TLR''' (<span style="font-weight: 700; background-color: yellow;">available in Trainz Plus only</span>), is to open its '''Industry Properties Window''' and see what appears.<br> |
| <td>
| | |
| <table width=680 bgcolor=#000000 cellpadding=2>
| | If the '''Industry Properties Window''' appears with the '''Commodity Levels''' and '''Industry Processes''' sections, both with products as shown in '''Examples 1 to 3''' in the section above, then the industry is compatible with the new interface and with the '''TLR'''.<br> |
| <tr valign="top">
| | |
| <td>
| | However, if there are sections missing from the '''Industry Properties Window''', then that is an indication that the industry '''may not''' be compatible.</td> |
| <table bgcolor=#ffffff cellpadding=2>
| |
| <tr valign="top">
| |
| <td colspan=2><span style="font-weight: 700; font-size: 15px;">Steps:</span> To move a placed object to another layer:-</td>
| |
| </tr> | | </tr> |
| <tr valign="top"> | | </table> |
| <td width=25>[[image:DotPoint1.JPG|link=]]</td> | | <br> |
| <td>select the object (<span style="font-weight: 700; font-size: 15px; background-color: lightcyan;"> Left Click </span> on the object) or several objects (<span style="font-weight: 700; font-size: 15px;"><span style="color: white; background-color: black;"> Shift </span> + <span style="background-color: lightcyan;"> Left Click </span></span> on each object) to be moved to another layer. If multiple objects are selected then they do not have to be of the same type or in the same starting layer. <span style="background-color: #ffffb0;"> '''Note:''' The layer(s) containing the object(s) must '''NOT''' be locked </span></td> | | <table width=1000> |
| | <tr valign="top" bgcolor=#82e0aa> |
| | <td><span style="font-weight: 700; font-size: 15px;">Symptoms and Diagnosis</span></td> |
| </tr> | | </tr> |
| | </table> |
| | <br> |
| | <table width=1000> |
| <tr valign="top"> | | <tr valign="top"> |
| <td width=25>[[image:DotPoint2.JPG|link=]]</td> | | <td> |
| <td>In the <span style="font-weight: 700; font-size: 15px; color: white; background-color: #797979;"> Info Palette </span> <span style="font-weight: 700; font-size: 15px; background-color: lightcyan;"> Left Click </span> on the Layer arrowhead icon (circled in red in the image left). This will open up the layer controls for the last selected object</td>
| | <table> |
| </tr> | |
| <tr valign="top"> | | <tr valign="top"> |
| <td>[[image:DotPoint3.JPG|link=]]</td> | | <td width=25>[[image:Ablue.png|link=]]</td> |
| <td>the drop down menu box labelled '''Layer''' shows the currently assigned layer for that object. If multiple objects from different layers have been selected then no layer name will be shown. <span style="font-weight: 700; font-size: 15px; background-color: lightcyan;"> Left Click </span> on the '''Up/Down''' arrows to open the list of all available layers.</td> | | <td>[[image:ManageIndustriesNoProperties_S20.png|link=]]</td> |
| | <td>No <span style="font-weight: 700; font-size: 15px; color: white; background-color: black;"> Commodity Levels </span> section<br> |
| | No <span style="font-weight: 700; font-size: 15px; color: white; background-color: black;"> Industry Processes </span> section<br><br> |
| | This object is most likely a scenery asset that has been mis-labelled as an industry object. Another clue is that the object may not have any attached track, visible or invisible, but having an attached track is not a guarantee that it is an Industry object</td> |
| </tr> | | </tr> |
| <tr valign="top"> | | <tr valign="top"> |
| <td>[[image:DotPoint4.JPG|link=]]</td> | | <td> </td> |
| <td>select the destination layer from the list. The object(s) will then be moved to the selected layer - you will be given a warning if the move has failed (usually because an objects layer is locked)</td> | | <td colspan=2>A common example of this situation is when a scenery object has been created with the '''kind''' tag in its '''config.txt''' file set to "Industry" most likely because the object represents a factory, mine or other industrial structure but none of the special tags required for a working industry have been added. This type of error is more common in assets created for early versions of '''Trainz''', usually because the asset creator assumed that the '''kind''' tag was descriptive only (i.e. the asset looked like an industry)</td> |
| </tr> | | </tr> |
| <tr valign="top"> | | </table> |
| <td colspan=2>
| | <br> |
| | |
| <table bgcolor=#ffffb0 cellpadding=2>
| |
| <tr valign="top">
| |
| <td width=25>[[image:NotePad.PNG|link=]]</td>
| |
| <td><span style="font-weight: 700; font-size: 15px;">Also see:-</span> | |
| <table> | | <table> |
| <tr valign="top"> | | <tr valign="top"> |
| <td>[[image:PageLink.PNG|link=]] '''[[#skip Assigning Objects to a Different Layer|Assigning Objects to a Different Layer]]''' for more details on the '''Layer Controls''' in the <span style="font-weight: 700; font-size: 15px; color: white; background-color: #797979;"> Info Palette </span></td> | | <td width=25>[[image:Bblue.png|link=]]</td><td>[[image:ManageIndustriesNoCommod_S20.png|link=]]</td> |
| | <td>No <span style="font-weight: 700; font-size: 15px; color: white; background-color: black;"> Commodity Levels </span> section<br> |
| | An <span style="font-weight: 700; font-size: 15px; color: white; background-color: black;"> Industry Processes </span> section containing a process that is disabled<br> |
| | If you attempt to drag the '''Green''' processes bar to the right it will instantly "snap back" when released<br><br> |
| | Most likely the product name and quantity tags in the objects '''config.txt''' file are missing or have been incorrectly written</td> |
| </tr> | | </tr> |
| | </table> |
| | <br> |
| | <table> |
| <tr valign="top"> | | <tr valign="top"> |
| <td>[[image:WikiLink.PNG|link=]] '''[[How_to_Use_Layers|How to Use Layers]]''' for detailed information on '''Layers'''</td> | | <td width=25>[[image:Cblue.png|link=]]</td><td>[[image:ManageIndustriesNoProcess_S20.png|link=]]</td> |
| | <td>A <span style="font-weight: 700; font-size: 15px; color: white; background-color: black;"> Commodity Levels </span> section present with at least one Product<br> |
| | No <span style="font-weight: 700; font-size: 15px; color: white; background-color: black;"> Industry Processes </span> section<br> |
| | You may be able to drag out and set the '''Green''' commodity bar but it has no effect on the industry.<br><br> |
| | Most likely the product process tags in the objects '''config.txt''' file are missing or have been incorrectly written</td> |
| </tr> | | </tr> |
| </table> | | </table> |
| Line 12,237: |
Line 12,466: |
| </tr> | | </tr> |
| </table> | | </table> |
| </td> | | <br> |
| | <table width=1000> |
| | <tr valign="top"> |
| | <td colspan=2>In the legacy examples shown above in [[image:Bblue.png|link=]] and [[image:Cblue.png|link=]] it '''may''' be possible for the objects to work as industries. The first step is to check the contents of the '''Script Properties''' section of the '''Industry Properties Window'''</td> |
| | </tr> |
| | </table> |
| | <br> |
| | <table width=1000 bgcolor=#000000 cellpadding=2> |
| | <tr valign="top"> |
| | <td> |
| | <table width=996 bgcolor=#ffffff cellpadding=2> |
| | <tr valign="top"> |
| | <td width=35>[[image:Information35.png|link=]]</td> |
| | <td>If the '''Script Properties''' section is empty, apart from the title '''Display Legacy View-Details Window''', then it is '''very unlikely''' that this object will work correctly as an industry.<br> |
| | [[image:ManageIndustriesEmptyScript_S20.png|link=]]</td> |
| </tr> | | </tr> |
| </table> | | </table> |
| Line 12,243: |
Line 12,486: |
| </tr> | | </tr> |
| </table> | | </table> |
| </td> | | <br> |
| | <table width=1000> |
| | <tr valign="top" bgcolor=#82e0aa> |
| | <td><span style="font-weight: 700; font-size: 15px;">Treatment</span></td> |
| </tr> | | </tr> |
| </table> | | </table> |
| <br> | | <br> |
| <table width=1000 bgcolor=#ff0000 cellpadding=2> | | <table width=1000 cellpadding=2> |
| <tr valign="top"> | | <tr valign="top"> |
| <td> | | <td colspan=2>If the '''Script Properties''' section contains the legacy ('''TRS19''' and earlier) '''Industry Properties Window''', like the examples shown below, then it is likely (but not 100% certain) that this object will work as an industry</td> |
| <table width=996 bgcolor=#fcbcbc cellpadding=2> | | </tr> |
| <tr valign="top"> | | <tr valign="top"> |
| <td>[[image:Stop.PNG|link=]]</td>
| | <td colspan=2 align="center">'''Other interface designs and colour schemes are possible'''</td> |
| <td colspan=2><span style="font-size: 15px; font-weight: 700;">CAUTION: Take Care when assigning objects to layers</span></td> | |
| </tr> | | </tr> |
| <tr valign="top"> | | <tr valign="top"> |
| <td width=10>[[image:DotPoint.JPG|10px|link=]]</td> | | <td width=500 align="center">[[image:ManageIndustriesLegacyMenu01_S20.png|500px|link=]] |
| <td>Placing an object in the <span style="font-weight: 700; font-size: 15px; color: white; background-color: black;"> Route Layer Group </span> will save it in the '''Route''' and it will appear in every '''Session''' based on that '''Route'''</td> | | <table cellpadding=2 align="left"> |
| | <tr valign="top"> |
| | <td colspan=2><span style="font-weight: 700; font-size: 15px;">Steps: To Add Products and Processes to a Legacy Industry Asset:-</span></td> |
| </tr> | | </tr> |
| <tr valign="top"> | | <tr valign="top"> |
| <td>[[image:DotPoint.JPG|10px|link=]]</td> | | <td width=25>[[image:DotPoint1.JPG|link=]]</td> |
| <td>Placing an object in the <span style="font-weight: 700; font-size: 15px; color: white; background-color: black;"> Session Layer Group </span> will save it in the '''Session''' and it will only appear in the currently loaded '''Session'''</td> | | <td>Fill out or edit as many of the industry details (inputs, outputs, rates, tracks, etc) as required. In the example shown above left <span style="font-weight: 700; font-size: 15px; background-color: lightcyan;"> Left Click </span> on each category tab (e.g. '''Queues''', '''Tracks''', etc) to reveal its data. For example:-<br> |
| | [[image:ManageIndustriesLegacyMenu04_S20.png|link=]]</td> |
| </tr> | | </tr> |
| </table> | | </table> |
| </td> | | </td> |
| | <td width=500>[[image:ManageIndustriesLegacy02_S20.png|445px|link=]]</td> |
| </tr> | | </tr> |
| </table> | | </table> |
| <br> | | <br> |
| | <span id="ConfigureIndustryExample"></span> |
| <table width=1000 bgcolor=#000000 cellpadding=2> | | <table width=1000 bgcolor=#000000 cellpadding=2> |
| <tr valign="top"> | | <tr valign="top"> |
| <td> | | <td> |
| <table width=996 bgcolor=#ffffb0 cellpadding=2> | | <table width=996 bgcolor=#ffffff cellpadding=2> |
| | <tr valign="top"> |
| | <td><span style="font-weight: 700; font-size: 15px; color: white; background-color: black;"> Example: Configuring an Industry </span><br> |
| | This example will configure a legacy industry as a storage and distribution facility that inputs and outputs the same two products</td> |
| | </tr> |
| | <tr valign="top"> |
| | <td> |
| | <table> |
| <tr valign="top"> | | <tr valign="top"> |
| <td width=25>[[image:NotePad.PNG|link=]]</td> | | <td colspan=2><span style="font-weight: 700; font-size: 15px;">Step 1:</span> '''Configure the Queues Tab'''</td> |
| <td width=975><span style="font-size: 17px; font-weight: 700;">Notes:'''</span><br>
| |
| ----
| |
| The contents of the '''Ground Height Layer''', '''Ground Texture Layer''' and the '''Effect Layers''' cannot be moved to other layers. Objects in the '''Route Layers Group''' and '''Session Layers Group''' cannot be moved into these layers</td>
| |
| </tr> | | </tr> |
| </table> | | <tr valign="top"> |
| | <td>[[image:IndustryLoadQueues1.png|link=]]</td> |
| | <td>You can set the maximum quantity of products allowed in the queue by a <span style="font-weight: 700; font-size: 15px; background-color: lightcyan;"> Left Click </span> on the '''Size:''' setting.<br><br> |
| | <span style="font-weight: 700; font-size: 15px;">To Add a Product:</span><br> |
| | <span style="font-weight: 700; font-size: 15px; background-color: lightcyan;"> Left Click </span> on the <span style="font-weight: 700; font-size: 15px;">+</span> button to add a product to a queue. You can add several products (the maximum number will depend on the industry) to the same queue or, as shown in the image on the left, add each product to a separate queue (again the number of queues will depend on the industry).<br><br> |
| | <span style="font-weight: 700; font-size: 15px;">To Edit a Product:</span><br> |
| | <span style="font-weight: 700; font-size: 15px; background-color: lightcyan;"> Left Click </span> on its icon |
| | <br> |
| | [[image:IndustryLoadQueues2.png|link=]]<br> |
| | You can set the maximum load for this product in the queue by a <span style="font-weight: 700; font-size: 15px; background-color: lightcyan;"> Left Click </span> on the underlined quantity figure. The units used (units/tonnes/litres) are set in the '''Products''' tab. You can delete this product from the queue by a <span style="font-weight: 700; font-size: 15px; background-color: lightcyan;"> Left Click </span> on the <span style="font-weight: 700; font-size: 15px;">X</span> button |
| </td> | | </td> |
| </tr> | | </tr> |
| </table> | | </table> |
| <br> | | <br> |
| <table width=1000> <!-- BEGIN Section Nav Buttons --> | | <table bgcolor=#ffffe0 cellpadding=2> |
| <tr valign="top"> | | <tr valign="top"> |
| <td width=629><span id="skip Free Move: Scenery Mesh Objects"></span> | | <td width=25>[[image:PencilTips.PNG|link=]]</td> |
| =='''Free Move: Scenery Mesh Objects'''==
| | <td>If, at any stage, you receive an error message (e.g. a '''Script Error'''), or you cannot open a specific section or option, then ignore it and move on to the next data item to be entered or edited</td> |
| </td>
| |
| <td width=50>[[image:SkipDown.png|link=#skip Free Move: Track Objects|Skip Down]]</td>
| |
| <td width=50>[[image:SkipUp.png|link=#skip Free Move: Changing an Objects Layer|Skip Up]]</td> | |
| <td width=46>[[image:SkipMinorDown.png|link=#FM: Height Mesh|Down]][[image:SkipMinorBlank.png|link=]]</td> <!-- for Top and Minor Up/Down -->
| |
| <td width=75>[[image:HeadingUp.png|link=#stepFreeMove|alt=Heading|To Heading]]</td>
| |
| <td width=75> </td>
| |
| <td width=75> </td> <!-- for Bottom -->
| |
| </tr>
| |
| </table> <!-- END Section Nav Buttons -->
| |
| | |
| <table width=1000 bgcolor="lightcyan" cellpadding=2>
| |
| <tr valign="top">
| |
| <td width=10>[[image:BlueDot10x10.png|link=]]</td>
| |
| <td>Individual "non-spline" scenery objects that are not attached to track are often referred to in '''Trainz''' terminology as <span style="font-weight: 700; font-size: 15px;">Scenery Mesh Objects</span>.</td>
| |
| </tr> | | </tr> |
| </table> | | </table> |
| <br> | | <br> |
| <table width=1000 bgcolor=#000000 cellpadding=2> | | <table> |
| <tr valign="top"> | | <tr valign="top"> |
| <td> | | <td colspan=2><span style="font-weight: 700; font-size: 15px;">Step 2:</span> '''Configure the Tracks Tab'''</td> |
| <table width=996 bgcolor=#ffe89a cellpadding=2>
| |
| <tr valign="middle">
| |
| <td width=45>[[image:PalettesIcon_S20.png|link=]]</td>
| |
| <td>If the <span style="font-weight: 700; font-size: 15px; color: white; background-color: #797979;"> Tool Options Palette </span> and <span style="font-weight: 700; font-size: 15px; color: white; background-color: #797979;"> Info Palette </span> are not visible on the screen then refer to [[image:PageLink.PNG|link=]] '''[[#Notes_Palettes|Notes: Palettes]]''' at the top of this document.
| |
| </td> | |
| </tr> | | </tr> |
| </table> | | <tr valign="top"> |
| </td> | | <td>[[image:IndustryLoadTracks1.png|link=]]</td> |
| | <td><span style="font-weight: 700; font-size: 15px; background-color: lightcyan;"> Left Click </span> on the <span style="font-weight: 700; font-size: 15px;">+</span> button to add each product identified in '''Step 1''' above. |
| | <br> |
| | For each product set the load/unload operation to be used by a series of <span style="font-weight: 700; font-size: 15px; background-color: lightcyan;"> Left Clicks </span> on the '''Mode:''' setting. Each click will cycle through the options '''<u>Load into vehicle and Unload from vehicle</u>''', '''<u>Load into vehicle</u>''' and '''<u>Unload from vehicle</u>''' |
| | <br> |
| | If the same product is in more than one queue (as set in the '''Queues''' tab) then you can select the queue to be used by a <span style="font-weight: 700; font-size: 15px; background-color: lightcyan;"> Left Click </span> on the '''Queue:''' settings. |
| | <br> |
| | You can delete this product from the '''Tracks''' tab by a <span style="font-weight: 700; font-size: 15px; background-color: lightcyan;"> Left Click </span> on the <span style="font-weight: 700; font-size: 15px;">X</span> button.</td> |
| </tr> | | </tr> |
| </table> | | </table> |
| <br> | | <br> |
| <table width=1000> <!-- BEGIN Section Nav Buttons --> | | <table> |
| <tr valign="top"> | | <tr valign="top"> |
| <td width=629><span id="FM: Move Mesh"></span> | | <td colspan=2><span style="font-weight: 700; font-size: 15px;">Step 3:</span> '''Configure the Processes Tab'''</td> |
| ===<span style="font-weight: 700; font-size: 17px; color: white; background-color: blue;"> Free Move: Move a Scenery Mesh Object </span>===
| |
| </td>
| |
| <td width=50> </td>
| |
| <td width=50> </td>
| |
| <td width=46>[[image:SkipMinorDown.png|link=#FM: Height Mesh|Down]][[image:SkipMinorBlank.png|link=]]</td> <!-- for Top and Minor Up/Down -->
| |
| <td width=75> </td>
| |
| <td width=75> </td>
| |
| <td width=75> </td> <!-- for Bottom -->
| |
| </tr> | | </tr> |
| </table> <!-- END Section Nav Buttons -->
| |
|
| |
| <table width=1000>
| |
| <tr valign="top"> | | <tr valign="top"> |
| <td width=250>[[image:FreeMoveToolCar_S20.png|link=]]</td> | | <td>[[image:IndustryLoadProcesses1.png|link=]]</td> |
| <td width=10> </td> | | <td><span style="font-weight: 700; font-size: 15px;">To Add Products:</span><br> |
| <td width=740> | | <span style="font-weight: 700; font-size: 15px; background-color: lightcyan;"> Left Click </span> on the '''FIRST''' <span style="font-weight: 700; font-size: 15px;">+</span> button to add each '''Input''' ('''<u>Unload from vehicle</u>''') product identified in '''Step 2''' above.<br> |
| <table bgcolor=#000000 cellpadding=2> | | <span style="font-weight: 700; font-size: 15px; background-color: lightcyan;"> Left Click </span> on the '''SECOND''' <span style="font-weight: 700; font-size: 15px;">+</span> button to add each '''Output''' ('''<u>Load into vehicle</u>''') product identified in '''Step 2''' above.<br> |
| <tr valign="top"> | | Where a product is both an '''Input''' and an '''Output''' ('''<u>Load into vehicle and Unload from vehicle</u>''') as shown in the image on the left, then add it to both <span style="font-weight: 700; font-size: 15px;">+</span> buttons.<br> |
| <td> | | <span style="font-weight: 700; font-size: 15px;">To Set the Duration Time:</span><br> |
| <table bgcolor=#ffffff cellpadding=2> | | You can set the delay cycle (in seconds) for consumption and production operations by a <span style="font-weight: 700; font-size: 15px; background-color: lightcyan;"> Left Click </span> on the '''Duration:''' setting. For example: if a commodity starts at a level of 50 tonnes and is set to consume 10 tonnes every '''30 secs''' and produce 5 tonnes every '''30 secs''' then, after the first 30 secs it will have 45 tonnes of the product left (50 - 10 + 5), after 1 minute it will have 40 tonnes left, and so on</td> |
| <tr valign="top"> | |
| <td colspan=2><span style="font-weight: 700; font-size: 15px;">Steps:</span> To move a '''Scenery Mesh Object''':-</td> | |
| </tr> | | </tr> |
| <tr valign="top"> | | <tr valign="top"> |
| <td width=20>[[image:DotPoint1.JPG|link=]]</td> | | <td colspan=2> |
| <td>In the <span style="font-weight: 700; font-size: 15px; color: white; background-color: #797979;"> Tools Palette </span> select the [[image:S20_FreeMoveToolIcon.png|link=|20px]] '''Free Move Tool''' or press the <span style="font-weight: 700; font-size: 15px; color: white; background-color: black;"> S </span> key</td>
| | <table> |
| </tr> | |
| <tr valign="top"> | | <tr valign="top"> |
| <td>[[image:DotPoint2.JPG|link=]]</td> | | <td width=300>[[image:IndustryProductsConsume_S20.png|link=]]</td> |
| <td><span style="font-weight: 700; font-size: 15px; background-color: lightcyan;">Left Click and Drag</span> the object in any '''horizontal''' direction</td> | | <td><span style="font-weight: 700; font-size: 15px;">To Set the Production/Consumption Rates:</span><br> |
| </tr> | | A <span style="font-weight: 700; font-size: 15px; background-color: lightcyan;"> Left Click </span> on a product icon will open its '''Production''' or '''Consumption''' window, depending on which side of the arrow it is located. This will allow you to edit how much of this product will be consumed or produced during the set '''Duration''' period. If you have used the coloured bars to set the '''Production''' and/or '''Consumption''' values then those figures will appear in this window.<br> |
| </table> | | You can delete this product from the '''Processes''' tab by a <span style="font-weight: 700; font-size: 15px; background-color: lightcyan;"> Left Click </span> on the <span style="font-weight: 700; font-size: 15px;">X</span> button.</td> |
| </td> | |
| </tr> | | </tr> |
| </table> | | </table> |
| <br> | | <br> |
| <table bgcolor=#000000 cellpadding=2> | | <table> |
| <tr valign="top"> | | <tr valign="top"> |
| <td> | | <td colspan=2><span style="font-weight: 700; font-size: 15px;">Step 4:</span> '''Optional - Configure the Products Tab''' |
| | <br> |
| <table bgcolor=#ffffb0 cellpadding=2> | | <table bgcolor=#ffffb0 cellpadding=2> |
| <tr valign="top"> | | <tr valign="top"> |
| <td width=25>[[image:NotePad.PNG|link=]]</td> | | <td width=25>[[image:NotePad.PNG|link=]]</td> |
| <td><span style="font-size: 17px;">'''Notes:'''</span><br> | | <td>The original purpose of this tab was to allocate products to a specific rolling stock object (one object only). This task is now performed much more effectively by the '''Rolling Stock Properties Window''' (see [[image:PageLink.PNG|link=]] '''[[#skipLoadConsists|Loading Consists]]''' below)</td> |
| ----
| | </tr> |
| | </table> |
| </td> | | </td> |
| </tr> | | </tr> |
| <tr valign="top"> | | <tr valign="top"> |
| <td>[[image:DotPoint.JPG|10px|link=]]</td> | | <td>[[image:IndustryLoadProducts1.png|link=]]</td> |
| <td>If multple objects have been selected then '''all''' the objects will be moved</td> | | <td><span style="font-weight: 700; font-size: 15px; background-color: lightcyan;"> Left Click </span> on an icon to open up its properties window |
| | <br> |
| | [[image:IndustryLoadProducts2.png|link=]]<br> |
| | It is recommended that you leave the '''Vehicle:''' setting at '''<u>none</u>''' to load/unload '''all''' rolling stock objects that are configured to carry this product (see [[image:PageLink.PNG|link=]] '''[[#skipLoadConsists|Loading Consists]]''' below).<br> |
| | You can set the quantity units used for this product by a series of <span style="font-weight: 700; font-size: 15px; background-color: lightcyan;"> Left Clicks </span> on the last item at the bottom of the window. Each click will cycle through the options '''<u>Tonnes</u>''', '''<u>Litres</u>''' and '''<u>Items</u>'''</td> |
| </tr> | | </tr> |
| <tr valign="top">
| | </table> |
| <td>[[image:DotPoint.JPG|10px|link=]]</td>
| | </td> |
| <td>When moving a scenery object, its height will be '''fixed''' to the terrain height</td>
| |
| </tr> | | </tr> |
| </table> | | </table> |
| Line 12,383: |
Line 12,624: |
| </table> | | </table> |
| <br> | | <br> |
| <table width=1000> <!-- BEGIN Section Nav Buttons --> | | <table width=1000 cellpadding=2> |
| <tr valign="top"> | | <tr valign="top"> |
| <td width=629><span id="FM: Height Mesh"></span> | | <td>[[image:DotPoint2.JPG|link=]]</td> |
| ===<span style="font-weight: 700; font-size: 17px; color: white; background-color: blue;"> Free Move: Set the Height of a Scenery Mesh Object </span>===
| | <td>When finished <span style="font-weight: 700; font-size: 15px; background-color: lightcyan;"> Left Click </span> on the <span style="font-weight: 700; font-size: 15px; color: white; background-color: black;"> Save Changes </span> button at the bottom right of the window<br> |
| </td>
| | [[image:ManageIndustriesLegacySave_S20.png|link=]]</td> |
| <td width=50> </td>
| |
| <td width=50> </td> | |
| <td width=46>[[image:SkipMinorDown.png|link=#FM: Context Mesh|Down]][[image:SkipMinorUp.png|link=#skip Free Move: Scenery Mesh Objects|Up]]</td> <!-- for Top and Minor Up/Down -->
| |
| <td width=75> </td>
| |
| <td width=75> </td>
| |
| <td width=75> </td> <!-- for Bottom -->
| |
| </tr> | | </tr> |
| </table> <!-- END Section Nav Buttons -->
| |
| <br>
| |
| <span style="Font-weight: 700; font-size: 15px;">Get the Height of a Scenery Mesh Object</span>
| |
| <br>
| |
| <table width=1000 bgcolor=#000000 cellpadding=2>
| |
| <tr valign="top"> | | <tr valign="top"> |
| <td> | | <td>[[image:DotPoint3.JPG|link=]]</td> |
| <table bgcolor=#ffffe0 cellpadding=2> | | <td>Close the '''Industry Properties Window'''</td> |
| | </tr> |
| <tr valign="top"> | | <tr valign="top"> |
| <td width=25>[[image:PencilTips.PNG|link=]]</td> | | <td>[[image:DotPoint4.JPG|link=]]</td> |
| <td>You can copy the height of a '''selected''' scenery mesh object (e.g. a house) into the <span style="font-weight: 700; font-size: 15px; color: white; background-color: #797979;"> Tool Options Palette </span> <span style="font-weight: 700; font-size: 15px; color: gold; background-color: black;"> Height </span> setting. Once it has been copied it can be applied to any other object.</td> | | <td>Reopen the '''Industry Properties Window''' for the same industry object</td> |
| </tr> | | </tr> |
| <tr valign="top"> | | </table> |
| <td> </td> | | <br> |
| | <table width=1000> |
| | <tr valign="top" bgcolor=#82e0aa> |
| | <td><span style="font-weight: 700; font-size: 15px;">Recovery</span></td> |
| | </tr> |
| | </table> |
| | <br> |
| | <table width=1000> |
| | <tr valign="top"> |
| | <td>If, after reopening the '''Industry Properties Window''', you see all the '''Commodity Level''' and '''Input/Output Processes''' present and filled out to the values you just set then the procedure has been successful, but there is no 100% guarantee that the Legacy Industry will work perfectly.<br> |
| | [[image:ManageIndustriesLegacyMenu06_S20.png|link=]]</td> |
| | </tr> |
| | <tr valign="top"> |
| <td> | | <td> |
| <table bgcolor=#ffffff> | | <table bgcolor=#000000 cellpadding=2> |
| <tr valign="top"> | | <tr valign="top"> |
| <td colspan=2><span style="font-weight: 700; font-size: 15px;">Steps:</span> To copy the height of any '''selected''' object into the <span style="font-weight: 700; font-size: 15px; color: gold; background-color: black;"> Height </span> setting:-</td> | | <td> |
| </tr>
| | <table bgcolor=#ffffff cellpadding=2> |
| <tr valign="top"> | | <tr valign="top"> |
| <td width=20>[[image:DotPoint1.JPG|link=]]</td> | | <td align="center"><span style="font-weight: 700; font-size: 15px;">Each of the Commodity Levels and Industry Processes can now be adjusted by altering the length of their green or blue bars</span></td> |
| <td>In the <span style="font-weight: 700; font-size: 15px; color: white; background-color: #797979;"> Tool Options Palette </span> <span style="font-weight: 700; font-size: 15px; background-color: lightcyan;">Right Click</span> inside the <span style="font-weight: 700; font-size: 15px; color: gold; background-color: black;"> Height </span> setting</td>
| |
| </tr> | | </tr> |
| <tr valign="top">
| | </table> |
| <td>[[image:DotPoint2.JPG|link=]]</td>
| | </td> |
| <td>select the <span style="font-weight: 700; font-size: 15px; color: white; background-color: black;"> Get Height from Selection </span> option</td>
| |
| </tr> | | </tr> |
| </table> | | </table> |
| </td> | | </td> |
| </tr> | | </tr> |
| | </table> |
| | <br> |
| | <table width=1000> <!-- BEGIN Nav Buttons Table --> |
| <tr valign="top"> | | <tr valign="top"> |
| <td> </td> | | <td width=629><span id="stepManageConsists"></span> |
| <td> | | ='''Managing Consists'''= |
| <table> | | </td> |
| <tr valign="top"> | | <td width=50>[[image:SkipDown.png|link=#skipConfigureConsists|Skip Down]]</td> |
| <td>You can check the height of any selected object or endpoint using the <span style="font-weight: 700; font-size: 15px; color: white; background-color: #797979;"> Info Palette </span>. The height is the last value in the '''Pos:''' (Position) data set.</td> | | <td width=50>[[image:SkipUp.png|link=#skipLegacyIndustries|Skip Up]]</td> |
| | <td width=46>[[image:BackToTop.png|link=#top|alt=Top|Top]]</td> |
| | <td width=75>[[image:NextUp.png|link=#stepManageIndustries|alt=Next Up|Next Up]]</td> |
| | <td width=75>[[image:NextDown.png|link=#stepLogs|alt=Next Down|Next Down]]</td> |
| | <td width=75>[[image:BackToBottom.png|link=#bottom|alt=Bottom|Bottom]]</td> |
| </tr> | | </tr> |
| | </table> <!-- END Nav Buttons Table --> |
| | |
| | <table width=1000 bgcolor="lightcyan" cellpadding=2> |
| <tr valign="top"> | | <tr valign="top"> |
| <td>[[image:InfoPaletteShowHeight_S20.png|link=]]</td> | | <td width=10>[[image:BlueDot10x10.png|link=]]</td> |
| | <td>'''Consist''' covers all rolling stock objects, including locomotives</td> |
| </tr> | | </tr> |
| </table> | | </table> |
| </td> | | <br> |
| | <table width=1000> |
| | <tr valign="top"> |
| | <td>You can open the '''Properties Window''' of a selected rolling stock object by one of two methods depending on your '''Trainz''' version and starting point |
| | <table> |
| | <tr valign="top"> |
| | <td width=25>[[image:Ablue.png|link=]]</td> |
| | <td width=550>from '''Surveyor''' using '''Trainz Plus''' or '''TRS22PE'''</td> |
| | <td width=25>[[image:Bblue.png|link=]]</td> |
| | <td>from '''Surveyor''' or '''Driver''' using '''Trainz Plus'''</td> |
| </tr> | | </tr> |
| </table> | | </table> |
| Line 12,442: |
Line 12,703: |
| </tr> | | </tr> |
| </table> | | </table> |
| <br>
| | |
| <span style="Font-weight: 700; font-size: 15px;">Set the Height of a Scenery Mesh Object</span>
| | <table width=1000> |
| <br>
| |
| <table width=1000 bgcolor=#000000 cellpadding=2> | |
| <tr valign="top"> | | <tr valign="top"> |
| <td> | | <td> |
| <table width=996 bgcolor=#ffffff cellpadding=2> | | <table width=550 bgcolor=#000000 cellpadding=2> |
| <tr>
| |
| <td colspan=2>To set the '''height''' of a '''selected''' scenery mesh object, choose one of the following:-<br>
| |
| <span style="font-weight: 700; font-size: 15px;">Options:</span></td>
| |
| </tr>
| |
| <tr valign="top"> | | <tr valign="top"> |
| <td> | | <td> |
| <table width=600> | | <table bgcolor=#ffffff cellpadding=2> |
| <tr valign="top"> | | <tr valign="top"> |
| <td width=25>[[image:Ablue.png|link=]]</td> | | <td colspan=2><span style="font-weight: 700; font-size: 15px;">Steps: To Open the Properties Window of a Rolling Stock Object in Surveyor:-</span></td> |
| <td>in the <span style="font-weight: 700; font-size: 15px; color: white; background-color: #797979;"> Tool Options Palette </span> <span style="font-weight: 700; font-size: 15px; background-color: lightcyan;"> Left Click </span> inside the <span style="font-size: 15px; font-weight: 700; color: gold; background-color: black;"> Height </span> setting and enter a new value (or keep the existing value) then press the <span style="font-weight: 700; font-size: 15px; color: white; background-color: black;"> Enter </span> key. This works even if the <span style="font-size: 15px; font-weight: 700; color: gold; background-color: black;"> Height </span> icon is not coloured <span style="font-weight: 700; font-size: 15px; color: gold; background-color: black;"> Gold </span>. <span style="font-size: 15px; font-weight: 700;">OR</span></td>
| |
| </tr> | | </tr> |
| <tr valign="top"> | | <tr valign="top"> |
| <td>[[image:Bblue.png|link=]]</td> | | <td colspan=2> |
| <td>in the <span style="font-weight: 700; font-size: 15px; color: white; background-color: #797979;"> Tool Options Palette </span> <span style="font-weight: 700; font-size: 15px; background-color: lightcyan;"> Left Click </span> inside the <span style="font-size: 15px; font-weight: 700; color: gold; background-color: black;"> Height </span> setting and enter a new value (or keep the existing value) then <span style="font-weight: 700; font-size: 15px; background-color: lightcyan;">Right Click</span> in the setting box and select the <span style="font-weight: 700; font-size: 15px; color: white; background-color: black;"> Set Height to Selection </span> option, <span style="font-weight: 700; font-size: 15px;">OR</span></td>
| | <table> |
| </tr> | |
| <tr valign="top"> | | <tr valign="top"> |
| <td>[[image:Cblue.png|link=]]</td>
| |
| <td>select the <span style="font-size: 15px; font-weight: 700; color: white; background-color: black;"> Apply Height </span> setting from the objects '''Context Menu''' (<span style="font-weight: 700; font-size: 15px; background-color: lightcyan;"> Left Click </span> on the objects '''Context Icon''' or press the <span style="font-weight: 700; font-size: 15px; color: white; background-color: black;"> T </span> key) to apply an existing height value, <span style="font-size: 15px; font-weight: 700;">OR</span></td>
| |
| </tr>
| |
| <tr valign="top">
| |
| <td>[[image:Dblue.png|link=]]</td>
| |
| <td>in the <span style="font-weight: 700; font-size: 15px; color: white; background-color: #797979;"> Info Palette </span> enter a value in the objects <span style="font-size: 15px; font-weight: 700; color: white; background-color: black;"> z </span> (height) setting or <span style="font-weight: 700; font-size: 15px; background-color: lightcyan;">Left Click and Drag</span> '''Up''' or '''Down''' on the double arrowheads to its right. This can be used to set the height to '''cm''' accuracy (see [[image:PageLink.PNG|link=]] '''[[#The Info Palette|The Info Palette]]''' below).</td>
| |
| </tr>
| |
| </table>
| |
| </td>
| |
| <td> | | <td> |
| <table bgcolor=#ffffb0 cellpadding=2> | | <table> |
| <tr valign="top"> | | <tr valign="top"> |
| <td width=25>[[image:NotePad.PNG|link=]]</td> | | <td width=25>[[image:DotPoint1.JPG|link=]]</td> |
| <td ><span style="font-size: 17px; font-weight: 700;">Notes:'''</span><br> | | <td>Use the [[image:S20_FreeMoveToolIcon.png|link=|20px]] '''Free Move Tool''' to <span style="font-weight: 700; font-size: 15px; background-color: lightcyan;"> Left Click </span> on any rolling stock object in the consist</td> |
| ----</td>
| |
| </tr> | | </tr> |
| <tr valign="top"> | | <tr valign="top"> |
| <td>[[image:DotPoint.JPG|10px|link=]]</td> | | <td>[[image:DotPoint2.JPG|link=]]</td> |
| <td>If multiple objects have been selected then the height of the '''context object''', the one with the '''Context Icon''', will have its height set to the new value.</td> | | <td>either press the <span style="font-weight: 700; font-size: 15px; color: white; background-color: black;"> T </span> key or <span style="font-weight: 700; font-size: 15px; background-color: lightcyan;"> Left Click </span> on its '''Context Icon'''</td> |
| </tr> | | </tr> |
| <tr valign="top"> | | <tr valign="top"> |
| <td>[[image:DotPoint.JPG|10px|link=]]</td> | | <td width=25>[[image:DotPoint3.JPG|link=]]</td> |
| <td>All other selected objects will have their heights adjusted to maintain their height relative to that object. For example: If another selected object is 2m below the '''context object''' then its adjusted height will always remain 2m below the '''context object'''</td> | | <td>select the <span style="font-weight: 700; font-size: 15px; color: white; background-color: black;"> Edit Details </span> option</td> |
| </tr> | | </tr> |
| </table> | | </table> |
| </td> | | </td> |
| | <td>[[image:ManageConsistsContext_S20.png|link=]]</td> |
| </tr> | | </tr> |
| </table> | | </table> |
| Line 12,496: |
Line 12,740: |
| </tr> | | </tr> |
| </table> | | </table> |
| <br>
| |
| <table width=1000> <!-- BEGIN Section Nav Buttons -->
| |
| <tr valign="top">
| |
| <td width=629><span id="FM: Context Mesh"></span>
| |
| ===<span style="font-weight: 700; font-size: 17px; color: white; background-color: blue;"> Free Move: Scenery Mesh Object Context Menu </span>===
| |
| </td> | | </td> |
| <td width=50> </td>
| |
| <td width=50> </td>
| |
| <td width=46>[[image:SkipMinorDown.png|link=#skip Free Move: Track Objects|Down]][[image:SkipMinorUp.png|link=#FM: Height Mesh|Up]]</td> <!-- for Top and Minor Up/Down -->
| |
| <td width=75> </td>
| |
| <td width=75> </td>
| |
| <td width=75> </td> <!-- for Bottom -->
| |
| </tr>
| |
| </table> <!-- END Section Nav Buttons -->
| |
|
| |
| <table width=1000>
| |
| <tr>
| |
| <td>A selected scenery mesh object, or a group of selected scenery mesh objects, will have a '''Context Icon''' that opens a '''Context Menu'''. <span style="font-weight: 700; font-size: 15px; background-color: lightcyan;"> Left Click </span> on its icon or press the <span style="font-weight: 700; font-size: 15px; color: white; background-color: black;"> T </span> key. The icon design will vary between object types.</td>
| |
| </tr> | | </tr> |
| </table> | | </table> |
| | | </td> |
| <table width=1000>
| | <td> |
| <tr valign="top">
| | <table width=450 bgcolor=#000000 cellpadding=2> |
| <td width=220>[[image:ContextMenuMeshObject_S20.png|link=]]</td>
| |
| <td width=780> | |
| <table width=780 bgcolor=#000000> | |
| <tr valign="top"> | | <tr valign="top"> |
| <td> | | <td> |
| <table width=776 bgcolor=#ffffff> | | <table bgcolor=#ffffff cellpadding=2> |
| <tr valign="top"> | | <tr valign="top"> |
| <td> | | <td colspan=2><span style="font-weight: 700; font-size: 15px;">Steps: To Open the Properties Window of a Rolling Stock Object in Dispatch Manager (<span style="background-color: yellow;">in Trainz Plus only</span>):-</span></td> |
| <table>
| |
| <tr valign="middle">
| |
| <td width=35>[[image:Information.png|35px|link=]]</td>
| |
| <td><span style="font-weight: 700; font-size: 17px;">Scenery Mesh Object Context Menu Options</span>
| |
| </td> | |
| </tr> | | </tr> |
| </table> | | <tr valign="top"> |
| </td> | | <td width=25>[[image:DotPoint1.JPG|link=]]</td> |
| | <td>Open the [[image:SurveyorToolsIcon_S20.png|link=]] '''Tools Menu''' from the '''Surveyor/Driver Main Menu''' bar and select the '''Dispatch Manager''' option from the drop down menu</td> |
| </tr> | | </tr> |
| <tr valign="top"> | | <tr valign="top"> |
| <td> | | <td>[[image:DotPoint2.JPG|link=]]</td> |
| <table> | | <td>from the '''Dispatch Manager''' window identify the consist to be edited |
| | <table bgcolor=#ffffe0 cellpadding=2> |
| <tr valign="top"> | | <tr valign="top"> |
| <td><span style="font-weight: 700; font-size: 15px; color: white; background-color: black;"> Cut </span></td> | | <td width=25>[[image:PencilTips.PNG|link=]]</td> |
| <td>remove the selected object or objects from the route and move them into the '''Scrapbook'''</td> | | <td>Filter the items displayed using the option '''All Trains''' or '''Drivers''' if the consist has a driver</td> |
| </tr> | | </tr> |
| </table> | | </table> |
| Line 12,547: |
Line 12,768: |
| </tr> | | </tr> |
| <tr valign="top"> | | <tr valign="top"> |
| <td> | | <td>[[image:DotPoint3.JPG|link=]]</td> |
| <table> | | <td><span style="font-weight: 700; font-size: 15px; background-color: lightcyan;"> Left Click </span> on the down '''Arrowhead''' icon of the selected consist in the '''Status''' column<br> |
| | [[image:DispatchManagerLeviDelivering_S20.png|link=]]</td> |
| | </tr> |
| <tr valign="top"> | | <tr valign="top"> |
| <td><span style="font-weight: 700; font-size: 15px; color: white; background-color: black;"> Copy </span></td> | | <td>[[image:DotPoint4.JPG|link=]]</td> |
| <td>copy the selected object or objects and place them into the '''Scrapbook'''</td>
| | <td>select the <span style="font-weight: 700; font-size: 15px; color: white; background-color: black;"> Show Consist... </span> option</td> |
| </tr> | | </tr> |
| </table> | | </table> |
| </td> | | </td> |
| </tr>
| |
| <tr valign="top">
| |
| <td>
| |
| <table>
| |
| <tr valign="top">
| |
| <td><span style="font-weight: 700; font-size: 15px; color: white; background-color: black;"> Paste </span></td>
| |
| <td>paste the contents of the current '''Scrapbook''' at the cursor (focus) point<br>
| |
| <table bgcolor=#ffffb0 cellpadding=2>
| |
| <tr valign="top">
| |
| <td width=25>[[image:NotePad.PNG|link=]]</td>
| |
| <td>When pasted from a scrapbook the objects will be surrounded by a '''Marquee Selection Area''' that, depending on the settings in the [[image:PageLink.PNG|link=]] '''[[#Scrapbook Filters|Scrapbook Filters]]''', may add to or replace all other objects, splines, textures, ground terrain and effect layers in that area</td>
| |
| </tr> | | </tr> |
| </table> | | </table> |
| Line 12,571: |
Line 12,783: |
| </tr> | | </tr> |
| </table> | | </table> |
| | <br> |
| | <table width=1000> <!-- BEGIN Nav Buttons Table --> |
| | <tr valign="top"> |
| | <td width=629><span id="skipConfigureConsists"></span> |
| | =='''Configuring a Consist'''== |
| </td> | | </td> |
| | <td width=50>[[image:SkipDown.png|link=#skipLoadConsists|Skip Up]]</td> |
| | <td width=50>[[image:SkipUp.png|link=#stepManageConsists|Skip Up]]</td> |
| | <td width=46> </td> |
| | <td width=75>[[image:HeadingUp.png|link=#stepManageConsists|alt=Heading|To Heading]]</td> |
| | <td width=75> </td> |
| | <td width=75> </td> |
| </tr> | | </tr> |
| | </table> <!-- END Nav Buttons Table --> |
| | |
| | <table width=1000 bgcolor="lightcyan" cellpadding=2> |
| <tr valign="top"> | | <tr valign="top"> |
| <td> | | <td width=10>[[image:BlueDot10x10.png|link=]]</td> |
| <table> | | <td>The general properties of a consist, such as its '''Track Priority''' and '''Classification''', can be edited</td> |
| | </tr> |
| <tr valign="top"> | | <tr valign="top"> |
| <td><span style="font-weight: 700; font-size: 15px; color: white; background-color: black;"> Delete </span></td> | | <td>[[image:BlueDot10x10.png|link=]]</td> |
| <td>delete the selected objects. It has the same effect as pressing the <span style="font-weight: 700; font-size: 15px; color: white; background-color: black;"> Delete </span> key</td> | | <td>Configuring the properties of any wagon in a consist will configure the properties of '''ALL''' the wagons in the consist</td> |
| </tr> | | </tr> |
| </table> | | </table> |
| </td> | | <br> |
| | <table width=1000> |
| | <tr valign="top"> |
| | <td colspan=2>The '''Properties Window''' of a selected rolling stock object is shown below with its option menus:-</td> |
| </tr> | | </tr> |
| <tr valign="top"> | | <tr valign="top"> |
| | <td width=590>[[image:ConsistManagerSettingsOptions_S20.png|link=]]</td> |
| <td> | | <td> |
| <table> | | <table bgcolor=#000000 cellpadding=2> |
| | <tr valign="top"> |
| | <td> |
| | <table bgcolor=#ffffff cellpadding=2> |
| <tr valign="top"> | | <tr valign="top"> |
| <td><span style="font-weight: 700; font-size: 15px; color: white; background-color: black;"> Replace Object with Selected Asset </span></td> | | <td colspan=2><span style="font-weight: 700; font-size: 15px;">Steps: To Open a Sub Menu in the Properties Window to Change a Setting:-</span></td> |
| <td>the '''selected''' object will be replaced with the asset currently selected in the <span style="font-weight: 700; font-size: 15px; color: white; background-color: #797979;"> Assets Palette </span>. If no object has been selected in the <span style="font-weight: 700; font-size: 15px; color: white; background-color: #797979;"> Assets Palette </span> or it is the wrong type (e.g. a scenery spline instead of a mesh object) then this option will be greyed out</td>
| |
| </tr> | | </tr> |
| </table> | | <tr valign="top"> |
| </td> | | <td width=25>[[image:DotPoint1.JPG|link=]]</td> |
| | <td><span style="font-weight: 700; font-size: 15px; background-color: lightcyan;"> Left Click </span> on the down '''Arrowhead''' next to the current setting of a property</td> |
| </tr> | | </tr> |
| <tr valign="top"> | | <tr valign="top"> |
| <td> | | <td>[[image:DotPoint2.JPG|link=]]</td> |
| <table>
| | <td><span style="font-weight: 700; font-size: 15px; background-color: lightcyan;"> Left Click </span> on the option to be set <span style="font-weight: 700; font-size: 15px;">OR</span> <span style="font-weight: 700; font-size: 15px; background-color: lightcyan;"> Left Click </span> anywhere outside the options list to close it</td> |
| <tr valign="top">
| |
| <td><span style="font-weight: 700; font-size: 15px; color: white; background-color: black;"> Paint Under Selected </span></td>
| |
| <td>the texture selected in the <span style="font-weight: 700; font-size: 15px; color: white; background-color: #797979;"> Assets Palette </span> will be painted under the '''selected''' objects. The <span style="font-weight: 700; font-size: 15px; color: white; background-color: #797979;"> Tool Options Palette </span> brush settings (<span style="font-weight: 700; font-size: 15px; color: gold; background-color: black;"> Radius </span> and <span style="font-weight: 700; font-size: 15px; color: gold; background-color: black;"> Sensitivity </span>) will control how the texture is applied. If no ground texture has been selected in the <span style="font-weight: 700; font-size: 15px; color: white; background-color: #797979;"> Assets Palette </span> then this option will be greyed out</td> | |
| </tr> | | </tr> |
| </table> | | </table> |
| </td> | | </td> |
| </tr> | | </tr> |
| | </table> |
| | <br> |
| | <table bgcolor=#000000 cellpadding=2> |
| <tr valign="top"> | | <tr valign="top"> |
| <td> | | <td> |
| <table> | | <table bgcolor=#ffffe0 cellpadding=2> |
| <tr valign="top"> | | <tr valign="top"> |
| <td><span style="font-weight: 700; font-size: 15px; color: white; background-color: black;"> Smooth Ground Under Selected </span></td> | | <td width=25>[[image:PencilTips.PNG|link=]]</td> |
| <td>smooths the height of the ground under the selected object to match the set height of the object. The size of the area affected will depend on which has the greater value: the width of the object <span style="font-weight: 700; font-size: 15px;">OR</span> the <span style="font-weight: 700; font-size: 15px; color: white; background-color: #797979;"> Tool Options Palette </span> <span style="font-weight: 700; font-size: 15px; color: gold; background-color: black;"> Radius </span> setting. If multiple objects at different heights have been selected then the ground height will be set to match, as far as possible, the heights of each object</td> | | <td>To edit the name of a rolling stock object (e.g. '''SAR BLV 111''' as shown at the top of the '''Properties Window''' in the figure on the left) open the <span style="font-weight: 700; font-size: 15px; color: white; background-color: #797979;"> Info Palette </span> and edit or type the name in the <span style="font-weight: 700; font-size: 15px; color: white; background-color: black;"> Name </span> text entry box. See [[image:PageLink.PNG|link=]] '''[[#The Info Palette|Info Palette]]''' for the details</td> |
| </tr> | | </tr> |
| </table> | | </table> |
| </td> | | </td> |
| </tr> | | </tr> |
| | </table> |
| | </td> |
| | </tr> |
| | </table> |
| | <br> |
| | <table width=1000 bgcolor=#000000 cellpadding=2> |
| <tr valign="top"> | | <tr valign="top"> |
| | <td> |
| | <table bgcolor=#ffffff cellpadding=2> |
| | <tr valign="middle"> |
| <td> | | <td> |
| <table> | | <table> |
| <tr valign="top"> | | <tr valign="top"> |
| <td><span style="font-weight: 700; font-size: 15px; color: white; background-color: black;"> Settle on Ground </span></td> | | <td width=35>[[image:Information35.png|link=]]</td> |
| <td>sets the height of the objects to match the height of the terrain beneath them ("drops them back to earth")</td>
| | <td><span style="font-weight: 700; font-size: 17px;">Consist Settings Menu Options</span></td> |
| </tr> | | </tr> |
| </table> | | </table> |
| Line 12,627: |
Line 12,870: |
| <table> | | <table> |
| <tr valign="top"> | | <tr valign="top"> |
| <td><span style="font-weight: 700; font-size: 15px; color: white; background-color: black;"> Apply Height </span></td> | | <td colspan=4><span style="font-weight: 700; font-size: 15px;"> Track Priority: </span></td> |
| <td>sets the height of the '''selected object''' to the value in the <span style="font-weight: 700; font-size: 15px; color: white; background-color: #797979;"> Tool Options Palette </span> <span style="font-weight: 700; font-size: 15px; color: gold; background-color: black;"> Height </span> setting. Where multiple objects have been selected the '''context object''', the one with the '''Context Icon''', will have its height set to the <span style="font-weight: 700; font-size: 15px; color: gold; background-color: black;"> Height </span> value and the other '''selected objects''' will have their heights adjusted up or down by the same amount</td> | | </tr> |
| | <tr valign="top"> |
| | <td>Select one option from <span style="font-weight: 700; font-size: 15px; color: white; background-color: black;"> 1 </span> <span style="font-weight: 700; font-size: 15px; color: white; background-color: black;"> 2 </span> or <span style="font-weight: 700; font-size: 15px; color: white; background-color: black;"> 3 </span></td> |
| | </tr> |
| | <tr valign="top"> |
| | <td>These settings are used with [[image:WikiLink.PNG|link=]] '''[[How_to_Use_Track_Priority_Markers|Track Priority Marker]]''' objects, and a few other track objects, to control the path that a consist will normally take at a junction. Without the presence and use of '''Track Priority Markers''', or other track objects designed to work with priority levels, this setting has no effect on a consist</td> |
| </tr> | | </tr> |
| </table> | | </table> |
| Line 12,637: |
Line 12,885: |
| <table> | | <table> |
| <tr valign="top"> | | <tr valign="top"> |
| <td><span style="font-weight: 700; font-size: 15px; color: white; background-color: black;"> Reset Object Rotation </span></td> | | <td colspan=3><span style="font-weight: 700; font-size: 15px;"> Train Classification: </span> These options control the running lights displayed on the leading locomotive if that locomotive has been configured correctly</td> |
| <td>resets the rotation angle of the '''selected''' objects to their default values</td> | | </tr> |
| | <tr valign="top"> |
| | <td width=25> </td> |
| | <td><span style="font-weight: 700; font-size: 15px; color: white; background-color: black;"> Timetabled Train (Off) </span></td> |
| | <td>sets the running lights for a normal scheduled train service</td> |
| | </tr> |
| | <tr valign="top"> |
| | <td width=25> </td> |
| | <td><span style="font-weight: 700; font-size: 15px; color: white; background-color: black;"> Extra Train (White) </span></td> |
| | <td>sets the running lights to indicate that this is an additional (not regularly scheduled) train service</td> |
| | </tr> |
| | <tr valign="top"> |
| | <td width=25> </td> |
| | <td><span style="font-weight: 700; font-size: 15px; color: white; background-color: black;"> Train with following section (Green)''' </span></td> |
| | <td>sets the running lights to indicate that this service has an additional (or "second division") service following. That following service should be set to show the '''Extra Train''' running lights</td> |
| </tr> | | </tr> |
| </table> | | </table> |
| Line 12,647: |
Line 12,909: |
| <table> | | <table> |
| <tr valign="top"> | | <tr valign="top"> |
| <td><span style="font-weight: 700; font-size: 15px; color: white; background-color: black;"> Randomise Object Rotation </span></td> | | <td colspan=3><span style="font-weight: 700; font-size: 15px;"> Dispatch Status: <span style="background-color: yellow;"> available in Trainz Plus only</span></span></td> |
| <td>applies a random rotation angle to each '''selected''' object around its vertical axis</td>
| | </tr> |
| | <tr valign="top"> |
| | <td colspan=3> |
| | <table bgcolor=#ffffb0 cellpadding=2> |
| | <tr valign="top"> |
| | <td width=25>[[image:NotePad.PNG|link=]]</td> |
| | <td>In <span style="font-weight: 700; background-color: yellow;">Trainz Plus</span> the <span style="font-weight: 700; font-size: 15px; color: white; background-color: black;"> Dispatch Manager </span> <span style="font-weight: 700; font-size: 15px; color: white; background-color: black;"> Dispatch Status </span> setting must be '''Enabled''' for these options to be available. The '''TLR''' (Trainz Living Railroad) uses this to control consists assigned to the '''Automatic Scheduler'''. See '''[[image:PageLink.PNG|link=]] [[#stepDispatchManager|Dispatch Manager]]''' for more information</td> |
| </tr> | | </tr> |
| </table> | | </table> |
| Line 12,654: |
Line 12,922: |
| </tr> | | </tr> |
| <tr valign="top"> | | <tr valign="top"> |
| | <td width=25> </td> |
| <td> | | <td> |
| <table> | | <table> |
| <tr valign="top"> | | <tr valign="top"> |
| <td><span style="font-weight: 700; font-size: 15px; color: white; background-color: black;"> Select in Assets Palette </span></td> | | <td><span style="font-weight: 700; font-size: 15px; color: white; background-color: black;"> Claim Task </span></td> |
| <td>sets the <span style="font-weight: 700; font-size: 15px; color: white; background-color: #797979;"> Filter Palette </span> to <span style="font-weight: 700; font-size: 15px; color: white; background-color: black;"> All Content </span> and highlights the selected object in the <span style="font-weight: 700; font-size: 15px; color: white; background-color: #797979;"> Assets Palette </span></td> | | <td>this will cancel the '''Automatic Scheduler''' if it has been set, and you, the player, will be given control of the train. Any driver commands in the '''Command Status''' will be cleared.</td> |
| </tr> | | </tr> |
| </table> | | </table> |
| Line 12,664: |
Line 12,933: |
| </tr> | | </tr> |
| <tr valign="top"> | | <tr valign="top"> |
| <td> | | <td> </td> |
| <table> | | <td colspan=2> |
| | <table bgcolor=#ffffb0 cellpadding=2> |
| <tr valign="top"> | | <tr valign="top"> |
| <td><span style="font-weight: 700; font-size: 15px; color: white; background-color: black;"> Select in Filter Palette </span></td> | | <td width=25>[[image:NotePad.PNG|link=]]</td> |
| <td>sets the <span style="font-weight: 700; font-size: 15px; color: white; background-color: #797979;"> Filter Palette </span> to <span style="font-weight: 700; font-size: 15px; color: white; background-color: black;"> All Content </span> and highlights the selected object in the <span style="font-weight: 700; font-size: 15px; color: white; background-color: #797979;"> Filter Palette </span></td> | | <td>If the current driver has already been '''Claimed''' then <span style="font-weight: 700; font-size: 15px; color: white; background-color: black;"> Assign to Automatic Scheduler </span> will appear instead of the <span style="font-weight: 700; font-size: 15px; color: white; background-color: black;"> Claim Task </span> option. Selecting '''Assign to Automatic Scheduler''' will return the driver to the '''TLR'''</td> |
| </tr> | | </tr> |
| </table> | | </table> |
| Line 12,674: |
Line 12,944: |
| </tr> | | </tr> |
| <tr valign="top"> | | <tr valign="top"> |
| <td> | | <td width=25> </td> |
| | <td colspan=2> |
| <table> | | <table> |
| <tr valign="top"> | | <tr valign="top"> |
| <td><span style="font-weight: 700; font-size: 15px; color: white; background-color: black;"> Edit Details </span></td> | | <td><span style="font-weight: 700; font-size: 15px; color: white; background-color: black;"> Pause Task </span></td> |
| <td>opens the '''Properties''' window of the selected object. '''Note:''' to enter or edit an objects name property use the <span style="font-weight: 700; font-size: 15px; color: white; background-color: #797979;"> Info Palette </span></td> | | <td>the current '''TLR''' tasks for this driver will be paused and the train will be halted. No other drivers will be affected.</td> |
| </tr> | | </tr> |
| </table> | | </table> |
| </td> | | </td> |
| | </tr> |
| | <tr valign="top"> |
| | <td width=25> </td> |
| | <td colspan=2> |
| | <table bgcolor=#ffffb0 cellpadding=2> |
| | <tr valign="top"> |
| | <td width=25>[[image:NotePad.PNG|link=]]</td> |
| | <td>The '''Pause Task''' option will not appear if the '''Claim Task''' option has been selected.<br> |
| | If the current driver has been put on '''Pause''' then <span style="font-weight: 700; font-size: 15px; color: white; background-color: black;"> Resume Task </span> will appear instead of the <span style="font-weight: 700; font-size: 15px; color: white; background-color: black;"> Pause Task </span> option. Selecting '''Resume Task''' will return the driver to the '''TLR''' to continue its normal operations</td> |
| </tr> | | </tr> |
| </table> | | </table> |
| </td> | | </td> |
| | </tr> |
| | <tr valign="top"> |
| | <td width=25> </td> |
| | <td colspan=2> |
| | <table> |
| | <tr valign="top"> |
| | <td><span style="font-weight: 700; font-size: 15px; color: white; background-color: black;"> Cancel Task </span></td> |
| | <td>any '''current''' driver commands in the '''Command Status''' will be terminated. The '''TLR''' will then allocate new tasks to this driver</td> |
| </tr> | | </tr> |
| </table> | | </table> |
| </td> | | </td> |
| | </tr> |
| | <tr valign="top"> |
| | <td width=25> </td> |
| | <td colspan=2> |
| | <table> |
| | <tr valign="top"> |
| | <td><span style="font-weight: 700; font-size: 15px; color: white; background-color: black;"> Clear Cached Track Path </span></td> |
| | <td>will delete the cached '''TLR''' path for this consist held in memory and will rebuild it using the current settings</td> |
| </tr> | | </tr> |
| </table> | | </table> |
| <br>
| |
| <table width=1000> <!-- BEGIN Section Nav Buttons -->
| |
| <tr valign="top">
| |
| <td width=629><span id="skip Free Move: Track Objects"></span>
| |
| =='''Free Move: Track Objects'''==
| |
| </td> | | </td> |
| <td width=50>[[image:SkipDown.png|link=#skip Free Move: Spline Objects|Skip Down]]</td>
| |
| <td width=50>[[image:SkipUp.png|link=#skip Free Move: Scenery Mesh Objects|Skip Up]]</td>
| |
| <td width=46>[[image:SkipMinorDown.png|link=#FM: Height TObject|Down]][[image:SkipMinorUp.png|link=#FM: Context Mesh|Up]]</td> <!-- for Top and Minor Up/Down -->
| |
| <td width=75>[[image:HeadingUp.png|link=#stepFreeMove|alt=Heading|To Heading]]</td>
| |
| <td width=75> </td>
| |
| <td width=75> </td> <!-- for Bottom -->
| |
| </tr> | | </tr> |
| </table> <!-- END Section Nav Buttons -->
| |
|
| |
| <table width=1000 bgcolor="lightcyan" cellpadding=2>
| |
| <tr valign="top"> | | <tr valign="top"> |
| <td width=10>[[image:BlueDot10x10.png|link=]]</td> | | <td width=25> </td> |
| <td>'''Track Objects''' (signals, switches, speed signs, markers, etc) are always attached to an existing track</td> | | <td colspan=2> |
| </tr> | | <table> |
| <tr valign="top"> | | <tr valign="top"> |
| <td>[[image:BlueDot10x10.png|link=]]</td> | | <td><span style="font-weight: 700; font-size: 15px; color: white; background-color: black;"> Show Dispatch Manager </span></td> |
| <td>In '''Surveyor 2.0''' they can be moved left, right, above and below the track</td> | | <td>if you have closed the '''Dispatch Manager''' window, or minimised it to free up screen space, then this will return it to the screen</td> |
| </tr> | | </tr> |
| </table> | | </table> |
| | | </td> |
| <table width=1000> <!-- BEGIN Section Nav Buttons --> | | </tr> |
| | </table> |
| | </td> |
| | </tr> |
| | </table> |
| | </td> |
| | </tr> |
| | </table> |
| | <br> |
| | <table width=1000> <!-- BEGIN Nav Buttons Table --> |
| <tr valign="top"> | | <tr valign="top"> |
| <td width=629><span id="FM: Move TObject"></span> | | <td width=629><span id="skipLoadConsists"></span> |
| ===<span style="font-weight: 700; font-size: 17px; color: white; background-color: blue;"> Free Move: Move a Track Object </span>=== | | =='''Loading Consists in Surveyor (Incl Locomotives)'''== |
| </td> | | </td> |
| <td width=50> </td> | | <td width=50>[[image:SkipDown.png|link=#skipDriverConsists|Skip Down]]</td> <!-- Skip Down --> |
| <td width=50> </td> | | <td width=50>[[image:SkipUp.png|link=#skipConfigureConsists|Skip Up]]</td> <!-- Skip Up --> |
| <td width=46>[[image:SkipMinorDown.png|link=#FM: Height TObject|Down]][[image:SkipMinorBlank.png|link=]]</td> <!-- for Top and Minor Up/Down --> | | <td width=46> </td> <!-- Top --> |
| <td width=75> </td> | | <td width=75>[[image:HeadingUp.png|link=#stepManageConsists|alt=Heading|To Heading]]</td> <!-- Next Up --> |
| <td width=75> </td> | | <td width=75> </td> <!-- Next Down --> |
| <td width=75> </td> <!-- for Bottom --> | | <td width=75> </td> <!-- Bottom --> |
| </tr> | | </tr> |
| </table> <!-- END Section Nav Buttons --> | | </table> <!-- END Nav Buttons Table --> |
|
| |
|
| <table width=1000 bgcolor="lightcyan" cellpadding=2> | | <table width=1000 bgcolor="lightcyan" cellpadding=2> |
| <tr valign="top"> | | <tr valign="top"> |
| <td width=10>[[image:BlueDot10x10.png|link=]]</td> | | <td width=10>[[image:BlueDot10x10.png|link=]]</td> |
| <td>'''Track objects''' can be dragged to new positions along the track, beside the track or to a different track</td> | | <td>In '''Surveyor''' consists and locomotives that are designed to carry products, including fuel for the locomotive, can be preloaded with products</td> |
| | </tr> |
| | <tr valign="top"> |
| | <td>[[image:BlueDot10x10.png|link=]]</td> |
| | <td>Not all consists and locomotives are designed to carry products, including locomotive fuel</td> |
| | </tr> |
| | <tr valign="top"> |
| | <td>[[image:BlueDot10x10.png|link=]]</td> |
| | <td>Once the load has been set for one wagon in a consist it can be copied to '''ALL''' identical wagons in the consist</td> |
| </tr> | | </tr> |
| </table> | | </table> |
| <br> | | <br> |
| <table width=1000> | | <table width=1000 bgcolor=#000000 cellpadding=2> |
| <tr valign="top"> | | <tr valign="top"> |
| <td width=300>[[image:PlacementTrackObject_S20.png|link=]]</td>
| |
| <td> | | <td> |
| <table bgcolor=#000000 cellpadding=2> | | <table width=996 bgcolor=#ffffff cellpadding=2> |
| <tr valign="top"> | | <tr valign="top"> |
| <td> | | <td>If you have opened a '''Consist Properties Window''' from the '''Dispatch Manager''' (available in '''Trainz Plus''' only) and want to edit the commodities (products) shown then <span style="font-weight: 700; font-size: 15px; background-color: lightcyan;"> Left Click </span> on the <span style="font-weight: 700; font-size: 15px; color: white; background-color: black;"> Enable Editing </span> button at the bottom of the window. This will open its '''Commodities Level''' settings for editing.<br><br> |
| <table bgcolor=#ffffff cellpadding=2> | | Then proceed to '''Step''' <span style="font-weight: 700; font-size: 15px; color: white; background-color: red;"> 2 </span> [[image:Ablue.png|link=]] [[image:Bblue.png|link=]] or [[image:Cblue.png|link=]] below.</td> |
| | </tr> |
| | </table> |
| | </td> |
| | </tr> |
| | </table> |
| | <br> |
| | <table width=1000> |
| <tr valign="top"> | | <tr valign="top"> |
| <td colspan=2><span style="font-weight: 700; font-size: 15px;">Steps:</span> To move a '''Track Object''' along the track using the '''Free Move Tool''':-</td> | | <td colspan=2><span style="font-weight: 700; font-size: 15px;">Steps: To Load a Rolling Stock Object with a Product:-</span></td> |
| </tr> | | </tr> |
| <tr valign="top"> | | <tr valign="top"> |
| <td width=20>[[image:DotPoint1.JPG|link=]]</td> | | <td width=25>[[image:DotPoint1.JPG|link=]]</td> |
| <td>In the <span style="font-weight: 700; font-size: 15px; color: white; background-color: #797979;"> Tools Palette </span> select the [[image:S20_FreeMoveToolIcon.png|link=|20px]] '''Free Move Tool''' or press the <span style="font-weight: 700; font-size: 15px; color: white; background-color: black;"> S </span> key</td> | | <td> |
| </tr> | | <table> |
| | <tr valign="top"> |
| | <td>In Surveyor use the [[image:S20_FreeMoveToolIcon.png|link=|20px]] '''Free Move Tool''' to select (highlight) a single suitable rolling stock object. |
| | <br> |
| | <table bgcolor=#000000 cellpadding=2> |
| <tr valign="top"> | | <tr valign="top"> |
| <td>[[image:DotPoint2.JPG|link=]]</td> | | <td> |
| <td><span style="font-weight: 700; font-size: 15px; background-color: lightcyan;">Left Click and Drag</span> the objects '''Anchor Point''' (the small yellow dot in the middle of the track as shown in the image left) to any position along the track or to another track.
| |
| <table bgcolor=#ffffb0 cellpadding=2> | | <table bgcolor=#ffffb0 cellpadding=2> |
| <tr valign="top"> | | <tr valign="top"> |
| <td width=25>[[image:NotePad.PNG|link=]]</td> | | <td width=25>[[image:NotePad.PNG|link=]]</td> |
| <td>You can also move the object by dragging the object itself and not its '''Anchor Point'''. However, it will lose its fixed distance, both vertical and horizontal, from the centre of the track. You will then have to open its '''Context Menu''' and select the <span style="font-weight: 700; font-size: 15px; color: white; background-color: black;"> Reattach to Track </span> option to restore it to the correct height and distance from the track centre</td> | | <td>Not all rolling stock objects were created to carry loads - the rolling stock creator has to add attachment points for visible products to appear. '''Step''' <span style="font-weight: 700; font-size: 15px; color: white; background-color: red;"> 2 </span> below will reveal if the chosen rolling stock object has been configured for carrying a load. Rolling stock objects that cannot be loaded with a product can still be included in a consist sent to an industry but they will not load/unload</td> |
| </tr>
| |
| </table>
| |
| </td>
| |
| </tr>
| |
| </table>
| |
| </td> | |
| </tr> | | </tr> |
| </table> | | </table> |
| Line 12,771: |
Line 13,073: |
| </table> | | </table> |
| <br> | | <br> |
| <table width=1000> | | <table bgcolor=#000000 cellpadding=2> |
| <tr valign="top"> | | <tr valign="top"> |
| <td width=400>[[image:FreeMoveTrackObject_S20.png|link=]]<br><br>
| |
| [[image:FreeMoveTrackObjectMoveH_S20.png|link=]]</td>
| |
| <td> | | <td> |
| <table bgcolor=#000000 width=600 cellpadding=2> | | <table bgcolor=#ffffff cellpadding=2> |
| | <tr valign="middle"> |
| | <td width=35>[[image:Information35.png|link=]]</td> |
| | <td>Locomotives can typically be loaded with:-</td> |
| | </tr> |
| <tr valign="top"> | | <tr valign="top"> |
| <td> | | <td colspan=2> |
| <table bgcolor=#ffffff width=596 cellpadding=2> | | <table> |
| <tr valign="top"> | | <tr valign="top"> |
| <td colspan=2><span style="font-weight: 700; font-size: 15px;">Step:</span> To move a track object horizontally away from the track with the '''Free Move Tool''':-</td> | | <td width=10>[[image:DotPoint.JPG|10px|link=]]</td> |
| | <td><span style="font-weight: 700; font-size: 15px; color: white; background-color: blue;"> for Steam </span> '''Coal''', '''Wood''' or '''Bunker Oil (or similar)''' for fuel plus '''Water''' and '''Sand''' - in the locomotive or its tender</td> |
| </tr> | | </tr> |
| <tr valign="top"> | | <tr valign="top"> |
| <td width=25>[[image:DotPoint1.JPG|link=]]</td> | | <td>[[image:DotPoint.JPG|10px|link=]]</td> |
| <td><span style="font-weight: 700; font-size: 15px; background-color: lightcyan;">Left Click and Drag</span> the object (but not by using its '''Anchor Point''') to anywhere in the horizontal plane including away from the track. The object will always be linked by a "stretchable" yellow line to its anchor point on the closest track segment.</td> | | <td><span style="font-weight: 700; font-size: 15px; color: white; background-color: blue;"> for Diesel </span> '''Diesel Fuel''' and '''Sand'''</td> |
| </tr> | | </tr> |
| <tr valign="top"> | | </table> |
| <td colspan=2>
| | But individual locomotives will vary.</td> |
| <table bgcolor=#ffffe0 cellpadding=2>
| |
| <tr valign="top">
| |
| <td width=25>[[image:PencilTips.PNG|link=]]</td>
| |
| <td>You can drag the track object to a different track</td>
| |
| </tr> | | </tr> |
| </table> | | </table> |
| Line 12,798: |
Line 13,099: |
| </tr> | | </tr> |
| </table> | | </table> |
| | <br> |
| </td> | | </td> |
| </tr>
| | <td width=300>[[image:LoadBulkWagonStep01_S20.png|link=]]</td> |
| </table>
| |
| <br>
| |
| Track objects that have been moved away from or closer to the track will still function normally and can be moved along the track without reversing the change. Their position can be reset to normal by selecting the <span style="font-weight: 700; font-size: 15px; color: white; background-color: black;"> Reattach to Track </span> option from the objects '''Context Menu'''<br><br>
| |
| <table bgcolor=#000000 cellpadding=2>
| |
| <tr valign="top">
| |
| <td>
| |
| <table bgcolor=#ffffe0 cellpadding=2>
| |
| <tr valign="top">
| |
| <td width=25>[[image:PencilTips.PNG|link=]]</td> | |
| <td>You can select and move multiple track objects at the same time. Use <span style="font-weight: 700; font-size: 15px;"><span style="color: white; background-color: black;"> Shift </span> + <span style="background-color: lightcyan;"> Left Click </span></span> when selecting each object then drag them all to their new positions. The last selected object will have the '''Context Icon'''.<br><br>
| |
| However, if you have moved the objects off the track (i.e. to the left or right of the track) then using the <span style="font-weight: 700; font-size: 15px; color: white; background-color: black;"> Reattach to Track </span> option may lead to some objects attaching themselves to a closer track than the one intended.</td>
| |
| </tr> | | </tr> |
| </table> | | </table> |
| Line 12,816: |
Line 13,107: |
| </tr> | | </tr> |
| </table> | | </table> |
| </td> | | |
| | <table width=1000> |
| | <tr valign="top"> |
| | <td width=25>[[image:DotPoint2.JPG|link=]]</td> |
| | <td>Open its context menu (either press the <span style="font-weight: 700; font-size: 15px; color: white; background-color: black;"> T </span> key or <span style="font-weight: 700; font-size: 15px; background-color: lightcyan;"> Left Click </span> on its '''Context Icon''') and select the <span style="font-weight: 700; font-size: 15px; color: white; background-color: black;"> Edit Details </span> option</td> |
| | <td width=220 rowspan=2>[[image:LoadBulkWagonStep02_S20.png|link=]]</td> |
| </tr> | | </tr> |
| </table> | | <tr valign="top"> |
| <br> | | <td> </td> |
| <table bgcolor=#000000 width=800 cellpadding=2> | | <td>This will open the '''Properties Window''' for the selected rolling stock object. Look for a section in the window labelled '''Commodity Levels'''<br> |
| | <table bgcolor=#000000 cellpadding=2> |
| <tr valign="top"> | | <tr valign="top"> |
| <td> | | <td> |
| <table bgcolor=#ffffe0 width=796 cellpadding=2> | | <table bgcolor=#ffffb0 cellpadding=2> |
| <tr valign="top"> | | <tr valign="top"> |
| <td width=25>[[image:PencilTips.PNG|link=]]</td><td colspan=2>Situations where it is useful to be able to move a track object away from the track include:-</td> | | <td width=25>[[image:NotePad.PNG|link=]]</td> |
| | <td><span style="font-size: 17px;">'''Notes:'''</span><br> |
| | ---- |
| | </td> |
| </tr> | | </tr> |
| <tr valign="top"> | | <tr valign="top"> |
| <td width=10>[[image:DotPoint.JPG|10px|link=]]</td> | | <td width=10>[[image:DotPoint.JPG|10px|link=]]</td> |
| <td>placing '''Track Marks''' and '''Triggers''' above (see the next section) or beside the track so that they are not hidden by consists parked on top of them</td> | | <td>If there is no '''Commodity Levels''' section then the selected rolling stock object is '''NOT''' configured for carrying any load.</td> |
| </tr> | | </tr> |
| <tr valign="top"> | | <tr valign="top"> |
| <td>[[image:DotPoint.JPG|10px|link=]]</td> | | <td>[[image:DotPoint.JPG|10px|link=]]</td> |
| <td>repositioning switches, signals, track signs closer to or further away from the track - particularly useful if the track object was originally created for a different gauge track</td> | | <td> |
| | <table> |
| | <tr valign="top"> |
| | <td width=100>[[image:LoadBulkWagonNoAdd_S20.png|link=]]</td> |
| | <td>If the <span style="font-weight: 700; font-size: 15px; color: white; background-color: black;"> + Add </span> button is greyed out and cannot be selected then the wagon may be in a consist that has been assigned to the '''Automatic Scheduler''', part of the '''TLR''' system in <span style="font-weight: 700; background-color: yellow;">Trainz Plus</span></td> |
| </tr> | | </tr> |
| </table> | | </table> |
| Line 12,839: |
Line 13,143: |
| </tr> | | </tr> |
| </table> | | </table> |
| <br>
| |
| <table width=1000> <!-- BEGIN Section Nav Buttons -->
| |
| <tr valign="top">
| |
| <td width=629><span id="FM: Height TObject"></span>
| |
| ===<span style="font-weight: 700; font-size: 17px; color: white; background-color: blue;"> Free Move: Set the Height of a Track Object </span>===
| |
| </td>
| |
| <td width=50> </td>
| |
| <td width=50> </td>
| |
| <td width=46>[[image:SkipMinorDown.png|link=#FM: Trigger TObject|Down]][[image:SkipMinorUp.png|link=#skip Free Move: Track Objects|Up]]</td> <!-- for Top and Minor Up/Down -->
| |
| <td width=75> </td>
| |
| <td width=75> </td>
| |
| <td width=75> </td> <!-- for Bottom -->
| |
| </tr>
| |
| </table> <!-- END Section Nav Buttons -->
| |
|
| |
| <table width=1000 bgcolor="lightcyan" cellpadding=2>
| |
| <tr valign="top">
| |
| <td width=10>[[image:BlueDot10x10.png|link=]]</td>
| |
| <td>'''Track objects''' can be raised above and lowered below the track level.</td>
| |
| </tr>
| |
| </table>
| |
| <br>
| |
| <table width=1000 bgcolor=#000000 cellpadding=2>
| |
| <tr valign="top">
| |
| <td>
| |
| <table width=996 bgcolor=#ffe89a cellpadding=2>
| |
| <tr valign="middle">
| |
| <td width=45>[[image:PalettesIcon_S20.png|link=]]</td>
| |
| <td>If the <span style="font-weight: 700; font-size: 15px; color: white; background-color: #797979;"> Info Palette </span> and <span style="font-weight: 700; font-size: 15px; color: white; background-color: #797979;"> Tool Options Palette </span> are not visible on the screen then refer to [[image:PageLink.PNG|link=]] '''[[#Notes_Palettes|Notes: Palettes]]''' at the top of this document.
| |
| </td> | | </td> |
| </tr> | | </tr> |
| Line 12,875: |
Line 13,150: |
| </table> | | </table> |
| <br> | | <br> |
| <span style="Font-weight: 700; font-size: 15px;">Get the Height of a Track Object</span>
| | <table> |
| <br>
| |
| <table width=1000 bgcolor=#000000 cellpadding=2> | |
| <tr valign="top"> | | <tr valign="top"> |
| | <td width=25> </td> |
| <td> | | <td> |
| <table bgcolor=#ffffe0 cellpadding=2> | | <table width=975 bgcolor=#000000 cellpadding=2> |
| <tr valign="top"> | | <tr valign="top"> |
| <td width=25>[[image:PencilTips.PNG|link=]]</td> | | <td> |
| <td>You can copy the height of a '''selected''' track mesh object (e.g. a signal) into the <span style="font-weight: 700; font-size: 15px; color: white; background-color: #797979;"> Tool Options Palette </span> <span style="font-weight: 700; font-size: 15px; color: gold; background-color: black;"> Height </span> setting. Once it has been copied it can be applied to any other object.</td> | | <table width=971 bgcolor=#ffffff cellpadding=2> |
| </tr>
| |
| <tr valign="top"> | | <tr valign="top"> |
| <td> </td> | | <td>Depending on how the rolling stock object has been previously configured (or not) you will see one of the following '''Commodity Levels''' displays:-<br> |
| <td>
| | <table> |
| <table bgcolor=#ffffff> | |
| <tr valign="top"> | | <tr valign="top"> |
| <td colspan=2><span style="font-weight: 700; font-size: 15px;">Steps:</span> To copy the height of any '''selected''' object into the <span style="font-weight: 700; font-size: 15px; color: gold; background-color: black;"> Height </span> setting:-</td> | | <td width=25>[[image:Ablue.png|link=]]</td> |
| | <td>For rolling stock objects with '''[[#NotConfiguredNotLoaded|no supported commodities (products)]]'''. These instructions will show you how to add, edit and configure commodities that can be loaded</td> |
| </tr> | | </tr> |
| <tr valign="top"> | | <tr valign="top"> |
| <td width=20>[[image:DotPoint1.JPG|link=]]</td> | | <td width=25>[[image:Bblue.png|link=]]</td> |
| <td><span style="font-weight: 700; font-size: 15px; background-color: lightcyan;">Right Click</span> in the <span style="font-weight: 700; font-size: 15px; color: gold; background-color: black;"> Height </span> setting in the <span style="font-weight: 700; font-size: 15px; color: white; background-color: #797979;"> Tool Options Palette </span></td> | | <td>For rolling stock objects with '''[[#ConfiguredNotLoaded|supported commodities (products) but nothing loaded]]'''. These instructions will show you how to load a supported commodity</td> |
| </tr> | | </tr> |
| <tr valign="top"> | | <tr valign="top"> |
| <td>[[image:DotPoint2.JPG|link=]]</td> | | <td width=25>[[image:Cblue.png|link=]]</td> |
| <td>select the <span style="font-weight: 700; font-size: 15px; color: white; background-color: black;"> Get Height from Selection </span> option</td> | | <td>For rolling stock objects with a '''[[#ConfiguredLoaded|loaded commodity (product)]]'''. These instructions will show you how to edit, change or delete a loaded commodity</td> |
| | </tr> |
| | </table> |
| | </td> |
| </tr> | | </tr> |
| </table> | | </table> |
| Line 12,907: |
Line 13,183: |
| </tr> | | </tr> |
| </table> | | </table> |
| <br>
| |
| <span style="Font-weight: 700; font-size: 15px;">Set the Height of a Track Object</span>
| |
| <br> | | <br> |
| <table width=1000> | | <table width=1000> |
| <tr valign="top"> | | <tr valign="top"> |
| <td width=400>[[image:FreeMoveTrackObjectMoveH_S20.png|link=]]<br> | | <td width=25> </td> |
| '''Throw Lever''' track object level with the track</td>
| |
| <td rowspan=2 width=600>
| |
| <table width=600 bgcolor=#000000 cellpadding=2>
| |
| <tr valign="top">
| |
| <td> | | <td> |
| <table width=596 bgcolor=#ffffff cellpadding=2>
| | ---- |
| <tr>
| | </td> |
| <td colspan=2>To set the '''height''' of a '''selected''' track object, choose one of the following:-<br>
| |
| <span style="font-weight: 700; font-size: 15px;">Options:</span></td>
| |
| </tr> | | </tr> |
| | </table> |
| | |
| | <table width=1000> |
| | <span id="NotConfiguredNotLoaded"></span> |
| <tr valign="top"> | | <tr valign="top"> |
| | <td width=25> </td> |
| <td width=25>[[image:Ablue.png|link=]]</td> | | <td width=25>[[image:Ablue.png|link=]]</td> |
| <td><span style="font-weight: 700; font-size: 15px; background-color: lightcyan;"> Left Click </span> in the <span style="font-weight: 700; font-size: 15px; color: white; background-color: #797979;"> Tool Options Palette </span> <span style="font-size: 15px; font-weight: 700; color: gold; background-color: black;"> Height </span> setting and enter a new value (or keep the existing value) then press the <span style="font-weight: 700; font-size: 15px; color: white; background-color: black;"> Enter </span> key. This works even if the <span style="font-size: 15px; font-weight: 700; color: gold; background-color: black;"> Height </span> icon is not coloured <span style="font-weight: 700; font-size: 15px; color: gold; background-color: black;"> Gold </span>. <span style="font-size: 15px; font-weight: 700;">OR</span></td> | | <td colspan=2>'''Rolling Stock Object not configured and not loaded''' - no list of approved products available to be loaded and no product is currently loaded</td> |
| </tr> | | </tr> |
| <tr valign="top"> | | <tr valign="top"> |
| <td>[[image:Bblue.png|link=]]</td> | | <td colspan=2> </td> |
| <td>in the <span style="font-weight: 700; font-size: 15px; color: white; background-color: #797979;"> Tool Options Palette </span> <span style="font-weight: 700; font-size: 15px; background-color: lightcyan;"> Left Click </span> inside the <span style="font-size: 15px; font-weight: 700; color: gold; background-color: black;"> Height </span> setting and enter a new value (or keep the existing value) then <span style="font-weight: 700; font-size: 15px; background-color: lightcyan;">Right Click</span> in the setting box and select the <span style="font-weight: 700; font-size: 15px; color: white; background-color: black;"> Set Height to Selection </span> option, <span style="font-weight: 700; font-size: 15px;">OR</span></td> | | <td width=220>[[image:ConsistLoadNoSupportedClosed.png|link=]]<br><br> |
| | [[image:ConsistLoadNoSupported.png|link=]]</td> |
| | <td>The first step is to add at least one item to the list of approved products |
| | <table bgcolor=#000000 cellpadding=2> |
| | <tr valign="top"> |
| | <td> |
| | <table bgcolor=#ffffff cellpadding=2> |
| | <tr valign="top"> |
| | <td colspan=2><span style="font-weight: 700; font-size: 15px;">Steps: To Select and Add a Product to the Rolling Stock Objects Approved List:-</span></td> |
| </tr> | | </tr> |
| <tr valign="top"> | | <tr valign="top"> |
| <td>[[image:Cblue.png|link=]]</td> | | <td width=25>[[image:DotPoint1RedC.png|link=]]</td> |
| <td>select the <span style="font-size: 15px; font-weight: 700; color: white; background-color: black;"> Apply Height </span> option from the objects '''Context Menu''' (<span style="font-weight: 700; font-size: 15px; background-color: lightcyan;"> Left Click </span> on the objects '''Context Icon''' or press the <span style="font-weight: 700; font-size: 15px; color: white; background-color: black;"> T </span> key) to apply an existing height value, <span style="font-size: 15px; font-weight: 700;">OR</span></td> | | <td><span style="font-weight: 700; font-size: 15px; background-color: lightcyan;"> Left Click </span> on the '''Arrowhead''' next to the '''No supported commodities''' message to open the list of supported products which, in this case, will be empty but it will reveal a second <span style="font-weight: 700; font-size: 15px; color: white; background-color: black;"> + Add </span> button</td> |
| </tr> | | </tr> |
| <tr valign="top"> | | <tr valign="top"> |
| <td>[[image:Dblue.png|link=]]</td> | | <td>[[image:DotPoint2RedC.png|link=]]</td> |
| <td>in the <span style="font-weight: 700; font-size: 15px; color: white; background-color: #797979;"> Info Palette </span> enter a value in the objects <span style="font-size: 15px; font-weight: 700; color: white; background-color: black;"> z </span> (height) setting or <span style="font-weight: 700; font-size: 15px; background-color: lightcyan;">Left Click and Drag</span> '''Up''' or '''Down''' on the double arrowheads to its right. This can be used to set the height to '''cm''' accuracy (see [[image:PageLink.PNG|link=]] '''[[#The Info Palette|The Info Palette]]''' below).</td> | | <td><span style="font-weight: 700; font-size: 15px; background-color: lightcyan;"> Left Click </span> on the second <span style="font-weight: 700; font-size: 15px; color: white; background-color: black;"> + Add </span> button, the one <span style="font-weight: 700; font-size: 15px;">below</span> the '''No supported commodities''' message - <span style="background-color: yellow;">the upper <span style="font-weight: 700; font-size: 15px; color: white; background-color: black;"> + Add </span> button has no effect when there are no supported commodities (products)</span></td> |
| </tr> | | </tr> |
| </table> | | <tr valign="top"> |
| </td> | | <td colspan=2> |
| | <table> |
| | <tr valign="top"> |
| | <td width=330 rowspan=3>[[image:LoadBulkWagonStep03b_S20.png|330px|link=]]</td> |
| | <td width=25>[[image:DotPoint3RedC.png|link=]]</td> |
| | <td>Locate and <span style="font-weight: 700; font-size: 15px; background-color: lightcyan;"> Left Click </span> on the new product to be added to the approved list and then <span style="font-weight: 700; font-size: 15px; background-color: lightcyan;"> Left Click </span> on the [[image:Tick.PNG|link=]] icon to accept the selection</td> |
| </tr> | | </tr> |
| </table> | | <tr valign="top"> |
| <br> | | <!-- <td> in rowspan --> |
| Track objects that have been "height adjusted" will still function normally and can be moved along the track without reversing the height change. The height can be reset to normal by selecting the <span style="font-weight: 700; font-size: 15px; color: white; background-color: black;"> Reattach to Track </span> option from the objects '''Context Menu'''</td>
| | <td>[[image:DotPoint4RedC.png|link=]]</td> |
| | <td>To add additional products to the list <span style="font-weight: 700; font-size: 15px; background-color: lightcyan;"> Left Click </span> on the <span style="font-weight: 700; font-size: 15px; color: white; background-color: black;"> + Add </span> button again and repeat '''Step''' [[image:DotPoint3RedC.png|link=]] above</td> |
| </tr> | | </tr> |
| <tr valign="top"> | | <tr valign="top"> |
| <td width=400>[[image:FreeMoveTrackObjectMoveHV_S20.png|link=]]<br> | | <!-- <td> in rowspan --> |
| After being moved vertically</td>
| | <td colspan=2>As each new product is added, its icon will appear in the list at the bottom of the '''Commodity Levels''' window.<br> |
| | [[image:ConsistLoadIconColorCodes.png|link=]]<br> |
| | Those icons with <span style="font-weight: 700; font-size: 15px; color: red;">RED</span> borders will need to be edited before they can be used as loaded products</td> |
| </tr> | | </tr> |
| </table> | | </table> |
| | | </td> |
| <table bgcolor=#000000 width=800 cellpadding=2> | | </tr> |
| <tr valign="top"> | | </table> |
| <td>
| | </td> |
| <table bgcolor=#ffffe0 width=796 cellpadding=2> | |
| <tr valign="top">
| |
| <td width=25>[[image:PencilTips.PNG|link=]]</td><td>A situation where it might be useful to raise a signal above the track level would be to place it higher up on the wall of a cutting</td>
| |
| </tr> | | </tr> |
| </table> | | </table> |
| Line 12,964: |
Line 13,250: |
| </table> | | </table> |
| <br> | | <br> |
| <table width=1000> <!-- BEGIN Section Nav Buttons --> | | <table width=1000> |
| <tr valign="top"> | | <tr valign="top"> |
| <td width=629><span id="FM: Trigger TObject"></span>
| |
| ===<span style="font-weight: 700; font-size: 17px; color: white; background-color: blue;"> Free Move: Set the Trigger Radius of a Track Object </span>===
| |
| </td>
| |
| <td width=50> </td> | | <td width=50> </td> |
| <td width=50> </td> | | <td>The next step is to configure each added product so that it can be used |
| <td width=46>[[image:SkipMinorDown.png|link=#FM: Context TObject|Down]][[image:SkipMinorUp.png|link=#FM: Height TObject|Up]]</td> <!-- for Top and Minor Up/Down -->
| |
| <td width=75> </td>
| |
| <td width=75> </td>
| |
| <td width=75> </td> <!-- for Bottom -->
| |
| </tr>
| |
| </table> <!-- END Section Nav Buttons -->
| |
| | |
| <table width=1000 bgcolor="lightcyan" cellpadding=2>
| |
| <tr valign="top">
| |
| <td width=10>[[image:BlueDot10x10.png|link=]]</td>
| |
| <td>Certain track objects have have a '''Trigger Radius''' that sets how close a consist must approach the object to trigger its action</td>
| |
| </tr>
| |
| </table>
| |
| | |
| <table bgcolor=#000000 cellpadding=2> | | <table bgcolor=#000000 cellpadding=2> |
| <tr valign="top"> | | <tr valign="top"> |
| Line 12,990: |
Line 13,259: |
| <table bgcolor=#ffffff cellpadding=2> | | <table bgcolor=#ffffff cellpadding=2> |
| <tr valign="top"> | | <tr valign="top"> |
| <td> | | <td colspan=2><span style="font-weight: 700; font-size: 15px;">Steps: To Edit or Delete Products in the Approved List:-</span></td> |
| <table>
| |
| <tr valign="middle"> | |
| <td width=35>[[image:Information.png|35px|link=]]</td>
| |
| <td>Track objects that have a '''Trigger Radius''' include:-</td>
| |
| </tr>
| |
| </table>
| |
| </td> | |
| </tr> | | </tr> |
| <tr valign="top"> | | <tr valign="top"> |
| <td> | | <td width=25>[[image:DotPoint1RedC.png|link=]]</td> |
| | <td>Move the mouse pointer over each icon to reveal their names in the pointer tooltip |
| <table> | | <table> |
| <tr valign="top"> | | <tr valign="top"> |
| <td width=10>[[image:DotPoint.JPG|10px|link=]]</td> | | <td>[[image:LoadBulkWagonStep03a_S20.png|link=]]</td> |
| <td>Track marks such as '''Track Markers''', '''Priority Markers''' and '''Direction Markers'''</td> | | <td>Select and <span style="font-weight: 700; font-size: 15px; background-color: lightcyan;"> Left Click </span> on the icon of a product to be edited or deleted</td> |
| </tr> | | </tr> |
| | </table> |
| | <br> |
| | There are two possible displays:- |
| | <table> |
| <tr valign="top"> | | <tr valign="top"> |
| <td>[[image:DotPoint.JPG|10px|link=]]</td> | | <td>[[image:ConsistLoadIconNotConfigured.png|link=]]</td> |
| <td>'''Track Triggers'''</td> | | <td>This product (Fertilizer Bagged) '''has not''' been placed to a queue for loading so it cannot be loaded into the rolling stock object until it has been configured</td> |
| </tr> | | </tr> |
| | </table> |
| | <table> |
| <tr valign="top"> | | <tr valign="top"> |
| <td>[[image:DotPoint.JPG|10px|link=]]</td> | | <td>[[image:ConsistLoadIconConfigured.png|link=]]</td> |
| <td>'''Whistle Signs'''</td> | | <td>This product (Fertilizer Bagged) has been placed to a queue for loading and is ready to be loaded into the rolling stock object</td> |
| </tr> | | </tr> |
| </table> | | </table> |
| Line 13,018: |
Line 13,287: |
| </tr> | | </tr> |
| <tr valign="top"> | | <tr valign="top"> |
| <td> | | <td>[[image:DotPoint2RedC.png|link=]]</td> |
| <table bgcolor=#ffffe0 cellpadding=2> | | <td>To edit (configure) or delete this product <span style="font-weight: 700; font-size: 15px; background-color: lightcyan;"> Left Click </span> on the down '''Arrowhead'''. This will open a settings menu for this particular product which will control its loading options.<br> |
| | <span style="font-weight: 700; font-size: 15px;">Editing:</span><br> |
| | A tick or ticks will show the currently selected option(s) - no ticks means that no options have been selected and that this product will not be available for loading. To remove or add a tick <span style="font-weight: 700; font-size: 15px; background-color: lightcyan;"> Left Click </span> on the required option. There are several possible displays of which a few samples are shown below:-<br> |
| | <table> |
| | <tr valign="top"> |
| | <td>[[image:ConsistLoadIconLoad0.png|link=]]</td> |
| | <td>Only a single load queue (load0) is available and the maximum permitted quantity of this product in the rolling stock object is 1 item |
| | <table bgcolor=#ffffb0 cellpadding=2> |
| <tr valign="top"> | | <tr valign="top"> |
| <td width=25>[[image:PencilTips.PNG|link=]]</td> | | <td width=25>[[image:NotePad.PNG|link=]]</td> |
| <td>It is a good idea to adjust the trigger radius of these objects so that they do not overlap a track junction</td> | | <td>The maximum load allowed in each queue is set by the rolling stock object creator and cannot be changed</td> |
| </tr> | | </tr> |
| </table> | | </table> |
| </td> | | </td> |
| | </tr> |
| | </table> |
| | <table> |
| | <tr valign="top"> |
| | <td>[[image:ConsistLoadIconLoad23000.png|link=]]</td> |
| | <td>Only a single load queue (load0) is available and the maximum permitted quantity of this product in the rolling stock object is 23000 items. This rolling stock object is designed to carry a bulk product (coal, grain, water, minerals, fuel, etc)</td> |
| | </tr> |
| | </table> |
| | <table> |
| | <tr valign="top"> |
| | <td>[[image:ConsistLoadIconLoad01.png|link=]]</td> |
| | <td>Two load queues (load0, load1) are available and the maximum permitted quantity of this product in the rolling stock object is 8 items in queue load0 and 16 items in queue load1. The queue load0 has been selected as the default, indicated by the tick, so only eight items will be loaded.<br> |
| | You can have both queues selected but this will not load more products. In such a case the first queue will be the default but some industry operations or driver commands may allow a choice of which queue will be used</td> |
| | </tr> |
| | </table> |
| | <table> |
| | <tr valign="top"> |
| | <td>[[image:LoadNotPermittedQueues1b_S20.png|link=]]</td> |
| | <td>Some rolling stock objects will allow you to select the loading position of a product.<br> |
| | <span style="font-weight: 700; font-size: 15px; background-color: lightcyan;"> Left Click </span> on one of the position options to load that product in that particular position of the rolling stock object</td> |
| | </tr> |
| | </table> |
| | </td> |
| | </tr> |
| | <tr valign="top"> |
| | <td> </td> |
| | <td><span style="font-weight: 700; font-size: 15px;">Deleting:</span><br> |
| | To delete a product from the approved product list <span style="font-weight: 700; font-size: 15px; background-color: lightcyan;"> Left Click </span> on the <span style="font-weight: 700; font-size: 15px; color: white; background-color: black;"> Delete </span> option</td> |
| </tr> | | </tr> |
| </table> | | </table> |
| Line 13,031: |
Line 13,335: |
| </tr> | | </tr> |
| </table> | | </table> |
| <br> | | </td> |
| | </tr> |
| | </table> |
| | |
| <table width=1000> | | <table width=1000> |
| <tr valign="top"> | | <tr valign="top"> |
| <td>The current '''Trigger Radius''' of these objects is shown by the size of the "wings" ('''Red''' or '''Green''' depending on the type of object) attached to the object and, in some cases, a distance value below the name of the object. Both of these options are shown in the image below.</td> | | <td width=50> </td> |
| | <td>Once all the required products have been added and configured then an approved product can be loaded into the rolling stock object. To load a product follow the instructions in [[image:Bblue.png|link=]] below</td> |
| </tr> | | </tr> |
| </table> | | </table> |
| Line 13,040: |
Line 13,348: |
| <table width=1000> | | <table width=1000> |
| <tr valign="top"> | | <tr valign="top"> |
| <td width=440>[[image:MarkerTriggerRadius_S20.png|link=]]</td> | | <td width=25> </td> |
| <td>On one side of the track object is a green '''Trigger Radius''' dot that allows the radius value to be adjusted up or down.<br>
| |
| | |
| <table bgcolor=#000000 cellpadding=2>
| |
| <tr valign="top">
| |
| <td> | | <td> |
| <table bgcolor=#ffffb0 cellpadding=2>
| | ---- |
| <tr valign="top">
| | </td> |
| <td width=25>[[image:NotePad.PNG|link=]]</td>
| |
| <td>If no '''Trigger Radius''' dot or '''Red/Green Wings''' appear on the track object then it does not have an adjustable '''Trigger Radius'''</td>
| |
| </tr> | | </tr> |
| </table> | | </table> |
| </td> | | |
| | <table width=1000> |
| | <span id="ConfiguredNotLoaded"></span> |
| | <tr valign="top"> |
| | <td width=25> </td> |
| | <td width=25>[[image:Bblue.png|link=]]</td> |
| | <td colspan=2>'''Rolling Stock Object configured but not loaded''' - it has a list of approved products but no product is currently loaded</td> |
| </tr> | | </tr> |
| </table> | | <tr valign="top"> |
| <br> | | <td colspan=2> </td> |
| | <td width=475>[[image:ConsistLoadSupportedNotLoaded.png|link=]]<br><br> |
| <table bgcolor=#000000 cellpadding=2> | | <table bgcolor=#000000 cellpadding=2> |
| <tr valign="top"> | | <tr valign="top"> |
| Line 13,061: |
Line 13,370: |
| <table bgcolor=#ffffff cellpadding=2> | | <table bgcolor=#ffffff cellpadding=2> |
| <tr valign="top"> | | <tr valign="top"> |
| <td colspan=2><span style="font-weight: 700; font-size: 15px;">Steps:</span> To adjust the '''Trigger Radius''' of a track object:-</td> | | <td colspan=2><span style="font-weight: 700; font-size: 15px;">Steps: To Load an Approved Product into the Rolling Stock Object:-</span></td> |
| | </tr> |
| | <tr valign="top"> |
| | <td width=25>[[image:DotPoint1RedC.png|link=]]</td> |
| | <td><span style="font-weight: 700; font-size: 15px; background-color: lightcyan;"> Left Click </span> on the <span style="font-weight: 700; font-size: 15px; color: white; background-color: black;"> + Add </span> button<br> |
| | <table> |
| | <tr valign="top"> |
| | <td colspan=2> </td> |
| </tr> | | </tr> |
| <tr valign="top"> | | <tr valign="top"> |
| <td width=25>[[image:DotPoint1.JPG|link=]]</td> | | <td width=140 rowspan=2>[[image:LoadBulkWagonStep04_S20.png|link=]]</td> |
| <td>In the <span style="font-weight: 700; font-size: 15px; color: white; background-color: #797979;"> Tools Palette </span> select the [[image:S20_FreeMoveToolIcon.png|link=|20px]] '''Free Move Tool''' or press the <span style="font-weight: 700; font-size: 15px; color: white; background-color: black;"> S </span> key</td> | | <td width=25>[[image:DotPoint2RedC.png|link=]]</td> |
| | <td><span style="font-weight: 700; font-size: 15px; background-color: lightcyan;"> Left Click </span> an approved product from the list</td> |
| </tr> | | </tr> |
| <tr valign="top"> | | <tr valign="top"> |
| <td colspan=2> | | <!-- <td> in rowspan --> |
| <table bgcolor=#ffffe0 cellpadding=2> | | <td colspan=2><br> |
| | The selected product will appear in the '''Commodity Levels''' list with a coloured bar and quantity values |
| | <table bgcolor=#ffffb0 cellpadding=2> |
| <tr valign="top"> | | <tr valign="top"> |
| <td width=25>[[image:PencilTips.PNG|link=]]</td> | | <td width=25>[[image:NotePad.PNG|link=]]</td> |
| <td>Move your camera POV (Point of View) to directly above the track object before adjusting its '''Trigger Radius'''. This will make the adjustment as quick and as smooth as possible.</td> | | <td>Visible bulk products (e.g. coal, ballast, etc) will '''not''' appear in a rolling stock object until the Session has started. Other (non-bulk) products will appear as soon as the product has been added or its quantity setting is set to the minimum value or above (see [[image:Cblue.png|link=]] below)</td> |
| </tr> | | </tr> |
| </table> | | </table> |
| </td> | | </td> |
| </tr> | | </tr> |
| <tr valign="top">
| | </table> |
| <td>[[image:DotPoint2.JPG|link=]]</td>
| | [[image:ConsistLoadCattleGreenBar.png|link=]] |
| <td><span style="font-weight: 700; font-size: 15px; background-color: lightcyan;"> Left Click </span> on the '''Track Object''' to select it.</td>
| | </td> |
| </tr>
| |
| <tr valign="top">
| |
| <td>[[image:DotPoint3.JPG|link=]]</td>
| |
| <td><span style="font-weight: 700; font-size: 15px; background-color: lightcyan;"> Left Click and Drag </span> forward or back on the '''Trigger Radius''' dot. The dot will not move but the "wings" that indicate the radius on the track and the displayed radius value will increase or decrease</td>
| |
| </tr>
| |
| <tr valign="top">
| |
| <td>[[image:DotPoint4.JPG|link=]]</td>
| |
| <td>when the radius reaches the required size release the mouse button</td>
| |
| </tr> | | </tr> |
| </table> | | </table> |
| Line 13,094: |
Line 13,405: |
| </table> | | </table> |
| <br> | | <br> |
| | </td> |
| | <td width=475> |
| <table bgcolor=#000000 cellpadding=2> | | <table bgcolor=#000000 cellpadding=2> |
| <tr valign="top"> | | <tr valign="top"> |
| <td> | | <td> |
| <table bgcolor=#ffffe0 cellpadding=2> | | <table bgcolor=#ffffb0 cellpadding=2> |
| | <tr valign="top"> |
| | <td width=25>[[image:NotePad.PNG|link=]]</td> |
| | <td width=450><span style="font-size: 17px; font-weight: 700;">Notes:'''</span><br> |
| | ---- |
| | </td> |
| | </tr> |
| <tr valign="top"> | | <tr valign="top"> |
| <td width=25>[[image:PencilTips.PNG|link=]]</td> | | <td colspan=2>Some rolling stock objects will allow more than one product to be loaded/unloaded at industries (but only one can be carried at any one time). To add and configure additional possible products repeat the steps shown on the left. In the image below a second possible product has been added to be loaded/unloaded<br> |
| <td>This action can also be performed on existing track objects using the [[image:S20_FineAdjustmentToolIcon.png|link=|20px]] '''[[#The Fine Adjustment Tool|Fine Adjustment Tool]]'''</td> | | [[image:ConsistLoadMultipleProducts.png|link=]]<br> |
| | In the example above if the rolling stock object is carrying sheep and is sent to unload at a stockyard that only accepts cattle then the rolling stock object will not unload. If it is empty of both cattle and sheep then it will load either product depending on what is available at the stockyard.<br> |
| | In the following image a second product is not allowed and you are requested to remove one product<br> |
| | [[image:ConsistLoadNoMultipleProducts.png|link=]] |
| | To remove the rejected new product from the load list (e.g. '''Fertilizer Bagged''' in the image above) <span style="font-weight: 700; font-size: 15px; background-color: lightcyan;"> Left Click </span> on the '''Eye''' icon at the right of the product.<br> |
| | To remove the other loaded product follow the instructions in [[image:Cblue.png|link=]] below</td> |
| </tr> | | </tr> |
| </table> | | </table> |
| Line 13,110: |
Line 13,434: |
| </table> | | </table> |
| <br> | | <br> |
| <table width=1000> <!-- BEGIN Section Nav Buttons --> | | <table width=1000> |
| <tr valign="top"> | | <tr valign="top"> |
| <td width=629><span id="FM: Context TObject"></span> | | <td>Once a product has been loaded into the rolling stock object its load quantity can be adjusted. To change the load quantity follow the instructions in [[image:Cblue.png|link=]] below</td> |
| ===<span style="font-weight: 700; font-size: 17px; color: white; background-color: blue;"> Free Move: Track Object Context Menu </span>===
| | </tr> |
| </td> | | <tr valign="top"> |
| <td width=50> </td> | | <td> |
| <td width=50> </td> | | ---- |
| <td width=46>[[image:SkipMinorDown.png|link=#skip Free Move: Spline Objects|Down]][[image:SkipMinorUp.png|link=#FM: Trigger TObject|Up]]</td> <!-- for Top and Minor Up/Down --> | | </td> |
| <td width=75> </td> | | </tr> |
| <td width=75> </td>
| | </table> |
| <td width=75> </td> <!-- for Bottom -->
| | <br> |
| | <table width=1000> |
| | <span id="ConfiguredLoaded"></span> |
| | <tr valign="top"> |
| | <td width=25> </td> |
| | <td width=25>[[image:Cblue.png|link=]]</td> |
| | <td colspan=2>'''Rolling Stock Object configured and loaded''' - it has a list of approved products and one (or more) of them is currently loaded</td> |
| </tr> | | </tr> |
| </table> <!-- END Section Nav Buttons --> | | <tr valign="top"> |
| | | <td colspan=2> </td> |
| A selected track mesh object, or a group of selected track mesh objects, will have a '''Context Icon''' that opens a '''Context Menu'''. The icon design will vary between object types.<br>
| | <td width=475>[[image:ConsistLoadSupportedLoaded.png|link=]] |
| | | <br><br> |
| <table bgcolor=#000000 cellpadding=2> | | <table bgcolor=#000000 cellpadding=2> |
| <tr valign="top"> | | <tr valign="top"> |
| Line 13,131: |
Line 13,461: |
| <table bgcolor=#ffffff cellpadding=2> | | <table bgcolor=#ffffff cellpadding=2> |
| <tr valign="top"> | | <tr valign="top"> |
| <td>To open a selected track objects '''Context Menu'''choose one of the following:-<br>
| | <td colspan=2><span style="font-weight: 700; font-size: 15px;">Steps: To Adjust a Product Level or to Delete the Product:-</span></td> |
| <table>
| | </tr> |
| <tr>
| | <tr valign="top"> |
| <td colspan=2><span style="font-weight: 700; font-size: 15px;">Options:</span> </td> | | <td width=25>[[image:DotPoint1RedC.png|link=]]</td> |
| | <td>Move the mouse pointer into the grey area at the end of the colored bar<br> |
| | [[image:LoadBulkWagonStep05_S20.png|link=]]</td> |
| </tr> | | </tr> |
| <tr valign="top"> | | <tr valign="top"> |
| <td width=25>[[image:Ablue.png|link=]]</td> | | <td>[[image:DotPoint2RedC.png|link=]]</td> |
| <td><span style="font-weight: 700; font-size: 15px; background-color: lightcyan;"> Left Click </span> the '''Context Icon''' [[image:ContextIconsTrackObjects_S20.png|link=]] <span style="font-size: 15px; font-weight: 700;">OR</span></td> | | <td><span style="font-weight: 700; font-size: 15px; background-color: lightcyan;"> Left Click and Drag </span> left or right the bar to its new position. To set the '''Product Quantity''' to '''zero''' drag the bar to the extreme left</td> |
| </tr> | | </tr> |
| <tr valign="top"> | | <tr valign="top"> |
| <td>[[image:Bblue.png|link=]]</td> | | <td>[[image:DotPoint3RedC.png|link=]]</td> |
| <td>Press the <span style="color: white; background-color: black; font-weight: 700; font-size: 15px;"> T </span> key</td> | | <td>To delete the product from the rolling stock objects load, set its quantity to '''zero''' as described in '''Step''' [[image:DotPoint2RedC.png|link=]] above.<br> |
| | [[image:LoadBulkWagonStep05a_S20.png|link=]]<br> |
| | Then <span style="font-weight: 700; font-size: 15px; background-color: lightcyan;"> Left Click </span> on the '''Eye''' icon at the end of the coloured bar</td> |
| </tr> | | </tr> |
| </table> | | </table> |
| Line 13,149: |
Line 13,483: |
| </table> | | </table> |
| </td> | | </td> |
| </tr> | | <td width=475> |
| </table> | | <table bgcolor=#000000 cellpadding=2> |
| <br>
| |
| <table width=1000>
| |
| <tr valign="top"> | | <tr valign="top"> |
| <td width=220>[[image:ContextMenuTrackObject_S20.png|link=]]</td>
| |
| <td> | | <td> |
| <table width=780 bgcolor=#000000 cellpadding=2> | | <table bgcolor=#ffffb0 cellpadding=2> |
| <tr valign="top"> | | <tr valign="top"> |
| <td> | | <td width=25>[[image:NotePad.PNG|link=]]</td> |
| <table width=776 bgcolor=#ffffff cellpadding=2> | | <td><span style="font-size: 17px;">'''Notes:'''</span><br> |
| | ---- |
| | </td> |
| | </tr> |
| <tr valign="top"> | | <tr valign="top"> |
| <td> | | <td>[[image:DotPoint.JPG|10px|link=]]</td> |
| <table>
| | <td>In most cases you will have to delete the currently loaded product before you can replace it with another. Follow the '''Steps''' shown on the left to delete a currently loaded product and then the instructions in [[image:Bblue.png|link=]] above to load the new product</td> |
| <tr valign="middle">
| |
| <td width=35>[[image:Information.png|35px|link=]]</td>
| |
| <td><span style="font-weight: 700; font-size: 17px;">Track Object Context Menu Options</span></td> | |
| </tr> | | </tr> |
| </table> | | <tr valign="top"> |
| </td> | | <td>[[image:DotPoint.JPG|10px|link=]]</td> |
| | <td>To add additional approved products to this rolling stock object, or to edit (or delete) those that are already there, follow the instructions in [[image:Ablue.png|link=]] above</td> |
| </tr> | | </tr> |
| <tr valign="top"> | | <tr valign="top"> |
| <td> | | <td>[[image:DotPoint.JPG|10px|link=]]</td> |
| <table bgcolor=#ffffb0 cellpadding=2> | | <td>If the maximum allowed load for a product is just 1 item, then the green bar will have just two possible positions - 1 (full or 100%) and 0 (empty or 0%)</td> |
| | </tr> |
| <tr valign="top"> | | <tr valign="top"> |
| <td width=25>[[image:NotePad.PNG|link=]]</td> | | <td>[[image:DotPoint.JPG|10px|link=]]</td> |
| <td>Track objects can be copied/moved into a scrapbook by themselves but when pasted/painted they will appear without any track. They will be automatically added to a scrapbook by selecting and copying or cutting the track segments under the objects</td> | | <td>Visible bulk products (e.g. coal, ballast, etc) will '''not''' appear in a rolling stock object until the Session has started. Other (non-bulk) products will appear as soon as the product has been added or its quantity setting is set to the minimum value or above</td> |
| </tr> | | </tr> |
| </table> | | </table> |
| <table>
| | </td> |
| <tr valign="top">
| |
| <td><span style="font-weight: 700; font-size: 15px; color: white; background-color: black;"> Cut </span></td>
| |
| <td>remove the selected object or objects from the route and move them into the '''Scrapbook'''</td>
| |
| </tr> | | </tr> |
| </table> | | </table> |
| </td> | | </td> |
| </tr> | | </tr> |
| | </table> |
| | <br> |
| | <table width=1000> |
| <tr valign="top"> | | <tr valign="top"> |
| <td> | | <td width=25>[[image:DotPoint3.JPG|link=]]</td> |
| | <td>You can copy the loaded products and their set levels from the current rolling stock object to all the other identical rolling stock objects in the consist by a <span style="font-weight: 700; font-size: 15px; background-color: lightcyan;"> Left Click </span> on the [[image:CopyCommodities_S20.png|link=]] icon<br> |
| | <br> |
| | Note that there are two of these icons |
| <table> | | <table> |
| <tr valign="top"> | | <tr valign="top"> |
| <td><span style="font-weight: 700; font-size: 15px; color: white; background-color: black;"> Copy </span></td> | | <td width=10>[[image:DotPoint.JPG|10px|link=]]</td> |
| <td>copy the selected object or objects and place them into the '''Scrapbook'''</td> | | <td>the upper one, in the '''Commodity Levels''' section, will copy the currently loaded commodity only. Use this one if you have only edited the currently loaded commodity and/or its load level</td> |
| | </tr> |
| | <tr valign="top"> |
| | <td>[[image:DotPoint.JPG|10px|link=]]</td> |
| | <td>the lower one, only visible if the '''Supported Commodities''' option has been opened, will copy the list of supported/allowed commodities. Use this one if you have edited the list of allowed commodities</td> |
| | </tr> |
| | <tr valign="top"> |
| | <td colspan=2>[[image:ConsistLoadCopy_S20.png|link=]]</td> |
| </tr> | | </tr> |
| </table> | | </table> |
| </td> | | </td> |
| </tr> | | </tr> |
| | </table> |
| | <br> |
| | <table width=1000> <!-- BEGIN Nav Buttons Table --> |
| <tr valign="top"> | | <tr valign="top"> |
| <td> | | <td width=629><span id="skipDriverConsists"></span> |
| <table> | | =='''Loading Consists in Driver'''== |
| | </td> |
| | <td width=50>[[image:SkipDown.png|link=#stepLogs|Skip Down]]</td> <!-- Skip Down --> |
| | <td width=50>[[image:SkipUp.png|link=#skipLoadConsists|Skip Up]]</td> <!-- Skip Up --> |
| | <td width=46> </td> <!-- Top --> |
| | <td width=75>[[image:HeadingUp.png|link=#stepManageConsists|alt=Heading|To Heading]]</td> <!-- Next Up --> |
| | <td width=75> </td> <!-- Next Down --> |
| | <td width=75> </td> <!-- Bottom --> |
| | </tr> |
| | </table> <!-- END Nav Buttons Table --> |
| | |
| | <table width=1000 bgcolor="lightcyan" cellpadding=2> |
| <tr valign="top"> | | <tr valign="top"> |
| <td><span style="font-weight: 700; font-size: 15px; color: white; background-color: black;"> Paste </span></td> | | <td width=10>[[image:BlueDot10x10.png|link=]]</td> |
| <td>paste the contents of the current '''Scrapbook''' at the cursor (focus) point<br> | | <td>In '''Driver Mode''' you can open up the properties window of a rolling stock object to view its current load and the list of products it can carry</td> |
| <table bgcolor=#ffffb0 cellpadding=2> | | </tr> |
| <tr valign="top"> | | <tr valign="top"> |
| <td width=25>[[image:NotePad.PNG|link=]]</td> | | <td width=10>[[image:BlueDot10x10.png|link=]]</td> |
| <td>When pasted from a scrapbook the objects will be surrounded by a '''Marquee Selection Area''' that, depending on the settings in the [[image:PageLink.PNG|link=]] '''[[#Scrapbook Filters|Scrapbook Filters]]''', may add to or replace all other objects, splines, textures, ground terrain and effect layers in that area</td> | | <td>You can also edit the products carried by a rolling stock object</td> |
| </tr> | | </tr> |
| </table> | | </table> |
| </td> | | <br> |
| </tr> | | <table width=1000 bgcolor=#000000 cellpadding=2> |
| </table>
| |
| </td>
| |
| </tr>
| |
| <tr valign="top"> | | <tr valign="top"> |
| <td> | | <td> |
| <table> | | <table width=996 bgcolor=#ffffff cellpadding=2> |
| <tr valign="top"> | | <tr valign="top"> |
| <td><span style="font-weight: 700; font-size: 15px; color: white; background-color: black;"> Delete </span></td> | | <td>If you have opened a '''Consist Properties Window''' from the '''Dispatch Manager''' (available in '''Trainz Plus''' only) and want to edit the commodities shown then <span style="font-weight: 700; font-size: 15px; background-color: lightcyan;"> Left Click </span> on the <span style="font-weight: 700; font-size: 15px; color: white; background-color: black;"> Enable Editing </span> button at the bottom of the window. This will open its '''Commodities Level''' settings for editing.<br><br> |
| <td>delete the selected objects. It has the same effect as pressing the <span style="font-weight: 700; font-size: 15px; color: white; background-color: black;"> Delete </span> key</td>
| | Once editing has been enabled, the products carried by the selected rolling stock object can be edited as shown in the [[image:Ablue.png|link=]], [[image:Bblue.png|link=]] and [[image:Cblue.png|link=]] sections at [[image:PageLink.PNG|link=]] '''[[#skipLoadConsists|Loading Consists in Surveyor]]''' above.</td> |
| </tr> | | </tr> |
| </table> | | </table> |
| </td> | | </td> |
| </tr> | | </tr> |
| | </table> |
| | <br> |
| | <table width=1000 bgcolor=#000000 cellpadding=2> |
| <tr valign="top"> | | <tr valign="top"> |
| <td> | | <td> |
| <table> | | <table width=996 bgcolor=#ffffff cellpadding=2> |
| <tr valign="top"> | | <tr valign="top"> |
| <td><span style="font-weight: 700; font-size: 15px; color: white; background-color: black;"> Replace Object with Selected Asset </span></td> | | <td colspan=2><span style="font-weight: 700; font-size: 15px;">Steps: To View the Load Properties of a Consist in Driver:-</span></td> |
| <td>the '''selected''' object will be replaced with the asset currently selected in the <span style="font-weight: 700; font-size: 15px; color: white; background-color: #797979;"> Assets Palette </span>. If the asset selected in the <span style="font-weight: 700; font-size: 15px; color: white; background-color: #797979;"> Assets Palette </span> is the wrong type (e.g. a scenery spline) then this option will be greyed out</td>
| |
| </tr> | | </tr> |
| </table> | | <tr valign="top"> |
| </td> | | <td width=25>[[image:DotPoint1.JPG|link=]]</td> |
| | <td width=513><span style="font-weight: 700; font-size: 15px;"><span style="color: white; background-color: black;"> Ctrl </span> + <span style="font-weight: 700; font-size: 15px; background-color: lightcyan;"> Right Click </span></span> on the consist rolling stock object to bring up its options menu. |
| | <br> |
| | The option <span style="font-weight: 700; font-size: 15px; color: white; background-color: black;"> Assign to Player > </span> is only available in '''Trainz Plus'''</td> |
| | <td rowspan=3 width=462>[[image:CoalHopperDriverViewDetails.png|link=]]</td> |
| </tr> | | </tr> |
| <tr valign="top"> | | <tr valign="top"> |
| | <td>[[image:DotPoint2.JPG|link=]]</td> |
| <td> | | <td> |
| <table> | | <table> |
| <tr valign="top"> | | <tr valign="top"> |
| <td><span style="font-weight: 700; font-size: 15px; color: white; background-color: black;"> Paint Under Selected </span></td> | | <td>Select the option <span style="font-weight: 700; font-size: 15px; color: white; background-color: black;"> View Details... </span>. This will open up the properties window for the selected rolling stock object</td> |
| <td>the texture selected in the <span style="font-weight: 700; font-size: 15px; color: white; background-color: #797979;"> Assets Palette </span> will be painted under the '''selected''' objects. The <span style="font-weight: 700; font-size: 15px; color: white; background-color: #797979;"> Tool Options Palette </span> brush settings (<span style="font-weight: 700; font-size: 15px; color: gold; background-color: black;"> Radius </span> and <span style="font-weight: 700; font-size: 15px; color: gold; background-color: black;"> Sensitivity </span>) will control how the texture is applied. If no ground texture has been selected in the <span style="font-weight: 700; font-size: 15px; color: white; background-color: #797979;"> Assets Palette </span> then this option will be greyed out.</td>
| |
| </tr>
| |
| <tr valign="top">
| |
| <td colspan=2>
| |
| <table bgcolor=#ffffb0 cellpadding=2>
| |
| <tr valign="top">
| |
| <td width=25>[[image:NotePad.PNG|link=]]</td>
| |
| <td>Objects have a '''minimum brush size''' that represents the smallest area that can be painted beneath them using the <span style="font-weight: 700; font-size: 15px; color: white; background-color: black;"> Paint Under Selected </span> option. This minimum area will vary in size between objects but it will be rectangular even for circular objects. If the <span style="font-weight: 700; font-size: 15px; color: white; background-color: #797979;"> Tool Options Palette </span> brush <span style="font-weight: 700; font-size: 15px; color: gold; background-color: black;"> Radius </span> is set to a smaller size then the brush <span style="font-weight: 700; font-size: 15px; color: gold; background-color: black;"> Radius </span> will be ignored and the objects minimum brush size will be used instead.</td>
| |
| </tr>
| |
| </table>
| |
| </td> | |
| </tr> | | </tr> |
| </table> | | </table> |
| </td> | | </td> |
| | <!-- <td></td> in rowspan --> |
| </tr> | | </tr> |
| <tr valign="top"> | | <tr valign="top"> |
| | <td>[[image:DotPoint3.JPG|link=]]</td> |
| <td> | | <td> |
| <table> | | <table> |
| <tr valign="top"> | | <tr valign="top"> |
| <td><span style="font-weight: 700; font-size: 15px; color: white; background-color: black;"> Smooth Ground Under Selected </span></td> | | <td>To edit the contents <span style="font-weight: 700; font-size: 15px; background-color: lightcyan;"> Left Click </span> on the <span style="font-weight: 700; font-size: 15px; color: white; background-color: black;"> Enable Editing </span> button on the bottom of the properties window<br> |
| <td>smooths the height of the ground under the selected object to match the set height of the object. For track objects the size of the area affected will depend on the <span style="font-weight: 700; font-size: 15px; color: white; background-color: #797979;"> Tool Options Palette </span> <span style="font-weight: 700; font-size: 15px; color: gold; background-color: black;"> Radius </span> setting</td>
| | [[image:DriverEnableEditing.png|link=]]</td> |
| </tr> | | </tr> |
| </table> | | </table> |
| </td> | | </td> |
| | <!-- <td></td> in rowspan --> |
| </tr> | | </tr> |
| <tr valign="top"> | | <tr valign="top"> |
| <td> | | <td> </td> |
| <table> | | <td colspan=2>Once editing has been enabled, the products carried by the selected rolling stock object can be edited as shown in the [[image:Ablue.png|link=]], [[image:Bblue.png|link=]] and [[image:Cblue.png|link=]] sections at [[image:PageLink.PNG|link=]] '''[[#skipLoadConsists|Loading Consists in Surveyor]]''' above</td> |
| <tr valign="top"> | |
| <td><span style="font-weight: 700; font-size: 15px; color: white; background-color: black;"> Settle on Ground </span></td>
| |
| <td>sets the height of the objects to match the height of the terrain beneath them ("drops them back to earth")</td>
| |
| </tr> | | </tr> |
| </table> | | </table> |
| </td> | | </td> |
| </tr> | | </tr> |
| | </table> |
| | <br> |
| | <table width=1000> <!-- BEGIN Nav Buttons Table --> |
| <tr valign="top"> | | <tr valign="top"> |
| <td> | | <td width=629><span id="stepLogs"></span> |
| <table>
| | ='''The Logs Palette'''= |
| <tr valign="top">
| |
| <td><span style="font-weight: 700; font-size: 15px; color: white; background-color: black;"> Apply Height </span></td>
| |
| <td>sets the height of the '''selected object''' to the value in the <span style="font-weight: 700; font-size: 15px; color: white; background-color: #797979;"> Tool Options Palette </span> <span style="font-weight: 700; font-size: 15px; color: gold; background-color: black;"> Height </span> setting. Where multiple objects have been selected the '''context object''', the one with the '''Context Icon''', will have its height set to the <span style="font-weight: 700; font-size: 15px; color: gold; background-color: black;"> Height </span> value and the other '''selected objects''' will have their heights adjusted up or down by the same amount</td>
| |
| </tr>
| |
| </table>
| |
| </td> | | </td> |
| | <td width=50> </td> |
| | <td width=50>[[image:SkipUp.png|link=#skipDriverConsists|Skip Up]]</td> |
| | <td width=46>[[image:BackToTop.png|link=#top|alt=Top|Top]]</td> |
| | <td width=75>[[image:NextUp.png|link=#stepManageConsists|alt=Next Up|Next Up]]</td> |
| | <td width=75>[[image:NextDown.png|link=#stepSessionOptions|alt=Next Down|Next Down]]</td> |
| | <td width=75>[[image:BackToBottom.png|link=#bottom|alt=Bottom|Bottom]]</td> |
| </tr> | | </tr> |
| | </table> <!-- END Nav Buttons Table --> |
| | |
| | <table width=1000 bgcolor=#ffffb0 cellpadding=2> |
| <tr valign="top"> | | <tr valign="top"> |
| <td>
| | <td><span style="font-weight: 700; font-size: 15px;">This is a <span style="color: white; background-color: blue;"> Surveyor Only </span> palette</span></td> |
| <table>
| |
| <tr valign="top">
| |
| <td><span style="font-weight: 700; font-size: 15px; color: white; background-color: black;"> Reattach to Track </span></td> | |
| <td>if the object has been moved away from the track then it will be reset to its correct position on the track. This option will be greyed out if the object is already attached to the track</td>
| |
| </tr> | | </tr> |
| </table> | | </table> |
| </td> | | <br> |
| </tr> | | <table width=1000 bgcolor=#000000> |
| <tr valign="top"> | | <tr valign="top"> |
| <td> | | <td> |
| <table> | | <table width=996 bgcolor=#ffe89a cellpadding=2> |
| <tr valign="top"> | | <tr valign="middle"> |
| <td><span style="font-weight: 700; font-size: 15px; color: white; background-color: black;"> Rotate Trackside </span></td> | | <td width=45>[[image:PalettesIcon_S20.png|link=]]</td> |
| <td>reverses the position of the object on the track to the other side and facing the opposite direction</td> | | <td>In '''Driver''' to show the '''Logs Palette''' on the screen refer to [[image:PageLink.PNG|link=]] '''[[#Hiding and Showing Palettes and Windows|Hiding and Showing Palettes and Windows]]''' at the top of this document</td> |
| </tr> | | </tr> |
| </table> | | </table> |
| </td> | | </td> |
| </tr> | | </tr> |
| | </table> |
| | <br> |
| | <table width=1000 bgcolor="lightcyan" cellpadding=2> |
| <tr valign="top"> | | <tr valign="top"> |
| <td> | | <td width=10>[[image:BlueDot10x10.png|link=]]</td> |
| <table>
| | <td>This palette displays the '''Trainz System Log''' which details the loading of assets, the operation of scripts, messages displayed on the screen (in Driver), etc. It is for diagnostic purposes.</td> |
| <tr valign="top">
| |
| <td><span style="font-weight: 700; font-size: 15px; color: white; background-color: black;"> Change Junction Direction </span></td>
| |
| <td>if the object is a track switch then its switch direction will be reversed</td> | |
| </tr> | | </tr> |
| </table> | | </table> |
| </td> | | <br> |
| </tr> | | <table width=1000> |
| | <tr valign="top"> |
| | <td width=605>[[image:LogsPalette_S20.png|link=]]</td> |
| | <td> |
| | <table bgcolor=#000000 cellpadding=2> |
| <tr valign="top"> | | <tr valign="top"> |
| <td> | | <td> |
| <table> | | <table bgcolor=#ffffff cellpadding=2> |
| <tr valign="top"> | | <tr valign="top"> |
| <td><span style="font-weight: 700; font-size: 15px; color: white; background-color: black;"> Select in Assets Palette </span></td> | | <td width=10>[[image:DotPoint.JPG|10px|link=]]</td> |
| <td>sets the <span style="font-weight: 700; font-size: 15px; color: white; background-color: #797979;"> Filter Palette </span> to <span style="font-weight: 700; font-size: 15px; color: white; background-color: black;"> All Content </span> and highlights the selected object in the <span style="font-weight: 700; font-size: 15px; color: white; background-color: #797979;"> Assets Palette </span></td> | | <td>the display area has a vertical scroll bar on the right for longer reports</td> |
| </tr>
| |
| </table>
| |
| </td> | |
| </tr> | | </tr> |
| <tr valign="top"> | | <tr valign="top"> |
| <td> | | <td>[[image:DotPoint.JPG|10px|link=]]</td> |
| | <td><span style="font-weight: 700; font-size: 15px; background-color: lightcyan;"> Left Click </span> on the coloured dots to toggle them on/off and filter the log entries by message type |
| <table> | | <table> |
| <tr valign="top"> | | <tr valign="top"> |
| <td><span style="font-weight: 700; font-size: 15px; color: white; background-color: black;"> Select in Filter Palette </span></td> | | <td>[[image:GreyDot10x10.png|link=]]</td> |
| <td>sets the <span style="font-weight: 700; font-size: 15px; color: white; background-color: #797979;"> Filter Palette </span> to <span style="font-weight: 700; font-size: 15px; color: white; background-color: black;"> All Content </span> and highlights the selected object in the <span style="font-weight: 700; font-size: 15px; color: white; background-color: #797979;"> Filter Palette </span></td> | | <td>'''Grey ON''' shows general messages: '''Grey OFF''' hides general messages</td> |
| </tr> | | </tr> |
| </table> | | <tr valign="top"> |
| </td> | | <td>[[image:YellowDot10x10.png|link=]]</td> |
| | <td>'''Yellow ON''' shows warnings: '''Yellow OFF''' hides warnings</td> |
| </tr> | | </tr> |
| <tr valign="top"> | | <tr valign="top"> |
| <td> | | <td>[[image:RedDot10x10.png|link=]]</td> |
| <table> | | <td>'''Red ON''' shows error messages: '''Red OFF''' hides error messages</td> |
| | </tr> |
| <tr valign="top"> | | <tr valign="top"> |
| <td><span style="font-weight: 700; font-size: 15px; color: white; background-color: black;"> Edit Details </span></td> | | <td>[[image:GreenDot10x10.png|link=]]</td> |
| <td>opens the '''Properties''' window of the selected rolling stock object. '''Note:''' to enter or edit an objects name property use the [[image:PageLink.PNG|link=]] '''[[#The Info Palette|Info Palette]]'''</td> | | <td>'''Green ON''' shows "task completed" messages: '''Green OFF''' hides "task completed" messages</td> |
| </tr> | | </tr> |
| </table> | | </table> |
| </td> | | </td> |
| | </tr> |
| | <tr valign="top"> |
| | <td>[[image:DotPoint.JPG|10px|link=]]</td> |
| | <td><span style="font-weight: 700; font-size: 15px; background-color: lightcyan;"> Left Click </span> in the <span style="font-weight: 700; font-size: 15px; color: white; background-color: black;"> Search </span> text box to enter a text string to filter the log entries</td> |
| </tr> | | </tr> |
| </table> | | </table> |
| Line 13,354: |
Line 13,715: |
| <tr valign="top"> | | <tr valign="top"> |
| <td width=25>[[image:NotePad.PNG|link=]]</td> | | <td width=25>[[image:NotePad.PNG|link=]]</td> |
| <td><span style="font-weight: 700; font-size: 15px;">Notes:</span><br> | | <td><span style="font-size: 17px; font-weight: 700;">Notes:'''</span><br> |
| ----</td> | | ---- |
| | </td> |
| </tr> | | </tr> |
| <tr valign="top"> | | <tr valign="top"> |
| <td> </td> | | <td>[[image:DotPoint.JPG|10px|link=]]</td> |
| <td>Track objects can be restored to their original height and position (on the track) by opening their '''Context Menu''' and choosing one of the following:- | | <td>This palette can be minimised and resized</td> |
| <table>
| |
| <tr>
| |
| <td colspan=2><span style="font-weight: 700; font-size: 15px;">Options:</span></td>
| |
| </tr> | | </tr> |
| <tr valign="top"> | | <tr valign="top"> |
| <td width=25>[[image:Ablue.png|link=]]</td> | | <td>[[image:DotPoint.JPG|10px|link=]]</td> |
| <td><span style="font-weight: 700; font-size: 15px; color: white; background-color: black;"> Reattach to Track </span> to cancel the both the height and position changes, <span style="font-size: 15px; font-weight: 700;">OR</span></td> | | <td><span style="font-weight: 700; font-size: 15px; background-color: lightcyan;"> Left Click </span> on the [[image:Cross.PNG|link=]] icon to close the palette</td> |
| </tr>
| |
| <tr valign="top">
| |
| <td>[[image:Bblue.png|link=]]</td>
| |
| <td><span style="font-weight: 700; font-size: 15px; color: white; background-color: black;"> Settle on Ground </span> to cancel the height change only</td>
| |
| </tr> | | </tr> |
| </table> | | </table> |
| Line 13,379: |
Line 13,734: |
| </tr> | | </tr> |
| </table> | | </table> |
| | <br> |
| | <table width=1000> <!-- BEGIN Nav Buttons Table --> |
| | <tr valign="top"> |
| | <td width=629><span id="stepSessionOptions"></span> |
| | ='''The Session Options Window'''= |
| </td> | | </td> |
| | <td width=50> </td> |
| | <td width=50> </td> |
| | <td width=46>[[image:BackToTop.png|link=#top|alt=Top|Top]]</td> |
| | <td width=75>[[image:NextUp.png|link=#stepLogs|alt=Next Up|Next Up]]</td> |
| | <td width=75>[[image:NextDown.png|link=#stepCommodityPicker|alt=Next Down|Next Down]]</td> |
| | <td width=75>[[image:BackToBottom.png|link=#bottom|alt=Bottom|Bottom]]</td> |
| | </tr> |
| | </table> <!-- END Nav Buttons Table --> |
| | |
| | <table width=1000 bgcolor=#33ff77 cellpadding=2> |
| | <tr valign="top"> |
| | <td><span style="font-weight: 700; font-size: 15px;">This is a <span style="color: white; background-color: blue;"> Driver Only </span> window</span></td> |
| </tr> | | </tr> |
| </table> | | </table> |
| <br> | | <br> |
| <table width=1000 bgcolor=#000000 cellpadding=2> | | <table width=1000 bgcolor=#000000> |
| <tr valign="top"> | | <tr valign="top"> |
| <td> | | <td> |
| <table width=996 bgcolor=#ffffff cellpadding=2> | | <table width=996 bgcolor=#ffe89a cellpadding=2> |
| <tr valign="top">
| |
| <td>
| |
| <table>
| |
| <tr valign="middle"> | | <tr valign="middle"> |
| <td width=35>[[image:Information.png|35px|link=]]</td> | | <td width=45>[[image:PalettesIcon_S20.png|link=]]</td> |
| <td>Track objects can also be rotated to the opposite side of the track to face the opposite direction.<br> | | <td>In '''Driver''' to show the '''Session Options Window''' on the screen refer to [[image:PageLink.PNG|link=]] '''[[#Hiding and Showing Palettes and Windows|Hiding and Showing Palettes and Windows]]''' at the top of this document</td> |
| For some track objects this will make no difference but for others it will have an affect on their operation - for example:-</td>
| |
| </tr> | | </tr> |
| </table> | | </table> |
| </td> | | </td> |
| </tr> | | </tr> |
| | </table> |
| | <br> |
| | <table width=1000 bgcolor="lightcyan" cellpadding=2> |
| <tr valign="top"> | | <tr valign="top"> |
| <td>
| | <td width=10>[[image:BlueDot10x10.png|link=]]</td> |
| <table>
| | <td>This window allows you to change session settings in '''Driver''' "on the fly"</td> |
| <tr valign="top">
| |
| <td width=10>[[image:DotPoint.JPG|10px|link=]]</td> | |
| <td>'''signals''' and '''trackside signs''' (e.g. speed, whistle and stop signs)</td> | |
| </tr> | | </tr> |
| | </table> |
| | <br> |
| | <table width=1000> |
| <tr valign="top"> | | <tr valign="top"> |
| <td>[[image:DotPoint.JPG|10px|link=]]</td> | | <td width=410>[[image:SessionOptionsPalette_S20.png|link=]] |
| <td>'''track direction markers''' and '''directional triggers'''</td> | | <br> |
| </tr> | | <table bgcolor=#000000 cellpadding=2> |
| </table>
| | <tr valign="top"> |
| | <td> |
| | <table bgcolor=#ffffb0 cellpadding=2> |
| | <tr valign="top"> |
| | <td width=25>[[image:NotePad.PNG|link=]]</td> |
| | <td><span style="font-size: 17px; font-weight: 700;">Notes:'''</span><br> |
| | ---- |
| </td> | | </td> |
| </tr> | | </tr> |
| <tr valign="top"> | | <tr valign="top"> |
| <td>if rotated these track objects will now only affect trains approaching from the direction that is opposite to the way that they originally faced.</td> | | <td>[[image:DotPoint.JPG|10px|link=]]</td> |
| | <td>This window can be minimised but it cannot be resized</td> |
| | </tr> |
| | <tr valign="top"> |
| | <td>[[image:DotPoint.JPG|10px|link=]]</td> |
| | <td><span style="font-weight: 700; font-size: 15px; background-color: lightcyan;"> Left Click </span> on the [[image:Cross.PNG|link=]] icon to close the window</td> |
| </tr> | | </tr> |
| </table> | | </table> |
| Line 13,419: |
Line 13,801: |
| </tr> | | </tr> |
| </table> | | </table> |
| <br>
| | </td> |
| <table>
| |
| <tr valign="top">
| |
| <td width=400>[[image:FreeMoveTrackObjectReversed_S20.png|link=]]</td>
| |
| <td> | | <td> |
| <table bgcolor=#000000 cellpadding=2> | | <table width=590 bgcolor=#000000 cellpadding=2> |
| <tr valign="top"> | | <tr valign="top"> |
| <td> | | <td> |
| <table bgcolor=#ffffff cellpadding=2> | | <table width=586 bgcolor=#ffffff cellpadding=2> |
| <tr valign="top"> | | <tr valign="top"> |
| <td colspan=2><span style="font-weight: 700; font-size: 15px;">Steps:</span> To rotate a track object:-</td> | | <td>Each item shown in the window can be edited:- |
| </tr> | | <table> |
| <tr valign="top"> | | <tr valign="top"> |
| <td width=20>[[image:DotPoint1.JPG|link=]]</td> | | <td width=10>[[image:DotPoint.JPG|10px|link=]]</td> |
| <td>Open the track objects '''Context Menu''' (<span style="font-weight: 700; font-size: 15px; background-color: lightcyan;"> Left Click </span> on its icon or press the <span style="font-weight: 700; font-size: 15px; color: white; background-color: black;"> T </span> key)</td> | | <td><span style="font-weight: 700; font-size: 15px; background-color: lightcyan;"> Left Click </span> on a '''boxed''' item to select an option from its drop down menu (see below)</td> |
| </tr> | | </tr> |
| <tr valign="top"> | | <tr valign="top"> |
| <td>[[image:DotPoint2.JPG|link=]]</td> | | <td>[[image:DotPoint.JPG|10px|link=]]</td> |
| <td>Select the option <span style="font-weight: 700; font-size: 15px; color: white; background-color: black;"> Rotate Trackside </span></td> | | <td>In the calendar <span style="font-weight: 700; font-size: 15px; background-color: lightcyan;"> Left Click </span> on date (the day and/or the left/right month arrows) to change the season of the year or enter a new date in the text entry box (the year entered does not matter)</td> |
| </tr> | | </tr> |
| <tr valign="top"> | | <tr valign="top"> |
| <td colspan=2>Rotating a track object does not change its distance from the track or its height. | | <td>[[image:DotPoint.JPG|10px|link=]]</td> |
| </td> | | <td>In the clock <span style="font-weight: 700; font-size: 15px; background-color: lightcyan;"> Left Click and Drag </span> the clock hand around the dial to change the time of day</td> |
| </tr> | | </tr> |
| </table> | | </table> |
| Line 13,451: |
Line 13,830: |
| </table> | | </table> |
| <br> | | <br> |
| <table width=1000> <!-- BEGIN Section Nav Buttons --> | | <table bgcolor=#000000 cellpadding=2> |
| | <tr valign="top"> |
| | <td> |
| | <table bgcolor=#ffffff cellpadding=2> |
| | <tr valign="top"> |
| | <td> |
| | <table> |
| <tr valign="top"> | | <tr valign="top"> |
| <td width=629><span id="skip Free Move: Spline Objects"></span> | | <td colspan=2><span style="font-weight: 700; font-size: 15px; color: white; background-color: black;"> Derailment Mode </span></td> |
| =='''Free Move: Spline Objects (Including Track)'''==
| |
| </td>
| |
| <td width=50>[[image:SkipDown.png|link=#skip Free Move: Rolling Stock Objects|Skip Down]]</td>
| |
| <td width=50>[[image:SkipUp.png|link=#skip Free Move: Track Objects|Skip Up]]</td>
| |
| <td width=46>[[image:SkipMinorDown.png|link=#FM: Move Splines|Down]][[image:SkipMinorUp.png|link=#FM: Context TObject|Up]]</td> <!-- for Top and Minor Up/Down -->
| |
| <td width=75>[[image:HeadingUp.png|link=#stepFreeMove|alt=Heading|To Heading]]</td>
| |
| <td width=75> </td>
| |
| <td width=75> </td> <!-- for Bottom -->
| |
| </tr> | | </tr> |
| </table> <!-- END Section Nav Buttons -->
| |
|
| |
| <table width=1000 bgcolor="lightcyan" cellpadding=2>
| |
| <tr valign="top"> | | <tr valign="top"> |
| <td width=10>[[image:BlueDot10x10.png|link=]]</td> | | <td width=20> </td> |
| <td>Scenery splines and track splines are defined by their '''endpoints'''. Splines are usually added to a route as a series of segments joined at the endpoints.</td> | | <td>sets the realism level of derailments. Options are '''None''' (no derailments will occur), '''Arcade''' (derailments will occur far more often than reality) and '''Realistic'''</td> |
| </tr> | | </tr> |
| </table> | | </table> |
| <br> | | </td> |
| <table width=1000 bgcolor=#000000 cellpadding=2> | | </tr> |
| <tr valign="top"> | | <tr valign="top"> |
| <td> | | <td> |
| <table width=996 bgcolor=#ffe89a cellpadding=2> | | <table> |
| <tr valign="middle"> | | <tr valign="top"> |
| <td width=45>[[image:PalettesIcon_S20.png|link=]]</td> | | <td colspan=2><span style="font-weight: 700; font-size: 15px; color: white; background-color: black;"> Living Railroad Dispatch </span> <span style="font-weight: 700; background-color: yellow;">available in Trainz Plus only</span></td> |
| <td>If the <span style="font-weight: 700; font-size: 15px; color: white; background-color: #797979;"> Tool Options Palette </span> and <span style="font-weight: 700; font-size: 15px; color: white; background-color: #797979;"> Info Palette </span> are not visible on the screen then refer to [[image:PageLink.PNG|link=]] '''[[#Notes_Palettes|Notes: Palettes]]''' at the top of this document.
| |
| </td> | |
| </tr> | | </tr> |
| </table> | | <tr valign="top"> |
| | <td width=20> </td> |
| | <td>sets the operation of the '''TLR''' ('''Trainz Living Railroad'''). Options are '''Enabled''' (feature is '''on''') and '''Disabled''' (feature is '''off''') |
| </td> | | </td> |
| </tr> | | </tr> |
| </table> | | </table> |
| <br>
| |
| <table width=1000> <!-- BEGIN Section Nav Buttons -->
| |
| <tr valign="top">
| |
| <td width=629><span id="FM: Troubleshooting Spline"></span>
| |
| ===<span style="font-weight: 700; font-size: 17px; color: white; background-color: blue;"> Free Move: Spline Troubleshooting Tip </span>===
| |
| </td> | | </td> |
| <td width=50> </td>
| |
| <td width=50> </td>
| |
| <td width=46>[[image:SkipMinorDown.png|link=#FM: Move Splines|Down]][[image:SkipMinorBlank.png|link=]]</td> <!-- for Top and Minor Up/Down -->
| |
| <td width=75> </td>
| |
| <td width=75> </td>
| |
| <td width=75> </td> <!-- for Bottom -->
| |
| </tr> | | </tr> |
| </table> <!-- END Section Nav Buttons -->
| |
|
| |
| <table width=1000 bgcolor=#000000 cellpadding=2>
| |
| <tr valign="top"> | | <tr valign="top"> |
| <td> | | <td> |
| <table width=996 bgcolor=#ffffe0 cellpadding=2> | | <table> |
| <tr valign="top"> | | <tr valign="top"> |
| <td width=25>[[image:PencilTips.PNG|link=]]</td> | | <td colspan=2><span style="font-weight: 700; font-size: 15px; color: white; background-color: black;"> Restart Stuck AI </span></td> |
| <td><span style="font-weight: 700; font-size: 15px;">Quickly Locate Broken Splines and Tracks</span></td>
| |
| </tr> | | </tr> |
| <tr valign="top"> | | <tr valign="top"> |
| <td> </td> | | <td width=20> </td> |
| <td>To quickly check for broken links in a spline or track <span style="font-weight: 700; font-size: 15px; background-color: lightcyan;">Double Left Click</span> on a segment. All the correctly joined segments upto the next junction or last endpoint (in both directions) will be highlighted. The highlighting will stop at a broken join (which is technically a "last" endpoint)</td> | | <td>sets whether or not attempts will be made to resolve AI conflicts and restart "stuck" AI controlled trains. Options are '''Enabled''' (feature is '''on''') and '''Disabled''' (feature is '''off''')</td> |
| </tr> | | </tr> |
| </table> | | </table> |
| </td> | | </td> |
| </tr> | | </tr> |
| </table>
| |
| <br>
| |
| <table width=1000> <!-- BEGIN Section Nav Buttons -->
| |
| <tr valign="top"> | | <tr valign="top"> |
| <td width=629><span id="FM: Move Splines"></span> | | <td> |
| ===<span style="font-weight: 700; font-size: 17px; color: white; background-color: blue;"> Free Move: Moving Splines </span>===
| | <table> |
| </td>
| | <tr valign="top"> |
| <td width=50> </td>
| | <td colspan=2><span style="font-weight: 700; font-size: 15px; color: white; background-color: black;"> Weather </span></td> |
| <td width=50> </td>
| |
| <td width=46>[[image:SkipMinorDown.png|link=#FM: Join Splines|Down]][[image:SkipMinorUp.png|link=#skip Free Move: Spline Objects|Up]]</td> <!-- for Top and Minor Up/Down -->
| |
| <td width=75> </td>
| |
| <td width=75> </td>
| |
| <td width=75> </td> <!-- for Bottom -->
| |
| </tr> | | </tr> |
| </table> <!-- END Section Nav Buttons -->
| |
|
| |
| <table bgcolor=#000000 cellpadding=2>
| |
| <tr valign="top"> | | <tr valign="top"> |
| <td> | | <td width=20> </td> |
| <table bgcolor=#ffffff cellpadding=2>
| | <td>sets the current weather conditions. Options are '''Clear''', '''Cloudy''', '''Drizzle''', '''Rain''', '''Stormy''', '''Light Snow''', '''Medium Snow''', '''Heavy Snow'''</td> |
| <tr valign="top"> | |
| <td colspan=2>Moving a spline can involve moving one of the following:-</td> | |
| </tr> | | </tr> |
| <tr> | | </table> |
| <td colspan=2><span style="font-weight: 700; font-size: 15px;">Options:</span> </td>
| | </td> |
| </tr> | | </tr> |
| <tr valign="top"> | | <tr valign="top"> |
| <td width=25>[[image:Ablue.png|link=]]</td> | | <td> |
| <td>moving an endpoint, <span style="font-size: 15px; font-weight: 700;">OR</span></td>
| | <table> |
| </tr> | |
| <tr valign="top"> | | <tr valign="top"> |
| <td>[[image:Bblue.png|link=]]</td> | | <td colspan=2><span style="font-weight: 700; font-size: 15px; color: white; background-color: black;"> Weather Changeability </span></td> |
| <td>moving a segment, <span style="font-size: 15px; font-weight: 700;">OR</span></td>
| |
| </tr> | | </tr> |
| <tr valign="top"> | | <tr valign="top"> |
| <td>[[image:Cblue.png|link=]]</td> | | <td width=20> </td> |
| <td>moving multiple segments including the entire length of the spline (between junctions)</td> | | <td>sets the rate and scope of changes to the weather conditions during the session. Options are '''None''' (no weather changes), '''Periodic''' (minor and gradual changes) and '''Extreme''' (rapid and wide ranging changes)</td> |
| </tr> | | </tr> |
| </table> | | </table> |
| </td> | | </td> |
| </tr> | | </tr> |
| </table>
| |
| <br>
| |
| ====Free Move: Move a Spline Endpoint====
| |
|
| |
| <table width=1000>
| |
| <tr valign="top"> | | <tr valign="top"> |
| <td width=450>[[image:FreeMoveToolSpline_S20.png|link=]]</td>
| |
| <td> | | <td> |
| <table bgcolor=#000000 width=550 cellpadding=2> | | <table> |
| <tr valign="top"> | | <tr valign="top"> |
| <td> | | <td colspan=2><span style="font-weight: 700; font-size: 15px; color: white; background-color: black;"> Time Rate </span></td> |
| <table bgcolor=#ffffff width=546 cellpadding=2> | | </tr> |
| <tr valign="top"> | | <tr valign="top"> |
| <td colspan=2><span style="font-weight: 700; font-size: 15px;">Steps:</span> To move an individual spline endpoint:-</td> | | <td width=20> </td> |
| | <td>sets the speed at which time changes during the session. This does not affect the speed of trains or other operations. Options range from '''1x''' (normal time) to '''1440x''' (extremely rapid time)</td> |
| | </tr> |
| | </table> |
| | </td> |
| </tr> | | </tr> |
| <tr valign="top"> | | <tr valign="top"> |
| <td width=20>[[image:DotPoint1.JPG|link=]]</td> | | <td> |
| <td>In the <span style="font-weight: 700; font-size: 15px; color: white; background-color: #797979;"> Tools Palette </span> select the [[image:S20_FreeMoveToolIcon.png|link=|20px]] '''Free Move Tool''' or press the <span style="font-weight: 700; font-size: 15px; color: white; background-color: black;"> S </span> key</td>
| | <table> |
| </tr> | |
| <tr valign="top"> | | <tr valign="top"> |
| <td>[[image:DotPoint2.JPG|link=]]</td> | | <td colspan=2><span style="font-weight: 700; font-size: 15px; color: white; background-color: black;"> Current Time </span></td> |
| <td><span style="font-weight: 700; font-size: 15px; background-color: lightcyan;">Left Click and Drag</span> the selected spline endpoint in any '''horizontal''' direction</td>
| |
| </tr> | | </tr> |
| <tr valign="top"> | | <tr valign="top"> |
| <td colspan=2>Active (selected) endpoints are shown as '''green'''. Inactive spline endpoints are shown as '''black'''</td> | | <td width=20> </td> |
| | <td>sets, very inaccurately, the current time shown on the session clock. <span style="font-weight: 700; font-size: 15px; background-color: lightcyan;"> Left Click and Drag </span> on the pointer shown on the clock dial. Each of the small dividing lines on the dial represents 36 minutes which makes accurate time setting difficult - approximations are best.</td> |
| </tr> | | </tr> |
| </table> | | </table> |
| Line 13,586: |
Line 13,927: |
| </tr> | | </tr> |
| </table> | | </table> |
| <br>
| | </td> |
| <table bgcolor=#000000 width=550 cellpadding=2>
| |
| <tr valign="top">
| |
| <td>
| |
| <table bgcolor=#ffffb0 width=546 cellpadding=2>
| |
| <tr valign="top">
| |
| <td width=25>[[image:NotePad.PNG|link=]]</td>
| |
| <td>The spline endpoint will be '''fixed''' at its original height.</td>
| |
| </tr> | | </tr> |
| </table> | | </table> |
| Line 13,599: |
Line 13,933: |
| </tr> | | </tr> |
| </table> | | </table> |
| | <br> |
| | <table width=1000> <!-- BEGIN Nav Buttons Table --> |
| | <tr valign="top"> |
| | <td width=629><span id="stepCommodityPicker"></span> |
| | ='''The Commodity Picker Window'''= |
| </td> | | </td> |
| | <td width=50> </td> |
| | <td width=50> </td> |
| | <td width=46>[[image:BackToTop.png|link=#top|alt=Top|Top]]</td> |
| | <td width=75>[[image:NextUp.png|link=#stepSessionOptions|alt=Next Up|Next Up]]</td> |
| | <td width=75>[[image:NextDown.png|link=#stepSessionInfo|alt=Next Down|Next Down]]</td> |
| | <td width=75>[[image:BackToBottom.png|link=#bottom|alt=Bottom|Bottom]]</td> |
| | </tr> |
| | </table> <!-- END Nav Buttons Table --> |
| | |
| | <table width=1000 bgcolor=#33ff77 cellpadding=2> |
| | <tr valign="top"> |
| | <td><span style="font-weight: 700; font-size: 15px;">This is a <span style="color: white; background-color: blue;"> Driver Only </span> window</span></td> |
| </tr> | | </tr> |
| </table> | | </table> |
| <br> | | <br> |
| ====Free Move: Move a Spline Segment or Multiple Segments====
| | <table width=1000 bgcolor=#000000> |
| | |
| Splines are frequently made of multiple segments joined together. You can easily move a spline by moving its segments, individually or as a group.<br>
| |
| | |
| <table width=10000> | |
| <tr valign="top"> | | <tr valign="top"> |
| <td width=400>[[image:FreeMoveSplineSegments_S20.png|link=|alt=spline made of 3 joined segments]]</td>
| |
| <td> | | <td> |
| <table bgcolor=#000000 width=600 cellpadding=2> | | <table width=996 bgcolor=#ffe89a cellpadding=2> |
| <tr valign="top">
| | <tr valign="middle"> |
| <td>
| | <td width=45>[[image:PalettesIcon_S20.png|link=]]</td> |
| <table bgcolor=#ffffb0 width=596 cellpadding=2>
| | <td>In '''Driver''' to show the '''Commodity Picker Window''' on the screen refer to [[image:PageLink.PNG|link=]] '''[[#Hiding and Showing Palettes and Windows|Hiding and Showing Palettes and Windows]]''' at the top of this document.</td> |
| <tr valign="top"> | |
| <td width=25>[[image:NotePad.PNG|link=]]</td> | |
| <td>Not all splines have endpoints at each end. As shown in the image on the left, some splines will have an "endcap" that is attached to the start of the first segment and to the end of the last segment, although not all splines with endcaps will have one at each end. The use of an endcap is a purely cosmetic effect - to give the spline a more distinctive appearance.</td> | |
| </tr>
| |
| </table>
| |
| </td> | |
| </tr> | | </tr> |
| </table> | | </table> |
| Line 13,627: |
Line 13,967: |
| </table> | | </table> |
| <br> | | <br> |
| <table width=1000> | | <table width=1000 bgcolor="lightcyan" cellpadding=2> |
| <tr valign="top"> | | <tr valign="top"> |
| <td width=400>[[image:FreeMoveSplineSegmentSelected_S20.png|link=]]</td> | | <td width=10>[[image:BlueDot10x10.png|link=]]</td> |
| <td> | | <td>This window allows you to change the products carried by rolling stock in '''Driver''' "on the fly"</td> |
| <table bgcolor=#ffffff cellpadding=2>
| |
| <tr valign="top">
| |
| <td colspan=2><span style="font-weight: 700; font-size: 15px;">Steps:</span> To move an individual segment or multiple segments:-</td>
| |
| </tr>
| |
| <tr valign="top">
| |
| <td width=20>[[image:DotPoint1.JPG|link=]]</td>
| |
| <td>In the <span style="font-weight: 700; font-size: 15px; color: white; background-color: #797979;"> Tools Palette </span> select the [[image:S20_FreeMoveToolIcon.png|link=|20px]] '''Free Move Tool''' or press the <span style="font-weight: 700; font-size: 15px; color: white; background-color: black;"> S </span> key</td>
| |
| </tr>
| |
| <tr valign="top">
| |
| <td>[[image:DotPoint2.JPG|link=]]</td>
| |
| <td><span style="font-weight: 700; font-size: 15px; background-color: lightcyan;"> Left Click </span> on the spline segment to be moved - click anywhere between the two spline endpoints on the segment<br>
| |
| </td> | |
| </tr> | | </tr> |
| </table> | | </table> |
| <br> | | <br> |
| <table width=600 bgcolor=#000000 cellpadding=2> | | <table width=1000> |
| <tr valign="top"> | | <tr valign="top"> |
| <td> | | <td width=370>[[image:CommodityPickerPalette_S20.png|link=]] |
| <table width=596 bgcolor=#ffffb0 cellpadding=2> | | <br><br> |
| | <table bgcolor=#000000 cellpadding=2> |
| <tr valign="top"> | | <tr valign="top"> |
| <td> | | <td> |
| <table> | | <table bgcolor=#ffffb0 cellpadding=2> |
| <tr valign="top"> | | <tr valign="top"> |
| <td width=25>[[image:NotePad.PNG|link=]]</td> | | <td width=25>[[image:NotePad.PNG|link=]]</td> |
| <td><span style="font-size: 17px; font-weight: 700;">Notes:</span><br> | | <td><span style="font-size: 17px; font-weight: 700;">Notes:'''</span><br> |
| ---- | | ---- |
| <table> | | </td> |
| | </tr> |
| <tr valign="top"> | | <tr valign="top"> |
| <td>[[image:DotPoint.JPG|10px|link=]]</td> | | <td>[[image:DotPoint.JPG|10px|link=]]</td> |
| <td>the selected segment will be highlighted in '''green/yellow'''.</td> | | <td>This window cannot be minimised or resized</td> |
| </tr> | | </tr> |
| <tr valign="top"> | | <tr valign="top"> |
| <td>[[image:DotPoint.JPG|10px|link=]]</td> | | <td>[[image:DotPoint.JPG|10px|link=]]</td> |
| <td>The segment will have a temporary endpoint inserted at the location you clicked.</td> | | <td><span style="font-weight: 700; font-size: 15px; background-color: lightcyan;"> Left Click </span> on the [[image:Cross.PNG|link=]] icon to close the window</td> |
| </tr> | | </tr> |
| </table> | | </table> |
| Line 13,671: |
Line 14,001: |
| </table> | | </table> |
| </td> | | </td> |
| | <td> |
| | <table bgcolor=#000000 cellpadding=2> |
| | <tr valign="top"> |
| | <td> |
| | <table bgcolor=#ffffff cellpadding=2> |
| | <tr valign="top"> |
| | <td colspan=2><span style="font-weight: 700; font-size: 15px;">Steps: To Change the Products Carried by a Rolling Stock Object:-</span></td> |
| </tr> | | </tr> |
| </table> | | <tr valign="top"> |
| | <td width=25>[[image:DotPoint1.JPG|link=]]</td> |
| | <td>move the mouse pointer onto a commodity icon in the '''Picker'''. A <span style="font-weight: 700; font-size: 15px; color: gold; background-color: black;"> Tooltip </span> identifying the product will appear on the pointer</td> |
| | </tr> |
| | <tr valign="top"> |
| | <td>[[image:DotPoint2.JPG|link=]]</td> |
| | <td><span style="font-weight: 700; font-size: 15px; background-color: lightcyan;"> Left Click </span> on an icon to select its commodity. The message at the top of the palette will change to confirm the selection<br> |
| | [[image:CommodityPickerPaletteClick_S20.png|link=]]</td> |
| | </tr> |
| | <tr valign="top"> |
| | <td>[[image:DotPoint3.JPG|link=]]</td> |
| | <td>move the pointer onto the rolling stock asset that will have its product queue restricted to the selected product only. The mouse pointer will have a '''Load''' icon [[image:CommodityPickerPaletteLoadIcon_S20.png|link=]] attached to it |
| </td> | | </td> |
| </tr> | | </tr> |
| </table>
| |
| <br>
| |
| <table bgcolor=#000000 width=500 cellpadding=2>
| |
| <tr valign="top"> | | <tr valign="top"> |
| <td> | | <td>[[image:DotPoint4.JPG|link=]]</td> |
| <table bgcolor=#ffffe0 width=496 cellpadding=2> | | <td><span style="font-weight: 700; font-size: 15px; background-color: lightcyan;"> Left Click </span> on the rolling stock object to restrict it to the selected product only. If the change is accepted then the mouse pointer will change to the icon for the selected product [[image:CommodityPickerPaletteSetIcon_S20.png|link=]]<br> |
| | <table bgcolor=#ffffb0 cellpadding=2> |
| <tr valign="top"> | | <tr valign="top"> |
| <td width=25>[[image:PencilTips.PNG|link=]]</td> | | <td width=25>[[image:NotePad.PNG|link=]]</td> |
| <td>A temporary spline endpoint can be made permanent by selecting the <span style="font-weight: 700; font-size: 15px; color: white; background-color: black;"> Insert Spline Point Here </span> option from its '''Context Menu'''</td> | | <td>The selection will fail if the rolling stock object has not been configured to accept the selected commodity. Failure is indicated when the '''Load''' icon attached to the pointer does not change when a rolling stock object has been clicked</td> |
| | </tr> |
| | </table> |
| | </td> |
| </tr> | | </tr> |
| </table> | | </table> |
| Line 13,693: |
Line 14,042: |
| </table> | | </table> |
| <br> | | <br> |
| <table width=1000> | | <table width=1000> <!-- BEGIN Nav Buttons Table --> |
| <tr valign="top"> | | <tr valign="top"> |
| <td width=400>[[image:FreeMoveSplineSegmentsAllSelected_S20.png|link=]]</td> | | <td width=629><span id="stepSessionInfo"></span> |
| <td> | | ='''The Session Info Window'''= |
| <table width=600>
| | </td> |
| <tr valign="top"> | | <td width=50> </td> |
| <td colspan=2><span style="font-weight: 700; font-size: 15px;">IF</span> you are going to select and move more than one spline segment, then:-</td> | | <td width=50> </td> |
| | <td width=46>[[image:BackToTop.png|link=#top|alt=Top|Top]]</td> |
| | <td width=75>[[image:NextUp.png|link=#stepCommodityPicker|alt=Next Up|Next Up]]</td> |
| | <td width=75>[[image:NextDown.png|link=#stepWaybill|alt=Next Down|Next Down]]</td> |
| | <td width=75>[[image:BackToBottom.png|link=#bottom|alt=Bottom|Bottom]]</td> |
| </tr> | | </tr> |
| | </table> <!-- END Nav Buttons Table --> |
| | |
| | <table width=1000 bgcolor=#33ff77 cellpadding=2> |
| <tr valign="top"> | | <tr valign="top"> |
| <td width=20>[[image:DotPoint3.JPG|link=]]</td> | | <td><span style="font-weight: 700; font-size: 15px;">This is a <span style="color: white; background-color: blue;"> Driver Only </span> window</span></td> |
| <td>hold the <span style="font-weight: 700; font-size: 15px; color: white; background-color: black;"> Shift </span> key down and individually <span style="font-weight: 700; font-size: 15px; background-color: lightcyan;"> Left Click </span> between the endpoints on each additional segment. The '''last''' segment that you <span style="font-weight: 700; font-size: 15px; background-color: lightcyan;"> Left Click </span> on will have a temporary endpoint (placed at the spot you clicked) and the '''Context Icons''' added.</td>
| |
| </tr> | | </tr> |
| <tr valign="top"> | | </table> |
| <td colspan=2> | | <br> |
| <table bgcolor=#000000 width=600 cellpadding=2> | | <table width=1000 bgcolor=#000000> |
| <tr valign="top"> | | <tr valign="top"> |
| <td> | | <td> |
| <table bgcolor=#ffffe0 width=596 cellpadding=2> | | <table width=996 bgcolor=#ffe89a cellpadding=2> |
| <tr valign="top"> | | <tr valign="middle"> |
| <td width=25>[[image:PencilTips.PNG|link=]]</td> | | <td width=45>[[image:PalettesIcon_S20.png|link=]]</td> |
| <td>To select '''ALL''' the segments in a spline, <span style="font-weight: 700; font-size: 15px; background-color: lightcyan;">Double Left Click</span> on a segment<br> | | <td>In '''Driver''' to show the '''Session Info Window''' on the screen refer to [[image:PageLink.PNG|link=]] '''[[#Hiding and Showing Palettes and Windows|Hiding and Showing Palettes and Windows]]''' at the top of this document.</td> |
| <table>
| |
| <tr valign="top">
| |
| <td>[[image:DotPoint.JPG|10px|link=]]</td>
| |
| <td>This will select all the segments upto the next junction or the final endpoint (in both directions)</td>
| |
| </tr>
| |
| <tr valign="top">
| |
| <td>[[image:DotPoint.JPG|10px|link=]]</td>
| |
| <td>The segment that you double-clicked will have the temporary endpoint (placed at the spot you clicked) and '''Context Icons''' added</td>
| |
| </tr> | | </tr> |
| </table> | | </table> |
| Line 13,727: |
Line 14,074: |
| </tr> | | </tr> |
| </table> | | </table> |
| </td> | | <br> |
| | <table width=1000 bgcolor="lightcyan" cellpadding=2> |
| | <tr valign="top"> |
| | <td width=10>[[image:BlueDot10x10.png|link=]]</td> |
| | <td>This window displays the active '''message windows''' that were created for this session by a '''HTML Asset''' or a '''Message Popup Rule''' starting with the last one displayed</td> |
| </tr> | | </tr> |
| </table> | | </table> |
| </td> | | <br> |
| </tr> | | <table width=1000> |
| <tr valign="top"> | | <tr valign="top"> |
| <td colspan=2> | | <td width=470>[[image:SessionInfoPalette_S20.png|link=]]</td> |
| | <td> |
| <table bgcolor=#000000 cellpadding=2> | | <table bgcolor=#000000 cellpadding=2> |
| <tr valign="top"> | | <tr valign="top"> |
| <td> | | <td> |
| <table bgcolor=#ffffff cellpadding=2> | | <table bgcolor=#ffffb0 cellpadding=2> |
| | <tr valign="top"> |
| | <td width=25>[[image:NotePad.PNG|link=]]</td> |
| | <td><span style="font-size: 17px; font-weight: 700;">Notes:'''</span><br> |
| | ---- |
| | This window can also be displayed by pressing the <span style="font-weight: 700; font-size: 15px; color: white; background-color: black;"> F1 </span> function key</td> |
| | </tr> |
| <tr valign="top"> | | <tr valign="top"> |
| <td width=10>[[image:DotPoint.JPG|10px|link=]]</td> | | <td>[[image:DotPoint.JPG|10px|link=]]</td> |
| <td>To remove individual spline segments from the selection <span style="font-weight: 700; font-size: 15px;"><span style="color: white; background-color: black;"> Shift </span> + <span style="background-color: lightcyan;"> Left Click </span></span> on each segment to be removed.</td> | | <td>If no '''HTML Asset''' or '''Message Popup Rule''' exists in the session, or those present have not yet been activated, then nothing will be displayed</td> |
| </tr> | | </tr> |
| <tr valign="top"> | | <tr valign="top"> |
| <td>[[image:DotPoint.JPG|10px|link=]]</td> | | <td>[[image:DotPoint.JPG|10px|link=]]</td> |
| <td>To remove '''ALL''' the segments from a selection, <span style="font-weight: 700; font-size: 15px; background-color: lightcyan;"> Double Left Click </span> on any highlighted segment <span style="font-weight: 700; font-size: 15px;">OR</span> <span style="font-weight: 700; font-size: 15px; background-color: lightcyan;"> Left Click </span> anywhere outside the selected segments.</td> | | <td>This window cannot be minimised or resized</td> |
| </tr> | | </tr> |
| </table> | | <tr valign="top"> |
| </td> | | <td>[[image:DotPoint.JPG|10px|link=]]</td> |
| | <td>'''Left''' and '''Right''' arrow icons at the bottom of the palette will allow you to move forward and back through any other message windows that have been activated for this session</td> |
| </tr> | | </tr> |
| </table> | | <tr valign="top"> |
| </td> | | <td>[[image:DotPoint.JPG|10px|link=]]</td> |
| | <td>A [[image:Tick.PNG|link=]] icon indicates no more messages. <span style="font-weight: 700; font-size: 15px; background-color: lightcyan;"> Left Click </span> on the [[image:Tick.PNG|link=]] or the [[image:Cross.PNG|link=]] icons to close the window</td> |
| </tr> | | </tr> |
| </table> | | </table> |
| Line 13,756: |
Line 14,116: |
| </tr> | | </tr> |
| </table> | | </table> |
| | | <br> |
| <table width=1000> | | <table cellpadding=2 bgcolor="Aquamarine"> |
| <tr valign="top"> | | <tr valign="top"> |
| <td width=20>[[image:DotPoint4.JPG|link=]]</td> | | <td>[[image:LinkWiki.PNG|link=]]</td> |
| <td><span style="font-weight: 700; font-size: 15px; background-color: lightcyan;">Left Click and Drag</span> the selected segment(s) in any horizontal direction.<br> | | <td>Detailed descriptions on how to create '''HTML Assets''' and '''Message Popups''' can be found on the '''Trainz Wiki Page''' at:- |
| <table> | | <table> |
| <tr valign="top"> | | <tr valign="top"> |
| <td colspan=2>If you had selected:-</td> | | <td>[[image:BlackDot10x10.png|link=]]</td> |
| | <td>'''[[How to Create a HTML Asset|How to Create a HTML Asset]]'''</td> |
| </tr> | | </tr> |
| <tr valign="top"> | | <tr valign="top"> |
| <td width=10>[[image:DotPoint.JPG|10px|link=]]</td> | | <td>[[image:BlackDot10x10.png|link=]]</td> |
| <td>only a single spline segment then only that segment will be moved and the adjacent segments that were not selected will have their shapes (but not their endpoints) adjusted</td> | | <td>'''[[How to Use Message Popup Rule|How to Create a Message Popup]]'''</td> |
| </tr>
| |
| <tr valign="top">
| |
| <td>[[image:DotPoint.JPG|10px|link=]]</td>
| |
| <td>multiple spline segments then those segments will be moved and the adjacent segments that were not selected will also have their shapes adjusted</td>
| |
| </tr>
| |
| <tr valign="top">
| |
| <td>[[image:DotPoint.JPG|10px|link=]]</td>
| |
| <td>the entire spline then '''ALL''' the segments and endpoints will be moved</td>
| |
| </tr> | | </tr> |
| </table> | | </table> |
| Line 13,781: |
Line 14,134: |
| </tr> | | </tr> |
| </table> | | </table> |
| | | </td> |
| <table>
| |
| <tr valign="top">
| |
| <td>[[image:FreeMoveSplineSegmentSelectedMoved_S20.png|link=]]</td>
| |
| <td>[[image:FreeMoveSplineSegmentsAllSelectedMoved_S20.png|link=]]</td>
| |
| </tr> | | </tr> |
| </table> | | </table> |
| <br> | | <br> |
| <table width=1000> <!-- BEGIN Section Nav Buttons --> | | <table width=1000> <!-- BEGIN Nav Buttons Table --> |
| <tr valign="top"> | | <tr valign="top"> |
| <td width=629><span id="FM: Join Splines"></span> | | <td width=629><span id="stepWaybill"></span> |
| ===<span style="font-weight: 700; font-size: 17px; color: white; background-color: blue;"> Free Move: Join Splines </span>=== | | ='''The Waybill Window'''= |
| </td> | | </td> |
| <td width=50> </td> | | <td width=50> </td> |
| <td width=50> </td> | | <td width=50> </td> |
| <td width=46>[[image:SkipMinorDown.png|link=#FM: Unjoin Splines|Down]][[image:SkipMinorUp.png|link=#FM: Move Splines|Up]]</td> <!-- for Top and Minor Up/Down --> | | <td width=46>[[image:BackToTop.png|link=#top|alt=Top|Top]]</td> |
| <td width=75> </td> | | <td width=75>[[image:NextUp.png|link=#stepSessionInfo|alt=Next Up|Next Up]]</td> |
| <td width=75> </td> | | <td width=75>[[image:NextDown.png|link=#stepScheduleInfo|alt=Next Down|Next Down]]</td> |
| <td width=75> </td> <!-- for Bottom -->
| | <td width=75>[[image:BackToBottom.png|link=#bottom|alt=Bottom|Bottom]]</td> |
| </tr> | | </tr> |
| </table> <!-- END Section Nav Buttons --> | | </table> <!-- END Nav Buttons Table --> |
|
| |
|
| <table width=1000 bgcolor="lightcyan" cellpadding=2> | | <table width=1000 bgcolor=#33ff77 cellpadding=2> |
| <tr valign="top">
| |
| <td width=10>[[image:BlueDot10x10.png|link=]]</td>
| |
| <td>Existing splines can be joined together at endpoints to create a longer spline or to create a junction between the two splines</td>
| |
| </tr>
| |
| <tr valign="top"> | | <tr valign="top"> |
| <td>[[image:BlueDot10x10.png|link=]]</td> | | <td><span style="font-weight: 700; font-size: 15px;">This is a <span style="color: white; background-color: blue;"> Driver Only </span> window</span></td> |
| <td>Joins and junctions can be formed using non identical but '''compatible''' spline objects, such as different types of track splines.</td> | |
| </tr> | | </tr> |
| </table> | | </table> |
| <br> | | <br> |
| <table width=1000 bgcolor=#000000 cellpadding=2> | | <table width=1000 bgcolor=#000000> |
| <tr valign="top"> | | <tr valign="top"> |
| <td> | | <td> |
| <table bgcolor=#ffffff cellpadding=2> | | <table width=996 bgcolor=#ffe89a cellpadding=2> |
| <tr valign="top"> | | <tr valign="middle"> |
| <td width=35>[[image:Information.png|35px|link=]]</td> | | <td width=45>[[image:PalettesIcon_S20.png|link=]]</td> |
| <td>The [[image:S20_FreeMoveToolIcon.png|link=|20px]] '''Free Move Tool''' can be used to form a join or a junction between '''existing''' but separated splines and endpoints by dragging the terminating endpoint of one spline onto an endpoint of the other spline. If the '''Target''' endpoint is:- | | <td>In '''Driver''' to show the '''Waybill Window''' on the screen refer to [[image:PageLink.PNG|link=]] '''[[#Hiding and Showing Palettes and Windows|Hiding and Showing Palettes and Windows]]''' at the top of this document.</td> |
| <table>
| |
| <tr valign="top">
| |
| <td width=10>[[image:BlueDot10x10.png|link=]]</td>
| |
| <td>at the end of the second spline then a join will be made that will increase the total length of the spline</td>
| |
| </tr>
| |
| <tr valign="top">
| |
| <td>[[image:BlueDot10x10.png|link=]]</td>
| |
| <td>between two of the segments of the second spline then the join will form a new junction between the splines</td>
| |
| </tr>
| |
| <tr valign="top">
| |
| <td colspan=2>The two splines must be '''identical''' or '''compatible'''. See '''Notes: Incompatible Splines''' below.</td>
| |
| </tr> | | </tr> |
| </table> | | </table> |
| Line 13,837: |
Line 14,170: |
| </tr> | | </tr> |
| </table> | | </table> |
| </td> | | <br> |
| | <table width=1000 bgcolor="lightcyan" cellpadding=2> |
| | <tr valign="top"> |
| | <td width=10>[[image:BlueDot10x10.png|link=]]</td> |
| | <td>This window displays the commodity deliveries and pickups for this train</td> |
| </tr> | | </tr> |
| </table> | | </table> |
| Line 13,843: |
Line 14,180: |
| <table width=1000> | | <table width=1000> |
| <tr valign="top"> | | <tr valign="top"> |
| | <td width=470>[[image:WaybillPaletteDriver.png|link=]]</td> |
| <td> | | <td> |
| <table width=495 bgcolor=#000000 cellpadding=2> | | <table bgcolor=#000000 cellpadding=2> |
| <tr valign="top"> | | <tr valign="top"> |
| <td> | | <td> |
| <table bgcolor=#ffffe0 cellpadding=2> | | <table bgcolor=#ffffb0 cellpadding=2> |
| <tr valign="top"> | | <tr valign="top"> |
| <td width=25>[[image:PencilTips.PNG|link=]]</td> | | <td width=25>[[image:NotePad.PNG|link=]]</td> |
| <td>You can use the '''Free Move Tool''' to join two existing compatible splines at an endpoint to create a join or a junction. | | <td><span style="font-size: 17px; font-weight: 700;">Notes:'''</span><br> |
| <table bgcolor=#ffffff cellpadding=2> | | ---- |
| | </td> |
| | </tr> |
| <tr valign="top"> | | <tr valign="top"> |
| <td colspan=2><span style="font-weight: 700; font-size: 15px;">Steps:</span> To join two existing spline together to create a junction or to lengthen a spline:-</td> | | <td>[[image:DotPoint.JPG|10px|link=]]</td> |
| | <td>This window cannot be minimised or resized</td> |
| </tr> | | </tr> |
| <tr valign="top"> | | <tr valign="top"> |
| <td width=25>[[image:DotPoint1.JPG|link=]]</td> | | <td>[[image:DotPoint.JPG|10px|link=]]</td> |
| <td>Select a terminating endpoint of one spline</td> | | <td><span style="font-weight: 700; font-size: 15px; background-color: lightcyan;"> Left Click </span> on the [[image:Cross.PNG|link=]] icon to close the window</td> |
| </tr> | | </tr> |
| <tr valign="top">
| | </table> |
| <td>[[image:DotPoint2.JPG|link=]]</td>
| | </td> |
| <td><span style="font-weight: 700; font-size: 15px; background-color: lightcyan;"> Left Click and Drag </span> it onto either:-
| |
| <table>
| |
| <tr valign="top">
| |
| <td width=10>[[image:RedDot10x10.png|link=]]</td>
| |
| <td>the '''terminating endpoint''' of the second spline and <span style="font-weight: 700; font-size: 15px; background-color: lightcyan;"> Left Click </span> on the endpoint to join the two splines together to make the original spline longer<br>
| |
| '''OR'''</td>
| |
| </tr> | | </tr> |
| <tr valign="top">
| | </table> |
| <td>[[image:RedDot10x10.png|link=]]</td>
| | </td> |
| <td>an endpoint '''between''' two segments of the second spline and <span style="font-weight: 700; font-size: 15px; background-color: lightcyan;"> Left Click </span> on the endpoint to form a junction between the two splines. The junction must be formed on an existing endpoint</td>
| |
| </tr> | | </tr> |
| </table> | | </table> |
| | <br> |
| | <table width=1000> <!-- BEGIN Nav Buttons Table --> |
| | <tr valign="top"> |
| | <td width=629><span id="stepScheduleInfo"></span> |
| | ='''The Schedule Info Window'''= |
| </td> | | </td> |
| | <td width=50> </td> |
| | <td width=50> </td> |
| | <td width=46>[[image:BackToTop.png|link=#top|alt=Top|Top]]</td> |
| | <td width=75>[[image:NextUp.png|link=#stepWaybill|alt=Next Up|Next Up]]</td> |
| | <td width=75> </td> |
| | <td width=75>[[image:BackToBottom.png|link=#bottom|alt=Bottom|Bottom]]</td> |
| </tr> | | </tr> |
| | </table> <!-- END Nav Buttons Table --> |
| | |
| | <table width=1000 bgcolor=#33ff77 cellpadding=2> |
| <tr valign="top"> | | <tr valign="top"> |
| <td colspan=2>If you do not want to physically join the two splines or form a real junction then hold down the <span style="font-weight: 700; font-size: 15px; color: white; background-color: black;"> Shift </span> key when you <span style="font-weight: 700; font-size: 15px; background-color: lightcyan;"> Left Click </span> on the second endpoint</td> | | <td><span style="font-weight: 700; font-size: 15px;">This is a <span style="color: white; background-color: blue;"> Driver Only </span> window</span></td> |
| </tr> | | </tr> |
| </table> | | </table> |
| <br> | | <br> |
| | <table width=1000 bgcolor=#000000> |
| | <tr valign="top"> |
| | <td> |
| | <table width=996 bgcolor=#ffe89a cellpadding=2> |
| | <tr valign="middle"> |
| | <td width=45>[[image:PalettesIcon_S20.png|link=]]</td> |
| | <td>In '''Driver''' to show the '''Schedule Info Window''' on the screen refer to [[image:PageLink.PNG|link=]] '''[[#Hiding and Showing Palettes and Windows|Hiding and Showing Palettes and Windows]]''' at the top of this document.</td> |
| | </tr> |
| | </table> |
| </td> | | </td> |
| </tr> | | </tr> |
| </table> | | </table> |
| </td> | | <br> |
| | <table width=1000 bgcolor="lightcyan" cellpadding=2> |
| | <tr valign="top"> |
| | <td width=10>[[image:BlueDot10x10.png|link=]]</td> |
| | <td>This window displays the '''Trainz Living Railroad (TLR)''' schedule for the train</td> |
| </tr> | | </tr> |
| </table> | | </table> |
| </td> | | <br> |
| | <table width=1000> |
| | <tr valign="top"> |
| | <td width=470>[[image:ScheduleInfoPaletteDriver.png|link=]]</td> |
| <td> | | <td> |
| <table width=495 bgcolor=#000000 cellpadding=2> | | <table bgcolor=#000000 cellpadding=2> |
| <tr valign="top"> | | <tr valign="top"> |
| <td> | | <td> |
| Line 13,894: |
Line 14,258: |
| <tr valign="top"> | | <tr valign="top"> |
| <td width=25>[[image:NotePad.PNG|link=]]</td> | | <td width=25>[[image:NotePad.PNG|link=]]</td> |
| <td width=975><span style="font-size: 17px; font-weight: 700;">Notes: Incompatible Splines</span><br> | | <td><span style="font-size: 17px; font-weight: 700;">Notes:'''</span><br> |
| ---- | | ---- |
| If, when forming a join or a junction between two splines, the message <span style="font-weight: 700; font-size: 15px; color: white; background-color: black;"> Incompatible Spline </span> appears in the top right corner of the screen, then you are attempting to join two splines that are not compatible with each other. The join or junction between the splines will '''NOT''' be created.</td>
| | </td> |
| </tr> | | </tr> |
| </table> | | <tr valign="top"> |
| </td> | | <td>[[image:DotPoint.JPG|10px|link=]]</td> |
| | <td>This window is fully functional in the '''Trainz Living Railroad (TLR)''' feature</td> |
| </tr> | | </tr> |
| </table>
| |
| <br>
| |
| <table width=495 bgcolor=#000000 cellpadding=2>
| |
| <tr valign="top"> | | <tr valign="top"> |
| <td> | | <td>[[image:DotPoint.JPG|10px|link=]]</td> |
| <table bgcolor=#ffffb0 cellpadding=2> | | <td>This window cannot be minimised or resized</td> |
| | </tr> |
| <tr valign="top"> | | <tr valign="top"> |
| <td width=25>[[image:NotePad.PNG|link=]]</td> | | <td>[[image:DotPoint.JPG|10px|link=]]</td> |
| <td width=470><span style="font-size: 17px; font-weight: 700;">Notes: Adding a New Spline</span><br> | | <td><span style="font-weight: 700; font-size: 15px; background-color: lightcyan;"> Left Click </span> on the [[image:Cross.PNG|link=]] icon to close the window</td> |
| ----
| |
| If the second spline needed for the join or junction does not yet exist then it must be added using the [[image:S20_PlacementToolIcon.png|link=|20px]] '''[[#The Placement Tool|Placement Tool]]'''. This tool can also be used to form the junction or join between the splines. See [[image:PageLink.PNG|link=]] '''[[#PT: Add Spline|Add a Spline]]''' for the details.</td>
| |
| </tr> | | </tr> |
| </table> | | </table> |
| Line 13,921: |
Line 14,282: |
| </table> | | </table> |
| <br> | | <br> |
| <table width=1000> <!-- BEGIN Section Nav Buttons --> | | <table width=1000> <!-- BEGIN Section Nav Buttons --> |
| <tr valign="top"> | | <tr valign="top"> |
| <td width=629><span id="FM: Unjoin Splines"></span> | | <td width=629><span id="bottom"></span></td> <!-- filler space --> |
| ===<span style="font-weight: 700; font-size: 17px; color: white; background-color: blue;"> Free Move: Separate Splines </span>===
| | <td width=50> </td> <!-- for Skip Down --> |
| </td> | |
| <td width=50> </td> | | <td width=50> </td> |
| <td width=50> </td>
| |
| <td width=46>[[image:SkipMinorDown.png|link=#FM: Junction Track|Down]][[image:SkipMinorUp.png|link=#FM: Join Splines|Up]]</td> <!-- for Top and Minor Up/Down -->
| |
| <td width=75> </td>
| |
| <td width=75> </td>
| |
| <td width=75> </td> <!-- for Bottom -->
| |
| </tr>
| |
| </table> <!-- END Section Nav Buttons -->
| |
|
| |
| <table width=1000>
| |
| <tr valign="top">
| |
| <td>
| |
| <table width=495 bgcolor=#000000 cellpadding=2>
| |
| <tr valign="top">
| |
| <td>
| |
| <table bgcolor=#ffffff cellpadding=2>
| |
| <tr valign="top">
| |
| <td colspan=2><span style="font-weight: 700; font-size: 15px;">Steps:</span> To remove a junction or a join between splines but keep all the spline segments:-</td>
| |
| </tr>
| |
| <tr valign="top">
| |
| <td width=20>[[image:DotPoint1.JPG|link=]]</td>
| |
| <td>use the [[image:S20_FreeMoveToolIcon.png|link=|20px]] '''Free Move Tool''' to select (<span style="font-weight: 700; font-size: 15px; background-color: lightcyan;"> Left Click </span> on) the junction or join endpoint</td>
| |
| </tr>
| |
| <tr valign="top">
| |
| <td>[[image:DotPoint2.JPG|link=]]</td>
| |
| <td>open the endpoint '''Context Menu''' by a <span style="font-weight: 700; font-size: 15px; background-color: lightcyan;"> Left Click </span> on its '''Context Icon''' [[image:SplineEndpointContextIcon_S20.png|link=]] or by pressing the <span style="font-weight: 700; font-size: 15px; color: white; background-color: black;"> T </span> key</td>
| |
| </tr>
| |
| <tr valign="top">
| |
| <td>[[image:DotPoint3.JPG|link=]]</td>
| |
| <td>select the <span style="font-weight: 700; font-size: 15px; color: white; background-color: black;"> Separate Splines </span> menu option. This will separate '''ALL''' the spline segments that meet at that endpoint without deleting any of the segments</td>
| |
| </tr>
| |
| </table>
| |
| </td>
| |
| </tr>
| |
| </table>
| |
| </td>
| |
| <td>
| |
| <table width=495 bgcolor=#000000 cellpadding=2>
| |
| <tr valign="top">
| |
| <td>
| |
| <table bgcolor=#ffffe0 cellpadding=2>
| |
| <tr valign="top">
| |
| <td width=25>[[image:PencilTips.PNG|link=]]</td>
| |
| <td>
| |
| <table>
| |
| <tr valign="top">
| |
| <td width=10>[[image:DotPoint.JPG|10px|link=]]</td>
| |
| <td>A spline junction or join can also be removed by deleting any spline segment that connects to its endpoint</td>
| |
| </tr>
| |
| <tr valign="top">
| |
| <td>[[image:DotPoint.JPG|10px|link=]]</td>
| |
| <td>A junction endpoint can be moved by using the [[image:S20_FreeMoveToolIcon.png|link=|20px]] '''Free Move Tool''' or the [[image:S20_FineAdjustmentToolIcon.png|link=|20px]] '''Fine Adjustment Tool'''</td>
| |
| </tr>
| |
| </table>
| |
| </td>
| |
| </tr>
| |
| </table>
| |
| </td>
| |
| </tr>
| |
| </table>
| |
| </td>
| |
| </tr>
| |
| </table>
| |
| <br>
| |
| <table width=1000> <!-- BEGIN Section Nav Buttons -->
| |
| <tr valign="top">
| |
| <td width=629><span id="FM: Junction Track"></span>
| |
| ===<span style="font-weight: 700; font-size: 17px; color: white; background-color: blue;"> Free Move: Add a Track Junction </span>===
| |
| </td>
| |
| <td width=50> </td>
| |
| <td width=50> </td>
| |
| <td width=46>[[image:SkipMinorDown.png|link=#FM: Height Spline|Down]][[image:SkipMinorUp.png|link=#FM: Unjoin Splines|Up]]</td> <!-- for Top and Minor Up/Down -->
| |
| <td width=75> </td>
| |
| <td width=75> </td>
| |
| <td width=75> </td> <!-- for Bottom -->
| |
| </tr>
| |
| </table> <!-- END Section Nav Buttons -->
| |
|
| |
| <table width=1000 bgcolor="lightcyan" cellpadding=2>
| |
| <tr valign="top">
| |
| <td width=10>[[image:BlueDot10x10.png|link=]]</td>
| |
| <td>A track junction is formed using '''track splines''' in the same way as described above but track junctions have additional features</td>
| |
| </tr>
| |
| </table>
| |
| <br>
| |
| <table width=1000>
| |
| <tr valign="top">
| |
| <td width=365>[[image:PlacementTrackJunction_S20.png|link=]]</td>
| |
| <td>
| |
| <table bgcolor=#000000 cellpadding=2>
| |
| <tr valign="top">
| |
| <td>
| |
| <table bgcolor=#ffffff cellpadding=2>
| |
| <tr valign="top">
| |
| <td colspan=2>When a junction is created using '''Track Spline Objects''', a junction switch will be automatically added.</td>
| |
| </tr>
| |
| <tr valign="top">
| |
| <td width=10>[[image:DotPoint.JPG|10px|link=]]</td>
| |
| <td><span style="font-weight: 700; font-size: 15px;">IF</span> the '''Automatic Junction Placement Checkbox''' (in the [[image:SurveyorMainMenuIcon.png|link=]] '''Surveyor Main Menu''' - '''Settings''' option - '''Interface Settings''') has been checked '''ON'''</td>
| |
| </tr>
| |
| <tr valign="top">
| |
| <td>[[image:DotPoint.JPG|10px|link=]]</td>
| |
| <td>the switch will be the one specified in the '''Region''' listed in the '''Route Properties'''. The '''region''' and its switch can be changed by opening the [[image:SurveyorEditIcon.png|link=]] '''Surveyor Edit Menu''' and selecting <span style="font-weight: 700; font-size: 15px; color: white; background-color: black;"> Edit Route... </span>. If no region has been specified then a '''default''' switch (as shown left) will be used</td>
| |
| </tr>
| |
| <tr valign="top">
| |
| <td>[[image:DotPoint.JPG|10px|link=]]</td>
| |
| <td>use the [[image:PageLink.PNG|link=]] '''[[#Free Move: Track Objects|Free Move Tool]]''' or the [[image:S20_FineAdjustmentToolIcon.png|link=|20px]] '''[[#The Fine Adjustment Tool|Fine Adjustment Tool]]''' to move or delete the switch and to open its '''Context Menu''' for editing</td>
| |
| </tr>
| |
| </table>
| |
| </td>
| |
| </tr>
| |
| </table>
| |
| <br>
| |
| <table cellpadding=2 bgcolor="Aquamarine">
| |
| <tr valign="top">
| |
| <td>[[image:LinkWiki.PNG|link=]]</td>
| |
| <td>
| |
| Information on creating and editing a '''Region''' can be found on the '''Trainz Wiki''' at:-<br>
| |
| :'''[[How_to_Create_a_Region_Asset|How to Create a Region Asset]]'''
| |
| </td>
| |
| </tr>
| |
| </table>
| |
| </td>
| |
| </tr>
| |
| </table>
| |
| <br>
| |
| <table width=1000 bgcolor=#000000 cellpadding=2>
| |
| <tr valign="top">
| |
| <td>
| |
| <table bgcolor=#ffffb0 cellpadding=2>
| |
| <tr valign="top">
| |
| <td width=25>[[image:NotePad.PNG|link=]]</td>
| |
| <td><span style="font-weight: 700; font-size: 15px;">Using Procedural Tracks</span><br>
| |
| If the track object used is a '''Procedural Track''' and the junction is formed with another '''Procedural Track''' then the junction endpoint dot will be coloured:-</td>
| |
| </tr>
| |
| <tr valign="top">
| |
| <td width=10>[[image:DotPoint.JPG|10px|link=]]</td>
| |
| <td><span style="font-weight: 700; font-size: 15px; color: red;">RED</span> (as shown above) if the junction exceeds the maximum allowed values for a procedural junction. This will not stop the junction from working but it will not display the special features only found in '''Procedural Tracks''', <span style="font-weight: 700; font-size: 15px;">OR</span></td>
| |
| </tr>
| |
| <tr valign="top">
| |
| <td>[[image:DotPointBlack.JPG|10px|link=]]</td>
| |
| <td><span style="font-weight: 700; font-size: 15px;">BLACK</span> if the junction is within the maximum allowed values for a procedural junction and it will display all the '''Procedural Track''' special features</td>
| |
| </tr>
| |
| <tr valign="top">
| |
| <td colspan=2>A procedural track junction can be changed from <span style="font-weight: 700; color: red;">red</span> to '''black''' by adjusting the height and/or position (depending on the exact cause of the problem) of the junction endpoint and the endpoints on either side of the junction. See the Wiki Page [[image:WikiLink.PNG|link=]] '''[[How_to_Use_Procedural_Track|How to Use Procedural Track]]''' for more details</td>
| |
| </tr>
| |
| <tr valign="top">
| |
| <td colspan=2>A junction between two non-procedural tracks and between a procedural track and a non-procedural track will always have a <span style="font-weight: 700; color: red;">red</span> endpoint dot</td>
| |
| </tr>
| |
| </table>
| |
| </td>
| |
| </tr>
| |
| </table>
| |
| <br>
| |
| <table width=1000> <!-- BEGIN Section Nav Buttons -->
| |
| <tr valign="top">
| |
| <td width=629><span id="FM: Height Spline"></span>
| |
| ===<span style="font-weight: 700; font-size: 17px; color: white; background-color: blue;"> Free Move: Set a Spline Height </span>===
| |
| </td>
| |
| <td width=50> </td>
| |
| <td width=50> </td>
| |
| <td width=46>[[image:SkipMinorDown.png|link=#FM: Gradient Spline|Down]][[image:SkipMinorUp.png|link=#FM: Junction Track|Up]]</td> <!-- for Top and Minor Up/Down -->
| |
| <td width=75> </td>
| |
| <td width=75> </td>
| |
| <td width=75> </td> <!-- for Bottom -->
| |
| </tr>
| |
| </table> <!-- END Section Nav Buttons -->
| |
| <br>
| |
| <span style="font-weight: 700; font-size: 15px;">Get the Height of a Spline Object</span>
| |
| <br>
| |
| <table width=1000 bgcolor=#000000 cellpadding=2>
| |
| <tr valign="top">
| |
| <td>
| |
| <table width=996 bgcolor=#ffffe0 cellpadding=2>
| |
| <tr valign="top">
| |
| <td width=25>[[image:PencilTips.PNG|link=]]</td>
| |
| <td>You can copy the '''height''' of a spline segment or endpoint into the <span style="font-weight: 700; font-size: 15px; color: white; background-color: #797979;"> Tool Options Palette </span> <span style="font-weight: 700; font-size: 15px; color: gold; background-color: black;"> Height </span> setting. Once it has been copied it can be applied to any other object. Choose one of the following:-</td>
| |
| </tr>
| |
| <tr valign="top">
| |
| <td colspan=2><span style="font-weight: 700; font-size: 15px;">Options:</span></td>
| |
| </tr>
| |
| <tr valign="top">
| |
| <td>[[image:Ablue.png|link=]]</td>
| |
| <td>Use the '''Eyedropper''' to copy the height of a spline segment<br>
| |
| <table>
| |
| <tr valign="top">
| |
| <td>
| |
| <table width=500 bgcolor=#ffffff>
| |
| <tr valign="top">
| |
| <td colspan=2><span style="font-weight: 700; font-size: 15px;">Steps:</span> To copy the '''Height''' of a spline segment (but not an endpoint):-</td>
| |
| </tr>
| |
| <tr valign="top">
| |
| <td width=25>[[image:DotPoint1.JPG|link=]]</td>
| |
| <td>hold down the <span style="font-weight: 700; font-size: 15px; color: white; background-color: black;"> Alt </span> key and move the mouse tool pointer onto the spline segment</td>
| |
| </tr>
| |
| <tr valign="top">
| |
| <td>[[image:DotPoint2.JPG|link=]]</td>
| |
| <td>while holding down the <span style="font-weight: 700; font-size: 15px; color: white; background-color: black;"> Alt </span> key <span style="font-weight: 700; font-size: 15px; background-color: lightcyan;"> Left Click </span> on the spline segment</td>
| |
| </tr>
| |
| </table>
| |
| </td>
| |
| <td>
| |
| <table bgcolor=#ffffb0 cellpadding=2>
| |
| <tr valign="top">
| |
| <td width=25>[[image:NotePad.PNG|link=]]</td>
| |
| <td>
| |
| <table>
| |
| <tr valign="top">
| |
| <td width=10>[[image:DotPoint.JPG|10px|link=]]</td>
| |
| <td>When the '''eyedropper''' is active spline endpoints will not be visible and cannot be selected</td>
| |
| </tr>
| |
| <tr valign="top">
| |
| <td>[[image:DotPoint.JPG|10px|link=]]</td>
| |
| <td>If the segment has a slope then the height at the point clicked will be copied into the <span style="font-weight: 700; font-size: 15px; color: gold; background-color: black;"> Height </span> setting</td>
| |
| </tr>
| |
| <tr valign="top">
| |
| <td>[[image:DotPoint.JPG|10px|link=]]</td>
| |
| <td>This will also select the clicked object in the <span style="font-weight: 700; font-size: 15px; color: white; background-color: #797979;"> Assets Palette </span> and it will become the next object added by a <span style="font-weight: 700; font-size: 15px; background-color: lightcyan;"> Left Click </span> with the '''Placement Tool''' in your '''Trainz World'''</td>
| |
| </tr>
| |
| </table>
| |
| </td>
| |
| </tr>
| |
| </table>
| |
| </td>
| |
| </tr>
| |
| </table>
| |
| </td>
| |
| </tr>
| |
| <tr valign="top">
| |
| <td> </td>
| |
| <td><span style="font-weight: 700; font-size: 15px;">OR</span></td>
| |
| </tr>
| |
| <tr valign="top">
| |
| <td>[[image:Bblue.png|link=]]</td>
| |
| <td>Use the <span style="font-weight: 700; font-size: 15px; color: gold; background-color: black;"> Height </span> setting drop down menu
| |
| <table>
| |
| <tr valign="top">
| |
| <td>
| |
| <table bgcolor=#ffffff>
| |
| <tr valign="top">
| |
| <td colspan=2><span style="font-weight: 700; font-size: 15px;">Steps:</span> To copy the '''Height''' of a spline segment or one of its endpoints:-</td>
| |
| </tr>
| |
| <tr valign="top">
| |
| <td width=25>[[image:DotPoint1.JPG|link=]]</td>
| |
| <td><span style="font-weight: 700; font-size: 15px; background-color: lightcyan;"> Left Click </span> on the spline segment or endpoint</td>
| |
| </tr>
| |
| <tr valign="top">
| |
| <td>[[image:DotPoint2.JPG|link=]]</td>
| |
| <td>in the <span style="font-weight: 700; font-size: 15px; color: white; background-color: #797979;"> Tool Options Palette </span> <span style="font-weight: 700; font-size: 15px; background-color: lightcyan;">Right Click</span> inside the <span style="font-weight: 700; font-size: 15px; color: gold; background-color: black;"> Height </span> setting box</td>
| |
| </tr>
| |
| <tr valign="top">
| |
| <td>[[image:DotPoint3.JPG|link=]]</td>
| |
| <td>Select the <span style="font-weight: 700; font-size: 15px; color: white; background-color: black;"> Get Height from Selection </span> option</td>
| |
| </tr>
| |
| </table>
| |
| </td>
| |
| <td>
| |
| <table bgcolor=#ffffb0 cellpadding=2>
| |
| <tr valign="top">
| |
| <td width=25>[[image:NotePad.PNG|link=]]</td>
| |
| <td>If the spline segment has a slope then the height at its midpoint will be used</td>
| |
| </tr>
| |
| </table>
| |
| </td>
| |
| </tr>
| |
| </table>
| |
| </td>
| |
| </tr>
| |
| </table>
| |
| </td>
| |
| </tr>
| |
| </table>
| |
| <br>
| |
| <span style="font-weight: 700; font-size: 15px;">Set the Height of a Spline Object</span>
| |
| <br>
| |
| <table width=1000 bgcolor=#000000 cellpadding=2>
| |
| <tr valign="top">
| |
| <td>
| |
| <table width=996 bgcolor=#ffffff cellpadding=2>
| |
| <tr>
| |
| <td colspan=2>To set the '''height''' of a '''selected''' spline (including track) or endpoint, choose one of the following:-<br>
| |
| <span style="font-weight: 700; font-size: 15px;">Options:</span></td>
| |
| </tr>
| |
| <tr valign="top">
| |
| <td colspan=2>
| |
| <table width=996 bgcolor=#ffffb0 cellpadding=2>
| |
| <tr valign="top">
| |
| <td width=25>[[image:NotePad.PNG|link=]]</td>
| |
| <td width=975>If the selected spline segments have a <span style="font-weight: 700; font-size: 15px; color: gold; background-color: black;"> Grade </span> setting then '''Options [[image:Ablue.png|link=]] [[image:Bblue.png|link=]] and [[image:Dblue.png|link=]]''' will '''adjust''' the height of each segment endpoint so that the heights will change but the grade will remain the same. '''Option [[image:Cblue.png|link=]]''' will set all the endpoints to the entered height and the grade will be removed</td>
| |
| </tr>
| |
| </table>
| |
| </td>
| |
| </tr>
| |
| <tr valign="top">
| |
| <td width=25>[[image:Ablue.png|link=]]</td>
| |
| <td><span style="font-weight: 700; font-size: 15px; background-color: lightcyan;"> Left Click </span> in the <span style="font-weight: 700; font-size: 15px; color: white; background-color: #797979;"> Tool Options Palette </span> <span style="font-size: 15px; font-weight: 700; color: gold; background-color: black;"> Height </span> setting and enter a new value (or keep the existing value) then press the <span style="font-weight: 700; font-size: 15px; color: white; background-color: black;"> Enter </span> key. This works even if the <span style="font-size: 15px; font-weight: 700; color: gold; background-color: black;"> Height </span> icon is not coloured <span style="font-weight: 700; font-size: 15px; color: gold; background-color: black;"> Gold </span>. <span style="font-size: 15px; font-weight: 700;">OR</span></td>
| |
| </tr>
| |
| <tr valign="top">
| |
| <td>[[image:Bblue.png|link=]]</td>
| |
| <td>in the <span style="font-weight: 700; font-size: 15px; color: white; background-color: #797979;"> Tool Options Palette </span> <span style="font-weight: 700; font-size: 15px; background-color: lightcyan;"> Left Click </span> inside the <span style="font-size: 15px; font-weight: 700; color: gold; background-color: black;"> Height </span> setting and enter a new value (or keep the existing value) then <span style="font-weight: 700; font-size: 15px; background-color: lightcyan;">Right Click</span> in the setting box and select the <span style="font-weight: 700; font-size: 15px; color: white; background-color: black;"> Set Height to Selection </span> option, <span style="font-weight: 700; font-size: 15px;">OR</span></td>
| |
| </tr>
| |
| <tr valign="top">
| |
| <td>[[image:Cblue.png|link=]]</td>
| |
| <td>select the <span style="font-size: 15px; font-weight: 700; color: white; background-color: black;"> Apply Height </span> option from the objects '''Context Menu''' (<span style="font-weight: 700; font-size: 15px; background-color: lightcyan;"> Left Click </span> on the objects '''Context Icon''' or press the <span style="font-weight: 700; font-size: 15px; color: white; background-color: black;"> T </span> key) to apply an existing height value, <span style="font-size: 15px; font-weight: 700;">OR</span></td>
| |
| </tr>
| |
| <tr valign="top">
| |
| <td>[[image:Dblue.png|link=]]</td>
| |
| <td>in the <span style="font-weight: 700; font-size: 15px; color: white; background-color: #797979;"> Info Palette </span> enter a value in the objects <span style="font-size: 15px; font-weight: 700; color: white; background-color: black;"> z </span> (height) setting or <span style="font-weight: 700; font-size: 15px; background-color: lightcyan;">Left Click and Drag</span> '''Up''' or '''Down''' on the double arrowheads to its right. This can be used to set the height to '''cm''' accuracy (see [[image:PageLink.PNG|link=]] '''[[#The Info Palette|The Info Palette]]''' below).</td>
| |
| </tr>
| |
| </table>
| |
| </td>
| |
| </tr>
| |
| </table>
| |
| <br>
| |
| <table bgcolor=#000000 width=1000 cellpadding=2>
| |
| <tr valign="top">
| |
| <td>
| |
| <table bgcolor=#ffffff width=996 cellpadding=2>
| |
| <tr valign="top">
| |
| <td colspan=2><span style="font-weight: 700; font-size: 15px;">Steps:</span> To set the heights of multiple spline segments to the value stored in the <span style="font-weight: 700; font-size: 15px; color: white; background-color: #797979;"> Tool Options Palette </span> <span style="font-weight: 700; font-size: 15px; color: gold; background-color: black;"> Height </span> setting:-</td>
| |
| </tr>
| |
| <tr valign="top">
| |
| <td>[[image:SelectedSplines_S20.png|link=]]</td>
| |
| <td>
| |
| <table>
| |
| <tr valign="top">
| |
| <td width=25>[[image:DotPoint1.JPG|link=]]</td>
| |
| <td>Select the spline segments using:-
| |
| <table>
| |
| <tr valign="top">
| |
| <td width=10>[[image:DotPointBlueSquare.png|10px|link=]]</td>
| |
| <td><span style="font-weight: 700; font-size: 15px;"><span style="color: white; background-color: black;"> Shift </span> + <span style="background-color: lightcyan;"> Left Click </span></span> to select individual segments, <span style="font-weight: 700; font-size: 15px;">OR</span></td>
| |
| </tr>
| |
| <tr valign="top">
| |
| <td>[[image:DotPointBlueSquare.png|10px|link=]]</td>
| |
| <td><span style="font-weight: 700; font-size: 15px; background-color: lightcyan;">Double Left Click</span> to select all the segments up to the next junction (in both directions).</td>
| |
| </tr>
| |
| </table>
| |
| </td>
| |
| </tr>
| |
| <tr valign="top">
| |
| <td>[[image:DotPoint2.JPG|link=]]</td>
| |
| <td>Select one of the options [[image:Ablue.png|link=]], [[image:Bblue.png|link=]], [[image:Cblue.png|link=]] or [[image:Dblue.png|link=]] described above</td>
| |
| </tr>
| |
| </table>
| |
| </td>
| |
| </tr>
| |
| <tr valign="top">
| |
| <td>[[image:SelectedSplinesHeight_S20.png|link=]]</td>
| |
| <td>'''ALL''' the selected spline segments and their endpoints will be set to the specified height.</td>
| |
| </tr>
| |
| </table>
| |
| </td>
| |
| </tr>
| |
| </table>
| |
| <br>
| |
| <table width=1000> <!-- BEGIN Section Nav Buttons -->
| |
| <tr valign="top">
| |
| <td width=629><span id="FM: Gradient Spline"></span>
| |
| ===<span style="font-weight: 700; font-size: 17px; color: white; background-color: blue;"> Free Move: Set a Spline Gradient </span>===
| |
| </td>
| |
| <td width=50> </td>
| |
| <td width=50> </td>
| |
| <td width=46>[[image:SkipMinorDown.png|link=#FM: Condition Track|Down]][[image:SkipMinorUp.png|link=#FM: Height Spline|Up]]</td> <!-- for Top and Minor Up/Down -->
| |
| <td width=75> </td>
| |
| <td width=75> </td>
| |
| <td width=75> </td> <!-- for Bottom -->
| |
| </tr>
| |
| </table> <!-- END Section Nav Buttons -->
| |
|
| |
| <table width=1000 bgcolor=#000000 cellpadding=2>
| |
| <tr valign="top">
| |
| <td>
| |
| <table width=996 bgcolor=#ffffb0 cellpadding=2>
| |
| <tr valign="top">
| |
| <td width=25>[[image:NotePad.PNG|link=]]</td>
| |
| <td><span style="font-size: 17px; font-weight: 700;">Notes:</span><br>
| |
| ----
| |
| </td>
| |
| </tr>
| |
| <tr valign="top">
| |
| <td> </td>
| |
| <td>The <span style="font-weight: 700; font-size: 15px; color: gold; background-color: black;"> Grade </span> is defined as '''vertical rise''' divided by '''horizontal distance''' converted to a percentage figure. So a grade of 100% (the maximum allowed) would mean a gradient formed by both measurements having the same value (e.g. a rise of 50m over a distance of 50m). A vertical slope (a cliff) would have an infinite grade (cliff height divided by 0) which is currently impossible in Surveyor.</td>
| |
| </tr>
| |
| </table>
| |
| </td>
| |
| </tr>
| |
| </table>
| |
| <br>
| |
| <span style="font-weight: 700; font-size: 15px;">Get the Grade of a Spline Object</span>
| |
| <br>
| |
| <table width=1000 bgcolor=#000000 cellpadding=2>
| |
| <tr valign="top">
| |
| <td>
| |
| <table width=996 bgcolor=#ffffe0 cellpadding=2>
| |
| <tr valign="top">
| |
| <td width=25>[[image:PencilTips.PNG|link=]]</td>
| |
| <td>You can copy the current '''Grade''' of any spline segment into the <span style="font-weight: 700; font-size: 15px; color: white; background-color: #797979;"> Tool Options Palette </span> <span style="font-weight: 700; font-size: 15px; color: gold; background-color: black;"> Grade </span> setting. Once it has been copied it can be applied to any other object that has a '''Grade''' setting. Choose one of the following:-<br>
| |
| <span style="font-weight: 700; font-size: 15px;">Options:</span></td>
| |
| </tr>
| |
| <tr valign="top">
| |
| <td>[[image:Ablue.png|link=]]</td>
| |
| <td>Use the '''Eyedropper'''<br>
| |
| <table>
| |
| <tr valign="top">
| |
| <td>
| |
| <table width=500 bgcolor=#ffffff>
| |
| <tr valign="top">
| |
| <td colspan=2><span style="font-weight: 700; font-size: 15px;">Steps:</span> To copy the '''Grade''' of a spline segment (but not an endpoint):-</td>
| |
| </tr>
| |
| <tr valign="top">
| |
| <td width=25>[[image:DotPoint1.JPG|link=]]</td>
| |
| <td>hold down the <span style="font-weight: 700; font-size: 15px; color: white; background-color: black;"> Alt </span> key and move the mouse tool pointer onto the spline segment</td>
| |
| </tr>
| |
| <tr valign="top">
| |
| <td>[[image:DotPoint2.JPG|link=]]</td>
| |
| <td>while holding down the <span style="font-weight: 700; font-size: 15px; color: white; background-color: black;"> Alt </span> key <span style="font-weight: 700; font-size: 15px; background-color: lightcyan;"> Left Click </span> on the spline segment</td>
| |
| </tr>
| |
| </table>
| |
| </td>
| |
| <td>
| |
| <table bgcolor=#ffffb0>
| |
| <tr valign="top">
| |
| <td width=25>[[image:NotePad.PNG|link=]]</td>
| |
| <td>When the '''eyedropper''' is active spline endpoints will not be visible and cannot be selected. This option will also change the asset selected in the <span style="font-weight: 700; font-size: 15px; color: white; background-color: #797979;"> Assets Palette </span> to the object clicked and it will become the next object added by a <span style="font-weight: 700; font-size: 15px; background-color: lightcyan;"> Left Click </span> with the '''Placement Tool'''</td>
| |
| </tr>
| |
| </table>
| |
| </td>
| |
| </tr>
| |
| </table>
| |
| The height at the point clicked will also be copied into the <span style="font-weight: 700; font-size: 15px; color: gold; background-color: black;"> Height </span> setting</td>
| |
| </tr>
| |
| <tr valign="top">
| |
| <td> </td>
| |
| <td><span style="font-weight: 700; font-size: 15px;">OR</span></td>
| |
| </tr>
| |
| <tr valign="top">
| |
| <td>[[image:Bblue.png|link=]]</td>
| |
| <td>Use the <span style="font-weight: 700; font-size: 15px; color: gold; background-color: black;"> Grade </span> setting drop down menu<br>
| |
| <table bgcolor=#ffffff>
| |
| <tr valign="top">
| |
| <td colspan=2><span style="font-weight: 700; font-size: 15px;">Steps:</span> To copy the '''Grade''' of a spline segment or one of its endpoints:-</td>
| |
| </tr>
| |
| <tr valign="top">
| |
| <td width=25>[[image:DotPoint1.JPG|link=]]</td>
| |
| <td><span style="font-weight: 700; font-size: 15px; background-color: lightcyan;"> Left Click </span> on the spline segment or endpoint</td>
| |
| </tr>
| |
| <tr valign="top">
| |
| <td>[[image:DotPoint2.JPG|link=]]</td>
| |
| <td>in the <span style="font-weight: 700; font-size: 15px; color: white; background-color: #797979;"> Tool Options Palette </span> <span style="font-weight: 700; font-size: 15px; background-color: lightcyan;">Right Click</span> inside the <span style="font-weight: 700; font-size: 15px; color: gold; background-color: black;"> Grade </span> setting box</td>
| |
| </tr>
| |
| <tr valign="top">
| |
| <td>[[image:DotPoint3.JPG|link=]]</td>
| |
| <td>Select the <span style="font-weight: 700; font-size: 15px; color: white; background-color: black;"> Get Grade from Selection </span> option</td>
| |
| </tr>
| |
| </table>
| |
| </td>
| |
| </tr>
| |
| </table>
| |
| </td>
| |
| </tr>
| |
| </table>
| |
| <br>
| |
| <span style="font-weight: 700; font-size: 15px;">Set the Grade of a Spline Object</span>
| |
| <br>
| |
| <table width=1000 bgcolor=#000000 cellpadding=2>
| |
| <tr valign="top">
| |
| <td>
| |
| <table width=996 bgcolor=#ffffff cellpadding=2>
| |
| <tr>
| |
| <td colspan=2>To set the '''gradient''' of a '''selected''' spline segment (including track), choose one of the following:-<br>
| |
| <span style="font-weight: 700; font-size: 15px;">Options:</span></td>
| |
| </tr>
| |
| <tr valign="top">
| |
| <td width=25>[[image:Ablue.png|link=]]</td>
| |
| <td>in the <span style="font-weight: 700; font-size: 15px; color: white; background-color: #797979;"> Tool Options Palette </span> <span style="font-weight: 700; font-size: 15px; background-color: lightcyan;"> Left Click </span> inside the <span style="font-size: 15px; font-weight: 700; color: gold; background-color: black;"> Grade </span> setting and enter a new value (or keep the existing value) then press the <span style="font-weight: 700; font-size: 15px; color: white; background-color: black;"> Enter </span> key. This works even if the <span style="font-size: 15px; font-weight: 700; color: gold; background-color: black;"> Grade </span> icon is not coloured <span style="font-weight: 700; font-size: 15px; color: gold; background-color: black;"> Gold </span>. <span style="font-size: 15px; font-weight: 700;">OR</span></td>
| |
| </tr>
| |
| <tr valign="top">
| |
| <td>[[image:Bblue.png|link=]]</td>
| |
| <td>select the <span style="font-size: 15px; font-weight: 700; color: white; background-color: black;"> Apply Grade to this Spline Endpoint </span> option from the '''Context Menu''' for the '''segment endpoint''' (not the segment context icon) - <span style="font-weight: 700; font-size: 15px; background-color: lightcyan;"> Left Click </span> on the endpoint '''Context Icon''' [[image:SplineEndpointContextIcon_S20.png|link=]] to apply the existing grade value. The '''endpoint''' that has been selected will be the starting point of the grade.</td>
| |
| </tr>
| |
| </table>
| |
| </td>
| |
| </tr>
| |
| </table>
| |
| <br>
| |
| <table bgcolor=#000000 width=1000 cellpadding=2>
| |
| <tr valign="top">
| |
| <td>
| |
| <table bgcolor=#ffffff width=996 cellpadding=2>
| |
| <tr valign="top">
| |
| <td colspan=2><span style="font-weight: 700; font-size: 15px;">Steps:</span> To set the gradients of multiple spline segments to the value stored in the <span style="font-weight: 700; font-size: 15px; color: white; background-color: #797979;"> Tool Options Palette </span> <span style="font-weight: 700; font-size: 15px; color: gold; background-color: black;"> Grade </span> setting:-</td>
| |
| </tr>
| |
| <tr valign="top">
| |
| <td>[[image:SelectedSplines_S20.png|link=]]</td>
| |
| <td>
| |
| <table>
| |
| <tr valign="top">
| |
| <td width=25>[[image:DotPoint1.JPG|link=]]</td>
| |
| <td>Select the spline segments using:-
| |
| <table>
| |
| <tr valign="top">
| |
| <td width=10>[[image:DotPointBlueSquare.png|10px|link=]]</td>
| |
| <td><span style="font-weight: 700; font-size: 15px;"><span style="color: white; background-color: black;"> Shift </span> + <span style="background-color: lightcyan;"> Left Click </span></span> to select individual segments, <span style="font-weight: 700; font-size: 15px;">OR</span></td>
| |
| </tr>
| |
| <tr valign="top">
| |
| <td>[[image:DotPointBlueSquare.png|10px|link=]]</td>
| |
| <td><span style="font-weight: 700; font-size: 15px; background-color: lightcyan;">Double Left Click</span> to select all the segments up to the next junction (in both directions).</td>
| |
| </tr>
| |
| </table>
| |
| </td>
| |
| </tr>
| |
| <tr valign="top">
| |
| <td colspan=2>
| |
| <table bgcolor=#ffffb0 cellpadding=2>
| |
| <tr valign="top">
| |
| <td width=25>[[image:NotePad.PNG|link=]]</td>
| |
| <td>To apply the same gradient to all the selected segments make sure that the first segment has the '''context icons'''</td>
| |
| </tr>
| |
| </table>
| |
| </td>
| |
| </tr>
| |
| <tr valign="top">
| |
| <td>[[image:DotPoint2.JPG|link=]]</td>
| |
| <td>Open the '''Context Menu''' of the '''first''' or starting endpoint (<span style="font-weight: 700; font-size: 15px; background-color: lightcyan;"> Left Click </span> on its icon [[image:SplineEndpointContextIcon_S20.png|link=]])</td>
| |
| </tr>
| |
| <tr valign="top">
| |
| <td>[[image:DotPoint3.JPG|link=]]</td>
| |
| <td>Select the option <span style="font-weight: 700; font-size: 15px; color: white; background-color: black;"> Apply Grade to this Spline Endpoint </span></td>
| |
| </tr>
| |
| </table>
| |
| </td>
| |
| </tr>
| |
| <tr valign="top">
| |
| <td>[[image:SelectedSplinesGradient_S20.png|link=]]</td>
| |
| <td>The selected spline segments are now set to the specified gradient.<br>
| |
| <table bgcolor=#ffffb0 cellpadding=2>
| |
| <tr valign="top">
| |
| <td width=25>[[image:NotePad.PNG|link=]]</td>
| |
| <td>If the selected endpoint is '''NOT''' at the start of the highlighted segments then the gradient will be applied in both directions from that endpoint as shown below.<br>
| |
| [[image:SelectedSplinesGradientUShape_S20.png|link=]]
| |
| </td>
| |
| </tr>
| |
| </table>
| |
| </td>
| |
| </tr>
| |
| <tr valign="top">
| |
| <td colspan=2>
| |
| <table>
| |
| <tr valign="top">
| |
| <td colspan=3>Once the height and/or gradient of the spline segments have been set then other effects can be added.</td>
| |
| </tr>
| |
| <tr valign="top">
| |
| <td>
| |
| <table width=600>
| |
| <tr valign="top">
| |
| <td>From the '''Context Menu''' of the highlighted segments, select the options:-
| |
| <table>
| |
| <tr valign="top">
| |
| <td><span style="font-weight: 700; font-size: 15px; color: white; background-color: black;"> Smooth Ground Under Selected  </span></td>
| |
| <td>to smooth the ground surface under a spline object to match its height, and</td>
| |
| </tr>
| |
| </table>
| |
| </td>
| |
| </tr>
| |
| <tr valign="top">
| |
| <td>
| |
| <table>
| |
| <tr valign="top">
| |
| <td><span style="font-weight: 700; font-size: 15px; color: white; background-color: black;"> Paint Under Selected </span></td>
| |
| <td>to paint the currently selected ground texture under the spline using the settings in the <span style="font-weight: 700; font-size: 15px; color: white; background-color: #797979;"> Tool Options Palette </span></td>
| |
| <!-- <td> </td> -->
| |
| </tr>
| |
| <tr valign="top">
| |
| <td colspan=2>
| |
| <table bgcolor=#ffffb0 cellpadding=2>
| |
| <tr valign="top">
| |
| <td width=25>[[image:NotePad.PNG|link=]]</td>
| |
| <td>Objects have a '''minimum brush size''' that represents the smallest area that can be painted beneath them using the <span style="font-weight: 700; font-size: 15px; color: white; background-color: black;"> Paint Under Selected </span> option. This minimum area will vary in size between objects but it will be rectangular even for circular objects. If the <span style="font-weight: 700; font-size: 15px; color: white; background-color: #797979;"> Tool Options Palette </span> brush <span style="font-weight: 700; font-size: 15px; color: gold; background-color: black;"> Radius </span> is set to a smaller size than this minimum value then the brush <span style="font-weight: 700; font-size: 15px; color: gold; background-color: black;"> Radius </span> will be ignored and the objects minimum brush size will be used instead.</td>
| |
| </tr>
| |
| </table>
| |
| </td>
| |
| </tr>
| |
| </table>
| |
| </td>
| |
| </tr>
| |
| </table>
| |
| </td>
| |
| <td width=400 rowspan=2>[[image:SelectedSplinesGradientSmoothPaint_S20.png|link=]]</td>
| |
| </tr>
| |
| </table>
| |
| </td>
| |
| </tr>
| |
| </table>
| |
| </td>
| |
| </tr>
| |
| </table>
| |
| <br>
| |
| <table width=1000> <!-- BEGIN Section Nav Buttons -->
| |
| <tr valign="top">
| |
| <td width=629><span id="FM: Condition Track"></span>
| |
| ===<span style="font-size: 17px; color: white; background-color: blue;"> Free Move: Set Track Condition and Superelevation </span>===
| |
| </td>
| |
| <td width=50> </td>
| |
| <td width=50> </td>
| |
| <td width=46>[[image:SkipMinorDown.png|link=#FM: Context Spline|Down]][[image:SkipMinorUp.png|link=#FM: Gradient Spline|Up]]</td> <!-- for Top and Minor Up/Down -->
| |
| <td width=75> </td>
| |
| <td width=75> </td>
| |
| <td width=75> </td> <!-- for Bottom -->
| |
| </tr>
| |
| </table> <!-- END Section Nav Buttons -->
| |
|
| |
| <table width=1000 bgcolor="lightcyan" cellpadding=2>
| |
| <tr valign="top">
| |
| <td width=10>[[image:BlueDot10x10.png|link=]]</td>
| |
| <td>The '''Track Condition''' sets the "smoothness" of the ride over a track segment. The default is '''50%''' which is '''Average'''</td>
| |
| </tr>
| |
| <tr valign="top">
| |
| <td>[[image:BlueDot10x10.png|link=]]</td>
| |
| <td>The '''Track Superelevation''' sets the height difference (as a angle) between the inner and outer rail lines on a curve</td>
| |
| </tr>
| |
| <tr valign="top">
| |
| <td>[[image:BlueDot10x10.png|link=]]</td>
| |
| <td>'''Track Condition''' and '''Superelevation''' are only available for '''Track Splines'''</td>
| |
| </tr>
| |
| </table>
| |
| <br>
| |
| <span style="font-weight: 700; font-size: 17px;">Track Condition</span><br>
| |
|
| |
| <table width=1000 bgcolor=#000000 cellpadding=2>
| |
| <tr valign="top">
| |
| <td>
| |
| <table width=996 bgcolor=#ffe89a cellpadding=2>
| |
| <tr valign="middle">
| |
| <td width=45>[[image:PalettesIcon_S20.png|link=]]</td>
| |
| <td>If the <span style="font-weight: 700; font-size: 15px; color: white; background-color: #797979;"> Tool Options Palette </span> is not visible on the screen then refer to [[image:PageLink.PNG|link=]] '''[[#Notes_Palettes|Notes: Palettes]]''' at the top of this document.</td>
| |
| </tr>
| |
| </table>
| |
| </td>
| |
| </tr>
| |
| </table>
| |
| There are '''three different methods''' available for setting the track condition of a track segment.
| |
| <br>
| |
| <table width=1000>
| |
| <tr valign="top">
| |
| <td width=25>[[image:Ablue.png|link=]]</td>
| |
| <td>The <span style="font-weight: 700; font-size: 15px; color: white; background-color: #797979;"> Tool Options Palette </span> has a '''Condition''' setting that only applies to '''track spline segments'''.</td>
| |
| </tr>
| |
| </table>
| |
|
| |
| <table width=1000>
| |
| <tr valign="top">
| |
| <td width=200>[[image:PlacementSplineTools_S20.png|link=]]</td>
| |
| <td>
| |
| <table bgcolor=#000000 width=800 cellpadding=2>
| |
| <tr valign="top">
| |
| <td>
| |
| <table bgcolor=#ffffff width=796 cellpadding=2>
| |
| <tr valign="top">
| |
| <td width=90><span style="font-size: 15px; font-weight: 700; color: gold; background-color: black;"> Condition </span></td>
| |
| <td>The <span style="font-weight: 700; font-size: 15px; color: white; background-color: #797979;"> Tool Options Palette </span> has a '''Condition''' setting that only applies to '''track spline segments'''. This can be set for a single selected segment or for multiple selected segments.</td>
| |
| </tr>
| |
| <tr valign="top">
| |
| <td colspan=2>
| |
| <table bgcolor=#ffffb0>
| |
| <tr valign="top">
| |
| <td width=90 align="right">'''Range:''' </td>
| |
| <td width=706>'''1%''' (terrible track condition) to<br>
| |
| '''50%''' (average track condition - the default setting) to<br>
| |
| '''100%''' (perfect track condition)<br>
| |
| </td>
| |
| </tr>
| |
| </table>
| |
| </td>
| |
| </tr>
| |
| </table>
| |
| </td>
| |
| </tr>
| |
| </table>
| |
| <br>
| |
| <table bgcolor=#000000 cellpadding=2>
| |
| <tr valign="top">
| |
| <td>
| |
| <table bgcolor=#ffffff cellpadding=2>
| |
| <tr valign="top">
| |
| <td colspan=2><span style="font-weight: 700; font-size: 15px;">Steps:</span> To set '''Track Condition''':-</td>
| |
| </tr>
| |
| <tr valign="top">
| |
| <td width=25>[[image:DotPoint1.JPG|link=]]</td>
| |
| <td>Select (<span style="font-weight: 700; font-size: 15px; background-color: lightcyan;"> Left Click </span>) the track segment or (<span style="font-weight: 700; font-size: 15px;"><span style="color: white; background-color: black;"> Shift </span> + <span style="background-color: lightcyan;"> Left Click </span></span> or <span style="font-weight: 700; font-size: 15px; background-color: lightcyan;"> Double Left Click </span>) multiple track segments</td>
| |
| </tr>
| |
| <tr valign="top">
| |
| <td>[[image:DotPoint2.JPG|link=]]</td>
| |
| <td>Enter a value from '''1''' to '''100''' in the <span style="font-weight: 700; font-size: 15px; color: white; background-color: #797979;"> Tool Options Palette </span> <span style="font-weight: 700; font-size: 15px; color: gold; background-color: black;"> Condition </span> setting</td>
| |
| </tr>
| |
| <tr valign="top">
| |
| <td>[[image:DotPoint3.JPG|link=]]</td>
| |
| <td>Press the <span style="font-weight: 700; font-size: 15px; color: white; background-color: black;"> Enter </span> key</td>
| |
| </tr>
| |
| </table>
| |
| </td>
| |
| </tr>
| |
| </table>
| |
|
| |
| <table>
| |
| <tr valign="top">
| |
| <td>There will be no visible change to the track appearance, not even for a 1% setting, as this change would have to be built into the track mesh. Instead when a consist moves over the track there will be a visible change in its rocking or swaying motion.</td>
| |
| </tr>
| |
| </table>
| |
| </td>
| |
| </tr>
| |
| </table>
| |
| <br>
| |
| <table width=1000>
| |
| <tr valign="top">
| |
| <td width=25>[[image:Bblue.png|link=]]</td>
| |
| <td>A second method of setting the '''Track Condition''' of a selected track segment is to use its '''Track Segment Context Menu'''.</td>
| |
| </tr>
| |
| </table>
| |
|
| |
| <table width=1000>
| |
| <tr valign="top">
| |
| <td width=220>[[image:ContextMenuSplineSegment_S20.png|link=]]</td>
| |
| <td>
| |
| <table bgcolor=#000000 cellpadding=2>
| |
| <tr valign="top">
| |
| <td>
| |
| <table bgcolor=#ffffff cellpadding=2>
| |
| <tr valign="top">
| |
| <td colspan=2><span style="font-weight: 700; font-size: 15px;">Steps:</span> To set the '''Track Condition''' of a single selected track segment:-</td>
| |
| </tr>
| |
| <tr valign="top">
| |
| <td width=25>[[image:DotPoint1.JPG|link=]]</td>
| |
| <td><span style="font-weight: 700; font-size: 15px; background-color: lightcyan;"> Left Click </span> on the [[image:TrackSegmentContextIcon_S20.png|link=]] '''Track Segment Context Icon''' to open its menu</td>
| |
| </tr>
| |
| <tr valign="top">
| |
| <td>[[image:DotPoint2.JPG|link=]]</td>
| |
| <td><span style="font-weight: 700; font-size: 15px; background-color: lightcyan;"> Left Click </span> on the <span style="font-weight: 700; font-size: 15px; color: white; background-color: black;"> Edit Details </span> option at the bottom of the list</td>
| |
| </tr>
| |
| <tr valign="top">
| |
| <td>[[image:DotPoint3.JPG|link=]]</td>
| |
| <td>Enter a track condition as a '''%''' value where it shows '''Default'''. The description on the right will change to show the effect of the new value<br>
| |
| [[image:TrackConditionSetting_S20.png|link=]]</td>
| |
| </tr>
| |
| <tr valign="top">
| |
| <td>[[image:DotPoint4.JPG|link=]]</td>
| |
| <td>Click <span style="font-weight: 700; font-size: 15px; color: white; background-color: black;"> Save Changes </span> to set the new value and exit or <span style="font-weight: 700; font-size: 15px; color: white; background-color: black;"> Cancel </span> to cancel the new value and exit</td>
| |
| </tr>
| |
| </table>
| |
| </td>
| |
| </tr>
| |
| </table>
| |
| </td>
| |
| </tr>
| |
| </table>
| |
| <br>
| |
| <table width=1000>
| |
| <tr valign="top">
| |
| <td width=25>[[image:Cblue.png|link=]]</td>
| |
| <td>A third method of setting the '''Track Condition''' is to use the [[image:S20_PlacementToolIcon.png|link=|20px]] '''[[#The Placement Tool|Placement Tool]]''' to place an invisible track "bump" object on a track segment.<br><br>
| |
|
| |
| See [[image:PageLink.PNG|link=]] '''[[#PT: Condition Track|Placement: Set Track Condition and Superelevation]]''' for the details</td>
| |
| </tr>
| |
| </table>
| |
| <br>
| |
| <span style="font-weight: 700; font-size: 17px;">Track Superelevation</span><br>
| |
|
| |
| <table width=1000>
| |
| <tr valign="top">
| |
| <td>The '''Track Superelevation''' can only be set through the '''Track Endpoint Context Menu'''. You can have a different value set for each endpoint that will reflect the changes that can take place around a curve. For more information on how to calculate and use '''Superelevation''' see the '''Trainz Wiki Page [[image:WikiLink.PNG|link=]] [[HowTo/Use_Superelevation|How to Use Superelevation]]'''</td>
| |
| </tr>
| |
| <tr valign="top">
| |
| <td>
| |
| <table>
| |
| <tr valign="top">
| |
| <td width=220>[[image:ContextMenuSplineEndPoint_S20.png|link=]]</td>
| |
| <td>
| |
| <table bgcolor=#000000 cellpadding=2>
| |
| <tr valign="top">
| |
| <td>
| |
| <table bgcolor=#ffffff cellpadding=2>
| |
| <tr valign="top">
| |
| <td colspan=2><span style="font-weight: 700; font-size: 15px;">Steps:</span> To set the '''Superelevation''' for an endpoint of a newly placed track segment:-</td>
| |
| </tr>
| |
| <tr valign="top">
| |
| <td width=25>[[image:DotPoint1.JPG|link=]]</td>
| |
| <td><span style="font-weight: 700; font-size: 15px; background-color: lightcyan;"> Left Click </span> on the [[image:SplineSegmentContextIcon_S20.png|link=]] '''Track Spline Endpoint Context Icon''' to open its menu</td>
| |
| </tr>
| |
| <tr valign="top">
| |
| <td>[[image:DotPoint2.JPG|link=]]</td>
| |
| <td><span style="font-weight: 700; font-size: 15px; background-color: lightcyan;"> Left Click </span> on the <span style="font-weight: 700; font-size: 15px; color: white; background-color: black;"> Edit Details </span> option at the bottom of the list</td>
| |
| </tr>
| |
| <tr valign="top">
| |
| <td>[[image:DotPoint3.JPG|link=]]</td>
| |
| <td>Enter a '''Superelevation Degree''' as an angle (in degrees) - this is the superelevation angle at this vertex (endpoint) per degree of curvature where '''0 = none'''</td>
| |
| </tr>
| |
| <tr valign="top">
| |
| <td colspan=2>
| |
| <table>
| |
| <tr valign="top">
| |
| <td width=265>[[image:TrackSuperElevationSetting_S20.png|link=]]</td>
| |
| <td>The '''Superelevation Angle''' is calculated using the radius of the curve, the maximum track speed and the track gauge.<br>
| |
| See the '''Trainz Wiki Page [[image:WikiLink.PNG|link=]] [[HowTo/Use_Superelevation|How to Use Superelevation]]''' for the formula</td>
| |
| </tr>
| |
| </table>
| |
| </td>
| |
| </tr>
| |
| <tr valign="top">
| |
| <td>[[image:DotPoint4.JPG|link=]]</td>
| |
| <td>Enter a '''Superelevation Limit''' as an angle (in degrees) - this is the '''maximum''' allowed superelevation angle at this vertex (endpoint)</td>
| |
| </tr>
| |
| <tr valign="top">
| |
| <td>[[image:DotPoint5.JPG|link=]]</td>
| |
| <td>Click <span style="font-weight: 700; font-size: 15px; color: white; background-color: black;"> Save Changes </span> to set the new values and exit or <span style="font-weight: 700; font-size: 15px; color: white; background-color: black;"> Cancel </span> to cancel the new values and exit</td>
| |
| </tr>
| |
| <tr valign="top">
| |
| <td colspan=2>'''Repeat the above steps for each endpoint'''</td>
| |
| </tr>
| |
| </table>
| |
| </td>
| |
| </tr>
| |
| </table>
| |
| </td>
| |
| </tr>
| |
| </table>
| |
| </td>
| |
| </tr>
| |
| </table>
| |
| <br>
| |
| <table width=1000> <!-- BEGIN Section Nav Buttons -->
| |
| <tr valign="top">
| |
| <td width=629><span id="FM: Context Spline"></span>
| |
| ===<span style="font-weight: 700; font-size: 17px; color: white; background-color: blue;"> Free Move: Spline Object Context Menus </span>===
| |
| </td>
| |
| <td width=50> </td>
| |
| <td width=50> </td>
| |
| <td width=46>[[image:SkipMinorDown.png|link=#skip Free Move: Rolling Stock Objects|Down]][[image:SkipMinorUp.png|link=#FM: Condition Track|Up]]</td> <!-- for Top and Minor Up/Down -->
| |
| <td width=75> </td>
| |
| <td width=75> </td>
| |
| <td width=75> </td> <!-- for Bottom -->
| |
| </tr>
| |
| </table> <!-- END Section Nav Buttons -->
| |
|
| |
| <table width=1000>
| |
| <tr valign="top">
| |
| <td>A selected scenery spline object, or a group of selected scenery spline objects, will have '''Context Icons'''. The icon design will vary between object types and their position on the spline object. Each icon will open its own '''Context Menu'''.</td>
| |
| </tr>
| |
| </table>
| |
| <br>
| |
| <table width=1000>
| |
| <tr valign="top">
| |
| <td width=420>[[image:ContextIconsSpline_S20.png|link=]]</td>
| |
| <td>
| |
| <table bgcolor=#000000 width=580 cellpadding=2>
| |
| <tr valign="top">
| |
| <td>
| |
| <table bgcolor=#ffffb0 width=576 cellpadding=2>
| |
| <tr valign="top">
| |
| <td>
| |
| <table>
| |
| <tr valign="top">
| |
| <td width=25>[[image:NotePad.PNG|link=]]</td>
| |
| <td width=551><span style="font-size: 17px; font-weight: 700;">Notes:</span><br>
| |
| ----</td>
| |
| </tr>
| |
| </table>
| |
| <table>
| |
| <tr valign="top">
| |
| <td colspan=2>Splines have two different '''Context Icons''' that lead to two slightly different '''Context Menus'''.</td>
| |
| </tr>
| |
| <tr valign="top">
| |
| <td width=10>[[image:DotPoint.JPG|10px|link=]]</td>
| |
| <td>one context icon and menu for each '''endpoint''' [[image:SplineEndpointContextIcon_S20.png|link=]]</td>
| |
| </tr>
| |
| <tr valign="top">
| |
| <td>[[image:DotPoint.JPG|10px|link=]]</td>
| |
| <td>one context icon and menu for the '''segment''' [[image:SplineSegmentContextIcon_S20.png|link=]][[image:TrackSegmentContextIcon_S20.png|link=]]</td>
| |
| </tr>
| |
| <tr valign="top">
| |
| <td colspan=2>If multiple segments have been selected then the last segment added to the selection will have the context icons. If all the segments were selected by a <span style="font-weight: 700; font-size: 15px; background-color: lightcyan;">Double Left Click</span> then the segment that was clicked will have the icons.</td>
| |
| </tr>
| |
| </table>
| |
| </td>
| |
| </tr>
| |
| </table>
| |
| </td>
| |
| </tr>
| |
| </table>
| |
| </td>
| |
| </tr>
| |
| </table>
| |
| <br>
| |
| <table width=1000>
| |
| <tr valign="top">
| |
| <td>
| |
| <table width=420 bgcolor=#000000 cellpadding=2>
| |
| <tr valign="top">
| |
| <td>
| |
| <table bgcolor=#ffffff cellpadding=2>
| |
| <tr valign="top">
| |
| <td>To open a selected objects '''Context Menu''' choose one of the following:-<br>
| |
| <table>
| |
| <tr>
| |
| <td colspan=2><span style="font-weight: 700; font-size: 15px;">Options:</span> </td>
| |
| </tr>
| |
| <tr valign="top">
| |
| <td width=25>[[image:Ablue.png|link=]]</td>
| |
| <td><span style="font-weight: 700; font-size: 15px; background-color: lightcyan;"> Left Click </span> the '''Context Icon''' [[image:SplineContextIcons_S20.png|link=]] <span style="font-size: 15px; font-weight: 700;">OR</span></td>
| |
| </tr>
| |
| <tr valign="top">
| |
| <td>[[image:Bblue.png|link=]]</td>
| |
| <td>Press the <span style="color: white; background-color: black; font-weight: 700; font-size: 15px;"> T </span> key</td>
| |
| </tr>
| |
| </table>
| |
| </td>
| |
| </tr>
| |
| </table>
| |
| </td>
| |
| </tr>
| |
| </table>
| |
| </td>
| |
| <td>
| |
| <table width=580 bgcolor=#000000 cellpadding=2>
| |
| <tr valign="top">
| |
| <td>
| |
| <table bgcolor=#ffffb0 cellpadding=2>
| |
| <tr valign="top">
| |
| <td width=25>[[image:NotePad.PNG|link=]]</td>
| |
| <td width=550><span style="font-size: 17px; font-weight: 700;">Notes: Using the <span style="color: white; background-color: black;"> T </span> key with splines</span><br>
| |
| ----</td>
| |
| </tr>
| |
| <tr valign="middle">
| |
| <td>[[image:SplineSegmentContextIcon_S20.png|link=]]<br>
| |
| [[image:TrackSegmentContextIcon_S20.png|link=]]</td>
| |
| <td>If a spline '''segment''' has been selected then pressing the <span style="color: white; background-color: black; font-weight: 700; font-size: 15px;"> T </span> key will open the '''Segment Context Menu''' and the '''Menu''' options you select or edit will apply to the whole segment or all selected segments</td>
| |
| </tr>
| |
| <tr>
| |
| <td> </td>
| |
| <td>
| |
| ----
| |
| </td>
| |
| </tr>
| |
| <tr valign="top">
| |
| <td>[[image:SplineEndpointContextIcon_S20.png|link=]]</td>
| |
| <td>If a spline '''end point''' has been selected then pressing the <span style="color: white; background-color: black; font-weight: 700; font-size: 15px;"> T </span> key will open the '''End Point Context Menu''' and the '''Menu''' options you select or edit will only apply to '''that particular endpoint'''</td>
| |
| </tr>
| |
| </table>
| |
| </td>
| |
| </tr>
| |
| </table>
| |
| </td>
| |
| </tr>
| |
| </table>
| |
| <br>
| |
| <table width=1000>
| |
| <tr valign="top">
| |
| <td colspan=2><span style="font-weight: 700; font-size: 17px;">Spline Object Context Menus</span></td>
| |
| </tr>
| |
| <tr valign="top">
| |
| <td width=220>[[image:SplineEndpointContextIcon_S20.png|link=]] <span style="font-weight: 700; font-size: 15px; color: white; background-color: black;"> Endpoint Context Menu </span><br>
| |
| [[image:ContextMenuSplineEndPoint_S20.png|link=]]</td>
| |
| <td width=240>[[image:SplineSegmentContextIcon_S20.png|link=]][[image:TrackSegmentContextIcon_S20.png|link=]] <span style="font-weight: 700; font-size: 15px; color: white; background-color: black;"> Segment Context Menu </span><br>
| |
| [[image:ContextMenuSplineSegment_S20.png|link=]]</td>
| |
| <td>
| |
| <table bgcolor=#000000 cellpadding=2>
| |
| <tr valign="top">
| |
| <td>
| |
| <table bgcolor=#ffffb0 cellpadding=2>
| |
| <tr valign="top">
| |
| <td width=25>[[image:NotePad.PNG|link=]]</td>
| |
| <td width=975><span style="font-size: 17px; font-weight: 700;">Notes:'''</span><br>
| |
| ----
| |
| The <span style="font-weight: 700; font-size: 15px; color: white; background-color: black;"> Edit Details </span> option is only available for '''Track''' splines. The properties that can be edited will depend on whether you have selected a '''Track Segment''' or a '''Track Endpoint'''.
| |
| <br>
| |
| <table>
| |
| <tr valign="top">
| |
| <td width=10>[[image:DotPoint.JPG|10px|link=]]</td>
| |
| <td><span style="font-weight: 700; font-size: 15px;">Endpoint Details</span> - the track '''Superelevation''' properties for that endpoint. '''Superelevation''' is a feature used on curves to raise the height of the outside track of the curve slightly above the height of the inside track. This allows higher speeds around curves.<br>
| |
| For more information on '''Superelevation''' see the Trainz Wiki Page at [[image:WikiLink.PNG|link=]] '''[[HowTo/Use_Superelevation|How to Use Superelevation]]'''</td>
| |
| </tr>
| |
| <tr valign="top">
| |
| <td >[[image:DotPoint.JPG|10px|link=]]</td>
| |
| <td><span style="font-weight: 700; font-size: 15px;">Segment Details</span> - the track '''Condition''' property for that segment.
| |
| <table>
| |
| <tr valign="top">
| |
| <td colspan=3>'''Track Condition''' is the "smoothness" of the ride over a track segment</td>
| |
| </tr>
| |
| <tr valign="top">
| |
| <td>100% = perfect</td>
| |
| <td>50% = average</td>
| |
| <td>1% = extremely poor</td>
| |
| </tr>
| |
| </table>
| |
| You can also select multiple track segments and set their track '''Condition''' by editing their combined <span style="font-weight: 700; font-size: 15px; color: gold; background-color: black;"> Condition </span> value in the <span style="font-weight: 700; font-size: 15px; color: white; background-color: #797979;"> Tool Options Palette </span>.</td>
| |
| </tr>
| |
| </table>
| |
| </td>
| |
| </tr>
| |
| </table>
| |
| </td>
| |
| </tr>
| |
| </table>
| |
| </td>
| |
| </tr>
| |
| </table>
| |
| <br>
| |
| <table width=1000 bgcolor=#000000>
| |
| <tr valign="top">
| |
| <td>
| |
| <table width=996 bgcolor=#ffffff>
| |
| <tr valign="top">
| |
| <td>
| |
| <table>
| |
| <tr valign="middle">
| |
| <td width=35>[[image:Information.png|35px|link=]]</td>
| |
| <td><span style="font-weight: 700; font-size: 17px;">Spline Object Context Menu Options</span></td>
| |
| </tr>
| |
| </table>
| |
| </td>
| |
| </tr>
| |
| <tr valign="top">
| |
| <td>
| |
| <table bgcolor=#ffffb0 cellpadding=2>
| |
| <tr valign="top">
| |
| <td width=25>[[image:NotePad.PNG|link=]]</td>
| |
| <td>When copying/moving track segments into a scrapbook any track objects on the segments will be included in the scrapbook</td>
| |
| </tr>
| |
| </table>
| |
| <table>
| |
| <tr valign="top">
| |
| <td><span style="font-weight: 700; font-size: 15px; color: white; background-color: black;"> Cut </span></td>
| |
| <td>remove the selected segment or segments from the route and move them into the '''Scrapbook''' ([[image:SplineSegmentContextIcon_S20.png|link=]][[image:TrackSegmentContextIcon_S20.png|link=]] only)</td>
| |
| </tr>
| |
| </table>
| |
| </td>
| |
| </tr>
| |
| <tr valign="top">
| |
| <td>
| |
| <table>
| |
| <tr valign="top">
| |
| <td><span style="font-weight: 700; font-size: 15px; color: white; background-color: black;"> Copy </span></td>
| |
| <td>copy the selected segment or segments and place them into the '''Scrapbook''' ([[image:SplineSegmentContextIcon_S20.png|link=]][[image:TrackSegmentContextIcon_S20.png|link=]] only)</td>
| |
| </tr>
| |
| </table>
| |
| </td>
| |
| </tr>
| |
| <tr valign="top">
| |
| <td>
| |
| <table>
| |
| <tr valign="top">
| |
| <td><span style="font-weight: 700; font-size: 15px; color: white; background-color: black;"> Paste </span></td>
| |
| <td>paste the contents of the current '''Scrapbook''' at the cursor (focus) point<br>
| |
| <table bgcolor=#ffffb0 cellpadding=2>
| |
| <tr valign="top">
| |
| <td width=25>[[image:NotePad.PNG|link=]]</td>
| |
| <td>When pasted from a scrapbook the objects will be surrounded by a '''Marquee Selection Area''' that, depending on the settings in the [[image:PageLink.PNG|link=]] '''[[#Scrapbook Filters|Scrapbook Filters]]''', may add to or replace all other objects, splines, textures, ground terrain and effect layers in that area</td>
| |
| </tr>
| |
| </table>
| |
| </td>
| |
| </tr>
| |
| </table>
| |
| </td>
| |
| </tr>
| |
| <tr valign="top">
| |
| <td>
| |
| <table>
| |
| <tr valign="top">
| |
| <td><span style="font-weight: 700; font-size: 15px; color: white; background-color: black;"> Delete </span></td>
| |
| <td>delete the segment, segments or endpoint. It has the same effect as pressing the <span style="font-weight: 700; font-size: 15px; color: white; background-color: black;"> Delete </span> key</td>
| |
| </tr>
| |
| </table>
| |
| </td>
| |
| </tr>
| |
| <tr valign="top">
| |
| <td>
| |
| <table>
| |
| <tr valign="top">
| |
| <td><span style="font-weight: 700; font-size: 15px; color: white; background-color: black;"> Replace Spline with Selected Asset </span></td>
| |
| <td>the highlighted spline will be replaced with the asset currently selected in the <span style="font-weight: 700; font-size: 15px; color: white; background-color: #797979;"> Assets Palette </span>. If the asset selected in the <span style="font-weight: 700; font-size: 15px; color: white; background-color: #797979;"> Assets Palette </span> is the wrong type (e.g. a mesh object instead of a scenery spline) then this option will be greyed out ([[image:SplineSegmentContextIcon_S20.png|link=]][[image:TrackSegmentContextIcon_S20.png|link=]] only)</td>
| |
| </tr>
| |
| </table>
| |
| </td>
| |
| </tr>
| |
| <tr valign="top">
| |
| <td>
| |
| <table>
| |
| <tr valign="top">
| |
| <td><span style="font-weight: 700; font-size: 15px; color: white; background-color: black;"> Paint Under Selected </span></td>
| |
| <td>the texture selected in the <span style="font-weight: 700; font-size: 15px; color: white; background-color: #797979;"> Assets Palette </span> will be painted under the '''selected''' objects. The <span style="font-weight: 700; font-size: 15px; color: white; background-color: #797979;"> Tool Options Palette </span> brush settings (<span style="font-weight: 700; font-size: 15px; color: gold; background-color: black;"> Radius </span> and <span style="font-weight: 700; font-size: 15px; color: gold; background-color: black;"> Sensitivity </span>) will control how the texture is applied. If no ground texture has been selected in the <span style="font-weight: 700; font-size: 15px; color: white; background-color: #797979;"> Assets Palette </span> then this option will be greyed out ([[image:SplineSegmentContextIcon_S20.png|link=]][[image:TrackSegmentContextIcon_S20.png|link=]] only)</td>
| |
| </tr>
| |
| <tr valign="top">
| |
| <td colspan=2>
| |
| <table bgcolor=#ffffb0 cellpadding=2>
| |
| <tr valign="top">
| |
| <td width=25>[[image:NotePad.PNG|link=]]</td>
| |
| <td>Objects have a '''minimum brush size''' that represents the smallest area that can be painted beneath them using the <span style="font-weight: 700; font-size: 15px; color: white; background-color: black;"> Paint Under Selected </span> option. This minimum area will vary in size between objects but it will be rectangular even for circular objects. If the <span style="font-weight: 700; font-size: 15px; color: white; background-color: #797979;"> Tool Options Palette </span> brush <span style="font-weight: 700; font-size: 15px; color: gold; background-color: black;"> Radius </span> is set to a smaller size then the brush <span style="font-weight: 700; font-size: 15px; color: gold; background-color: black;"> Radius </span> will be ignored and the objects minimum brush size will be used instead.</td>
| |
| </tr>
| |
| </table>
| |
| </td>
| |
| </tr>
| |
| </table>
| |
| </td>
| |
| </tr>
| |
| <tr valign="top">
| |
| <td>
| |
| <table>
| |
| <tr valign="top">
| |
| <td><span style="font-weight: 700; font-size: 15px; color: white; background-color: black;"> Smooth Ground Under Selected </span></td>
| |
| <td>smooths the height of the ground under the selected spline to match its set height. If multiple spline segments have been selected then the ground under all the segments will be smoothed to their height. The size of the area affected will depend on which has the greater value: the width of the spline <span style="font-weight: 700; font-size: 15px;">OR</span> the <span style="font-weight: 700; font-size: 15px; color: white; background-color: #797979;"> Tool Options Palette </span> <span style="font-weight: 700; font-size: 15px; color: gold; background-color: black;"> Radius </span> setting. Does not work for endpoints [[image:SplineEndpointContextIcon_S20.png|link=]]</td>
| |
| </tr>
| |
| </table>
| |
| </td>
| |
| </tr>
| |
| <tr valign="top">
| |
| <td>
| |
| <table>
| |
| <tr valign="top">
| |
| <td><span style="font-weight: 700; font-size: 15px; color: white; background-color: black;"> Settle on Ground </span></td>
| |
| <td>sets the height of the selected endpoint or segments to match the height of the terrain beneath them ("drops them back to earth"). When used on segments the spline will follow the height changes of the terrain</td>
| |
| </tr>
| |
| </table>
| |
| </td>
| |
| </tr>
| |
| <tr valign="top">
| |
| <td>
| |
| <table>
| |
| <tr valign="top">
| |
| <td><span style="font-weight: 700; font-size: 15px; color: white; background-color: black;"> Apply Height to this Spline Endpoint </span></td>
| |
| <td>sets the height of the selected '''<u>endpoint</u>''' to the value in the <span style="font-weight: 700; font-size: 15px; color: white; background-color: #797979;"> Tool Options Palette </span> <span style="font-weight: 700; font-size: 15px; color: gold; background-color: black;"> Height </span> setting ([[image:SplineEndpointContextIcon_S20.png|link=]] only)</td>
| |
| </tr>
| |
| </table>
| |
| </td>
| |
| </tr>
| |
| <tr valign="top">
| |
| <td>
| |
| <table bgcolor=#ffffe0 cellpadding=2>
| |
| <tr valign="top">
| |
| <td width=25>[[image:PencilTips.PNG|link=]]</td>
| |
| <td>You can copy the '''Height''' from an existing spline endpoint into the <span style="font-weight: 700; font-size: 15px; color: gold; background-color: black;"> Height </span> setting of the <span style="font-weight: 700; font-size: 15px; color: white; background-color: #797979;"> Tool Options Palette </span>. Once it has been copied it can be applied to any other object.<br>
| |
| [[image:DotPoint.JPG|10px|link=]] hold down the <span style="font-weight: 700; font-size: 15px; color: white; background-color: black;"> Alt </span> key and <span style="font-weight: 700; font-size: 15px; background-color: lightcyan;"> Left Click </span> on the spline endpoint to copy its '''Height''' value. That value can then be used to set the '''Height''' of other spline endpoints</td>
| |
| </tr>
| |
| </table>
| |
| </td>
| |
| </tr>
| |
| <tr valign="top">
| |
| <td>
| |
| <table>
| |
| <tr valign="top">
| |
| <td><span style="font-weight: 700; font-size: 15px; color: white; background-color: black;"> Apply Height </span></td>
| |
| <td>sets the height of the selected '''<u>segment</u>''' or '''<u>segments</u>''' to the value in the <span style="font-weight: 700; font-size: 15px; color: white; background-color: #797979;"> Tool Options Palette </span> <span style="font-weight: 700; font-size: 15px; color: gold; background-color: black;"> Height </span> setting ([[image:SplineSegmentContextIcon_S20.png|link=]][[image:TrackSegmentContextIcon_S20.png|link=]] only)</td>
| |
| </tr>
| |
| </table>
| |
| </td>
| |
| </tr>
| |
| <tr valign="top">
| |
| <td>
| |
| <table>
| |
| <tr valign="top">
| |
| <td><span style="font-weight: 700; font-size: 15px; color: white; background-color: black;"> Apply Grade to this Spline Endpoint </span></td>
| |
| <td>you must first <span style="font-weight: 700; background-color: yellow;">select a segment</span> then click on one of its endpoint icons [[image:SplineEndpointContextIcon_S20.png|link=]]. This sets the height of the endpoint to give a '''Grade''' to the surrounding segments that matches the value in the <span style="font-weight: 700; font-size: 15px; color: white; background-color: #797979;"> Tool Options Palette </span> <span style="font-weight: 700; font-size: 15px; color: gold; background-color: black;"> Grade </span> setting</td>
| |
| </tr>
| |
| </table>
| |
| </td>
| |
| </tr>
| |
| <tr valign="top">
| |
| <td>
| |
| <table bgcolor=#ffffe0 cellpadding=2>
| |
| <tr valign="top">
| |
| <td width=25>[[image:PencilTips.PNG|link=]]</td>
| |
| <td>You can copy the '''Grade''' from an existing spline segment into the <span style="font-weight: 700; font-size: 15px; color: gold; background-color: black;"> Grade </span> setting of the <span style="font-weight: 700; font-size: 15px; color: white; background-color: #797979;"> Tool Options Palette </span>. Once it has been copied it can be applied to any other object.<br>
| |
| [[image:DotPoint.JPG|10px|link=]] hold down the <span style="font-weight: 700; font-size: 15px; color: white; background-color: black;"> Alt </span> key and <span style="font-weight: 700; font-size: 15px; background-color: lightcyan;"> Left Click </span> on the spline segment to copy its '''Grade''' value. That value can then be used to set the '''Grade''' of other spline segments</td>
| |
| </tr>
| |
| </table>
| |
| </td>
| |
| </tr>
| |
| <tr valign="top">
| |
| <td>
| |
| <table>
| |
| <tr valign="top">
| |
| <td><span style="font-weight: 700; font-size: 15px; color: white; background-color: black;"> Straighten Spline </span></td>
| |
| <td>forces a straight line (as far as possible) between the endpoints of a single segment. This option will be [[image:Tick.PNG|link=]] ticked if the segment has already been straightened in which case selecting this option will "un-straighten" the segment and remove the tick ([[image:SplineSegmentContextIcon_S20.png|link=]][[image:TrackSegmentContextIcon_S20.png|link=]] only)</td>
| |
| </tr>
| |
| </table>
| |
| </td>
| |
| </tr>
| |
| <tr valign="top">
| |
| <td>
| |
| <table>
| |
| <tr valign="top">
| |
| <td><span style="font-weight: 700; font-size: 15px; color: white; background-color: black;"> Separate Splines </span></td>
| |
| <td>breaks two spline segments into two separate (independent) splines at the '''selected''' endpoint
| |
| <table bgcolor=#ffffb0 cellpadding=2>
| |
| <tr valign="top">
| |
| <td width=25>[[image:NotePad.PNG|link=]]</td>
| |
| <td>If multiple segments have been selected then this option will break '''ALL''' the selected segments into separate (independent) splines</td>
| |
| </tr>
| |
| </table>
| |
| </td>
| |
| </tr>
| |
| <tr valign="top">
| |
| <td><span style="font-weight: 700; font-size: 15px; color: white; background-color: black;"> Merge Splines </span></td>
| |
| <td>removes the '''selected''' endpoint between two segments and merges the segments into one ([[image:SplineEndpointContextIcon_S20.png|link=]] only). Two segments can also be merged by deleting a '''selected''' endpoint with the <span style="font-weight: 700; font-size: 15px; color: white; background-color: black;"> Delete </span> key</td>
| |
| </tr>
| |
| </table>
| |
| </td>
| |
| </tr>
| |
| <tr valign="top">
| |
| <td>
| |
| <table>
| |
| <tr valign="top">
| |
| <td><span style="font-weight: 700; font-size: 15px; color: white; background-color: black;"> Insert Spline Point Here </span></td>
| |
| <td>splits the selected segment into two segments by adding a new endpoint at the point where the segment was clicked ([[image:SplineSegmentContextIcon_S20.png|link=]][[image:TrackSegmentContextIcon_S20.png|link=]] only)</td>
| |
| </tr>
| |
| </table>
| |
| </td>
| |
| </tr>
| |
| <tr valign="top">
| |
| <td>
| |
| <table>
| |
| <tr valign="top">
| |
| <td><span style="font-weight: 700; font-size: 15px; color: white; background-color: black;"> Select in Assets Palette </span></td>
| |
| <td>sets the <span style="font-weight: 700; font-size: 15px; color: white; background-color: #797979;"> Filter Palette </span> to <span style="font-weight: 700; font-size: 15px; color: white; background-color: black;"> All Content </span> and highlights the selected object in the <span style="font-weight: 700; font-size: 15px; color: white; background-color: #797979;"> Assets Palette </span></td>
| |
| </tr>
| |
| </table>
| |
| </td>
| |
| </tr>
| |
| <tr valign="top">
| |
| <td>
| |
| <table>
| |
| <tr valign="top">
| |
| <td><span style="font-weight: 700; font-size: 15px; color: white; background-color: black;"> Select in Filter Palette </span></td>
| |
| <td>sets the <span style="font-weight: 700; font-size: 15px; color: white; background-color: #797979;"> Filter Palette </span> to <span style="font-weight: 700; font-size: 15px; color: white; background-color: black;"> All Content </span> and highlights the selected object in the <span style="font-weight: 700; font-size: 15px; color: white; background-color: #797979;"> Filter Palette </span></td>
| |
| </tr>
| |
| </table>
| |
| </td>
| |
| </tr>
| |
| <tr valign="top">
| |
| <td>
| |
| <table>
| |
| <tr valign="top">
| |
| <td><span style="font-weight: 700; font-size: 15px; color: white; background-color: black;"> Edit Details </span></td>
| |
| <td>opens the '''Properties''' window of the selected spline object. This option is only available for '''Track''' splines. '''Note:''' to enter or edit an objects name property use the <span style="font-weight: 700; font-size: 15px; color: white; background-color: #797979;"> Info Palette </span></td>
| |
| </tr>
| |
| </table>
| |
| </td>
| |
| </tr>
| |
| </table>
| |
| </td>
| |
| </tr>
| |
| </table>
| |
| <br>
| |
| <table width=1000> <!-- BEGIN Section Nav Buttons -->
| |
| <tr valign="top">
| |
| <td width=629><span id="skip Free Move: Rolling Stock Objects"></span>
| |
| =='''Free Move: Rolling Stock Objects'''==
| |
| </td>
| |
| <td width=50>[[image:SkipDown.png|link=#stepFineAdjustment|Skip Down]]</td>
| |
| <td width=50>[[image:SkipUp.png|link=#skip Free Move: Spline Objects|Skip Up]]</td>
| |
| <td width=46>[[image:SkipMinorDown.png|link=#FM: Decouple Rolling|Down]][[image:SkipMinorUp.png|link=#FM: Context Spline|Up]]</td> <!-- for Top and Minor Up/Down -->
| |
| <td width=75>[[image:HeadingUp.png|link=#stepFreeMove|alt=Heading|To Heading]]</td>
| |
| <td width=75> </td>
| |
| <td width=75> </td> <!-- for Bottom -->
| |
| </tr>
| |
| </table> <!-- END Section Nav Buttons -->
| |
|
| |
| <table width=1000 bgcolor="lightcyan" cellpadding=2>
| |
| <tr valign="top">
| |
| <td width=10>[[image:BlueDot10x10.png|link=]]</td>
| |
| <td>'''Rolling Stock Objects''' (locomotives, wagons, etc) can only be moved along the track that they are attached to. If they are moved off the track then they will immediately "snap back" to the nearest track when they are released.</td>
| |
| </tr>
| |
| </table>
| |
|
| |
| <table width=1000 bgcolor=#000000 cellpadding=2>
| |
| <tr valign="top">
| |
| <td>
| |
| <table width=996 bgcolor=#ffe89a cellpadding=2>
| |
| <tr valign="middle">
| |
| <td width=45>[[image:PalettesIcon_S20.png|link=]]</td>
| |
| <td>If the <span style="font-weight: 700; font-size: 15px; color: white; background-color: #797979;"> Tool Options Palette </span> and <span style="font-weight: 700; font-size: 15px; color: white; background-color: #797979;"> Info Palette </span> are not visible on the screen then refer to [[image:PageLink.PNG|link=]] '''[[#Notes_Palettes|Notes: Palettes]]''' at the top of this document.
| |
| </td>
| |
| </tr>
| |
| </table>
| |
| </td>
| |
| </tr>
| |
| </table>
| |
| <br>
| |
| <table width=1000> <!-- BEGIN Section Nav Buttons -->
| |
| <tr valign="top">
| |
| <td width=629><span id="FM: Move Rolling"></span>
| |
| ===<span style="font-weight: 700; font-size: 17px; color: white; background-color: blue;"> Free Move: Move Rolling Stock Objects </span>===
| |
| </td>
| |
| <td width=50> </td>
| |
| <td width=50> </td>
| |
| <td width=46>[[image:SkipMinorDown.png|link=#FM: Decouple Rolling|Down]][[image:SkipMinorBlank.png|link=]]</td> <!-- for Top and Minor Up/Down -->
| |
| <td width=75> </td>
| |
| <td width=75> </td>
| |
| <td width=75> </td> <!-- for Bottom -->
| |
| </tr>
| |
| </table> <!-- END Section Nav Buttons -->
| |
|
| |
| Use the '''Free Move''' tool to move a selected rolling stock object along the track.<br>
| |
|
| |
| <table width=1000 bgcolor=#000000 cellpadding=2>
| |
| <tr valign="top">
| |
| <td>
| |
| <table width=996 bgcolor=#ffffb0 cellpadding=2>
| |
| <tr valign="top">
| |
| <td width=25>[[image:NotePad.PNG|link=]]</td>
| |
| <td>'''Rolling Stock Objects''' are always attached to a track segment. They can be moved along the track or to a different track but they '''cannot be moved''' to a position that is to the left, right, above or below the track</td>
| |
| </tr>
| |
| </table>
| |
| </td>
| |
| </tr>
| |
| </table>
| |
| <br>
| |
| <table bgcolor=#000000 width=600 cellpadding=2>
| |
| <tr valign="top">
| |
| <td>
| |
| <table bgcolor=#ffffe0 width=596 cellpadding=2>
| |
| <tr valign="top">
| |
| <td width=25>[[image:PencilTips.PNG|link=]]</td><td>To move an entire consist of rolling stock objects, <span style="font-weight: 700; font-size: 15px; background-color: lightcyan;">Double Left Click</span> on any one of the objects in the consist to select them all and then move them as one object</td>
| |
| </tr>
| |
| </table>
| |
| </td>
| |
| </tr>
| |
| </table>
| |
| <br>
| |
| <table width=1000>
| |
| <tr valign="top">
| |
| <td width=480>[[image:FreeMoveRollingStock_S20.png|link=]]
| |
| <br>
| |
| <table bgcolor=#000000 cellpadding=2>
| |
| <tr valign="top">
| |
| <td>
| |
| <table bgcolor=#ffffff cellpadding=2>
| |
| <tr valign="top">
| |
| <td colspan=2><span style="font-weight: 700; font-size: 15px;">Steps:</span> To move a '''Rolling Stock Object''' or objects:-</td>
| |
| </tr>
| |
| <tr valign="top">
| |
| <td width=25>[[image:DotPoint1.JPG|link=]]</td>
| |
| <td><span style="font-weight: 700; font-size: 15px; background-color: lightcyan;"> Left Click and Drag </span> the object or objects</td>
| |
| </tr>
| |
| <tr valign="top">
| |
| <td>[[image:DotPoint2.JPG|link=]]</td>
| |
| <td>release the objects on or close to their new track position</td>
| |
| </tr>
| |
| </table>
| |
| </td>
| |
| </tr>
| |
| </table>
| |
| </td>
| |
| <td>
| |
| <table width=520 bgcolor=#000000 cellpadding=2>
| |
| <tr valign="top">
| |
| <td>
| |
| <table bgcolor=#ffffb0 width=516 cellpadding=2>
| |
| <tr valign="top">
| |
| <td width=25>[[image:NotePad.PNG|link=]]</td>
| |
| <td><span style="font-size: 17px; font-weight: 700;">Notes: Rolling Stock Conflicts</span><br>
| |
| ----
| |
| <br>
| |
| You can accidently place a rolling stock object so that it "overlaps" (occupies the same space as) another rolling stock object. A large yellow <span style="font-weight: 700; font-size: 17px;">X</span> rotating above the rolling stock object is a sign of this "conflict".<br>
| |
| This can happen if a rolling stock object is moved off the track and released. It will instantly snap to the nearest track position even if that position is already occupied.<br>
| |
| [[image:PlacementRollingStockCollision_S20.png|360px|link=]]<br>
| |
| The simple solution is to use the [[image:S20_FreeMoveToolIcon.png|link=|20px]] '''Free Move Tool''' to move the incorrectly placed object to an unoccupied section of the track.
| |
| </td>
| |
| </tr>
| |
| </table>
| |
| </td>
| |
| </tr>
| |
| </table>
| |
| </td>
| |
| </tr>
| |
| </table>
| |
| <br>
| |
| <table width=1000> <!-- BEGIN Section Nav Buttons -->
| |
| <tr valign="top">
| |
| <td width=629><span id="FM: Decouple Rolling"></span>
| |
| ===<span style="font-weight: 700; font-size: 17px; color: white; background-color: blue;"> Free Move: Decouple Rolling Stock Objects </span>===
| |
| </td>
| |
| <td width=50> </td>
| |
| <td width=50> </td>
| |
| <td width=46>[[image:SkipMinorDown.png|link=#FM: Couple Rolling|Down]][[image:SkipMinorUp.png|link=#skip Free Move: Rolling Stock Objects|Up]]</td> <!-- for Top and Minor Up/Down -->
| |
| <td width=75> </td>
| |
| <td width=75> </td>
| |
| <td width=75> </td> <!-- for Bottom -->
| |
| </tr>
| |
| </table> <!-- END Section Nav Buttons -->
| |
|
| |
| <table width=1000 bgcolor="lightcyan" cellpadding=2>
| |
| <tr valign="top">
| |
| <td width=10>[[image:BlueDot10x10.png|link=]]</td>
| |
| <td>All decoupling operations between '''Rolling Stock Objects''' are performed using just a <span style="font-weight: 700; font-size: 15px; color: blue;">Left Click and Drag</span>.</td>
| |
| </tr>
| |
| </table>
| |
| <br>
| |
| <table bgcolor=#000000 width=1000 cellpadding=2>
| |
| <tr valign="top">
| |
| <td>
| |
| <table bgcolor=#ffffe0 width=996 cellpadding=2>
| |
| <tr valign="top">
| |
| <td width=25>[[image:PencilTips.PNG|link=]]</td><td>To decouple a rake of joined rolling stock objects from a consist (for example, the first or last 5 wagons), <span style="font-weight: 700; font-size: 15px;"><span style="color: white; background-color: black;"> Shift </span> + <span style="background-color: lightcyan;"> Left Click </span></span> on each of the objects to be selected and then drag them away from the consist</td>
| |
| </tr>
| |
| </table>
| |
| </td>
| |
| </tr>
| |
| </table>
| |
| <br>
| |
| A rolling stock object or objects in the middle of a consist can also be decoupled. This will break the consist into 3 sections.
| |
| <table width=1000>
| |
| <tr valign="top">
| |
| <td width=480>[[image:FreeMoveRollingStockCouple5_S20.png|link=]]<br><br>
| |
| [[image:FreeMoveRollingStockCouple5A_S20.png|link=]]
| |
| </td>
| |
| <td>
| |
| <table width=520 bgcolor=#000000 cellpadding=2>
| |
| <tr valign="top">
| |
| <td>
| |
| <table width=516 bgcolor=#ffffff cellpadding=2>
| |
| <tr valign="top">
| |
| <td colspan=2><span style="font-weight: 700; font-size: 15px;">Steps:</span> To decouple rolling stock from a consist:-</td>
| |
| </tr>
| |
| <tr valign="top">
| |
| <td width=25>[[image:DotPoint1.JPG|link=]]</td>
| |
| <td>Select one (<span style="font-weight: 700; font-size: 15px; background-color: lightcyan;"> Left Click </span>) or more (<span style="font-weight: 700; font-size: 15px;"><span style="color: white; background-color: black;"> Shift </span> + <span style="background-color: lightcyan;"> Left Click </span></span>) rolling stock objects inside a consist<br>
| |
| <table>
| |
| <tr valign="top">
| |
| <td colspan=2>If more than one object is selected, then they:-</td>
| |
| </tr>
| |
| <tr valign="top">
| |
| <td width=10>[[image:DotPoint.JPG|10px|link=]]</td>
| |
| <td>do not have to be connected to each other</td>
| |
| </tr>
| |
| <tr valign="top">
| |
| <td width=10>[[image:DotPoint.JPG|10px|link=]]</td>
| |
| <td>should be in the same consist - the results may be "unexpected" if the objects are selected and dragged out from different consists</td>
| |
| </tr>
| |
| </table>
| |
| <br>
| |
| </td>
| |
| </tr>
| |
| <tr valign="top">
| |
| <td>[[image:DotPoint2.JPG|link=]]</td>
| |
| <td><span style="font-weight: 700; font-size: 15px; background-color: lightcyan;">Left Click and Drag</span> the object or objects out of the consist and onto an <span style="font-weight: 700; font-size: 15px; text-decoration: underline;">Unoccupied</span> section of track<br>
| |
| <table>
| |
| <tr valign="top">
| |
| <td width=10>[[image:DotPoint.JPG|10px|link=]]</td>
| |
| <td><span style="font-weight: 700; background-color: yellow;">do not release the mouse button until you have the rolling stock objects in position otherwise they will simply "snap back" to the nearest track, regardless of whether it is already occupied or not.</span> Think of the yellow connecting line between the wagon and the track shown in the image as if it is a "stretched rubber band"</td>
| |
| </tr>
| |
| <tr valign="top">
| |
| <td width=10>[[image:DotPoint.JPG|10px|link=]]</td>
| |
| <td>The rotating yellow <span style="font-weight: 700; font-size: 15px;">X</span> floating above the selected and now disconnected consist in the image indicates that it has been "derailed" from the track. This will disappear when it is "rerailled" again</td>
| |
| </tr>
| |
| </table>
| |
| </td>
| |
| </tr>
| |
| </table>
| |
| </td>
| |
| </tr>
| |
| </table>
| |
| </td>
| |
| </tr>
| |
| </table>
| |
| <br>
| |
| <table width=1000> <!-- BEGIN Section Nav Buttons -->
| |
| <tr valign="top">
| |
| <td width=629><span id="FM: Couple Rolling"></span>
| |
| ===<span style="font-weight: 700; font-size: 17px; color: white; background-color: blue;"> Free Move: Couple Rolling Stock Objects </span>===
| |
| </td>
| |
| <td width=50> </td>
| |
| <td width=50> </td>
| |
| <td width=46>[[image:SkipMinorDown.png|link=#FM: Context Rolling|Down]][[image:SkipMinorUp.png|link=#FM: Decouple Rolling|Up]]</td> <!-- for Top and Minor Up/Down -->
| |
| <td width=75> </td>
| |
| <td width=75> </td>
| |
| <td width=75> </td> <!-- for Bottom -->
| |
| </tr>
| |
| </table> <!-- END Section Nav Buttons -->
| |
|
| |
| <table width=1000 bgcolor="lightcyan" cellpadding=2>
| |
| <tr valign="top">
| |
| <td width=10>[[image:BlueDot10x10.png|link=]]</td>
| |
| <td>All coupling operations between '''Rolling Stock Objects''' can be performed using just a <span style="font-weight: 700; font-size: 15px; color: blue;">Left Click and Drag</span> or through the objects '''Context Menu'''.</td>
| |
| </tr>
| |
| </table>
| |
| <span style="font-weight: 700; font-size: 15px;">Options:</span><br><br>
| |
| [[image:Ablue.png|link=]] <span style="font-weight: 700; font-size: 15px;">Using "Click and Drag"</span><br>
| |
| <br>
| |
| Consider the following simple situation:-
| |
| <table width=1000>
| |
| <tr valign="top">
| |
| <td colspan=3>The guard van (caboose) standing at the rear of a consist has to be coupled to the rear gondola wagon.</td>
| |
| </tr>
| |
| <tr valign="top">
| |
| <td width=480>[[image:FreeMoveRollingStockCouple1_S20.png|link=]]<br><br>
| |
| [[image:FreeMoveRollingStockCouple2_S20.png|link=]]</td>
| |
| <td>
| |
| <table width=520 bgcolor=#000000 cellpadding=2>
| |
| <tr valign="top">
| |
| <td>
| |
| <table width=516 bgcolor=#ffffff cellpadding=2>
| |
| <tr valign="top">
| |
| <td colspan=2><span style="font-weight: 700; font-size: 15px;">Steps:</span> To '''Couple''' rolling stock objects:-</td>
| |
| </tr>
| |
| <tr valign="top">
| |
| <td width=25>[[image:DotPoint1.JPG|link=]]</td>
| |
| <td>Select (<span style="font-weight: 700; font-size: 15px; background-color: lightcyan;"> Left Click </span>) the rolling stock object (in this case the guard van) to be coupled to a consist or another rolling stock object (in this case the gondola)
| |
| <table>
| |
| <tr valign="top">
| |
| <td>[[image:DotPoint.JPG|10px|link=]]</td>
| |
| <td>If more than one object has to be selected then use a <span style="font-weight: 700; font-size: 15px;"><span style="color: white; background-color: black;"> Shift </span> + <span style="background-color: lightcyan;"> Left Click </span></span> to individually select each object</td>
| |
| </tr>
| |
| <tr valign="top">
| |
| <td>[[image:DotPoint.JPG|10px|link=]]</td>
| |
| <td>If '''ALL''' the objects in a consist have to be selected then use a <span style="font-weight: 700; font-size: 15px; background-color: lightcyan;">Double Left Click</span> on any object in the consist</td>
| |
| </tr>
| |
| </table>
| |
| </td>
| |
| </tr>
| |
| <tr valign="top">
| |
| <td>[[image:DotPoint2.JPG|link=]]</td>
| |
| <td><span style="font-weight: 700; font-size: 15px; background-color: lightcyan;">Left Click and Drag</span> the object (the guard van) along the track to its target object or consist. When dragged rolling stock objects will "drop" or lower their height a few cms
| |
| <table>
| |
| <tr valign="top">
| |
| <td width=10>[[image:DotPoint.JPG|10px|link=]]</td>
| |
| <td>If the selected object (or objects) is already part of a consist then dragging will decouple it from the consist before moving it</td>
| |
| </tr>
| |
| <tr valign="top">
| |
| <td width=10>[[image:DotPoint.JPG|10px|link=]]</td>
| |
| <td>When it reaches the target object and couples it cannot be moved any further</td>
| |
| </tr>
| |
| </table>
| |
| </td>
| |
| </tr>
| |
| <tr valign="top">
| |
| <td>[[image:DotPoint3.JPG|link=]]</td>
| |
| <td>Release the object when it has coupled and it will return to its correct height</td>
| |
| </tr>
| |
| </table>
| |
| </td>
| |
| </tr>
| |
| </table>
| |
| <br>
| |
| <table bgcolor=#000000 cellpadding=2>
| |
| <tr valign="top">
| |
| <td>
| |
| <table bgcolor=#ffffb0 cellpadding=2>
| |
| <tr valign="top">
| |
| <td width=25>[[image:NotePad.PNG|link=]]</td>
| |
| <td>If the two objects do not couple check that both are on the same track</td>
| |
| </tr>
| |
| </table>
| |
| </td>
| |
| </tr>
| |
| </table>
| |
| </td>
| |
| </tr>
| |
| </table>
| |
| <br>
| |
| [[image:Bblue.png|link=]] <span style="font-weight: 700; font-size: 15px;">Using the Context Menu</span><br>
| |
|
| |
| Using the same situation as above, the isolated guard van and the gondola wagon at the end of a consist are to be coupled together.
| |
|
| |
| <span id="Free_Move_Merge"></span>
| |
| <table width=1000>
| |
| <tr valign="top">
| |
| <td width=480>[[image:FreeMoveRollingStockCouple3_S20.png|link=]]</td>
| |
| <td>
| |
| <table width=480 bgcolor=#000000 cellpadding=2>
| |
| <tr valign="top">
| |
| <td>
| |
| <table width=476 bgcolor=#ffffff cellpadding=2>
| |
| <tr valign="top">
| |
| <td colspan=2><span style="font-weight: 700; font-size: 15px;">Steps:</span></td>
| |
| </tr>
| |
| <tr valign="top">
| |
| <td width=20>[[image:DotPoint1.JPG|link=]]</td>
| |
| <td>Select, <span style="font-weight: 700; font-size: 15px;"><span style="color: white; background-color: black;"> Shift </span> + <span style="background-color: lightcyan;"> Left Click </span></span>, on both objects<br>
| |
| <table bgcolor=#ffffe0 cellpadding=2>
| |
| <tr valign="top">
| |
| <td width=25>[[image:PencilTips.PNG|link=]]</td><td>'''The order of selection <span style="font-size: 15px;">IS</span> important. Select the "destination" object, where the others will be coupled, last'''</td>
| |
| </tr>
| |
| </table>
| |
| The '''Context Icon''' will appear on the last rolling stock object selected.
| |
| </td>
| |
| </tr>
| |
| <tr valign="top">
| |
| <td>[[image:DotPoint2.JPG|link=]]</td>
| |
| <td>Open the '''Rolling Stock Object Context Menu''' and <span style="font-weight: 700; font-size: 15px; background-color: lightcyan;"> Left Click </span> on the '''Context Icon''' of the last selected rolling stock object, <span style="font-weight: 700; font-size: 15px;">OR</span>] press the <span style="font-weight: 700; font-size: 15px; color: white; background-color: black;"> T </span> key
| |
| </td>
| |
| </tr>
| |
| <tr>
| |
| <td>[[image:DotPoint3.JPG|link=]]</td>
| |
| <td>Select the option <span style="font-weight: 700; font-size: 15px; color: white; background-color: black;"> Merge into Single Train </span>
| |
| </td>
| |
| </tr>
| |
| </table>
| |
| </td>
| |
| </tr>
| |
| </table>
| |
| </td>
| |
| </tr>
| |
| </table>
| |
| <br>
| |
| There are '''two''' possible outcomes depending on which object has the '''Context Icon'''
| |
| <br>
| |
| <table width=1000>
| |
| <tr valign="top">
| |
| <td width=500>
| |
| <table bgcolor=#000000 cellpadding=2>
| |
| <tr valign="top">
| |
| <td>
| |
| <table bgcolor=#ffffff cellpadding=2>
| |
| <tr valign="top">
| |
| <td width=480>[[image:DotPoint1RedC.png|link=]] <span style="font-weight: 700; font-size: 15px;">Context Icon on the Gondola Wagon</span><br>
| |
| [[image:FreeMoveRollingStockCouple3A_S20.png|link=]]<br>
| |
| Using the <span style="font-weight: 700; font-size: 15px; color: white; background-color: black;"> Merge into Single Train </span> option with the '''Context Icon''' on the gondola wagon at the end of the consist. The guard van couples to the gondola wagon and the consist
| |
| </td>
| |
| </tr>
| |
| </table>
| |
| </td>
| |
| </tr>
| |
| </table>
| |
| </td>
| |
| <td width=500>
| |
| <table bgcolor=#000000 cellpadding=2>
| |
| <tr valign="top">
| |
| <td>
| |
| <table bgcolor=#ffffff cellpadding=2>
| |
| <tr valign="top">
| |
| <td width=480>[[image:DotPoint2RedC.png|link=]] <span style="font-weight: 700; font-size: 15px;">Context Icon on the Guard Van</span><br>
| |
| [[image:FreeMoveRollingStockCouple4A_S20.png|link=]]<br>
| |
| Using the <span style="font-weight: 700; font-size: 15px; color: white; background-color: black;"> Merge into Single Train </span> option with the '''Context Icon''' on the guard van. The gondola wagon decouples from the consist and couples to the guard van
| |
| </td>
| |
| </tr>
| |
| </table>
| |
| </td>
| |
| </tr>
| |
| </table>
| |
| </td>
| |
| </tr>
| |
| </table>
| |
| <br>
| |
| <table width=1000>
| |
| <tr valign="top">
| |
| <td>Using a more complex example involving multiple objects from several different consists. The selected wagons shown below are to form a single consist based on the loco.</td>
| |
| </tr>
| |
| <tr>
| |
| <td>[[image:FreeMoveRollingStockMultiMerge1_S20.png|link=]]</td>
| |
| </tr>
| |
| <tr>
| |
| <td>The loco was the last object to be selected so it has the '''Context Icon'''. The '''Context Menu''' is opened and the option <span style="font-weight: 700; font-size: 15px; color: white; background-color: black;"> Merge into Single Train </span> is selected with the result as shown below.</td>
| |
| </tr>
| |
| <tr>
| |
| <td>[[image:FreeMoveRollingStockMultiMerge2_S20.png|link=]]</td>
| |
| </tr>
| |
| <tr>
| |
| <td>The wagons and loco have been combined into a single consist but not necessarily in a useful order. <span style="font-weight: 700; font-size: 15px; background-color: lightcyan;">Left Click and Drag</span> the incorrectly placed vehicles to their correct positions.</td>
| |
| </tr>
| |
| </table>
| |
| <br>
| |
| <table width=1000> <!-- BEGIN Section Nav Buttons -->
| |
| <tr valign="top">
| |
| <td width=629><span id="FM: Context Rolling"></span>
| |
| ===<span style="font-weight: 700; font-size: 17px; color: white; background-color: blue;"> Free Move: Rolling Stock Object Context Menu </span>===
| |
| </td>
| |
| <td width=50> </td>
| |
| <td width=50> </td>
| |
| <td width=46>[[image:SkipMinorDown.png|link=#stepFineAdjustment|Down]][[image:SkipMinorUp.png|link=#FM: Couple Rolling|Up]]</td> <!-- for Top and Minor Up/Down -->
| |
| <td width=75> </td>
| |
| <td width=75> </td>
| |
| <td width=75> </td> <!-- for Bottom -->
| |
| </tr>
| |
| </table> <!-- END Section Nav Buttons -->
| |
|
| |
| <table width=1000>
| |
| <tr>
| |
| <td>A selected rolling stock object, or a group of selected rolling stock objects, will have a '''Context Icon''' that opens a '''Context Menu'''. The icon design will vary between object types.</td>
| |
| </tr>
| |
| </table>
| |
|
| |
| <table width=1000>
| |
| <tr valign="top">
| |
| <td>
| |
| <table bgcolor=#000000 width=500 cellpadding=2>
| |
| <tr valign="top">
| |
| <td>
| |
| <table bgcolor=#ffffff width=496 cellpadding=2>
| |
| <tr valign="top">
| |
| <td width=396>To open a selected rolling stock object's '''Context Menu''' choose one of the following:-<br>
| |
| <table>
| |
| <tr>
| |
| <td colspan=2><span style="font-weight: 700; font-size: 15px;">Options:</span> </td>
| |
| </tr>
| |
| <tr valign="top">
| |
| <td width=25>[[image:Ablue.png|link=]]</td>
| |
| <td width=371><span style="font-weight: 700; font-size: 15px; background-color: lightcyan;"> Left Click </span> its '''Context Icon''' [[image:ContextIconsRollingStock_S20.png|link=]] <span style="font-size: 15px; font-weight: 700;">OR</span></td>
| |
| </tr>
| |
| <tr valign="top">
| |
| <td>[[image:Bblue.png|link=]]</td>
| |
| <td>Press the <span style="color: white; background-color: black; font-weight: 700; font-size: 15px;"> T </span> key</td>
| |
| </tr>
| |
| </table>
| |
| </td>
| |
| </tr>
| |
| </table>
| |
| </td>
| |
| </tr>
| |
| </table>
| |
| </td>
| |
| <td>
| |
| <table width=500 bgcolor=#000000 cellpadding=2>
| |
| <tr valign="top">
| |
| <td>
| |
| <table width=496 bgcolor=#ffffe0 cellpadding=2>
| |
| <tr valign="top">
| |
| <td width=25>[[image:PencilTips.PNG|link=]]</td>
| |
| <td>You cannot add rolling stock assets to a '''Scrapbook''' but you can create and save '''Consist Assets''' that have multiple rolling stock objects
| |
| <table bgcolor=#ffffff cellpadding=2>
| |
| <tr valign="top">
| |
| <td colspan=2><span style="font-weight: 700; font-size: 15px;">Steps:</span> To create a '''Consist Asset''':-</td>
| |
| </tr>
| |
| <tr valign="top">
| |
| <td width=25>[[image:DotPoint1.JPG|link=]]</td>
| |
| <td>select the consist - <span style="font-weight: 700; font-size: 15px; background-color: lightcyan;"> Double Left Click </span> on the consist or <span style="font-weight: 700; font-size: 15px;"><span style="color: white; background-color: black;"> Shift </span> + <span style="background-color: lightcyan;"> Left Click </span></span> on individual items</td>
| |
| </tr>
| |
| <tr valign="top">
| |
| <td>[[image:DotPoint2.JPG|link=]]</td>
| |
| <td>open the consist '''Context Menu''' - <span style="font-weight: 700; font-size: 15px; background-color: lightcyan;"> Left Click </span> on its icon or press the <span style="font-weight: 700; font-size: 15px; color: white; background-color: black;"> T </span> key</td>
| |
| </tr>
| |
| <tr valign="top">
| |
| <td>[[image:DotPoint3.JPG|link=]]</td>
| |
| <td>select the option <span style="font-weight: 700; font-size: 15px; color: white; background-color: black;"> Save to Consist Asset... </span></td>
| |
| </tr>
| |
| <tr valign="top">
| |
| <td>[[image:DotPoint4.JPG|link=]]</td>
| |
| <td>enter a name and an optional description for your new '''Consist Asset''' and click the [[image:Tick.PNG|link=]] icon</td>
| |
| </tr>
| |
| <tr valign="top">
| |
| <td colspan=2>The consist will appear as a '''Train Asset''' in the <span style="font-weight: 700; font-size: 15px; color: white; background-color: #797979;"> Assets Palette </span> </td>
| |
| </tr>
| |
| </table>
| |
| </td>
| |
| </tr>
| |
| </table>
| |
| </td>
| |
| </tr>
| |
| </table>
| |
| </td>
| |
| </tr>
| |
| </table>
| |
| <br>
| |
| <table width=1000>
| |
| <tr valign="top">
| |
| <td width=220>[[image:ContextMenuRollingStock_S20.png|link=]]<br>
| |
| <br>
| |
| <table width=220 bgcolor=#000000 cellpadding=2>
| |
| <tr valign="top">
| |
| <td>
| |
| <table bgcolor=#ffffb0 cellpadding=2>
| |
| <tr valign="top">
| |
| <td width=25>[[image:NotePad.PNG|link=]]</td>
| |
| <td>You cannot set a '''Height''' value for a rolling stock object. It will always take the same height as the track on which it is placed</td>
| |
| </tr>
| |
| </table>
| |
| </td>
| |
| </tr>
| |
| </table>
| |
| </td>
| |
| <td width=780>
| |
| <table width=780 bgcolor=#000000>
| |
| <tr valign="top">
| |
| <td>
| |
| <table width=776 bgcolor=#ffffff>
| |
| <tr valign="top">
| |
| <td>
| |
| <table>
| |
| <tr valign="middle">
| |
| <td width=35>[[image:Information.png|35px|link=]]</td>
| |
| <td><span style="font-weight: 700; font-size: 17px;">Rolling Stock Object Context Menu Options</span></td>
| |
| </tr>
| |
| </table>
| |
| </td>
| |
| </tr>
| |
| <tr valign="top">
| |
| <td>
| |
| <table width=776 bgcolor=#ffffb0 cellpadding=2>
| |
| <tr valign="top">
| |
| <td>
| |
| <table>
| |
| <tr valign="top">
| |
| <td width=25>[[image:NotePad.PNG|link=]]</td>
| |
| <td><span style="font-size: 17px; font-weight: 700;">Notes:</span><br>
| |
| ----
| |
| Unlike other '''Context Menus''', the <span style="font-weight: 700; font-size: 15px; color: white; background-color: black;"> Cut </span> and <span style="font-weight: 700; font-size: 15px; color: white; background-color: black;"> Copy </span> menu options are not selectable for '''Rolling Stock Objects''' because these objects cannot be added to a '''Scrapbook'''. The <span style="font-weight: 700; font-size: 15px; color: white; background-color: black;"> Save to Consist Asset... </span> option performs some of the '''Scrapbook''' functions for rolling stock (see '''Tips''' above).</td>
| |
| </tr>
| |
| </table>
| |
| </td>
| |
| </tr>
| |
| </table>
| |
| <table>
| |
| <tr valign="top">
| |
| <td><span style="font-weight: 700; font-size: 15px; color: white; background-color: black;"> Paste </span></td>
| |
| <td>the contents of the current '''Scrapbook''' will be pasted at the cursor (focus) point<br>
| |
| <table bgcolor=#ffffb0 cellpadding=2>
| |
| <tr valign="top">
| |
| <td width=25>[[image:NotePad.PNG|link=]]</td>
| |
| <td>When pasted from a scrapbook the objects will be surrounded by a '''Marquee Selection Area''' that, depending on the settings in the [[image:PageLink.PNG|link=]] '''[[#Scrapbook Filters|Scrapbook Filters]]''', may add to or replace all other objects, splines, textures, ground terrain and effect layers in that area</td>
| |
| </tr>
| |
| </table>
| |
| </td>
| |
| </tr>
| |
| </table>
| |
| </td>
| |
| </tr>
| |
| <tr valign="top">
| |
| <td>
| |
| <table>
| |
| <tr valign="top">
| |
| <td><span style="font-weight: 700; font-size: 15px; color: white; background-color: black;"> Delete </span></td>
| |
| <td>the selected rolling stock objects will be deleted. It has the same effect as pressing the <span style="font-weight: 700; font-size: 15px; color: white; background-color: black;"> Delete </span> key</td>
| |
| </tr>
| |
| </table>
| |
| <table>
| |
| <tr valign="top">
| |
| <td><span style="font-weight: 700; font-size: 15px; color: white; background-color: black;"> Paint Under Selected </span></td>
| |
| <td>the texture selected in the <span style="font-weight: 700; font-size: 15px; color: white; background-color: #797979;"> Assets Palette </span> will be painted under the '''selected''' objects. The <span style="font-weight: 700; font-size: 15px; color: white; background-color: #797979;"> Tool Options Palette </span> brush settings (<span style="font-weight: 700; font-size: 15px; color: gold; background-color: black;"> Radius </span> and <span style="font-weight: 700; font-size: 15px; color: gold; background-color: black;"> Sensitivity </span>) will control how the texture is applied. If no ground texture has been selected in the <span style="font-weight: 700; font-size: 15px; color: white; background-color: #797979;"> Assets Palette </span> then this option will be greyed out.</td>
| |
| </tr>
| |
| <tr valign="top">
| |
| <td colspan=2>
| |
| <table bgcolor=#ffffb0 cellpadding=2>
| |
| <tr valign="top">
| |
| <td width=25>[[image:NotePad.PNG|link=]]</td>
| |
| <td>Objects have a '''minimum brush size''' that represents the smallest area that can be painted beneath them using the <span style="font-weight: 700; font-size: 15px; color: white; background-color: black;"> Paint Under Selected </span> option. This minimum area will vary in size between objects but it will be rectangular even for circular objects. If the <span style="font-weight: 700; font-size: 15px; color: white; background-color: #797979;"> Tool Options Palette </span> brush <span style="font-weight: 700; font-size: 15px; color: gold; background-color: black;"> Radius </span> is set to a smaller size then the brush <span style="font-weight: 700; font-size: 15px; color: gold; background-color: black;"> Radius </span> will be ignored and the objects minimum brush size will be used instead.</td>
| |
| </tr>
| |
| </table>
| |
| </td>
| |
| </tr>
| |
| </table>
| |
| </td>
| |
| </tr>
| |
| <tr valign="top">
| |
| <td>
| |
| <table>
| |
| <tr valign="top">
| |
| <td><span style="font-weight: 700; font-size: 15px; color: white; background-color: black;"> Smooth Ground Under Selected </span></td>
| |
| <td>smooths the height of the ground under the rolling stock object to match its height</td>
| |
| </tr>
| |
| </table>
| |
| <table>
| |
| <tr valign="top">
| |
| <td><span style="font-weight: 700; font-size: 15px; color: white; background-color: black;"> Reattach to Track </span></td>
| |
| <td>this option is only selecteable if a rolling stock object has derailed</td>
| |
| </tr>
| |
| </table>
| |
| <table>
| |
| <tr valign="top">
| |
| <td><span style="font-weight: 700; font-size: 15px; color: white; background-color: black;"> Rotate Vehicle </span></td>
| |
| <td>rotates (reverses) the facing direction of a selected rolling stock object. If more than one object has been selected then they will all have their directions reversed but they will remain in the same order </td>
| |
| </tr>
| |
| </table>
| |
| <table>
| |
| <tr valign="top">
| |
| <td><span style="font-weight: 700; font-size: 15px; color: white; background-color: black;"> Change Consist Heading </span></td>
| |
| <td>reverses the consist heading as indicated by the directions of the red and green arrows above the start and end of the consist</td>
| |
| </tr>
| |
| </table>
| |
| <table>
| |
| <tr valign="top">
| |
| <td><span style="font-weight: 700; font-size: 15px; color: white; background-color: black;"> Rotate Consist Heading </span></td>
| |
| <td>the entire consist is reversed, both in the order of the vehicles and the direction they face</td>
| |
| </tr>
| |
| </table>
| |
| <table>
| |
| <tr valign="top">
| |
| <td><span style="font-weight: 700; font-size: 15px; color: white; background-color: black;"> Merge into Single Train </span></td>
| |
| <td>when two or more separate rolling stock assets have been selected they will be coupled into a single consist. See [[image:PageLink.PNG|link=]] '''[[#FM: Couple Rolling|Coupling Rolling Stock Objects]]''' for more details</td>
| |
| </tr>
| |
| </table>
| |
| <table>
| |
| <tr valign="top">
| |
| <td><span style="font-weight: 700; font-size: 15px; color: white; background-color: black;"> Save to Consist Asset... </span></td>
| |
| <td>saves the selected rolling stock objects as a new '''Train''' ssset in the <span style="font-weight: 700; font-size: 15px; color: white; background-color: #797979;"> Assets Palette </span></td>
| |
| </tr>
| |
| </table>
| |
| <table>
| |
| <tr valign="top">
| |
| <td><span style="font-weight: 700; font-size: 15px; color: white; background-color: black;"> Select in Assets Palette </span></td>
| |
| <td>sets the <span style="font-weight: 700; font-size: 15px; color: white; background-color: #797979;"> Filter Palette </span> to <span style="font-weight: 700; font-size: 15px; color: white; background-color: black;"> All Content </span> and highlights the selected object in the <span style="font-weight: 700; font-size: 15px; color: white; background-color: #797979;"> Assets Palette </span></td>
| |
| </tr>
| |
| </table>
| |
| <table>
| |
| <tr valign="top">
| |
| <td><span style="font-weight: 700; font-size: 15px; color: white; background-color: black;"> Select in Filter Palette </span></td>
| |
| <td>sets the <span style="font-weight: 700; font-size: 15px; color: white; background-color: #797979;"> Filter Palette </span> to <span style="font-weight: 700; font-size: 15px; color: white; background-color: black;"> All Content </span> and highlights the selected object in the <span style="font-weight: 700; font-size: 15px; color: white; background-color: #797979;"> Filter Palette </span></td>
| |
| </tr>
| |
| </table>
| |
| <table>
| |
| <tr valign="top">
| |
| <td><span style="font-weight: 700; font-size: 15px; color: white; background-color: black;"> Edit Details </span></td>
| |
| <td>opens the '''Properties''' window of the selected rolling stock object. '''Note:''' to enter or edit an objects name property use the [[image:PageLink.PNG|link=]] '''[[#The Info Palette|Info Palette]]'''</td>
| |
| </tr>
| |
| </table>
| |
| </td>
| |
| </tr>
| |
| </table>
| |
| </td>
| |
| </tr>
| |
| </table>
| |
| </td>
| |
| </tr>
| |
| </table>
| |
| <br>
| |
| <!-- Fine Ajustment Tool Section -->
| |
| <table width=1000> <!-- BEGIN Nav Buttons Table -->
| |
| <tr valign="top">
| |
| <td width=629><span id="stepFineAdjustment"></span>
| |
| ='''The Fine Adjustment Tool'''=
| |
| </td>
| |
| <td width=50>[[image:SkipDown.png|link=#skip Fine Adjustment: Selecting an Object|Skip Down]]</td>
| |
| <td width=50>[[image:SkipUp.png|link=#skip Free Move: Rolling Stock Objects|Skip Up]]</td>
| |
| <td width=46>[[image:BackToTop.png|link=#top|alt=Top|Top]]</td>
| |
| <td width=75>[[image:NextUp.png|link=#stepFreeMove|alt=Next Up|Top]]</td>
| |
| <td width=75>[[image:NextDown.png|link=#stepMarquee|alt=Next Down|Next Down]]</td>
| |
| <td width=75>[[image:BackToBottom.png|link=#bottom|alt=Bottom|Bottom]]</td>
| |
| </tr>
| |
| </table> <!-- END Nav Buttons Table -->
| |
|
| |
| <table width=1000>
| |
| <tr valign="top">
| |
| <td>
| |
| <table width=214 bgcolor=#000000 cellpadding=2>
| |
| <tr valign="top">
| |
| <td>
| |
| <table width=210 bgcolor=#ffffff cellpadding=2>
| |
| <tr valign="top">
| |
| <td width=40>[[image:S20_FineAdjustmentToolIcon.png|link=]]</td>
| |
| <td width=170>'''Keyboard Shortcut:''' <span style="color: white; background-color: black; font-weight: 700; font-size: 17px;"> D </span></td>
| |
| </tr>
| |
| </table>
| |
| </td>
| |
| </tr>
| |
| </table>
| |
| </td>
| |
| <td width=786 bgcolor="lightcyan"><span style="font-weight: 700; font-size: 15px;">The <span style="color: white; background-color: black;"> Fine Adjustment Tool </span> makes 3D adjustments (XYZ position and rotations) to objects in your '''Trainz World'''</span></td>
| |
| </tr>
| |
| </table>
| |
| <br>
| |
| <table width=1000 bgcolor=#000000>
| |
| <tr valign="top">
| |
| <td>
| |
| <table width=996 bgcolor=#ffe89a cellpadding=2>
| |
| <tr valign="middle">
| |
| <td width=45>[[image:PalettesIcon_S20.png|link=]]</td>
| |
| <td>Various function of this tool use the <span style="font-weight: 700; font-size: 15px; color: white; background-color: #797979;"> Tool Options Palette </span> <span style="font-weight: 700; font-size: 15px; color: white; background-color: #797979;"> Info Palette </span> <span style="font-weight: 700; font-size: 15px; color: white; background-color: #797979;"> Filter Palette </span> and the <span style="font-weight: 700; font-size: 15px; color: white; background-color: #797979;"> Assets Palette </span>. If these palettes are not visible on the screen when required then refer to [[image:PageLink.PNG|link=]] '''[[#Notes_Palettes|Notes: Palettes]]''' at the top of this document.</td>
| |
| </tr>
| |
| </table>
| |
| </td>
| |
| </tr>
| |
| </table>
| |
| <br>
| |
| <table width=1000 bgcolor=#000000 cellpadding=2>
| |
| <tr valign="top">
| |
| <td>
| |
| <table width=996 bgcolor=#ffffff cellpadding=2>
| |
| <tr valign="top">
| |
| <td width=200>[[image:FineAdjustmentTools_S20.png|link=|alt=Fine Adjustment Tools]]</td>
| |
| <td>
| |
| <table width=800 cellpadding=2>
| |
| <tr valign="top">
| |
| <td bgcolor=#ffffb0><span style="font-weight: 700; font-size: 15px; color: white; background-color: black;"> Tool Targets </span> The '''Fine Adjustment Tool''' has no '''Target''' options so it has no drop down menu list</td>
| |
| </tr>
| |
| <tr valign="top">
| |
| <td>
| |
| <table>
| |
| <tr valign="top">
| |
| <td width=10>[[image:DotPoint.JPG|10px|link=]]</td>
| |
| <td>This tool is ideal for making small adjustments to objects - horizontally, vertically and rotations in 3D space</td>
| |
| </tr>
| |
| <tr valign="top">
| |
| <td>[[image:DotPoint.JPG|10px|link=]]</td>
| |
| <td>Multiple objects (of different types) can be selected for mass adjustments and other operations</td>
| |
| </tr>
| |
| </table>
| |
| </td>
| |
| </tr>
| |
| <tr valign="top">
| |
| <td bgcolor=#ffffb0><span style="font-weight: 700; font-size: 15px; color: white; background-color: black;"> Tool Actions </span> The '''Fine Adjustment Tool''' has no '''Action''' options so it has no drop down menu list</td>
| |
| </tr>
| |
| </table>
| |
| </td>
| |
| </tr>
| |
| </table>
| |
| </td>
| |
| </tr>
| |
| </table>
| |
| <br>
| |
| <table width=1000 bgcolor=#000000 cellpadding=2>
| |
| <tr valign="top">
| |
| <td>
| |
| <table width=996 bgcolor=#ffffe0 cellpadding=2>
| |
| <tr valign="top">
| |
| <td width=25>[[image:PencilTips.PNG|link=]]</td><td><span style="font-weight: 700; font-size: 15px;">Fine Adjustment Alternatives</span></td>
| |
| </tr>
| |
| <tr valign="top">
| |
| <td colspan=2>In addition to the [[image:S20_FineAdjustmentToolIcon.png|link=|20px]] '''Fine Adjustment Tool''' the position, orientation and/or height of objects can be changed by choosing one of the following:-</td>
| |
| </tr>
| |
| <tr>
| |
| <td colspan=2><span style="font-weight: 700; font-size: 15px;">Options:</span> </td>
| |
| </tr>
| |
| <tr valign="top">
| |
| <td width=25>[[image:Ablue.png|link=]]</td>
| |
| <td>using the [[image:S20_FreeMoveToolIcon.png|link=|20px]] '''[[#The Free Move Tool|Free Move Tool]]''' <span style="font-weight: 700; font-size: 15px;">OR</span></td>
| |
| </tr>
| |
| <tr valign="top">
| |
| <td>[[image:Bblue.png|link=]]</td>
| |
| <td>editing its <span style="font-size: 15px; font-weight: 700; color: white;"><span style="background-color: black;"> x: </span> <span style="background-color: black;"> y: </span> <span style="background-color: black;"> z: </span></span> position values and <span style="font-size: 15px; font-weight: 700; color: white;"><span style="background-color: black;"> r: </span> <span style="background-color: black;"> p: </span> <span style="background-color: black;"> y: </span></span> rotation values in [[image:PageLink.PNG|link=]] '''[[#The Info Palette|The Info Palette]]''' <span style="font-weight: 700; font-size: 15px;">OR</span></td>
| |
| </tr>
| |
| <tr valign="top">
| |
| <td>[[image:Cblue.png|link=]]</td>
| |
| <td>selecting the <span style="font-size: 15px; font-weight: 700; color: white; background-color: black;"> Apply Height </span> option in its '''Context Menu'''</td>
| |
| </tr>
| |
| </table>
| |
| </td>
| |
| </tr>
| |
| </table>
| |
| <br>
| |
| <table width=1000 bgcolor="lightcyan" cellpadding=2>
| |
| <tr valign="top">
| |
| <td width=10>[[image:BlueDot10x10.png|link=]]</td>
| |
| <td>The most obvious feature of the '''Fine Adjustment Tool''' is the '''3D Anchor Frame''' it adds to a selected object. The frame is made of 3 straight and 3 curved coloured lines plus a central dot, called <span style="font-weight: 700; font-size: 15px;">Anchors</span></td>
| |
| </tr>
| |
| <tr valign="top">
| |
| <td width=10>[[image:BlueDot10x10.png|link=]]</td>
| |
| <td>The '''Anchors''' in the '''Fine Adjustment Tool''' are used to move and rotate a selected object, or a group of selected objects, through '''3D space'''.</td>
| |
| </tr>
| |
| </table>
| |
|
| |
| <table width=1000>
| |
| <tr valign="top">
| |
| <td width=250>[[image:FineAdjust3DFrame_S20.png|link=]]</td>
| |
| <td width=750>The '''Anchor''' controls are:-
| |
| <table width=750>
| |
| <tr valign="top">
| |
| <td colspan=2><span style="font-weight: 700; font-size: 15px; color: white; background-color: black;"> The Horizontal and Vertical Anchors </span></td>
| |
| </tr>
| |
| <tr valign="top">
| |
| <td width=150><span style="font-weight: 700; font-size: 15px; color: white; background-color: red;"> Red </span> <span style="font-weight: 700; font-size: 15px; color: white; background-color: green;"> Green </span> <span style="font-weight: 700; font-size: 15px; color: white; background-color: blue;"> Blue </span></td>
| |
| <td>move the object (forward/back or up/down) in the direction of the '''Anchor''' line</td>
| |
| </tr>
| |
| </table>
| |
| <table width=750>
| |
| <tr valign="top">
| |
| <td colspan=3><span style="font-weight: 700; font-size: 15px; color: white; background-color: black;"> The Rotational Anchors </span></td>
| |
| </tr>
| |
| <tr valign="top">
| |
| <td width=150><span style="font-weight: 700; font-size: 15px; color: white; background-color: red;"> Red </span> <span style="font-weight: 700; font-size: 15px; color: white; background-color: green;"> Green </span> <span style="font-weight: 700; font-size: 15px; color: white; background-color: blue;"> Blue </span></td>
| |
| <td width=350>rotate the object (clockwise and anti-clockwise) along the '''Anchor Arc Line''' centred around the '''Anchor Straight Line''' of the same colour</td>
| |
| <td>
| |
| <table bgcolor=#000000 width=250 cellpadding=2>
| |
| <tr valign="top">
| |
| <td>
| |
| <table bgcolor=#ffffb0 width=246 cellpadding=2>
| |
| <tr valign="top">
| |
| <td width=25>[[image:NotePad.PNG|link=]]</td>
| |
| <td>Not all objects will have <span style="font-weight: 700; font-size: 15px; color: white; background-color: red;"> Red </span> and/or <span style="font-weight: 700; font-size: 15px; color: white; background-color: green;"> Green </span> rotational Anchors. Some objects will have no rotational anchors at all.</td>
| |
| </tr>
| |
| </table>
| |
| </td>
| |
| </tr>
| |
| </table>
| |
| </td>
| |
| </tr>
| |
| </table>
| |
| <table width=750>
| |
| <tr valign="top">
| |
| <td colspan=2><span style="font-weight: 700; font-size: 15px; color: white; background-color: black;"> The Object Anchor </span></td>
| |
| </tr>
| |
| <tr valign="top">
| |
| <td colspan=2><span style="font-weight: 700; font-size: 15px; background-color: black;">    </span> (black central dot) moves the object in any horizontal direction</td>
| |
| </tr>
| |
| </table>
| |
| </td>
| |
| </tr>
| |
| </table>
| |
|
| |
| <table width=1000>
| |
| <tr valign="top">
| |
| <td>
| |
| <table width=400 bgcolor=#000000 cellpadding=2>
| |
| <tr valign="top">
| |
| <td>
| |
| <table bgcolor=#ffffb0 cellpadding=2>
| |
| <tr valign="top">
| |
| <td width=25>[[image:NotePad.PNG|link=]]</td>
| |
| <td>
| |
| The orientation of the <span style="font-weight: 700; font-size: 15px; color: white; background-color: red;"> Red </span> and <span style="font-weight: 700; font-size: 15px; color: white; background-color: green;"> Green </span> horizontal anchor lines is based on the orientation of the object when it is placed in the scene, not on the compass directions</td>
| |
| </tr>
| |
| </table>
| |
| </td>
| |
| </tr>
| |
| </table>
| |
| </td>
| |
| <td>
| |
| <table width=600 bgcolor=#000000 cellpadding=2>
| |
| <tr valign="top">
| |
| <td>
| |
| <table bgcolor=#ffffff cellpadding=2>
| |
| <tr valign="top">
| |
| <td colspan=2><span style="font-weight: 700; font-size: 15px;">Steps:</span> To use the '''Fine Adjustment Tool''' controls:-</td>
| |
| </tr>
| |
| <tr valign="top">
| |
| <td width=20>[[image:DotPoint1.JPG|link=]]</td>
| |
| <td>move the tool pointer onto an Anchor - its colour will change to yellow for Anchor lines or green for the Object Anchor</td>
| |
| </tr>
| |
| <tr valign="top">
| |
| <td>[[image:DotPoint2.JPG|link=]]</td>
| |
| <td><span style="font-weight: 700; font-size: 15px; background-color: lightcyan;">Left Click and Drag</span> the '''Object Anchor''' in any direction or move the pointer along the chosen '''Anchor Line''' in the required direction (e.g. up on the blue vertical Anchor or clockwise around the arc of the red rotational Anchor)</td>
| |
| </tr>
| |
| </table>
| |
| </td>
| |
| </tr>
| |
| </table>
| |
| </td>
| |
| </tr>
| |
| </table>
| |
| <br>
| |
| <table width=1000 bgcolor=#000000 cellpadding=2>
| |
| <tr valign="top">
| |
| <td>
| |
| <table width=996 bgcolor=#ffffe0 cellpadding=2>
| |
| <tr valign="top">
| |
| <td width=25>[[image:PencilTips.PNG|link=]]</td><td colspan=2>To achieve finer and more accurate control when moving anchors, choose one of the following:-</td>
| |
| </tr>
| |
| <tr>
| |
| <td colspan=2><span style="font-weight: 700; font-size: 15px;">Options:</span> </td>
| |
| </tr>
| |
| <tr valign="top">
| |
| <td>[[image:Ablue.png|link=]]</td>
| |
| <td>zoom in closer to the anchor point, <span style="font-weight: 700; font-size: 15px;">OR</span></td>
| |
| </tr>
| |
| <tr valign="top">
| |
| <td>[[image:Bblue.png|link=]]</td>
| |
| <td>use the <span style="font-weight: 700; font-size: 15px; color: white; background-color: black;"> x: </span> <span style="font-weight: 700; font-size: 15px; color: white; background-color: black;"> y: </span> <span style="font-weight: 700; font-size: 15px; color: white; background-color: black;"> z: </span> fine adjustment arrows in the <span style="font-weight: 700; font-size: 15px; color: white; background-color: #797979;"> Info Palette </span> object <span style="font-weight: 700; font-size: 15px; color: white; background-color: black;"> Pos: </span> controls. These arrows can be used to set the height and position to '''cm''' accuracy (see [[image:PageLink.PNG|link=]] '''[[#The Info Palette|The Info Palette]]''' below), <span style="font-weight: 700; font-size: 15px;">OR</span></td>
| |
| </tr>
| |
| <tr valign="top">
| |
| <td>[[image:Cblue.png|link=]]</td>
| |
| <td>use the <span style="font-weight: 700; font-size: 15px; color: white; background-color: black;"> r: </span> <span style="font-weight: 700; font-size: 15px; color: white; background-color: black;"> p: </span> <span style="font-weight: 700; font-size: 15px; color: white; background-color: black;"> y: </span> fine adjustment arrows in the <span style="font-weight: 700; font-size: 15px; color: white; background-color: #797979;"> Info Palette </span> object <span style="font-weight: 700; font-size: 15px; color: white; background-color: black;"> Rot: </span> controls. These arrows can be used to set the rotation to '''1°''' accuracy (see [[image:PageLink.PNG|link=]] '''[[#The Info Palette|The Info Palette]]''' below).</td>
| |
| </tr>
| |
| </table>
| |
| </td>
| |
| </tr>
| |
| </table>
| |
| <br>
| |
| <table width=1000> <!-- BEGIN Section Nav Buttons -->
| |
| <tr valign="top">
| |
| <td width=629><span id="skip Fine Adjustment: Selecting an Object"></span>
| |
| =='''Fine Adjustment: Selecting an Object'''==
| |
| </td>
| |
| <td width=50>[[image:SkipDown.png|link=#skip Fine Adjustment: Naming an Object|Skip Down]]</td>
| |
| <td width=50>[[image:SkipUp.png|link=#stepFineAdjustment|Skip Up]]</td>
| |
| <td width=46> </td> <!-- for Top -->
| |
| <td width=75>[[image:HeadingUp.png|link=#stepFineAdjustment|alt=Heading|To Heading]]</td>
| |
| <td width=75> </td>
| |
| <td width=75> </td> <!-- for Bottom -->
| |
| </tr>
| |
| </table> <!-- END Section Nav Buttons -->
| |
|
| |
| <table width=1000 bgcolor="lightcyan" cellpadding=2>
| |
| <tr valign="top">
| |
| <td width=10>[[image:BlueDot10x10.png|link=]]</td>
| |
| <td>The '''Fine Adjustment Tool''' can be used to select individual objects and multiple objects. The multiple objects can be of different types (e.g. spline objects and scenery objects) and in different layers</td>
| |
| </tr>
| |
| </table>
| |
| <br>
| |
| <table width=1000 bgcolor=#000000 cellpadding=2>
| |
| <tr valign="top">
| |
| <td>
| |
| <table width=996 bgcolor=#ffffff cellpadding=2>
| |
| <tr valign="top">
| |
| <td>
| |
| <table width=590>
| |
| <tr valign="top">
| |
| <td colspan=2><span style="font-weight: 700; font-size: 15px;">Steps:</span> To select single and multiple objects with the '''Fine Adjustment Tool''':-</td>
| |
| </tr>
| |
| <tr valign="top">
| |
| <td width=25>[[image:DotPoint1.JPG|link=]]</td>
| |
| <td>In the <span style="font-weight: 700; font-size: 15px; color: white; background-color: #797979;"> Tools Palette </span> <span style="font-weight: 700; font-size: 15px; background-color: lightcyan;"> Left Click </span> on the [[image:S20_FineAdjustmentToolIcon.png|link=|20px] '''Fine Adjustment Tool'''] or press the <span style="font-weight: 700; font-size: 15px; color: white; background-color: black;"> D </span> key</td>
| |
| </tr>
| |
| <tr valign="top">
| |
| <td>[[image:DotPoint2.JPG|link=]]</td>
| |
| <td>In the '''Surveyor''' screen <span style="font-weight: 700; font-size: 15px; background-color: lightcyan;"> Left Click </span> on the object to be selected, or the first object if multiple objects are to be selected</td>
| |
| </tr>
| |
| <tr valign="top">
| |
| <td>[[image:DotPoint3.JPG|link=]]</td>
| |
| <td>To select additional objects, hold down the <span style="font-weight: 700; font-size: 15px; color: white; background-color: black;"> Shift </span> key and <span style="font-weight: 700; font-size: 15px; background-color: lightcyan;"> Left Click </span> on each object to be added to the selection. The additional objects do not have to be the same type or in the same layer</td>
| |
| </tr>
| |
| </table>
| |
| </td>
| |
| <td>
| |
| <table width=400 bgcolor=#ffffe0 cellpadding=2>
| |
| <tr valign="top">
| |
| <td width=25>[[image:PencilTips.PNG|link=]]</td>
| |
| <td><span style="font-weight: 700; font-size: 15px; background-color: lightcyan;"> Double Left Click </span> on an object to add it and all '''nearby''' identical objects into a single selection.
| |
| <table>
| |
| <tr valign="top">
| |
| <td>[[image:DotPoint.JPG|10px|link=]]</td>
| |
| <td>for a spline object all the segments up to the next junction (in both directions) will be selected</td>
| |
| </tr>
| |
| <tr valign="top">
| |
| <td>[[image:DotPoint.JPG|10px|link=]]</td>
| |
| <td>for a rolling stock object all the rolling stock objects in '''that consist''' will be selected</td>
| |
| </tr>
| |
| </table>
| |
| </td>
| |
| </tr>
| |
| </table>
| |
| </td>
| |
| </tr>
| |
| <tr valign="top">
| |
| <td colspan=2>
| |
| <table bgcolor=#ffffb0 cellpadding=2>
| |
| <tr valign="top">
| |
| <td width=25>[[image:NotePad.PNG|link=]]</td>
| |
| <td><span style="font-size: 17px;">'''Notes:'''</span><br>
| |
| ----
| |
| </td>
| |
| </tr>
| |
| <tr valign="top">
| |
| <td width=10>[[image:DotPoint.JPG|10px|link=]]</td>
| |
| <td>To remove an object from the selection <span style="font-weight: 700; font-size: 15px; background-color: lightcyan;"> Left Click </span> on it again if it is the only selected object or <span style="font-weight: 700; font-size: 15px;"><span style="color: white; background-color: black;"> Shift </span> + <span style="background-color: lightcyan;"> Left Click </span></span> if it is one of several selected objects.<br>
| |
| To remove '''ALL''' objects from a selection, <span style="font-weight: 700; font-size: 15px; background-color: lightcyan;"> Left Click </span> on a '''Ground Texture''' or press the <span style="font-weight: 700; font-size: 15px;"><span style="color: white; background-color: black;"> Ctrl </span> + <span style="color: white; background-color: black;"> D </span></span> keys</td>
| |
| </tr>
| |
| <tr valign="top">
| |
| <td>[[image:DotPoint.JPG|10px|link=]]</td>
| |
| <td>When you select an object its '''Context Icon''' will appear attached to the object. <span style="font-weight: 700; font-size: 15px; background-color: lightcyan;"> Left Click </span> on its icon or press the <span style="font-weight: 700; font-size: 15px; color: white; background-color: black;"> T </span> key to open its '''Context Menu'''. If more than one object is selected then the '''Context Icon''' will be attached to the <span style="font-weight: 700; text-decoration: underline;">last</span> object selected</td>
| |
| </tr>
| |
| </table>
| |
| </td>
| |
| </tr>
| |
| </table>
| |
| </td>
| |
| </tr>
| |
| </table>
| |
| <br>
| |
| <table width=1000 bgcolor=#000000 cellpadding=2>
| |
| <tr valign="top">
| |
| <td>
| |
| <table width=996 bgcolor=#ffffe0 cellpadding=2>
| |
| <tr valign="top">
| |
| <td width=25>[[image:PencilTips.PNG|link=]]</td>
| |
| <td><span style="font-weight: 700; font-size: 15px;">Selecting Objects From a Crowded Scene</span><br>
| |
| Sometimes the object you want to select is part of a crowded scene or is overlapped by other objects, such as splines, and this can make it difficult to select. In these situations the best solution is to use the <span style="font-weight: 700; font-size: 15px; color: white; background-color: #797979;"> Filter Palette </span> and <span style="font-weight: 700; font-size: 15px; color: white; background-color: #797979;"> Assets Palette </span> to narrow the selection to a single object or to a set of objects.<br>
| |
| See [[image:PageLink.PNG|link=]] '''[[#Narrowing the Search|Narrowing the Search]]''' for more details</td>
| |
| </tr>
| |
| </table>
| |
| </td>
| |
| </tr>
| |
| </table>
| |
| <br>
| |
| <table width=1000> <!-- BEGIN Section Nav Buttons -->
| |
| <tr valign="top">
| |
| <td width=629><span id="skip Fine Adjustment: Naming an Object"></span>
| |
| =='''Fine Adjustment: Naming an Object'''==
| |
| </td>
| |
| <td width=50>[[image:SkipDown.png|link=#skip Fine Adjustment: Changing an Objects Layer|Skip Down]]</td>
| |
| <td width=50>[[image:SkipUp.png|link=#skip Fine Adjustment: Selecting an Object|Skip Up]]</td>
| |
| <td width=46> </td> <!-- for Top -->
| |
| <td width=75>[[image:HeadingUp.png|link=#stepFineAdjustment|alt=Heading|To Heading]]</td>
| |
| <td width=75> </td>
| |
| <td width=75> </td> <!-- for Bottom -->
| |
| </tr>
| |
| </table> <!-- END Section Nav Buttons -->
| |
|
| |
| <table width=1000 bgcolor="lightcyan" cellpadding=2>
| |
| <tr valign="top">
| |
| <td width=10>[[image:BlueDot10x10.png|link=]]</td>
| |
| <td>Objects can be given names to help identify them with the '''Find Tool'''</td>
| |
| </tr>
| |
| <tr valign="top">
| |
| <td width=10>[[image:BlueDot10x10.png|link=]]</td>
| |
| <td>Some objects must be given '''unique''' names for display and session operations</td>
| |
| </tr>
| |
| </table>
| |
| <br>
| |
| <table width=1000 bgcolor=#000000 cellpadding=2>
| |
| <tr valign="top">
| |
| <td>
| |
| <table width=996 bgcolor=#ffe89a cellpadding=2>
| |
| <tr valign="middle">
| |
| <td width=45>[[image:PalettesIcon_S20.png|link=]]</td>
| |
| <td>If the <span style="font-weight: 700; font-size: 15px; color: white; background-color: #797979;"> Tool Options Palette </span> and <span style="font-weight: 700; font-size: 15px; color: white; background-color: #797979;"> Info Palette </span> are not visible on the screen then refer to [[image:PageLink.PNG|link=]] '''[[#Notes_Palettes|Notes: Palettes]]''' at the top of this document.
| |
| </td>
| |
| </tr>
| |
| </table>
| |
| </td>
| |
| </tr>
| |
| </table>
| |
| <br>
| |
| <table width=1000>
| |
| <tr valign="top">
| |
| <td width=225>[[image:InfoPaletteObjectName_S20.png|link=]]</td>
| |
| <td>
| |
| <table bgcolor=#000000 cellpadding=2>
| |
| <tr valign="top">
| |
| <td>
| |
| <table bgcolor=#ffffff cellpadding=2>
| |
| <tr valign="top">
| |
| <td colspan=2><span style="font-weight: 700; font-size: 15px;">Steps:</span> To name (or rename) an object using the '''Fine Adjustment Tool''':-</td>
| |
| </tr>
| |
| <tr valign="top">
| |
| <td width=25>[[image:DotPoint1.JPG|link=]]</td>
| |
| <td><span style="font-weight: 700; font-size: 15px; background-color: lightcyan;"> Left Click </span> on the object using the '''Fine Adjustment Tool'''</td>
| |
| </tr>
| |
| <tr valign="top">
| |
| <td>[[image:DotPoint2.JPG|link=]]</td>
| |
| <td>In the <span style="font-weight: 700; font-size: 15px; color: white; background-color: #797979;"> Info Palette </span> <span style="font-weight: 700; font-size: 15px; background-color: lightcyan;"> Left Click </span> inside the '''Name''' text entry box</td>
| |
| </tr>
| |
| <tr valign="top">
| |
| <td>[[image:DotPoint3.JPG|link=]]</td>
| |
| <td>Enter a name and press the <span style="font-weight: 700; font-size: 15px; color: white; background-color: black;"> Enter </span> key</td>
| |
| </tr>
| |
| </table>
| |
| </td>
| |
| </tr>
| |
| </table>
| |
| <br>
| |
| <table bgcolor=#000000 cellpadding=2>
| |
| <tr valign="top">
| |
| <td>
| |
| <table bgcolor=#ffffb0 cellpadding=2>
| |
| <tr valign="top">
| |
| <td width=25>[[image:NotePad.PNG|link=]]</td>
| |
| <td>If more than one object has been selected then only the '''last selected object''', the one with the '''Context Icon''', will be named.</td>
| |
| </tr>
| |
| </table>
| |
| </td>
| |
| </tr>
| |
| </table>
| |
| </td>
| |
| </tr>
| |
| </table>
| |
| <br>
| |
| <table width=1000 cellpadding=2>
| |
| <tr valign="top">
| |
| <td width=420>[[image:ObjectsUsingSameName.png|link=]]</td>
| |
| <td>
| |
| <table width=580 bgcolor=#000000 cellpadding=2>
| |
| <tr valign="top">
| |
| <td>
| |
| <table width=576 bgcolor=#ffffff cellpadding=2>
| |
| <tr valign="middle">
| |
| <td width=35>[[image:Information.png|35px|link=]]</td>
| |
| <td align="center"><span style="font-weight: 700; font-size: 15px;">There is no ban on two or more objects using the same name</span></td>
| |
| </tr>
| |
| </table>
| |
| </td>
| |
| </tr>
| |
| </table>
| |
| <br>
| |
| In the image shown on the left there are 4 objects all named '''Old Orroroo Rd'''.<br>
| |
| <br>
| |
| This will not cause any problems for scenery objects apart from finding the ''exact'' one you want with the '''Find Tool''' (<span style="font-weight: 700; font-size: 15px;"><span style="color: white; background-color: black;"> Ctrl </span> + <span style="color: white; background-color: black;"> F </span></span> keys) as shown in the image on the left - Which of the 4 "Old Orroroo Rd" objects is the one that I need?<br>
| |
| <br>
| |
| <table bgcolor=#ff0000 cellpadding=2>
| |
| <tr valign="top">
| |
| <td>
| |
| <table bgcolor=#fcbcbc cellpadding=2>
| |
| <tr valign="top">
| |
| <td>[[image:Stop.PNG|link=]]</td>
| |
| <td><span style="font-size: 15px; font-weight: 700;">WARNING:</span><br>
| |
| '''Duplicate names''' will cause problems for '''Industries''' (including passenger enabled stations), '''Locomotives''', '''Track Marks''', '''Triggers''', '''Switches''', '''Signals''', etc that have to be identified to control the operation of a session.</td>
| |
| </tr>
| |
| <tr valign="top">
| |
| <td colspan=2 align="center"><span style="font-weight: 700; font-size: 15px;">These objects must have unique names</span></td>
| |
| </tr>
| |
| </table>
| |
| </td>
| |
| </tr>
| |
| </table>
| |
| </td>
| |
| </tr>
| |
| </table>
| |
| <br>
| |
| <table width=1000> <!-- BEGIN Nav Buttons Table SKIPS NO SECTIONS -->
| |
| <tr valign="top">
| |
| <td width=629><span id="skip Fine Adjustment: Changing an Objects Layer"></span>
| |
| =='''Fine Adjustment: Changing an Objects Layer'''==
| |
| </td>
| |
| <td width=50>[[image:SkipDown.png|link=#skip Fine Adjustment: Scenery Mesh Objects|Skip Down]]</td> <!-- skip Down -->
| |
| <td width=50>[[image:SkipUp.png|link=#skip Fine Adjustment: Naming an Object|Skip Up]]</td> <!-- skip Up -->
| |
| <td width=46> </td> <!-- Top -->
| |
| <td width=75>[[image:HeadingUp.png|link=#stepFineAdjustment|alt=Heading|To Heading]]</td>
| |
| <td width=75> </td> <!-- Next Down -->
| |
| <td width=75> </td> <!-- Bottom -->
| |
| </tr>
| |
| </table> <!-- END Nav Buttons Table -->
| |
|
| |
| <table width=1000 bgcolor="lightcyan" cellpadding=2>
| |
| <tr valign="top">
| |
| <td width=10>[[image:BlueDot10x10.png|link=]]</td>
| |
| <td>All objects in the '''Trainz World''' are in layers. For '''scenery objects''' you can set and change the layers where they are placed</td>
| |
| </tr>
| |
| </table>
| |
| <br>
| |
| <table width=1000 bgcolor=#000000 cellpadding=2>
| |
| <tr valign="top">
| |
| <td>
| |
| <table width=996 bgcolor=#ffffff cellpadding=2>
| |
| <tr valign="top">
| |
| <td colspan=2>
| |
| <table>
| |
| <tr valign="middle">
| |
| <td width=35>[[image:Information.png|35px|link=]]</td>
| |
| <td>Layers are an essential feature of '''Trainz''' for managing different objects in '''Surveyor'''. Layers can be:-</td>
| |
| </tr>
| |
| </table>
| |
| </td>
| |
| </tr>
| |
| <tr valign="top">
| |
| <td width=10>[[image:DotPoint.JPG|10px|link=]]</td>
| |
| <td>locked to prevent the accidental deletion, movement or alteration of the objects they contain</td>
| |
| </tr>
| |
| <tr valign="top">
| |
| <td>[[image:DotPoint.JPG|10px|link=]]</td>
| |
| <td>hidden to remove their objects from view so that other nearby objects can be manipulated</td>
| |
| </tr>
| |
| <tr valign="top">
| |
| <td colspan=2>Layers can also be used in '''Driver''' to hide and reveal objects during ganeplay.<br><br>
| |
| See [[image:WikiLink.PNG|link=]] '''[[How_to_Use_Layers|How to Use Layers]]''' for detailed information on '''Layers'''</td>
| |
| </tr>
| |
| </table>
| |
| </td>
| |
| </tr>
| |
| </table>
| |
| <br>
| |
| <table width=1000 bgcolor=#000000 cellpadding=2>
| |
| <tr valign="top">
| |
| <td>
| |
| <table width=996 bgcolor=#ffe89a cellpadding=2>
| |
| <tr valign="middle">
| |
| <td width=45>[[image:PalettesIcon_S20.png|link=]]</td>
| |
| <td>If the <span style="font-weight: 700; font-size: 15px; color: white; background-color: #797979;"> Info Palette </span> is not visible on the screen then refer to [[image:PageLink.PNG|link=]] '''[[#Notes_Palettes|Notes: Palettes]]''' at the top of this document</td>
| |
| </tr>
| |
| </table>
| |
| </td>
| |
| </tr>
| |
| </table>
| |
|
| |
| <table width=1000>
| |
| <tr valign="top">
| |
| <td>An object will be added to a layer when it is placed into the '''Trainz World''' by the [[image:S20_PlacementToolIcon.png|link=|20px]] '''[[#The Placement Tool|Placement Tool]]''' and the '''Scrapbook'''. Once it has been placed it can be moved to a different layer.</td>
| |
| </tr>
| |
| </table>
| |
|
| |
| <table width=1000>
| |
| <tr valign="top">
| |
| <td width=320>[[image:InfoLayerSetNew.png|link=]]</td>
| |
| <td>
| |
| <table width=680 bgcolor=#000000 cellpadding=2>
| |
| <tr valign="top">
| |
| <td>
| |
| <table bgcolor=#ffffff cellpadding=2>
| |
| <tr valign="top">
| |
| <td colspan=2><span style="font-weight: 700; font-size: 15px;">Steps:</span> To move a placed object to another layer:-</td>
| |
| </tr>
| |
| <tr valign="top">
| |
| <td width=25>[[image:DotPoint1.JPG|link=]]</td>
| |
| <td>select the object (<span style="font-weight: 700; font-size: 15px; background-color: lightcyan;"> Left Click </span> on the object) or several objects (<span style="font-weight: 700; font-size: 15px;"><span style="color: white; background-color: black;"> Shift </span> + <span style="background-color: lightcyan;"> Left Click </span></span> on each object) to be moved to another layer. If multiple objects are selected then they do not have to be of the same type or in the same starting layer. <span style="background-color: #ffffb0;"> '''Note:''' The layer(s) containing the object(s) must '''NOT''' be locked </span></td>
| |
| </tr>
| |
| <tr valign="top">
| |
| <td width=25>[[image:DotPoint2.JPG|link=]]</td>
| |
| <td>in the <span style="font-weight: 700; font-size: 15px; color: white; background-color: #797979;"> Info Palette </span> <span style="font-weight: 700; font-size: 15px; background-color: lightcyan;"> Left Click </span> on the Layer arrowhead icon (circled in red in the image left). This will open up the layer controls for the last selected object</td>
| |
| </tr>
| |
| <tr valign="top">
| |
| <td>[[image:DotPoint3.JPG|link=]]</td>
| |
| <td>the drop down menu box labelled '''Layer''' shows the currently assigned layer for that object. If multiple objects from different layers have been selected then no layer name will be shown. <span style="font-weight: 700; font-size: 15px; background-color: lightcyan;"> Left Click </span> on the '''Up/Down''' arrows to open the list of all available layers.</td>
| |
| </tr>
| |
| <tr valign="top">
| |
| <td>[[image:DotPoint4.JPG|link=]]</td>
| |
| <td>select the destination layer from the list. The object(s) will then be moved to the selected layer - you will be given a warning if the move has failed (usually because an objects layer is locked)</td>
| |
| </tr>
| |
| <tr valign="top">
| |
| <td colspan=2>
| |
|
| |
| <table bgcolor=#ffffb0 cellpadding=2>
| |
| <tr valign="top">
| |
| <td width=25>[[image:NotePad.PNG|link=]]</td>
| |
| <td><span style="font-weight: 700; font-size: 15px;">Also see:-</span>
| |
| <table>
| |
| <tr valign="top">
| |
| <td>[[image:PageLink.PNG|link=]] '''[[#skip Assigning Objects to a Different Layer|Assigning Objects to a Different Layer]]''' for more details on the '''Layer Controls''' in the <span style="font-weight: 700; font-size: 15px; color: white; background-color: #797979;"> Info Palette </span></td>
| |
| </tr>
| |
| <tr valign="top">
| |
| <td>[[image:WikiLink.PNG|link=]] '''[[How_to_Use_Layers|How to Use Layers]]''' for detailed information on '''Layers'''</td>
| |
| </tr>
| |
| </table>
| |
| </td>
| |
| </tr>
| |
| </table>
| |
| </td>
| |
| </tr>
| |
| </table>
| |
| </td>
| |
| </tr>
| |
| </table>
| |
| </td>
| |
| </tr>
| |
| </table>
| |
| <br>
| |
| <table width=1000 bgcolor=#ff0000 cellpadding=2>
| |
| <tr valign="top">
| |
| <td>
| |
| <table width=996 bgcolor=#fcbcbc cellpadding=2>
| |
| <tr valign="top">
| |
| <td>[[image:Stop.PNG|link=]]</td>
| |
| <td colspan=2><span style="font-size: 15px; font-weight: 700;">CAUTION: Take Care when assigning objects to layers</span></td>
| |
| </tr>
| |
| <tr valign="top">
| |
| <td width=10>[[image:DotPoint.JPG|10px|link=]]</td>
| |
| <td>Placing an object in the <span style="font-weight: 700; font-size: 15px; color: white; background-color: black;"> Route Layer Group </span> will save it in the '''Route''' and it will appear in every '''Session''' based on that '''Route'''</td>
| |
| </tr>
| |
| <tr valign="top">
| |
| <td>[[image:DotPoint.JPG|10px|link=]]</td>
| |
| <td>Placing an object in the <span style="font-weight: 700; font-size: 15px; color: white; background-color: black;"> Session Layer Group </span> will save it in the '''Session''' and it will only appear in the currently loaded '''Session'''</td>
| |
| </tr>
| |
| </table>
| |
| </td>
| |
| </tr>
| |
| </table>
| |
| <br>
| |
| <table width=1000 bgcolor=#000000 cellpadding=2>
| |
| <tr valign="top">
| |
| <td>
| |
| <table width=996 bgcolor=#ffffb0 cellpadding=2>
| |
| <tr valign="top">
| |
| <td width=25>[[image:NotePad.PNG|link=]]</td>
| |
| <td width=975><span style="font-size: 17px; font-weight: 700;">Notes:'''</span><br>
| |
| ----
| |
| The contents of the '''Ground Height Layer''', '''Ground Texture Layer''' and the '''Effect Layers''' cannot be moved to other layers. Objects in the '''Route Layers Group''' and '''Session Layers Group''' cannot be moved into these layers</td>
| |
| </tr>
| |
| </table>
| |
| </td>
| |
| </tr>
| |
| </table>
| |
| <br>
| |
| <table width=1000> <!-- BEGIN Section Nav Buttons -->
| |
| <tr valign="top">
| |
| <td width=629><span id="skip Fine Adjustment: Scenery Mesh Objects"></span>
| |
| =='''Fine Adjustment: Scenery Mesh Objects'''==
| |
| </td>
| |
| <td width=50>[[image:SkipDown.png|link=#skip Fine Adjustment: Track Objects|Skip Down]]</td>
| |
| <td width=50>[[image:SkipUp.png|link=#skip Fine Adjustment: Changing an Objects Layer|Skip Up]]</td>
| |
| <td width=46>[[image:SkipMinorDown.png|link=#FA: Height Mesh|Down]][[image:SkipMinorBlank.png|link=]]</td> <!-- for Top and Minor Up/Down -->
| |
| <td width=75>[[image:HeadingUp.png|link=#stepFineAdjustment|alt=Heading|To Heading]]</td>
| |
| <td width=75> </td>
| |
| <td width=75> </td> <!-- for Bottom -->
| |
| </tr>
| |
| </table> <!-- END Section Nav Buttons -->
| |
|
| |
| <table width=1000 bgcolor="lightcyan" cellpadding=2>
| |
| <tr valign="top">
| |
| <td width=10>[[image:BlueDot10x10.png|link=]]</td>
| |
| <td>Individual "non-spline" scenery objects that are not attached to track are often referred to in '''Trainz''' terminology as <span style="font-weight: 700; font-size: 15px;">Scenery Mesh Objects</span>.</td>
| |
| </tr>
| |
| </table>
| |
| <br>
| |
| <table width=1000 bgcolor=#000000 cellpadding=2>
| |
| <tr valign="top">
| |
| <td>
| |
| <table width=996 bgcolor=#ffe89a cellpadding=2>
| |
| <tr valign="middle">
| |
| <td width=45>[[image:PalettesIcon_S20.png|link=]]</td>
| |
| <td>If the <span style="font-weight: 700; font-size: 15px; color: white; background-color: #797979;"> Tool Options Palette </span> and <span style="font-weight: 700; font-size: 15px; color: white; background-color: #797979;"> Info Palette </span> are not visible on the screen then refer to [[image:PageLink.PNG|link=]] '''[[#Notes_Palettes|Notes: Palettes]]''' at the top of this document.
| |
| </td>
| |
| </tr>
| |
| </table>
| |
| </td>
| |
| </tr>
| |
| </table>
| |
| <br>
| |
| <table width=1000> <!-- BEGIN Section Nav Buttons -->
| |
| <tr valign="top">
| |
| <td width=629><span id="FA: Move Mesh"></span>
| |
| ===<span style="font-weight: 700; font-size: 17px; color: white; background-color: blue;"> Fine Adjustment: Move a Scenery Mesh Object </span>===
| |
| </td>
| |
| <td width=50> </td>
| |
| <td width=50> </td>
| |
| <td width=46>[[image:SkipMinorDown.png|link=#FA: Height Mesh|Down]][[image:SkipMinorBlank.png|link=]]</td> <!-- for Top and Minor Up/Down -->
| |
| <td width=75> </td>
| |
| <td width=75> </td>
| |
| <td width=75> </td> <!-- for Bottom -->
| |
| </tr>
| |
| </table> <!-- END Section Nav Buttons -->
| |
|
| |
| <table width=1000 bgcolor=#000000 cellpadding=2>
| |
| <tr valign="top">
| |
| <td>
| |
| <table width=996 bgcolor=#ffffff cellpadding=2>
| |
| <tr valign="top">
| |
| <td colspan=2>To move an object with the '''Fine Adjustment Tool''' choose one of the following:-</td>
| |
| </tr>
| |
| <tr>
| |
| <td colspan=2><span style="font-weight: 700; font-size: 15px;">Options:</span> </td>
| |
| </tr>
| |
| <tr valign="top">
| |
| <td width=25>[[image:Ablue.png|link=]]</td>
| |
| <td><span style="font-weight: 700; font-size: 15px; background-color: lightcyan;">Left Click and Drag</span> anywhere on the selected object (except on an '''Anchor''' line) to move it freely in any horizontal direction</td>
| |
| </tr>
| |
| <tr valign="top">
| |
| <td></td>
| |
| <td><span style="font-weight: 700; font-size: 15px;">OR</span></td>
| |
| </tr>
| |
| <tr valign="top">
| |
| <td>[[image:Bblue.png|link=]]</td>
| |
| <td><span style="font-weight: 700; font-size: 15px; background-color: lightcyan;">Left Click and Drag</span> on an Anchor line to move or rotate it in the direction of the line or arc</td>
| |
| </tr>
| |
| <tr>
| |
| <td colspan=2>These operations can also be performed on a group of selected objects. The 3D Anchor Frame will be on the last object added to the group.</td>
| |
| </tr>
| |
| </table>
| |
| </td>
| |
| </tr>
| |
| </table>
| |
| <br>
| |
| <span style="font-weight: 700; font-size: 15px;">Using the Anchors</span>
| |
| <br>
| |
| <table width=1000>
| |
| <tr valign="top">
| |
| <td width=400 align="center"><span style="font-weight: 700; font-size: 15px; color: white; background-color: red;"> Red </span> <span style="font-weight: 700; font-size: 15px; color: white; background-color: green;"> Green </span> and <span style="font-weight: 700; font-size: 15px; color: white; background-color: black;"> Black </span> horizontal Anchor movements<br>
| |
| [[image:FineAdjustXYMove_S20.png|link=|400px]]</td>
| |
| <td width=600>
| |
| <br>
| |
| <table bgcolor=#000000 cellpadding=2>
| |
| <tr valign="top">
| |
| <td>
| |
| <table bgcolor=#ffffff cellpadding=2>
| |
| <tr valign="top">
| |
| <td colspan=2><span style="font-weight: 700; font-size: 15px;">Steps:</span> To move a mesh object in a straight horizontal direction:-</td>
| |
| </tr>
| |
| <tr valign="top">
| |
| <td width=25>[[image:DotPoint1.JPG|link=]]</td>
| |
| <td>place the pointer anywhere on the <span style="font-weight: 700; font-size: 15px; color: white; background-color: red;"> Red </span> or <span style="font-weight: 700; font-size: 15px; color: white; background-color: green;"> Green </span> horizontal Anchor line</td>
| |
| </tr>
| |
| <tr valign="top">
| |
| <td>[[image:DotPoint2.JPG|link=]]</td>
| |
| <td><span style="font-weight: 700; font-size: 15px; background-color: lightcyan;"> Left Click and Drag </span> in either direction along the colored Anchor line</td>
| |
| </tr>
| |
| </table>
| |
| </td>
| |
| </tr>
| |
| </table>
| |
| <br>
| |
| The black dot <span style="font-weight: 700; font-size: 15px; background-color: black;">    </span> at the centre of the Anchor Frame is the '''Object Anchor'''.
| |
| <br>
| |
| <table bgcolor=#000000 cellpadding=2>
| |
| <tr valign="top">
| |
| <td>
| |
| <table bgcolor=#ffffff cellpadding=2>
| |
| <tr valign="top">
| |
| <td colspan=2><span style="font-weight: 700; font-size: 15px;">Steps:</span> To move a mesh object using the '''Object Anchor''':-</td>
| |
| </tr>
| |
| <tr valign="top">
| |
| <td width=25>[[image:DotPoint1.JPG|link=]]</td>
| |
| <td>place the pointer on the black '''Object Anchor'''</td>
| |
| </tr>
| |
| <tr valign="top">
| |
| <td>[[image:DotPoint2.JPG|link=]]</td>
| |
| <td><span style="font-weight: 700; font-size: 15px; background-color: lightcyan;"> Left Click and Drag </span> in any direction</td>
| |
| </tr>
| |
| </table>
| |
| </td>
| |
| </tr>
| |
| </table>
| |
| <br>
| |
| The same steps apply to the other Anchor Lines, straight and curved, as shown below.
| |
| </td>
| |
| </tr>
| |
| </table>
| |
| <table>
| |
| <tr valign="top">
| |
| <td width=250 align="center"><span style="font-weight: 700; font-size: 15px; color: white; background-color: blue;"> Blue </span> vertical Anchor movement<br>[[image:FineAdjustZMove_S20.png|link=]]</td>
| |
| <td width=20> </td>
| |
| <td width=250 align="center"><span style="font-weight: 700; font-size: 15px; color: white; background-color: green;"> Green </span> Anchor rotation<br>[[image:FineAdjustYawMove_S20.png|link=]]</td>
| |
| <td width=20> </td>
| |
| <td width=250 align="center"><span style="font-weight: 700; font-size: 15px; color: white; background-color: red;"> Red </span> Anchor rotation<br>[[image:FineAdjustPitchMove_S20.png|link=]]</td>
| |
| <td width=20> </td>
| |
| <td width=250 align="center"><span style="font-weight: 700; font-size: 15px; color: white; background-color: blue;"> Blue </span> Anchor rotation<br>[[image:FineAdjustRotateXYMove_S20.png|link=]]</td>
| |
| </tr>
| |
| </table>
| |
| <br>
| |
| <table width=1000 bgcolor=#000000 cellpadding=2>
| |
| <tr valign="top">
| |
| <td>
| |
| <table width=996 bgcolor=#ffffb0 cellpadding=2>
| |
| <tr valign="top">
| |
| <td width=25>[[image:NotePad.PNG|link=]]</td>
| |
| <td><span style="font-size: 17px; font-weight: 700;">Notes:</span><br>
| |
| ----</td>
| |
| </tr>
| |
| <tr valign="top">
| |
| <td>[[image:DotPoint.JPG|10px|link=]]</td>
| |
| <td>Not all objects will have <span style="font-weight: 700; font-size: 15px; color: white; background-color: red;"> Red </span> or <span style="font-weight: 700; font-size: 15px; color: white; background-color: green;"> Green </span> '''Rotational Anchors'''. Some objects will have no rotational anchors at all.</td>
| |
| </tr>
| |
| <tr valign="top">
| |
| <td>[[image:DotPoint.JPG|10px|link=]]</td>
| |
| <td>Objects can be restored to their original height and rotation settings by opening their '''Context Menu''' and choosing one of the following:-
| |
| <table>
| |
| <tr>
| |
| <td colspan=2><span style="font-weight: 700; font-size: 15px;">Options:</span></td>
| |
| </tr>
| |
| <tr valign="top">
| |
| <td width=25>[[image:Ablue.png|link=]]</td>
| |
| <td><span style="font-weight: 700; font-size: 15px; color: white; background-color: black;"> Reset Object Rotation </span> to cancel the rotation changes, <span style="font-weight: 700; font-size: 15px;">OR</span></td>
| |
| </tr>
| |
| <tr valign="top">
| |
| <td>[[image:Bblue.png|link=]]</td>
| |
| <td><span style="font-weight: 700; font-size: 15px; color: white; background-color: black;"> Settle on Ground </span> to cancel the height change</td>
| |
| </tr>
| |
| </table>
| |
| </td>
| |
| </tr>
| |
| <tr valign="top">
| |
| <td>[[image:DotPoint.JPG|10px|link=]]</td>
| |
| <td>The <span style="font-weight: 700; font-size: 15px; color: white; background-color: black;"> Randomise Object Rotation </span> option in the '''Context Menu''' only affects rotations around the vertical axis - the <span style="font-weight: 700; font-size: 15px; color: white; background-color: blue;"> Blue </span> '''Rotational Anchor'''.
| |
| </td>
| |
| </tr>
| |
| </table>
| |
| </td>
| |
| </tr>
| |
| </table>
| |
| <br>
| |
| <table width=1000> <!-- BEGIN Section Nav Buttons -->
| |
| <tr valign="top">
| |
| <td width=629><span id="FA: Height Mesh"></span>
| |
| ===<span style="font-weight: 700; font-size: 17px; color: white; background-color: blue;"> Fine Adjustment: Set the Height of a Scenery Mesh Object </span>===
| |
| </td>
| |
| <td width=50> </td>
| |
| <td width=50> </td>
| |
| <td width=46>[[image:SkipMinorDown.png|link=#FA: Context Mesh|Down]][[image:SkipMinorUp.png|link=#skip Fine Adjustment: Scenery Mesh Objects|Up]]</td> <!-- for Top and Minor Up/Down -->
| |
| <td width=75> </td>
| |
| <td width=75> </td>
| |
| <td width=75> </td> <!-- for Bottom -->
| |
| </tr>
| |
| </table> <!-- END Section Nav Buttons -->
| |
|
| |
| <table width=1000 bgcolor="lightcyan" cellpadding=2>
| |
| <tr valign="top">
| |
| <td width=10>[[image:BlueDot10x10.png|link=]]</td>
| |
| <td>'''Scenery Mesh objects''' can be raised above and lowered below the ground level.</td>
| |
| </tr>
| |
| </table>
| |
| <br>
| |
| <span style="Font-weight: 700; font-size: 15px;">Get the Height of a Scenery Mesh Object</span>
| |
| <br>
| |
| <table width=1000 bgcolor=#000000 cellpadding=2>
| |
| <tr valign="top">
| |
| <td>
| |
| <table bgcolor=#ffffe0 cellpadding=2>
| |
| <tr valign="top">
| |
| <td width=25>[[image:PencilTips.PNG|link=]]</td>
| |
| <td>You can copy the height of a '''selected''' scenery mesh object (e.g. a house) into the <span style="font-weight: 700; font-size: 15px; color: white; background-color: #797979;"> Tool Options Palette </span> <span style="font-weight: 700; font-size: 15px; color: gold; background-color: black;"> Height </span> setting. Once it has been copied it can be applied to any other object.</td>
| |
| </tr>
| |
| <tr valign="top">
| |
| <td> </td>
| |
| <td>
| |
| <table bgcolor=#ffffff>
| |
| <tr valign="top">
| |
| <td colspan=2><span style="font-weight: 700; font-size: 15px;">Steps:</span> To copy the height of any '''selected''' object into the <span style="font-weight: 700; font-size: 15px; color: gold; background-color: black;"> Height </span> setting:-</td>
| |
| </tr>
| |
| <tr valign="top">
| |
| <td width=20>[[image:DotPoint1.JPG|link=]]</td>
| |
| <td>in the <span style="font-weight: 700; font-size: 15px; color: white; background-color: #797979;"> Tool Options Palette </span> <span style="font-weight: 700; font-size: 15px; background-color: lightcyan;">Right Click</span> inside the <span style="font-weight: 700; font-size: 15px; color: gold; background-color: black;"> Height </span> setting</td>
| |
| </tr>
| |
| <tr valign="top">
| |
| <td>[[image:DotPoint2.JPG|link=]]</td>
| |
| <td>select the <span style="font-weight: 700; font-size: 15px; color: white; background-color: black;"> Get Height from Selection </span> option</td>
| |
| </tr>
| |
| </table>
| |
| </td>
| |
| </tr>
| |
| <tr valign="top">
| |
| <td> </td>
| |
| <td>
| |
| <table>
| |
| <tr valign="top">
| |
| <td>You can check the height of any selected object or endpoint using the <span style="font-weight: 700; font-size: 15px; color: white; background-color: #797979;"> Info Palette </span>. The height is the last value in the '''Pos:''' (Position) data set.</td>
| |
| </tr>
| |
| <tr valign="top">
| |
| <td>[[image:InfoPaletteShowHeight_S20.png|link=]]</td>
| |
| </tr>
| |
| </table>
| |
| </td>
| |
| </tr>
| |
| </table>
| |
| </td>
| |
| </tr>
| |
| </table>
| |
| <br>
| |
| <span style="Font-weight: 700; font-size: 15px;">Set the Height of a Scenery Mesh Object</span>
| |
| <br>
| |
| <table width=1000 bgcolor=#000000 cellpadding=2>
| |
| <tr valign="top">
| |
| <td>
| |
| <table width=996 bgcolor=#ffffff cellpadding=2>
| |
| <tr>
| |
| <td colspan=2>To set the '''height''' of a '''selected''' scenery mesh object, choose one of the following:-<br>
| |
| <span style="font-weight: 700; font-size: 15px;">Options:</span></td>
| |
| </tr>
| |
| <tr valign="top">
| |
| <td>
| |
| <table width=600>
| |
| <tr valign="top">
| |
| <td width=25>[[image:Ablue.png|link=]]</td>
| |
| <td><span style="font-weight: 700; font-size: 15px; background-color: lightcyan;">Left Click and Drag</span> '''Up/Down''' on the <span style="font-weight: 700; font-size: 15px; color: white; background-color: blue;"> Blue </span> vertical '''Anchor''' line. <span style="font-weight: 700; background-color: yellow;"> Movement is restricted to the length of the Anchor line only </span>, <span style="font-weight: 700; font-size: 15px;">OR</span></td>
| |
| </tr>
| |
| <tr valign="top">
| |
| <td>[[image:Bblue.png|link=]]</td>
| |
| <td>in the <span style="font-weight: 700; font-size: 15px; color: white; background-color: #797979;"> Tool Options Palette </span> <span style="font-weight: 700; font-size: 15px; background-color: lightcyan;"> Left Click </span> inside the <span style="font-size: 15px; font-weight: 700; color: gold; background-color: black;"> Height </span> setting and enter a new value (or keep the existing value) then press the <span style="font-weight: 700; font-size: 15px; color: white; background-color: black;"> Enter </span> key. This works even if the <span style="font-size: 15px; font-weight: 700; color: gold; background-color: black;"> Height </span> icon is not coloured <span style="font-weight: 700; font-size: 15px; color: gold; background-color: black;"> Gold </span>. <span style="font-size: 15px; font-weight: 700;">OR</span></td>
| |
| </tr>
| |
| <tr valign="top">
| |
| <td>[[image:Cblue.png|link=]]</td>
| |
| <td>in the <span style="font-weight: 700; font-size: 15px; color: white; background-color: #797979;"> Tool Options Palette </span> <span style="font-weight: 700; font-size: 15px; background-color: lightcyan;"> Left Click </span> inside the <span style="font-size: 15px; font-weight: 700; color: gold; background-color: black;"> Height </span> setting and enter a new value (or keep the existing value) then <span style="font-weight: 700; font-size: 15px; background-color: lightcyan;">Right Click</span> in the setting box and select the <span style="font-weight: 700; font-size: 15px; color: white; background-color: black;"> Set Height to Selection </span> option, <span style="font-weight: 700; font-size: 15px;">OR</span></td>
| |
| </tr>
| |
| <tr valign="top">
| |
| <td>[[image:Dblue.png|link=]]</td>
| |
| <td>select the <span style="font-size: 15px; font-weight: 700; color: white; background-color: black;"> Apply Height </span> option from the objects '''Context Menu''' (<span style="font-weight: 700; font-size: 15px; background-color: lightcyan;"> Left Click </span> on the objects '''Context Icon''' or press the <span style="font-weight: 700; font-size: 15px; color: white; background-color: black;"> T </span> key) to apply an existing height value, <span style="font-size: 15px; font-weight: 700;">OR</span></td>
| |
| </tr>
| |
| <tr valign="top">
| |
| <td>[[image:Eblue.png|link=]]</td>
| |
| <td>in the <span style="font-weight: 700; font-size: 15px; color: white; background-color: #797979;"> Info Palette </span> enter a value in the objects <span style="font-size: 15px; font-weight: 700; color: white; background-color: black;"> z </span> (height) setting or <span style="font-weight: 700; font-size: 15px; background-color: lightcyan;">Left Click and Drag</span> '''Up''' or '''Down''' on the double arrowheads to its right. This can be used to set the height to '''cm''' accuracy (see [[image:PageLink.PNG|link=]] '''[[#The Info Palette|The Info Palette]]''' below).</td>
| |
| </tr>
| |
| </table>
| |
| </td>
| |
| <td>
| |
| <table bgcolor=#ffffb0 cellpadding=2>
| |
| <tr valign="top">
| |
| <td width=25>[[image:NotePad.PNG|link=]]</td>
| |
| <td ><span style="font-size: 17px; font-weight: 700;">Notes:'''</span><br>
| |
| ----</td>
| |
| </tr>
| |
| <tr valign="top">
| |
| <td>[[image:DotPoint.JPG|10px|link=]]</td>
| |
| <td>If multiple objects have been selected then the height of the '''context object''', the one with the '''Context Icon''', will have its height set to the new value.</td>
| |
| </tr>
| |
| <tr valign="top">
| |
| <td>[[image:DotPoint.JPG|10px|link=]]</td>
| |
| <td>All other selected objects will have their heights adjusted to maintain their height relative to that object. For example: If another selected object is 2m below the '''context object''' then its adjusted height will always remain 2m below the '''context object'''</td>
| |
| </tr>
| |
| </table>
| |
| </td>
| |
| </tr>
| |
| </table>
| |
| </td>
| |
| </tr>
| |
| </table>
| |
| <br>
| |
| <table width=1000> <!-- BEGIN Section Nav Buttons -->
| |
| <tr valign="top">
| |
| <td width=629><span id="FA: Context Mesh"></span>
| |
| ===<span style="font-weight: 700; font-size: 17px; color: white; background-color: blue;"> Fine Adjustment: Scenery Mesh Object Context Menu </span>===
| |
| </td>
| |
| <td width=50> </td>
| |
| <td width=50> </td>
| |
| <td width=46>[[image:SkipMinorDown.png|link=#skip Fine Adjustment: Track Objects|Down]][[image:SkipMinorUp.png|link=#FA: Height Mesh|Up]]</td> <!-- for Top and Minor Up/Down -->
| |
| <td width=75> </td>
| |
| <td width=75> </td>
| |
| <td width=75> </td> <!-- for Bottom -->
| |
| </tr>
| |
| </table> <!-- END Section Nav Buttons -->
| |
|
| |
| <table width=1000>
| |
| <tr>
| |
| <td>A selected scenery mesh object, or a group of selected scenery mesh objects, will have a '''Context Icon''' that opens a '''Context Menu'''. <span style="font-weight: 700; font-size: 15px; background-color: lightcyan;"> Left Click </span> on its icon or press the <span style="font-weight: 700; font-size: 15px; color: white; background-color: black;"> T </span> key. The icon design will vary between object types.</td>
| |
| </tr>
| |
| </table>
| |
| <br>
| |
| <table width=1000>
| |
| <tr valign="top">
| |
| <td width=220>[[image:ContextMenuMeshObject_S20.png|link=]]</td>
| |
| <td width=780>
| |
| <table width=780 bgcolor=#000000>
| |
| <tr valign="top">
| |
| <td>
| |
| <table width=776 bgcolor=#ffffff>
| |
| <tr valign="top">
| |
| <td>
| |
| <table>
| |
| <tr valign="middle">
| |
| <td width=35>[[image:Information.png|35px|link=]]</td>
| |
| <td><span style="font-weight: 700; font-size: 17px;">Scenery Mesh Object Context Menu Options</span>
| |
| </td>
| |
| </tr>
| |
| </table>
| |
| </td>
| |
| </tr>
| |
| <tr valign="top">
| |
| <td>
| |
| <table>
| |
| <tr valign="top">
| |
| <td><span style="font-weight: 700; font-size: 15px; color: white; background-color: black;"> Cut </span></td>
| |
| <td>remove the selected object or objects from the route and move them into the '''Scrapbook'''</td>
| |
| </tr>
| |
| </table>
| |
| </td>
| |
| </tr>
| |
| <tr valign="top">
| |
| <td>
| |
| <table>
| |
| <tr valign="top">
| |
| <td><span style="font-weight: 700; font-size: 15px; color: white; background-color: black;"> Copy </span></td>
| |
| <td>copy the selected object or objects and place them into the '''Scrapbook'''</td>
| |
| </tr>
| |
| </table>
| |
| </td>
| |
| </tr>
| |
| <tr valign="top">
| |
| <td>
| |
| <table>
| |
| <tr valign="top">
| |
| <td><span style="font-weight: 700; font-size: 15px; color: white; background-color: black;"> Paste </span></td>
| |
| <td>paste the contents of the current '''Scrapbook''' at the cursor (focus) point<br>
| |
| <table bgcolor=#ffffb0 cellpadding=2>
| |
| <tr valign="top">
| |
| <td width=25>[[image:NotePad.PNG|link=]]</td>
| |
| <td>When pasted from a scrapbook the objects will be surrounded by a '''Marquee Selection Area''' that, depending on the settings in the [[image:PageLink.PNG|link=]] '''[[#Scrapbook Filters|Scrapbook Filters]]''', may add to or replace all other objects, splines, textures, ground terrain and effect layers in that area</td>
| |
| </tr>
| |
| </table>
| |
| </td>
| |
| </tr>
| |
| </table>
| |
| </td>
| |
| </tr>
| |
| <tr valign="top">
| |
| <td>
| |
| <table>
| |
| <tr valign="top">
| |
| <td><span style="font-weight: 700; font-size: 15px; color: white; background-color: black;"> Delete </span></td>
| |
| <td>delete the selected objects. It has the same effect as pressing the <span style="font-weight: 700; font-size: 15px; color: white; background-color: black;"> Delete </span> key</td>
| |
| </tr>
| |
| </table>
| |
| </td>
| |
| </tr>
| |
| <tr valign="top">
| |
| <td>
| |
| <table>
| |
| <tr valign="top">
| |
| <td><span style="font-weight: 700; font-size: 15px; color: white; background-color: black;"> Replace Object with Selected Asset </span></td>
| |
| <td>the '''selected''' object will be replaced with the asset currently selected in the <span style="font-weight: 700; font-size: 15px; color: white; background-color: #797979;"> Assets Palette </span>. If no object has been selected in the <span style="font-weight: 700; font-size: 15px; color: white; background-color: #797979;"> Assets Palette </span> or it is the wrong type (e.g. a scenery spline instead of a mesh object) then this option will be greyed out</td>
| |
| </tr>
| |
| </table>
| |
| </td>
| |
| </tr>
| |
| <tr valign="top">
| |
| <td>
| |
| <table>
| |
| <tr valign="top">
| |
| <td><span style="font-weight: 700; font-size: 15px; color: white; background-color: black;"> Paint Under Selected </span></td>
| |
| <td>the texture selected in the <span style="font-weight: 700; font-size: 15px; color: white; background-color: #797979;"> Assets Palette </span> will be painted under the '''selected''' objects. The <span style="font-weight: 700; font-size: 15px; color: white; background-color: #797979;"> Tool Options Palette </span> brush settings (<span style="font-weight: 700; font-size: 15px; color: gold; background-color: black;"> Radius </span> and <span style="font-weight: 700; font-size: 15px; color: gold; background-color: black;"> Sensitivity </span>) will control how the texture is applied. If no ground texture has been selected in the <span style="font-weight: 700; font-size: 15px; color: white; background-color: #797979;"> Assets Palette </span> then this option will be greyed out</td>
| |
| </tr>
| |
| </table>
| |
| </td>
| |
| </tr>
| |
| <tr valign="top">
| |
| <td>
| |
| <table>
| |
| <tr valign="top">
| |
| <td><span style="font-weight: 700; font-size: 15px; color: white; background-color: black;"> Smooth Ground Under Selected </span></td>
| |
| <td>smooths the height of the ground under the selected object to match the set height of the object. The size of the area affected will depend on which has the greater value: the width of the object <span style="font-weight: 700; font-size: 15px;">OR</span> the <span style="font-weight: 700; font-size: 15px; color: white; background-color: #797979;"> Tool Options Palette </span> <span style="font-weight: 700; font-size: 15px; color: gold; background-color: black;"> Radius </span> setting. If multiple objects at different heights have been selected then the ground height will be set to match, as far as possible, the heights of each object</td>
| |
| </tr>
| |
| </table>
| |
| </td>
| |
| </tr>
| |
| <tr valign="top">
| |
| <td>
| |
| <table>
| |
| <tr valign="top">
| |
| <td><span style="font-weight: 700; font-size: 15px; color: white; background-color: black;"> Settle on Ground </span></td>
| |
| <td>sets the height of the objects to match the height of the terrain beneath them ("drops them back to earth")</td>
| |
| </tr>
| |
| </table>
| |
| </td>
| |
| </tr>
| |
| <tr valign="top">
| |
| <td>
| |
| <table>
| |
| <tr valign="top">
| |
| <td><span style="font-weight: 700; font-size: 15px; color: white; background-color: black;"> Apply Height </span></td>
| |
| <td>sets the height of the '''selected object''' to the value in the <span style="font-weight: 700; font-size: 15px; color: white; background-color: #797979;"> Tool Options Palette </span> <span style="font-weight: 700; font-size: 15px; color: gold; background-color: black;"> Height </span> setting. Where multiple objects have been selected the '''context object''', the one with the '''Context Icon''', will have its height set to the <span style="font-weight: 700; font-size: 15px; color: gold; background-color: black;"> Height </span> value and the other '''selected objects''' will have their heights adjusted up or down by the same amount</td>
| |
| </tr>
| |
| </table>
| |
| </td>
| |
| </tr>
| |
| <tr valign="top">
| |
| <td>
| |
| <table>
| |
| <tr valign="top">
| |
| <td><span style="font-weight: 700; font-size: 15px; color: white; background-color: black;"> Reset Object Rotation </span></td>
| |
| <td>resets the rotation angle of the '''selected''' objects to their default values</td>
| |
| </tr>
| |
| </table>
| |
| </td>
| |
| </tr>
| |
| <tr valign="top">
| |
| <td>
| |
| <table>
| |
| <tr valign="top">
| |
| <td><span style="font-weight: 700; font-size: 15px; color: white; background-color: black;"> Randomise Object Rotation </span></td>
| |
| <td>applies a random rotation angle to each '''selected''' object around its vertical axis</td>
| |
| </tr>
| |
| </table>
| |
| </td>
| |
| </tr>
| |
| <tr valign="top">
| |
| <td>
| |
| <table>
| |
| <tr valign="top">
| |
| <td><span style="font-weight: 700; font-size: 15px; color: white; background-color: black;"> Select in Assets Palette </span></td>
| |
| <td>sets the <span style="font-weight: 700; font-size: 15px; color: white; background-color: #797979;"> Filter Palette </span> to <span style="font-weight: 700; font-size: 15px; color: white; background-color: black;"> All Content </span> and highlights the selected object in the <span style="font-weight: 700; font-size: 15px; color: white; background-color: #797979;"> Assets Palette </span></td>
| |
| </tr>
| |
| </table>
| |
| </td>
| |
| </tr>
| |
| <tr valign="top">
| |
| <td>
| |
| <table>
| |
| <tr valign="top">
| |
| <td><span style="font-weight: 700; font-size: 15px; color: white; background-color: black;"> Select in Filter Palette </span></td>
| |
| <td>sets the <span style="font-weight: 700; font-size: 15px; color: white; background-color: #797979;"> Filter Palette </span> to <span style="font-weight: 700; font-size: 15px; color: white; background-color: black;"> All Content </span> and highlights the selected object in the <span style="font-weight: 700; font-size: 15px; color: white; background-color: #797979;"> Filter Palette </span></td>
| |
| </tr>
| |
| </table>
| |
| </td>
| |
| </tr>
| |
| <tr valign="top">
| |
| <td>
| |
| <table>
| |
| <tr valign="top">
| |
| <td><span style="font-weight: 700; font-size: 15px; color: white; background-color: black;"> Edit Details </span></td>
| |
| <td>opens the '''Properties''' window of the selected object. '''Note:''' to enter or edit an objects name property use the <span style="font-weight: 700; font-size: 15px; color: white; background-color: #797979;"> Info Palette </span></td>
| |
| </tr>
| |
| </table>
| |
| </td>
| |
| </tr>
| |
| </table>
| |
| </td>
| |
| </tr>
| |
| </table>
| |
| </td>
| |
| </tr>
| |
| </table>
| |
| <br>
| |
| <table width=1000> <!-- BEGIN Section Nav Buttons -->
| |
| <tr valign="top">
| |
| <td width=629><span id="skip Fine Adjustment: Track Objects"></span>
| |
| =='''Fine Adjustment: Track Objects'''==
| |
| </td>
| |
| <td width=50>[[image:SkipDown.png|link=#skip Fine Adjustment: Spline Objects|Skip Down)]]</td>
| |
| <td width=50>[[image:SkipUp.png|link=#skip Fine Adjustment: Scenery Mesh Objects|Skip Up]]</td>
| |
| <td width=46>[[image:SkipMinorDown.png|link=#FA: Height TObject|Down]][[image:SkipMinorUp.png|link=#FA: Context Mesh|Up]]</td> <!-- for Top and Minor Up/Down -->
| |
| <td width=75>[[image:HeadingUp.png|link=#stepFineAdjustment|alt=Heading|To Heading]]</td>
| |
| <td width=75> </td>
| |
| <td width=75> </td> <!-- for Bottom -->
| |
| </tr>
| |
| </table> <!-- END Section Nav Buttons -->
| |
|
| |
| <table width=1000 bgcolor="lightcyan" cellpadding=2>
| |
| <tr valign="top">
| |
| <td width=10>[[image:BlueDot10x10.png|link=]]</td>
| |
| <td>'''Track Objects''' (signals, switches, speed signs, markers, etc) are always attached to an existing track</td>
| |
| </tr>
| |
| <tr valign="top">
| |
| <td>[[image:BlueDot10x10.png|link=]]</td>
| |
| <td>In '''Surveyor 2.0''' they can be moved left, right, above and below the track</td>
| |
| </tr>
| |
| </table>
| |
| <br>
| |
| <table width=1000 bgcolor=#000000 cellpadding=2>
| |
| <tr valign="top">
| |
| <td>
| |
| <table width=996 bgcolor=#ffe89a cellpadding=2>
| |
| <tr valign="middle">
| |
| <td width=45>[[image:PalettesIcon_S20.png|link=]]</td>
| |
| <td>If the <span style="font-weight: 700; font-size: 15px; color: white; background-color: #797979;"> Tool Options Palette </span> and <span style="font-weight: 700; font-size: 15px; color: white; background-color: #797979;"> Info Palette </span> are not visible on the screen then refer to [[image:PageLink.PNG|link=]] '''[[#Notes_Palettes|Notes: Palettes]]''' at the top of this document.
| |
| </td>
| |
| </tr>
| |
| </table>
| |
| </td>
| |
| </tr>
| |
| </table>
| |
| <br>
| |
| <table width=1000> <!-- BEGIN Section Nav Buttons -->
| |
| <tr valign="top">
| |
| <td width=629><span id="FA: Move TObject"></span>
| |
| ===<span style="font-weight: 700; font-size: 17px; color: white; background-color: blue;"> Fine Adjustment: Move a Track Object </span>===
| |
| </td>
| |
| <td width=50> </td>
| |
| <td width=50> </td>
| |
| <td width=46>[[image:SkipMinorDown.png|link=#FA: Height TObject|Down]][[image:SkipMinorBlank.png|link=]]</td> <!-- for Top and Minor Up/Down -->
| |
| <td width=75> </td>
| |
| <td width=75> </td>
| |
| <td width=75> </td> <!-- for Bottom -->
| |
| </tr>
| |
| </table> <!-- END Section Nav Buttons -->
| |
|
| |
| <table width=1000 bgcolor="lightcyan" cellpadding=2>
| |
| <tr valign="top">
| |
| <td width=10>[[image:BlueDot10x10.png|link=]]</td>
| |
| <td>'''Track objects''' can be dragged to new positions along and beside the track or to a different track</td>
| |
| </tr>
| |
| </table>
| |
|
| |
| <table width=1000>
| |
| <tr valign="top">
| |
| <td width=400>[[image:FineAdjustTrackObject_S20.png|link=]]</td>
| |
| <td>
| |
| <table bgcolor=#000000 width=600 cellpadding=2>
| |
| <tr valign="top">
| |
| <td>
| |
| <table bgcolor=#ffffff width=596 cellpadding=2>
| |
| <tr valign="top">
| |
| <td colspan=2>To move a selected track object horizontally, choose one of the following:-</td>
| |
| </tr>
| |
| <tr>
| |
| <td colspan=2><span style="font-weight: 700; font-size: 15px;">Options:</span> </td>
| |
| </tr>
| |
| <tr valign="top">
| |
| <td width=25>[[image:Ablue.png|link=]]</td>
| |
| <td>For movements '''along the track''' only - <span style="font-weight: 700; font-size: 15px; background-color: lightcyan;">Left Click and Drag</span>:-
| |
| <table>
| |
| <tr valign="top">
| |
| <td width=10>[[image:DotPoint.JPG|10px|link=]]</td>
| |
| <td>the objects '''Anchor Point''' (the yellow dot in the centre of the track), <span style="font-weight: 700; font-size: 15px;">OR</span></td>
| |
| </tr>
| |
| <tr valign="top">
| |
| <td>[[image:DotPoint.JPG|10px|link=]]</td>
| |
| <td>on its <span style="font-weight: 700; font-size: 15px; color: white; background-color: green;"> Green </span> horizontal '''Anchor''' line (movement is restricted to the Anchor line)</td>
| |
| </tr>
| |
| </table>
| |
| </td>
| |
| </tr>
| |
| <tr valign="top">
| |
| <td width=20>[[image:Bblue.png|link=]]</td>
| |
| <td>For movements '''left or right''' of the track - <span style="font-weight: 700; font-size: 15px; background-color: lightcyan;">Left Click and Drag</span><br>
| |
| <table>
| |
| <tr valign="top">
| |
| <td width=10>[[image:DotPoint.JPG|10px|link=]]</td>
| |
| <td>on the <span style="font-weight: 700; font-size: 15px; color: white; background-color: red;"> Red </span> horizontal '''Anchor''' line (movement is restricted to the Anchor line), <span style="font-weight: 700; font-size: 15px;">OR</span></td>
| |
| </tr>
| |
| <tr valign="top">
| |
| <td width=10>[[image:DotPoint.JPG|10px|link=]]</td>
| |
| <td>on the '''Object Anchor''' (the '''black dot''') to get unrestricted horizontal movement including to a different track</td>
| |
| </tr>
| |
| </table>
| |
| </td>
| |
| </tr>
| |
| <tr valign="top">
| |
| <td colspan=2>
| |
| <table bgcolor=#ffffb0 cellpadding=2>
| |
| <tr valign="top">
| |
| <td width=25>[[image:NotePad.PNG|link=]]</td>
| |
| <td>For most track objects the '''Rotational Anchors''', if they are present, will have no effect</td>
| |
| </tr>
| |
| </table>
| |
| </td>
| |
| </tr>
| |
| </table>
| |
| </td>
| |
| </tr>
| |
| </table>
| |
| </td>
| |
| </tr>
| |
| <tr valign="top">
| |
| <td>[[image:FineAdjustTrackObjectMoveH_S20.png|link=]]</td>
| |
| <td>
| |
| Track objects that have been moved away from or closer to the track will still function normally and can be moved along the track without reversing the change. Their position can be reset to normal by selecting the <span style="font-weight: 700; font-size: 15px; color: white; background-color: black;"> Reattach to Track </span> option from the objects '''Context Menu'''<br>
| |
| <table bgcolor=#000000 cellpadding=2>
| |
| <tr valign="top">
| |
| <td>
| |
| <table bgcolor=#ffffe0 cellpadding=2>
| |
| <tr valign="top">
| |
| <td width=25>[[image:PencilTips.PNG|link=]]</td>
| |
| <td>You can select and move multiple track objects at the same time. Use <span style="font-weight: 700; font-size: 15px;"><span style="color: white; background-color: black;"> Shift </span> + <span style="background-color: lightcyan;"> Left Click </span></span> when selecting each object then drag them all to their new positions. The last selected object will have the '''Context Icon'''.<br><br>
| |
| However, if you have moved the objects off the track (i.e. to the left or right of the track) then using the <span style="font-weight: 700; font-size: 15px; color: white; background-color: black;"> Reattach to Track </span> option may lead to some objects attaching themselves to a closer track than the one intended.</td>
| |
| </tr>
| |
| </table>
| |
| </td>
| |
| </tr>
| |
| </table>
| |
| </td>
| |
| </tr>
| |
| </table>
| |
| <br>
| |
| <table bgcolor=#000000 width=800 cellpadding=2>
| |
| <tr valign="top">
| |
| <td>
| |
| <table bgcolor=#ffffe0 width=796 cellpadding=2>
| |
| <tr valign="top">
| |
| <td width=25>[[image:PencilTips.PNG|link=]]</td><td colspan=2>Situations where it is useful to be able to move a track object away from the track include:-</td>
| |
| </tr>
| |
| <tr valign="top">
| |
| <td width=10>[[image:DotPoint.JPG|10px|link=]]</td>
| |
| <td>placing '''Track Marks''' and '''Triggers''' above (see the next section) or beside the track so that they are not hidden by consists parked on top of them</td>
| |
| </tr>
| |
| <tr valign="top">
| |
| <td>[[image:DotPoint.JPG|10px|link=]]</td>
| |
| <td>repositioning switches, signals, track signs closer to or further away from the track - particularly useful if the track object was originally created for a different gauge track</td>
| |
| </tr>
| |
| </table>
| |
| </td>
| |
| </tr>
| |
| </table>
| |
| <br>
| |
| <table width=1000> <!-- BEGIN Section Nav Buttons -->
| |
| <tr valign="top">
| |
| <td width=629><span id="FA: Height TObject"></span>
| |
| ===<span style="font-weight: 700; font-size: 17px; color: white; background-color: blue;"> Fine Adjustment: Set the Height of a Track Object </span>===
| |
| </td>
| |
| <td width=50> </td>
| |
| <td width=50> </td>
| |
| <td width=46>[[image:SkipMinorDown.png|link=#FA: Trigger TObject|Down]][[image:SkipMinorUp.png|link=#skip Fine Adjustment: Track Objects|Up]]</td> <!-- for Top and Minor Up/Down -->
| |
| <td width=75> </td>
| |
| <td width=75> </td>
| |
| <td width=75> </td> <!-- for Bottom -->
| |
| </tr>
| |
| </table> <!-- END Section Nav Buttons -->
| |
|
| |
| <table width=1000 bgcolor="lightcyan" cellpadding=2>
| |
| <tr valign="top">
| |
| <td width=10>[[image:BlueDot10x10.png|link=]]</td>
| |
| <td>'''Track objects''' can be raised above and lowered below the track level.</td>
| |
| </tr>
| |
| </table>
| |
| <br>
| |
| <span style="Font-weight: 700; font-size: 15px;">Get the Height of a Track Object</span>
| |
| <br>
| |
| <table width=1000 bgcolor=#000000 cellpadding=2>
| |
| <tr valign="top">
| |
| <td>
| |
| <table bgcolor=#ffffe0 cellpadding=2>
| |
| <tr valign="top">
| |
| <td width=25>[[image:PencilTips.PNG|link=]]</td>
| |
| <td>You can copy the height of a '''selected''' track mesh object (e.g. a signal) into the <span style="font-weight: 700; font-size: 15px; color: white; background-color: #797979;"> Tool Options Palette </span> <span style="font-weight: 700; font-size: 15px; color: gold; background-color: black;"> Height </span> setting. Once it has been copied it can be applied to any other object.</td>
| |
| </tr>
| |
| <tr valign="top">
| |
| <td> </td>
| |
| <td>
| |
| <table bgcolor=#ffffff>
| |
| <tr valign="top">
| |
| <td colspan=2><span style="font-weight: 700; font-size: 15px;">Steps:</span> To copy the height of any '''selected''' object into the <span style="font-weight: 700; font-size: 15px; color: gold; background-color: black;"> Height </span> setting:-</td>
| |
| </tr>
| |
| <tr valign="top">
| |
| <td width=20>[[image:DotPoint1.JPG|link=]]</td>
| |
| <td>in the <span style="font-weight: 700; font-size: 15px; color: white; background-color: #797979;"> Tool Options Palette </span> <span style="font-weight: 700; font-size: 15px; background-color: lightcyan;">Right Click</span> inside the <span style="font-weight: 700; font-size: 15px; color: gold; background-color: black;"> Height </span> setting</td>
| |
| </tr>
| |
| <tr valign="top">
| |
| <td>[[image:DotPoint2.JPG|link=]]</td>
| |
| <td>select the <span style="font-weight: 700; font-size: 15px; color: white; background-color: black;"> Get Height from Selection </span> option</td>
| |
| </tr>
| |
| </table>
| |
| </td>
| |
| </tr>
| |
| </table>
| |
| </td>
| |
| </tr>
| |
| </table>
| |
| <br>
| |
| <span style="Font-weight: 700; font-size: 15px;">Set the Height of a Track Object</span>
| |
| <br>
| |
| <table width=1000>
| |
| <tr valign="top">
| |
| <td width=400>[[image:FineAdjustTrackObjectMoveH_S20.png|link=]]<br>
| |
| '''Throw Lever''' track object level with track<br>
| |
| [[image:FineAdjustTrackObjectMoveHV_S20.png|link=]]<br>
| |
| After being moved vertically</td>
| |
| <td>
| |
| <table bgcolor=#000000 width=600 cellpadding=2>
| |
| <tr valign="top">
| |
| <td>
| |
| <table bgcolor=#ffffff width=596 cellpadding=2>
| |
| <tr valign="top">
| |
| <td colspan=2>To set the '''height''' of a '''selected''' track object, choose one of the following:-<br>
| |
| <span style="font-weight: 700; font-size: 15px;">Options:</span></td>
| |
| </tr>
| |
| <tr valign="top">
| |
| <td width=25>[[image:Ablue.png|link=]]</td>
| |
| <td><span style="font-weight: 700; font-size: 15px; background-color: lightcyan;">Left Click and Drag</span> '''Up/Down''' on the <span style="font-weight: 700; font-size: 15px; color: white; background-color: blue;"> Blue </span> vertical '''Anchor''' line. <span style="font-weight: 700; background-color: yellow;"> Movement is restricted to the length of the Anchor line only </span>, <span style="font-weight: 700; font-size: 15px;">OR</span></td>
| |
| </tr>
| |
| <tr valign="top">
| |
| <td>[[image:Bblue.png|link=]]</td>
| |
| <td>in the <span style="font-weight: 700; font-size: 15px; color: white; background-color: #797979;"> Tool Options Palette </span> <span style="font-size: 15px; font-weight: 700; color: gold; background-color: black;"> Height </span> setting, enter a value followed by the <span style="font-weight: 700; font-size: 15px; color: white; background-color: black;"> Enter </span> key <span style="font-size: 15px; font-weight: 700;">OR</span></td>
| |
| </tr>
| |
| <tr valign="top">
| |
| <td>[[image:Cblue.png|link=]]</td>
| |
| <td>in the <span style="font-weight: 700; font-size: 15px; color: white; background-color: #797979;"> Tool Options Palette </span> <span style="font-size: 15px; font-weight: 700; color: gold; background-color: black;"> Height </span> setting, enter a value then <span style="font-weight: 700; font-size: 15px; background-color: lightcyan;">Right Click</span> and select <span style="font-weight: 700; font-size: 15px; color: white; background-color: black;"> Set Height to Selection </span> <span style="font-size: 15px; font-weight: 700;">OR</span></td>
| |
| </tr>
| |
| <tr valign="top">
| |
| <td>[[image:Dblue.png|link=]]</td>
| |
| <td>from the objects '''Context Menu''' select the <span style="font-size: 15px; font-weight: 700; color: white; background-color: black;"> Apply Height </span> option to apply an existing height setting, <span style="font-size: 15px; font-weight: 700;">OR</span></td>
| |
| </tr>
| |
| <tr valign="top">
| |
| <td>[[image:Eblue.png|link=]]</td>
| |
| <td>in the <span style="font-weight: 700; font-size: 15px; color: white; background-color: #797979;"> Info Palette </span> enter a value in the objects <span style="font-size: 15px; font-weight: 700; color: white; background-color: black;"> z </span> (height) setting or <span style="font-weight: 700; font-size: 15px; background-color: lightcyan;">Left Click and Drag</span> '''Up''' or '''Down''' on the double arrowheads to its right. This can be used to set the height to '''cm''' accuracy (see [[image:PageLink.PNG|link=]] '''[[#The Info Palette|The Info Palette]]''' below).</td>
| |
| </tr>
| |
| </table>
| |
| </td>
| |
| </tr>
| |
| </table>
| |
| <br>
| |
| <table width=600 bgcolor=#000000 cellpadding=2>
| |
| <tr valign="top">
| |
| <td>
| |
| <table width=596 bgcolor=#ffffe0 cellpadding=2>
| |
| <tr valign="top">
| |
| <td width=25>[[image:PencilTips.PNG|link=]]</td><td>A situation where it might be useful to raise a signal above the track level would be to place it higher up on the wall of a cutting</td>
| |
| </tr>
| |
| </table>
| |
| </td>
| |
| </tr>
| |
| </table>
| |
| <br>
| |
| Track objects that have been "height adjusted" will still function normally and can be moved along the track without reversing the height change. The height can be reset to normal by selecting the <span style="font-weight: 700; font-size: 15px; color: white; background-color: black;"> Reattach to Track </span> option from the objects '''Context Menu'''</td>
| |
| </tr>
| |
| <tr valign="top">
| |
| <td colspan=2>
| |
| <br>
| |
| <table bgcolor=#000000 cellpadding=2>
| |
| <tr valign="top">
| |
| <td>
| |
| <table bgcolor=#ffffb0 cellpadding=2>
| |
| <tr valign="top">
| |
| <td width=25>[[image:NotePad.PNG|link=]]</td>
| |
| <td>For most track objects the '''Rotational Anchors''', if they are present, will have no effect</td>
| |
| </tr>
| |
| </table>
| |
| </td>
| |
| </tr>
| |
| </table>
| |
| </td>
| |
| </tr>
| |
| </table>
| |
| <br>
| |
| <table width=1000> <!-- BEGIN Section Nav Buttons -->
| |
| <tr valign="top">
| |
| <td width=629><span id="FA: Trigger TObject"></span>
| |
| ===<span style="font-weight: 700; font-size: 17px; color: white; background-color: blue;"> Fine Adjustment: Set the Trigger Radius of a Track Object </span>===
| |
| </td>
| |
| <td width=50> </td>
| |
| <td width=50> </td>
| |
| <td width=46>[[image:SkipMinorDown.png|link=#FA: Context TObject|Down]][[image:SkipMinorUp.png|link=#FA: Height TObject|Up]]</td> <!-- for Top and Minor Up/Down -->
| |
| <td width=75> </td>
| |
| <td width=75> </td>
| |
| <td width=75> </td> <!-- for Bottom -->
| |
| </tr>
| |
| </table> <!-- END Section Nav Buttons -->
| |
|
| |
| <table width=1000 bgcolor="lightcyan" cellpadding=2>
| |
| <tr valign="top">
| |
| <td width=10>[[image:BlueDot10x10.png|link=]]</td>
| |
| <td>Certain track objects have a '''Trigger Radius''' that sets how close a consist must approach the object to trigger its action</td>
| |
| </tr>
| |
| </table>
| |
|
| |
| <table bgcolor=#000000 cellpadding=2>
| |
| <tr valign="top">
| |
| <td>
| |
| <table bgcolor=#ffffff cellpadding=2>
| |
| <tr valign="top">
| |
| <td>Track objects that have a '''Trigger Radius''' include:-
| |
| <table>
| |
| <tr valign="top">
| |
| <td width=10>[[image:DotPoint.JPG|10px|link=]]</td>
| |
| <td>Track marks such as '''Track Markers''', '''Priority Markers''' and '''Direction Markers'''</td>
| |
| </tr>
| |
| <tr valign="top">
| |
| <td>[[image:DotPoint.JPG|10px|link=]]</td>
| |
| <td>'''Track Triggers'''</td>
| |
| </tr>
| |
| <tr valign="top">
| |
| <td>[[image:DotPoint.JPG|10px|link=]]</td>
| |
| <td>'''Whistle Signs'''</td>
| |
| </tr>
| |
| </table>
| |
| </td>
| |
| </tr>
| |
| <tr valign="top">
| |
| <td>
| |
| <table bgcolor=#ffffe0 cellpadding=2>
| |
| <tr valign="top">
| |
| <td width=25>[[image:PencilTips.PNG|link=]]</td>
| |
| <td>It is a good idea to adjust the trigger radius of these objects so that they do not overlap a track junction</td>
| |
| </tr>
| |
| </table>
| |
| </td>
| |
| </tr>
| |
| </table>
| |
| </td>
| |
| </tr>
| |
| </table>
| |
| <br>
| |
| <table width=1000>
| |
| <tr valign="top">
| |
| <td>The current '''Trigger Radius''' of these objects is shown by the size of the "wings" ('''Red''' or '''Green''' depending on the type of object) attached to the object and, in some cases, a distance value below the name of the object. Both of these options are shown in the image below.</td>
| |
| </tr>
| |
| </table>
| |
| <br>
| |
| <table width=1000>
| |
| <tr valign="top">
| |
| <td width=440>[[image:MarkerTriggerRadius_S20.png|link=]]</td>
| |
| <td>On one side of the track object is a green '''Trigger Radius''' dot that allows the radius value to be adjusted up or down.<br>
| |
|
| |
| <table bgcolor=#000000 cellpadding=2>
| |
| <tr valign="top">
| |
| <td>
| |
| <table bgcolor=#ffffb0 cellpadding=2>
| |
| <tr valign="top">
| |
| <td width=25>[[image:NotePad.PNG|link=]]</td>
| |
| <td>If no '''Trigger Radius''' dot or '''Red/Green Wings''' appear on the track object then it does not have an adjustable '''Trigger Radius'''</td>
| |
| </tr>
| |
| </table>
| |
| </td>
| |
| </tr>
| |
| </table>
| |
| <br>
| |
| <table bgcolor=#000000 cellpadding=2>
| |
| <tr valign="top">
| |
| <td>
| |
| <table bgcolor=#ffffff cellpadding=2>
| |
| <tr valign="top">
| |
| <td colspan=2><span style="font-weight: 700; font-size: 15px;">Steps:</span> To adjust the '''Trigger Radius''' of a track object:-</td>
| |
| </tr>
| |
| <tr valign="top">
| |
| <td width=25>[[image:DotPoint1.JPG|link=]]</td>
| |
| <td>use the '''Fine Adjustment Tool''' to select the track object</td>
| |
| </tr>
| |
| <tr valign="top">
| |
| <td colspan=2>
| |
| <table bgcolor=#ffffe0 cellpadding=2>
| |
| <tr valign="top">
| |
| <td width=25>[[image:PencilTips.PNG|link=]]</td>
| |
| <td>Move your camera POV (Point of View) to directly above the track object before adjusting its '''Trigger Radius'''. This will make the adjustment as quick and as smooth as possible.</td>
| |
| </tr>
| |
| </table>
| |
| </td>
| |
| </tr>
| |
| <tr valign="top">
| |
| <td>[[image:DotPoint2.JPG|link=]]</td>
| |
| <td><span style="font-weight: 700; font-size: 15px; background-color: lightcyan;"> Left Click and Drag </span> forward or back on the '''Trigger Radius''' dot. The dot will not move but the "wings" that indicate the radius on the track and the displayed radius value will increase or decrease</td>
| |
| </tr>
| |
| <tr valign="top">
| |
| <td>[[image:DotPoint3.JPG|link=]]</td>
| |
| <td>when the radius reaches the required size release the mouse button</td>
| |
| </tr>
| |
| </table>
| |
| </td>
| |
| </tr>
| |
| </table>
| |
| <br>
| |
| <table bgcolor=#000000 cellpadding=2>
| |
| <tr valign="top">
| |
| <td>
| |
| <table bgcolor=#ffffe0 cellpadding=2>
| |
| <tr valign="top">
| |
| <td width=25>[[image:PencilTips.PNG|link=]]</td>
| |
| <td>This action can also be performed on existing track objects using the [[image:S20_FreeMoveToolIcon.png|link=|20px]] '''[[#The Free Move Tool|Free Move Tool]]'''</td>
| |
| </tr>
| |
| </table>
| |
| </td>
| |
| </tr>
| |
| </table>
| |
| </td>
| |
| </tr>
| |
| </table>
| |
| <br>
| |
| <table width=1000> <!-- BEGIN Section Nav Buttons -->
| |
| <tr valign="top">
| |
| <td width=629><span id="FA: Context TObject"></span>
| |
| ===<span style="font-weight: 700; font-size: 17px; color: white; background-color: blue;"> Fine Adjustment: Track Object Context Menu </span>===
| |
| </td>
| |
| <td width=50> </td>
| |
| <td width=50> </td>
| |
| <td width=46>[[image:SkipMinorDown.png|link=#skip Fine Adjustment: Spline Objects|Down]][[image:SkipMinorUp.png|link=#FA: Trigger TObject|Up]]</td> <!-- for Top and Minor Up/Down -->
| |
| <td width=75> </td>
| |
| <td width=75> </td>
| |
| <td width=75> </td> <!-- for Bottom -->
| |
| </tr>
| |
| </table> <!-- END Section Nav Buttons -->
| |
|
| |
| A selected track mesh object, or a group of selected track mesh objects, will have a '''Context Icon''' that opens a '''Context Menu'''. The icon design will vary between object types.<br>
| |
|
| |
| <table bgcolor=#000000 cellpadding=2>
| |
| <tr valign="top">
| |
| <td>
| |
| <table bgcolor=#ffffff cellpadding=2>
| |
| <tr valign="top">
| |
| <td width=396>To open a selected track objects '''Context Menu''' choose one of the following:-<br>
| |
| <table>
| |
| <tr>
| |
| <td colspan=2><span style="font-weight: 700; font-size: 15px;">Options:</span> </td>
| |
| </tr>
| |
| <tr valign="top">
| |
| <td width=25>[[image:Ablue.png|link=]]</td>
| |
| <td width=371><span style="font-weight: 700; font-size: 15px; background-color: lightcyan;"> Left Click </span> the '''Context Icon''' [[image:ContextIconsTrackObjects_S20.png|link=]] <span style="font-size: 15px; font-weight: 700;">OR</span></td>
| |
| </tr>
| |
| <tr valign="top">
| |
| <td>[[image:Bblue.png|link=]]</td>
| |
| <td>Press the <span style="color: white; background-color: black; font-weight: 700; font-size: 15px;"> T </span> key</td>
| |
| </tr>
| |
| </table>
| |
| </td>
| |
| </tr>
| |
| </table>
| |
| </td>
| |
| </tr>
| |
| </table>
| |
| <br>
| |
| <table width=1000>
| |
| <tr valign="top">
| |
| <td width=220>[[image:ContextMenuTrackObject_S20.png|link=]]</td>
| |
| <td>
| |
| <table width=780 bgcolor=#000000 cellpadding=2>
| |
| <tr valign="top">
| |
| <td>
| |
| <table width=776 bgcolor=#ffffff cellpadding=2>
| |
| <tr valign="top">
| |
| <td>
| |
| <table>
| |
| <tr valign="middle">
| |
| <td width=35>[[image:Information.png|35px|link=]]</td>
| |
| <td><span style="font-weight: 700; font-size: 17px;">Track Object Context Menu Options</span></td>
| |
| </tr>
| |
| </table>
| |
| </td>
| |
| </tr>
| |
| <tr valign="top">
| |
| <td>
| |
| <table bgcolor=#ffffb0 cellpadding=2>
| |
| <tr valign="top">
| |
| <td width=25>[[image:NotePad.PNG|link=]]</td>
| |
| <td>Track objects can be copied/moved into a scrapbook by themselves but when pasted/painted they will appear without any track. They will be automatically added to a scrapbook by selecting and copying or cutting the track segments under the objects</td>
| |
| </tr>
| |
| </table>
| |
| <table>
| |
| <tr valign="top">
| |
| <td><span style="font-weight: 700; font-size: 15px; color: white; background-color: black;"> Cut </span></td>
| |
| <td>remove the selected object or objects from the route and move them into the '''Scrapbook'''</td>
| |
| </tr>
| |
| </table>
| |
| </td>
| |
| </tr>
| |
| <tr valign="top">
| |
| <td>
| |
| <table>
| |
| <tr valign="top">
| |
| <td><span style="font-weight: 700; font-size: 15px; color: white; background-color: black;"> Copy </span></td>
| |
| <td>copy the selected object or objects and place them into the '''Scrapbook'''</td>
| |
| </tr>
| |
| </table>
| |
| </td>
| |
| </tr>
| |
| <tr valign="top">
| |
| <td>
| |
| <table>
| |
| <tr valign="top">
| |
| <td><span style="font-weight: 700; font-size: 15px; color: white; background-color: black;"> Paste </span></td>
| |
| <td>paste the contents of the current '''Scrapbook''' at the cursor (focus) point<br>
| |
| <table bgcolor=#ffffb0 cellpadding=2>
| |
| <tr valign="top">
| |
| <td width=25>[[image:NotePad.PNG|link=]]</td>
| |
| <td>When pasted from a scrapbook the objects will be surrounded by a '''Marquee Selection Area''' that, depending on the settings in the [[image:PageLink.PNG|link=]] '''[[#Scrapbook Filters|Scrapbook Filters]]''', may add to or replace all other objects, splines, textures, ground terrain and effect layers in that area</td>
| |
| </tr>
| |
| </table>
| |
| </td>
| |
| </tr>
| |
| </table>
| |
| </td>
| |
| </tr>
| |
| <tr valign="top">
| |
| <td>
| |
| <table>
| |
| <tr valign="top">
| |
| <td><span style="font-weight: 700; font-size: 15px; color: white; background-color: black;"> Delete </span></td>
| |
| <td>delete the selected objects. It has the same effect as pressing the <span style="font-weight: 700; font-size: 15px; color: white; background-color: black;"> Delete </span> key</td>
| |
| </tr>
| |
| </table>
| |
| </td>
| |
| </tr>
| |
| <tr valign="top">
| |
| <td>
| |
| <table>
| |
| <tr valign="top">
| |
| <td><span style="font-weight: 700; font-size: 15px; color: white; background-color: black;"> Replace Object with Selected Asset </span></td>
| |
| <td>the '''selected''' object will be replaced with the asset currently selected in the <span style="font-weight: 700; font-size: 15px; color: white; background-color: #797979;"> Assets Palette </span>. If the asset selected in the <span style="font-weight: 700; font-size: 15px; color: white; background-color: #797979;"> Assets Palette </span> is the wrong type (e.g. a scenery spline) then this option will be greyed out</td>
| |
| </tr>
| |
| </table>
| |
| </td>
| |
| </tr>
| |
| <tr valign="top">
| |
| <td>
| |
| <table>
| |
| <tr valign="top">
| |
| <td><span style="font-weight: 700; font-size: 15px; color: white; background-color: black;"> Paint Under Selected </span></td>
| |
| <td>the texture selected in the <span style="font-weight: 700; font-size: 15px; color: white; background-color: #797979;"> Assets Palette </span> will be painted under the '''selected''' objects. The <span style="font-weight: 700; font-size: 15px; color: white; background-color: #797979;"> Tool Options Palette </span> brush settings (<span style="font-weight: 700; font-size: 15px; color: gold; background-color: black;"> Radius </span> and <span style="font-weight: 700; font-size: 15px; color: gold; background-color: black;"> Sensitivity </span>) will control how the texture is applied. If no ground texture has been selected in the <span style="font-weight: 700; font-size: 15px; color: white; background-color: #797979;"> Assets Palette </span> then this option will be greyed out.</td>
| |
| </tr>
| |
| <tr valign="top">
| |
| <td colspan=2>
| |
| <table bgcolor=#ffffb0 cellpadding=2>
| |
| <tr valign="top">
| |
| <td width=25>[[image:NotePad.PNG|link=]]</td>
| |
| <td>Objects have a '''minimum brush size''' that represents the smallest area that can be painted beneath them using the <span style="font-weight: 700; font-size: 15px; color: white; background-color: black;"> Paint Under Selected </span> option. This minimum area will vary in size between objects but it will be rectangular even for circular objects. If the <span style="font-weight: 700; font-size: 15px; color: white; background-color: #797979;"> Tool Options Palette </span> brush <span style="font-weight: 700; font-size: 15px; color: gold; background-color: black;"> Radius </span> is set to a smaller size then the brush <span style="font-weight: 700; font-size: 15px; color: gold; background-color: black;"> Radius </span> will be ignored and the objects minimum brush size will be used instead.</td>
| |
| </tr>
| |
| </table>
| |
| </td>
| |
| </tr>
| |
| </table>
| |
| </td>
| |
| </tr>
| |
| <tr valign="top">
| |
| <td>
| |
| <table>
| |
| <tr valign="top">
| |
| <td><span style="font-weight: 700; font-size: 15px; color: white; background-color: black;"> Smooth Ground Under Selected </span></td>
| |
| <td>smooths the height of the ground under the selected object to match the set height of the object. For track objects the size of the area affected will depend on the <span style="font-weight: 700; font-size: 15px; color: white; background-color: #797979;"> Tool Options Palette </span> <span style="font-weight: 700; font-size: 15px; color: gold; background-color: black;"> Radius </span> setting</td>
| |
| </tr>
| |
| </table>
| |
| </td>
| |
| </tr>
| |
| <tr valign="top">
| |
| <td>
| |
| <table>
| |
| <tr valign="top">
| |
| <td><span style="font-weight: 700; font-size: 15px; color: white; background-color: black;"> Settle on Ground </span></td>
| |
| <td>sets the height of the objects to match the height of the terrain beneath them ("drops them back to earth")</td>
| |
| </tr>
| |
| </table>
| |
| </td>
| |
| </tr>
| |
| <tr valign="top">
| |
| <td>
| |
| <table>
| |
| <tr valign="top">
| |
| <td><span style="font-weight: 700; font-size: 15px; color: white; background-color: black;"> Apply Height </span></td>
| |
| <td>sets the height of the '''selected object''' to the value in the <span style="font-weight: 700; font-size: 15px; color: white; background-color: #797979;"> Tool Options Palette </span> <span style="font-weight: 700; font-size: 15px; color: gold; background-color: black;"> Height </span> setting. Where multiple objects have been selected the '''context object''', the one with the '''Context Icon''', will have its height set to the <span style="font-weight: 700; font-size: 15px; color: gold; background-color: black;"> Height </span> value and the other '''selected objects''' will have their heights adjusted up or down by the same amount</td>
| |
| </tr>
| |
| </table>
| |
| </td>
| |
| </tr>
| |
| <tr valign="top">
| |
| <td>
| |
| <table>
| |
| <tr valign="top">
| |
| <td><span style="font-weight: 700; font-size: 15px; color: white; background-color: black;"> Reattach to Track </span></td>
| |
| <td>if the object has been moved away from the track then it will be reset to its correct position on the track. This option will be greyed out if the object is already attached to the track</td>
| |
| </tr>
| |
| </table>
| |
| </td>
| |
| </tr>
| |
| <tr valign="top">
| |
| <td>
| |
| <table>
| |
| <tr valign="top">
| |
| <td><span style="font-weight: 700; font-size: 15px; color: white; background-color: black;"> Rotate Trackside </span></td>
| |
| <td>reverses the position of the object on the track to the other side and facing the opposite direction</td>
| |
| </tr>
| |
| </table>
| |
| </td>
| |
| </tr>
| |
| <tr valign="top">
| |
| <td>
| |
| <table>
| |
| <tr valign="top">
| |
| <td><span style="font-weight: 700; font-size: 15px; color: white; background-color: black;"> Change Junction Direction </span></td>
| |
| <td>if the object is a track switch then its switch direction will be reversed</td>
| |
| </tr>
| |
| </table>
| |
| </td>
| |
| </tr>
| |
| <tr valign="top">
| |
| <td>
| |
| <table>
| |
| <tr valign="top">
| |
| <td><span style="font-weight: 700; font-size: 15px; color: white; background-color: black;"> Select in Assets Palette </span></td>
| |
| <td>sets the <span style="font-weight: 700; font-size: 15px; color: white; background-color: #797979;"> Filter Palette </span> to <span style="font-weight: 700; font-size: 15px; color: white; background-color: black;"> All Content </span> and highlights the selected object in the <span style="font-weight: 700; font-size: 15px; color: white; background-color: #797979;"> Assets Palette </span></td>
| |
| </tr>
| |
| </table>
| |
| </td>
| |
| </tr>
| |
| <tr valign="top">
| |
| <td>
| |
| <table>
| |
| <tr valign="top">
| |
| <td><span style="font-weight: 700; font-size: 15px; color: white; background-color: black;"> Select in Filter Palette </span></td>
| |
| <td>sets the <span style="font-weight: 700; font-size: 15px; color: white; background-color: #797979;"> Filter Palette </span> to <span style="font-weight: 700; font-size: 15px; color: white; background-color: black;"> All Content </span> and highlights the selected object in the <span style="font-weight: 700; font-size: 15px; color: white; background-color: #797979;"> Filter Palette </span></td>
| |
| </tr>
| |
| </table>
| |
| </td>
| |
| </tr>
| |
| <tr valign="top">
| |
| <td>
| |
| <table>
| |
| <tr valign="top">
| |
| <td><span style="font-weight: 700; font-size: 15px; color: white; background-color: black;"> Edit Details </span></td>
| |
| <td>opens the '''Properties''' window of the selected rolling stock object. '''Note:''' to enter or edit an objects name property use the [[image:PageLink.PNG|link=]] '''[[#The Info Palette|Info Palette]]'''</td>
| |
| </tr>
| |
| </table>
| |
| </td>
| |
| </tr>
| |
| </table>
| |
| </td>
| |
| </tr>
| |
| </table>
| |
| </td>
| |
| </tr>
| |
| </table>
| |
| <br>
| |
| <table bgcolor=#000000 cellpadding=2>
| |
| <tr valign="top">
| |
| <td>
| |
| <table bgcolor=#ffffb0 cellpadding=2>
| |
| <tr valign="top">
| |
| <td width=25>[[image:NotePad.PNG|link=]]</td>
| |
| <td><span style="font-weight: 700; font-size: 15px;">Notes:</span><br>
| |
| ----</td>
| |
| </tr>
| |
| <tr valign="top">
| |
| <td> </td>
| |
| <td>Track objects can be restored to their original height and position (on the track) by opening their '''Context Menu''' and choosing one of the following:-
| |
| <table>
| |
| <tr>
| |
| <td colspan=2><span style="font-weight: 700; font-size: 15px;">Options:</span> </td>
| |
| </tr>
| |
| <tr valign="top">
| |
| <td width=25>[[image:Ablue.png|link=]]</td>
| |
| <td><span style="font-weight: 700; font-size: 15px; color: white; background-color: black;"> Reattach to Track </span> to cancel the both the height and position changes, <span style="font-size: 15px; font-weight: 700;">OR</span></td>
| |
| </tr>
| |
| <tr valign="top">
| |
| <td>[[image:bblue.png|link=]]</td>
| |
| <td><span style="font-weight: 700; font-size: 15px; color: white; background-color: black;"> Settle on Ground </span> to cancel the height change only</td>
| |
| </tr>
| |
| </table>
| |
| </td>
| |
| </tr>
| |
| </table>
| |
| </td>
| |
| </tr>
| |
| </table>
| |
| <br>
| |
| <table width=1000>
| |
| <tr>
| |
| <td colspan=2>Track objects can also be rotated to the opposite side of the track to face the opposite direction.<br>
| |
| For some track objects this will make no difference but for others it will have an affect on their operation - for example:-</td>
| |
| </tr>
| |
| <tr valign="top">
| |
| <td width=10>[[image:DotPoint.JPG|10px|link=]]</td>
| |
| <td>'''signals''' and '''trackside signs''' (e.g. speed, whistle and stop signs)</td>
| |
| </tr>
| |
| <tr valign="top">
| |
| <td>[[image:DotPoint.JPG|10px|link=]]</td>
| |
| <td>'''track direction markers''' and '''directional triggers'''</td>
| |
| </tr>
| |
| <tr valign="top">
| |
| <td> </td>
| |
| <td>if rotated these track objects will now only affect trains approaching from the '''opposite direction''' to the direction that they originally faced.</td>
| |
| </tr>
| |
| </table>
| |
| <br>
| |
| <table width=1000>
| |
| <tr valign="top">
| |
| <td width=400>[[image:FineAdjustTrackObjectReversed_S20.png|400px|link=]]</td>
| |
| <td>
| |
| <table bgcolor=#000000 width=600 cellpadding=2>
| |
| <tr valign="top">
| |
| <td>
| |
| <table bgcolor=#ffffff width=596 cellpadding=2>
| |
| <tr valign="top">
| |
| <td colspan=2><span style="font-weight: 700; font-size: 15px;">Steps:</span> To rotate a track object:-</td>
| |
| </tr>
| |
| <tr valign="top">
| |
| <td width=20>[[image:DotPoint1.JPG|link=]]</td>
| |
| <td>Open the track objects '''Context Menu''' (<span style="font-weight: 700; font-size: 15px; background-color: lightcyan;"> Left Click </span> on its icon or press the <span style="font-weight: 700; font-size: 15px; color: white; background-color: black;"> T </span> key)</td>
| |
| </tr>
| |
| <tr valign="top">
| |
| <td width=25>[[image:DotPoint2.JPG|link=]]</td>
| |
| <td>Select the option <span style="font-weight: 700; font-size: 15px; color: white; background-color: black;"> Rotate Trackside </span></td>
| |
| </tr>
| |
| <tr valign="top">
| |
| <td colspan=2>Rotating a track object does not change its distance from the track or its height.
| |
| </td>
| |
| </tr>
| |
| </table>
| |
| </td>
| |
| </tr>
| |
| </table>
| |
| </td>
| |
| </tr>
| |
| </table>
| |
| <br>
| |
| <table width=1000> <!-- BEGIN Section Nav Buttons -->
| |
| <tr valign="top">
| |
| <td width=629><span id="skip Fine Adjustment: Spline Objects"></span>
| |
| =='''Fine Adjustment: Spline Objects (Including Track)'''==
| |
| </td>
| |
| <td width=50>[[image:SkipDown.png|link=#skip Fine Adjustment: Rolling Stock Objects|Skip Down]]</td>
| |
| <td width=50>[[image:SkipUp.png|link=#skip Fine Adjustment: Track Objects|Skip Up]]</td>
| |
| <td width=46>[[image:SkipMinorDown.png|link=#FA: Move Splines|Down]][[image:SkipMinorUp.png|link=#FA: Context TObject|Up]]</td> <!-- for Top and Minor Up/Down -->
| |
| <td width=75>[[image:HeadingUp.png|link=#stepFineAdjustment|alt=Heading|To Heading]]</td>
| |
| <td width=75> </td>
| |
| <td width=75> </td> <!-- for Bottom -->
| |
| </tr>
| |
| </table> <!-- END Section Nav Buttons -->
| |
|
| |
| <table width=1000 bgcolor="lightcyan" cellpadding=2>
| |
| <tr valign="top">
| |
| <td width=10>[[image:BlueDot10x10.png|link=]]</td>
| |
| <td>Scenery splines and track splines are defined by their '''endpoints'''. Splines are usually added to a route as a series of segments joined at the endpoints.</td>
| |
| </tr>
| |
| </table>
| |
| <br>
| |
| <table width=1000 bgcolor=#000000 cellpadding=2>
| |
| <tr valign="top">
| |
| <td>
| |
| <table width=996 bgcolor=#ffe89a cellpadding=2>
| |
| <tr valign="middle">
| |
| <td width=45>[[image:PalettesIcon_S20.png|link=]]</td>
| |
| <td>If the <span style="font-weight: 700; font-size: 15px; color: white; background-color: #797979;"> Tool Options Palette </span> and <span style="font-weight: 700; font-size: 15px; color: white; background-color: #797979;"> Info Palette </span> are not visible on the screen then refer to [[image:PageLink.PNG|link=]] '''[[#Notes_Palettes|Notes: Palettes]]''' at the top of this document.
| |
| </td>
| |
| </tr>
| |
| </table>
| |
| </td>
| |
| </tr>
| |
| </table>
| |
| <br>
| |
| <table width=1000> <!-- BEGIN Section Nav Buttons -->
| |
| <tr valign="top">
| |
| <td width=629><span id="FA: Troubleshooting Splines"></span>
| |
| ===<span style="font-weight: 700; font-size: 17px; color: white; background-color: blue;"> Fine Adjustment: Spline Troubleshooting Tip </span>===
| |
| </td>
| |
| <td width=50> </td>
| |
| <td width=50> </td>
| |
| <td width=46>[[image:SkipMinorDown.png|link=#FA: Move Splines|Down]][[image:SkipMinorBlank.png|link=]]</td> <!-- for Top and Minor Up/Down -->
| |
| <td width=75> </td>
| |
| <td width=75> </td>
| |
| <td width=75> </td> <!-- for Bottom -->
| |
| </tr>
| |
| </table> <!-- END Section Nav Buttons -->
| |
|
| |
| <table width=1000 bgcolor=#000000 cellpadding=2>
| |
| <tr valign="top">
| |
| <td>
| |
| <table width=996 bgcolor=#ffffe0 cellpadding=2>
| |
| <tr valign="top">
| |
| <td width=25>[[image:PencilTips.PNG|link=]]</td>
| |
| <td><span style="font-weight: 700; font-size: 15px;">Quickly Locate Broken Splines and Tracks</span></td>
| |
| </tr>
| |
| <tr valign="top">
| |
| <td> </td>
| |
| <td>To quickly check for broken links in a spline or track <span style="font-weight: 700; font-size: 15px; background-color: lightcyan;">Double Left Click</span> on a segment. All the correctly joined segments upto the next junction or last endpoint (in both directions) will be highlighted. The highlighting will stop at a broken join (which is technically a "last" endpoint)</td>
| |
| </tr>
| |
| </table>
| |
| </td>
| |
| </tr>
| |
| </table>
| |
| <br>
| |
| <table width=1000> <!-- BEGIN Section Nav Buttons -->
| |
| <tr valign="top">
| |
| <td width=629><span id="FA: Move Splines"></span>
| |
| ===<span style="font-weight: 700; font-size: 17px; color: white; background-color: blue;"> Fine Adjustment: Moving Splines </span>===
| |
| </td>
| |
| <td width=50> </td>
| |
| <td width=50> </td>
| |
| <td width=46>[[image:SkipMinorDown.png|link=#FA: Join Splines|Down]][[image:SkipMinorUp.png|link=#skip Fine Adjustment: Spline Objects|Up]]</td> <!-- for Top and Minor Up/Down -->
| |
| <td width=75> </td>
| |
| <td width=75> </td>
| |
| <td width=75> </td> <!-- for Bottom -->
| |
| </tr>
| |
| </table> <!-- END Section Nav Buttons -->
| |
|
| |
| <table bgcolor=#000000 cellpadding=2>
| |
| <tr valign="top">
| |
| <td>
| |
| <table bgcolor=#ffffff cellpadding=2>
| |
| <tr valign="top">
| |
| <td colspan=2>Moving a spline can involve moving one of the following:-</td>
| |
| </tr>
| |
| <tr>
| |
| <td colspan=2><span style="font-weight: 700; font-size: 15px;">Options:</span> </td>
| |
| </tr>
| |
| <tr valign="top">
| |
| <td width=25>[[image:Ablue.png|link=]]</td>
| |
| <td>moving an endpoint, <span style="font-size: 15px; font-weight: 700;">OR</span></td>
| |
| </tr>
| |
| <tr valign="top">
| |
| <td>[[image:Bblue.png|link=]]</td>
| |
| <td>moving a segment, <span style="font-size: 15px; font-weight: 700;">OR</span></td>
| |
| </tr>
| |
| <tr valign="top">
| |
| <td>[[image:Cblue.png|link=]]</td>
| |
| <td>moving multiple segments including the entire length of the spline (between junctions)</td>
| |
| </tr>
| |
| </table>
| |
| </td>
| |
| </tr>
| |
| </table>
| |
| <br>
| |
|
| |
| ====Fine Adjustment: Move a Spline Endpoint====
| |
|
| |
| <table width=1000>
| |
| <tr valign="top">
| |
| <td width=280>[[image:FineAdjustSplineEndPoint_S20.png|link=]]</td>
| |
| <td width=720>
| |
| The '''3D Anchor Frame''' shown is for a spline '''endpoint'''.<br>
| |
| <table bgcolor=#000000 cellpadding=2>
| |
| <tr valign="top">
| |
| <td>
| |
| <table bgcolor=#ffffff cellpadding=2>
| |
| <tr valign="top">
| |
| <td colspan=2><span style="font-weight: 700; font-size: 15px;">Steps:</span> To move an individual spline endpoint:-</td>
| |
| </tr>
| |
| <tr valign="top">
| |
| <td width=20>[[image:DotPoint1.JPG|link=]]</td>
| |
| <td>Select the [[image:S20_FineAdjustmentToolIcon.png|link=|20px]] '''Fine Adjustment Tool''' </td>
| |
| </tr>
| |
| <tr valign="top">
| |
| <td>[[image:DotPoint2.JPG|link=]]</td>
| |
| <td>Select, <span style="font-weight: 700; font-size: 15px; background-color: lightcyan;"> Left Click </span> on, the spline endpoint to be moved.</td>
| |
| </tr>
| |
| <tr valign="top">
| |
| <td colspan=2>'''Note:''' only the horizontal <span style="font-weight: 700; font-size: 15px; color: white; background-color: red;"> Red </span> and <span style="font-weight: 700; font-size: 15px; color: white; background-color: green;"> Green </span> and the vertical <span style="font-weight: 700; font-size: 15px; color: white; background-color: blue;"> Blue </span> lines can be selected.</td>
| |
| </tr>
| |
| <tr valign="top">
| |
| <td>[[image:DotPoint3.JPG|link=]]</td>
| |
| <td><span style="font-weight: 700; font-size: 15px; background-color: lightcyan;">Left Click and Drag</span> one of the following:-
| |
| <table>
| |
| <tr>
| |
| <td colspan=2><span style="font-weight: 700; font-size: 15px;">Options:</span> </td>
| |
| </tr>
| |
| <tr valign="top">
| |
| <td width=25>[[image:Ablue.png|link=]]</td>
| |
| <td>an '''Anchor''' to move the endpoint in that specific direction, <span style="font-size: 15px; font-weight: 700;">OR</span></td>
| |
| </tr>
| |
| <tr valign="top">
| |
| <td>[[image:Bblue.png|link=]]</td>
| |
| <td>the endpoint itself to move it in any direction in the horizontal plane</td>
| |
| </tr>
| |
| </table>
| |
| </td>
| |
| </tr>
| |
| </table>
| |
| </td>
| |
| </tr>
| |
| </table>
| |
| </td>
| |
| </tr>
| |
| </table>
| |
| <br>
| |
| ====Fine Adjustment: Move a Spline Segment or Multiple Segments====
| |
|
| |
| <table width=1000>
| |
| <tr valign="top">
| |
| <td width=280>[[image:FineAdjustSplineSegment_S20.png|link=]]</td>
| |
| <td width=720>The '''3D Anchor Frame''' shown is for a spline '''segment'''.<br>
| |
| <table bgcolor=#000000 cellpadding=2>
| |
| <tr valign="top">
| |
| <td>
| |
| <table bgcolor=#ffffff cellpadding=2>
| |
| <tr valign="top">
| |
| <td colspan=2><span style="font-weight: 700; font-size: 15px;">Steps:</span> To move spline segments:-</td>
| |
| </tr>
| |
| <tr valign="top">
| |
| <td width=20>[[image:DotPoint1.JPG|link=]]</td>
| |
| <td>Select the [[image:S20_FineAdjustmentToolIcon.png|link=|20px]] '''Fine Adjustment Tool'''</td>
| |
| </tr>
| |
| <tr valign="top">
| |
| <td>[[image:DotPoint2.JPG|link=]]</td>
| |
| <td>Select, <span style="font-weight: 700; font-size: 15px; background-color: lightcyan;"> Left Click </span> on, the spline segment to be moved.
| |
| <table bgcolor=#ffffe0 cellpadding=2>
| |
| <tr valign="top">
| |
| <td width=25>[[image:PencilTips.PNG|link=]]</td>
| |
| <td>To select:-
| |
| <table>
| |
| <tr valign="top">
| |
| <td width=10>[[image:DotPoint.JPG|10px|link=]]</td>
| |
| <td>more than one segment - <span style="font-weight: 700; font-size: 15px;"><span style="color: white; background-color: black;"> Shift </span> + <span style="background-color: lightcyan;"> Left Click </span></span> on each segment</td>
| |
| </tr>
| |
| <tr valign="top">
| |
| <td>[[image:DotPoint.JPG|10px|link=]]</td>
| |
| <td>'''ALL''' the segments - <span style="font-weight: 700; font-size: 15px; background-color: lightcyan;">Double Left Click</span> on a segment. This will the select segments in '''both''' directions from the segment clicked upto the next junction or the final endpoint</td>
| |
| </tr>
| |
| </table>
| |
| </td>
| |
| </tr>
| |
| </table>
| |
| </td>
| |
| </tr>
| |
| <tr valign="top">
| |
| <td>[[image:DotPoint3.JPG|link=]]</td>
| |
| <td><span style="font-weight: 700; font-size: 15px; background-color: lightcyan;">Left Click and Drag</span> one of the following:-</td>
| |
| </tr>
| |
| <tr valign="top">
| |
| <td> </td>
| |
| <td>
| |
| <table>
| |
| <tr>
| |
| <td colspan=2><span style="font-weight: 700; font-size: 15px;">Options:</span> </td>
| |
| </tr>
| |
| <tr valign="top">
| |
| <td width=25>[[image:Ablue.png|link=]]</td>
| |
| <td>an '''Anchor Line''' to move the segment or segments in that specific direction, <span style="font-size: 15px; font-weight: 700;">OR</span></td>
| |
| </tr>
| |
| <tr valign="top">
| |
| <td>[[image:Bblue.png|link=]]</td>
| |
| <td>anywhere in a segment to move it in any direction in the horizontal plane</td>
| |
| </tr>
| |
| </table>
| |
| </td>
| |
| </tr>
| |
| </table>
| |
| </td>
| |
| </tr>
| |
| </table>
| |
| </td>
| |
| </tr>
| |
| </table>
| |
| <br>
| |
| <table width=1000 bgcolor=#000000 cellpadding=2>
| |
| <tr valign="top">
| |
| <td>
| |
| <table width=996 bgcolor=#ffffff cellpadding=2>
| |
| <tr valign="top">
| |
| <td width=10>[[image:DotPoint.JPG|10px|link=]]</td>
| |
| <td>To remove individual spline segments from the selection simply <span style="font-weight: 700; font-size: 15px;"><span style="color: white; background-color: black;"> Shift </span> + <span style="background-color: lightcyan;"> Left Click </span></span> on each segment to be removed.</td>
| |
| </tr>
| |
| <tr valign="top">
| |
| <td>[[image:DotPoint.JPG|10px|link=]]</td>
| |
| <td>To remove '''ALL''' the segments from a selection, <span style="font-weight: 700; font-size: 15px; background-color: lightcyan;"> Double Left Click </span> on any highlighted segment <span style="font-weight: 700; font-size: 15px;">OR</span> <span style="font-weight: 700; font-size: 15px; background-color: lightcyan;"> Left Click </span> anywhere outside the selected segments.</td>
| |
| </tr>
| |
| </table>
| |
| </td>
| |
| </tr>
| |
| </table>
| |
| <br>
| |
| <table width=1000>
| |
| <tr valign="top">
| |
| <td width=320>[[image:FineAdjustSplineSegmentStraight_S20.png|link=]]</td>
| |
| <td>Selecting a spline segment with the [[image:S20_FineAdjustmentToolIcon.png|link=|20px]] '''Fine Adjustment Tool''' will add a '''Temporary Endpoint''' at the point where the segment was clicked.<br>
| |
| <br>
| |
| This will produce 3 '''Fine Adjustment Tool''' control frames, one at each end of the segment and one at the click point, as shown in the image on the left. The whole segment can be moved, as shown in the following images, by a <span style="font-weight: 700; font-size: 15px; background-color: lightcyan;">Left Click and Drag</span> anywhere within the segment.<br><br>
| |
| <table bgcolor=#000000 cellpadding=2>
| |
| <tr valign="top">
| |
| <td>
| |
| <table bgcolor=#ffffe0 cellpadding=2>
| |
| <tr valign="top">
| |
| <td width=25>[[image:PencilTips.PNG|link=]]</td>
| |
| <td>A temporary spline endpoint can be made permanent by selecting the <span style="font-weight: 700; font-size: 15px; color: white; background-color: black;"> Insert Spline Point Here </span> option from its '''Context Menu'''</td>
| |
| </tr>
| |
| </table>
| |
| </td>
| |
| </tr>
| |
| </table>
| |
| </td>
| |
| </tr>
| |
| </table>
| |
|
| |
| <table width=1000>
| |
| <tr valign="top">
| |
| <td width=320>[[image:FineAdjustSplineSegmentXYMove_S20.png|link=]]<br>
| |
| Segment moved to the right along the <span style="font-weight: 700; font-size: 15px; color: white; background-color: red;"> Red </span> horizontal Anchor line</td>
| |
| <td width=320>[[image:FineAdjustSplineSegmentZMove_S20.png|link=]]<br>
| |
| Segment moved up along the <span style="font-weight: 700; font-size: 15px; color: white; background-color: blue;"> Blue </span> vertical Anchor line</td>
| |
| <td>
| |
| <table bgcolor=#000000 cellpadding=2>
| |
| <tr valign="top">
| |
| <td>
| |
| <table bgcolor=#ffffb0 cellpadding=2>
| |
| <tr valign="top">
| |
| <td width=25>[[image:NotePad.PNG|link=]]</td>
| |
| <td>
| |
| <span style="font-weight: 700; font-size: 15px;"><span style="color: white; background-color: red;"> Red </span> <span style="color: white; background-color: green;"> Green </span> <span style="color: white; background-color: blue;"> Blue </span></span> straight anchor lines will move the whole segment along the direction of the line
| |
| </td>
| |
| </tr>
| |
| </table>
| |
| </td>
| |
| </tr>
| |
| </table>
| |
| </td>
| |
| </tr>
| |
| <tr valign="top">
| |
| <td width=320>[[image:FineAdjustSplineSegmentRotate_S20.png|link=]]<br>
| |
| Segment rotated anti-clockwise around the <span style="font-weight: 700; font-size: 15px; color: white; background-color: blue;"> Blue </span> rotational Anchor arc line</td>
| |
| <td width=320>[[image:FineAdjustSplineSegmentPitch_S20.png|link=]]<br>
| |
| Segment rotated clockwise around the <span style="font-weight: 700; font-size: 15px; color: white; background-color: red;"> Red </span> rotational Anchor arc line</td>
| |
| <td>
| |
| <table bgcolor=#000000 cellpadding=2>
| |
| <tr valign="top">
| |
| <td>
| |
| <table bgcolor=#ffffb0 cellpadding=2>
| |
| <tr valign="top">
| |
| <td width=25>[[image:NotePad.PNG|link=]]</td>
| |
| <td>
| |
| <span style="font-weight: 700; font-size: 15px;"><span style="color: white; background-color: red;"> Red </span> <span style="color: white; background-color: blue;"> Blue </span></span> curved anchor lines will rotate the whole segment around the axis of the same colour<br>
| |
| <span style="font-weight: 700; font-size: 15px; color: white; background-color: green;"> Green </span> curved anchor line has no effect</td>
| |
| </tr>
| |
| </table>
| |
| </td>
| |
| </tr>
| |
| </table>
| |
| </td>
| |
| </tr>
| |
| </table>
| |
| <br>
| |
| <table bgcolor=#000000 width=1000 cellpadding=2>
| |
| <tr valign="top">
| |
| <td>
| |
| <table bgcolor=#ffffe0 width=996 cellpadding=2>
| |
| <tr valign="top">
| |
| <td width=25>[[image:PencilTips.PNG|link=]]</td><td>
| |
| <table>
| |
| <tr valign="top">
| |
| <td width=10>[[image:DotPoint.JPG|10px|link=]]</td>
| |
| <td>a <span style="font-weight: 700; font-size: 15px; color: white; background-color: blue;"> Blue </span> line height change and a <span style="font-weight: 700; font-size: 15px; color: white; background-color: red;"> Red </span> Anchor rotation can be cancelled at any time (even after saving and reloading the route) by selecting the <span style="font-weight: 700; font-size: 15px; color: white; background-color: black;"> Settle on Ground </span> option from the segments '''Context Menu'''</td>
| |
| </tr>
| |
| <tr valign="top">
| |
| <td>[[image:DotPoint.JPG|10px|link=]]</td>
| |
| <td>a <span style="font-weight: 700; font-size: 15px; color: white; background-color: blue;"> Blue </span> Anchor rotation can be straightened at any time (even after saving and reloading the route) by selecting the <span style="font-weight: 700; font-size: 15px; color: white; background-color: black;"> Straighten Spline </span> option from the segments '''Context Menu''' but this will not return the '''endpoints''' to their original positions
| |
| </td>
| |
| </tr>
| |
| </table>
| |
| </td>
| |
| </tr>
| |
| </table>
| |
| </td>
| |
| </tr>
| |
| </table>
| |
| <br>
| |
| <table width=1000 bgcolor=#000000 cellpadding=2>
| |
| <tr valign="top">
| |
| <td>
| |
| <table bgcolor=#ffffb0 cellpadding=2>
| |
| <tr valign="top">
| |
| <td width=25>[[image:NotePad.PNG|link=]]</td>
| |
| <td><span style="font-size: 17px; font-weight: 700;">Notes: Superelevation for Trainz Geekz'''</span><br>
| |
| ----</td>
| |
| </tr>
| |
| <tr valign="top">
| |
| <td colspan=2>In the real world rail tracks have a property called '''Superelevation''' which is used on curves. The track is tilted so that the outside track is raised slightly above the level of the inside track. This allows higher train speeds around the curve. The degree of tilting or superelevation that has to be applied depends on the curve radius, the track gauge and the maximum allowed train speed for that curve.<br><br>
| |
| In the '''Trainz World''' track splines can also have superelevation. This feature is found in the <span style="font-weight: 700; font-size: 15px; color: white; background-color: black;"> Edit Details </span> option in the '''Context Menu''' of track spline endpoints.<br>See [[image:PageLink.PNG|link=]] '''[[#FA: Context Splines|Spline Object Context Menus]]'''<br><br>
| |
| Adding superelevation would have been the function of the <span style="font-weight: 700; font-size: 15px; color: white; background-color: green;"> Green </span> curved anchor line but its correct application is more complex than a simple rotation around the track spline axis. For more information see the Trainz Wiki Page at [[image:WikiLink.PNG|link=]] '''[[HowTo/Use_Superelevation|How to Use Superelevation]]'''</td>
| |
| </tr>
| |
| </table>
| |
| </td>
| |
| </tr>
| |
| </table>
| |
| <br>
| |
| <table width=1000> <!-- BEGIN Section Nav Buttons -->
| |
| <tr valign="top">
| |
| <td width=629><span id="FA: Join Splines"></span>
| |
| ===<span style="font-weight: 700; font-size: 17px; color: white; background-color: blue;"> Fine Adjustment: Join Splines </span>===
| |
| </td>
| |
| <td width=50> </td>
| |
| <td width=50> </td>
| |
| <td width=46>[[image:SkipMinorDown.png|link=#FA: Unjoin Splines|Down]][[image:SkipMinorUp.png|link=#FA: Move Splines|Up]]</td> <!-- for Top and Minor Up/Down -->
| |
| <td width=75> </td>
| |
| <td width=75> </td>
| |
| <td width=75> </td> <!-- for Bottom -->
| |
| </tr>
| |
| </table> <!-- END Section Nav Buttons -->
| |
|
| |
| <table width=1000 bgcolor="lightcyan" cellpadding=2>
| |
| <tr valign="top">
| |
| <td width=10>[[image:BlueDot10x10.png|link=]]</td>
| |
| <td>Existing splines can be joined together at endpoints to create a longer spline or to create a junction between the two splines</td>
| |
| </tr>
| |
| <tr valign="top">
| |
| <td>[[image:BlueDot10x10.png|link=]]</td>
| |
| <td>Joins and junctions can be formed using non identical but '''compatible''' spline objects, such as different types of track splines.</td>
| |
| </tr>
| |
| </table>
| |
| <br>
| |
| <table width=1000 bgcolor=#000000 cellpadding=2>
| |
| <tr valign="top">
| |
| <td>
| |
| <table bgcolor=#ffffff cellpadding=2>
| |
| <tr valign="top">
| |
| <td width=35>[[image:Information.png|35px|link=]]</td>
| |
| <td>The [[image:S20_FineAdjustmentToolIcon.png|link=|20px]] '''Fine Adjustment Tool''' can be used to form a join or a junction between '''existing''' but separated splines and endpoints by dragging the terminating endpoint of one spline onto an endpoint of the other spline. If the '''Target''' endpoint is:-
| |
| <table>
| |
| <tr valign="top">
| |
| <td width=10>[[image:BlueDot10x10.png|link=]]</td>
| |
| <td>at the end of the second spline then a join will be made that will increase the total length of the spline</td>
| |
| </tr>
| |
| <tr valign="top">
| |
| <td>[[image:BlueDot10x10.png|link=]]</td>
| |
| <td>between two of the segments of the second spline then the join will form a new junction between the splines</td>
| |
| </tr>
| |
| <tr valign="top">
| |
| <td colspan=2>The two splines must be '''identical''' or '''compatible'''. See '''Notes: Incompatible Splines''' below.</td>
| |
| </tr>
| |
| </table>
| |
| </td>
| |
| </tr>
| |
| </table>
| |
| </td>
| |
| </tr>
| |
| </table>
| |
| <br>
| |
| <table width=1000>
| |
| <tr valign="top">
| |
| <td>
| |
| <table width=495 bgcolor=#000000 cellpadding=2>
| |
| <tr valign="top">
| |
| <td>
| |
| <table bgcolor=#ffffe0 cellpadding=2>
| |
| <tr valign="top">
| |
| <td width=25>[[image:PencilTips.PNG|link=]]</td>
| |
| <td>You can use the '''Fine Adjustment Tool''' to join two existing compatible splines at an endpoint to create a join or a junction.
| |
| <table bgcolor=#ffffff cellpadding=2>
| |
| <tr valign="top">
| |
| <td colspan=2><span style="font-weight: 700; font-size: 15px;">Steps:</span> To join two existing spline together to create a junction or to lengthen a spline:-</td>
| |
| </tr>
| |
| <tr valign="top">
| |
| <td width=25>[[image:DotPoint1.JPG|link=]]</td>
| |
| <td>Select a terminating endpoint of one spline</td>
| |
| </tr>
| |
| <tr valign="top">
| |
| <td>[[image:DotPoint2.JPG|link=]]</td>
| |
| <td><span style="font-weight: 700; font-size: 15px; background-color: lightcyan;"> Left Click and Drag </span> it onto either:-
| |
| <table>
| |
| <tr valign="top">
| |
| <td width=10>[[image:RedDot10x10.png|link=]]</td>
| |
| <td>the '''terminating endpoint''' of the second spline and <span style="font-weight: 700; font-size: 15px; background-color: lightcyan;"> Left Click </span> on the endpoint to join the two splines together to make the original spline longer<br>
| |
| '''OR'''</td>
| |
| </tr>
| |
| <tr valign="top">
| |
| <td>[[image:RedDot10x10.png|link=]]</td>
| |
| <td>an endpoint '''between''' two segments of the second spline and <span style="font-weight: 700; font-size: 15px; background-color: lightcyan;"> Left Click </span> on the endpoint to form a junction between the two splines. The junction must be formed on an existing endpoint</td>
| |
| </tr>
| |
| </table>
| |
| </td>
| |
| </tr>
| |
| <tr valign="top">
| |
| <td colspan=2>If you do not want to physically join the two splines or form a real junction then hold down the <span style="font-weight: 700; font-size: 15px; color: white; background-color: black;"> Shift </span> key when you <span style="font-weight: 700; font-size: 15px; background-color: lightcyan;"> Left Click </span> on the second endpoint</td>
| |
| </tr>
| |
| </table>
| |
| <br>
| |
| </td>
| |
| </tr>
| |
| </table>
| |
| </td>
| |
| </tr>
| |
| </table>
| |
| </td>
| |
| <td>
| |
| <table width=495 bgcolor=#000000 cellpadding=2>
| |
| <tr valign="top">
| |
| <td>
| |
| <table bgcolor=#ffffb0 cellpadding=2>
| |
| <tr valign="top">
| |
| <td width=25>[[image:NotePad.PNG|link=]]</td>
| |
| <td width=975><span style="font-size: 17px; font-weight: 700;">Notes: Incompatible Splines</span><br>
| |
| ----
| |
| If, when forming a join or a junction between two splines, the message <span style="font-weight: 700; font-size: 15px; color: white; background-color: black;"> Incompatible Spline </span> appears in the top right corner of the screen, then you are attempting to join two splines that are not compatible with each other. The join or junction between the splines will '''NOT''' be created.</td>
| |
| </tr>
| |
| </table>
| |
| </td>
| |
| </tr>
| |
| </table>
| |
| <br>
| |
| <table width=495 bgcolor=#000000 cellpadding=2>
| |
| <tr valign="top">
| |
| <td>
| |
| <table bgcolor=#ffffb0 cellpadding=2>
| |
| <tr valign="top">
| |
| <td width=25>[[image:NotePad.PNG|link=]]</td>
| |
| <td width=470><span style="font-size: 17px; font-weight: 700;">Notes: Adding a New Spline</span><br>
| |
| ----
| |
| If the second spline needed for the join or junction does not yet exist then it must be added using the [[image:S20_PlacementToolIcon.png|link=|20px]] '''[[#The Placement Tool|Placement Tool]]'''. This tool can also be used to form the junction or join between the splines. See [[image:PageLink.PNG|link=]] '''[[#PT: Add Spline|Add a Spline]]''' for the details.</td>
| |
| </tr>
| |
| </table>
| |
| </td>
| |
| </tr>
| |
| </table>
| |
| </td>
| |
| </tr>
| |
| </table>
| |
| <br>
| |
| <table width=1000> <!-- BEGIN Section Nav Buttons -->
| |
| <tr valign="top">
| |
| <td width=629><span id="FA: Unjoin Splines"></span>
| |
| ===<span style="font-weight: 700; font-size: 17px; color: white; background-color: blue;"> Fine Adjustment: Separate Splines </span>===
| |
| </td>
| |
| <td width=50> </td>
| |
| <td width=50> </td>
| |
| <td width=46>[[image:SkipMinorDown.png|link=#FA: Junction Tracks|Down]][[image:SkipMinorUp.png|link=#FA: Join Splines|Up]]</td> <!-- for Top and Minor Up/Down -->
| |
| <td width=75> </td>
| |
| <td width=75> </td>
| |
| <td width=75> </td> <!-- for Bottom -->
| |
| </tr>
| |
| </table> <!-- END Section Nav Buttons -->
| |
|
| |
| <table width=1000>
| |
| <tr valign="top">
| |
| <td>
| |
| <table width=495 bgcolor=#000000 cellpadding=2>
| |
| <tr valign="top">
| |
| <td>
| |
| <table bgcolor=#ffffff cellpadding=2>
| |
| <tr valign="top">
| |
| <td colspan=2><span style="font-weight: 700; font-size: 15px;">Steps:</span> To remove a junction or a join between splines but keep all the spline segments:-</td>
| |
| </tr>
| |
| <tr valign="top">
| |
| <td width=20>[[image:DotPoint1.JPG|link=]]</td>
| |
| <td>use the [[image:S20_FineAdjustmentToolIcon.png|link=|20px]] '''Fine Adjustment Tool''' to select (<span style="font-weight: 700; font-size: 15px; background-color: lightcyan;"> Left Click </span> on) the junction or join endpoint</td>
| |
| </tr>
| |
| <tr valign="top">
| |
| <td>[[image:DotPoint2.JPG|link=]]</td>
| |
| <td>open the endpoint '''Context Menu''' by a <span style="font-weight: 700; font-size: 15px; background-color: lightcyan;"> Left Click </span> on its '''Context Icon''' [[image:SplineEndpointContextIcon_S20.png|link=]] or by pressing the <span style="font-weight: 700; font-size: 15px; color: white; background-color: black;"> T </span> key</td>
| |
| </tr>
| |
| <tr valign="top">
| |
| <td>[[image:DotPoint3.JPG|link=]]</td>
| |
| <td>select the <span style="font-weight: 700; font-size: 15px; color: white; background-color: black;"> Separate Splines </span> menu option. This will separate '''ALL''' the spline segments that meet at that endpoint without deleting any of the segments</td>
| |
| </tr>
| |
| </table>
| |
| </td>
| |
| </tr>
| |
| </table>
| |
| </td>
| |
| <td>
| |
| <table width=495 bgcolor=#000000 cellpadding=2>
| |
| <tr valign="top">
| |
| <td>
| |
| <table bgcolor=#ffffe0 cellpadding=2>
| |
| <tr valign="top">
| |
| <td width=25>[[image:PencilTips.PNG|link=]]</td>
| |
| <td>
| |
| <table>
| |
| <tr valign="top">
| |
| <td width=10>[[image:DotPoint.JPG|10px|link=]]</td>
| |
| <td>A spline junction or join can also be removed by deleting any spline segment that connects to its endpoint</td>
| |
| </tr>
| |
| <tr valign="top">
| |
| <td>[[image:DotPoint.JPG|10px|link=]]</td>
| |
| <td>A junction endpoint can be moved by using the [[image:S20_FreeMoveToolIcon.png|link=|20px]] '''Free Move Tool''' or the [[image:S20_FineAdjustmentToolIcon.png|link=|20px]] '''Fine Adjustment Tool'''</td>
| |
| </tr>
| |
| </table>
| |
| </td>
| |
| </tr>
| |
| </table>
| |
| </td>
| |
| </tr>
| |
| </table>
| |
| </td>
| |
| </tr>
| |
| </table>
| |
| <br>
| |
| <table width=1000> <!-- BEGIN Section Nav Buttons -->
| |
| <tr valign="top">
| |
| <td width=629><span id="FA: Junction Tracks"></span>
| |
| ===<span style="font-weight: 700; font-size: 17px; color: white; background-color: blue;"> Fine Adjustment: Add a Track Junction </span>===
| |
| </td>
| |
| <td width=50> </td>
| |
| <td width=50> </td>
| |
| <td width=46>[[image:SkipMinorDown.png|link=#FA: Height Splines|Down]][[image:SkipMinorUp.png|link=#FA: Unjoin Splines|Up]]</td> <!-- for Top and Minor Up/Down -->
| |
| <td width=75> </td>
| |
| <td width=75> </td>
| |
| <td width=75> </td> <!-- for Bottom -->
| |
| </tr>
| |
| </table> <!-- END Section Nav Buttons -->
| |
|
| |
| <table width=1000 bgcolor="lightcyan" cellpadding=2>
| |
| <tr valign="top">
| |
| <td width=10>[[image:BlueDot10x10.png|link=]]</td>
| |
| <td>A track junction is formed using '''track splines''' in the same way as described above but track junctions have additional features</td>
| |
| </tr>
| |
| </table>
| |
| <br>
| |
| <table width=1000>
| |
| <tr valign="top">
| |
| <td width=365>[[image:PlacementTrackJunction_S20.png|link=]]</td>
| |
| <td>
| |
| <table bgcolor=#000000 cellpadding=2>
| |
| <tr valign="top">
| |
| <td>
| |
| <table bgcolor=#ffffff cellpadding=2>
| |
| <tr valign="top">
| |
| <td colspan=2>When a junction is created using '''Track Spline Objects''', a junction switch will be automatically added.</td>
| |
| </tr>
| |
| <tr valign="top">
| |
| <td width=10>[[image:DotPoint.JPG|10px|link=]]</td>
| |
| <td><span style="font-weight: 700; font-size: 15px;">IF</span> the '''Automatic Junction Placement Checkbox''' (in the [[image:SurveyorMainMenuIcon.png|link=]] '''Surveyor Main Menu''' - '''Settings''' option - '''Interface Settings''') has been checked '''ON'''</td>
| |
| </tr>
| |
| <tr valign="top">
| |
| <td>[[image:DotPoint.JPG|10px|link=]]</td>
| |
| <td>the switch will be the one specified in the '''Region''' listed in the '''Route Properties'''. The '''region''' and its switch can be changed by opening the [[image:SurveyorEditIcon.png|link=]] '''Surveyor Edit Menu''' and selecting <span style="font-weight: 700; font-size: 15px; color: white; background-color: black;"> Edit Route... </span>. If no region has been specified then a '''default''' switch (as shown left) will be used</td>
| |
| </tr>
| |
| <tr valign="top">
| |
| <td>[[image:DotPoint.JPG|10px|link=]]</td>
| |
| <td>use the [[image:S20_FreeMoveToolIcon.png|link=|20px]] '''[[#The Free Move Tool|Free Move Tool]]''' or the [[image:PageLink.PNG|link=]] '''[[#Fine Adjustment: Track Objects|Fine Adjustment Tool]]''' to move or delete the switch and to open its '''Context Menu''' for editing</td>
| |
| </tr>
| |
| </table>
| |
| </td>
| |
| </tr>
| |
| </table>
| |
| <br>
| |
| <table cellpadding=2 bgcolor="Aquamarine">
| |
| <tr valign="top">
| |
| <td>[[image:LinkWiki.PNG|link=]]</td>
| |
| <td>
| |
| Information on creating and editing a '''Region''' can be found on the '''Trainz Wiki''' at:-<br>
| |
| :'''[[How_to_Create_a_Region_Asset|How to Create a Region Asset]]'''
| |
| </td>
| |
| </tr>
| |
| </table>
| |
| </td>
| |
| </tr>
| |
| </table>
| |
| <br>
| |
| <table width=1000 bgcolor=#000000 cellpadding=2>
| |
| <tr valign="top">
| |
| <td>
| |
| <table bgcolor=#ffffb0 cellpadding=2>
| |
| <tr valign="top">
| |
| <td width=25>[[image:NotePad.PNG|link=]]</td>
| |
| <td><span style="font-weight: 700; font-size: 15px;">Using Procedural Tracks</span><br>
| |
| If the track object used is a '''Procedural Track''' and the junction is formed with another '''Procedural Track''' then the junction endpoint dot will be coloured:-</td>
| |
| </tr>
| |
| <tr valign="top">
| |
| <td width=10>[[image:DotPoint.JPG|10px|link=]]</td>
| |
| <td><span style="font-weight: 700; font-size: 15px; color: red;">RED</span> (as shown above) if the junction exceeds the maximum allowed values for a procedural junction. This will not stop the junction from working but it will not display the special features only found in '''Procedural Tracks''', <span style="font-weight: 700; font-size: 15px;">OR</span></td>
| |
| </tr>
| |
| <tr valign="top">
| |
| <td>[[image:DotPointBlack.JPG|10px|link=]]</td>
| |
| <td><span style="font-weight: 700; font-size: 15px;">BLACK</span> if the junction is within the maximum allowed values for a procedural junction and it will display all the '''Procedural Track''' special features</td>
| |
| </tr>
| |
| <tr valign="top">
| |
| <td colspan=2>A procedural track junction can be changed from <span style="font-weight: 700; color: red;">red</span> to '''black''' by adjusting the height and/or position (depending on the exact cause of the problem) of the junction endpoint and the endpoints on either side of the junction. See the Wiki Page [[image:WikiLink.PNG|link=]] '''[[How_to_Use_Procedural_Track|How to Use Procedural Track]]''' for more details</td>
| |
| </tr>
| |
| <tr valign="top">
| |
| <td colspan=2>A junction between two non-procedural tracks and between a procedural track and a non-procedural track will always have a <span style="font-weight: 700; color: red;">red</span> endpoint dot</td>
| |
| </tr>
| |
| </table>
| |
| </td>
| |
| </tr>
| |
| </table>
| |
| <br>
| |
| <table width=1000> <!-- BEGIN Section Nav Buttons -->
| |
| <tr valign="top">
| |
| <td width=629><span id="FA: Height Splines"></span>
| |
| ===<span style="font-weight: 700; font-size: 17px; color: white; background-color: blue;"> Fine Adjustment: Set a Spline Height </span>===
| |
| </td>
| |
| <td width=50> </td>
| |
| <td width=50> </td>
| |
| <td width=46>[[image:SkipMinorDown.png|link=#FA: Gradient Splines|Down]][[image:SkipMinorUp.png|link=#FA: Junction Tracks|Up]]</td> <!-- for Top and Minor Up/Down -->
| |
| <td width=75> </td>
| |
| <td width=75> </td>
| |
| <td width=75> </td> <!-- for Bottom -->
| |
| </tr>
| |
| </table> <!-- END Section Nav Buttons -->
| |
|
| |
| <span style="font-weight: 700; font-size: 15px;">Get the Height of a Spline Object</span>
| |
| <br>
| |
| <table width=1000 bgcolor=#000000 cellpadding=2>
| |
| <tr valign="top">
| |
| <td>
| |
| <table width=996 bgcolor=#ffffe0 cellpadding=2>
| |
| <tr valign="top">
| |
| <td width=25>[[image:PencilTips.PNG|link=]]</td>
| |
| <td>You can copy the '''height''' of a spline segment or endpoint into the <span style="font-weight: 700; font-size: 15px; color: white; background-color: #797979;"> Tool Options Palette </span> <span style="font-weight: 700; font-size: 15px; color: gold; background-color: black;"> Height </span> setting. Once it has been copied it can be applied to any other object. Choose one of the following:-</td>
| |
| </tr>
| |
| <tr valign="top">
| |
| <td colspan=2><span style="font-weight: 700; font-size: 15px;">Options:</span></td>
| |
| </tr>
| |
| <tr valign="top">
| |
| <td>[[image:Ablue.png|link=]]</td>
| |
| <td>Use the '''Eyedropper''' to copy the height of a spline segment<br>
| |
| <table>
| |
| <tr valign="top">
| |
| <td>
| |
| <table width=500 bgcolor=#ffffff>
| |
| <tr valign="top">
| |
| <td colspan=2><span style="font-weight: 700; font-size: 15px;">Steps:</span> To copy the '''Height''' of a spline segment (but not an endpoint):-</td>
| |
| </tr>
| |
| <tr valign="top">
| |
| <td width=25>[[image:DotPoint1.JPG|link=]]</td>
| |
| <td>hold down the <span style="font-weight: 700; font-size: 15px; color: white; background-color: black;"> Alt </span> key and move the mouse tool pointer onto the spline segment</td>
| |
| </tr>
| |
| <tr valign="top">
| |
| <td>[[image:DotPoint2.JPG|link=]]</td>
| |
| <td>while holding down the <span style="font-weight: 700; font-size: 15px; color: white; background-color: black;"> Alt </span> key <span style="font-weight: 700; font-size: 15px; background-color: lightcyan;"> Left Click </span> on the spline segment</td>
| |
| </tr>
| |
| </table>
| |
| </td>
| |
| <td>
| |
| <table bgcolor=#ffffb0 cellpadding=2>
| |
| <tr valign="top">
| |
| <td width=25>[[image:NotePad.PNG|link=]]</td>
| |
| <td>
| |
| <table>
| |
| <tr valign="top">
| |
| <td width=10>[[image:DotPoint.JPG|10px|link=]]</td>
| |
| <td>When the '''eyedropper''' is active spline endpoints will not be visible and cannot be selected</td>
| |
| </tr>
| |
| <tr valign="top">
| |
| <td>[[image:DotPoint.JPG|10px|link=]]</td>
| |
| <td>If the segment has a slope then the height at the point clicked will be copied into the <span style="font-weight: 700; font-size: 15px; color: gold; background-color: black;"> Height </span> setting</td>
| |
| </tr>
| |
| <tr valign="top">
| |
| <td>[[image:DotPoint.JPG|10px|link=]]</td>
| |
| <td>This will also select the clicked object in the <span style="font-weight: 700; font-size: 15px; color: white; background-color: #797979;"> Assets Palette </span> and it will become the next object added by a <span style="font-weight: 700; font-size: 15px; background-color: lightcyan;"> Left Click </span> with the '''Placement Tool''' in your '''Trainz World'''</td>
| |
| </tr>
| |
| </table>
| |
| </td>
| |
| </tr>
| |
| </table>
| |
| </td>
| |
| </tr>
| |
| </table>
| |
| </td>
| |
| </tr>
| |
| <tr valign="top">
| |
| <td> </td>
| |
| <td><span style="font-weight: 700; font-size: 15px;">OR</span></td>
| |
| </tr>
| |
| <tr valign="top">
| |
| <td>[[image:Bblue.png|link=]]</td>
| |
| <td>Use the <span style="font-weight: 700; font-size: 15px; color: gold; background-color: black;"> Height </span> setting drop down menu
| |
| <table>
| |
| <tr valign="top">
| |
| <td>
| |
| <table bgcolor=#ffffff>
| |
| <tr valign="top">
| |
| <td colspan=2><span style="font-weight: 700; font-size: 15px;">Steps:</span> To copy the '''Height''' of a spline segment or one of its endpoints:-</td>
| |
| </tr>
| |
| <tr valign="top">
| |
| <td width=25>[[image:DotPoint1.JPG|link=]]</td>
| |
| <td><span style="font-weight: 700; font-size: 15px; background-color: lightcyan;"> Left Click </span> on the spline segment or endpoint</td>
| |
| </tr>
| |
| <tr valign="top">
| |
| <td>[[image:DotPoint2.JPG|link=]]</td>
| |
| <td>in the <span style="font-weight: 700; font-size: 15px; color: white; background-color: #797979;"> Tool Options Palette </span> <span style="font-weight: 700; font-size: 15px; background-color: lightcyan;">Right Click</span> inside the <span style="font-weight: 700; font-size: 15px; color: gold; background-color: black;"> Height </span> setting box</td>
| |
| </tr>
| |
| <tr valign="top">
| |
| <td>[[image:DotPoint3.JPG|link=]]</td>
| |
| <td>Select the <span style="font-weight: 700; font-size: 15px; color: white; background-color: black;"> Get Height from Selection </span> option</td>
| |
| </tr>
| |
| </table>
| |
| </td>
| |
| <td>
| |
| <table bgcolor=#ffffb0 cellpadding=2>
| |
| <tr valign="top">
| |
| <td width=25>[[image:NotePad.PNG|link=]]</td>
| |
| <td>If the spline segment has a slope then the height at its midpoint will be used</td>
| |
| </tr>
| |
| </table>
| |
| </td>
| |
| </tr>
| |
| </table>
| |
| </td>
| |
| </tr>
| |
| </table>
| |
| </td>
| |
| </tr>
| |
| </table>
| |
| <br>
| |
| <span style="font-weight: 700; font-size: 15px;">Set the Height of a Spline Object</span>
| |
| <br>
| |
| <table width=1000 bgcolor=#000000 cellpadding=2>
| |
| <tr valign="top">
| |
| <td>
| |
| <table width=996 bgcolor=#ffffff cellpadding=2>
| |
| <tr>
| |
| <td colspan=2>To set the '''height''' of a '''selected''' spline segment (including track) or endpoint using the [[image:S20_FineAdjustmentToolIcon.png|link=|20px]] '''Fine Adjustment Tool''' choose one of the following:-<br>
| |
| <span style="font-weight: 700; font-size: 15px;">Options:</span></td>
| |
| </tr>
| |
| <tr valign="top">
| |
| <td colspan=2>
| |
| <table width=996 bgcolor=#ffffb0 cellpadding=2>
| |
| <tr valign="top">
| |
| <td width=25>[[image:NotePad.PNG|link=]]</td>
| |
| <td width=975>If the selected spline segments have a <span style="font-weight: 700; font-size: 15px; color: gold; background-color: black;"> Grade </span> setting then '''Options [[image:Ablue.png|link=]] [[image:Bblue.png|link=]] and [[image:Dblue.png|link=]]''' will '''adjust''' the height of each segment endpoint so that the heights will change but the grade will remain the same. '''Option [[image:Cblue.png|link=]]''' will set all the endpoints to the entered height and the grade will be removed</td>
| |
| </tr>
| |
| </table>
| |
| </td>
| |
| </tr>
| |
| <tr valign="top">
| |
| <td width=25>[[image:Ablue.png|link=]]</td>
| |
| <td><span style="font-weight: 700; font-size: 15px; background-color: lightcyan;">Left Click and Drag</span> '''Up''' or '''Down''' on the vertical <span style="font-size: 15px; font-weight: 700; color: white; background-color: blue;"> Blue </span> anchor line in the '''3D Anchor Frame'''. <span style="font-size: 15px; font-weight: 700;">OR</span></td>
| |
| </tr>
| |
| <tr valign="top">
| |
| <td>[[image:Bblue.png|link=]]</td>
| |
| <td>in the <span style="font-weight: 700; font-size: 15px; color: white; background-color: #797979;"> Tool Options Palette </span> <span style="font-weight: 700; font-size: 15px; background-color: lightcyan;"> Left Click </span> inside the <span style="font-size: 15px; font-weight: 700; color: gold; background-color: black;"> Height </span> setting and enter a new value (or keep the existing value) then press the <span style="font-weight: 700; font-size: 15px; color: white; background-color: black;"> Enter </span> key. This works even if the <span style="font-size: 15px; font-weight: 700; color: gold; background-color: black;"> Height </span> icon is not coloured <span style="font-weight: 700; font-size: 15px; color: gold; background-color: black;"> Gold </span>. <span style="font-size: 15px; font-weight: 700;">OR</span></td>
| |
| </tr>
| |
| <tr valign="top">
| |
| <td>[[image:Cblue.png|link=]]</td>
| |
| <td>in the <span style="font-weight: 700; font-size: 15px; color: white; background-color: #797979;"> Tool Options Palette </span> <span style="font-weight: 700; font-size: 15px; background-color: lightcyan;"> Left Click </span> inside the <span style="font-size: 15px; font-weight: 700; color: gold; background-color: black;"> Height </span> setting and enter a new value (or keep the existing value) then <span style="font-weight: 700; font-size: 15px; background-color: lightcyan;">Right Click</span> in the setting box and select the <span style="font-weight: 700; font-size: 15px; color: white; background-color: black;"> Set Height to Selection </span> option, <span style="font-weight: 700; font-size: 15px;">OR</span></td>
| |
| </tr>
| |
| <tr valign="top">
| |
| <td>[[image:Dblue.png|link=]]</td>
| |
| <td>select the <span style="font-size: 15px; font-weight: 700; color: white; background-color: black;"> Apply Height </span> option from the objects '''Context Menu''' (<span style="font-weight: 700; font-size: 15px; background-color: lightcyan;"> Left Click </span> on the objects '''Context Icon''' or press the <span style="font-weight: 700; font-size: 15px; color: white; background-color: black;"> T </span> key) to apply an existing height value, <span style="font-size: 15px; font-weight: 700;">OR</span></td>
| |
| </tr>
| |
| <tr valign="top">
| |
| <td>[[image:Eblue.png|link=]]</td>
| |
| <td>in the <span style="font-weight: 700; font-size: 15px; color: white; background-color: #797979;"> Info Palette </span> enter a value in the objects '''Pos:''' <span style="font-size: 15px; font-weight: 700; color: white; background-color: black;"> z </span> (height) setting or <span style="font-weight: 700; font-size: 15px; background-color: lightcyan;">Left Click and Drag</span> '''Up''' or '''Down''' on the double arrowheads to its right. This can be used to set the height to '''cm''' accuracy (see [[image:PageLink.PNG|link=]] '''[[#The Info Palette|The Info Palette]]''' below).</td>
| |
| </tr>
| |
| </table>
| |
| </td>
| |
| </tr>
| |
| </table>
| |
| <br>
| |
| <table bgcolor=#000000 width=1000 cellpadding=2>
| |
| <tr valign="top">
| |
| <td>
| |
| <table bgcolor=#ffffff width=996 cellpadding=2>
| |
| <tr valign="top">
| |
| <td colspan=2><span style="font-weight: 700; font-size: 15px;">Steps:</span> To set the heights of multiple spline segments to the value stored in the <span style="font-weight: 700; font-size: 15px; color: white; background-color: #797979;"> Tool Options Palette </span> <span style="font-weight: 700; font-size: 15px; color: gold; background-color: black;"> Height </span> setting:-</td>
| |
| </tr>
| |
| <tr valign="top">
| |
| <td>[[image:SelectedSplines_S20.png|link=]]</td>
| |
| <td>
| |
| <table>
| |
| <tr valign="top">
| |
| <td width=25>[[image:DotPoint1.JPG|link=]]</td>
| |
| <td>Select the spline segments using:-
| |
| <table>
| |
| <tr valign="top">
| |
| <td width=10>[[image:DotPointBlueSquare.png|10px|link=]]</td>
| |
| <td><span style="font-weight: 700; font-size: 15px;"><span style="color: white; background-color: black;"> Shift </span> + <span style="background-color: lightcyan;"> Left Click </span></span> to select individual segments, <span style="font-weight: 700; font-size: 15px;">OR</span></td>
| |
| </tr>
| |
| <tr valign="top">
| |
| <td>[[image:DotPointBlueSquare.png|10px|link=]]</td>
| |
| <td><span style="font-weight: 700; font-size: 15px; background-color: lightcyan;">Double Left Click</span> to select all the segments up to the next junction (in both directions).</td>
| |
| </tr>
| |
| </table>
| |
| </td>
| |
| </tr>
| |
| <tr valign="top">
| |
| <td>[[image:DotPoint2.JPG|link=]]</td>
| |
| <td>Select one of the options [[image:Ablue.png|link=]], [[image:Bblue.png|link=]], [[image:Cblue.png|link=]], [[image:Dblue.png|link=]] or [[image:Eblue.png|link=]] described above</td>
| |
| </tr>
| |
| </table>
| |
| </td>
| |
| </tr>
| |
| <tr valign="top">
| |
| <td>[[image:SelectedSplinesHeight_S20.png|link=]]</td>
| |
| <td>'''ALL''' the selected spline segments and their endpoints will be set to the specified height.</td>
| |
| </tr>
| |
| </table>
| |
| </td>
| |
| </tr>
| |
| </table>
| |
| <br>
| |
| <table width=1000> <!-- BEGIN Section Nav Buttons -->
| |
| <tr valign="top">
| |
| <td width=629><span id="FA: Gradient Splines"></span>
| |
| ===<span style="font-weight: 700; font-size: 17px; color: white; background-color: blue;"> Fine Adjustment: Set a Spline Gradient </span>===
| |
| </td>
| |
| <td width=50> </td>
| |
| <td width=50> </td>
| |
| <td width=46>[[image:SkipMinorDown.png|link=#FA: Condition Track|Down]][[image:SkipMinorUp.png|link=#FA: Height Splines|Up]]</td> <!-- for Top and Minor Up/Down -->
| |
| <td width=75> </td>
| |
| <td width=75> </td>
| |
| <td width=75> </td> <!-- for Bottom -->
| |
| </tr>
| |
| </table> <!-- END Section Nav Buttons -->
| |
|
| |
| <table width=1000 bgcolor=#000000 cellpadding=2>
| |
| <tr valign="top">
| |
| <td>
| |
| <table width=996 bgcolor=#ffffb0 cellpadding=2>
| |
| <tr valign="top">
| |
| <td width=25>[[image:NotePad.PNG|link=]]</td>
| |
| <td><span style="font-size: 17px; font-weight: 700;">Notes:</span><br>
| |
| ----
| |
| </td>
| |
| </tr>
| |
| <tr valign="top">
| |
| <td> </td>
| |
| <td>The <span style="font-weight: 700; font-size: 15px; color: gold; background-color: black;"> Grade </span> is defined as '''vertical rise''' divided by '''horizontal distance''' converted to a percentage figure. So a grade of 100% (the maximum allowed) would mean a gradient formed by both measurements having the same value (e.g. a rise of 50m over a distance of 50m). A vertical slope (a cliff) would have an infinite grade (cliff height divided by 0) which is currently impossible in Surveyor.</td>
| |
| </tr>
| |
| </table>
| |
| </td>
| |
| </tr>
| |
| </table>
| |
| <br>
| |
| <span style="font-weight: 700; font-size: 15px;">Get the Grade of a Spline Object</span>
| |
| <br>
| |
| <table width=1000 bgcolor=#000000 cellpadding=2>
| |
| <tr valign="top">
| |
| <td>
| |
| <table width=996 bgcolor=#ffffe0 cellpadding=2>
| |
| <tr valign="top">
| |
| <td width=25>[[image:PencilTips.PNG|link=]]</td>
| |
| <td>You can copy the current '''Grade''' of any spline segment into the <span style="font-weight: 700; font-size: 15px; color: white; background-color: #797979;"> Tool Options Palette </span> <span style="font-weight: 700; font-size: 15px; color: gold; background-color: black;"> Grade </span> setting. Once it has been copied it can be applied to any other object that has a '''Grade''' setting. Choose one of the following:-<br>
| |
| <span style="font-weight: 700; font-size: 15px;">Options:</span></td>
| |
| </tr>
| |
| <tr valign="top">
| |
| <td>[[image:Ablue.png|link=]]</td>
| |
| <td>Use the '''Eyedropper'''<br>
| |
| <table>
| |
| <tr valign="top">
| |
| <td>
| |
| <table width=500 bgcolor=#ffffff>
| |
| <tr valign="top">
| |
| <td colspan=2><span style="font-weight: 700; font-size: 15px;">Steps:</span> To copy the '''Grade''' of a spline segment (but not an endpoint):-</td>
| |
| </tr>
| |
| <tr valign="top">
| |
| <td width=25>[[image:DotPoint1.JPG|link=]]</td>
| |
| <td>hold down the <span style="font-weight: 700; font-size: 15px; color: white; background-color: black;"> Alt </span> key and move the mouse tool pointer onto the spline segment</td>
| |
| </tr>
| |
| <tr valign="top">
| |
| <td>[[image:DotPoint2.JPG|link=]]</td>
| |
| <td>while holding down the <span style="font-weight: 700; font-size: 15px; color: white; background-color: black;"> Alt </span> key <span style="font-weight: 700; font-size: 15px; background-color: lightcyan;"> Left Click </span> on the spline segment</td>
| |
| </tr>
| |
| </table>
| |
| </td>
| |
| <td>
| |
| <table bgcolor=#ffffb0>
| |
| <tr valign="top">
| |
| <td width=25>[[image:NotePad.PNG|link=]]</td>
| |
| <td>When the '''eyedropper''' is active spline endpoints will not be visible and cannot be selected. This option will also change the asset selected in the <span style="font-weight: 700; font-size: 15px; color: white; background-color: #797979;"> Assets Palette </span> to the object clicked and it will become the next object added by a <span style="font-weight: 700; font-size: 15px; background-color: lightcyan;"> Left Click </span> with the '''Placement Tool'''</td>
| |
| </tr>
| |
| </table>
| |
| </td>
| |
| </tr>
| |
| </table>
| |
| The height at the point clicked will also be copied into the <span style="font-weight: 700; font-size: 15px; color: gold; background-color: black;"> Height </span> setting</td>
| |
| </tr>
| |
| <tr valign="top">
| |
| <td> </td>
| |
| <td><span style="font-weight: 700; font-size: 15px;">OR</span></td>
| |
| </tr>
| |
| <tr valign="top">
| |
| <td>[[image:Bblue.png|link=]]</td>
| |
| <td>Use the <span style="font-weight: 700; font-size: 15px; color: gold; background-color: black;"> Grade </span> setting drop down menu<br>
| |
| <table bgcolor=#ffffff>
| |
| <tr valign="top">
| |
| <td colspan=2><span style="font-weight: 700; font-size: 15px;">Steps:</span> To copy the '''Grade''' of a spline segment or one of its endpoints:-</td>
| |
| </tr>
| |
| <tr valign="top">
| |
| <td width=25>[[image:DotPoint1.JPG|link=]]</td>
| |
| <td><span style="font-weight: 700; font-size: 15px; background-color: lightcyan;"> Left Click </span> on the spline segment or endpoint</td>
| |
| </tr>
| |
| <tr valign="top">
| |
| <td>[[image:DotPoint2.JPG|link=]]</td>
| |
| <td>in the <span style="font-weight: 700; font-size: 15px; color: white; background-color: #797979;"> Tool Options Palette </span> <span style="font-weight: 700; font-size: 15px; background-color: lightcyan;">Right Click</span> inside the <span style="font-weight: 700; font-size: 15px; color: gold; background-color: black;"> Grade </span> setting box</td>
| |
| </tr>
| |
| <tr valign="top">
| |
| <td>[[image:DotPoint3.JPG|link=]]</td>
| |
| <td>Select the <span style="font-weight: 700; font-size: 15px; color: white; background-color: black;"> Get Grade from Selection </span> option</td>
| |
| </tr>
| |
| </table>
| |
| </td>
| |
| </tr>
| |
| </table>
| |
| </td>
| |
| </tr>
| |
| </table>
| |
| <br>
| |
| <span style="font-weight: 700; font-size: 15px;">Set the Grade of a Spline Object</span>
| |
| <br>
| |
| <table bgcolor=#000000 width=1000 cellpadding=2>
| |
| <tr valign="top">
| |
| <td>
| |
| <table bgcolor=#ffffff width=996 cellpadding=2>
| |
| <tr valign="top">
| |
| <td colspan=2><span style="font-weight: 700; font-size: 15px;">Steps:</span> To set the gradients of multiple spline segments to the value stored in the <span style="font-weight: 700; font-size: 15px; color: white; background-color: #797979;"> Tool Options Palette </span> <span style="font-weight: 700; font-size: 15px; color: gold; background-color: black;"> Grade </span> setting:-</td>
| |
| </tr>
| |
| <tr valign="top">
| |
| <td>[[image:SelectedSplines_S20.png|link=]]</td>
| |
| <td>
| |
| <table>
| |
| <tr valign="top">
| |
| <td width=25>[[image:DotPoint1.JPG|link=]]</td>
| |
| <td>Select the spline segments using:-
| |
| <table>
| |
| <tr valign="top">
| |
| <td width=10>[[image:DotPointBlueSquare.png|10px|link=]]</td>
| |
| <td><span style="font-weight: 700; font-size: 15px;"><span style="color: white; background-color: black;"> Shift </span> + <span style="background-color: lightcyan;"> Left Click </span></span> to select individual segments, <span style="font-weight: 700; font-size: 15px;">OR</span></td>
| |
| </tr>
| |
| <tr valign="top">
| |
| <td>[[image:DotPointBlueSquare.png|10px|link=]]</td>
| |
| <td><span style="font-weight: 700; font-size: 15px; background-color: lightcyan;">Double Left Click</span> to select all the segments up to the next junction (in both directions).</td>
| |
| </tr>
| |
| </table>
| |
| </td>
| |
| </tr>
| |
| <tr valign="top">
| |
| <td colspan=2>
| |
| <table bgcolor=#ffffb0 cellpadding=2>
| |
| <tr valign="top">
| |
| <td width=25>[[image:NotePad.PNG|link=]]</td>
| |
| <td>To apply the same gradient to all the selected segments make sure that the first segment has the '''context icons'''</td>
| |
| </tr>
| |
| </table>
| |
| </td>
| |
| </tr>
| |
| <tr valign="top">
| |
| <td>[[image:DotPoint2.JPG|link=]]</td>
| |
| <td>Open the '''Context Menu''' of the '''first''' or starting endpoint (<span style="font-weight: 700; font-size: 15px; background-color: lightcyan;"> Left Click </span> on its icon [[image:SplineEndpointContextIcon_S20.png|link=]])</td>
| |
| </tr>
| |
| <tr valign="top">
| |
| <td>[[image:DotPoint3.JPG|link=]]</td>
| |
| <td>Select the option <span style="font-weight: 700; font-size: 15px; color: white; background-color: black;"> Apply Grade to this Spline Endpoint </span></td>
| |
| </tr>
| |
| </table>
| |
| </td>
| |
| </tr>
| |
| <tr valign="top">
| |
| <td>[[image:SelectedSplinesGradient_S20.png|link=]]</td>
| |
| <td>The selected spline segments are now set to the specified gradient.<br>
| |
| <table bgcolor=#ffffb0 cellpadding=2>
| |
| <tr valign="top">
| |
| <td width=25>[[image:NotePad.PNG|link=]]</td>
| |
| <td>If the selected endpoint is '''NOT''' at the start of the highlighted segments then the gradient will be applied in both directions from that endpoint as shown below.<br>
| |
| [[image:SelectedSplinesGradientUShape_S20.png|link=]]
| |
| </td>
| |
| </tr>
| |
| </table>
| |
| </td>
| |
| </tr>
| |
| <tr valign="top">
| |
| <td colspan=2>
| |
| <table>
| |
| <tr valign="top">
| |
| <td colspan=3>Once the height and/or gradient of the spline segments have been set then other effects can be added.</td>
| |
| </tr>
| |
| <tr valign="top">
| |
| <td>
| |
| <table width=600>
| |
| <tr valign="top">
| |
| <td>From the '''Context Menu''' of the highlighted segments, select the options:-
| |
| <table>
| |
| <tr valign="top">
| |
| <td><span style="font-weight: 700; font-size: 15px; color: white; background-color: black;"> Smooth Ground Under Selected  </span></td>
| |
| <td>to smooth the ground surface under a spline object to match its height, and</td>
| |
| </tr>
| |
| </table>
| |
| </td>
| |
| </tr>
| |
| <tr valign="top">
| |
| <td>
| |
| <table>
| |
| <tr valign="top">
| |
| <td><span style="font-weight: 700; font-size: 15px; color: white; background-color: black;"> Paint Under Selected </span></td>
| |
| <td>the texture selected in the <span style="font-weight: 700; font-size: 15px; color: white; background-color: #797979;"> Assets Palette </span> will be painted under the '''selected''' objects. The <span style="font-weight: 700; font-size: 15px; color: white; background-color: #797979;"> Tool Options Palette </span> brush settings (<span style="font-weight: 700; font-size: 15px; color: gold; background-color: black;"> Radius </span> and <span style="font-weight: 700; font-size: 15px; color: gold; background-color: black;"> Sensitivity </span>) will control how the texture is applied. If no ground texture has been selected in the <span style="font-weight: 700; font-size: 15px; color: white; background-color: #797979;"> Assets Palette </span> then this option will be greyed out.</td>
| |
| </tr>
| |
| <tr valign="top">
| |
| <td colspan=2>
| |
| <table bgcolor=#ffffb0 cellpadding=2>
| |
| <tr valign="top">
| |
| <td width=25>[[image:NotePad.PNG|link=]]</td>
| |
| <td>Objects have a '''minimum brush size''' that represents the smallest area that can be painted beneath them using the <span style="font-weight: 700; font-size: 15px; color: white; background-color: black;"> Paint Under Selected </span> option. This minimum area will vary in size between objects but it will be rectangular even for circular objects. If the <span style="font-weight: 700; font-size: 15px; color: white; background-color: #797979;"> Tool Options Palette </span> brush <span style="font-weight: 700; font-size: 15px; color: gold; background-color: black;"> Radius </span> is set to a smaller size then the brush <span style="font-weight: 700; font-size: 15px; color: gold; background-color: black;"> Radius </span> will be ignored and the objects minimum brush size will be used instead.</td>
| |
| </tr>
| |
| </table>
| |
| </td>
| |
| </tr>
| |
| </table>
| |
| </td>
| |
| </tr>
| |
| </table>
| |
| </td>
| |
| <td width=400 rowspan=2>[[image:SelectedSplinesGradientSmoothPaint_S20.png|link=]]</td>
| |
| </tr>
| |
| </table>
| |
| </td>
| |
| </tr>
| |
| </table>
| |
| </td>
| |
| </tr>
| |
| </table>
| |
| <br>
| |
| <table width=1000> <!-- BEGIN Section Nav Buttons -->
| |
| <tr valign="top">
| |
| <td width=629><span id="FA: Condition Track"></span>
| |
| ===<span style="font-size: 17px; color: white; background-color: blue;"> Fine Adjustment: Set Track Condition and Superelevation </span>===
| |
| </td>
| |
| <td width=50> </td>
| |
| <td width=50> </td>
| |
| <td width=46>[[image:SkipMinorDown.png|link=#FA: Context Splines|Down]][[image:SkipMinorUp.png|link=#FA: Gradient Splines|Up]]</td> <!-- for Top and Minor Up/Down -->
| |
| <td width=75> </td>
| |
| <td width=75> </td>
| |
| <td width=75> </td> <!-- for Bottom -->
| |
| </tr>
| |
| </table> <!-- END Section Nav Buttons -->
| |
|
| |
| <table width=1000 bgcolor="lightcyan" cellpadding=2>
| |
| <tr valign="top">
| |
| <td width=10>[[image:BlueDot10x10.png|link=]]</td>
| |
| <td>The '''Track Condition''' sets the "smoothness" of the ride over a track segment. The default is '''50%''' which is '''Average'''</td>
| |
| </tr>
| |
| <tr valign="top">
| |
| <td>[[image:BlueDot10x10.png|link=]]</td>
| |
| <td>The '''Track Superelevation''' sets the height difference (as a angle) between the inner and outer rail lines on a curve</td>
| |
| </tr>
| |
| <tr valign="top">
| |
| <td>[[image:BlueDot10x10.png|link=]]</td>
| |
| <td>'''Track Condition''' and '''Superelevation''' are only available for '''Track Splines'''</td>
| |
| </tr>
| |
| </table>
| |
| <br>
| |
| <span style="font-weight: 700; font-size: 17px;">Track Condition</span><br>
| |
|
| |
| <table width=1000 bgcolor=#000000 cellpadding=2>
| |
| <tr valign="top">
| |
| <td>
| |
| <table width=996 bgcolor=#ffe89a cellpadding=2>
| |
| <tr valign="middle">
| |
| <td width=45>[[image:PalettesIcon_S20.png|link=]]</td>
| |
| <td>If the <span style="font-weight: 700; font-size: 15px; color: white; background-color: #797979;"> Tool Options Palette </span> is not visible on the screen then refer to [[image:PageLink.PNG|link=]] '''[[#Notes_Palettes|Notes: Palettes]]''' at the top of this document.</td>
| |
| </tr>
| |
| </table>
| |
| </td>
| |
| </tr>
| |
| </table>
| |
| <br>
| |
| There are '''three different methods''' available for setting the track condition of a track segment.
| |
| <br>
| |
| <table width=1000>
| |
| <tr valign="top">
| |
| <td width=25>[[image:Ablue.png|link=]]</td>
| |
| <td>The <span style="font-weight: 700; font-size: 15px; color: white; background-color: #797979;"> Tool Options Palette </span> has a '''Condition''' setting that only applies to '''track spline segments'''.</td>
| |
| </tr>
| |
| </table>
| |
|
| |
| <table width=1000>
| |
| <tr valign="top">
| |
| <td width=200>[[image:PlacementSplineTools_S20.png|link=]]</td>
| |
| <td>
| |
| <table bgcolor=#000000 width=800 cellpadding=2>
| |
| <tr valign="top">
| |
| <td>
| |
| <table bgcolor=#ffffff width=796 cellpadding=2>
| |
| <tr valign="top">
| |
| <td width=90><span style="font-size: 15px; font-weight: 700; color: gold; background-color: black;"> Condition </span></td>
| |
| <td>The <span style="font-weight: 700; font-size: 15px; color: white; background-color: #797979;"> Tool Options Palette </span> has a '''Condition''' setting that only applies to '''track spline segments'''. This can be set for a single selected segment or for multiple selected segments.</td>
| |
| </tr>
| |
| <tr valign="top">
| |
| <td colspan=2>
| |
| <table bgcolor=#ffffb0>
| |
| <tr valign="top">
| |
| <td width=90 align="right">'''Range:''' </td>
| |
| <td width=706>'''1%''' (terrible track condition) to<br>
| |
| '''50%''' (average track condition - the default setting) to<br>
| |
| '''100%''' (perfect track condition)<br>
| |
| </td>
| |
| </tr>
| |
| </table>
| |
| </td>
| |
| </tr>
| |
| </table>
| |
| </td>
| |
| </tr>
| |
| </table>
| |
| <br>
| |
| <table bgcolor=#000000 cellpadding=2>
| |
| <tr valign="top">
| |
| <td>
| |
| <table bgcolor=#ffffff cellpadding=2>
| |
| <tr valign="top">
| |
| <td colspan=2><span style="font-weight: 700; font-size: 15px;">Steps:</span> To set '''Track Condition''':-</td>
| |
| </tr>
| |
| <tr valign="top">
| |
| <td width=25>[[image:DotPoint1.JPG|link=]]</td>
| |
| <td>Select (<span style="font-weight: 700; font-size: 15px; background-color: lightcyan;"> Left Click </span>) the track segment or (<span style="font-weight: 700; font-size: 15px;"><span style="color: white; background-color: black;"> Shift </span> + <span style="background-color: lightcyan;"> Left Click </span></span> or <span style="font-weight: 700; font-size: 15px; background-color: lightcyan;"> Double Left Click </span>) multiple track segments</td>
| |
| </tr>
| |
| <tr valign="top">
| |
| <td>[[image:DotPoint2.JPG|link=]]</td>
| |
| <td>Enter a value from '''1''' to '''100''' in the <span style="font-weight: 700; font-size: 15px; color: white; background-color: #797979;"> Tool Options Palette </span> <span style="font-weight: 700; font-size: 15px; color: gold; background-color: black;"> Condition </span> setting</td>
| |
| </tr>
| |
| <tr valign="top">
| |
| <td>[[image:DotPoint3.JPG|link=]]</td>
| |
| <td>Press the <span style="font-weight: 700; font-size: 15px; color: white; background-color: black;"> Enter </span> key</td>
| |
| </tr>
| |
| </table>
| |
| </td>
| |
| </tr>
| |
| </table>
| |
|
| |
| <table>
| |
| <tr valign="top">
| |
| <td>There will be no visible change to the track appearance, not even for a 1% setting, as this change would have to be built into the track mesh. Instead when a consist moves over the track there will be a visible change in its rocking or swaying motion.</td>
| |
| </tr>
| |
| </table>
| |
| </td>
| |
| </tr>
| |
| </table>
| |
| <br>
| |
| <table width=1000>
| |
| <tr valign="top">
| |
| <td width=25>[[image:Bblue.png|link=]]</td>
| |
| <td>A second method of setting the '''Track Condition''' of a selected track segment is to use its '''Track Segment Context Menu'''.</td>
| |
| </tr>
| |
| </table>
| |
|
| |
| <table width=1000>
| |
| <tr valign="top">
| |
| <td width=220>[[image:ContextMenuSplineSegment_S20.png|link=]]</td>
| |
| <td>
| |
| <table bgcolor=#000000 cellpadding=2>
| |
| <tr valign="top">
| |
| <td>
| |
| <table bgcolor=#ffffff cellpadding=2>
| |
| <tr valign="top">
| |
| <td colspan=2><span style="font-weight: 700; font-size: 15px;">Steps:</span> To set the '''Track Condition''' of a single selected track segment:-</td>
| |
| </tr>
| |
| <tr valign="top">
| |
| <td width=25>[[image:DotPoint1.JPG|link=]]</td>
| |
| <td><span style="font-weight: 700; font-size: 15px; background-color: lightcyan;"> Left Click </span> on the [[image:TrackSegmentContextIcon_S20.png|link=]] '''Track Segment Context Icon''' to open its menu</td>
| |
| </tr>
| |
| <tr valign="top">
| |
| <td>[[image:DotPoint2.JPG|link=]]</td>
| |
| <td><span style="font-weight: 700; font-size: 15px; background-color: lightcyan;"> Left Click </span> on the <span style="font-weight: 700; font-size: 15px; color: white; background-color: black;"> Edit Details </span> option at the bottom of the list</td>
| |
| </tr>
| |
| <tr valign="top">
| |
| <td>[[image:DotPoint3.JPG|link=]]</td>
| |
| <td>Enter a track condition as a '''%''' value where it shows '''Default'''. The description on the right will change to show the effect of the new value<br>
| |
| [[image:TrackConditionSetting_S20.png|link=]]</td>
| |
| </tr>
| |
| <tr valign="top">
| |
| <td>[[image:DotPoint4.JPG|link=]]</td>
| |
| <td>Click <span style="font-weight: 700; font-size: 15px; color: white; background-color: black;"> Save Changes </span> to set the new value and exit or <span style="font-weight: 700; font-size: 15px; color: white; background-color: black;"> Cancel </span> to cancel the new value and exit</td>
| |
| </tr>
| |
| </table>
| |
| </td>
| |
| </tr>
| |
| </table>
| |
| </td>
| |
| </tr>
| |
| </table>
| |
| <br>
| |
| <table width=1000>
| |
| <tr valign="top">
| |
| <td width=25>[[image:Cblue.png|link=]]</td>
| |
| <td>A third method of setting the '''Track Condition''' is to use the [[image:S20_PlacementToolIcon.png|link=|20px]] '''[[#The Placement Tool|Placement Tool]]''' to place an invisible track "bump" object on a track segment.<br><br>
| |
|
| |
| See [[image:PageLink.PNG|link=]] '''[[#PT: Condition Track|Placement: Set Track Condition and Superelevation]]''' for the details</td>
| |
| </tr>
| |
| </table>
| |
| <br>
| |
| <span style="font-weight: 700; font-size: 17px;">Track Superelevation</span><br>
| |
|
| |
| <table width=1000>
| |
| <tr valign="top">
| |
| <td>The '''Track Superelevation''' can only be set through the '''Track Endpoint Context Menu'''. You can have a different value set for each endpoint that will reflect the changes that can take place around a curve. For more information on how to calculate and use '''Superelevation''' see the '''Trainz Wiki Page [[image:WikiLink.PNG|link=]] [[HowTo/Use_Superelevation|How to Use Superelevation]]'''</td>
| |
| </tr>
| |
| <tr valign="top">
| |
| <td>
| |
| <table>
| |
| <tr valign="top">
| |
| <td width=220>[[image:ContextMenuSplineEndPoint_S20.png|link=]]</td>
| |
| <td>
| |
| <table bgcolor=#000000 cellpadding=2>
| |
| <tr valign="top">
| |
| <td>
| |
| <table bgcolor=#ffffff cellpadding=2>
| |
| <tr valign="top">
| |
| <td colspan=2><span style="font-weight: 700; font-size: 15px;">Steps:</span> To set the '''Superelevation''' for an endpoint of a newly placed track segment:-</td>
| |
| </tr>
| |
| <tr valign="top">
| |
| <td width=25>[[image:DotPoint1.JPG|link=]]</td>
| |
| <td><span style="font-weight: 700; font-size: 15px; background-color: lightcyan;"> Left Click </span> on the [[image:SplineSegmentContextIcon_S20.png|link=]] '''Track Spline Endpoint Context Icon''' to open its menu</td>
| |
| </tr>
| |
| <tr valign="top">
| |
| <td>[[image:DotPoint2.JPG|link=]]</td>
| |
| <td><span style="font-weight: 700; font-size: 15px; background-color: lightcyan;"> Left Click </span> on the <span style="font-weight: 700; font-size: 15px; color: white; background-color: black;"> Edit Details </span> option at the bottom of the list</td>
| |
| </tr>
| |
| <tr valign="top">
| |
| <td>[[image:DotPoint3.JPG|link=]]</td>
| |
| <td>Enter a '''Superelevation Degree''' as an angle (in degrees) - this is the superelevation angle at this vertex (endpoint) per degree of curvature where '''0 = none'''</td>
| |
| </tr>
| |
| <tr valign="top">
| |
| <td colspan=2>
| |
| <table>
| |
| <tr valign="top">
| |
| <td width=265>[[image:TrackSuperElevationSetting_S20.png|link=]]</td>
| |
| <td>The '''Superelevation Angle''' is calculated using the radius of the curve, the maximum track speed and the track gauge.<br>
| |
| See the '''Trainz Wiki Page [[image:WikiLink.PNG|link=]] [[HowTo/Use_Superelevation|How to Use Superelevation]]''' for the formula</td>
| |
| </tr>
| |
| </table>
| |
| </td>
| |
| </tr>
| |
| <tr valign="top">
| |
| <td>[[image:DotPoint4.JPG|link=]]</td>
| |
| <td>Enter a '''Superelevation Limit''' as an angle (in degrees) - this is the '''maximum''' allowed superelevation angle at this vertex (endpoint)</td>
| |
| </tr>
| |
| <tr valign="top">
| |
| <td>[[image:DotPoint5.JPG|link=]]</td>
| |
| <td>Click <span style="font-weight: 700; font-size: 15px; color: white; background-color: black;"> Save Changes </span> to set the new values and exit or <span style="font-weight: 700; font-size: 15px; color: white; background-color: black;"> Cancel </span> to cancel the new values and exit</td>
| |
| </tr>
| |
| <tr valign="top">
| |
| <td colspan=2>'''Repeat the above steps for each endpoint'''</td>
| |
| </tr>
| |
| </table>
| |
| </td>
| |
| </tr>
| |
| </table>
| |
| </td>
| |
| </tr>
| |
| </table>
| |
| </td>
| |
| </tr>
| |
| </table>
| |
| <br>
| |
| <table width=1000> <!-- BEGIN Section Nav Buttons -->
| |
| <tr valign="top">
| |
| <td width=629><span id="FA: Context Splines"></span>
| |
| ===<span style="font-weight: 700; font-size: 17px; color: white; background-color: blue;"> Fine Adjustment: Spline Object Context Menus </span>===
| |
| </td>
| |
| <td width=50> </td>
| |
| <td width=50> </td>
| |
| <td width=46>[[image:SkipMinorDown.png|link=#skip Fine Adjustment: Rolling Stock Objects|Down]][[image:SkipMinorUp.png|link=#FA: Condition Track|Up]]</td> <!-- for Top and Minor Up/Down -->
| |
| <td width=75> </td>
| |
| <td width=75> </td>
| |
| <td width=75> </td> <!-- for Bottom -->
| |
| </tr>
| |
| </table> <!-- END Section Nav Buttons -->
| |
|
| |
| <table width=1000>
| |
| <tr valign="top">
| |
| <td>A selected scenery spline object, or a group of selected scenery spline objects, will have '''Context Icons'''. The icon design will vary between object types and their position on the spline object. Each icon will open its own '''Context Menu'''.</td>
| |
| </tr>
| |
| </table>
| |
| <br>
| |
| <table width=1000>
| |
| <tr valign="top">
| |
| <td width=420>[[image:ContextIconsSpline_S20.png|link=]]</td>
| |
| <td>
| |
| <table bgcolor=#000000 width=580 cellpadding=2>
| |
| <tr valign="top">
| |
| <td>
| |
| <table bgcolor=#ffffb0 width=576 cellpadding=2>
| |
| <tr valign="top">
| |
| <td>
| |
| <table>
| |
| <tr valign="top">
| |
| <td width=25>[[image:NotePad.PNG|link=]]</td>
| |
| <td width=551><span style="font-size: 17px; font-weight: 700;">Notes:</span><br>
| |
| ----</td>
| |
| </tr>
| |
| </table>
| |
| <table>
| |
| <tr valign="top">
| |
| <td colspan=2>Splines have two different '''Context Icons''' that lead to two slightly different '''Context Menus'''.</td>
| |
| </tr>
| |
| <tr valign="top">
| |
| <td width=10>[[image:DotPoint.JPG|10px|link=]]</td>
| |
| <td>one context icon and menu for each '''endpoint''' [[image:SplineEndpointContextIcon_S20.png|link=]]</td>
| |
| </tr>
| |
| <tr valign="top">
| |
| <td>[[image:DotPoint.JPG|10px|link=]]</td>
| |
| <td>one context icon and menu for the '''segment''' [[image:SplineSegmentContextIcon_S20.png|link=]][[image:TrackSegmentContextIcon_S20.png|link=]]</td>
| |
| </tr>
| |
| <tr valign="top">
| |
| <td colspan=2>If multiple segments have been selected then the last segment added to the selection will have the context icons. If all the segments were selected by a <span style="font-weight: 700; font-size: 15px; background-color: lightcyan;">Double Left Click</span> then the segment that was clicked will have the icons.</td>
| |
| </tr>
| |
| </table>
| |
| </td>
| |
| </tr>
| |
| </table>
| |
| </td>
| |
| </tr>
| |
| </table>
| |
| </td>
| |
| </tr>
| |
| </table>
| |
| <br>
| |
| <table width=1000>
| |
| <tr valign="top">
| |
| <td>
| |
| <table width=420 bgcolor=#000000 cellpadding=2>
| |
| <tr valign="top">
| |
| <td>
| |
| <table bgcolor=#ffffff cellpadding=2>
| |
| <tr valign="top">
| |
| <td>To open a selected objects '''Context Menu''' choose one of the following:-<br>
| |
| <table>
| |
| <tr>
| |
| <td colspan=2><span style="font-weight: 700; font-size: 15px;">Options:</span> </td>
| |
| </tr>
| |
| <tr valign="top">
| |
| <td width=25>[[image:Ablue.png|link=]]</td>
| |
| <td><span style="font-weight: 700; font-size: 15px; background-color: lightcyan;"> Left Click </span> the '''Context Icon''' [[image:SplineContextIcons_S20.png|link=]] <span style="font-size: 15px; font-weight: 700;">OR</span></td>
| |
| </tr>
| |
| <tr valign="top">
| |
| <td>[[image:Bblue.png|link=]]</td>
| |
| <td>Press the <span style="color: white; background-color: black; font-weight: 700; font-size: 15px;"> T </span> key</td>
| |
| </tr>
| |
| </table>
| |
| </td>
| |
| </tr>
| |
| </table>
| |
| </td>
| |
| </tr>
| |
| </table>
| |
| </td>
| |
| <td>
| |
| <table width=580 bgcolor=#000000 cellpadding=2>
| |
| <tr valign="top">
| |
| <td>
| |
| <table bgcolor=#ffffb0 cellpadding=2>
| |
| <tr valign="top">
| |
| <td width=25>[[image:NotePad.PNG|link=]]</td>
| |
| <td width=550><span style="font-size: 17px; font-weight: 700;">Notes: Using the <span style="color: white; background-color: black;"> T </span> key with splines</span><br>
| |
| ----</td>
| |
| </tr>
| |
| <tr valign="middle">
| |
| <td>[[image:SplineSegmentContextIcon_S20.png|link=]]<br>
| |
| [[image:TrackSegmentContextIcon_S20.png|link=]]</td>
| |
| <td>If a spline '''segment''' has been selected then pressing the <span style="color: white; background-color: black; font-weight: 700; font-size: 15px;"> T </span> key will open the '''Segment Context Menu''' and the '''Menu''' options you select or edit will apply to the whole segment or all selected segments</td>
| |
| </tr>
| |
| <tr>
| |
| <td> </td>
| |
| <td>
| |
| ----
| |
| </td>
| |
| </tr>
| |
| <tr valign="top">
| |
| <td>[[image:SplineEndpointContextIcon_S20.png|link=]]</td>
| |
| <td>If a spline '''end point''' has been selected then pressing the <span style="color: white; background-color: black; font-weight: 700; font-size: 15px;"> T </span> key will open the '''End Point Context Menu''' and the '''Menu''' options you select or edit will only apply to '''that particular endpoint'''</td>
| |
| </tr>
| |
| </table>
| |
| </td>
| |
| </tr>
| |
| </table>
| |
| </td>
| |
| </tr>
| |
| </table>
| |
| <br>
| |
| <table width=1000>
| |
| <tr valign="top">
| |
| <td colspan=2><span style="font-weight: 700; font-size: 17px;">Spline Object Context Menus</span></td>
| |
| </tr>
| |
| <tr valign="top">
| |
| <td width=220>[[image:SplineEndpointContextIcon_S20.png|link=]] <span style="font-weight: 700; font-size: 15px; color: white; background-color: black;"> Endpoint Context Menu </span><br>
| |
| [[image:ContextMenuSplineEndPoint_S20.png|link=]]</td>
| |
| <td width=240>[[image:SplineSegmentContextIcon_S20.png|link=]][[image:TrackSegmentContextIcon_S20.png|link=]] <span style="font-weight: 700; font-size: 15px; color: white; background-color: black;"> Segment Context Menu </span><br>
| |
| [[image:ContextMenuSplineSegment_S20.png|link=]]</td>
| |
| <td>
| |
| <table bgcolor=#000000 cellpadding=2>
| |
| <tr valign="top">
| |
| <td>
| |
| <table bgcolor=#ffffb0 cellpadding=2>
| |
| <tr valign="top">
| |
| <td width=25>[[image:NotePad.PNG|link=]]</td>
| |
| <td width=975><span style="font-size: 17px; font-weight: 700;">Notes:'''</span><br>
| |
| ----
| |
| The <span style="font-weight: 700; font-size: 15px; color: white; background-color: black;"> Edit Details </span> option is only available for '''Track''' splines. The properties that can be edited will depend on whether you have selected a '''Track Segment''' or a '''Track Endpoint'''.
| |
| <br>
| |
| <table>
| |
| <tr valign="top">
| |
| <td width=10>[[image:DotPoint.JPG|10px|link=]]</td>
| |
| <td><span style="font-weight: 700; font-size: 15px;">Endpoint Details</span> - the track '''Superelevation''' properties for that endpoint. '''Superelevation''' is a feature used on curves to raise the height of the outside track of the curve slightly above the height of the inside track. This allows higher speeds around curves.<br>
| |
| For more information on '''Superelevation''' see the Trainz Wiki Page at [[image:WikiLink.PNG|link=]] '''[[HowTo/Use_Superelevation|How to Use Superelevation]]'''</td>
| |
| </tr>
| |
| <tr valign="top">
| |
| <td >[[image:DotPoint.JPG|10px|link=]]</td>
| |
| <td><span style="font-weight: 700; font-size: 15px;">Segment Details</span> - the track '''Condition''' property for that segment.
| |
| <table>
| |
| <tr valign="top">
| |
| <td colspan=3>'''Track Condition''' is the "smoothness" of the ride over a track segment</td>
| |
| </tr>
| |
| <tr valign="top">
| |
| <td>100% = perfect</td>
| |
| <td>50% = average</td>
| |
| <td>1% = extremely poor</td>
| |
| </tr>
| |
| </table>
| |
| You can also select multiple track segments and set their track '''Condition''' by editing their combined <span style="font-weight: 700; font-size: 15px; color: gold; background-color: black;"> Condition </span> value in the <span style="font-weight: 700; font-size: 15px; color: white; background-color: #797979;"> Tool Options Palette </span>.</td>
| |
| </tr>
| |
| </table>
| |
| </td>
| |
| </tr>
| |
| </table>
| |
| </td>
| |
| </tr>
| |
| </table>
| |
| </td>
| |
| </tr>
| |
| </table>
| |
| <br>
| |
| <table width=1000 bgcolor=#000000>
| |
| <tr valign="top">
| |
| <td>
| |
| <table width=996 bgcolor=#ffffff>
| |
| <tr valign="top">
| |
| <td>
| |
| <table>
| |
| <tr valign="middle">
| |
| <td width=35>[[image:Information.png|35px|link=]]</td>
| |
| <td><span style="font-weight: 700; font-size: 17px;">Spline Object Context Menu Options</span></td>
| |
| </tr>
| |
| </table>
| |
| </td>
| |
| </tr>
| |
| <tr valign="top">
| |
| <td>
| |
| <table bgcolor=#ffffb0 cellpadding=2>
| |
| <tr valign="top">
| |
| <td width=25>[[image:NotePad.PNG|link=]]</td>
| |
| <td>When copying/moving track segments into a scrapbook any track objects on the segments will be included in the scrapbook</td>
| |
| </tr>
| |
| </table>
| |
| <table>
| |
| <tr valign="top">
| |
| <td><span style="font-weight: 700; font-size: 15px; color: white; background-color: black;"> Cut </span></td>
| |
| <td>remove the selected segment or segments from the route and move them into the '''Scrapbook''' ([[image:SplineSegmentContextIcon_S20.png|link=]][[image:TrackSegmentContextIcon_S20.png|link=]] only)</td>
| |
| </tr>
| |
| </table>
| |
| </td>
| |
| </tr>
| |
| <tr valign="top">
| |
| <td>
| |
| <table>
| |
| <tr valign="top">
| |
| <td><span style="font-weight: 700; font-size: 15px; color: white; background-color: black;"> Copy </span></td>
| |
| <td>copy the selected segment or segments and place them into the '''Scrapbook''' ([[image:SplineSegmentContextIcon_S20.png|link=]][[image:TrackSegmentContextIcon_S20.png|link=]] only)</td>
| |
| </tr>
| |
| </table>
| |
| </td>
| |
| </tr>
| |
| <tr valign="top">
| |
| <td>
| |
| <table>
| |
| <tr valign="top">
| |
| <td><span style="font-weight: 700; font-size: 15px; color: white; background-color: black;"> Paste </span></td>
| |
| <td>paste the contents of the current '''Scrapbook''' at the cursor (focus) point<br>
| |
| <table bgcolor=#ffffb0 cellpadding=2>
| |
| <tr valign="top">
| |
| <td width=25>[[image:NotePad.PNG|link=]]</td>
| |
| <td>When pasted from a scrapbook the objects will be surrounded by a '''Marquee Selection Area''' that, depending on the settings in the [[image:PageLink.PNG|link=]] '''[[#Scrapbook Filters|Scrapbook Filters]]''', may add to or replace all other objects, splines, textures, ground terrain and effect layers in that area</td>
| |
| </tr>
| |
| </table>
| |
| </td>
| |
| </tr>
| |
| </table>
| |
| </td>
| |
| </tr>
| |
| <tr valign="top">
| |
| <td>
| |
| <table>
| |
| <tr valign="top">
| |
| <td><span style="font-weight: 700; font-size: 15px; color: white; background-color: black;"> Delete </span></td>
| |
| <td>delete the segment, segments or endpoint. It has the same effect as pressing the <span style="font-weight: 700; font-size: 15px; color: white; background-color: black;"> Delete </span> key</td>
| |
| </tr>
| |
| </table>
| |
| </td>
| |
| </tr>
| |
| <tr valign="top">
| |
| <td>
| |
| <table>
| |
| <tr valign="top">
| |
| <td><span style="font-weight: 700; font-size: 15px; color: white; background-color: black;"> Replace Spline with Selected Asset </span></td>
| |
| <td>the highlighted spline will be replaced with the asset currently selected in the <span style="font-weight: 700; font-size: 15px; color: white; background-color: #797979;"> Assets Palette </span>. If the asset selected in the <span style="font-weight: 700; font-size: 15px; color: white; background-color: #797979;"> Assets Palette </span> is the wrong type (e.g. a mesh object instead of a scenery spline) then this option will be greyed out ([[image:SplineSegmentContextIcon_S20.png|link=]][[image:TrackSegmentContextIcon_S20.png|link=]] only)</td>
| |
| </tr>
| |
| </table>
| |
| </td>
| |
| </tr>
| |
| <tr valign="top">
| |
| <td>
| |
| <table>
| |
| <tr valign="top">
| |
| <td><span style="font-weight: 700; font-size: 15px; color: white; background-color: black;"> Paint Under Selected </span></td>
| |
| <td>the texture selected in the <span style="font-weight: 700; font-size: 15px; color: white; background-color: #797979;"> Assets Palette </span> will be painted under the '''selected''' objects. The <span style="font-weight: 700; font-size: 15px; color: white; background-color: #797979;"> Tool Options Palette </span> brush settings (<span style="font-weight: 700; font-size: 15px; color: gold; background-color: black;"> Radius </span> and <span style="font-weight: 700; font-size: 15px; color: gold; background-color: black;"> Sensitivity </span>) will control how the texture is applied. If no ground texture has been selected in the <span style="font-weight: 700; font-size: 15px; color: white; background-color: #797979;"> Assets Palette </span> then this option will be greyed out ([[image:SplineSegmentContextIcon_S20.png|link=]][[image:TrackSegmentContextIcon_S20.png|link=]] only)</td>
| |
| </tr>
| |
| <tr valign="top">
| |
| <td colspan=2>
| |
| <table bgcolor=#ffffb0 cellpadding=2>
| |
| <tr valign="top">
| |
| <td width=25>[[image:NotePad.PNG|link=]]</td>
| |
| <td>Objects have a '''minimum brush size''' that represents the smallest area that can be painted beneath them using the <span style="font-weight: 700; font-size: 15px; color: white; background-color: black;"> Paint Under Selected </span> option. This minimum area will vary in size between objects but it will be rectangular even for circular objects. If the <span style="font-weight: 700; font-size: 15px; color: white; background-color: #797979;"> Tool Options Palette </span> brush <span style="font-weight: 700; font-size: 15px; color: gold; background-color: black;"> Radius </span> is set to a smaller size then the brush <span style="font-weight: 700; font-size: 15px; color: gold; background-color: black;"> Radius </span> will be ignored and the objects minimum brush size will be used instead.</td>
| |
| </tr>
| |
| </table>
| |
| </td>
| |
| </tr>
| |
| </table>
| |
| </td>
| |
| </tr>
| |
| <tr valign="top">
| |
| <td>
| |
| <table>
| |
| <tr valign="top">
| |
| <td><span style="font-weight: 700; font-size: 15px; color: white; background-color: black;"> Smooth Ground Under Selected </span></td>
| |
| <td>smooths the height of the ground under the selected spline to match its set height. If multiple spline segments have been selected then the ground under all the segments will be smoothed to their height. The size of the area affected will depend on which has the greater value: the width of the spline <span style="font-weight: 700; font-size: 15px;">OR</span> the <span style="font-weight: 700; font-size: 15px; color: white; background-color: #797979;"> Tool Options Palette </span> <span style="font-weight: 700; font-size: 15px; color: gold; background-color: black;"> Radius </span> setting. Does not work for endpoints [[image:SplineEndpointContextIcon_S20.png|link=]]</td>
| |
| </tr>
| |
| </table>
| |
| </td>
| |
| </tr>
| |
| <tr valign="top">
| |
| <td>
| |
| <table>
| |
| <tr valign="top">
| |
| <td><span style="font-weight: 700; font-size: 15px; color: white; background-color: black;"> Settle on Ground </span></td>
| |
| <td>sets the height of the selected endpoint or segments to match the height of the terrain beneath them ("drops them back to earth"). When used on segments the spline will follow the height changes of the terrain</td>
| |
| </tr>
| |
| </table>
| |
| </td>
| |
| </tr>
| |
| <tr valign="top">
| |
| <td>
| |
| <table>
| |
| <tr valign="top">
| |
| <td><span style="font-weight: 700; font-size: 15px; color: white; background-color: black;"> Apply Height to this Spline Endpoint </span></td>
| |
| <td>sets the height of the selected '''<u>endpoint</u>''' to the value in the <span style="font-weight: 700; font-size: 15px; color: white; background-color: #797979;"> Tool Options Palette </span> <span style="font-weight: 700; font-size: 15px; color: gold; background-color: black;"> Height </span> setting ([[image:SplineEndpointContextIcon_S20.png|link=]] only)</td>
| |
| </tr>
| |
| </table>
| |
| </td>
| |
| </tr>
| |
| <tr valign="top">
| |
| <td>
| |
| <table bgcolor=#ffffe0 cellpadding=2>
| |
| <tr valign="top">
| |
| <td width=25>[[image:PencilTips.PNG|link=]]</td>
| |
| <td>You can copy the '''Height''' from an existing spline endpoint into the <span style="font-weight: 700; font-size: 15px; color: gold; background-color: black;"> Height </span> setting of the <span style="font-weight: 700; font-size: 15px; color: white; background-color: #797979;"> Tool Options Palette </span>. Once it has been copied it can be applied to any other object.<br>
| |
| [[image:DotPoint.JPG|10px|link=]] hold down the <span style="font-weight: 700; font-size: 15px; color: white; background-color: black;"> Alt </span> key and <span style="font-weight: 700; font-size: 15px; background-color: lightcyan;"> Left Click </span> on the spline endpoint to copy its '''Height''' value. That value can then be used to set the '''Height''' of other spline endpoints</td>
| |
| </tr>
| |
| </table>
| |
| </td>
| |
| </tr>
| |
| <tr valign="top">
| |
| <td>
| |
| <table>
| |
| <tr valign="top">
| |
| <td><span style="font-weight: 700; font-size: 15px; color: white; background-color: black;"> Apply Height </span></td>
| |
| <td>sets the height of the selected '''<u>segment</u>''' or '''<u>segments</u>''' to the value in the <span style="font-weight: 700; font-size: 15px; color: white; background-color: #797979;"> Tool Options Palette </span> <span style="font-weight: 700; font-size: 15px; color: gold; background-color: black;"> Height </span> setting ([[image:SplineSegmentContextIcon_S20.png|link=]][[image:TrackSegmentContextIcon_S20.png|link=]] only)</td>
| |
| </tr>
| |
| </table>
| |
| </td>
| |
| </tr>
| |
| <tr valign="top">
| |
| <td>
| |
| <table>
| |
| <tr valign="top">
| |
| <td><span style="font-weight: 700; font-size: 15px; color: white; background-color: black;"> Apply Grade to this Spline Endpoint </span></td>
| |
| <td>you must first <span style="font-weight: 700; background-color: yellow;">select a segment</span> then click on one of its endpoint icons [[image:SplineEndpointContextIcon_S20.png|link=]]. This sets the height of the endpoint to give a '''Grade''' to the surrounding segments that matches the value in the <span style="font-weight: 700; font-size: 15px; color: white; background-color: #797979;"> Tool Options Palette </span> <span style="font-weight: 700; font-size: 15px; color: gold; background-color: black;"> Grade </span> setting</td>
| |
| </tr>
| |
| </table>
| |
| </td>
| |
| </tr>
| |
| <tr valign="top">
| |
| <td>
| |
| <table bgcolor=#ffffe0 cellpadding=2>
| |
| <tr valign="top">
| |
| <td width=25>[[image:PencilTips.PNG|link=]]</td>
| |
| <td>You can copy the '''Grade''' from an existing spline segment into the <span style="font-weight: 700; font-size: 15px; color: gold; background-color: black;"> Grade </span> setting of the <span style="font-weight: 700; font-size: 15px; color: white; background-color: #797979;"> Tool Options Palette </span>. Once it has been copied it can be applied to any other object.<br>
| |
| [[image:DotPoint.JPG|10px|link=]] hold down the <span style="font-weight: 700; font-size: 15px; color: white; background-color: black;"> Alt </span> key and <span style="font-weight: 700; font-size: 15px; background-color: lightcyan;"> Left Click </span> on the spline segment to copy its '''Grade''' value. That value can then be used to set the '''Grade''' of other spline segments</td>
| |
| </tr>
| |
| </table>
| |
| </td>
| |
| </tr>
| |
| <tr valign="top">
| |
| <td>
| |
| <table>
| |
| <tr valign="top">
| |
| <td><span style="font-weight: 700; font-size: 15px; color: white; background-color: black;"> Straighten Spline </span></td>
| |
| <td>forces a straight line (as far as possible) between the endpoints of a single segment. This option will be [[image:Tick.PNG|link=]] ticked if the segment has already been straightened in which case selecting this option will "un-straighten" the segment and remove the tick ([[image:SplineSegmentContextIcon_S20.png|link=]][[image:TrackSegmentContextIcon_S20.png|link=]] only)</td>
| |
| </tr>
| |
| </table>
| |
| </td>
| |
| </tr>
| |
| <tr valign="top">
| |
| <td>
| |
| <table>
| |
| <tr valign="top">
| |
| <td><span style="font-weight: 700; font-size: 15px; color: white; background-color: black;"> Separate Splines </span></td>
| |
| <td>breaks two spline segments into two separate (independent) splines at the '''selected''' endpoint
| |
| <table bgcolor=#ffffb0 cellpadding=2>
| |
| <tr valign="top">
| |
| <td width=25>[[image:NotePad.PNG|link=]]</td>
| |
| <td>If multiple segments have been selected then this option will break '''ALL''' the selected segments into separate (independent) splines</td>
| |
| </tr>
| |
| </table>
| |
| </td>
| |
| </tr>
| |
| <tr valign="top">
| |
| <td><span style="font-weight: 700; font-size: 15px; color: white; background-color: black;"> Merge Splines </span></td>
| |
| <td>removes the '''selected''' endpoint between two segments and merges the segments into one ([[image:SplineEndpointContextIcon_S20.png|link=]] only). Two segments can also be merged by deleting a '''selected''' endpoint with the <span style="font-weight: 700; font-size: 15px; color: white; background-color: black;"> Delete </span> key</td>
| |
| </tr>
| |
| </table>
| |
| </td>
| |
| </tr>
| |
| <tr valign="top">
| |
| <td>
| |
| <table>
| |
| <tr valign="top">
| |
| <td><span style="font-weight: 700; font-size: 15px; color: white; background-color: black;"> Insert Spline Point Here </span></td>
| |
| <td>splits the selected segment into two segments by adding a new endpoint at the point where the segment was clicked ([[image:SplineSegmentContextIcon_S20.png|link=]][[image:TrackSegmentContextIcon_S20.png|link=]] only)</td>
| |
| </tr>
| |
| </table>
| |
| </td>
| |
| </tr>
| |
| <tr valign="top">
| |
| <td>
| |
| <table>
| |
| <tr valign="top">
| |
| <td><span style="font-weight: 700; font-size: 15px; color: white; background-color: black;"> Select in Assets Palette </span></td>
| |
| <td>sets the <span style="font-weight: 700; font-size: 15px; color: white; background-color: #797979;"> Filter Palette </span> to <span style="font-weight: 700; font-size: 15px; color: white; background-color: black;"> All Content </span> and highlights the selected object in the <span style="font-weight: 700; font-size: 15px; color: white; background-color: #797979;"> Assets Palette </span></td>
| |
| </tr>
| |
| </table>
| |
| </td>
| |
| </tr>
| |
| <tr valign="top">
| |
| <td>
| |
| <table>
| |
| <tr valign="top">
| |
| <td><span style="font-weight: 700; font-size: 15px; color: white; background-color: black;"> Select in Filter Palette </span></td>
| |
| <td>sets the <span style="font-weight: 700; font-size: 15px; color: white; background-color: #797979;"> Filter Palette </span> to <span style="font-weight: 700; font-size: 15px; color: white; background-color: black;"> All Content </span> and highlights the selected object in the <span style="font-weight: 700; font-size: 15px; color: white; background-color: #797979;"> Filter Palette </span></td>
| |
| </tr>
| |
| </table>
| |
| </td>
| |
| </tr>
| |
| <tr valign="top">
| |
| <td>
| |
| <table>
| |
| <tr valign="top">
| |
| <td><span style="font-weight: 700; font-size: 15px; color: white; background-color: black;"> Edit Details </span></td>
| |
| <td>opens the '''Properties''' window of the selected spline object. This option is only available for '''Track''' splines. '''Note:''' to enter or edit an objects name property use the <span style="font-weight: 700; font-size: 15px; color: white; background-color: #797979;"> Info Palette </span></td>
| |
| </tr>
| |
| </table>
| |
| </td>
| |
| </tr>
| |
| </table>
| |
| </td>
| |
| </tr>
| |
| </table>
| |
| <br>
| |
| <table width=1000> <!-- BEGIN Section Nav Buttons -->
| |
| <tr valign="top">
| |
| <td width=629><span id="skip Fine Adjustment: Rolling Stock Objects"></span>
| |
| =='''Fine Adjustment: Rolling Stock Objects'''==
| |
| </td>
| |
| <td width=50>[[image:SkipDown.png|link=#skip Fine Adjustment: Object Height Problem Solutions|Skip Down]]</td>
| |
| <td width=50>[[image:SkipUp.png|link=#skip Fine Adjustment: Spline Objects|Skip Up]]</td>
| |
| <td width=46>[[image:SkipMinorDown.png|link=#FA: Decouple Rolling|Down]][[image:SkipMinorUp.png|link=#FA: Context Splines|Up]]</td> <!-- for Top and Minor Up/Down -->
| |
| <td width=75>[[image:HeadingUp.png|link=#stepFineAdjustment|alt=Heading|To Heading]]</td>
| |
| <td width=75> </td>
| |
| <td width=75> </td> <!-- for Bottom -->
| |
| </tr>
| |
| </table> <!-- END Section Nav Buttons -->
| |
|
| |
| <table width=1000 bgcolor="lightcyan" cellpadding=2>
| |
| <tr valign="top">
| |
| <td width=10>[[image:BlueDot10x10.png|link=]]</td>
| |
| <td>'''Rolling Stock Objects''' (locomotives, wagons, etc) can only be moved along the track that they are attached to. If they are moved off the track then they will immediately "snap back" to the nearest track when they are released.</td>
| |
| </tr>
| |
| </table>
| |
| <br>
| |
| <table width=1000> <!-- BEGIN Section Nav Buttons -->
| |
| <tr valign="top">
| |
| <td width=629><span id="FA: Move Rolling"></span>
| |
| ===<span style="font-weight: 700; font-size: 17px; color: white; background-color: blue;"> Fine Adjustment: Move Rolling Stock Objects </span>===
| |
| </td>
| |
| <td width=50> </td>
| |
| <td width=50> </td>
| |
| <td width=46>[[image:SkipMinorDown.png|link=#FA: Decouple Rolling|Down]][[image:SkipMinorBlank.png|link=]]</td> <!-- for Top and Minor Up/Down -->
| |
| <td width=75> </td>
| |
| <td width=75> </td>
| |
| <td width=75> </td> <!-- for Bottom -->
| |
| </tr>
| |
| </table> <!-- END Section Nav Buttons -->
| |
|
| |
| Use the '''Fine Adjustment''' tool to move a selected rolling stock object along the track.<br>
| |
|
| |
| <table width=1000 bgcolor=#000000 cellpadding=2>
| |
| <tr valign="top">
| |
| <td>
| |
| <table width=996 bgcolor=#ffffb0 cellpadding=2>
| |
| <tr valign="top">
| |
| <td width=25>[[image:NotePad.PNG|link=]]</td>
| |
| <td>'''Rolling Stock Objects''' are always attached to a track segment. They can be moved along the track or to a different track but they '''cannot be moved''' to a position that is to the left, right, above or below the track</td>
| |
| </tr>
| |
| </table>
| |
| </td>
| |
| </tr>
| |
| </table>
| |
| <br>
| |
| <table bgcolor=#000000 width=1000 cellpadding=2>
| |
| <tr valign="top">
| |
| <td>
| |
| <table bgcolor=#ffffe0 width=996 cellpadding=2>
| |
| <tr valign="top">
| |
| <td width=25>[[image:PencilTips.PNG|link=]]</td><td>To move an entire consist of rolling stock objects, <span style="font-weight: 700; font-size: 15px; background-color: lightcyan;">Double Left Click</span> on any one of the objects in the consist to select them all and then move them as one object</td>
| |
| </tr>
| |
| </table>
| |
| </td>
| |
| </tr>
| |
| </table>
| |
| <br>
| |
| <table width=1000>
| |
| <tr valign="top">
| |
| <td width=480>[[image:FineAdjustRollingStock_S20.png|link=]]</td>
| |
| <td width=520>
| |
| <table>
| |
| <tr valign="top">
| |
| <td width=10>[[image:DotPoint.JPG|10px|;-]]</td>
| |
| <td>Despite their presence in the '''Fine Adjustment Tool 3D Anchor Frame''' the <span style="font-weight: 700; font-size: 15px;"><span style="color: white; background-color: red;"> Red </span> <span style="color: white; background-color: green;"> Green </span> <span style=" color: white; background-color: blue;"> Blue </span> Rotational Anchor lines</span> and the <span style="font-weight: 700; font-size: 15px;"><span style="font-weight: 700; font-size: 15px; color: white; background-color: blue;"> Blue </span> Vertical Anchor Line</span> will '''NOT''' work on '''Rolling Stock Objects'''</td>
| |
| </tr>
| |
| <tr valign="top">
| |
| <td>[[image:DotPoint.JPG|10px|;-]]</td>
| |
| <td>The <span style="font-weight: 700; font-size: 15px;">Object Anchor</span> (the central black dot) will move the selected rolling stock object or objects in any horizontal direction but they will always be attached to the nearest track spline</td>
| |
| </tr>
| |
| <tr valign="top">
| |
| <td>[[image:DotPoint.JPG|10px|;-]]</td>
| |
| <td>The <span style="font-weight: 700; font-size: 15px;"><span style="color: white; background-color: green;"> Green </span> Horizontal Anchor Line</span> will move the selected rolling stock object or objects along the track</td>
| |
| </tr>
| |
| <tr valign="top">
| |
| <td>[[image:DotPoint.JPG|10px|;-]]</td>
| |
| <td>The <span style="font-weight: 700; font-size: 15px;"><span style="color: white; background-color: red;"> Red </span> Horizontal Anchor Line</span> will move the selected rolling stock object or objects horizontally off the track but they will always be attached to the nearest track spline</td>
| |
| </tr>
| |
| </table>
| |
| <table bgcolor=#000000 cellpadding=2>
| |
| <tr valign="top">
| |
| <td>
| |
| <table bgcolor=#ffffff cellpadding=2>
| |
| <tr valign="top">
| |
| <td colspan=2><span style="font-weight: 700; font-size: 15px;">Steps:</span> To move a '''Rolling Stock Object''' or objects:-</td>
| |
| </tr>
| |
| <tr valign="top">
| |
| <td width=25>[[image:DotPoint1.JPG|link=]]</td>
| |
| <td><span style="font-weight: 700; font-size: 15px; background-color: lightcyan;"> Left Click and Drag </span> the object or objects</td>
| |
| </tr>
| |
| <tr valign="top">
| |
| <td>[[image:DotPoint2.JPG|link=]]</td>
| |
| <td>release the objects on or close to their new track position</td>
| |
| </tr>
| |
| </table>
| |
| </td>
| |
| </tr>
| |
| </table>
| |
| </td>
| |
| </tr>
| |
| </table>
| |
| <br>
| |
| <table width=1000 bgcolor=#000000 cellpadding=2>
| |
| <tr valign="top">
| |
| <td>
| |
| <table bgcolor=#ffffb0 cellpadding=2>
| |
| <tr valign="top">
| |
| <td width=25>[[image:NotePad.PNG|link=]]</td>
| |
| <td><span style="font-size: 17px; font-weight: 700;">Notes: Rolling Stock Conflicts</span><br>
| |
| ----
| |
| <table>
| |
| <tr valign="top">
| |
| <td>You can accidently place a rolling stock object so that it "overlaps" (occupies the same space as) another rolling stock object. A large yellow <span style="font-weight: 700; font-size: 17px;">X</span> rotating above the rolling stock object is a sign of this "conflict".<br>
| |
| This can happen if a rolling stock object is moved off the track and released. It will instantly snap to the nearest track position even if that position is already occupied.<br>
| |
| The simple solution is to use the [[image:S20_FineAdjustmentToolIcon.png|link=|20px]] '''Fine Adjustment Tool''' to move the incorrectly placed object to an unoccupied section of the track.</td>
| |
| <td width=480>[[image:PlacementRollingStockCollision_S20.png|360px|link=]]</td>
| |
| </tr>
| |
| </table>
| |
| </td>
| |
| </tr>
| |
| </table>
| |
| </td>
| |
| </tr>
| |
| </table>
| |
| <br>
| |
| <table width=1000> <!-- BEGIN Section Nav Buttons -->
| |
| <tr valign="top">
| |
| <td width=629><span id="FA: Decouple Rolling"></span>
| |
| ===<span style="font-weight: 700; font-size: 17px; color: white; background-color: blue;"> Fine Adjustment: Decouple Rolling Stock Objects </span>===
| |
| </td>
| |
| <td width=50> </td>
| |
| <td width=50> </td>
| |
| <td width=46>[[image:SkipMinorDown.png|link=#FA: Couple Rolling|Down]][[image:SkipMinorUp.png|link=#skip Fine Adjustment: Rolling Stock Objects|Up]]</td> <!-- for Top and Minor Up/Down -->
| |
| <td width=75> </td>
| |
| <td width=75> </td>
| |
| <td width=75> </td> <!-- for Bottom -->
| |
| </tr>
| |
| </table> <!-- END Section Nav Buttons -->
| |
|
| |
| <table width=1000 bgcolor="lightcyan" cellpadding=2>
| |
| <tr valign="top">
| |
| <td width=10>[[image:BlueDot10x10.png|link=]]</td>
| |
| <td>All decoupling operations between '''Rolling Stock Objects''' are performed using just a <span style="font-weight: 700; font-size: 15px; color: blue;">Left Click and Drag</span>.</td>
| |
| </tr>
| |
| </table>
| |
| <br>
| |
| <table bgcolor=#000000 width=1000 cellpadding=2>
| |
| <tr valign="top">
| |
| <td>
| |
| <table bgcolor=#ffffe0 width=996 cellpadding=2>
| |
| <tr valign="top">
| |
| <td width=25>[[image:PencilTips.PNG|link=]]</td><td>To decouple a rake of joined rolling stock objects from a consist (for example, the first or last 5 wagons), <span style="font-weight: 700; font-size: 15px;"><span style="color: white; background-color: black;"> Shift </span> + <span style="background-color: lightcyan;"> Left Click </span></span> on each of the objects to be selected and then drag them away from the consist</td>
| |
| </tr>
| |
| </table>
| |
| </td>
| |
| </tr>
| |
| </table>
| |
| <br>
| |
| A rolling stock object or objects in the middle of a consist can also be decoupled. This will break the consist into 3 sections.
| |
| <table width=1000>
| |
| <tr valign="top">
| |
| <td width=480>[[image:FreeMoveRollingStockCouple5_S20.png|link=]]<br><br>
| |
| [[image:FreeMoveRollingStockCouple5A_S20.png|link=]]
| |
| </td>
| |
| <td>
| |
| <table width=520 bgcolor=#000000 cellpadding=2>
| |
| <tr valign="top">
| |
| <td>
| |
| <table width=516 bgcolor=#ffffff cellpadding=2>
| |
| <tr valign="top">
| |
| <td colspan=2><span style="font-weight: 700; font-size: 15px;">Steps:</span> To decouple rolling stock from a consist:-</td>
| |
| </tr>
| |
| <tr valign="top">
| |
| <td width=25>[[image:DotPoint1.JPG|link=]]</td>
| |
| <td>Select one (<span style="font-weight: 700; font-size: 15px; background-color: lightcyan;"> Left Click </span>) or more (<span style="font-weight: 700; font-size: 15px;"><span style="color: white; background-color: black;"> Shift </span> + <span style="background-color: lightcyan;"> Left Click </span></span>) rolling stock objects inside a consist<br>
| |
| <table>
| |
| <tr valign="top">
| |
| <td colspan=2>If more than one object is selected, then they:-</td>
| |
| </tr>
| |
| <tr valign="top">
| |
| <td width=10>[[image:DotPoint.JPG|10px|link=]]</td>
| |
| <td>do not have to be connected to each other</td>
| |
| </tr>
| |
| <tr valign="top">
| |
| <td width=10>[[image:DotPoint.JPG|10px|link=]]</td>
| |
| <td>should be in the same consist - the results may be "unexpected" if the objects are selected and dragged out from different consists</td>
| |
| </tr>
| |
| </table>
| |
| <br>
| |
| </td>
| |
| </tr>
| |
| <tr valign="top">
| |
| <td>[[image:DotPoint2.JPG|link=]]</td>
| |
| <td><span style="font-weight: 700; font-size: 15px; background-color: lightcyan;">Left Click and Drag</span> the object or objects out of the consist and onto an <span style="font-weight: 700; font-size: 15px; text-decoration: underline;">Unoccupied</span> section of track<br>
| |
| <table>
| |
| <tr valign="top">
| |
| <td width=10>[[image:DotPoint.JPG|10px|link=]]</td>
| |
| <td><span style="font-weight: 700; background-color: yellow;">do not release the mouse button until you have the rolling stock objects in position otherwise they will simply "snap back" to the nearest track, regardless of whether it is already occupied or not.</span> Think of the yellow connecting line between the wagon and the track shown in the image as if it is a "stretched rubber band"</td>
| |
| </tr>
| |
| <tr valign="top">
| |
| <td width=10>[[image:DotPoint.JPG|10px|link=]]</td>
| |
| <td>The rotating yellow <span style="font-weight: 700; font-size: 15px;">X</span> floating above the selected and now disconnected consist in the image indicates that it has been "derailed" from the track. This will disappear when it is "rerailled" again</td>
| |
| </tr>
| |
| </table>
| |
| </td>
| |
| </tr>
| |
| </table>
| |
| </td>
| |
| </tr>
| |
| </table>
| |
| </td>
| |
| </tr>
| |
| </table>
| |
| <br>
| |
| <table width=1000> <!-- BEGIN Section Nav Buttons -->
| |
| <tr valign="top">
| |
| <td width=629><span id="FA: Couple Rolling"></span>
| |
| ===<span style="font-weight: 700; font-size: 17px; color: white; background-color: blue;"> Fine Adjustment: Couple Rolling Stock Objects </span>===
| |
| </td>
| |
| <td width=50> </td>
| |
| <td width=50> </td>
| |
| <td width=46>[[image:SkipMinorDown.png|link=#FA: Context Rolling|Down]][[image:SkipMinorUp.png|link=#FA: Decouple Rolling|Up]]</td> <!-- for Top and Minor Up/Down -->
| |
| <td width=75> </td>
| |
| <td width=75> </td>
| |
| <td width=75> </td> <!-- for Bottom -->
| |
| </tr>
| |
| </table> <!-- END Section Nav Buttons -->
| |
|
| |
| <table width=1000 bgcolor="lightcyan" cellpadding=2>
| |
| <tr valign="top">
| |
| <td width=10>[[image:BlueDot10x10.png|link=]]</td>
| |
| <td>All coupling operations between '''Rolling Stock Objects''' can be performed using just a <span style="font-weight: 700; font-size: 15px; color: blue;">Left Click and Drag</span> or through the objects '''Context Menu'''.</td>
| |
| </tr>
| |
| </table>
| |
| <span style="font-weight: 700; font-size: 15px;">Options:</span><br><br>
| |
| [[image:Ablue.png|link=]] <span style="font-weight: 700; font-size: 15px;">Using "Click and Drag"</span><br>
| |
| <br>
| |
| Consider the following simple situation:-
| |
| <table width=1000>
| |
| <tr valign="top">
| |
| <td colspan=3>The guard van (caboose) standing at the rear of a consist has to be coupled to the rear gondola wagon.</td>
| |
| </tr>
| |
| <tr valign="top">
| |
| <td width=480>[[image:FreeMoveRollingStockCouple1_S20.png|link=]]<br><br>
| |
| [[image:FreeMoveRollingStockCouple2_S20.png|link=]]</td>
| |
| <td>
| |
| <table width=520 bgcolor=#000000 cellpadding=2>
| |
| <tr valign="top">
| |
| <td>
| |
| <table width=516 bgcolor=#ffffff cellpadding=2>
| |
| <tr valign="top">
| |
| <td colspan=2><span style="font-weight: 700; font-size: 15px;">Steps:</span> To '''Couple''' rolling stock objects:-</td>
| |
| </tr>
| |
| <tr valign="top">
| |
| <td width=25>[[image:DotPoint1.JPG|link=]]</td>
| |
| <td>Select (<span style="font-weight: 700; font-size: 15px; background-color: lightcyan;"> Left Click </span>) the rolling stock object (in this case the guard van) to be coupled to a consist or another rolling stock object (in this case the gondola)
| |
| <table>
| |
| <tr valign="top">
| |
| <td>[[image:DotPoint.JPG|10px|link=]]</td>
| |
| <td>If more than one object has to be selected then use a <span style="font-weight: 700; font-size: 15px;"><span style="color: white; background-color: black;"> Shift </span> + <span style="background-color: lightcyan;"> Left Click </span></span> to individually select each object</td>
| |
| </tr>
| |
| <tr valign="top">
| |
| <td>[[image:DotPoint.JPG|10px|link=]]</td>
| |
| <td>If '''ALL''' the objects in a consist have to be selected then use a <span style="font-weight: 700; font-size: 15px; background-color: lightcyan;">Double Left Click</span> on any object in the consist</td>
| |
| </tr>
| |
| </table>
| |
| </td>
| |
| </tr>
| |
| <tr valign="top">
| |
| <td>[[image:DotPoint2.JPG|link=]]</td>
| |
| <td><span style="font-weight: 700; font-size: 15px; background-color: lightcyan;">Left Click and Drag</span> the object (the guard van) along the track to its target object or consist. When dragged rolling stock objects will "drop" or lower their height a few cms
| |
| <table>
| |
| <tr valign="top">
| |
| <td width=10>[[image:DotPoint.JPG|10px|link=]]</td>
| |
| <td>If the selected object (or objects) is already part of a consist then dragging will decouple it from the consist before moving it</td>
| |
| </tr>
| |
| <tr valign="top">
| |
| <td width=10>[[image:DotPoint.JPG|10px|link=]]</td>
| |
| <td>When it reaches the target object and couples it cannot be moved any further</td>
| |
| </tr>
| |
| </table>
| |
| </td>
| |
| </tr>
| |
| <tr valign="top">
| |
| <td>[[image:DotPoint3.JPG|link=]]</td>
| |
| <td>Release the object when it has coupled and it will return to its correct height</td>
| |
| </tr>
| |
| </table>
| |
| </td>
| |
| </tr>
| |
| </table>
| |
| <br>
| |
| <table bgcolor=#000000 cellpadding=2>
| |
| <tr valign="top">
| |
| <td>
| |
| <table bgcolor=#ffffb0 cellpadding=2>
| |
| <tr valign="top">
| |
| <td width=25>[[image:NotePad.PNG|link=]]</td>
| |
| <td>If the two objects do not couple check that both are on the same track</td>
| |
| </tr>
| |
| </table>
| |
| </td>
| |
| </tr>
| |
| </table>
| |
| </td>
| |
| </tr>
| |
| </table>
| |
| <br>
| |
| [[image:Bblue.png|link=]] <span style="font-weight: 700; font-size: 15px;">Using the Context Menu</span><br>
| |
|
| |
| Using the same situation as above, the isolated guard van and the gondola wagon at the end of a consist are to be coupled together.
| |
|
| |
| <span id="Free_Move_Merge"></span>
| |
| <table width=1000>
| |
| <tr valign="top">
| |
| <td width=480>[[image:FreeMoveRollingStockCouple3_S20.png|link=]]</td>
| |
| <td>
| |
| <table width=480 bgcolor=#000000 cellpadding=2>
| |
| <tr valign="top">
| |
| <td>
| |
| <table width=476 bgcolor=#ffffff cellpadding=2>
| |
| <tr valign="top">
| |
| <td colspan=2><span style="font-weight: 700; font-size: 15px;">Steps:</span></td>
| |
| </tr>
| |
| <tr valign="top">
| |
| <td width=20>[[image:DotPoint1.JPG|link=]]</td>
| |
| <td>Select, <span style="font-weight: 700; font-size: 15px;"><span style="color: white; background-color: black;"> Shift </span> + <span style="background-color: lightcyan;"> Left Click </span></span>, on both objects<br>
| |
| <table bgcolor=#ffffe0 cellpadding=2>
| |
| <tr valign="top">
| |
| <td width=25>[[image:PencilTips.PNG|link=]]</td><td>'''The order of selection <span style="font-size: 15px;">IS</span> important. Select the "destination" object, where the others will be coupled, last'''</td>
| |
| </tr>
| |
| </table>
| |
| The '''Context Icon''' will appear on the last rolling stock object selected.
| |
| </td>
| |
| </tr>
| |
| <tr valign="top">
| |
| <td>[[image:DotPoint2.JPG|link=]]</td>
| |
| <td>Open the '''Rolling Stock Object Context Menu''' and <span style="font-weight: 700; font-size: 15px; background-color: lightcyan;"> Left Click </span> on the '''Context Icon''' of the last selected rolling stock object, <span style="font-weight: 700; font-size: 15px;">OR</span> press the <span style="font-weight: 700; font-size: 15px; color: white; background-color: black;"> T </span> key</td>
| |
| </tr>
| |
| <tr>
| |
| <td>[[image:DotPoint3.JPG|link=]]</td>
| |
| <td>Select the option <span style="font-weight: 700; font-size: 15px; color: white; background-color: black;"> Merge into Single Train </span>
| |
| </td>
| |
| </tr>
| |
| </table>
| |
| </td>
| |
| </tr>
| |
| </table>
| |
| </td>
| |
| </tr>
| |
| </table>
| |
| <br>
| |
| There are '''two''' possible outcomes depending on which object has the '''Context Icon'''
| |
| <br>
| |
| <table width=1000>
| |
| <tr valign="top">
| |
| <td width=500>
| |
| <table bgcolor=#000000 cellpadding=2>
| |
| <tr valign="top">
| |
| <td>
| |
| <table bgcolor=#ffffff cellpadding=2>
| |
| <tr valign="top">
| |
| <td width=480>[[image:DotPoint1RedC.png|link=]] <span style="font-weight: 700; font-size: 15px;">Context Icon on the Gondola Wagon</span><br>
| |
| [[image:FreeMoveRollingStockCouple3A_S20.png|link=]]<br>
| |
| Using the <span style="font-weight: 700; font-size: 15px; color: white; background-color: black;"> Merge into Single Train </span> option with the '''Context Icon''' on the gondola wagon at the end of the consist. The guard van couples to the gondola wagon and the consist
| |
| </td>
| |
| </tr>
| |
| </table>
| |
| </td>
| |
| </tr>
| |
| </table>
| |
| </td>
| |
| <td width=500>
| |
| <table bgcolor=#000000 cellpadding=2>
| |
| <tr valign="top">
| |
| <td>
| |
| <table bgcolor=#ffffff cellpadding=2>
| |
| <tr valign="top">
| |
| <td width=480>[[image:DotPoint2RedC.png|link=]] <span style="font-weight: 700; font-size: 15px;">Context Icon on the Guard Van</span><br>
| |
| [[image:FreeMoveRollingStockCouple4A_S20.png|link=]]<br>
| |
| Using the <span style="font-weight: 700; font-size: 15px; color: white; background-color: black;"> Merge into Single Train </span> option with the '''Context Icon''' on the guard van. The gondola wagon decouples from the consist and couples to the guard van
| |
| </td>
| |
| </tr>
| |
| </table>
| |
| </td>
| |
| </tr>
| |
| </table>
| |
| </td>
| |
| </tr>
| |
| </table>
| |
| <br>
| |
| <table width=1000>
| |
| <tr valign="top">
| |
| <td>Using a more complex example involving multiple objects from several different consists. The selected wagons shown below are to form a single consist based on the loco.</td>
| |
| </tr>
| |
| <tr>
| |
| <td>[[image:FreeMoveRollingStockMultiMerge1_S20.png|link=]]</td>
| |
| </tr>
| |
| <tr>
| |
| <td>The loco was the last object to be selected so it has the '''Context Icon'''. The '''Context Menu''' is opened and the option <span style="font-weight: 700; font-size: 15px; color: white; background-color: black;"> Merge into Single Train </span> is selected with the result as shown below.</td>
| |
| </tr>
| |
| <tr>
| |
| <td>[[image:FreeMoveRollingStockMultiMerge2_S20.png|link=]]</td>
| |
| </tr>
| |
| <tr>
| |
| <td>The wagons and loco have been combined into a single consist but not necessarily in a useful order. <span style="font-weight: 700; font-size: 15px; background-color: lightcyan;">Left Click and Drag</span> the incorrectly placed vehicles to their correct positions.</td>
| |
| </tr>
| |
| </table>
| |
| <br>
| |
| <table width=1000> <!-- BEGIN Section Nav Buttons -->
| |
| <tr valign="top">
| |
| <td width=629><span id="FA: Context Rolling"></span>
| |
| ===<span style="font-weight: 700; font-size: 17px; color: white; background-color: blue;"> Fine Adjustment: Rolling Stock Object Context Menu </span>===
| |
| </td>
| |
| <td width=50> </td>
| |
| <td width=50> </td>
| |
| <td width=46>[[image:SkipMinorDown.png|link=#skip Fine Adjustment: Object Height Problem Solutions|Down]][[image:SkipMinorUp.png|link=#FA: Couple Rolling|Up]]</td> <!-- for Top and Minor Up/Down -->
| |
| <td width=75> </td>
| |
| <td width=75> </td>
| |
| <td width=75> </td> <!-- for Bottom -->
| |
| </tr>
| |
| </table> <!-- END Section Nav Buttons -->
| |
|
| |
| <table width=1000>
| |
| <tr>
| |
| <td>A selected rolling stock object, or a group of selected rolling stock objects, will have a '''Context Icon''' that opens a '''Context Menu'''. The icon design will vary between object types.</td>
| |
| </tr>
| |
| </table>
| |
|
| |
| <table width=1000>
| |
| <tr valign="top">
| |
| <td>
| |
| <table bgcolor=#000000 width=500 cellpadding=2>
| |
| <tr valign="top">
| |
| <td>
| |
| <table bgcolor=#ffffff width=496 cellpadding=2>
| |
| <tr valign="top">
| |
| <td width=396>To open a selected rolling stock object's '''Context Menu''' choose one of the following:-<br>
| |
| <table>
| |
| <tr>
| |
| <td colspan=2><span style="font-weight: 700; font-size: 15px;">Options:</span> </td>
| |
| </tr>
| |
| <tr valign="top">
| |
| <td width=25>[[image:Ablue.png|link=]]</td>
| |
| <td width=371><span style="font-weight: 700; font-size: 15px; background-color: lightcyan;"> Left Click </span> its '''Context Icon''' [[image:ContextIconsRollingStock_S20.png|link=]] <span style="font-size: 15px; font-weight: 700;">OR</span></td>
| |
| </tr>
| |
| <tr valign="top">
| |
| <td>[[image:Bblue.png|link=]]</td>
| |
| <td>Press the <span style="color: white; background-color: black; font-weight: 700; font-size: 15px;"> T </span> key</td>
| |
| </tr>
| |
| </table>
| |
| </td>
| |
| </tr>
| |
| </table>
| |
| </td>
| |
| </tr>
| |
| </table>
| |
| </td>
| |
| <td>
| |
| <table width=500 bgcolor=#000000 cellpadding=2>
| |
| <tr valign="top">
| |
| <td>
| |
| <table width=496 bgcolor=#ffffe0 cellpadding=2>
| |
| <tr valign="top">
| |
| <td width=25>[[image:PencilTips.PNG|link=]]</td>
| |
| <td>You cannot add rolling stock assets to a '''Scrapbook''' but you can create and save '''Consist Assets''' that have multiple rolling stock objects
| |
| <table bgcolor=#ffffff cellpadding=2>
| |
| <tr valign="top">
| |
| <td colspan=2><span style="font-weight: 700; font-size: 15px;">Steps:</span> To create a '''Consist Asset''':-</td>
| |
| </tr>
| |
| <tr valign="top">
| |
| <td width=25>[[image:DotPoint1.JPG|link=]]</td>
| |
| <td>select the consist - <span style="font-weight: 700; font-size: 15px; background-color: lightcyan;"> Double Left Click </span> on the consist or <span style="font-weight: 700; font-size: 15px;"><span style="color: white; background-color: black;"> Shift </span> + <span style="background-color: lightcyan;"> Left Click </span></span> on individual items</td>
| |
| </tr>
| |
| <tr valign="top">
| |
| <td>[[image:DotPoint2.JPG|link=]]</td>
| |
| <td>open the consist '''Context Menu''' - <span style="font-weight: 700; font-size: 15px; background-color: lightcyan;"> Left Click </span> on its icon or press the <span style="font-weight: 700; font-size: 15px; color: white; background-color: black;"> T </span> key</td>
| |
| </tr>
| |
| <tr valign="top">
| |
| <td>[[image:DotPoint3.JPG|link=]]</td>
| |
| <td>select the option <span style="font-weight: 700; font-size: 15px; color: white; background-color: black;"> Save to Consist Asset... </span></td>
| |
| </tr>
| |
| <tr valign="top">
| |
| <td>[[image:DotPoint4.JPG|link=]]</td>
| |
| <td>enter a name and an optional description for your new '''Consist Asset''' and click the [[image:Tick.PNG|link=]] icon</td>
| |
| </tr>
| |
| <tr valign="top">
| |
| <td colspan=2>The consist will appear as a '''Train''' asset in the <span style="font-weight: 700; font-size: 15px; color: white; background-color: #797979;"> Assets Palette </span> </td>
| |
| </tr>
| |
| </table>
| |
| </td>
| |
| </tr>
| |
| </table>
| |
| </td>
| |
| </tr>
| |
| </table>
| |
| </td>
| |
| </tr>
| |
| </table>
| |
| <br>
| |
| <table width=1000>
| |
| <tr valign="top">
| |
| <td width=220>[[image:ContextMenuRollingStock_S20.png|link=]]<br>
| |
| <br>
| |
| <table width=220 bgcolor=#000000 cellpadding=2>
| |
| <tr valign="top">
| |
| <td>
| |
| <table bgcolor=#ffffb0 cellpadding=2>
| |
| <tr valign="top">
| |
| <td width=25>[[image:NotePad.PNG|link=]]</td>
| |
| <td>You cannot set a '''Height''' value for a rolling stock object. It will always take the same height as the track on which it is placed</td>
| |
| </tr>
| |
| </table>
| |
| </td>
| |
| </tr>
| |
| </table>
| |
| </td>
| |
| <td width=780>
| |
| <table width=780 bgcolor=#000000>
| |
| <tr valign="top">
| |
| <td>
| |
| <table width=776 bgcolor=#ffffff>
| |
| <tr valign="top">
| |
| <td>
| |
| <table>
| |
| <tr valign="middle">
| |
| <td width=35>[[image:Information.png|35px|link=]]</td>
| |
| <td><span style="font-weight: 700; font-size: 17px;">Rolling Stock Object Context Menu Options</span></td>
| |
| </tr>
| |
| </table>
| |
| </td>
| |
| </tr>
| |
| <tr valign="top">
| |
| <td>
| |
| <table width=776 bgcolor=#ffffb0 cellpadding=2>
| |
| <tr valign="top">
| |
| <td>
| |
| <table>
| |
| <tr valign="top">
| |
| <td width=25>[[image:NotePad.PNG|link=]]</td>
| |
| <td><span style="font-size: 17px; font-weight: 700;">Notes:</span><br>
| |
| ----
| |
| Unlike other '''Context Menus''', the <span style="font-weight: 700; font-size: 15px; color: white; background-color: black;"> Cut </span> and <span style="font-weight: 700; font-size: 15px; color: white; background-color: black;"> Copy </span> menu options are not selectable for '''Rolling Stock Objects''' because these objects cannot be added to a '''Scrapbook'''. The <span style="font-weight: 700; font-size: 15px; color: white; background-color: black;"> Save to Consist Asset... </span> option performs some of the '''Scrapbook''' functions for rolling stock (see '''Tips''' above).</td>
| |
| </tr>
| |
| </table>
| |
| </td>
| |
| </tr>
| |
| </table>
| |
| <table>
| |
| <tr valign="top">
| |
| <td><span style="font-weight: 700; font-size: 15px; color: white; background-color: black;"> Paste </span></td>
| |
| <td>the contents of the current '''Scrapbook''' will be pasted at the cursor (focus) point<br>
| |
| <table bgcolor=#ffffb0 cellpadding=2>
| |
| <tr valign="top">
| |
| <td width=25>[[image:NotePad.PNG|link=]]</td>
| |
| <td>When pasted from a scrapbook the objects will be surrounded by a '''Marquee Selection Area''' that, depending on the settings in the [[image:PageLink.PNG|link=]] '''[[#Scrapbook Filters|Scrapbook Filters]]''', may add to or replace all other objects, splines, textures, ground terrain and effect layers in that area</td>
| |
| </tr>
| |
| </table>
| |
| </td>
| |
| </tr>
| |
| </table>
| |
| </td>
| |
| </tr>
| |
| <tr valign="top">
| |
| <td>
| |
| <table>
| |
| <tr valign="top">
| |
| <td><span style="font-weight: 700; font-size: 15px; color: white; background-color: black;"> Delete </span></td>
| |
| <td>the selected rolling stock objects will be deleted. It has the same effect as pressing the <span style="font-weight: 700; font-size: 15px; color: white; background-color: black;"> Delete </span> key</td>
| |
| </tr>
| |
| </table>
| |
| <table>
| |
| <tr valign="top">
| |
| <td><span style="font-weight: 700; font-size: 15px; color: white; background-color: black;"> Paint Under Selected </span></td>
| |
| <td>the texture selected in the <span style="font-weight: 700; font-size: 15px; color: white; background-color: #797979;"> Assets Palette </span> will be painted under the '''selected''' objects. The <span style="font-weight: 700; font-size: 15px; color: white; background-color: #797979;"> Tool Options Palette </span> brush settings (<span style="font-weight: 700; font-size: 15px; color: gold; background-color: black;"> Radius </span> and <span style="font-weight: 700; font-size: 15px; color: gold; background-color: black;"> Sensitivity </span>) will control how the texture is applied. If no ground texture has been selected in the <span style="font-weight: 700; font-size: 15px; color: white; background-color: #797979;"> Assets Palette </span> then this option will be greyed out.</td>
| |
| </tr>
| |
| <tr valign="top">
| |
| <td colspan=2>
| |
| <table bgcolor=#ffffb0 cellpadding=2>
| |
| <tr valign="top">
| |
| <td width=25>[[image:NotePad.PNG|link=]]</td>
| |
| <td>Objects have a '''minimum brush size''' that represents the smallest area that can be painted beneath them using the <span style="font-weight: 700; font-size: 15px; color: white; background-color: black;"> Paint Under Selected </span> option. This minimum area will vary in size between objects but it will be rectangular even for circular objects. If the <span style="font-weight: 700; font-size: 15px; color: white; background-color: #797979;"> Tool Options Palette </span> brush <span style="font-weight: 700; font-size: 15px; color: gold; background-color: black;"> Radius </span> is set to a smaller size then the brush <span style="font-weight: 700; font-size: 15px; color: gold; background-color: black;"> Radius </span> will be ignored and the objects minimum brush size will be used instead.</td>
| |
| </tr>
| |
| </table>
| |
| </td>
| |
| </tr>
| |
| </table>
| |
| </td>
| |
| </tr>
| |
| <tr valign="top">
| |
| <td>
| |
| <table>
| |
| <tr valign="top">
| |
| <td><span style="font-weight: 700; font-size: 15px; color: white; background-color: black;"> Smooth Ground Under Selected </span></td>
| |
| <td>smooths the height of the ground under the rolling stock object to match its height</td>
| |
| </tr>
| |
| </table>
| |
| <table>
| |
| <tr valign="top">
| |
| <td><span style="font-weight: 700; font-size: 15px; color: white; background-color: black;"> Reattach to Track </span></td>
| |
| <td>this option is only selecteable if a rolling stock object has derailed</td>
| |
| </tr>
| |
| </table>
| |
| <table>
| |
| <tr valign="top">
| |
| <td><span style="font-weight: 700; font-size: 15px; color: white; background-color: black;"> Rotate Vehicle </span></td>
| |
| <td>rotates (reverses) the facing direction of a selected rolling stock object. If more than one object has been selected then they will all have their directions reversed but they will remain in the same order </td>
| |
| </tr>
| |
| </table>
| |
| <table>
| |
| <tr valign="top">
| |
| <td><span style="font-weight: 700; font-size: 15px; color: white; background-color: black;"> Change Consist Heading </span></td>
| |
| <td>reverses the consist heading as indicated by the directions of the red and green arrows above the start and end of the consist</td>
| |
| </tr>
| |
| </table>
| |
| <table>
| |
| <tr valign="top">
| |
| <td><span style="font-weight: 700; font-size: 15px; color: white; background-color: black;"> Rotate Consist Heading </span></td>
| |
| <td>the entire consist is reversed, both in the order of the vehicles and the direction they face</td>
| |
| </tr>
| |
| </table>
| |
| <table>
| |
| <tr valign="top">
| |
| <td><span style="font-weight: 700; font-size: 15px; color: white; background-color: black;"> Merge into Single Train </span></td>
| |
| <td>when two or more separate rolling stock assets have been selected they will be coupled into a single consist. See [[image:PageLink.PNG|link=]] '''[[#FM: Couple Rolling|Coupling Rolling Stock Objects]]''' for more details</td>
| |
| </tr>
| |
| </table>
| |
| <table>
| |
| <tr valign="top">
| |
| <td><span style="font-weight: 700; font-size: 15px; color: white; background-color: black;"> Save to Consist Asset... </span></td>
| |
| <td>saves the selected rolling stock objects as a new '''Train''' ssset in the <span style="font-weight: 700; font-size: 15px; color: white; background-color: #797979;"> Assets Palette </span></td>
| |
| </tr>
| |
| </table>
| |
| <table>
| |
| <tr valign="top">
| |
| <td><span style="font-weight: 700; font-size: 15px; color: white; background-color: black;"> Select in Assets Palette </span></td>
| |
| <td>sets the <span style="font-weight: 700; font-size: 15px; color: white; background-color: #797979;"> Filter Palette </span> to <span style="font-weight: 700; font-size: 15px; color: white; background-color: black;"> All Content </span> and highlights the selected object in the <span style="font-weight: 700; font-size: 15px; color: white; background-color: #797979;"> Assets Palette </span></td>
| |
| </tr>
| |
| </table>
| |
| <table>
| |
| <tr valign="top">
| |
| <td><span style="font-weight: 700; font-size: 15px; color: white; background-color: black;"> Select in Filter Palette </span></td>
| |
| <td>sets the <span style="font-weight: 700; font-size: 15px; color: white; background-color: #797979;"> Filter Palette </span> to <span style="font-weight: 700; font-size: 15px; color: white; background-color: black;"> All Content </span> and highlights the selected object in the <span style="font-weight: 700; font-size: 15px; color: white; background-color: #797979;"> Filter Palette </span></td>
| |
| </tr>
| |
| </table>
| |
| <table>
| |
| <tr valign="top">
| |
| <td><span style="font-weight: 700; font-size: 15px; color: white; background-color: black;"> Edit Details </span></td>
| |
| <td>opens the '''Properties''' window of the selected rolling stock object. '''Note:''' to enter or edit an objects name property use the [[image:PageLink.PNG|link=]] '''[[#The Info Palette|Info Palette]]'''</td>
| |
| </tr>
| |
| </table>
| |
| </td>
| |
| </tr>
| |
| </table>
| |
| </td>
| |
| </tr>
| |
| </table>
| |
| </td>
| |
| </tr>
| |
| </table>
| |
| <br>
| |
| <table width=1000> <!-- BEGIN Section Nav Buttons -->
| |
| <tr valign="top">
| |
| <td width=629><span id="skip Fine Adjustment: Object Height Problem Solutions"></span>
| |
| =='''Fine Adjustment: Object Height Problem Solutions'''==
| |
| </td>
| |
| <td width=50>[[image:SkipDown.png|link=#stepMarquee|Skip Down]]</td>
| |
| <td width=50>[[image:SkipUp.png|link=#skip Fine Adjustment: Rolling Stock Objects|Skip Up]]</td>
| |
| <td width=46>[[image:SkipMinorBlank.png|link=]][[image:SkipMinorUp.png|link=#FA: Context Rolling|Up]]</td> <!-- for Top and Minor Up/Down -->
| |
| <td width=75>[[image:HeadingUp.png|link=#stepFineAdjustment|alt=Heading|To Heading]]</td>
| |
| <td width=75> </td>
| |
| <td width=75> </td> <!-- for Bottom -->
| |
| </tr>
| |
| </table> <!-- END Section Nav Buttons -->
| |
|
| |
| <table width=1000>
| |
| <tr valign="top">
| |
| <td colspan=2>
| |
| <table width=1000 bgcolor="lightcyan" cellpadding=2>
| |
| <tr valign="top">
| |
| <td colspan=2>Two '''Anchor Points''' on the <span style="font-weight: 700; font-size: 15px; color: white; background-color: blue;"> Blue </span> vertical Anchor line determine the height of an endpoint or an object above the ground.</td>
| |
| </tr>
| |
| <tr valign="top">
| |
| <td width=10>[[image:BlueDot10x10.png|link=]]</td>
| |
| <td>the '''Object Height Anchor''', which is normally '''Black''' but turns '''Green''' when it is selected, controls the height of the object (including spline '''Endpoints''') above the ground. This Anchor point can be moved vertically by the tool pointer using the <span style="font-weight: 700; font-size: 15px; color: white; background-color: blue;"> Blue </span> vertical Anchor line</td>
| |
| </tr>
| |
| <tr valign="top">
| |
| <td width=10>[[image:BlueDot10x10.png|link=]]</td>
| |
| <td>the '''Ground Height Anchor''', which is '''Yellow''', marks the position of the object on the ground. This Anchor point cannot be moved vertically by the tool pointer but its height can be changed by setting the <span style="font-weight: 700; font-size: 15px; color: white; background-color: #797979;"> Tool Options Palette </span> <span style="font-weight: 700; font-size: 15px; color: gold; background-color: black;"> Height </span> value</td>
| |
| </tr>
| |
| <tr valign="top">
| |
| <td colspan=2>It is common for both height anchors to be at the same height but there are many situation where the two will be at different heights. The examples below show situations where the two are at different heights and the height of the '''Object Height Anchor''' will need to be adjusted.</td>
| |
| </tr>
| |
| </table>
| |
| </td>
| |
| </tr>
| |
| </table>
| |
| <br>
| |
| <table width=1000 bgcolor=#000000 cellpadding=2>
| |
| <tr valign="top">
| |
| <td>
| |
| <table width=996 bgcolor=#ffe89a cellpadding=2>
| |
| <tr valign="middle">
| |
| <td width=45>[[image:PalettesIcon_S20.png|link=]]</td>
| |
| <td>If the <span style="font-weight: 700; font-size: 15px; color: white; background-color: #797979;"> Tool Options Palette </span> and <span style="font-weight: 700; font-size: 15px; color: white; background-color: #797979;"> Info Palette </span> are not visible on the screen then refer to [[image:PageLink.PNG|link=]] '''[[#Notes_Palettes|Notes: Palettes]]''' at the top of this document.
| |
| </td>
| |
| </tr>
| |
| </table>
| |
| </td>
| |
| </tr>
| |
| </table>
| |
| <br>
| |
| <table width=1000 bgcolor=#000000 cellpadding=2>
| |
| <tr valign="top">
| |
| <td>
| |
| <table width=996 bgcolor=#ffffb0 cellpadding=2>
| |
| <tr valign="top">
| |
| <td width=25>[[image:NotePad.PNG|link=]]</td>
| |
| <td width=975><span style="font-size: 17px; font-weight: 700;">Notes:'''</span><br>
| |
| ----
| |
| The '''height''' of a '''Rolling Stock Object''' (locomotive, wagon, etc) '''CANNOT''' be altered. These objects are always tied to the height of the track where they have been placed.</td>
| |
| </tr>
| |
| </table>
| |
| </td>
| |
| </tr>
| |
| </table>
| |
| <br>
| |
| <table width=1000>
| |
| <tr valign="top">
| |
| <td width=300>[[image:FineAdjustSplineHeightUp.png|300px|link=]]</td>
| |
| <td width=700><span style="font-weight: 700; font-size: 15px; color: white; background-color: black;"> Object Height Above Ground Height </span><br>
| |
| <br>
| |
| <table bgcolor=#000000 width=700 cellpadding=2>
| |
| <tr valign="top">
| |
| <td>
| |
| <table bgcolor=#ffffff width=696 cellpadding=2>
| |
| <tr valign="top">
| |
| <td colspan=2><span style="font-weight: 700; font-size: 15px;">Step:</span> To bring the object height down to the ground height:-</td>
| |
| </tr>
| |
| <tr valign="top">
| |
| <td width=20>[[image:DotPoint1.JPG|link=]]</td>
| |
| <td><span style="font-weight: 700; font-size: 15px; background-color: lightcyan;">Left Click and Drag</span> downwards on the <span style="font-weight: 700; font-size: 15px; color: white; background-color: blue;"> Blue </span> vertical Anchor line to bring the '''Object Height Anchor''' down to the same level as the '''Ground Height Anchor''' </td>
| |
| </tr>
| |
| </table>
| |
| </td>
| |
| </tr>
| |
| </table>
| |
| <br>
| |
| <table bgcolor=#000000 width=700 cellpadding=2>
| |
| <tr valign="top">
| |
| <td>
| |
| <table bgcolor=#ffffe0 width=696 cellpadding=2>
| |
| <tr valign="top">
| |
| <td width=25>[[image:PencilTips.PNG|link=]]</td><td colspan=2>To achieve finer and more accurate control when moving the height Anchor point, choose one of the following:-</td>
| |
| </tr>
| |
| <tr>
| |
| <td colspan=2><span style="font-weight: 700; font-size: 15px;">Options:</span> </td>
| |
| </tr>
| |
| <tr valign="top">
| |
| <td>[[image:Ablue.png|link=]]</td>
| |
| <td>zoom in closer to the Anchor point, <span style="font-weight: 700; font-size: 15px;">OR</span></td>
| |
| </tr>
| |
| <tr valign="top">
| |
| <td>[[image:Bblue.png|link=]]</td>
| |
| <td>use the <span style="font-weight: 700; font-size: 15px; color: white; background-color: black;"> z </span> fine adjustment arrows in the <span style="font-weight: 700; font-size: 15px; color: white; background-color: #797979;"> Info Palette </span> object '''Pos''' controls. This can be used to set the height and position to '''cm''' accuracy (see [[image:PageLink.PNG|link=]] '''[[#The Info Palette|The Info Palette]]''' below).</td>
| |
| </tr>
| |
| </table>
| |
| </td>
| |
| </tr>
| |
| </table>
| |
| <br>
| |
| </td>
| |
| </tr>
| |
| <tr valign="top">
| |
| <td width=300>[[image:FineAdjustSplineHeightDown.png|300px|link=]]</td>
| |
| <td width=500><span style="font-weight: 700; font-size: 15px; color: white; background-color: black;"> Object Height Below Ground Height </span><br>
| |
| <br>
| |
| <table bgcolor=#000000 width=500 cellpadding=2>
| |
| <tr valign="top">
| |
| <td>
| |
| <table bgcolor=#ffffff width=496 cellpadding=2>
| |
| <tr valign="top">
| |
| <td colspan=2><span style="font-weight: 700; font-size: 15px;">Step:</span> To bring the object height up to the ground height:-</td>
| |
| </tr>
| |
| <tr valign="top">
| |
| <td width=20>[[image:DotPoint1.JPG|link=]]</td>
| |
| <td><span style="font-weight: 700; font-size: 15px; background-color: lightcyan;">Left Click and Drag</span> upwards on the <span style="font-weight: 700; font-size: 15px; color: white; background-color: blue;"> Blue </span> vertical Anchor line to bring the '''Object Height Anchor''' up to the same level as the '''Ground Height Anchor''' </td>
| |
| </tr>
| |
| </table>
| |
| </td>
| |
| </tr>
| |
| </table>
| |
| [[image:FineAdjustSplineHeightOK.png|link=]]
| |
| </td>
| |
| </tr>
| |
| </table>
| |
| <br>
| |
| <table width=1000>
| |
| <tr valign="top">
| |
| <td width=300>
| |
| [[image:FineAdjustSplineHeightFarDown.png|;]]</td>
| |
| <td width=700>Where this method fails is when the height difference between the two Anchor points exceeds the length of the <span style="font-weight: 700; font-size: 15px; color: white; background-color: blue;"> Blue </span> vertical Anchor line so the '''Ground Height Anchor''' or the '''Object Height Anchor''' is at the very top of the Anchor line. Once it is in that position the '''Object Height Anchor''' can no longer be moved up or down because there is no vertical Anchor line to grab.
| |
| <br>
| |
| <br>
| |
| <table bgcolor=#000000 width=700 cellpadding=2>
| |
| <tr valign="top">
| |
| <td>
| |
| <table bgcolor=#ffffff width=696 cellpadding=2>
| |
| <tr valign="top" bgcolor=#ffffe0>
| |
| <td width=25>[[image:PencilTips.PNG|link=]]</td><td colspan=2>The '''Quick Solution''' to this problem</td>
| |
| </tr>
| |
| <tr valign="top">
| |
| <td colspan=2><span style="font-weight: 700; font-size: 15px;">Steps:</span> Use the <span style="font-weight: 700; font-size: 15px; color: white; background-color: black;"> Settle on Ground </span> option:-</td>
| |
| </tr>
| |
| <tr valign="top">
| |
| <td>[[image:DotPoint1.JPG|link=]]</td>
| |
| <td>open the object or endpont '''Context Menu'''</td>
| |
| </tr>
| |
| <tr valign="top">
| |
| <td>[[image:DotPoint2.JPG|link=]]</td>
| |
| <td>select the option <span style="font-weight: 700; font-size: 15px; color: white; background-color: black;"> Settle on Ground </span>. For splines this option will force the spline segment to follow the contours of the ground but it will now be at the same height as the ground</td>
| |
| </tr>
| |
| </table>
| |
| </td>
| |
| </tr>
| |
| </table>
| |
| </td>
| |
| </tr>
| |
| </table>
| |
| <br>
| |
| A more complex alternative method is to use the '''Surveyor Compass Rose''', the <span style="font-weight: 700; font-size: 15px; color: white; background-color: #797979;"> Info Palette </span> and the <span style="font-weight: 700; font-size: 15px; color: white; background-color: #797979;"> Tool Options Palette </span>.
| |
| <br>
| |
| <table width=1000>
| |
| <tr valign="top">
| |
| <td width=300>[[image:FineAdjustSplineSetFocus.png|link=]]<br>
| |
| The '''Surveyor Compass Rose'''</td>
| |
| <td>
| |
| <table bgcolor=#000000 width=700 cellpadding=2>
| |
| <tr valign="top">
| |
| <td>
| |
| <table bgcolor=#ffffff width=696 cellpadding=2>
| |
| <tr valign="top">
| |
| <td colspan=2><span style="font-weight: 700; font-size: 15px;">Steps:</span> Use the '''Compass Rose''':-</td>
| |
| </tr>
| |
| <tr valign="top">
| |
| <td width=20>[[image:DotPoint1.JPG|link=]]</td>
| |
| <td><span style="font-weight: 700; font-size: 15px; background-color: lightcyan;">Right Click</span> on the terrain at a point which has the height that will be used by the object. This will position the '''Surveyor Compass Rose''' and record its data as the '''Focus'''</td>
| |
| </tr>
| |
| <tr valign="top">
| |
| <td>[[image:DotPoint2.JPG|link=]]</td>
| |
| <td>In the <span style="font-weight: 700; font-size: 15px; color: white; background-color: #797979;"> Info Palette </span> open the '''Focus''' controls by a <span style="font-weight: 700; font-size: 15px; background-color: lightcyan;"> Left Click </span> on the small '''Right Arrowhead''' to the left of the '''Focus''' label</td>
| |
| </tr>
| |
| <tr valign="top">
| |
| <td></td>
| |
| <td>
| |
| <table>
| |
| <tr valign="top">
| |
| <td>[[image:InfoPaletteFocusUseHeight.png|link=]]</td>
| |
| <td>The <span style="font-weight: 700; font-size: 15px; color: white; background-color: #797979;"> Info Palette </span> stores the positional data, including the '''Height''' (the <span style="font-weight: 700; font-size: 15px; color: white; background-color: black;"> z </span> value), of the '''Compass Rose''' under the label '''Focus'''</td>
| |
| </tr>
| |
| </table>
| |
| </td>
| |
| </tr>
| |
| <tr valign="top">
| |
| <td>[[image:DotPoint3.JPG|link=]]</td>
| |
| <td><span style="font-weight: 700; font-size: 15px; background-color: lightcyan;"> Left Click </span> on the white '''Down Arrowhead''' next to the <span style="font-weight: 700; font-size: 15px; color: white; background-color: black;"> z </span> value and select the menu option <span style="font-weight: 700; font-size: 15px; color: white; background-color: black;"> Use Height for Brush </span>. This will transfer the Focus <span style="font-weight: 700; font-size: 15px; color: white; background-color: black;"> z </span> value to the <span style="font-weight: 700; font-size: 15px; color: white; background-color: #797979;"> Tool Options Palette </span> <span style="font-weight: 700; font-size: 15px; color: gold; background-color: black;"> Height </span> setting</td>
| |
| </tr>
| |
| <tr valign="top">
| |
| <td>[[image:DotPoint4.JPG|link=]]</td>
| |
| <td>Open the '''Context Menu''' for the object (or spline endpoint)</td>
| |
| </tr>
| |
| <tr valign="top">
| |
| <td>[[image:DotPoint5.JPG|link=]]</td>
| |
| <td>Select the option <span style="font-weight: 700; font-size: 15px; color: white; background-color: black;"> Apply Height </span> or <span style="font-weight: 700; font-size: 15px; color: white; background-color: black;"> Apply Height to this Spline Endpoint </span></td>
| |
| </tr>
| |
| </table>
| |
| </td>
| |
| </tr>
| |
| </table>
| |
| </td>
| |
| </tr>
| |
| </table>
| |
| <br>
| |
| <!-- Marquee Tool Section -->
| |
| <table width=1000> <!-- BEGIN Nav Buttons Table -->
| |
| <tr valign="top">
| |
| <td width=629><span id="stepMarquee"></span>
| |
| ='''The Marquee Tool'''=
| |
| </td>
| |
| <td width=50>[[image:SkipDown.png|link=#skip Marquee Filters|Skip Down]]</td>
| |
| <td width=50>[[image:SkipUp.png|link=#skip Fine Adjustment: Object Height Problem Solutions|Skip Up]]</td>
| |
| <td width=46>[[image:BackToTop.png|link=#top|alt=Top|Top]]</td>
| |
| <td width=75>[[image:NextUp.png|link=#stepFineAdjustment|alt=Next Up|Next Up]]</td>
| |
| <td width=75>[[image:NextDown.png|link=#stepMass|alt=Next Down|Next Down]]</td>
| |
| <td width=75>[[image:BackToBottom.png|link=#bottom|alt=Bottom|Bottom]]</td>
| |
| </tr>
| |
| </table> <!-- END Nav Buttons Table -->
| |
|
| |
| <table width=1000>
| |
| <tr valign="top">
| |
| <td>
| |
| <table width=214 bgcolor=#000000 cellpadding=2>
| |
| <tr valign="top">
| |
| <td>
| |
| <table width=210 bgcolor=#ffffff cellpadding=2>
| |
| <tr valign="top">
| |
| <td width=40>[[image:S20_MarqueeToolIcon.png|link=]]</td>
| |
| <td width=170>'''Keyboard Shortcut:''' <span style="color: white; background-color: black; font-weight: 700; font-size: 17px;"> F </span></td>
| |
| </tr>
| |
| </table>
| |
| </td>
| |
| </tr>
| |
| </table>
| |
| </td>
| |
| <td width=786 bgcolor="lightcyan"><span style="font-weight: 700; font-size: 15px;">The <span style="color: white; background-color: black;"> Marquee Tool </span> allows areas of your Trainz World to be selected for Scrapbook and baseboard operations</span></td>
| |
| </tr>
| |
| </table>
| |
| <br>
| |
| <table width=1000 bgcolor=#000000 cellpadding=2>
| |
| <tr valign="top">
| |
| <td>
| |
| <table width=996 bgcolor=#ffffff cellpadding=2>
| |
| <tr valign="top">
| |
| <td colspan=2>
| |
| <table>
| |
| <tr valign="middle">
| |
| <td width=35>[[image:Information.png|35px|link=]]</td>
| |
| <td>The '''Marquee Tool''' is a general purpose tool for marking out areas of baseboards (or empty space) for:-</td>
| |
| </tr>
| |
| </table>
| |
| </td>
| |
| </tr>
| |
| <tr valign="top">
| |
| <td width=10>[[image:DotPoint.JPG|10px|link=]]</td>
| |
| <td>the mass selection of objects for deletion, movement and creating '''Scrapbooks'''</td>
| |
| </tr>
| |
| <tr valign="top">
| |
| <td>[[image:DotPoint.JPG|10px|link=]]</td>
| |
| <td>adding, deleting, painting and converting baseboards</td>
| |
| </tr>
| |
| </table>
| |
| </td>
| |
| </tr>
| |
| </table>
| |
| <br>
| |
| <table width=1000 bgcolor=#000000>
| |
| <tr valign="top">
| |
| <td>
| |
| <table width=996 bgcolor=#ffe89a cellpadding=2>
| |
| <tr valign="middle">
| |
| <td width=45>[[image:PalettesIcon_S20.png|link=]]</td>
| |
| <td>Various function of this tool use the <span style="font-weight: 700; font-size: 15px; color: white; background-color: #797979;"> Scrapbook Palette </span> <span style="font-weight: 700; font-size: 15px; color: white; background-color: #797979;"> Tool Options Palette </span> <span style="font-weight: 700; font-size: 15px; color: white; background-color: #797979;"> Info Palette </span> <span style="font-weight: 700; font-size: 15px; color: white; background-color: #797979;"> Filter Palette </span> and the <span style="font-weight: 700; font-size: 15px; color: white; background-color: #797979;"> Assets Palette </span>. If these palettes are not visible on the screen when required then refer to [[image:PageLink.PNG|link=]] '''[[#Notes_Palettes|Notes: Palettes]]''' at the top of this document.</td>
| |
| </tr>
| |
| </table>
| |
| </td>
| |
| </tr>
| |
| </table>
| |
| <br>
| |
| <table width=1000 bgcolor=#000000 cellpadding=2>
| |
| <tr valign="top">
| |
| <td>
| |
| <table width=996 bgcolor=#ffffff cellpadding=2>
| |
| <tr valign="top">
| |
| <td width=200>[[image:MarqueeTools_S20.png|link=|Marquee Tools]]</td>
| |
| <td>
| |
| <table width=796 cellpadding=2>
| |
| <tr valign="top">
| |
| <td bgcolor=#ffffb0><span style="font-weight: 700; font-size: 15px; color: white; background-color: black;"> Tool Targets </span> The '''Marquee Tool''' has no '''Target''' options so it has no drop down menu list</td>
| |
| </tr>
| |
| <tr valign="top">
| |
| <td>
| |
| <table>
| |
| <tr valign="top">
| |
| <td colspan=2>This tool has a range of tasks:-</td>
| |
| </tr>
| |
| <tr valign="top">
| |
| <td width=10>[[image:DotPoint.JPG|10px|link=]]</td>
| |
| <td>Select objects for moving, deleting and copying into a scrapbook</td>
| |
| </tr>
| |
| <tr valign="top">
| |
| <td>[[image:DotPoint.JPG|10px|link=]]</td>
| |
| <td>Add and delete one or multiple baseboards</td>
| |
| </tr>
| |
| <tr valign="top">
| |
| <td>[[image:DotPoint.JPG|10px|link=]]</td>
| |
| <td>Set the resolution of one or multiple baseboards</td>
| |
| </tr>
| |
| <tr valign="top">
| |
| <td width=10>[[image:DotPoint.JPG|10px|link=]]</td>
| |
| <td>Set the texture and height of an area including multiple baseboards</td>
| |
| </tr>
| |
| </table>
| |
| </td>
| |
| </tr>
| |
| <tr valign="top">
| |
| <td bgcolor=#ffffb0><span style="font-weight: 700; font-size: 15px; color: white; background-color: black;"> Tool Actions </span> The '''Marquee Tool''' has no '''Action''' options so it has no drop down menu list</td>
| |
| </tr>
| |
| </table>
| |
| </td>
| |
| </tr>
| |
| </table>
| |
| </td>
| |
| </tr>
| |
| </table>
| |
| <br>
| |
| <table width=1000 bgcolor="lightcyan" cellpadding=2>
| |
| <tr valign="top">
| |
| <td width=10>[[image:BlueDot10x10.png|link=]]</td>
| |
| <td>The '''Marquee Tool''' draws out a rectangular area, the '''Marquee Selection Area''', on the route. Any objects (including ground heights, ground textures and '''TurfFX/Clutter Effect Layers''') that are inside the '''Marquee Selection Area''' or touched by its boundary will be selected.</td>
| |
| </tr>
| |
| </table>
| |
| <br>
| |
| <table width=1000>
| |
| <tr valign="top">
| |
| <td>
| |
| <table width=500 bgcolor=#000000 cellpadding=2>
| |
| <tr valign="top">
| |
| <td>
| |
| <table width=496 bgcolor=#ffffff cellpadding=2>
| |
| <tr valign="top">
| |
| <td colspan=2><span style="font-weight: 700; font-size: 15px;">Steps:</span> To draw out a '''Marquee Selection Area''':-</td>
| |
| </tr>
| |
| <tr valign="top">
| |
| <td width=25>[[image:DotPoint1.JPG|link=]]</td>
| |
| <td>In the <span style="font-weight: 700; font-size: 15px; color: white; background-color: #797979;"> Tools Palette </span> <span style="font-weight: 700; font-size: 15px; background-color: lightcyan;"> Left Click </span> on the '''Marquee Tool''' icon [[image:S20_MarqueeToolIcon.png|link=|20px]] or press the <span style="font-weight: 700; font-size: 15px; color: white; background-color: black;"> F </span> key</td>
| |
| </tr>
| |
| <tr valign="top">
| |
| <td>[[image:DotPoint2.JPG|link=]]</td>
| |
| <td><span style="font-weight: 700; font-size: 15px; background-color: lightcyan;"> Left Click and Drag </span> over the area to be selected</td>
| |
| </tr>
| |
| </table>
| |
| </td>
| |
| </tr>
| |
| </table>
| |
| </td>
| |
| <td>
| |
| <table width=496 width=500 bgcolor=#000000 cellpadding=2>
| |
| <tr valign="top">
| |
| <td>
| |
| <table bgcolor=#ffffe0 cellpadding=2>
| |
| <tr valign="top">
| |
| <td width=25>[[image:PencilTips.PNG|link=]]</td>
| |
| <td>You can use the filters in the <span style="font-weight: 700; font-size: 15px; color: white; background-color: #797979;"> Filter Palette </span> and <span style="font-weight: 700; font-size: 15px; color: white; background-color: #797979;"> Assets Palette </span> to restrict the objects that will be selected in the '''Marquee Selection Area'''. See [[image:PageLink.PNG|link=]] '''[[#skip Marquee Filters|Marquee Assets Filter]]''' below for more details</td>
| |
| </tr>
| |
| </table>
| |
| </td>
| |
| </tr>
| |
| </table>
| |
| </td>
| |
| </tr>
| |
| </table>
| |
| <br>
| |
| [[image:MarqueeSelectArea_S20.png|link=]]<br>
| |
| <table width=1000>
| |
| <tr valign="top">
| |
| <td colspan=2>In the image above:-</td>
| |
| </tr>
| |
| <tr valign="top">
| |
| <td width=10>[[image:DotPoint.JPG|10px|link=]]</td>
| |
| <td>a road spline at the bottom and a house at the lower left of the '''Marquee Selection Area''' have been touched by the drawn rectangle so they have been included in the selection.</td>
| |
| </tr>
| |
| <tr valign="top">
| |
| <td>[[image:DotPoint.JPG|10px|link=]]</td>
| |
| <td>the '''Marquee Selection Area''' was drawn from the top left to the bottom right which places the Marquee '''Context Icon''' [[image:MarqueeContextIcon_S20.png|link=]] at the bottom right of the rectangle.</td>
| |
| </tr>
| |
| <tr valign="top">
| |
| <td>[[image:DotPoint.JPG|10px|link=]]</td>
| |
| <td>the bottom right of the '''Marquee Selection Area''' also has a '''3D Anchor Frame'''.
| |
| <table bgcolor=#000000 cellpadding=2>
| |
| <tr valign="top">
| |
| <td>
| |
| <table bgcolor=#ffffb0 cellpadding=2>
| |
| <tr valign="top">
| |
| <td width=25>[[image:NotePad.PNG|link=]]</td>
| |
| <td>Like the '''Fine Adjustment Tool''', a '''Marquee Selection Area''' has a '''3D Anchor Frame'''. The '''Marquee Anchors''' are used to move, rotate and/or resize the objects within the selection area (including ground heights, ground textures and '''TurfFX/Clutter Effect Layers''' if they have been included in the palette filter) through '''3D space'''. See the [[image:PageLink.PNG|link=]] '''[[#skip Marquee Anchor Controls|Marquee Anchor Controls]]''' for the details on using this tool.</td>
| |
| </tr>
| |
| </table>
| |
| </td>
| |
| </tr>
| |
| </table>
| |
| </td>
| |
| </tr>
| |
| <tr valign="top">
| |
| <td>[[image:DotPoint.JPG|10px|link=]]</td>
| |
| <td>The road spline was the last object that was included in the selection area so its '''Context Icons''' are also present.</td>
| |
| </tr>
| |
| </table>
| |
|
| |
| <table width=1000>
| |
| <tr valign="top">
| |
| <td>Shown in the image, but not highlighted, are the '''Ground Heights''', '''Ground Textures''' and '''Effect Layers''' that are also included in the '''Marquee Selection Area'''.</td>
| |
| </tr>
| |
| </table>
| |
| <br>
| |
| <table width=1000> <!-- BEGIN Section Nav Buttons -->
| |
| <tr valign="top">
| |
| <td width=629><span id="skip Marquee Filters"></span>
| |
| =='''The Marquee Tool and the Palette Filters'''==
| |
| </td>
| |
| <td width=50>[[image:SkipDown.png|link=#skip Marquee Anchor Controls|Skip Down]]</td>
| |
| <td width=50>[[image:SkipUp.png|link=#stepMarquee|Skip Up]]</td>
| |
| <td width=46> </td> <!-- for Top -->
| |
| <td width=75>[[image:HeadingUp.png|link=#stepMarquee|alt=Heading|To Heading]]</td>
| |
| <td width=75> </td>
| |
| <td width=75> </td> <!-- for Bottom -->
| |
| </tr>
| |
| </table> <!-- END Section Nav Buttons -->
| |
|
| |
| <table width=1000 bgcolor="lightcyan" cellpadding=2>
| |
| <tr valign="top">
| |
| <td width=10>[[image:BlueDot10x10.png|link=]]</td>
| |
| <td>The <span style="font-weight: 700; font-size: 15px; color: white; background-color: #797979;"> Filter Palette </span> and <span style="font-weight: 700; font-size: 15px; color: white; background-color: #797979;"> Assets Palette </span> can be used to restrict the objects selected by the '''Marquee Tool'''.</td>
| |
| </tr>
| |
| </table>
| |
|
| |
| <table width=1000>
| |
| <tr valign="top">
| |
| <td width=340>[[image:FilterPaletteScenerySplinesSelected_S20.png|link=]]</td>
| |
| <td>
| |
| <table width=660 bgcolor=#000000 cellpadding=2>
| |
| <tr valign="top">
| |
| <td>
| |
| <table width=656 bgcolor=#ffffff cellpadding=2>
| |
| <tr valign="top">
| |
| <td colspan=2><span style="font-weight: 700; font-size: 15px;">Steps:</span> To restrict the objects selected by the '''Marquee Tool''':-</td>
| |
| </tr>
| |
| <tr valign="top">
| |
| <td width=20>[[image:DotPoint1.JPG|link=]]</td>
| |
| <td>In the <span style="font-weight: 700; font-size: 15px; color: white; background-color: #797979;"> Filter Palette </span> set the '''Filter Action''' to <span style="font-weight: 700; font-size: 15px; color: white; background-color: black;"> Filter Selections </span></td>
| |
| </tr>
| |
| <tr valign="top">
| |
| <td>[[image:DotPoint2.JPG|link=]]</td>
| |
| <td>In the <span style="font-weight: 700; font-size: 15px; color: white; background-color: #797979;"> Filter Palette </span> select an '''Asset Icon''' or an '''Asset Type''' (e.g. '''Scenery Splines''')</td>
| |
| </tr>
| |
| <tr valign="top">
| |
| <td>[[image:DotPoint3.JPG|link=]]</td>
| |
| <td>In the <span style="font-weight: 700; font-size: 15px; color: white; background-color: #797979;"> Assets Palette </span> enter an optional search text in the <span style="font-weight: 700; font-size: 15px; color: white; background-color: black;"> Search </span> box to narrow down the type of object</td>
| |
| </tr>
| |
| <tr valign="top">
| |
| <td>[[image:DotPoint4.JPG|link=]]</td>
| |
| <td>In the <span style="font-weight: 700; font-size: 15px; color: white; background-color: #797979;"> Tools Palette </span> <span style="font-weight: 700; font-size: 15px; background-color: lightcyan;"> Left Click </span> on the '''Marquee Tool''' [[image:S20_MarqueeToolIcon.png|link=|20px]] or press the <span style="font-weight: 700; font-size: 15px; color: white; background-color: black;"> F </span> key</td>
| |
| </tr>
| |
| <tr valign="top">
| |
| <td>[[image:DotPoint5.JPG|link=]]</td>
| |
| <td><span style="font-weight: 700; font-size: 15px; background-color: lightcyan;">Left Click and Drag</span> out the '''Marquee Selection Area''' around the objects to be selected</td>
| |
| </tr>
| |
| <tr valign="top">
| |
| <td colspan=2>Only those objects identified in the filtered list will be selected by the '''Marquee'''</td>
| |
| </tr>
| |
| </table>
| |
| </td>
| |
| </tr>
| |
| </table>
| |
| </td>
| |
| </tr>
| |
| </table>
| |
| <br>
| |
| <table width=1000>
| |
| <tr valign="top">
| |
| <td width=600>[[image:MarqueeSelectSplines_S20.png|link=]]</td>
| |
| <td colspan=2>Using the '''Filters''' shown above, the '''Marquee Selection Area''' will include:-<br>
| |
| <table>
| |
| <tr valign="top">
| |
| <td width=10>[[image:DotPoint.JPG|10px|link=]]</td>
| |
| <td>all spline objects (excluding tracks) crossed by the selection area. See '''Note:''' below</td>
| |
| </tr>
| |
| <tr valign="top">
| |
| <td>[[image:DotPoint.JPG|10px|link=]]</td>
| |
| <td>all ground textures</td>
| |
| </tr>
| |
| <tr valign="top">
| |
| <td>[[image:DotPoint.JPG|10px|link=]]</td>
| |
| <td>all '''TurfFX/Clutter Effect Layers'''</td>
| |
| </tr>
| |
| <tr valign="top">
| |
| <td>[[image:DotPoint.JPG|10px|link=]]</td>
| |
| <td>all ground heights</td>
| |
| </tr>
| |
| <tr valign="top">
| |
| <td colspan=2>...found within the '''Marquee Selection Area'''</td>
| |
| </tr>
| |
| <tr valign="top">
| |
| <td colspan=2>
| |
| <table bgcolor=#000000 cellpadding=2>
| |
| <tr valign="top">
| |
| <td>
| |
| <table bgcolor=#ffffb0 cellpadding=2>
| |
| <tr valign="top">
| |
| <td width=25>[[image:NotePad.PNG|link=]]</td>
| |
| <td>If a spline segment has one or both of its endpoints '''outside''' the '''Marquee Selection Area''' but the selection area crosses part of the segment then that segment will be selected</td>
| |
| </tr>
| |
| </table>
| |
| </td>
| |
| </tr>
| |
| </table>
| |
| </td>
| |
| </tr>
| |
| <tr valign="top">
| |
| <td colspan=2>Not included (highlighted) in the '''Marquee Selection Area''', because they were not included in the filter, are:-<br>
| |
| <table>
| |
| <tr valign="top">
| |
| <td width=10>[[image:DotPointBlueSquare.png|10px|link=]]</td>
| |
| <td>all scenery mesh objects (trees, grasses, buildings, etc)</td>
| |
| </tr>
| |
| <tr valign="top">
| |
| <td>[[image:DotPointBlueSquare.png|10px|link=]]</td>
| |
| <td>tracks and track objects</td>
| |
| </tr>
| |
| </table>
| |
| </td>
| |
| </tr>
| |
| <tr valign="top">
| |
| <td colspan=2>
| |
| </td>
| |
| </tr>
| |
| </table>
| |
| </td>
| |
| </tr>
| |
| </table>
| |
| <br>
| |
| <table width=1000> <!-- BEGIN Section Nav Buttons -->
| |
| <tr valign="top">
| |
| <td width=629><span id="skip Marquee Anchor Controls"></span>
| |
| =='''Marquee Anchor Controls'''==
| |
| </td>
| |
| <td width=50>[[image:SkipDown.png|link=#skip Scrapbook Operations|Skip Down]]</td>
| |
| <td width=50>[[image:SkipUp.png|link=#skip Marquee Filters|Skip Up]]</td>
| |
| <td width=46> </td> <!-- for Top -->
| |
| <td width=75>[[image:HeadingUp.png|link=#stepMarquee|alt=Heading|To Heading]]</td>
| |
| <td width=75> </td>
| |
| <td width=75> </td> <!-- for Bottom -->
| |
| </tr>
| |
| </table> <!-- END Section Nav Buttons -->
| |
|
| |
| <table width=1000>
| |
| <tr valign="top">
| |
| <td colspan=2>When a '''Marquee Selection Area''' is drawn or a '''Scrapbook''' is pasted in your '''Trainz World''' it will come with a '''3D Anchor Frame''' at one corner of the selection area. This frame has some similarities to the one used with the '''Fine Adjustment Tool.</td>
| |
| </tr>
| |
| <tr valign="top">
| |
| <td width=360>[[image:MarqueeAreaTools_S20.png|link=]]</td>
| |
| <td>The controls provided by the '''Marquee Anchor Frame''' are:-<br>
| |
| <table width=640>
| |
| <tr valign="top">
| |
| <td width=10>[[image:DotPoint.JPG|10px|link=]]</td>
| |
| <td>the <span style="font-weight: 700; font-size: 15px; color: white; background-color: green;"> Green </span> and <span style="font-weight: 700; font-size: 15px; color: white; background-color: red;"> Red </span> horizontal Anchors will move the '''Marquee Selection Area''' and all its contents'''‡''' horizontally in the Anchor direction. <span style="font-weight: 700; font-size: 15px; background-color: lightcyan;"> Left Click and Drag </span> left or right along the red or green horizontal Anchor line</td>
| |
| </tr>
| |
| <tr valign="top">
| |
| <td>[[image:DotPoint.JPG|10px|link=]]</td>
| |
| <td>the <span style="font-weight: 700; font-size: 15px; color: white; background-color: blue;"> Blue </span> vertical Anchor will move the '''Marquee Selection Area''' with all its contents'''‡''' up or down in the Anchor direction. <span style="font-weight: 700; font-size: 15px; background-color: lightcyan;"> Left Click and Drag </span> up or down on the blue vertical Anchor line</td>
| |
| </tr>
| |
| <tr valign="top">
| |
| <td>[[image:DotPoint.JPG|10px|link=]]</td>
| |
| <td>the <span style="font-weight: 700; font-size: 15px; color: white; background-color: blue;"> Blue </span> rotational Anchor will rotate the '''Marquee Selection Area''' with all its contents'''‡''' in the direction of the rotation movement. <span style="font-weight: 700; font-size: 15px; background-color: lightcyan;"> Left Click and Drag </span> clockwise or anticlockwise around the blue curved Anchor line</td>
| |
| </tr>
| |
| <tr valign="top">
| |
| <td>[[image:DotPoint.JPG|10px|link=]]</td>
| |
| <td bgcolor="yellow"><span style="font-weight: 700;">there are no <span style="font-size: 15px; color: white; background-color: green;"> Green </span> and <span style="font-weight: 700; font-size: 15px; color: white; background-color: red;"> Red </span> rotational Anchors</span></td>
| |
| </tr>
| |
| <tr valign="top">
| |
| <td>[[image:DotPoint.JPG|10px|link=]]</td>
| |
| <td>at the centre of the '''3D Anchor Frame''' is a '''Select Area Anchor'''. <span style="font-weight: 700; font-size: 15px; background-color: lightcyan;">Left Click and Drag</span> this Anchor point to move the '''Marquee Selection Area''' with all its contents'''‡''' in any horizontal direction</td>
| |
| </tr>
| |
| <tr valign="top">
| |
| <td>[[image:DotPoint.JPG|10px|link=]]</td>
| |
| <td>each of the <span style="font-weight: 700; font-size: 15px; color: white; background-color: green;"> Green </span> and <span style="font-weight: 700; font-size: 15px; color: white; background-color: red;"> Red </span> horizontal Anchors has a '''resize Anchor''', an orange coloured dot, located at its end. <span style="font-weight: 700; font-size: 15px; background-color: lightcyan;"> Left Click and Drag </span> the orange anchor point left or right along its coloured Anchor line to resize the '''Marquee Selection Area''' and all its contents'''‡''' in that specific direction. Objects that are in locked layers will not be affected by the resize action</td>
| |
| </tr>
| |
| <tr valign="top">
| |
| <td colspan=2>
| |
| <table bgcolor=#000000 cellpadding=2>
| |
| <tr valign="top">
| |
| <td>
| |
| <table bgcolor=#ffffb0 cellpadding=2>
| |
| <tr valign="top">
| |
| <td width=25>[[image:NotePad.PNG|link=]]</td>
| |
| <td width=975 colspan=2><span style="font-size: 17px; font-weight: 700;">‡ Notes:'''</span><br>
| |
| ----
| |
| </td>
| |
| </tr>
| |
| <tr valign="top">
| |
| <td width=10>[[image:DotPoint.JPG|10px|link=]]</td>
| |
| <td>'''Contents''' for the '''Selection Area''' drawn using the '''Marquee Tool''' will always include '''Ground Heights''', '''Textures''' and '''TurfFX/Clutter Effect Layers'''</td>
| |
| </tr>
| |
| <tr valign="top">
| |
| <td>[[image:DotPoint.JPG|10px|link=]]</td>
| |
| <td>'''Contents''' for the '''Selection Area''' from a '''Scrapbook''' pasted into your '''Trainz World''' will only include those elements selected in the <span style="font-weight: 700; font-size: 15px; color: white; background-color: #797979;"> Scrapbook Palette </span> '''Filter'''</td>
| |
| </tr>
| |
| </table>
| |
| </td>
| |
| </tr>
| |
| </table>
| |
| </td>
| |
| </tr>
| |
| </table>
| |
| </td>
| |
| </tr>
| |
| </table>
| |
| <br>
| |
| <table width=1000 bgcolor=#000000 cellpadding=2>
| |
| <tr valign="top">
| |
| <td>
| |
| <table width=996 bgcolor=#ffffb0 cellpadding=2>
| |
| <tr valign="top">
| |
| <td colspan=2>
| |
| <table width=996>
| |
| <tr valign="top">
| |
| <td width=25>[[image:NotePad.PNG|link=]]</td>
| |
| <td><span style="font-size: 17px; font-weight: 700;">Notes:</span><br>
| |
| ----
| |
| </td>
| |
| </tr>
| |
| <tr valign="top">
| |
| <td colspan=2>The '''Marquee Anchors''' will move/rotate:-</td>
| |
| </tr>
| |
| <tr valign="top">
| |
| <td colspan=2>
| |
| <table>
| |
| <tr valign="top">
| |
| <td>
| |
| <table cellpadding=2>
| |
| <tr valign="top">
| |
| <td width=10>[[image:DotPoint.JPG|10px|link=]]</td>
| |
| <td>the selected scenery objects. If the objects are in locked layers then they will '''NOT''' be moved</td>
| |
| </tr>
| |
| <tr valign="top">
| |
| <td>[[image:DotPoint.JPG|10px|link=]]</td>
| |
| <td>the ground textures. As shown in two of the images below this will leave the original baseboard ground texture or grid pattern showing</td>
| |
| </tr>
| |
| </table>
| |
| </td>
| |
| <td>
| |
| <table bgcolor=#ffffe0 cellpadding=2>
| |
| <tr valign="top">
| |
| <td width=25>[[image:PencilTips.PNG|link=]]</td>
| |
| <td>If you do not want to move everything that is in the '''Marquee Selection Area''' then set the filters in the <span style="font-weight: 700; font-size: 15px; color: white; background-color: #797979;"> Filter Palette </span> and <span style="font-weight: 700; font-size: 15px; color: white; background-color: #797979;"> Assets Palette </span> before using the '''Marquee Tool''' to only include those assets that you do want to move</td>
| |
| </tr>
| |
| </table>
| |
| </td>
| |
| </tr>
| |
| </table>
| |
| </td>
| |
| </tr>
| |
| <tr valign="top">
| |
| <td>[[image:DotPoint.JPG|10px|link=]]</td>
| |
| <td>the '''TurfFX/Clutter Effect Layers'''. If an effect layer is locked then it will not be moved but it will still be deleted from the area that was covered by the original Marquee Selection Area</td>
| |
| </tr>
| |
| <tr valign="top">
| |
| <td>[[image:DotPoint.JPG|10px|link=]]</td>
| |
| <td>the ground heights</td>
| |
| </tr>
| |
| </table>
| |
| </td>
| |
| </tr>
| |
| </table>
| |
| </td>
| |
| </tr>
| |
| </table>
| |
| <br>
| |
| <table width=1000>
| |
| <tr valign="top">
| |
| <td>The following images demonstrate the effect of using the '''Marquee Anchor Controls''' on the image shown at the top of this section as the starting point.</td>
| |
| </tr>
| |
| </table>
| |
| <br>
| |
| <span style="font-weight: 700; font-size: 17px; color: white; background-color: black;"> Horizontal Anchor Shift </span>
| |
| <br>
| |
| <table width=1000 bgcolor=#000000 cellpadding=2>
| |
| <tr valign="top">
| |
| <td>
| |
| <table width=996 bgcolor=#ffffff cellpadding=2>
| |
| <tr valign="top">
| |
| <td width=50> </td>
| |
| <td>The <span style="font-weight: 700; font-size: 15px; color: white; background-color: green;"> Green </span> '''Horizontal Anchor Line''' has been used to shift the '''Marquee Selection Area''' to the left. Note that the 3 trees and a small building that were on the left of the Marquee Selection Area in the original image above at the start of this section have been replaced (overwritten) by the Marquee contents. Also note that the texture has been moved leaving a gap showing the original grid texture.</td>
| |
| <td width=50> </td>
| |
| </tr>
| |
| <tr valign="top">
| |
| <td width=50> </td>
| |
| <td>[[image:MarqueeSelectAreaShift_S20.png|link=]]</td>
| |
| </tr>
| |
| <tr valign="top">
| |
| <td colspan=3> </td>
| |
| </tr>
| |
| </table>
| |
| </td>
| |
| </tr>
| |
| </table>
| |
| <br>
| |
| <span style="font-weight: 700; font-size: 17px; color: white; background-color: black;"> Rotational Anchor Shift </span>
| |
| <br>
| |
| <table width=1000 bgcolor=#000000 cellpadding=2>
| |
| <tr valign="top">
| |
| <td>
| |
| <table width=996 bgcolor=#ffffff cellpadding=2>
| |
| <tr valign="top">
| |
| <td width=50> </td>
| |
| <td>The <span style="font-weight: 700; font-size: 15px; color: white; background-color: blue;"> Blue </span> '''Rotational Anchor Arc''' has been used to rotate the '''Marquee Selection Area''' about '''45°''' anti-clockwise. Again, anything that was originally in the area now covered by the '''Marquee Selection Area''' has been replaced by the contents of the Marquee. Also note that the texture has been moved leaving a gap showing the original grid texture.</td>
| |
| <td width=50> </td>
| |
| </tr>
| |
| <tr valign="top">
| |
| <td width=50> </td>
| |
| <td>[[image:MarqueeSelectAreaRotate_S20.png|link=]]</td>
| |
| </tr>
| |
| <tr valign="top">
| |
| <td colspan=3> </td>
| |
| </tr>
| |
| </table>
| |
| </td>
| |
| </tr>
| |
| </table>
| |
| <br>
| |
| <span style="font-weight: 700; font-size: 17px; color: white; background-color: black;"> Vertical Anchor Shift </span>
| |
| <br>
| |
| <table width=1000 bgcolor=#000000 cellpadding=2>
| |
| <tr valign="top">
| |
| <td>
| |
| <table width=996 bgcolor=#ffffff cellpadding=2>
| |
| <tr valign="top">
| |
| <td width=50> </td>
| |
| <td>The <span style="font-weight: 700; font-size: 15px; color: white; background-color: blue;"> Blue </span> '''Vertical Anchor Line''' has been used to lift the '''Marquee Selection Area''' upwards. Note that the ground height, ground textures and any effect layers within the '''Marquee Selection Area''' have also been moved up.</td>
| |
| <td width=50> </td>
| |
| </tr>
| |
| <tr valign="top">
| |
| <td width=50> </td>
| |
| <td>[[image:MarqueeSelectAreaUplift_S20.png|link=]]</td>
| |
| </tr>
| |
| <tr valign="top">
| |
| <td colspan=3> </td>
| |
| </tr>
| |
| </table>
| |
| </td>
| |
| </tr>
| |
| </table>
| |
| <br>
| |
| <table width=1000> <!-- BEGIN Section Nav Buttons -->
| |
| <tr valign="top">
| |
| <td width=629><span id="skip Scrapbook Operations"></span>
| |
| =='''Scrapbook Operations'''==
| |
| </td>
| |
| <td width=50>[[image:SkipDown.png|link=#skip Marquee Context Menu|Skip Down]]</td>
| |
| <td width=50>[[image:SkipUp.png|link=#skip Marquee Anchor Controls|Skip Up]]</td>
| |
| <td width=46>[[image:SkipMinorDown.png|link=#SB: Add|Down]][[image:SkipMinorBlank.png|link=]]</td> <!-- for Top and Minor Up/Down -->
| |
| <td width=75>[[image:HeadingUp.png|link=#stepMarquee|alt=Heading|To Heading]]</td>
| |
| <td width=75> </td>
| |
| <td width=75> </td> <!-- for Bottom -->
| |
| </tr>
| |
| </table> <!-- END Section Nav Buttons -->
| |
|
| |
| <table width=1000 bgcolor=#000000 cellpadding=2>
| |
| <tr valign="top">
| |
| <td>
| |
| <table width=996 bgcolor=#ffffff cellpadding=2>
| |
| <tr valign="top">
| |
| <td colspan=2>
| |
| <table>
| |
| <tr valign="top">
| |
| <td width=35>[[image:Information.png|35px|link=]]</td>
| |
| <td>The '''Scrapbook''' is a Surveyor 2.0 '''Clipboard''' that can hold multiple objects of different types. Like your operating system clipboard you can '''Cut''' or '''Copy''' selected objects into a new scrapbook and then '''Paste''' them anywhere in your route. The '''Scrapbook''' has additional features:-</td>
| |
| </tr>
| |
| </table>
| |
| </td>
| |
| </tr>
| |
| <tr valign="top">
| |
| <td width=10>[[image:DotPoint.JPG|10px|link=]]</td>
| |
| <td>you can have multiple scrapbooks, that can be permanent or temporary, ready for use whenever Surveyor is started</td>
| |
| </tr>
| |
| <tr valign="top">
| |
| <td>[[image:DotPoint.JPG|10px|link=]]</td>
| |
| <td>you can '''Paint''' a scrapbook into a scene, using the [[image:S20_BrushToolIcon.png|link=|20px]] '''Brush Tool''', with a range of control options and '''Brush Actions'''</td>
| |
| </tr>
| |
| <tr valign="top">
| |
| <td>[[image:DotPoint.JPG|10px|link=]]</td>
| |
| <td>you can control which '''types''' of objects in a scrapbook are painted or pasted and how they are painted/pasted. You can alter these controls to suit different situations</td>
| |
| </tr>
| |
| </table>
| |
| </td>
| |
| </tr>
| |
| </table>
| |
| <br>
| |
| <table width=1000>
| |
| <tr valign="top">
| |
| <td>
| |
| <table width=500 bgcolor=#000000 cellpadding=2>
| |
| <tr valign="top">
| |
| <td>
| |
| <table width=496 bgcolor=#ffffb0 cellpadding=2>
| |
| <tr valign="top">
| |
| <td width=25>[[image:NotePad.PNG|link=]]</td>
| |
| <td><span style="font-size: 17px; font-weight: 700;">Notes:</span><br>
| |
| ----</td>
| |
| </tr>
| |
| <tr>
| |
| <td colspan=2>'''Scrapbooks''', when created, will contain:-</td>
| |
| </tr>
| |
| <tr valign="top">
| |
| <td>[[image:DotPoint.JPG|10px|link=]]</td>
| |
| <td>'''Ground Heights'''</td>
| |
| </tr>
| |
| <tr valign="top">
| |
| <td>[[image:DotPoint.JPG|10px|link=]]</td>
| |
| <td>'''Ground Textures'''</td>
| |
| </tr>
| |
| <tr valign="top">
| |
| <td>[[image:DotPoint.JPG|10px|link=]]</td>
| |
| <td>'''TurfFX/Clutter Effect Layers''' - if present</td>
| |
| </tr>
| |
| <tr valign="top">
| |
| <td>[[image:DotPoint.JPG|10px|link=]]</td>
| |
| <td>'''Selected Objects''' - scenery items, splines, track, signals, etc</td>
| |
| </tr>
| |
| <tr valign="top">
| |
| <td>[[image:DotPoint.JPG|10px|link=]]</td>
| |
| <td><span style="font-weight: 700; font-size: 15px;">But <span style="background-color: yellow;"> <span style="text-decoration: underline;">NOT</span> Rolling Stock (Trains) </span></span>. Rolling Stock consists can be saved for later use as new '''Consist Assets'''. See [[image:PageLink.PNG|link=]] '''[[#FM: Context Rolling|Rolling Stock Object Context Menu]]''' for the details.</td>
| |
| </tr>
| |
| <tr valign="top">
| |
| <td colspan=2>The ground heights, ground textures and '''TurfFX/Clutter Effect Layers''' in the '''Marquee Selection Area''' will always be added to the scrapbook. You can use the filters in the <span style="font-weight: 700; font-size: 15px; color: white; background-color: #797979;"> Filter Palette </span> and <span style="font-weight: 700; font-size: 15px; color: white; background-color: #797979;"> Assets Palette </span> to control which visible objects in the selection area will also be added</td>
| |
| </tr>
| |
| </table>
| |
| </td>
| |
| </tr>
| |
| </table>
| |
| </td>
| |
| <td>
| |
| <table width=500 bgcolor=#000000 cellpadding=2>
| |
| <tr valign="top">
| |
| <td>
| |
| <table width=496 bgcolor=#ffffb0 cellpadding=2>
| |
| <tr valign="top">
| |
| <td width=25>[[image:NotePad.PNG|link=]]</td>
| |
| <td><span style="font-size: 17px; font-weight: 700;">Notes:</span><br>
| |
| ----</td>
| |
| </tr>
| |
| <tr>
| |
| <td colspan=2>
| |
| '''Scrapbooks''', when painted or pasted, can contain any combinations of:-</td>
| |
| </tr>
| |
| <tr valign="top">
| |
| <td width=10>[[image:DotPoint.JPG|10px|link=]]</td>
| |
| <td>'''Ground Heights'''</td>
| |
| </tr>
| |
| <tr valign="top">
| |
| <td>[[image:DotPoint.JPG|10px|link=]]</td>
| |
| <td>'''Ground Textures'''</td>
| |
| </tr>
| |
| <tr valign="top">
| |
| <td>[[image:DotPoint.JPG|10px|link=]]</td>
| |
| <td>'''TurfFX/Clutter Effect Layers'''</td>
| |
| </tr>
| |
| <tr valign="top">
| |
| <td>[[image:DotPoint.JPG|10px|link=]]</td>
| |
| <td>'''Scenery Objects (Meshes)''' - individual buildings, trees, signals, etc</td>
| |
| </tr>
| |
| <tr valign="top">
| |
| <td>[[image:DotPoint.JPG|10px|link=]]</td>
| |
| <td>'''Scenery Splines''' - roads, track, fences, etc</td>
| |
| </tr>
| |
| <tr valign="top">
| |
| <td colspan=2>You have options in [[image:PageLink.PNG|link=]] '''[[#Scrapbook Filters|The Scrapbook Filters]]''' that will control which of these data types are added to your '''Trainz World''' and how they are added.</td>
| |
| </tr>
| |
| </table>
| |
| </td>
| |
| </tr>
| |
| </table>
| |
| </td>
| |
| </tr>
| |
| </table>
| |
| <br>
| |
| Once an area has been marked out by the '''Marquee Tool''' a number of options become available.<br>
| |
|
| |
| <table width=1000>
| |
| <tr valign="top">
| |
| <td width=165>[[image:MarqueeEditMenu_S20.png|link=]]</td>
| |
| <td>
| |
| <table width=835 bgcolor=#000000 cellpadding=2>
| |
| <tr>
| |
| <td>
| |
| <table width=831 bgcolor=#ffffff cellpadding=2>
| |
| <tr>
| |
| <td colspan=2>The [[image:SurveyorEditIcon.png|link=]] '''Surveyor Edit Menu''' will show some additional options specifically for the '''Marquee Tool''':-</td>
| |
| </tr>
| |
| <tr valign="top">
| |
| <td><span style="font-weight: 700; font-size: 15px; color: white; background-color: black;"> Cut </span></td>
| |
| <td>the objects selected in the Marquee area (including the ground heights, ground textures and '''TurfFX/Clutter Effect Layers''') will be copied and placed into a new '''Scrapbook'''. Any scenery objects (excluding ground heights, ground textures and effect layers) that are not in a locked layer will be removed from the Marquee area. This is the same as pressing the <span style="font-weight: 700; font-size: 15px;"><span style="color: white; background-color: black;"> Ctrl </span> + <span style="color: white; background-color: black;"> X </span></span> keys</td>
| |
| </tr>
| |
| <tr valign="top">
| |
| <td><span style="font-weight: 700; font-size: 15px; color: white; background-color: black;"> Copy </span></td>
| |
| <td>the objects selected in the Marquee area (including ground heights, ground textures and '''TurfFX/Clutter Effect Layers''') will be copied and placed into a new '''Scrapbook'''. This is the same as pressing the <span style="font-weight: 700; font-size: 15px;"><span style="color: white; background-color: black;"> Ctrl </span> + <span style="color: white; background-color: black;"> C </span></span> keys</td>
| |
| </tr>
| |
| <tr valign="top">
| |
| <td><span style="font-weight: 700; font-size: 15px; color: white; background-color: black;"> Paste </span></td>
| |
| <td>the contents of the current '''Scrapbook''' will be pasted into the route at the cursor (focus) point. Which contents will be pasted and how they will be pasted are controlled by the '''Filters''' in the <span style="font-weight: 700; font-size: 15px; color: white; background-color: #797979;"> Scrapbook Palette </span> (see [[image:PageLink.PNG|link=]] '''[[#Scrapbook_Data|Scrapbook Data]]''' for more details). This option will always be available with and without a Marquee area being marked if there is a scrapbook available to be pasted. This is the same as pressing the <span style="font-weight: 700; font-size: 15px;"><span style="color: white; background-color: black;"> Ctrl </span> + <span style="color: white; background-color: black;"> V </span></span> keys</td>
| |
| </tr>
| |
| <tr valign="top">
| |
| <td><span style="font-weight: 700; font-size: 15px; color: white; background-color: black;"> Clear </span></td>
| |
| <td>the selected scenery '''objects''' that are not in locked layers will be removed from the Marquee area but '''NOT''' the selected ground heights, ground textures and '''TurfFX/Clutter Effect Layers'''. This is the same as pressing the <span style="font-weight: 700; font-size: 15px; color: white; background-color: black;"> Delete </span> key</td>
| |
| </tr>
| |
| <tr valign="top">
| |
| <td><span style="font-weight: 700; font-size: 15px; color: white; background-color: black;"> Select None </span></td>
| |
| <td>the '''Marquee Selection Area''' boundary lines are removed from the route cancelling the selection process. Nothing that is inside the area will be removed. This is the same as pressing the <span style="font-weight: 700; font-size: 15px;"><span style="color: white; background-color: black;"> Ctrl </span> + <span style="color: white; background-color: black;"> D </span></span> keys</td>
| |
| </tr>
| |
| </table>
| |
| </td>
| |
| </tr>
| |
| </table>
| |
| </td>
| |
| </tr>
| |
| </table>
| |
| <br>
| |
| <table width=1000> <!-- BEGIN Section Nav Buttons -->
| |
| <tr valign="top">
| |
| <td width=629><span id="SB: Add"></span>
| |
| ===<span style="font-weight: 700; font-size: 17px; color: white; background-color: blue;"> Adding a New Scrapbook </span>===
| |
| </td>
| |
| <td width=50> </td>
| |
| <td width=50> </td>
| |
| <td width=46>[[image:SkipMinorDown.png|link=#skip Marquee Context Menu|Down]][[image:SkipMinorUp.png|link=#skip Scrapbook Operations|Up]]</td> <!-- for Top and Minor Up/Down -->
| |
| <td width=75> </td>
| |
| <td width=75> </td>
| |
| <td width=75> </td> <!-- for Bottom -->
| |
| </tr>
| |
| </table> <!-- END Section Nav Buttons -->
| |
|
| |
| <table width=1000 bgcolor="lightcyan">
| |
| <tr valign="top">
| |
| <td width=10>[[image:BlueDot10x10.png|link=]]</td>
| |
| <td>The <span style="font-weight: 700; font-size: 15px; color: white; background-color: black;"> Cut </span> and <span style="font-weight: 700; font-size: 15px; color: white; background-color: black;"> Copy </span> '''Scrapbook''' operations are also found in the '''Marquee Context Menu''' (see the [[image:PageLink.PNG|link=]] '''[[#skip Marquee Context Menu|Marquee Context Menu]]''' below).</td>
| |
| </tr>
| |
| </table>
| |
| <br>
| |
| <table bgcolor=#000000 width=1000 cellpadding=2>
| |
| <tr valign="top">
| |
| <td>
| |
| <table bgcolor=#ffffe0 width=996 cellpadding=2>
| |
| <tr valign="top">
| |
| <td width=25>[[image:PencilTips.PNG|link=]]</td><td>You don't have to use the '''Marquee Tool''' to create a new '''Scrapbook'''. You can use the [[image:S20_FreeMoveToolIcon.png|link=|20px]] '''Free Move Tool''' or the [[image:S20_FineAdjustmentToolIcon.png|link=|20px]] '''Fine Adjustment Tool''' to select any number of objects and then press <span style="font-weight: 700; font-size: 15px;"><span style="color: white; background-color: black;"> Ctrl </span> + <span style="color: white; background-color: black;"> C </span></span>. The selected objects, along with the ground heights, ground textures, and any '''TurfFX/Clutter Effect Layers''', will be copied into a new '''Scrapbook'''</td>
| |
| </tr>
| |
| </table>
| |
| </td>
| |
| </tr>
| |
| </table>
| |
| <br>
| |
| When a new '''Scrapbook''' is created by a <span style="font-weight: 700; font-size: 15px; color: white; background-color: black;"> Cut </span> (or press <span style="font-weight: 700; font-size: 15px;"><span style="color: white; background-color: black;"> Ctrl </span> + <span style="color: white; background-color: black;"> X </span></span>) or <span style="font-weight: 700; font-size: 15px; color: white; background-color: black;"> Copy </span> (or press <span style="font-weight: 700; font-size: 15px;"><span style="color: white; background-color: black;"> Ctrl </span> + <span style="color: white; background-color: black;"> C </span></span>), it will appear in the '''Scrapbook''' palette with some basic details.<br>
| |
|
| |
| <table width=1000>
| |
| <tr valign="top">
| |
| <td width=500>[[image:ScrapbookNew_S20.png|link=]]</td>
| |
| <td width=500>
| |
| <table width=500>
| |
| <tr valign="top">
| |
| <td colspan=2>The newly created scrapbook will be given:-</td>
| |
| </tr>
| |
| <tr valign="top">
| |
| <td width=10>[[image:DotPoint.JPG|10px|link=]]</td>
| |
| <td>a name consisting of the date and time of its creation</td>
| |
| </tr>
| |
| <tr valign="top">
| |
| <td>[[image:DotPoint.JPG|10px|link=]]</td>
| |
| <td>a thumbnail</td>
| |
| </tr>
| |
| <tr valign="top">
| |
| <td colspan=2>
| |
| <table bgcolor=#000000 cellpadding=2>
| |
| <tr valign="top">
| |
| <td>
| |
| <table bgcolor=#ffffe0 cellpadding=2>
| |
| <tr valign="top">
| |
| <td width=25>[[image:PencilTips.PNG|link=]]</td><td>The thumbnail image will be taken using the current camera POV (point of view). To get a better image adjust the camera position and view to give the best possible shot of the '''Scrapbook''' objects before giving the <span style="font-weight: 700; font-size: 15px; color: white; background-color: black;"> Cut </span> or <span style="font-weight: 700; font-size: 15px; color: white; background-color: black;"> Copy </span> command
| |
| </td>
| |
| </tr>
| |
| </table>
| |
| </td>
| |
| </tr>
| |
| </table>
| |
| </td>
| |
| </tr>
| |
| <tr valign="top">
| |
| <td>[[image:DotPoint.JPG|10px|link=]]</td>
| |
| <td>a scrapbook number (it will be inserted as the '''№1''' scrapbook)</td>
| |
| </tr>
| |
| <tr valign="top">
| |
| <td>[[image:DotPoint.JPG|10px|link=]]</td>
| |
| <td>an expiry date which will be set 5 days after its creation - this will countdown each day until '''0''' when the new scrapbook will be deleted</td>
| |
| </tr>
| |
| </table>
| |
| </td>
| |
| </tr>
| |
| </table>
| |
| <br>
| |
| <table width=1000 bgcolor=#000000 cellpadding=2>
| |
| <tr valign="top">
| |
| <td>
| |
| <table bgcolor=#ffffb0 cellpadding=2>
| |
| <tr valign="top">
| |
| <td>
| |
| <table>
| |
| <tr valign="top">
| |
| <td width=25>[[image:NotePad.PNG|link=]]</td>
| |
| <td><span style="font-size: 17px; font-weight: 700;">Notes:</span><br>
| |
| ----</td>
| |
| </tr>
| |
| <tr valign="top">
| |
| <td>[[image:DotPoint.JPG|10px|link=]]</td>
| |
| <td>'''Scrapbooks''' use very little memory so there is no real limit to how many you can store in the palette but finding the one you want will be more difficult as the list grows longer</td>
| |
| </tr><tr valign="top">
| |
| <td>[[image:DotPoint.JPG|10px|link=]]</td>
| |
| <td>'''Rolling Stock Objects''' cannot be added to a '''Scrapbook'''. The rolling stock '''Context Menu''' option <span style="font-weight: 700; font-size: 15px; color: white; background-color: black;"> Save to Consist Asset... </span> performs some of the '''Scrapbook''' functions for rolling stock objects and consists</td>
| |
| </tr>
| |
| <tr valign="top">
| |
| <td>[[image:DotPoint.JPG|10px|link=]]</td>
| |
| <td>Deleting a '''Scrapbook''' after it has been pasted does not delete the objects that it has added to the route</td>
| |
| </tr>
| |
| </table>
| |
| </td>
| |
| </tr>
| |
| </table>
| |
| </td>
| |
| </tr>
| |
| </table>
| |
| <br>
| |
| <table width=710>
| |
| <tr valign="top">
| |
| <td width=500>
| |
| <table bgcolor=#000000 width=500 cellpadding=2>
| |
| <tr valign="top">
| |
| <td>
| |
| <table bgcolor=#ffffff width=496 cellpadding=2>
| |
| <tr valign="top">
| |
| <td width=496>There are two changes that can be made to the new scrapbook:-<br>
| |
| <table width=496>
| |
| <tr valign="top">
| |
| <td width=20>[[image:DotPoint1RedC.png|link=]]</td>
| |
| <td>'''Give it a name''' - <span style="font-weight: 700; font-size: 15px; background-color: lightcyan;"> Left Click </span> inside the '''Name Text Box''' and type a new name. To set its new name <span style="font-weight: 700; font-size: 15px; background-color: lightcyan;"> Left Click </span> on the image <span style="font-weight: 700; font-size: 15px;">OR</span> press the <span style="font-weight: 700; font-size: 15px; color: white; background-color: black;"> Enter </span> key</td>
| |
| </tr>
| |
| <tr valign="top">
| |
| <td>[[image:DotPoint2RedC.png|link=]]</td>
| |
| <td>'''Make it permanent''' - <span style="font-weight: 700; font-size: 15px; background-color: lightcyan;"> Left Click </span> the white '''Pin''' icon ([[image:ScrapbookUnPinnedIcon_S20.png|link=]]) to change it to blue. The scrapbook will no longer expire but it can still be deleted at any time</td>
| |
| </tr>
| |
| <tr valign="top">
| |
| <td colspan=2>'''Pinned''' scrapbooks are always shown with a '''blue''' pin icon [[image:ScrapbookPinnedIcon_S20.png|link=]] and the words "pinned, no expiry" displayed next to their scrapbook №</td>
| |
| </tr>
| |
| </table>
| |
| <table bgcolor=#ffffe0 cellpadding=2>
| |
| <tr valign="top">
| |
| <td width=25>[[image:PencilTips.PNG|link=]]</td><td>The '''Pinning''' of any scrapbook can be reversed so that it will then expire in 5 days time. <span style="font-weight: 700; font-size: 15px; background-color: lightcyan;"> Left Click </span> the blue pin icon.</td>
| |
| </tr>
| |
| </table>
| |
| </td>
| |
| </tr>
| |
| </table>
| |
| </td>
| |
| </tr>
| |
| </table>
| |
| </td>
| |
| <td width=210>[[image:ScrapbookNewNamedPinned_S20.png|link=]]</td>
| |
| </tr>
| |
| </table>
| |
| <br>
| |
| Once a scrapbook has been '''Pinned''' it becomes an asset and will appear in '''Content Manager'''<br>
| |
|
| |
| [[image:ScrapbookEntryCM_S20.png|link=]]<br>
| |
|
| |
| The scrapbook can be uploaded to the '''DLS''' and saved as a '''CDP''' file.<br>
| |
| <br>
| |
| <table bgcolor=#000000 width=1000 cellpadding=2>
| |
| <tr valign="top">
| |
| <td>
| |
| <table bgcolor=#ffffe0 width=996 cellpadding=2>
| |
| <tr valign="top">
| |
| <td width=25>[[image:PencilTips.PNG|link=]]</td><td>You can archive your scrapbooks as '''CDP''' files to keep the number of installed scrapbooks to a minimum. If an archived scrapbook is needed then you can use the '''Import Content Files''' option in '''Content Manager''' to add it to the <span style="font-weight: 700; font-size: 15px; color: white; background-color: #797979;"> Scrapbook Palette </span>. It can be deleted from the palette later, when no longer needed.</td>
| |
| </tr>
| |
| </table>
| |
| </td>
| |
| </tr>
| |
| </table>
| |
| <br>
| |
| <table width=1000> <!-- BEGIN Section Nav Buttons -->
| |
| <tr valign="top">
| |
| <td width=629><span id="skip Marquee Context Menu"></span>
| |
| =='''Marquee Context Menu'''==
| |
| </td>
| |
| <td width=50>[[image:SkipDown.png|link=#skip Managing Baseboards|Skip Down]]</td>
| |
| <td width=50>[[image:SkipUp.png|link=#skip Scrapbook Operations|Skip Up]]</td>
| |
| <td width=46>[[image:SkipMinorBlank.png|link=]][[image:SkipMinorUp.png|link=#SB: Add|Up]]</td> <!-- for Top and Minor Up/Down -->
| |
| <td width=75>[[image:HeadingUp.png|link=#stepMarquee|alt=Heading|To Heading]]</td>
| |
| <td width=75> </td>
| |
| <td width=75> </td> <!-- for Bottom -->
| |
| </tr>
| |
| </table> <!-- END Section Nav Buttons -->
| |
|
| |
| <table width=1000 bgcolor="lightcyan" cellpadding=2>
| |
| <tr valign="top">
| |
| <td width=10>[[image:BlueDot10x10.png|link=]]</td>
| |
| <td>The '''Marquee Context Menu''' creates, deletes, converts and paints individual or multiple baseboards. It also creates and pastes scrapbooks.</td>
| |
| </tr>
| |
| </table>
| |
| <br>
| |
| To open the '''Context Menu''' for a '''Marquee Selection Area''' <span style="font-weight: 700; font-size: 15px; background-color: lightcyan;"> Left Click </span> on its '''Context Icon''' [[image:MarqueeContextIcon_S20.png|link=]] or press the <span style="font-weight: 700; font-size: 15px; color: white; background-color: black;"> T </span> key.<br>
| |
|
| |
| <table width=1000>
| |
| <tr valign="top">
| |
| <td width=300>[[image:MarqueeContextMenu_S20.png|link=]]</td>
| |
| <td>
| |
| <table width=700 bgcolor=#000000 cellpadding=2>
| |
| <tr valign="top">
| |
| <td>
| |
| <table width=696 bgcolor=#ffffff cellpadding=2>
| |
| <tr valign="top">
| |
| <td>
| |
| <table>
| |
| <tr valign="middle">
| |
| <td width=35>[[image:Information.png|35px|link=]]</td>
| |
| <td><span style="font-weight: 700; font-size: 17px;">Marquee Context Menu Options</span></td>
| |
| </tr>
| |
| </table>
| |
| </td>
| |
| </tr>
| |
| <tr valign="top">
| |
| <td>
| |
| <table>
| |
| <tr valign="top">
| |
| <td><span style="font-weight: 700; font-size: 15px; color: white; background-color: black;"> Cut </span></td>
| |
| <td>removes the objects in the selection area from the route and moves them into the '''Scrapbook'''. Ground heights, ground textures and '''TurfFX/Clutter Effect Layers''' will be copied, not cut. Has the same effect as pressing the <span style="font-weight: 700; font-size: 15px;"><span style="color: white; background-color: black;"> Ctrl </span> + <span style="color: white; background-color: black;"> X </span></span> keys</td>
| |
| </tr>
| |
| </table>
| |
| </td>
| |
| </tr>
| |
| <tr valign="top">
| |
| <td>
| |
| <table>
| |
| <tr valign="top">
| |
| <td><span style="font-weight: 700; font-size: 15px; color: white; background-color: black;"> Copy </span></td>
| |
| <td>copies the objects in the selection area and moves them into the '''Scrapbook'''. Has the same effect as pressing the <span style="font-weight: 700; font-size: 15px;"><span style="color: white; background-color: black;"> Ctrl </span> + <span style="color: white; background-color: black;"> C </span></span> keys</td>
| |
| </tr>
| |
| </table>
| |
| </td>
| |
| </tr>
| |
| <tr valign="top">
| |
| <td>
| |
| <table>
| |
| <tr valign="top">
| |
| <td width=175><span style="font-weight: 700; font-size: 15px; color: white; background-color: black;"> Paste to Selected Area </span></td>
| |
| <td>pastes the objects in the currently selected '''Scrapbook''' into the selection area.<br>
| |
| <table bgcolor=#ffffb0 cellpadding=2>
| |
| <tr valign="top">
| |
| <td width=25>[[image:NotePad.PNG|link=]]</td>
| |
| <td>When pasted from a scrapbook the objects will add to or replace all other objects, splines, textures, ground terrain and effect layers in the Marquee Selection area depending on the settings in the [[image:PageLink.PNG|link=]] '''[[#Scrapbook Filters|Scrapbook Filters]]'''</td>
| |
| </tr>
| |
| </table>
| |
| </td>
| |
| </tr>
| |
| </table>
| |
| </td>
| |
| </tr>
| |
| <tr valign="top">
| |
| <td>
| |
| <table>
| |
| <tr valign="top">
| |
| <td><span style="font-weight: 700; font-size: 15px; color: white; background-color: black;"> Delete </span></td>
| |
| <td>deletes the objects in the selection area except for the ground heights, textures and effect layers. Has the same effect as pressing the <span style="font-weight: 700; font-size: 15px; color: white; background-color: black;"> Delete </span> key</td>
| |
| </tr>
| |
| </table>
| |
| </td>
| |
| </tr>
| |
| <tr valign="top">
| |
| <td>
| |
| <table>
| |
| <tr valign="top">
| |
| <td width=175><span style="font-weight: 700; font-size: 15px; color: white; background-color: black;"> Paint Within Marquee </span></td>
| |
| <td>if a texture has been selected in the <span style="font-weight: 700; font-size: 15px; color: white; background-color: #797979;"> Assets Palette </span> then that texture will be painted inside the selection area using the settings in the <span style="font-weight: 700; font-size: 15px; color: white; background-color: #797979;"> Tool Options Palette </span>. If no texture has been selected then this option will be greyed out</td>
| |
| </tr>
| |
| </table>
| |
| </td>
| |
| </tr>
| |
| <tr valign="top">
| |
| <td>
| |
| <table>
| |
| <tr valign="top">
| |
| <td width=225><span style="font-weight: 700; font-size: 15px; color: white; background-color: black;"> Set Marquee To Brush Height </span></td>
| |
| <td>changes the ground height of the selection area to the brush height in the <span style="font-weight: 700; font-size: 15px; color: white; background-color: #797979;"> Tool Options Palette </span></td>
| |
| </tr>
| |
| </table>
| |
| </td>
| |
| </tr>
| |
| <tr valign="top">
| |
| <td>
| |
| <table>
| |
| <tr valign="top">
| |
| <td width=200><span style="font-weight: 700; font-size: 15px; color: white; background-color: black;"> Convert Baseboards To </span></td>
| |
| <td>converts the resolution of the entire baseboard or baseboards covered by the selection area to one of three options - <span style="font-weight: 700; font-size: 15px; color: white; background-color: black;"> HD Grid </span> (<span style="background-color: yellow;">in '''Trainz Plus''' only</span>), <span style="font-weight: 700; font-size: 15px; color: white; background-color: black;"> 5m Grid </span> and <span style="font-weight: 700; font-size: 15px; color: white; background-color: black;"> 10m Grid </span>. If the selection area covers any empty spaces outside the existing baseboards then '''NO NEW''' baseboards will be created in those spaces. See '''Notes:''' below</td>
| |
| </tr>
| |
| </table>
| |
| </td>
| |
| </tr>
| |
| <tr valign="top">
| |
| <td>
| |
| <table>
| |
| <tr valign="top">
| |
| <td width=250><span style="font-weight: 700; font-size: 15px; color: white; background-color: black;"> Delete Baseboards in Marquee </span></td>
| |
| <td>deletes the entire baseboard or baseboards covered by the selection area. See '''Notes:''' below</td>
| |
| </tr>
| |
| </table>
| |
| </td>
| |
| </tr>
| |
| <tr valign="top">
| |
| <td>
| |
| <table>
| |
| <tr valign="top">
| |
| <td><span style="font-weight: 700; font-size: 15px; color: white; background-color: black;"> Select in Assets Palette </span></td>
| |
| <td>sets the <span style="font-weight: 700; font-size: 15px; color: white; background-color: #797979;"> Filter Palette </span> to <span style="font-weight: 700; font-size: 15px; color: white; background-color: black;"> All Content </span> and highlights in the <span style="font-weight: 700; font-size: 15px; color: white; background-color: #797979;"> Assets Palette </span> the most common ground texture used in the Marquee Selection area</td>
| |
| </tr>
| |
| </table>
| |
| </td>
| |
| </tr>
| |
| <tr valign="top">
| |
| <td>
| |
| <table>
| |
| <tr valign="top">
| |
| <td><span style="font-weight: 700; font-size: 15px; color: white; background-color: black;"> Select in Filter Palette </span></td>
| |
| <td>sets the <span style="font-weight: 700; font-size: 15px; color: white; background-color: #797979;"> Filter Palette </span> to <span style="font-weight: 700; font-size: 15px; color: white; background-color: black;"> All Content </span> and highlights in the <span style="font-weight: 700; font-size: 15px; color: white; background-color: #797979;"> Filter Palette </span> the most common ground texture used in the Marquee Selection area</td>
| |
| </tr>
| |
| </table>
| |
| </td>
| |
| </tr>
| |
| </table>
| |
| </td>
| |
| </tr>
| |
| </table>
| |
| </td>
| |
| </tr>
| |
| </table>
| |
| <br>
| |
| <table width=1000 bgcolor=#000000 cellpadding=2>
| |
| <tr valign="top">
| |
| <td>
| |
| <table width=996 bgcolor=#ffffb0 cellpadding=2>
| |
| <tr valign="top">
| |
| <td width=25>[[image:NotePad.PNG|link=]]</td>
| |
| <td width=970><span style="font-size: 17px; font-weight: 700;">Notes:'''</span><br>
| |
| ----</td>
| |
| </tr>
| |
| <tr valign="top">
| |
| <td> </td>
| |
| <td>
| |
| <table>
| |
| <tr valign="top">
| |
| <td width=10>[[image:DotPoint.JPG|10px|link=]]</td>
| |
| <td>The <span style="font-weight: 700; font-size: 15px; color: white; background-color: black;"> Convert Baseboards To </span> and <span style="font-weight: 700; font-size: 15px; color: white; background-color: black;"> Delete Baseboards in Marquee </span> options will affect the entire baseboard or baseboards that contain the '''Marquee Selection Area''' even if the selection area only covers a small part of a baseboard.
| |
| </td>
| |
| </tr>
| |
| <tr valign="top">
| |
| <td>[[image:DotPoint.JPG|10px|link=]]</td>
| |
| <td><span style="background-color: yellow;"> It is '''NOT RECOMMENDED''' that you mix '''HD Resolution''' baseboards with '''10m''' or '''5m Resolution''' baseboards in the same route</span>. The boundaries between '''HD''' and '''non-HD''' baseboards will have display issues. If you are going to use the '''HD Resolution''' then it is recommended that the entire route should be '''Upgraded''' to '''HD'''. You can mix both '''5m Resolution''' and '''10m Resolution''' baseboards in the same '''non-HD Resolution''' route. See [[image:PageLink.PNG|link=]] '''[[#stepUpgrading|Upgrading a Route to HD]]''' below for more details.</td>
| |
| </tr>
| |
| </table>
| |
| </td>
| |
| </tr>
| |
| </table>
| |
| </td>
| |
| </tr>
| |
| </table>
| |
| <br>
| |
| <table width=1000> <!-- BEGIN Section Nav Buttons -->
| |
| <tr valign="top">
| |
| <td width=629><span id="skip Managing Baseboards"></span>
| |
| =='''Managing Baseboards'''==
| |
| </td>
| |
| <td width=50>[[image:SkipDown.png|link=#stepMass|Skip Down]]</td>
| |
| <td width=50>[[image:SkipUp.png|link=#skip Marquee Context Menu|Skip Up]]</td>
| |
| <td width=46>[[image:SkipMinorDown.png|link=#MQ: Height Baseboard|Down]][[image:SkipMinorBlank.png|link=]]</td> <!-- for Top and Minor Up/Down -->
| |
| <td width=75>[[image:HeadingUp.png|link=#stepMarquee|alt=Heading|To Heading]]</td>
| |
| <td width=75> </td>
| |
| <td width=75> </td> <!-- for Bottom -->
| |
| </tr>
| |
| </table> <!-- END Section Nav Buttons -->
| |
|
| |
| <table width=1000 bgcolor="lightcyan" cellpadding=2>
| |
| <tr valign="top">
| |
| <td width=10>[[image:BlueDot10x10.png|link=]]</td>
| |
| <td>The '''Marquee''' is a powerful tool for adding, deleting and changing the properties of multiple baseboards</td>
| |
| </tr>
| |
| </table>
| |
| <br>
| |
| ===<span style="font-weight: 700; font-size: 17px; color: white; background-color: blue;"> Add, Delete, Convert Baseboards </span>===
| |
|
| |
| <table width=1000>
| |
| <tr valign="top">
| |
| <td width=450>[[image:S20_MarqueeDrawnArea.png|link=|alt=Marquee drawn area]]
| |
| <br>
| |
| <table bgcolor=#000000 cellpadding=2>
| |
| <tr valign="top">
| |
| <td>
| |
| <table bgcolor=#ffffe0 cellpadding=2>
| |
| <tr valign="top">
| |
| <td width=25>[[image:PencilTips.PNG|link=]]</td>
| |
| <td>In '''Trainz Plus''' you can '''Upgrade''' an existing '''5m Resolution''' or '''10m Resolution''' route entirely to '''HD Resolution'''. See [[image:PageLink.PNG|link=]] '''[[#stepUpgrading|Upgrading a Route to HD]]''' below for more details.</td>
| |
| </tr>
| |
| </table>
| |
| </td>
| |
| </tr>
| |
| </table>
| |
| </td>
| |
| <td>
| |
| <table bgcolor=#000000 width=550 cellpadding=2>
| |
| <tr valign="top">
| |
| <td>
| |
| <table bgcolor=#ffffff width=546 cellpadding=2>
| |
| <tr valign="top">
| |
| <td colspan=2><span style="font-weight: 700; font-size: 15px;">Steps:</span> To add, delete and convert baseboards:-</td>
| |
| </tr>
| |
| <tr valign="top">
| |
| <td width=20>[[image:DotPoint1.JPG|link=]]</td>
| |
| <td>In the <span style="font-weight: 700; font-size: 15px; color: white; background-color: #797979;"> Tools Palette </span> <span style="font-weight: 700; font-size: 15px; background-color: lightcyan;"> Left Click </span> on the '''Marquee Tool''' [[image:S20_MarqueeToolIcon.png|link=|20px]] or press the <span style="font-weight: 700; font-size: 15px; color: white; background-color: black;"> F </span> key</td>
| |
| </tr>
| |
| <tr valign="top">
| |
| <td>[[image:DotPoint2.JPG|link=]]</td>
| |
| <td><span style="font-weight: 700; font-size: 15px; background-color: lightcyan;">Left Click and Drag</span> to draw out the '''Marquee Selection Area''' area where the new baseboards will be added or the existing baseboards will be deleted or converted.</td>
| |
| </tr>
| |
| <tr valign="top">
| |
| <td colspan=2>The '''Marquee Selection Area''', shown with a green border in the image on the left, covers the existing baseboard (black, bottom left) and where 3 new baseboards will be created. The Marquee has a '''Context Icon''' as shown in the image.</td>
| |
| </tr>
| |
| <tr valign="top">
| |
| <td>[[image:DotPoint3.JPG|link=]]</td>
| |
| <td><span style="font-weight: 700; font-size: 15px; background-color: lightcyan;"> Left Click </span> on the '''Context Icon''' or press the <span style="font-weight: 700; font-size: 15px; color: white; background-color: black;"> T </span> key to open up the '''Marquee Context Menu''' (see '''Marquee Context Menu''' above).</td>
| |
| </tr>
| |
| <tr valign="top">
| |
| <td>[[image:DotPoint4.JPG|link=]]</td>
| |
| <td>Create, Convert, Delete</td>
| |
| </tr>
| |
| <tr valign="top">
| |
| <td>[[image:DotPoint.JPG|10px|link=]]</td>
| |
| <td>To '''Add''' new baseboards select the context option <span style="font-weight: 700; font-size: 15px; color: white; background-color: black;"> Add New Baseboards > </span> then select a resolution from two or three sub-options, <span style="font-weight: 700; font-size: 15px; color: white; background-color: black;"> HD Grid </span> (<span style="background-color: yellow;">in '''Trainz Plus''' only</span>), <span style="font-weight: 700; font-size: 15px; color: white; background-color: black;"> 5m Grid </span> and <span style="font-weight: 700; font-size: 15px; color: white; background-color: black;"> 10m Grid </span>. If existing baseboards have also been covered by the selection area then they will '''NOT''' be converted to the new resolution.
| |
| <table>
| |
| <tr valign="top">
| |
| <td>
| |
| <table bgcolor=#ffffb0 cellpadding=2>
| |
| <tr valign="top">
| |
| <td width=25>[[image:NotePad.PNG|link=]]</td>
| |
| <td><span style="font-weight: 700; background-color: yellow;"> It is NOT RECOMMENDED that you mix HD Resolution baseboards with 10m or 5m Resolution baseboards in the same route</span>. It should be '''ALL HD''' or none. You can mix both '''5m Resolution''' and '''10m Resolution''' baseboards in the same route but '''NOT''' with '''HD Resolution''' baseboards</td>
| |
| </tr>
| |
| </table>
| |
| </td>
| |
| </tr>
| |
| </table>
| |
| </td>
| |
| </tr>
| |
| <tr valign="top">
| |
| <td>[[image:DotPoint.JPG|10px|link=]]</td>
| |
| <td>To '''Convert''' highlighted baseboards to a different '''Grid Resolution''' select the context option <span style="font-weight: 700; font-size: 15px; color: white; background-color: black;"> Convert Existing Baseboards To > </span> then select a resolution from two or three sub-options, <span style="font-weight: 700; font-size: 15px; color: white; background-color: black;"> HD Grid </span> (<span style="background-color: yellow;">in '''Trainz Plus''' only</span>), <span style="font-weight: 700; font-size: 15px; color: white; background-color: black;"> 5m Grid </span> and <span style="font-weight: 700; font-size: 15px; color: white; background-color: black;"> 10m Grid </span>. If the selection area covers any empty spaces outside the existing baseboards then '''NO NEW''' baseboards will be created in those spaces
| |
| <table>
| |
| <tr valign="top">
| |
| <td>
| |
| <table bgcolor=#ffffb0 cellpadding=2>
| |
| <tr valign="top">
| |
| <td width=25>[[image:NotePad.PNG|link=]]</td>
| |
| <td><span style="font-weight: 700; background-color: yellow;"> It is NOT RECOMMENDED that you mix HD Resolution baseboards with 10m or 5m Resolution baseboards in the same route</span>. It should be '''ALL HD''' or none. Mixing '''5m Resolution''' and '''10m Resolution''' baseboards in a route is OK</td>
| |
| </tr>
| |
| </table>
| |
| </td>
| |
| </tr>
| |
| </table>
| |
| </td>
| |
| </tr>
| |
| <tr valign="top">
| |
| <td>[[image:DotPoint.JPG|10px|link=]]</td>
| |
| <td>To '''Delete''' the selected baseboards select the context option <span style="font-weight: 700; font-size: 15px; color: white; background-color: black;"> Delete Baseboards in Marquee </span>. <span style="font-weight: 700; background-color: yellow;">Note: An entire baseboard will be deleted even if the selection area only covers a small part of the baseboard</span>. The <span style="font-weight: 700; font-size: 15px;"><span style="color: white; background-color: black;"> Ctrl </span> + <span style="color: white; background-color: black;"> Z </span></span> keys can '''Undo''' the deletion.
| |
| </td>
| |
| </tr>
| |
| </table>
| |
| </td>
| |
| </tr>
| |
| </table>
| |
| </td>
| |
| </tr>
| |
| </table>
| |
| <br>
| |
| <table width=1000> <!-- BEGIN Section Nav Buttons -->
| |
| <tr valign="top">
| |
| <td width=629><span id="MQ: Height Baseboard"></span>
| |
| ===<span style="font-weight: 700; font-size: 17px; color: white; background-color: blue;"> Baseboard Ground Height </span>===
| |
| </td>
| |
| <td width=50> </td>
| |
| <td width=50> </td>
| |
| <td width=46>[[image:SkipMinorDown.png|link=#MQ: Texture Baseboard|Down]][[image:SkipMinorUp.png|link=#skip Managing Baseboards|Up]]</td> <!-- for Top and Minor Up/Down -->
| |
| <td width=75> </td>
| |
| <td width=75> </td>
| |
| <td width=75> </td> <!-- for Bottom -->
| |
| </tr>
| |
| </table> <!-- END Section Nav Buttons -->
| |
|
| |
| <table width=1000 bgcolor="lightcyan" cellpadding=2>
| |
| <tr valign="top">
| |
| <td width=10>[[image:BlueDot10x10.png|link=]]</td>
| |
| <td>The '''Marquee Selection Area''' can be used to set the height of entire baseboards or just a selected section of one or more baseboards</td>
| |
| </tr>
| |
| </table>
| |
|
| |
| <table width=1000 bgcolor=#000000 cellpadding=2>
| |
| <tr valign="top">
| |
| <td>
| |
| <table bgcolor=#ffffff cellpadding=2>
| |
| <tr valign="top">
| |
| <td colspan=2><span style="font-weight: 700; font-size: 15px;">Steps:</span> To set the height of the baseboards or area under the '''Marquee Selection Area''':-</td>
| |
| </tr>
| |
| <tr valign="top">
| |
| <td width=20>[[image:DotPoint1.JPG|link=]]</td>
| |
| <td>in the <span style="font-weight: 700; font-size: 15px; color: white; background-color: #797979;"> Tool Options Palette </span> enter the required ground height into the <span style="font-weight: 700; font-size: 15px; color: gold; background-color: black;"> Height </span> setting. <span style="font-weight: 700; font-size: 15px; background-color: yellow;"> Note: the <span style="font-weight: 700; font-size: 15px; color: gold; background-color: black;"> Grade </span> setting has no effect when used with the Marquee tool</span></td>
| |
| </tr>
| |
| <tr valign="top">
| |
| <td>[[image:DotPoint2.JPG|link=]]</td>
| |
| <td>In the <span style="font-weight: 700; font-size: 15px; color: white; background-color: #797979;"> Tools Palette </span> <span style="font-weight: 700; font-size: 15px; background-color: lightcyan;"> Left Click </span> on the '''Marquee Tool''' [[image:S20_MarqueeToolIcon.png|link=|20px]] or press the <span style="font-weight: 700; font-size: 15px; color: white; background-color: black;"> F </span> key</td>
| |
| </tr>
| |
| <tr valign="top">
| |
| <td>[[image:DotPoint3.JPG|link=]]</td>
| |
| <td><span style="font-weight: 700; font-size: 15px; background-color: lightcyan;">Left Click and Drag</span> to draw out the '''Marquee Selection Area''' area so that it covers the area that will have its height set. This can include multiple baseboards and empty spaces. <span style="font-weight:700; font-size: 15px; background-color: yellow;"> Note: If empty spaces are included in the Marquee Selection Area then new baseboards will be created in those empty spaces </span></td>
| |
| </tr>
| |
| <tr valign="top">
| |
| <td>[[image:DotPoint4.JPG|link=]]</td>
| |
| <td><span style="font-weight: 700; font-size: 15px; background-color: lightcyan;"> Left Click </span> on the '''Context Icon''' or press the <span style="font-weight: 700; font-size: 15px; color: white; background-color: black;"> T </span> key to open up the '''Marquee Context Menu''' (see '''Marquee Context Menu''' above).</td>
| |
| </tr>
| |
| <tr valign="top">
| |
| <td>[[image:DotPoint5.JPG|link=]]</td>
| |
| <td>select the '''Context Menu''' option <span style="font-weight: 700; font-size: 15px; color: white; background-color: black;"> Set Marquee to Brush Height </span>. If the '''Marquee''' extends over empty space then new baseboards will be created at the set <span style="font-weight: 700; font-size: 15px; color: gold; background-color: black;"> Height </span> value.</td>
| |
| </tr>
| |
| </table>
| |
| </td>
| |
| </tr>
| |
| </table>
| |
| <br>
| |
| <table width=1000> <!-- BEGIN Section Nav Buttons -->
| |
| <tr valign="top">
| |
| <td width=629><span id="MQ: Texture Baseboard"></span>
| |
| ===<span style="font-weight: 700; font-size: 17px; color: white; background-color: blue;"> Baseboard Ground Texture </span>===
| |
| </td>
| |
| <td width=50> </td>
| |
| <td width=50> </td>
| |
| <td width=46>[[image:SkipMinorDown.png|link=#stepMass|Down]][[image:SkipMinorUp.png|link=#MQ: Height Baseboard|Up]]</td> <!-- for Top and Minor Up/Down -->
| |
| <td width=75> </td>
| |
| <td width=75> </td>
| |
| <td width=75> </td> <!-- for Bottom -->
| |
| </tr>
| |
| </table> <!-- END Section Nav Buttons -->
| |
|
| |
| <table width=1000 bgcolor="lightcyan" cellpadding=2>
| |
| <tr valign="top">
| |
| <td width=10>[[image:BlueDot10x10.png|link=]]</td>
| |
| <td>The '''Marquee Selection Area''' can be used to set the ground texture of entire baseboards or just a selected section of one or more baseboards</td>
| |
| </tr>
| |
| </table>
| |
|
| |
| <table width=1000 bgcolor=#000000 cellpadding=2>
| |
| <tr valign="top">
| |
| <td>
| |
| <table bgcolor=#ffffff cellpadding=2>
| |
| <tr valign="top">
| |
| <td colspan=2><span style="font-weight: 700; font-size: 15px;">Steps:</span> To paint the baseboards or area under the '''Marquee Selection Area''' with a ground texture:-</td>
| |
| </tr>
| |
| <tr valign="top">
| |
| <td width=20>[[image:DotPoint1.JPG|link=]]</td>
| |
| <td>from the <span style="font-weight: 700; font-size: 15px; color: white; background-color: #797979;"> Assets Palette </span> <span style="font-weight: 700; font-size: 15px; background-color: lightcyan;"> Left Click </span> on a ground texture. Selecting a texture will automatically select the [[image:S20_BrushToolIcon.png|link=|20px]] '''Brush Tool'''</td>
| |
| </tr>
| |
| <tr valign="top">
| |
| <td>[[image:DotPoint2.JPG|link=]]</td>
| |
| <td>in the <span style="font-weight: 700; font-size: 15px; color: white; background-color: #797979;"> Tool Options Palette </span> set the brush <span style="font-weight: 700; font-size: 15px; color: gold; background-color: black;"> Scale </span> setting and any other required controls</td>
| |
| </tr>
| |
| <tr valign="top">
| |
| <td>[[image:DotPoint3.JPG|link=]]</td>
| |
| <td>in the <span style="font-weight: 700; font-size: 15px; color: white; background-color: #797979;"> Tools Palette </span> <span style="font-weight: 700; font-size: 15px; background-color: lightcyan;"> Left Click </span> on the '''Marquee Tool''' [[image:S20_MarqueeToolIcon.png|link=|20px]] or press the <span style="font-weight: 700; font-size: 15px; color: white; background-color: black;"> F </span> key</td>
| |
| </tr>
| |
| <tr valign="top">
| |
| <td>[[image:DotPoint4.JPG|link=]]</td>
| |
| <td><span style="font-weight: 700; font-size: 15px; background-color: lightcyan;">Left Click and Drag</span> to draw out the '''Marquee Selection Area''' area so that it covers the area that will be painted with the texture. This can include multiple baseboards and empty spaces. <span style="font-weight:700; font-size: 15px; background-color: yellow;"> Note: If empty spaces are included in the Marquee Selection Area then new baseboards will be created in those empty spaces </span></td>
| |
| </tr>
| |
| <tr valign="top">
| |
| <td>[[image:DotPoint5.JPG|link=]]</td>
| |
| <td><span style="font-weight: 700; font-size: 15px; background-color: lightcyan;"> Left Click </span> on the '''Context Icon''' or press the <span style="font-weight: 700; font-size: 15px; color: white; background-color: black;"> T </span> key to open up the '''Marquee Context Menu''' (see '''Marquee Context Menu''' above).</td>
| |
| </tr>
| |
| <tr valign="top">
| |
| <td>[[image:DotPoint6.JPG|link=]]</td>
| |
| <td>select the '''Context Menu''' option <span style="font-weight: 700; font-size: 15px; color: white; background-color: black;"> Paint Within Marquee </span>. If the '''Marquee''' extends over empty space then new baseboards will be created and covered with the selected ground texture. The new baseboards will be created at the '''Default''' altitude for the set '''Region''' or at '''0m''' if no region has been set.</td>
| |
| </tr>
| |
| </table>
| |
| </td>
| |
| </tr>
| |
| </table>
| |
| <br>
| |
| <!-- Mass Object Section -->
| |
| <table width=1000> <!-- BEGIN Nav Buttons Table -->
| |
| <tr valign="top">
| |
| <td width=629><span id="stepMass"></span>
| |
| ='''Mass Moves and Clones'''=
| |
| </td>
| |
| <td width=50>[[image:SkipDown.png|link=#skip Identical Move|Skip Down]]</td>
| |
| <td width=50>[[image:SkipUp.png|link=#skip Managing Baseboards|Skip Up]]</td>
| |
| <td width=46>[[image:BackToTop.png|link=#top|alt=Top|Top]]</td>
| |
| <td width=75>[[image:NextUp.png|link=#stepMarquee|alt=Next Up|Next Up]]</td>
| |
| <td width=75>[[image:NextDown.png|link=#stepBulkReplace|alt=Next Down|Next Down]]</td>
| |
| <td width=75>[[image:BackToBottom.png|link=#bottom|alt=Bottom|Bottom]]</td>
| |
| </tr>
| |
| </table> <!-- END Nav Buttons Table -->
| |
|
| |
| <table width=1000>
| |
| <tr valign="top">
| |
| <td width=500>The [[image:S20_FreeMoveToolIcon.png|link=|20px]] '''[[#The Free Move Tool|Free Move Tool]]''' and [[image:S20_FineAdjustmentToolIcon.png|link=|20px]] '''[[#The Fine Adjustment Tool|Fine Adjustment Tool]]''' are able to select multiple objects that can then be manipulated as a single object. The objects can be of different '''Asset Types''' (e.g. '''Scenery Meshes''' and '''Scenery Splines''') and they do not have to be in the same layer.</td>
| |
| <td width=500>
| |
| <table bgcolor=#000000 cellpadding=2>
| |
| <tr valign="top">
| |
| <td>
| |
| <table bgcolor=#ffffe0 cellpadding=2>
| |
| <tr valign="top">
| |
| <td width=25>[[image:PencilTips.PNG|link=]]</td><td>You can also use the '''Marquee Tool''' to select objects but this will also select the ground heights, ground textures and '''TurfFX/Clutter Effect Layers''' as well as the objects.</td>
| |
| </tr>
| |
| </table>
| |
| </td>
| |
| </tr>
| |
| </table>
| |
| </td>
| |
| </tr>
| |
| <tr valign="top">
| |
| <td colspan=2>The possible manipulations are:-
| |
| <table>
| |
| <tr valign="top">
| |
| <td width=10>[[image:DotPoint.JPG|10px|link=]]</td>
| |
| <td>bulk physical moves - horizontal, vertical and rotations. Objects in '''Locked''' layers cannot be moved</td>
| |
| </tr>
| |
| <tr valign="top">
| |
| <td>[[image:DotPoint.JPG|10px|link=]]</td>
| |
| <td>cloning or duplication - all the cloned objects will be placed into the current '''Active Layer'''</td>
| |
| </tr>
| |
| </table>
| |
| </td>
| |
| </tr>
| |
| </table>
| |
| <br>
| |
| <table width=1000> <!-- BEGIN Section Nav Buttons -->
| |
| <tr valign="top">
| |
| <td width=629><span id="skip Identical Move"></span>
| |
| =='''Selecting Multiple Identical Objects'''==
| |
| </td>
| |
| <td width=50>[[image:SkipDown.png|link=#skip Multiple Move|Skip Down]]</td> <!-- skip Down -->
| |
| <td width=50>[[image:SkipUp.png|link=#stepMass|Skip Up]]</td> <!-- skip Up -->
| |
| <td width=46> </td> <!-- Top -->
| |
| <td width=75>[[image:HeadingUp.png|link=#stepMass|alt=Heading|To Heading]]</td>
| |
| <td width=75> </td> <!-- Next Down -->
| |
| <td width=75> </td> <!-- Bottom -->
| |
| </tr>
| |
| </table> <!-- END Section Nav Buttons -->
| |
|
| |
| <table bgcolor=#000000 width=1000 cellpadding=2>
| |
| <tr valign="top">
| |
| <td>
| |
| <table bgcolor=#ffffe0 width=996 cellpadding=2>
| |
| <tr valign="top">
| |
| <td width=25>[[image:PencilTips.PNG|link=]]</td>
| |
| <td>Both the [[image:S20_FreeMoveToolIcon.png|link=|20px]] '''Free Move Tool''' and the [[image:S20_FineAdjustmentToolIcon.png|link=|20px]] '''Fine Adjustment Tool''' can move and clone (duplicate) single and multiple objects. The '''Marquee Tool''' can also move and clone objects but it will include the ground heights, ground textures and any '''TurfFX/Clutter Effect Layers''' in the cloning and moving operations.</td>
| |
| </tr>
| |
| </table>
| |
| </td>
| |
| </tr>
| |
| </table>
| |
| <br>
| |
| <table width=1000>
| |
| <tr valign="top">
| |
| <td>You can quickly select all '''nearby''' identical objects by a <span style="font-weight: 700; font-size: 15px; background-color: lightcyan;">Double Left Click</span> on an object.</td>
| |
| </tr>
| |
| </table>
| |
| <br>
| |
| <table bgcolor=#000000 cellpadding=2>
| |
| <tr valign="top">
| |
| <td>
| |
| <table bgcolor=#ffffe0 cellpadding=2>
| |
| <tr valign="top">
| |
| <td width=25>[[image:PencilTips.PNG|link=]]</td><td>This also applies to all the wagons in a consist. <span style="font-weight: 700; font-size: 15px; background-color: lightcyan;">Double Left Click</span> on any one of them to select all of them - they '''DO NOT''' have to be identical wagons.</td>
| |
| </tr>
| |
| </table>
| |
| </td>
| |
| </tr>
| |
| </table>
| |
| <br>
| |
| <table>
| |
| <tr valign="top">
| |
| <td width=500>A forest of many different trees. Only one has been selected.</td>
| |
| <td width=500><span style="font-weight: 700; font-size: 15px; background-color: lightcyan;">Double Left Click</span> on a tree to select all the identical trees in the forest.</td>
| |
| </tr>
| |
| <tr valign="top">
| |
| <td>[[image:MultipleSelectTip1_S20.png|link=]]</td>
| |
| <td>[[image:MultipleSelectTip2_S20.png|link=]]</td>
| |
| </tr>
| |
| </table>
| |
| <br>
| |
| <table bgcolor=#000000 cellpadding=2>
| |
| <tr valign="top">
| |
| <td>
| |
| <table bgcolor=#ffffe0 cellpadding=2>
| |
| <tr valign="top">
| |
| <td width=25>[[image:PencilTips.PNG|link=]]</td><td><span style="font-weight: 700; font-size: 15px;"><span style="color: white; background-color: black;"> Shift </span> + <span style="background-color: lightcyan;">Double Left Click</span></span> on another object. It and all its identical copies will be added to the selection.</td>
| |
| </tr>
| |
| </table>
| |
| </td>
| |
| </tr>
| |
| </table>
| |
| <br>
| |
| <table width=1000> <!-- BEGIN Section Nav Buttons -->
| |
| <tr valign="top">
| |
| <td width=629><span id="skip Multiple Move"></span>
| |
| =='''Selecting and Moving Multiple Objects'''==
| |
| </td>
| |
| <td width=50>[[image:SkipDown.png|link=#skip Cloning Objects|Skip Down]]</td> <!-- skip Down -->
| |
| <td width=50>[[image:SkipUp.png|link=#skip Identical Move|Skip Up]]</td> <!-- skip Up -->
| |
| <td width=46> </td> <!-- Top -->
| |
| <td width=75>[[image:HeadingUp.png|link=#stepMass|alt=Heading|To Heading]]</td>
| |
| <td width=75> </td> <!-- Next Down -->
| |
| <td width=75> </td> <!-- Bottom -->
| |
| </tr>
| |
| </table> <!-- END Section Nav Buttons -->
| |
|
| |
| Multiple objects can be selected and moved with the [[image:S20_FreeMoveToolIcon.png|link=|20px]] '''[[#The Free Move Tool|Free Move Tool]]''' and the [[image:S20_FineAdjustmentToolIcon.png|link=|20px]] '''[[#The Fine Adjustment Tool|Fine Adjustment Tool]]'''.<br>
| |
|
| |
| <table width=1000>
| |
| <tr valign="top">
| |
| <td width=500>
| |
| <table bgcolor=#000000 cellpadding=2>
| |
| <tr valign="top">
| |
| <td>
| |
| <table bgcolor=#ffffb0 cellpadding=2>
| |
| <tr valign="top">
| |
| <td width=25>[[image:NotePad.PNG|link=]]</td>
| |
| <td><span style="font-size: 17px; font-weight: 700;">Notes: Mass Moves'''</span><br>
| |
| ----
| |
| <table>
| |
| <tr valign="top">
| |
| <td colspan=2>The objects '''DO NOT''' have to be:-</td>
| |
| </tr>
| |
| <tr valign="top">
| |
| <td width=10>[[image:DotPoint.JPG|10px|link=]]</td>
| |
| <td>the same type. They can be a mixture of scenery splines and mesh objects</td>
| |
| </tr>
| |
| <tr valign="top">
| |
| <td>[[image:DotPoint.JPG|10px|link=]]</td>
| |
| <td>in the same layers but objects in '''Locked''' layers cannot be moved</td>
| |
| </tr>
| |
| </table>
| |
| </td>
| |
| </tr>
| |
| </table>
| |
| </td>
| |
| </tr>
| |
| </table>
| |
| </td>
| |
| <td>
| |
| <table bgcolor=#000000 width=500 cellpadding=2>
| |
| <tr valign="top">
| |
| <td>
| |
| <table bgcolor=#ffffe0 width=496 cellpadding=2>
| |
| <tr valign="top">
| |
| <td width=25>[[image:PencilTips.PNG|link=]]</td><td>You can also use the '''Marquee Tool''' to move objects but this will also move the ground heights, ground textures and '''TurfFX/Clutter Effect Layers''' as well as objects.</td>
| |
| </tr>
| |
| </table>
| |
| </td>
| |
| </tr>
| |
| </table>
| |
| </td>
| |
| </tr>
| |
| </table>
| |
| <br>
| |
| <table width=1000>
| |
| <tr valign="top">
| |
| <td>[[image:MultipleSelectionGroup_S20.png|link=]]</td>
| |
| <td>
| |
| <table bgcolor=#000000 width=400 cellpadding=2>
| |
| <tr valign="top">
| |
| <td>
| |
| <table bgcolor=#ffffff width=396 cellpadding=2>
| |
| <tr valign="top">
| |
| <td colspan=2><span style="font-weight: 700; font-size: 15px;">Steps:</span> To select multiple objects:-</td>
| |
| </tr>
| |
| <tr valign="top">
| |
| <td width=25>[[image:DotPoint1.JPG|link=]]</td>
| |
| <td>In the <span style="font-weight: 700; font-size: 15px; color: white; background-color: #797979;"> Tools Palette </span> select the [[image:S20_FreeMoveToolIcon.png|link=|20px]] '''[[#The Free Move Tool|Free Move Tool]]''' or [[image:S20_FineAdjustmentToolIcon.png|link=|20px]] '''[[#The Fine Adjustment Tool|Fine Adjustment Tool]]'''</td>
| |
| </tr>
| |
| <tr valign="top">
| |
| <td>[[image:DotPoint2.JPG|link=]]</td>
| |
| <td><span style="font-weight: 700; font-size: 15px;"><span style="color: white; background-color: black;"> Shift </span> + <span style="background-color: lightcyan;"> Left Click </span></span> on every object that is to be included in the selection group</td>
| |
| </tr>
| |
| </table>
| |
| </td>
| |
| </tr>
| |
| </table>
| |
| <br>
| |
| <table bgcolor=#000000 cellpadding=2>
| |
| <tr valign="top">
| |
| <td>
| |
| <table bgcolor=#ffffe0 cellpadding=2>
| |
| <tr valign="top">
| |
| <td width=25>[[image:PencilTips.PNG|link=]]</td><td>You can apply the <span style="font-weight: 700; font-size: 15px; color: gold; background-color: black;"> Height </span> setting in the <span style="font-weight: 700; font-size: 15px; color: white; background-color: #797979;"> Tool Options Palette </span> to the entire group of selected objects.</td>
| |
| </tr>
| |
| </table>
| |
| </td>
| |
| </tr>
| |
| </table>
| |
| </td>
| |
| </tr>
| |
| <tr valign="top">
| |
| <td>[[image:MultipleSelectionGroupMove_S20.png|link=]]</td>
| |
| <td>
| |
| <table bgcolor=#000000 width=400 cellpadding=2>
| |
| <tr valign="top">
| |
| <td>
| |
| <table bgcolor=#ffffff width=396 cellpadding=2>
| |
| <tr valign="top">
| |
| <td colspan=2><span style="font-weight: 700; font-size: 15px;">Steps:</span> To move multiple objects:-</td>
| |
| </tr>
| |
| <tr valign="top">
| |
| <td width=25>[[image:DotPoint3.JPG|link=]]</td>
| |
| <td><span style="font-weight: 700; font-size: 15px; background-color: lightcyan;">Left Click and Drag</span> the '''selected''' objects in the required direction</td>
| |
| </tr>
| |
| <tr valign="top">
| |
| <td>[[image:DotPoint4.JPG|link=]]</td>
| |
| <td>Release the mouse button when the group of objects are in position</td>
| |
| </tr>
| |
| </table>
| |
| </td>
| |
| </tr>
| |
| </table>
| |
| <br>
| |
| <table bgcolor=#000000 cellpadding=2>
| |
| <tr valign="top">
| |
| <td>
| |
| <table bgcolor=#ffffe0 cellpadding=2>
| |
| <tr valign="top">
| |
| <td width=25>[[image:PencilTips.PNG|link=]]</td><td>The '''Fine Adjustment Tool <span style="font-size: 15px; color: white; background-color: blue;"> Blue </span> Rotation Anchor''' can be used to rotate all the members of the group with the last selected object (the one with the '''Context Icon''') as the centre of rotation</td>
| |
| </tr>
| |
| </table>
| |
| </td>
| |
| </tr>
| |
| </table>
| |
| </td>
| |
| </tr>
| |
| </table>
| |
| <br>
| |
| <table width=1000> <!-- BEGIN Section Nav Buttons -->
| |
| <tr valign="top">
| |
| <td width=629><span id="skip Cloning Objects"></span>
| |
| =='''Cloning Objects'''==
| |
| </td>
| |
| <td width=50>[[image:SkipDown.png|link=#stepBulkReplace|Skip Down]]</td>
| |
| <td width=50>[[image:SkipUp.png|link=#skip Multiple Move|Skip Up]]</td>
| |
| <td width=46> </td> <!-- for Top and Minor Up/Down -->
| |
| <td width=75>[[image:HeadingUp.png|link=#stepMass|alt=Heading|To Heading]]</td>
| |
| <td width=75> </td>
| |
| <td width=75> </td> <!-- for Bottom -->
| |
| </tr>
| |
| </table> <!-- END Section Nav Buttons -->
| |
|
| |
| <table width=1000 bgcolor="lightcyan" cellpadding=2>
| |
| <tr valign="top">
| |
| <td width=10>[[image:BlueDot10x10.png|link=]]</td>
| |
| <td>You can easily clone single and multiple selected objects. If you have selected a group of objects they '''DO NOT''' have to be the same type - you can, for example, select scenery objects and scenery splines.</td>
| |
| </tr>
| |
| </table>
| |
| <br>
| |
| <table bgcolor=#000000 cellpadding=2>
| |
| <tr valign="top">
| |
| <td>
| |
| <table bgcolor=#ffffb0 cellpadding=2>
| |
| <tr valign="top">
| |
| <td>
| |
| <table>
| |
| <tr valign="top">
| |
| <td width=25>[[image:NotePad.PNG|link=]]</td>
| |
| <td><span style="font-size: 17px; font-weight: 700;">Notes: Layers and Cloning'''</span><br>
| |
| ----
| |
| </td>
| |
| </tr>
| |
| </table>
| |
| <table>
| |
| <tr valign="top">
| |
| <td width=10>[[image:DotPoint.JPG|10px|link=]]</td>
| |
| <td>the objects can be in different layers</td>
| |
| </tr>
| |
| <tr valign="top">
| |
| <td>[[image:DotPoint.JPG|10px|link=]]</td>
| |
| <td>the layers can be locked and the objects will still be cloned</td>
| |
| </tr>
| |
| <tr valign="top">
| |
| <td>[[image:DotPoint.JPG|10px|link=]]</td>
| |
| <td>all the cloned objects will be placed into the current '''Active Layer''' which must be '''Unlocked'''</td>
| |
| </tr>
| |
| <tr valign="top">
| |
| <td colspan=2>For more information on layers see [[image:PageLink.PNG|link=]] '''[[#The_Info_Palette|The Info Palette]]''' at the end of this document.</td>
| |
| </tr>
| |
| </table>
| |
| </td>
| |
| </tr>
| |
| </table>
| |
| </td>
| |
| </tr>
| |
| </table>
| |
| <br>
| |
| <table bgcolor=#000000 width=804 cellpadding=2>
| |
| <tr valign="top">
| |
| <td>
| |
| <table bgcolor=#ffffff width=800 cellpadding=2>
| |
| <tr valign="top">
| |
| <td width=800>
| |
| <table width=800>
| |
| <tr valign="top">
| |
| <td colspan=2><span style="font-weight: 700; font-size: 15px;">Steps:</span> To clone an object or a group of objects:-</td>
| |
| </tr>
| |
| <tr valign="top">
| |
| <td width=25>[[image:DotPoint1.JPG|link=]]</td>
| |
| <td>In the <span style="font-weight: 700; font-size: 15px; color: white; background-color: #797979;"> Tools Palette </span> select either the [[image:S20_FreeMoveToolIcon.png|link=|20px]] '''[[#The Free Move Tool|Free Move Tool]]''' or the [[image:S20_FineAdjustmentToolIcon.png|link=|20px]] '''[[#The Fine Adjustment Tool|Fine Adjustment Tool]]'''</td>
| |
| </tr>
| |
| <tr valign="top">
| |
| <td>[[image:DotPoint2.JPG|link=]]</td>
| |
| <td><span style="font-weight: 700; font-size: 15px; background-color: lightcyan;"> Left Click </span> on a single object or <span style="font-weight: 700; font-size: 15px;"><span style="color: white; background-color: black;"> Shift </span> + <span style="background-color: lightcyan;"> Left Click </span></span> for multiple objects</td>
| |
| </tr>
| |
|
| |
| <tr valign="top">
| |
| <td>[[image:DotPoint3.JPG|link=]]</td>
| |
| <td><span style="font-weight: 700; font-size: 15px;"><span style="color: white; background-color: black;"> Ctrl </span> + <span style="background-color: lightcyan;">Left Click and Drag</span></span> on any of the selected objects</td>
| |
| </tr>
| |
| </table>
| |
|
| |
| <table width=800>
| |
| <tr valign="top">
| |
| <td width=400>[[image:FreeMoveCloneSelect_S20.png|link=]]</td>
| |
| <td width=400>[[image:FreeMoveCloneMoved_S20.png|link=]]</td>
| |
| </tr>
| |
| </table>
| |
| </td>
| |
| </tr>
| |
| </table>
| |
| </td>
| |
| </tr>
| |
| </table>
| |
| <br>
| |
| <!-- Bulk Replace Assets Section -->
| |
| <table width=1000> <!-- BEGIN Section Nav Buttons -->
| |
| <tr valign="top">
| |
| <td width=629><span id="stepBulkReplace"></span>
| |
| ='''Bulk Replace Assets Tool (Trainz Plus Only)'''=
| |
| </td>
| |
| <td width=50> </td>
| |
| <td width=50>[[image:SkipUp.png|link=#skip Cloning Objects|Skip Up]]</td>
| |
| <td width=46>[[image:BackToTop.png|link=#top|alt=Top|Top]]</td>
| |
| <td width=75>[[image:NextUp.png|link=#stepMarquee|alt=Next Up|Next Up]]</td>
| |
| <td width=75>[[image:NextDown.png|link=#stepUpgrading|alt=Next Down|Next Down]]</td>
| |
| <td width=75>[[image:BackToBottom.png|link=#bottom|alt=Bottom|Bottom]]</td>
| |
| </tr>
| |
| </table> <!-- END Section Nav Buttons -->
| |
|
| |
| <table width=1000 bgcolor="lightcyan" cellpadding=2>
| |
| <tr valign="top">
| |
| <td width=10>[[image:BlueDot10x10.png|link=]]</td>
| |
| <td>This tool is available in '''Trainz Plus''' only</td>
| |
| </tr>
| |
| <tr valign="top">
| |
| <td>[[image:BlueDot10x10.png|link=]]</td>
| |
| <td>It will replace '''ALL''' seleted objects with a single selected replacement asset</td>
| |
| </tr>
| |
| <tr valign="top">
| |
| <td >[[image:BlueDot10x10.png|link=]]</td>
| |
| <td>All objects, and its replacement, must be the same '''Asset Type'''</td>
| |
| </tr>
| |
| <tr valign="top">
| |
| <td>[[image:BlueDot10x10.png|link=]]</td>
| |
| <td>The replacement will occur throughout the entire route</td>
| |
| </tr>
| |
| </table>
| |
| <br>
| |
| <table width=1000 bgcolor=#000000 cellpadding=2>
| |
| <tr valign="top">
| |
| <td>
| |
| <table width=996 bgcolor=#ffe89a cellpadding=2>
| |
| <tr valign="middle">
| |
| <td width=45>[[image:PalettesIcon_S20.png|link=]]</td>
| |
| <td>This tool uses the <span style="font-weight: 700; font-size: 15px; color: white; background-color: #797979;"> Filter Palette </span> and the <span style="font-weight: 700; font-size: 15px; color: white; background-color: #797979;"> Assets Palette </span>. If these palettes are not visible on the screen then refer to [[image:PageLink.PNG|link=]] '''[[#Notes_Palettes|Notes: Palettes]]''' at the top of this document.</td>
| |
| </tr>
| |
| </table>
| |
| </td>
| |
| </tr>
| |
| </table>
| |
| <br>
| |
| <table width=1000 bgcolor=#000000 cellpadding=2>
| |
| <tr valign="top">
| |
| <td>
| |
| <table width=996 bgcolor=#ffffff cellpadding=2>
| |
| <tr valign="top">
| |
| <td align="center" colspan=2><span style="font-weight: 700; font-size: 15px; background-color: yellow;">This tool is only available in Trainz Plus</span><br>
| |
| <span style="font-weight: 700; font-size: 15px;">In TRS22PE use the Surveyor Classic <span style="color: white; background-color: black;"> Bulk Asset Update/Replace </span> option</span></td>
| |
| </tr>
| |
| <tr valign="top">
| |
| <td width=10>[[image:DotPoint.JPG|10px|link=]]</td>
| |
| <td>More detailed instructions, with examples, on performing a '''Bulk Asset Replacement''' in '''Surveyor 2.0''' can be found on the '''Trainz Wiki Page [[image:WikiLink.PNG|link=]] [[How to Use S20 Palettes#skipFilterToggles|How to Use the Surveyor 2.0 Palettes]]'''. Only a summary is provided here</td>
| |
| </tr>
| |
| <tr valign="top">
| |
| <td>[[image:DotPoint.JPG|10px|link=]]</td>
| |
| <td>For detailed instructions on using the Surveyor Classic '''Bulk Asset Replace/Update''' refer to the '''Trainz Wiki Page''' at [[image:WikiLink.PNG|link=]] '''[[How_to_Use_Bulk_Asset_Update/Replace_Tool|How to Use the Bulk Asset Update/Replace Tool]]'''</td>
| |
| </tr>
| |
| </table>
| |
| </td>
| |
| </tr>
| |
| </table>
| |
| <br>
| |
| <table width=1000 bgcolor=#000000 cellpadding=2>
| |
| <tr valign="top">
| |
| <td>
| |
| <table width=996 bgcolor=#ffffe0 cellpadding=2>
| |
| <tr valign="top">
| |
| <td width=25>[[image:PencilTips.PNG|link=]]</td>
| |
| <td>Before you reach '''Step <span style="font-size: 15px; background-color: red; color: white;"> 6 </span>''' below it would be a good idea to either know the exact name of the asset you will be using as the replacement or have it visible in the Surveyor '''Trainz World View''' to identify it with the '''Eyedropper'''</td>
| |
| </tr>
| |
| </table>
| |
| </td>
| |
| </tr>
| |
| </table>
| |
| <br>
| |
| <table width=1000 cellpadding=2>
| |
| <tr valign="top">
| |
| <td colspan=3><span style="font-weight: 700; font-size: 15px;">Steps:</span> To use the '''Bulk Replace Assets Tool''':-</td>
| |
| </tr>
| |
| <tr valign="top">
| |
| <td width=25>[[image:DotPoint1.JPG|link=]]</td>
| |
| <td colspan=2>In the <span style="font-weight: 700; font-size: 15px; color: white; background-color: #797979;"> Filter Palette </span> open the <span style="font-weight: 700; font-size: 15px; color: white; background-color: black;"> Filter Toggles </span> by a <span style="font-weight: 700; font-size: 15px; background-color: lightcyan;"> Left Click </span> on either the small arrowhead on the left of the '''Enabled''' box or on the "Enabled" message itself.</td>
| |
| </tr>
| |
| <tr valign="top">
| |
| <td> </td>
| |
| <td width=205><br>
| |
| [[image:FilterPaletteClickToggleListOpen_S20.png|link=]]</td>
| |
| <td><br>
| |
| This will open the <span style="font-weight: 700; font-size: 15px; color: white; background-color: #797979;"> Filter Palette </span> '''Toggle List''' of assets and a separate <span style="font-weight: 700; font-size: 15px; color: white; background-color: black;"> Search </span> text box. The '''Toggle List''' list is identical to the list shown in the <span style="font-weight: 700; font-size: 15px; color: white; background-color: #797979;"> Assets Palette </span> except that each item can be toggled or switched '''ON''' or '''OFF''' by the check mark on its left.</td>
| |
| </tr>
| |
| </table>
| |
| <br>
| |
| <table width=1000>
| |
| <tr valign="top">
| |
| <td width=25> </td>
| |
| <td width=335>[[image:FilterPaletteToggleListOpen_S20.png|link=]]</td>
| |
| <td><br>
| |
| The <span style="font-weight: 700; font-size: 15px; color: white; background-color: #797979;"> Filter Palette </span> and the <span style="font-weight: 700; font-size: 15px; color: white; background-color: #797979;"> Assets Palette </span> are normally linked so that the list of toggled assets in the '''Filter Palette''' is duplicated in the '''Assets Palette'''.<br>
| |
| If an asset is:-
| |
| *toggled '''OFF''' in the '''Filter Palette''' it will disappear from the list in the '''Assets Palette'''
| |
| *If it is toggled back '''ON''' it will reappear in the '''Assets Palette''' list
| |
| <br>
| |
| <table bgcolor=#000000 cellpadding=2>
| |
| <tr valign="top">
| |
| <td>
| |
| <table bgcolor=#ffffff cellpadding=2>
| |
| <tr valign="top">
| |
| <td colspan=2>Items in the '''Toggle List''' can be selected (highlighted)</td>
| |
| </tr>
| |
| <tr valign="top">
| |
| <td width=10>[[image:DotPoint.JPG|10px|link=]]</td>
| |
| <td>To select a single item in the list <span style="font-weight: 700; font-size: 15px; background-color: lightcyan;"> Left Click </span> on its name</td>
| |
| </tr>
| |
| <tr valign="top">
| |
| <td>[[image:DotPoint.JPG|10px|link=]]</td>
| |
| <td>To select multiple items in the list use <span style="font-weight: 700; font-size: 15px;"><span style="color: white; background-color: black;"> Shift </span> + <span style="background-color: lightcyan;"> Left Click </span></span> or <span style="font-weight: 700; font-size: 15px;"><span style="color: white; background-color: black;"> Ctrl </span> + <span style="background-color: lightcyan;"> Left Click </span></span></td>
| |
| </tr>
| |
| <tr valign="top">
| |
| <td>[[image:DotPoint.JPG|10px|link=]]</td>
| |
| <td>To select the entire list <span style="font-weight: 700; font-size: 15px; background-color: lightcyan;"> Left Click </span> on one of the asset names then press the <span style="font-weight: 700; font-size: 15px;"><span style="color: white; background-color: black;"> Ctrl </span> + <span style="color: white; background-color: black;"> A </span></span> keys</td>
| |
| </tr>
| |
| </table>
| |
| </td>
| |
| </tr>
| |
| </table>
| |
| </td>
| |
| </tr>
| |
| </table>
| |
| <br>
| |
| <table width=1000>
| |
| <tr valign="top">
| |
| <td width=25>[[image:DotPoint2.JPG|link=]]</td>
| |
| <td>Use the <span style="font-weight: 700; font-size: 15px; color: white; background-color: #797979;"> Filter Palette </span> '''Asset Type''' icons or the Drop Down List to select the '''TYPE''' of asset to be replaced. <span style="font-weight: 700; font-size: 15px; background-color: yellow;">Note: All the assets to be replaced must be of the same type (e.g. ALL scenery splines or ALL track objects)</span></td>
| |
| </tr>
| |
| </table>
| |
| <br>
| |
| <table width=1000 bgcolor=#000000 cellpadding=2>
| |
| <tr valign="top">
| |
| <td>
| |
| <table width=996 bgcolor=#ffffff cellpadding=2>
| |
| <tr valign="top">
| |
| <td colspan=3 bgcolor="lightgreen"><span style="font-weight: 700; font-size: 15px;">You <span style="font-size: 17px;">can</span> bulk replace:-</span></td>
| |
| </tr>
| |
| <tr valign="top">
| |
| <td width=32>[[image:Tick.PNG|link=]]</td>
| |
| <td width=25>[[image:GroundTextureFilter_S20.png|link=]]</td>
| |
| <td>one or more different '''Ground Textures''' with a single '''Ground Texture''' and <span style="font-weight: 700; font-size: 15px;">NOT</span> with any other type of asset</td>
| |
| </tr>
| |
| <tr valign="top">
| |
| <td>[[image:Tick.PNG|link=]]</td>
| |
| <td>[[image:SceneryMeshFilter_S20.png|link=]]</td>
| |
| <td>one or more different '''Scenery Meshes''' with a single '''Scenery Mesh''' and <span style="font-weight: 700; font-size: 15px;">NOT</span> with any other type of asset. <span style="font-weight: 700; background-color: #fcbcbc;">None of the meshes can include track‡</span></td>
| |
| </tr>
| |
| <tr valign="top">
| |
| <td>[[image:Tick.PNG|link=]]</td>
| |
| <td>[[image:ScenerySplineFilter_S20.png|link=]]</td>
| |
| <td>one or more different '''Scenery Splines''' with a single '''Scenery Spline''' and <span style="font-weight: 700; font-size: 15px;">NOT</span> with any other type of asset. <span style="font-weight: 700; background-color: #fcbcbc;">None of the splines can include track‡</span></td>
| |
| </tr>
| |
| <tr valign="top">
| |
| <td>[[image:Tick.PNG|link=]]</td>
| |
| <td>[[image:TrackSplineFilter_S20.png|link=]]</td>
| |
| <td>one or more different '''Track Splines''' with a single '''Track Spline''' and <span style="font-weight: 700; font-size: 15px;">NOT</span> with any other type of asset. <span style="font-weight: 700; background-color: yellow;">Fixed Track assets are NOT track splines</span></td>
| |
| </tr>
| |
| <tr valign="top">
| |
| <td width=10>[[image:Tick.PNG|link=]]</td>
| |
| <td>[[image:TrackMeshFilter_S20.png|link=]]</td>
| |
| <td>one or more different '''Track Objects''' with a single '''Track Object''' and <span style="font-weight: 700; font-size: 15px;">NOT</span> with any other type of asset</td>
| |
| </tr>
| |
| <tr valign="top">
| |
| <td colspan=3 align="right">'''‡''' this includes fixed assets and splines with built-in track (e.g. industries, bridges, tunnels)</td>
| |
| </tr>
| |
| <tr valign="top">
| |
| <td colspan=3 bgcolor=#fcbcbc><span style="font-weight: 700; font-size: 15px;">You <span style="font-size: 17px;">cannot</span> bulk replace:-</span></td>
| |
| </tr>
| |
| <tr valign="top">
| |
| <td width=32>[[image:Cross.PNG|link=]]</td>
| |
| <td>[[image:TrainFilter_S20.png|link=]]</td>
| |
| <td>'''Rolling Stock''' (locomotives, wagons)</td>
| |
| </tr>
| |
| <tr valign="top">
| |
| <td>[[image:Cross.PNG|link=]]</td>
| |
| <td>[[image:PresetFilter_S20.png|link=]]</td>
| |
| <td>'''Presets''' (effect layers)</td>
| |
| </tr>
| |
| </table>
| |
| </td>
| |
| </tr>
| |
| </table>
| |
| <br>
| |
| <table width=1000>
| |
| <tr valign="top">
| |
| <td width=25>[[image:DotPoint3.JPG|link=]]</td>
| |
| <td>'''Optional:''' Use the <span style="font-weight: 700; font-size: 15px; color: white; background-color: #797979;"> Filter Palette </span> <span style="font-weight: 700; font-size: 15px; color: white; background-color: black;"> Search </span> text box to narrow down the list</td>
| |
| </tr>
| |
| <tr valign="top">
| |
| <td colspan=2> </td>
| |
| </tr>
| |
| <tr valign="top">
| |
| <td>[[image:DotPoint4.JPG|link=]]</td>
| |
| <td>Select (highlight) and toggle '''ON''' the assets that will be replaced in the route (the process is summarised in the steps below)
| |
| <table bgcolor=#000000 cellpadding=2>
| |
| <tr valign="top">
| |
| <td>
| |
| <table bgcolor=#ffffff cellpadding=2>
| |
| <tr valign="top">
| |
| <td>
| |
| <table cellpadding=2>
| |
| <tr valign="top">
| |
| <td colspan=2><span style="font-weight: 700; font-size: 15px;">Steps:</span> To toggle '''ON''' an asset, or a subset of the assets, shown in the list:-</td>
| |
| </tr>
| |
| <tr valign="top">
| |
| <td colspan=2><span style="font-weight: 700; font-size: 15px;">Clear the Existing Toggles:</span></td>
| |
| </tr>
| |
| <tr valign="top">
| |
| <td width=25>[[image:DotPoint1Blue.png|link=]]</td>
| |
| <td>In the '''Toggle List''' select one of the assets such as the asset to be replaced, or the first of a group of assets to be replaced</td>
| |
| </tr>
| |
| <tr valign="top">
| |
| <td>[[image:DotPoint2Blue.png|link=]]</td>
| |
| <td>Press <span style="font-weight: 700; font-size: 15px;"><span style="color: white; background-color: black;"> Ctrl </span> + <span style="color: white; background-color: black;"> A </span></span> to highlight them all</td>
| |
| </tr>
| |
| <tr valign="top">
| |
| <td>[[image:DotPoint3Blue.png|link=]]</td>
| |
| <td><span style="font-weight: 700; font-size: 15px; background-color: lightcyan;">Left Click</span> on the '''Toggle''' icon of any one of the assets to set them all to '''OFF'''</td>
| |
| </tr>
| |
| <tr valign="top">
| |
| <td colspan=2><span style="font-weight: 700; font-size: 15px;">Set the New Toggles:</span></td>
| |
| </tr>
| |
| <tr valign="top">
| |
| <td>[[image:DotPoint4Blue.png|link=]]</td>
| |
| <td>To clear all the highlighting and select an asset to be replaced <span style="font-weight: 700; font-size: 15px; background-color: lightcyan;">Left Click</span> on the name of the asset<br>
| |
| If more then one asset is to be replaced then use <span style="font-weight: 700; font-size: 15px;"><span style="color: white; background-color: black;"> Shift </span> + <span style="background-color: lightcyan;"> Left Click </span></span> and/or <span style="font-weight: 700; font-size: 15px;"><span style="color: white; background-color: black;"> Ctrl </span> + <span style="background-color: lightcyan;"> Left Click </span></span> to highlight the additional assets</td>
| |
| </tr>
| |
| <tr valign="top">
| |
| <td>[[image:DotPoint5Blue.png|link=]]</td>
| |
| <td><span style="font-weight: 700; font-size: 15px; background-color: lightcyan;">Left Click</span> on the '''Toggle''' icon of the selected asset or on any one of the seleted assets to set them all to '''ON'''</td>
| |
| </tr>
| |
| </table>
| |
| </td>
| |
| </tr>
| |
| </table>
| |
| </td>
| |
| </tr>
| |
| </table>
| |
| </td>
| |
| </tr>
| |
| </table>
| |
| <br>
| |
| <table width=1000>
| |
| <tr valign="top">
| |
| <td width=25>[[image:DotPoint5.JPG|link=]]</td>
| |
| <td>In the <span style="font-weight: 700; font-size: 15px; color: white; background-color: #797979;"> Filter Palette </span> select the <span style="font-weight: 700; font-size: 15px; color: white; background-color: black;"> Filter Disabled </span> option from the '''Filter Actions''' drop down menu<br>
| |
| <table>
| |
| <tr valign="top">
| |
| <td>[[image:FilterPaletteFilterDisabled_S20.png|link=]]</td>
| |
| <td><br>
| |
| <table bgcolor=#000000 cellpadding=2>
| |
| <tr valign="top">
| |
| <td>
| |
| <table bgcolor=#ffffff cellpadding=2>
| |
| <tr valign="top">
| |
| <td>This will break the connection between the '''Filter Palette''' and the '''Assets Palette''' and will set the '''Assets Palette''' to show <span style="font-weight: 700; font-size: 15px; color: white; background-color: black;"> All Content </span></td>
| |
| </tr>
| |
| </table>
| |
| </td>
| |
| </tr>
| |
| </table>
| |
| </td>
| |
| </tr>
| |
| </table>
| |
| </td>
| |
| </tr>
| |
| </table>
| |
| <br>
| |
| <table width=1000>
| |
| <tr valign="top">
| |
| <td>[[image:DotPoint6.JPG|link=]]</td>
| |
| <td>In the <span style="font-weight: 700; font-size: 15px; color: white; background-color: #797979;"> Assets Palette </span> select the '''Replacement Asset''' (only one can be selected and it must be of the same '''Type''' as those selected to be replaced)<br>
| |
| You can use the '''Assets Palette''' <span style="font-weight: 700; font-size: 15px; color: white; background-color: black;"> Search </span> text box to narrow down the list of assets (or use the '''Eyedropper''') but '''DO NOT''' use the selection tools (the asset type icons or drop down list) in the '''Filter Palette'''</td>
| |
| </tr>
| |
| </table>
| |
| <br>
| |
| <table width=1000>
| |
| <tr valign="top">
| |
| <td colspan=2>
| |
| <table width=400>
| |
| <tr valign="top">
| |
| <td>[[image:DotPoint7.JPG|link=]]</td>
| |
| <td>In the <span style="font-weight: 700; font-size: 15px; color: white; background-color: #797979;"> Assets Palette </span> filtered list <span style="font-weight: 700; font-size: 15px; background-color: lightcyan;">Right Click</span> on the replacement asset to open its menu</td>
| |
| </tr>
| |
| <tr valign="top">
| |
| <td colspan=2> </td>
| |
| </tr>
| |
| <tr valign="top">
| |
| <td>[[image:DotPoint8.JPG|link=]]</td>
| |
| <td>Select the last item, <span style="font-weight: 700; font-size: 15px; color: white; background-color: black;"> Bulk Replace Filtered Assets </span></td>
| |
| </tr>
| |
| </table>
| |
| </td>
| |
| <td width=200>[[image:FilterPaletteBulkReplaceExample_11_S20.png|link=]]</td>
| |
| <td>
| |
| <table bgcolor=#ff0000 cellpadding=2>
| |
| <tr valign="top">
| |
| <td>
| |
| <table bgcolor=#fcbcbc cellpadding=2>
| |
| <tr valign="top">
| |
| <td>[[image:Stop.PNG|link=]]</td>
| |
| <td><span style="font-size: 15px; font-weight: 700;">WARNING:</span><br>
| |
| The '''Bulk Replace''' will occur throughout the '''ENTIRE''' route</td>
| |
| </tr>
| |
| </table>
| |
| </td>
| |
| </tr>
| |
| </table>
| |
| </td>
| |
| </tr>
| |
| </table>
| |
| <br>
| |
| <table width=1000>
| |
| <tr valign="top">
| |
| <td width=25> </td>
| |
| <td>With the exception of unusually small or simple routes, a progress bar will be shown. For large routes the replacement process may take a few minutes.
| |
| <table>
| |
| <tr valign="top">
| |
| <td>[[image:FilterPaletteBulkReplaceExample_12_S20.png|link=]]<br><br>
| |
| </td>
| |
| <td>
| |
| <table bgcolor=#000000 cellpadding=2>
| |
| <tr valign="top">
| |
| <td>
| |
| <table bgcolor=#ffffb0 cellpadding=2>
| |
| <tr valign="top">
| |
| <td width=25>[[image:NotePad.PNG|link=]]</td>
| |
| <td><span style="font-size: 17px;">'''Notes:'''</span><br>
| |
| ----
| |
| </td>
| |
| </tr>
| |
| <tr valign="top">
| |
| <td width=10>[[image:DotPoint.JPG|10px|link=]]</td>
| |
| <td>Clicking the <span style="font-weight: 700; font-size: 15px; color: white; background-color: black;"> Cancel </span> button will terminate the replacement process at the point shown by the position of the progress bar but some, or many, of the replacements will have already been made.</td>
| |
| </tr>
| |
| <tr valign="top">
| |
| <td>[[image:DotPoint.JPG|10px|link=]]</td>
| |
| <td>After termination, or after the replacement process has been completed, pressing the <span style="font-weight: 700; font-size: 15px;"><span style="color: white; background-color: black;"> Ctrl </span> + <span style="color: white; background-color: black;"> Z </span></span> keys will '''Undo''' all the replacements</td>
| |
| </tr>
| |
| </table>
| |
| </td>
| |
| </tr>
| |
| </table>
| |
| </td>
| |
| </tr>
| |
| </table>
| |
| </td>
| |
| </tr>
| |
| </table>
| |
| <br>
| |
| <table width=1000> <!-- BEGIN Section Nav Buttons -->
| |
| <tr valign="top">
| |
| <td width=629><span id="stepUpgrading"></span>
| |
| ='''Upgrading a Route to HD (Trainz Plus Only)'''=
| |
| </td>
| |
| <td width=50> </td> <!-- for Skip Down -->
| |
| <td width=50> </td>
| |
| <td width=46>[[image:BackToTop.png|link=#top|alt=Top|Top]]</td>
| |
| <td width=75>[[image:NextUp.png|link=#stepBulkReplace|alt=Next Up|Next Up]]</td>
| |
| <td width=75>[[image:NextDown.png|link=#stepInfo|alt=Next Down|Next Down]]</td>
| |
| <td width=75>[[image:BackToBottom.png|link=#bottom|alt=Bottom|Bottom]]</td>
| |
| </tr>
| |
| </table> <!-- END Section Nav Buttons -->
| |
|
| |
| <table width=1000 bgcolor="lightcyan" cellpadding=2>
| |
| <tr valign="top">
| |
| <td width=10>[[image:BlueDot10x10.png|link=]]</td>
| |
| <td>This option is only available in '''Trainz Plus'''</td>
| |
| </tr>
| |
| <tr valign="top">
| |
| <td>[[image:BlueDot10x10.png|link=]]</td>
| |
| <td>Upgrading an entire route to '''HD''' is '''recommended''' over mixing '''HD Resolution''' and '''non-HD Resolution''' baseboards in the same route, but there are limitations to upgrading that must be considered beforehand</td>
| |
| </tr>
| |
| </table>
| |
| <br>
| |
| <table width=1000>
| |
| <tr valign="top">
| |
| <td>You can convert ('''Upgrade''') an entire '''5m Resolution''' or '''10m Resolution''' route to '''HD Resolution''' in a single step but there are some important limitations. See the '''Notes:''' below.</td>
| |
| </tr>
| |
| </table>
| |
|
| |
| <table>
| |
| <tr valign="top">
| |
| <td width=215>[[image:ToolsMenuUpgradeRoute_S20.png|link=]]</td>
| |
| <td>
| |
| <table width=785 bgcolor=#000000 cellpadding=2>
| |
| <tr valign="top">
| |
| <td>
| |
| <table bgcolor=#ffffff cellpadding=2>
| |
| <tr valign="top">
| |
| <td><span style="font-weight: 700; font-size: 15px;">Steps:</span> To '''Upgrade''' a route to '''HD''':-</td>
| |
| </tr>
| |
| <tr valign="top">
| |
| <td>
| |
| <table>
| |
| <tr valign="top">
| |
| <td width=25>[[image:DotPoint1.JPG|link=]]</td>
| |
| <td><span style="font-weight: 700; font-size: 15px; background-color: lightcyan;"> Left Click </span> on the [[image:SurveyorToolsIcon_S20.png|link=]] '''Surveyor Tools Menu''' icon</td>
| |
| </tr>
| |
| <tr valign="top">
| |
| <td>[[image:DotPoint2.JPG|link=]]</td>
| |
| <td><span style="font-weight: 700; font-size: 15px; background-color: lightcyan;"> Left Click </span> on the option <span style="font-weight: 700; font-size: 15px; color: white; background-color: black;"> Upgrade Route </span></td>
| |
| </tr>
| |
| <tr valign="top">
| |
| <td colspan=2>A progress bar will show the status of the conversion process which may take several minutes depending on the size of the route. At the conclusion of the upgrade you will be given a report indicating that the process was successful or it has failed because of errors. See '''Notes:''' below.</td>
| |
| </tr>
| |
| </table>
| |
| </td>
| |
| </tr>
| |
| </table>
| |
| </td>
| |
| </tr>
| |
| </table>
| |
| </td>
| |
| </tr>
| |
| </table>
| |
| <br>
| |
| <table width=1000 bgcolor=#000000 cellpadding=2>
| |
| <tr valign="top">
| |
| <td>
| |
| <table bgcolor=#ffffb0 cellpadding=2>
| |
| <tr valign="top">
| |
| <td width=25>[[image:NotePad.PNG|link=]]</td>
| |
| <td><span style="font-size: 17px; font-weight: 700;">Notes:'''</span><br>
| |
| ----
| |
| There are some important considerations and restrictions that may affect the viability of converting an entire route to HD. They are:-
| |
| <table>
| |
| <tr valign="top">
| |
| <td width=10>[[image:DotPoint.JPG|10px|link=]]</td>
| |
| <td>the '''HD''' route, after conversion from a 10m grid, for example, will be '''at least''' <span style="font-weight: 700; font-size: 15px;">5x</span> the file size of the original route. If the original route is already large then this could easily push it over the limit ('''1GB''') for saving as a '''.cdp''' file.</td>
| |
| </tr>
| |
| <tr valign="top">
| |
| <td>[[image:DotPoint.JPG|10px|link=]]</td>
| |
| <td>'''HD''' routes have a limit of 16 different ground textures <span style="font-weight: 700; text-decoration: underline;">per baseboard</span> but each baseboard can have a different set of 16 textures. '''This is a limitation caused by hardware, not software'''.</td>
| |
| </tr>
| |
| <tr valign="top">
| |
| <td>[[image:DotPoint.JPG|10px|link=]]</td>
| |
| <td>If more than 16 textures are identified in a single baseboard then the extra textures will be replaced by one of those already present in that baseboard. The upgrade process will continue as this is not a "fatal error". You will be given the '''Focus''' co-ordinates of any affected baseboards so you can inspect them for any noticeable changes</td>
| |
| </tr>
| |
| <tr valign="top">
| |
| <td>[[image:DotPoint.JPG|10px|link=]]</td>
| |
| <td>'''Legacy Water''', which was normally painted onto the terrain using a brush, will be converted to a '''Water Effect Layer''' which will cover the entire layout. Like any effect layer, it can be easily deleted - see [[image:PageLink.PNG|link=]] '''[[#skip Edit Effect|Edit Effect Layers]]''' for the details</td>
| |
| </tr>
| |
| </table>
| |
| </td>
| |
| </tr>
| |
| </table>
| |
| </td>
| |
| </tr>
| |
| </table>
| |
| <br>
| |
| <table width=1000>
| |
| <tr valign="top">
| |
| <td colspan=2>A typical '''HD Upgrade''' report would look like:-</td>
| |
| </tr>
| |
| <tr valign="top">
| |
| <td width=465>[[image:HDUpdateError_S20.png|link=]]</td>
| |
| <td>The report indicates that:-<br>
| |
| <table bgcolor=#000000 cellpadding=2>
| |
| <tr valign="top">
| |
| <td>
| |
| <table bgcolor=#ffffff cellpadding=2>
| |
| <tr valign="top">
| |
| <td width=10>[[image:GreyDot10x10.png|10px|link=]]</td>
| |
| <td>'''Legacy Water''' was detected and was converted to a '''Water Effect Layer'''</td>
| |
| </tr>
| |
| <tr valign="top">
| |
| <td>[[image:redDotX10x10.png|10px|link=]]</td>
| |
| <td>the baseboard at compass co-ordinates '''x = 73440m''', '''y = 720m'''<br>
| |
| has exceeded the limit of '''16''' ground textures</td>
| |
| </tr>
| |
| <tr valign="top">
| |
| <td>[[image:GreenDot10x10.png|10px|link=]]</td>
| |
| <td>the '''HD Upgrade''' was completed successfully</td>
| |
| </tr>
| |
| </table>
| |
| </td>
| |
| </tr>
| |
| </table>
| |
| </td>
| |
| </tr>
| |
| </table>
| |
| <br>
| |
| <!-- Info Palette Section Section -->
| |
| <table width=1000> <!-- BEGIN Nav Buttons Table -->
| |
| <tr valign="top">
| |
| <td width=629><span id="stepInfo"></span>
| |
| ='''The Info Palette'''=
| |
| </td>
| |
| <td width=50>[[image:SkipDown.png|link=#skip Info Palette Coordinates|Skip Down]]</td>
| |
| <td width=50> </td>
| |
| <td width=46>[[image:BackToTop.png|link=#top|alt=Top|Top]]</td>
| |
| <td width=75>[[image:NextUp.png|link=#stepUpgrading|alt=Next Up|Next Up]]</td>
| |
| <td width=75> </td> <!-- for Next Down -->
| |
| <td width=75>[[image:BackToBottom.png|link=#bottom|alt=Bottom|Bottom]]</td>
| |
| </tr>
| |
| </table> <!-- END Nav Buttons Table -->
| |
| <br>
| |
| <table width=1000 bgcolor=#000000>
| |
| <tr valign="top">
| |
| <td>
| |
| <table width=996 bgcolor=#ffe89a cellpadding=2>
| |
| <tr valign="middle">
| |
| <td width=45>[[image:PalettesIcon_S20.png|link=]]</td>
| |
| <td>If the <span style="font-weight: 700; font-size: 15px; color: white; background-color: #797979;"> Info Palette </span> is not visible on the screen then refer to [[image:PageLink.PNG|link=]] '''[[#Notes_Palettes|Notes: Palettes]]''' at the top of this document. Some <span style="font-weight: 700; font-size: 15px; color: white; background-color: #797979;"> Info Palette </span> functions will also require the <span style="font-weight: 700; font-size: 15px; color: white; background-color: #797979;"> Assets Palette </span> and the <span style="font-weight: 700; font-size: 15px; color: white; background-color: #797979;"> Tool Options Palette </span>.
| |
| </td>
| |
| </tr>
| |
| </table>
| |
| </td>
| |
| </tr>
| |
| </table>
| |
| <br>
| |
| <table width=1000 bgcolor="lightcyan" cellpadding=2>
| |
| <tr valign="top">
| |
| <td colspan=2>This palette can be easily overlooked but it has some very useful features:-</td>
| |
| </tr>
| |
| <tr valign="top">
| |
| <td>[[image:BlueDot10x10.png|10px|link=]]</td>
| |
| <td>naming objects</td>
| |
| </tr>
| |
| <tr valign="top">
| |
| <td>[[image:BlueDot10x10.png|10px|link=]]</td>
| |
| <td>providing precise data and control over the "focus" - the position of the cursor</td>
| |
| </tr>
| |
| <tr valign="top">
| |
| <td>[[image:BlueDot10x10.png|10px|link=]]</td>
| |
| <td>providing precise data and control over the position and orientation of objects (it can be used instead of the '''Free Move Tool''' and the '''Fine Adjustment Tool''')</td>
| |
| </tr>
| |
| <tr valign="top">
| |
| <td>[[image:BlueDot10x10.png|10px|link=]]</td>
| |
| <td>identifying and setting the "home" layer and binding layer of a selected object</td>
| |
| </tr>
| |
| <tr valign="top">
| |
| <td>[[image:BlueDot10x10.png|10px|link=]]</td>
| |
| <td>used for locking and unlocking a selected objects layer</td>
| |
| </tr>
| |
| </table>
| |
| <br>
| |
| The components of the <span style="font-weight: 700; font-size: 15px; color: white; background-color: #797979;"> Info Palette </span> are identified in the image below.<br>
| |
| <table width=1000>
| |
| <tr valign="top">
| |
| <td width=370>[[image:InfoPalette_S20.png|link=]]</td>
| |
| <td>
| |
| <table>
| |
| <tr valign="top">
| |
| <td width=10>[[image:BlueDot10x10.png|link=]]</td>
| |
| <td>Every item in the palette can be edited.</td>
| |
| </tr>
| |
| <tr valign="top">
| |
| <td>[[image:BlueDot10x10.png|link=]]</td>
| |
| <td>Each of the small arrowhead icons in the palette will open to display more information and controls or a drop down menu of options.</td>
| |
| </tr>
| |
| </table>
| |
| <br>
| |
| <table bgcolor=#000000 cellpadding=2>
| |
| <tr valign="top">
| |
| <td>
| |
| <table bgcolor=#ffffb0 cellpadding=2>
| |
| <tr valign="top">
| |
| <td width=25>[[image:NotePad.PNG|link=]]</td>
| |
| <td>
| |
| <table>
| |
| <tr valign="top">
| |
| <td width=10>[[image:DotPoint.JPG|10px|link=]]</td>
| |
| <td>The '''Asset Name''' is the name given to the asset by its creator and the name that will appear in the asset list of '''Content Manager''' and in the <span style="font-weight: 700; font-size: 15px; color: white; background-color: #797979;"> Assets Palette </span></td>
| |
| </tr>
| |
| <tr valign="top">
| |
| <td>[[image:DotPoint.JPG|10px|link=]]</td>
| |
| <td>The '''Object Name''' is the optional name that you have given the object so that it can be quickly located in the route and/or session. Some objects, such as station name signs, will require an '''Object Name''' that will be visible in Surveyor and Driver</td>
| |
| </tr>
| |
| </table>
| |
| </td>
| |
| </tr>
| |
| </table>
| |
| </td>
| |
| </tr>
| |
| </table>
| |
| </td>
| |
| </tr>
| |
| </table>
| |
| <br>
| |
| <table width=1000> <!-- BEGIN Section Nav Buttons -->
| |
| <tr valign="top">
| |
| <td width=629><span id="skip Info Palette Coordinates"></span>
| |
| =='''Palette Coordinates'''==
| |
| </td>
| |
| <td width=50>[[image:SkipDown.png|link=#skip Info Settings Menu|Skip Down]]</td>
| |
| <td width=50>[[image:SkipUp.png|link=#stepInfo|Skip Up]]</td>
| |
| <td width=46> </td> <!-- for Top -->
| |
| <td width=75>[[image:HeadingUp.png|link=#stepInfo|alt=Heading|To Heading]]</td>
| |
| <td width=75> </td> <!-- for Next Down -->
| |
| <td width=75> </td> <!-- for Bottom -->
| |
| </tr>
| |
| </table> <!-- END Section Nav Buttons -->
| |
|
| |
| <table width=1000>
| |
| <tr valign="top">
| |
| <td width=700>
| |
| <table bgcolor=#000000 cellpadding=2>
| |
| <tr valign="top">
| |
| <td>
| |
| <table bgcolor=#ffffff cellpadding=2>
| |
| <tr valign="top">
| |
| <td colspan=2>
| |
| <table>
| |
| <tr valign="middle">
| |
| <td width=35>[[image:Information.png|35px|link=]]</td>
| |
| <td>All the positional data and controls in the <span style="font-weight: 700; font-size: 15px; color: white; background-color: #797979;"> Info Palette </span> are defined in the following ways:-</td>
| |
| </tr>
| |
| </table>
| |
| </td>
| |
| </tr>
| |
| <tr valign="top">
| |
| <td><span style="font-weight: 700; font-size: 17px; color: white; background-color: black;"> x: </span></td>
| |
| <td>is '''ALWAYS''' the <span style="font-weight: 700; font-size: 17px; color: white; background-color: black;"> North-South </span> compass direction regardless of the direction that an object is facing</td>
| |
| </tr>
| |
| <tr valign="top">
| |
| <td><span style="font-weight: 700; font-size: 17px; color: white; background-color: black;"> y: </span></td>
| |
| <td>is '''ALWAYS''' the <span style="font-weight: 700; font-size: 17px; color: white; background-color: black;"> East-West </span> compass direction regardless of the direction that an object is facing</td>
| |
| </tr>
| |
| <tr valign="top">
| |
| <td><span style="font-weight: 700; font-size: 17px; color: white; background-color: black;"> z: </span></td>
| |
| <td>is '''ALWAYS''' the <span style="font-weight: 700; font-size: 17px; color: white; background-color: black;"> Vertical </span> direction (perpendicular to the compass directions) regardless of how an object has been rolled or tilted</td>
| |
| </tr>
| |
| <tr valign="top">
| |
| <td colspan=2>
| |
| <table bgcolor=#ffffb0 cellpadding=2>
| |
| <tr valign="top">
| |
| <td width=25>[[image:NotePad.PNG|link=]]</td>
| |
| <td><span style="font-size: 17px;">'''Notes:'''</span><br>
| |
| ----
| |
| </td>
| |
| </tr>
| |
| <tr valign="top">
| |
| <td width=10>[[image:DotPoint.JPG|10px|link=]]</td>
| |
| <td>distances are measured in '''metres''' from the '''North-West''' corner of the first baseboard. If that baseboard is later deleted then distances will '''still''' be measured from its original and now "virtual" North-West corner.</td>
| |
| </tr>
| |
| <tr valign="top">
| |
| <td>[[image:DotPoint.JPG|10px|link=]]</td>
| |
| <td><span style="font-weight: 700; font-size: 17px;"> + </span> positive distances are in the <span style="font-weight: 700; font-size: 15px; color: white; background-color: black;"> South </span>, <span style="font-weight: 700; font-size: 15px; color: white; background-color: black;"> East </span> and <span style="font-weight: 700; font-size: 15px; color: white; background-color: black;"> Up </span> directions</td>
| |
| </tr>
| |
| <tr valign="top">
| |
| <td>[[image:DotPoint.JPG|10px|link=]]</td>
| |
| <td><span style="font-weight: 700; font-size: 17px;"> - </span> negative distances are in the <span style="font-weight: 700; font-size: 15px; color: white; background-color: black;"> North </span>, <span style="font-weight: 700; font-size: 15px; color: white; background-color: black;"> West </span> and <span style="font-weight: 700; font-size: 15px; color: white; background-color: black;"> Down </span> directions</td>
| |
| </tr>
| |
| <tr valign="top">
| |
| <td>[[image:DotPoint.JPG|10px|link=]]</td>
| |
| <td>New boards added to the '''North''' of the first baseboard will have negative '''x''' coordinates and new boards added to the '''West''' of the first baseboard will have negative '''y''' coordinates.</td>
| |
| </tr>
| |
| </table>
| |
| </td>
| |
| </tr>
| |
| </table>
| |
| </td>
| |
| </tr>
| |
| </table>
| |
| </td>
| |
| <td width=300>[[image:PositionXYZ_S20.png|300px|link=]]</td>
| |
| </tr>
| |
| </table>
| |
| <br>
| |
| <table width=1000> <!-- BEGIN Section Nav Buttons -->
| |
| <tr valign="top">
| |
| <td width=629><span id="skip Info Settings Menu"></span>
| |
| =='''Info Settings Menu'''==
| |
| </td>
| |
| <td width=50>[[image:SkipDown.png|link=#skip Focus Info and Controls|Skip Down]]</td>
| |
| <td width=50>[[image:SkipUp.png|link=#skip Info Palette Coordinates|Skip Up]]</td>
| |
| <td width=46> </td> <!-- for Top -->
| |
| <td width=75>[[image:HeadingUp.png|link=#stepInfo|alt=Heading|To Heading]]</td>
| |
| <td width=75> </td> <!-- for Next Down -->
| |
| <td width=75> </td> <!-- for Bottom -->
| |
| </tr>
| |
| </table> <!-- END Section Nav Buttons -->
| |
|
| |
| <table width=1000>
| |
| <tr valign="top">
| |
| <td>All the '''Focus''', '''Position''' and '''Rotation''' settings have control settings and drop down menus that allow values to be transferred to and from other settings and other tools.</td>
| |
| </tr>
| |
| <tr valign="top">
| |
| <td>Next to each name is a small grey arrowhead. <span style="font-weight: 700; font-size: 15px; background-color: lightcyan;"> Left Click </span> on the arrowhead to open its list of control settings and to access its menus.</td>
| |
| </tr>
| |
| </table>
| |
| <br>
| |
| <table width=1000>
| |
| <tr valign="top">
| |
| <td width=270>[[image:InfoPaletteSettingDropMenu1_S20.png|link=]]<br><br>
| |
| [[image:InfoPaletteSettingDropMenu2_S20.png|link=]]</td>
| |
| <td>
| |
| <table bgcolor=#000000 cellpadding=2>
| |
| <tr valign="top">
| |
| <td>
| |
| <table bgcolor=#ffffff cellpadding=2>
| |
| <tr valign="top">
| |
| <td colspan=2><span style="font-weight: 700; font-size: 15px;">Steps:</span></td>
| |
| </tr>
| |
| <tr valign="top">
| |
| <td width=20>[[image:DotPoint1.JPG|link=]]</td>
| |
| <td>in the <span style="font-weight: 700; font-size: 15px; color: white; background-color: #797979;"> Info Palette </span> <span style="font-weight: 700; font-size: 15px; color: black; background-color: lightcyan;">Right Click</span> inside '''ANY''' control setting box</td>
| |
| </tr>
| |
| <tr valign="top">
| |
| <td colspan=2>The first time the popup menu is opened it will only show two active options - '''Paste''' and '''Select All'''.</td>
| |
| </tr>
| |
| <tr valign="top">
| |
| <td colspan=2>
| |
| <table>
| |
| <tr valign="top">
| |
| <td><span style="font-weight: 700; font-size: 15px; color: white; background-color: black;"> Paste </span></td>
| |
| <td>will paste the contents of your Operating System (Windows, MacOS) clipboard into the setting. If data is already present then the new data will be added to it, not replace it</td>
| |
| </tr>
| |
| </table>
| |
| </td>
| |
| </tr>
| |
| <tr valign="top">
| |
| <td colspan=2>
| |
| <table>
| |
| <tr valign="top">
| |
| <td><span style="font-weight: 700; font-size: 15px; color: white; background-color: black;"> Select All </span> will highlight the contents of the selected setting. You can also achieve this with a <span style="font-weight: 700; font-size: 15px; background-color: lightcyan;">Left Click and Drag</span> across the contents of the setting</td>
| |
| </tr>
| |
| </table>
| |
| </td>
| |
| </tr>
| |
| <tr valign="top">
| |
| <td>[[image:DotPoint2.JPG|link=]]</td>
| |
| <td><span style="font-weight: 700; font-size: 15px; color: black; background-color: lightcyan;">Right Click</span> inside the same setting box</td>
| |
| </tr>
| |
| <tr valign="top">
| |
| <td colspan=2>Once the value in a setting has been selected (highlighted) the popup menu will show all options as active.</td>
| |
| </tr>
| |
| <tr valign="top">
| |
| <td colspan=2>
| |
| <table>
| |
| <tr valign="top">
| |
| <td><span style="font-weight: 700; font-size: 15px; color: white; background-color: black;"> Cut </span></td>
| |
| <td>will copy the contents of the selected setting into your Operating System clipboard. The contents will then be deleted from the setting</td>
| |
| </tr>
| |
| </table>
| |
| </td>
| |
| </tr>
| |
| <tr valign="top">
| |
| <td colspan=2>
| |
| <table>
| |
| <tr valign="top">
| |
| <td><span style="font-weight: 700; font-size: 15px; color: white; background-color: black;"> Copy </span></td>
| |
| <td>will copy the contents of the selected setting into your Operating System clipboard without deleting it</td>
| |
| </tr>
| |
| </table>
| |
| </td>
| |
| </tr>
| |
| <tr valign="top">
| |
| <td colspan=2>
| |
| <table>
| |
| <tr valign="top">
| |
| <td><span style="font-weight: 700; font-size: 15px; color: white; background-color: black;"> Delete </span> will delete the contents of the selected setting. You can also achieve this with a <span style="font-weight: 700; font-size: 15px; background-color: lightcyan;">Left Click and Drag</span> across the contents and then press the <span style="font-weight: 700; font-size: 15px; color: white; background-color: black;"> Delete </span> key</td>
| |
| </tr>
| |
| </table>
| |
| </td>
| |
| </tr>
| |
| </table>
| |
| </td>
| |
| </tr>
| |
| </table>
| |
| </td>
| |
| </tr>
| |
| </table>
| |
| <br>
| |
| Next to the '''z''' co-ordinate in both the '''Focus''' and '''Position''' is a small white down arrowhead. <span style="font-weight: 700; font-size: 15px; background-color: lightcyan;"> Left Click </span> on the arrowhead to open its menu.<br>
| |
| <table width=1000>
| |
| <tr valign="top">
| |
| <td width=325>[[image:InfoPaletteFocusMenu_S20.png|link=]]</td>
| |
| <td>There is only one option in the sub-menu.<br>
| |
| <table bgcolor=#000000 cellpadding=2>
| |
| <tr valign="top">
| |
| <td>
| |
| <table bgcolor=#ffffff cellpadding=2>
| |
| <tr valign="top">
| |
| <td><span style="font-weight: 700; font-size: 15px; background-color: lightcyan;"> Left Click </span> on the <span style="font-weight: 700; font-size: 15px; color: white; background-color: black;"> Use Height for Brush </span> option to copy the current '''z''' value to the <span style="font-weight: 700; font-size: 15px; color: white; background-color: #797979;"> Tool Options Palette </span> <span style="font-weight: 700; font-size: 15px; color: gold; background-color: black;"> Height </span> setting.</td>
| |
| </tr>
| |
| </table>
| |
| </td>
| |
| </tr>
| |
| </table>
| |
| </td>
| |
| </tr>
| |
| </table>
| |
| <br>
| |
| <table width=1000> <!-- BEGIN Section Nav Buttons -->
| |
| <tr valign="top">
| |
| <td width=629><span id="skip Focus Info and Controls"></span>
| |
| =='''Focus Info and Controls'''==
| |
| </td>
| |
| <td width=50>[[image:SkipDown.png|link=#skip Asset Name Menu|Skip Down]]</td>
| |
| <td width=50>[[image:SkipUp.png|link=#skip Info Settings Menu|Skip Up]]</td>
| |
| <td width=46> </td> <!-- for Top -->
| |
| <td width=75>[[image:HeadingUp.png|link=#stepInfo|alt=Heading|To Heading]]</td>
| |
| <td width=75> </td> <!-- for Next Down -->
| |
| <td width=75> </td> <!-- for Bottom -->
| |
| </tr>
| |
| </table> <!-- END Section Nav Buttons -->
| |
|
| |
| <table width=1000 bgcolor="lightcyan" cellpadding=2>
| |
| <tr valign="top">
| |
| <td width=10>[[image:BlueDot10x10.png|link=]]</td>
| |
| <td>The '''Focus''' shows the current position and height of the '''Cursor''' object.</td>
| |
| </tr>
| |
| </table>
| |
|
| |
| Open up the '''Focus''' by a <span style="font-weight: 700; font-size: 15px; background-color: lightcyan;"> Left Click </span> on its arrowhead icon.<br>
| |
|
| |
| <table width=1000>
| |
| <tr valign="top">
| |
| <td width=225>[[image:InfoPaletteFocus_S20.png|link=]]</td>
| |
| <td>
| |
| <br>
| |
| The current cursor position is shown in the '''x:''', '''y:''' and '''z:''' text boxes. These values can be edited to move the cursor to a new position but '''CARE''' will be needed.
| |
| <table bgcolor=#000000 width=775 cellpadding=2>
| |
| <tr valign="top">
| |
| <td>
| |
| <table bgcolor=#ffffe0 width=771 cellpadding=2>
| |
| <tr valign="top">
| |
| <td width=25>[[image:PencilTips.PNG|link=]]</td><td>On the right of each data entry box is a pair of '''Up/Down''' arrow controls. <span style="font-weight: 700; font-size: 15px; background-color: lightcyan;">Left Click and Drag</span> up or down on these to adjust the position in smaller increments down to '''centimetres'''</td>
| |
| </tr>
| |
| </table>
| |
| </td>
| |
| </tr>
| |
| </table>
| |
| <br>
| |
| <table bgcolor=#000000 width=775 cellpadding=2>
| |
| <tr valign="top">
| |
| <td>
| |
| <table bgcolor=#ffffb0 width=771 cellpadding=2>
| |
| <tr valign="top">
| |
| <td width=25>[[image:NotePad.PNG|link=]]</td>
| |
| <td><span style="font-size: 17px; font-weight: 700;">Notes:</span><br>
| |
| ----
| |
| If you enter an '''x:''' or '''y:''' value that is "out in empty space" (beyond the edge of a boundary baseboard) then the cursor will be refocused at a point on the baseboard edge that is the closest to the entered co-ordinates.
| |
| </td>
| |
| </tr>
| |
| </table>
| |
| </td>
| |
| </tr>
| |
| </table>
| |
| </td>
| |
| </tr>
| |
| </table>
| |
| <br>
| |
| <table bgcolor=#000000 cellpadding=2>
| |
| <tr valign="top">
| |
| <td>
| |
| <table bgcolor=#ffffe0 cellpadding=2>
| |
| <tr valign="top">
| |
| <td width=25>[[image:PencilTips.PNG|link=]]</td>
| |
| <td>If it has not been deleted you can identify the '''North-West''' corner of the original (first) baseboard by entering <span style="font-weight: 700; font-size: 15px;">0</span> as the '''Focus''' <span style="font-weight: 700; font-size: 15px; color: white; background-color: black;"> x: </span> and <span style="font-weight: 700; font-size: 15px; color: white; background-color: black;"> y: </span> co-ordinates</td>
| |
| </tr>
| |
| </table>
| |
| </td>
| |
| </tr>
| |
| </table>
| |
| <br>
| |
| <table width=1000> <!-- BEGIN Section Nav Buttons -->
| |
| <tr valign="top">
| |
| <td width=629><span id="skip Asset Name Menu"></span>
| |
| =='''Asset Name Menu'''==
| |
| </td>
| |
| <td width=50>[[image:SkipDown.png|link=#skip Object Name|Skip Down]]</td>
| |
| <td width=50>[[image:SkipUp.png|link=#skip Focus Info and Controls|Skip Up]]</td>
| |
| <td width=46> </td> <!-- for Top -->
| |
| <td width=75>[[image:HeadingUp.png|link=#stepInfo|alt=Heading|To Heading]]</td>
| |
| <td width=75> </td> <!-- for Next Down -->
| |
| <td width=75> </td> <!-- for Bottom -->
| |
| </tr>
| |
| </table> <!-- END Section Nav Buttons -->
| |
|
| |
| <table width=1000 bgcolor="lightcyan" cellpadding=2>
| |
| <tr valign="top">
| |
| <td width=10>[[image:BlueDot10x10.png|link=]]</td>
| |
| <td>'''"Asset Name"''' refers to the name of the asset as displayed in the <span style="font-weight: 700; font-size: 15px; color: white; background-color: #797979;"> Assets Palette </span> and in '''Content Manager'''. This is not the same as the '''Object Name''' (see the next section)</td>
| |
| </tr>
| |
| </table>
| |
| <br>
| |
| You must have an object (or objects) selected for an '''Asset Name''' to be shown and for this menu to be available.<br>
| |
|
| |
| <table width=1000>
| |
| <tr valign="top">
| |
| <td width=210>[[image:InfoPaletteMulti_S20.png|link=]]</td>
| |
| <td>If more than one object has been selected then the name and position data shown will be for the last selected object. If different objects (with different '''kuid''' codes) have been selected then a count of the additional objects will be added. The '''(+2)''' shown in the object name in the image on the left indicates that 2 additional different objects are in the group of selected objects.</td>
| |
| </tr>
| |
| </table>
| |
| <br>
| |
| Next to the '''Asset Name''' is a small white '''Down Arrowhead'''. <span style="font-weight: 700; font-size: 15px; background-color: lightcyan;"> Left Click </span> on the arrowhead to open its menu.<br>
| |
| <table width=1000>
| |
| <tr valign="top">
| |
| <td width=385>[[image:InfoPaletteMenu_S20.png|link=]]</td>
| |
| <td>
| |
| <table width=615 bgcolor=#000000 cellpadding=2>
| |
| <tr valign="top">
| |
| <td>
| |
| <table width=611 bgcolor=#ffffff cellpadding=2>
| |
| <tr valign="top">
| |
| <td colspan=2><span style="font-weight: 700; font-size: 17px;">Asset Name Menu Options</span></td>
| |
| </tr>
| |
| <tr>
| |
| <td colspan=2>
| |
| <table>
| |
| <tr valign="top">
| |
| <td><span style="font-weight: 700; font-size: 15px; color: white; background-color: black;"> Copy </span></td>
| |
| <td>copies the asset '''name''' and '''<kuid>''' into your operating systems clipboard. If more than two assets have been selected then only the first two will be copied</td>
| |
| </tr>
| |
| </table>
| |
| </td>
| |
| </tr>
| |
| <tr>
| |
| <td colspan=2>
| |
| <table>
| |
| <tr valign="top">
| |
| <td><span style="font-weight: 700; font-size: 15px; color: white; background-color: black;"> Show Asset Details </span></td>
| |
| <td>opens a new window showing the image and description of the selected object</td>
| |
| </tr>
| |
| </table>
| |
| </td>
| |
| </tr>
| |
| <tr>
| |
| <td colspan=2>
| |
| <table>
| |
| <tr valign="top">
| |
| <td width=220><span style="font-weight: 700; font-size: 15px; color: white; background-color: black;"> List Assets in New Window </span></td>
| |
| <td>opens up '''Content Manager''' and lists all the selected objects</td>
| |
| </tr>
| |
| </table>
| |
| </td>
| |
| </tr>
| |
| <tr>
| |
| <td colspan=2>
| |
| <table>
| |
| <tr valign="top">
| |
| <td><span style="font-weight: 700; font-size: 15px; color: white; background-color: black;"> Add to Picklist </span></td>
| |
| <td>adds selected objects to a '''Picklist'''</td>
| |
| </tr>
| |
| </table>
| |
| </td>
| |
| </tr>
| |
| <tr>
| |
| <td colspan=2>
| |
| <table>
| |
| <tr valign="top">
| |
| <td width=180><span style="font-weight: 700; font-size: 15px; color: white; background-color: black;"> Remove from Picklist </span></td>
| |
| <td><span style="font-weight: 700; font-size: 15px; color: white; background-color: red;"> NOT WORKING </span><span style="font-weight: 700; font-size: 15px; background-color: #fcbcbc;"> (a known bug)</span><br>
| |
| use this same option found in the '''Filter Palette''' or '''Content Manager''' instead</td>
| |
| </tr>
| |
| </table>
| |
| </td>
| |
| </tr>
| |
| <tr>
| |
| <td colspan=2>
| |
| <table>
| |
| <tr valign="top">
| |
| <td><span style="font-weight: 700; font-size: 15px; color: white; background-color: black;"> Select in Assets Palette </span></td>
| |
| <td>sets the <span style="font-weight: 700; font-size: 15px; color: white; background-color: #797979;"> Filter Palette </span> to <span style="font-weight: 700; font-size: 15px; color: white; background-color: black;"> All Content </span> and highlights the selected object in the <span style="font-weight: 700; font-size: 15px; color: white; background-color: #797979;"> Assets Palette </span></td>
| |
| </tr>
| |
| </table>
| |
| <table>
| |
| <tr valign="top">
| |
| <td><span style="font-weight: 700; font-size: 15px; color: white; background-color: black;"> Select in Filter Palette </span></td>
| |
| <td>sets the <span style="font-weight: 700; font-size: 15px; color: white; background-color: #797979;"> Filter Palette </span> to <span style="font-weight: 700; font-size: 15px; color: white; background-color: black;"> All Content </span> and highlights the selected object in the <span style="font-weight: 700; font-size: 15px; color: white; background-color: #797979;"> Filter Palette </span></td>
| |
| </tr>
| |
| </table>
| |
| </td>
| |
| </tr>
| |
| </table>
| |
| </td>
| |
| </tr>
| |
| </table>
| |
| </td>
| |
| </tr>
| |
| </table>
| |
| <br>
| |
| <table width=1000> <!-- BEGIN Section Nav Buttons -->
| |
| <tr valign="top">
| |
| <td width=629><span id="skip Object Name"></span>
| |
| =='''Object Name'''==
| |
| </td>
| |
| <td width=50>[[image:SkipDown.png|link=#skip Position Info and Controls|Skip Down]]</td>
| |
| <td width=50>[[image:SkipUp.png|link=#skip Asset Name Menu|Skip Up]]</td>
| |
| <td width=46> </td> <!-- for Top -->
| |
| <td width=75>[[image:HeadingUp.png|link=#stepInfo|alt=Heading|To Heading]]</td>
| |
| <td width=75> </td> <!-- for Next Down -->
| |
| <td width=75> </td> <!-- for Bottom -->
| |
| </tr>
| |
| </table> <!-- END Section Nav Buttons -->
| |
|
| |
| <table width=1000 bgcolor="lightcyan" cellpadding=2>
| |
| <tr valign="top">
| |
| <td width=10>[[image:BlueDot10x10.png|link=]]</td>
| |
| <td>'''"Object Name"''' refers to the name that you give to an object</td>
| |
| </tr>
| |
| </table>
| |
| <br>
| |
| <table width=1000>
| |
| <tr valign="top">
| |
| <td>You can give any object in your route an identifying name. In some cases a name is vital for '''AI''' and session operations, in other cases it will be needed as a display feature - for example: to be shown on a station nameboard. You must have an object (or objects) selected for this option to be available. If more than one object has been selected then only the last object (the one with the '''Context Icon''') will be affected</td>
| |
| </tr>
| |
| </table>
| |
|
| |
| <table>
| |
| <tr valign="top">
| |
| <td width=225>[[image:InfoPaletteObjectName_S20.png|link=]]</td>
| |
| <td>
| |
| <table bgcolor=#000000 cellpadding=2>
| |
| <tr valign="top">
| |
| <td>
| |
| <table bgcolor=#ffffff cellpadding=2>
| |
| <tr valign="top">
| |
| <td colspan=2><span style="font-weight: 700; font-size: 15px;">Steps:</span> To name (or rename) a selected object:-</td>
| |
| </tr>
| |
| <tr valign="top">
| |
| <td width=25>[[image:DotPoint1.JPG|link=]]</td>
| |
| <td><span style="font-weight: 700; font-size: 15px; background-color: lightcyan;"> Left Click </span> inside the '''Name''' text entry box</td>
| |
| </tr>
| |
| <tr valign="top">
| |
| <td>[[image:DotPoint2.JPG|link=]]</td>
| |
| <td>Enter a name</td>
| |
| </tr>
| |
| <tr valign="top">
| |
| <td>[[image:DotPoint3.JPG|link=]]</td>
| |
| <td>Press the <span style="font-weight: 700; font-size: 15px; color: white; background-color: black;"> Enter </span> key</td>
| |
| </tr>
| |
| </table>
| |
| </td>
| |
| </tr>
| |
| </table>
| |
| </td>
| |
| </tr>
| |
| </table>
| |
| <br>
| |
| <table width=1000 cellpadding=2>
| |
| <tr valign="top">
| |
| <td width=420>[[image:ObjectsUsingSameName.png|link=]]</td>
| |
| <td>
| |
| <table width=580 bgcolor=#000000 cellpadding=2>
| |
| <tr valign="top">
| |
| <td>
| |
| <table width=576 bgcolor=#ffffff cellpadding=2>
| |
| <tr valign="middle">
| |
| <td width=35>[[image:Information.png|35px|link=]]</td>
| |
| <td align="center"><span style="font-weight: 700; font-size: 15px;">There is no ban on two or more objects using the same name</span></td>
| |
| </tr>
| |
| </table>
| |
| </td>
| |
| </tr>
| |
| </table>
| |
| <br>
| |
| In the image shown on the left there are 4 objects all named '''Old Orroroo Rd'''.<br>
| |
| <br>
| |
| This will not cause any problems for scenery objects apart from finding the ''exact'' one you want with the '''Find Tool''' (<span style="font-weight: 700; font-size: 15px;"><span style="color: white; background-color: black;"> Ctrl </span> + <span style="color: white; background-color: black;"> F </span></span> keys) as shown in the image on the left - Which of the 4 "Old Orroroo Rd" objects is the one that I need?<br>
| |
| <br>
| |
| <table bgcolor=#ff0000 cellpadding=2>
| |
| <tr valign="top">
| |
| <td>
| |
| <table bgcolor=#fcbcbc cellpadding=2>
| |
| <tr valign="top">
| |
| <td>[[image:Stop.PNG|link=]]</td>
| |
| <td><span style="font-size: 15px; font-weight: 700;">WARNING:</span><br>
| |
| '''Duplicate names''' will cause problems for '''Industries''' (including passenger enabled stations), '''Locomotives''', '''Track Marks''', '''Triggers''', '''Switches''', '''Signals''', etc that have to be identified to control the operation of a session.</td>
| |
| </tr>
| |
| <tr valign="top">
| |
| <td colspan=2 align="center"><span style="font-weight: 700; font-size: 15px;">These objects must have unique names</span></td>
| |
| </tr>
| |
| </table>
| |
| </td>
| |
| </tr>
| |
| </table>
| |
| </td>
| |
| </tr>
| |
| </table>
| |
| <br>
| |
| <table width=1000> <!-- BEGIN Section Nav Buttons -->
| |
| <tr valign="top">
| |
| <td width=629><span id="skip Position Info and Controls"></span>
| |
| =='''Position Info and Controls'''==
| |
| </td>
| |
| <td width=50>[[image:SkipDown.png|link=#skip Rotation Info and Controls|Skip Down]]</td>
| |
| <td width=50>[[image:SkipUp.png|link=#skip Object Name|Skip Up]]</td>
| |
| <td width=46> </td> <!-- for Top -->
| |
| <td width=75>[[image:HeadingUp.png|link=#stepInfo|alt=Heading|To Heading]]</td>
| |
| <td width=75> </td> <!-- for Next Down -->
| |
| <td width=75> </td> <!-- for Bottom -->
| |
| </tr>
| |
| </table> <!-- END Section Nav Buttons -->
| |
| You must have an object (or objects) selected for the position data to be shown and edited. Open up the position data by a <span style="font-weight: 700; font-size: 15px; background-color: lightcyan;"> Left Click </span> on its '''Pos:''' arrowhead icon.<br>
| |
|
| |
| <table width=1000>
| |
| <tr valign="top">
| |
| <td width=310>[[image:InfoPalettePos_S20.png|link=]]</td>
| |
| <td>The position of the selected object (or the last object if more than one is selected) is shown in the '''x:''', '''y:''' and '''z:''' text boxes. These values can be edited to move the object or objects to a new position but '''CARE''' will be needed.
| |
| <br>
| |
| <table bgcolor=#000000 width=690 cellpadding=2>
| |
| <tr valign="top">
| |
| <td>
| |
| <table bgcolor=#ffffe0 width=686 cellpadding=2>
| |
| <tr valign="top">
| |
| <td width=25>[[image:PencilTips.PNG|link=]]</td><td>On the right of each data entry box is a pair of '''Up/Down''' arrow controls. <span style="font-weight: 700; font-size: 15px; background-color: lightcyan;">Left Click and Drag</span> up or down on these to adjust the position in smaller increments down to '''centimetres'''</td>
| |
| </tr>
| |
| </table>
| |
| </td>
| |
| </tr>
| |
| </table>
| |
| <br>
| |
| <table bgcolor=#000000 width=690 cellpadding=2>
| |
| <tr valign="top">
| |
| <td>
| |
| <table bgcolor=#ffffb0 width=686 cellpadding=2>
| |
| <tr valign="top">
| |
| <td width=25>[[image:NotePad.PNG|link=]]</td>
| |
| <td><span style="font-size: 17px; font-weight: 700;">Notes:</span><br>
| |
| ----
| |
| If you enter an '''x:''' or '''y:''' value that is "out in empty space" (beyond the edge of a boundary baseboard) then the objects will be moved to that position and may vanish from view. The '''Undo''' command can be used to reverse the move or the '''Marquee Tool''' can be used to add a baseboard under the "floating" objects.</td>
| |
| </tr>
| |
| </table>
| |
| </td>
| |
| </tr>
| |
| </table>
| |
| </td>
| |
| </tr>
| |
| </table>
| |
| <br>
| |
| <table width=1000> <!-- BEGIN Section Nav Buttons -->
| |
| <tr valign="top">
| |
| <td width=629><span id="skip Rotation Info and Controls"></span>
| |
| =='''Rotation Info and Controls'''==
| |
| </td>
| |
| <td width=50>[[image:SkipDown.png|link=#skip Layer Info and Controls|Skip Down]]</td>
| |
| <td width=50>[[image:SkipUp.png|link=#skip Position Info and Controls|Skip Up]]</td>
| |
| <td width=46> </td> <!-- for Top -->
| |
| <td width=75>[[image:HeadingUp.png|link=#stepInfo|alt=Heading|To Heading]]</td>
| |
| <td width=75> </td> <!-- for Next Down -->
| |
| <td width=75> </td> <!-- for Bottom -->
| |
| </tr>
| |
| </table> <!-- END Section Nav Buttons -->
| |
|
| |
| You must have an object (or objects) selected for the rotation data to be shown and edited. Open up the rotation data by a <span style="font-weight: 700; font-size: 15px; background-color: lightcyan;"> Left Click </span> on its '''Rot:''' arrowhead icon.<br>
| |
|
| |
| <table width=1000>
| |
| <tr valign="top">
| |
| <td width=310>[[image:InfoPaletteRot_S20.png|link=]]</td>
| |
| <td width=690>The rotational orientation of the selected object (or the last object if more than one is selected) is shown in the '''r:''', '''p:''' and '''y:''' text boxes (the letters stand for '''R'''oll, '''P'''itch and '''Y'''aw). These values can be edited to rotate the object or objects in 3D space '''BUT''' not all objects can be rotated in certain directions.
| |
| <table bgcolor=#000000 cellpadding=2>
| |
| <tr valign="top">
| |
| <td>
| |
| <table bgcolor=#ffffb0 cellpadding=2>
| |
| <tr valign="top">
| |
| <td>
| |
| <table>
| |
| <tr valign="top">
| |
| <td width=25>[[image:NotePad.PNG|link=]]</td>
| |
| <td><span style="font-size: 17px; font-weight: 700;">Notes:</span><br>
| |
| ----
| |
| </td>
| |
| </tr>
| |
| </table>
| |
| <table>
| |
| <tr valign="top">
| |
| <td width=10>[[image:DotPoint.JPG|10px|link=]]</td>
| |
| <td>If several objects have been selected then the last selected object, the one with the '''Context Icon''', will be the centre of all rotations.</td>
| |
| </tr>
| |
| <tr valign="top">
| |
| <td width=10>[[image:DotPoint.JPG|10px|link=]]</td>
| |
| <td>Not all objects will allow rotations. For example, '''SpeedTree''' objects can only be rotated using the <span style="font-weight: 700; font-size: 15px; color: white; background-color: black;"> y: </span> value (<span style="font-weight: 700; font-size: 15px; color: white; background-color: black;"> r </span> and <span style="font-weight: 700; font-size: 15px; color: white; background-color: black;"> p </span> entries will be ignored) while '''Spline''' objects cannot be rotated at all</td>
| |
| </tr>
| |
| </table>
| |
| </td>
| |
| </tr>
| |
| </table>
| |
| </td>
| |
| </tr>
| |
| </table>
| |
| <br>
| |
| <table bgcolor=#000000 width=690 cellpadding=2>
| |
| <tr valign="top">
| |
| <td>
| |
| <table bgcolor=#ffffe0 width=686 cellpadding=2>
| |
| <tr valign="top">
| |
| <td width=25>[[image:PencilTips.PNG|link=]]</td><td>On the right of each box is a pair of '''Up/Down''' arrow controls. <span style="font-weight: 700; font-size: 15px; background-color: lightcyan;">Left Click and Drag</span> up or down on these to adjust the rotation angle in increments of 1°.</td>
| |
| </tr>
| |
| </table>
| |
| </td>
| |
| </tr>
| |
| </table>
| |
| </td>
| |
| </tr>
| |
| </table>
| |
| <br>
| |
| <table bgcolor=#000000 width=1000 cellpadding=2>
| |
| <tr valign="top">
| |
| <td>
| |
| <table bgcolor=#ffffb0 width=996 cellpadding=2>
| |
| <tr valign="top">
| |
| <td width=25>[[image:NotePad.PNG|link=]]</td>
| |
| <td><span style="font-size: 17px; font-weight: 700;">Notes:</span><br>
| |
| ----
| |
| The rotation data and controls are defined in the following ways:-<br>
| |
| <table width=970>
| |
| <tr valign="top">
| |
| <td width=820>
| |
| <table>
| |
| <tr valign="top">
| |
| <td width=20><span style="font-weight: 700; font-size: 17px; color: white; background-color: black;"> r: </span></td>
| |
| <td>'''ALWAYS''' rotates in the '''vertical plane''' around the <span style="font-weight: 700; text-decoration: underline;">selected objects</span> '''Y''' axis (which was defined when it was created).<br>
| |
| This is the same as the <span style="font-weight: 700; font-size: 15px; color: white; background-color: red;"> Red </span> '''Rotational Anchor''' in the '''Fine Adjustment Tool'''</td>
| |
| </tr>
| |
| <tr valign="top">
| |
| <td><span style="font-weight: 700; font-size: 17px; color: white; background-color: black;"> p: </span></td>
| |
| <td>'''ALWAYS''' rotates in the '''vertical plane''' around the <span style="font-weight: 700; text-decoration: underline;">selected objects</span> '''Y''' axis '''PLUS''' '''90°'''.<br>
| |
| This is the same as the <span style="font-weight: 700; font-size: 15px; color: white; background-color: green;"> Green </span> '''Rotational Anchor''' in the '''Fine Adjustment Tool'''</td>
| |
| </tr>
| |
| <tr valign="top">
| |
| <td><span style="font-weight: 700; font-size: 17px; color: white; background-color: black;"> y: </span></td>
| |
| <td>'''ALWAYS''' rotates in the '''horizontal plane''' around the <span style="font-weight: 700; text-decoration: underline;">compass</span> '''Z''' or <span style="font-weight: 700; font-size: 15px;">Vertical</span> axis regardless of how the object has been rolled or pitched.<br>
| |
| This is similar to but <span style="font-weight: 700; text-decoration: underline;">NOT exactly the same</span> as the <span style="font-weight: 700; font-size: 15px; color: white; background-color: blue;"> Blue </span> '''Rotational Anchor''' in the '''Fine Adjustment Tool'''. The difference will become obvious if the object has had a '''roll''' or '''pitch''' rotation applied before the '''yaw''' rotation</td>
| |
| </tr>
| |
| </table>
| |
| </td>
| |
| <td width=150>[[image:FineAdjust3DFrameSmall_S20.png|link=]]</td>
| |
| </tr>
| |
| <tr valign="top">
| |
| <td>
| |
| <table>
| |
| <tr>
| |
| <td width=170 align="right"><span style="font-weight: 700; font-size: 15px;"><span style="color: white; background-color: black;"> Rot: </span> <span style="color: white; background-color: black;"> y: </span> = </span></td>
| |
| <td width=200><span style="font-weight: 700; font-size: 15px;">0°</span> '''East'''</td>
| |
| <td width=200><span style="font-weight: 700; font-size: 15px;">90°</span> '''North'''</td>
| |
| <td width=200><span style="font-weight: 700; font-size: 15px;">180°</span> '''West'''</td>
| |
| <td width=200><span style="font-weight: 700; font-size: 15px;">270°</span> '''South'''</td>
| |
| </tr>
| |
| </table>
| |
| </td>
| |
| </tr>
| |
| </table>
| |
| </td>
| |
| </tr>
| |
| <tr valign="top">
| |
| <td colspan=2>
| |
| <table>
| |
| <tr valign="top">
| |
| <td align="center"><span style="font-weight: 700; font-size: 15px;">Original</span><br>[[image:RotationAxis_S20.png|link=]]</td>
| |
| <td align="center"><span style="font-weight: 700; font-size: 15px;">Roll: <span style="color: white; background-color: black;"> r: = 45 </span></span><br>[[image:RotationAxisRoll_S20.png|link=]]</td>
| |
| <td align="center"><span style="font-weight: 700; font-size: 15px;">Pitch: <span style="color: white; background-color: black;"> p: = 45 </span></span><br>[[image:RotationAxisPitch_S20.png|link=]]</td>
| |
| <td align="center"><span style="font-weight: 700; font-size: 15px;">Yaw: <span style="color: white; background-color: black;"> y: = 45 </span></span><br>[[image:RotationAxisYaw_S20.png|link=]]</td>
| |
| </tr>
| |
| <tr valign="top">
| |
| <td> </td>
| |
| <td colspan=3 align="center">All rotations shown are 45° in the <span style="font-weight: 700; font-size: 15px;">+</span> ('''anticlockwise''') direction</td>
| |
| </tr>
| |
| </table>
| |
| </td>
| |
| </tr>
| |
| <tr valign="top">
| |
| <td> </td>
| |
| <td>
| |
| <table>
| |
| <tr valign="top">
| |
| <td colspan=2>
| |
| ----
| |
| </td>
| |
| </tr>
| |
| <tr valign="top">
| |
| <td>[[image:DotPoint.JPG|10px|link=]]</td>
| |
| <td>Some objects (for example: '''SpeedTrees''') will '''NOT''' allow <span style="font-weight: 700; font-size: 15px;">Roll</span> or <span style="font-weight: 700; font-size: 15px;">Pitch</span> rotations</td>
| |
| </tr>
| |
| <tr valign="top">
| |
| <td>[[image:DotPoint.JPG|10px|link=]]</td>
| |
| <td>all angles are measured in degrees</td>
| |
| </tr>
| |
| <tr valign="top">
| |
| <td>[[image:DotPoint.JPG|10px|link=]]</td>
| |
| <td><span style="font-weight: 700; font-size: 15px;"> + </span> positive angles are '''anticlockwise''' when viewed facing the rotation axis direction</td>
| |
| </tr>
| |
| <tr valign="top">
| |
| <td>[[image:DotPoint.JPG|10px|link=]]</td>
| |
| <td><span style="font-weight: 700; font-size: 15px;"> - </span> negative angles are '''clockwise''' when viewed facing the rotation axis direction</td>
| |
| </tr>
| |
| <tr valign="top">
| |
| <td>[[image:DotPoint.JPG|10px|link=]]</td>
| |
| <td>angles greater than 360° can be entered but will give the same result as the angle '''minus''' 360°. For example: 450° is exactly the same angle as 90° (450°-360°=90°)</td>
| |
| </tr>
| |
| <tr valign="top">
| |
| <td>[[image:DotPoint.JPG|10px|link=]]</td>
| |
| <td>clockwise and anti-clockwise angles are complementary. For example: entering -270° (clockwise) will give the same angle as entering +90° (anticlockwise)</td>
| |
| </tr>
| |
| </table>
| |
| </td>
| |
| </tr>
| |
| </table>
| |
| </td>
| |
| </tr>
| |
| </table>
| |
| <br>
| |
| <table width=1000> <!-- BEGIN Section Nav Buttons -->
| |
| <tr valign="top">
| |
| <td width=629><span id="skip Layer Info and Controls"></span>
| |
| =='''Layer Info and Controls'''==
| |
| </td>
| |
| <td width=50>[[image:SkipDown.png|link=#skip Assigning Objects to a Different Layer|Skip Down]]</td>
| |
| <td width=50>[[image:SkipUp.png|link=#skip Rotation Info and Controls|Skip Up]]</td>
| |
| <td width=46> </td> <!-- for Top -->
| |
| <td width=75>[[image:HeadingUp.png|link=#stepInfo|alt=Heading|To Heading]]</td>
| |
| <td width=75> </td> <!-- for Next Down -->
| |
| <td width=75> </td> <!-- for Bottom -->
| |
| </tr>
| |
| </table> <!-- END Section Nav Buttons -->
| |
|
| |
| <table width=1000>
| |
| <tr valign="top">
| |
| <td>You must have an object (or objects) selected for the layer data to be shown and edited. Open up the layer data by a <span style="font-weight: 700; font-size: 15px; background-color: lightcyan;">Left Click</span> on its '''Layer:''' arrowhead icon.</td>
| |
| </tr>
| |
| </table>
| |
| <br>
| |
| <table bgcolor=#000000 cellpadding=2>
| |
| <tr valign="top">
| |
| <td>
| |
| <table bgcolor=#ffffb0 cellpadding=2>
| |
| <tr valign="top">
| |
| <td width=25>[[image:NotePad.PNG|link=]]</td>
| |
| <td><span style="font-size: 17px; font-weight: 700;">Notes:</span><br>
| |
| ----
| |
| </td>
| |
| </tr>
| |
| <tr valign="top">
| |
| <td>[[image:DotPoint.JPG|10px|link=]]</td>
| |
| <td>the <span style="font-weight: 700; font-size: 15px; color: white; background-color: #797979;"> Info Palette </span> is best used to show and edit the '''layer''' and '''binding layer''' assignments of individual selected objects</td>
| |
| </tr>
| |
| <tr valign="top">
| |
| <td width=10>[[image:DotPoint.JPG|10px|link=]]</td>
| |
| <td>operations such as '''creating, deleting, merging, renaming, moving''' and '''hiding layers''' are performed using the <span style="font-weight: 700; font-size: 15px; color: white; background-color: #797979;"> Layers Palette </span></td>
| |
| </tr>
| |
| <tr valign="top">
| |
| <td>[[image:DotPoint.JPG|10px|link=]]</td>
| |
| <td>layers can be '''Locked''' and '''Unlocked''' using the <span style="font-weight: 700; font-size: 15px; color: white; background-color: #797979;"> Info Palette </span> but the <span style="font-weight: 700; font-size: 15px; color: white; background-color: #797979;"> Layers Palette </span> is often the best choice for these tasks</td>
| |
| </tr>
| |
| </table>
| |
| </td>
| |
| </tr>
| |
| </table>
| |
| <br>
| |
| <table width=1000>
| |
| <tr valign="top">
| |
| <td colspan=2><span style="font-weight: 700; font-size: 15px;">For a single selected object</span></td>
| |
| </tr>
| |
| <tr valign="top">
| |
| <td width=215>[[image:InfoPaletteLayer_S20.png|link=]]</td>
| |
| <td>This will show the:-
| |
| <table width=785>
| |
| <tr valign="top">
| |
| <td width=10>[[image:DotPoint.JPG|10px|link=]]</td>
| |
| <td>current layer assigned to the selected object</td>
| |
| </tr>
| |
| <tr valign="top">
| |
| <td>[[image:DotPoint.JPG|10px|link=]]</td>
| |
| <td>its assigned '''Binding Layer''' (if any)</td>
| |
| </tr>
| |
| <tr valign="top">
| |
| <td>[[image:DotPoint.JPG|10px|link=]]</td>
| |
| <td>the '''Locked''' or '''Unlocked''' state of the assigned layer</td>
| |
| </tr>
| |
| <tr valign="top">
| |
| <td> </td>
| |
| <td>[[image:InfoPaletteLockedLayerBtn_S20.png|link=]] Layer is currently '''Unlocked'''. Click this button to '''Lock''' the layer</td>
| |
| </tr>
| |
| <tr valign="top">
| |
| <td> </td>
| |
| <td>[[image:InfoPaletteUnlockedLayerBtn_S20.png|link=]] Layer is currently '''Locked'''. Click this button to '''Unlock''' the layer</td>
| |
| </tr>
| |
| <tr valign="top">
| |
| <td> </td>
| |
| <td>Using this button will also change the '''Locked''' or '''Unlocked''' padlock icon shown next to the layer name in the <span style="font-weight: 700; font-size: 15px; color: white; background-color: #797979;"> Layers Palette </span><br>
| |
| <table width=780>
| |
| <tr valign="top">
| |
| <td>[[image:AssetsPaletteLockedUnlockedLayers_S20.png|link=]]</td>
| |
| <td>
| |
| <table bgcolor=#000000 cellpadding=2>
| |
| <tr valign="top">
| |
| <td>
| |
| <table bgcolor=#ffffb0 cellpadding=2>
| |
| <tr valign="top">
| |
| <td width=25>[[image:NotePad.PNG|link=]]</td>
| |
| <td><span style="font-size: 17px; font-weight: 700;">Notes:</span><br>
| |
| ----
| |
| <table>
| |
| <tr valign="top">
| |
| <td width=10>[[image:DotPoint.JPG|10px|link=]]</td>
| |
| <td>Objects in a '''Locked Layer''' cannot be deleted or moved</td>
| |
| </tr>
| |
| <tr valign="top">
| |
| <td>[[image:DotPoint.JPG|10px|link=]]</td>
| |
| <td>'''Locked Layers''' can be deleted, moved and merged with other layers</td>
| |
| </tr>
| |
| </table>
| |
| </td>
| |
| </tr>
| |
| </table>
| |
| </td>
| |
| </tr>
| |
| </table>
| |
| </td>
| |
| </tr>
| |
| </table>
| |
| </td>
| |
| </tr>
| |
| </table>
| |
| </td>
| |
| </tr>
| |
| </table>
| |
| <br>
| |
| <table width=1000>
| |
| <tr valign="top">
| |
| <td colspan=2><span style="font-weight: 700; font-size: 15px;">For multiple selected objects</span></td>
| |
| </tr>
| |
| <tr valign="top">
| |
| <td width=235>[[image:InfoPaletteLayersMulti_S20.png|link=]]</td>
| |
| <td>
| |
| <table>
| |
| <tr valign="top">
| |
| <td width=10>[[image:DotPoint.JPG|10px|link=]]</td>
| |
| <td width=755>If multiple objects '''all from the same layer''' have been selected then that layer name will be shown in the '''Layer''' box</td>
| |
| </tr>
| |
| <tr valign="top">
| |
| <td>[[image:DotPoint.JPG|10px|link=]]</td>
| |
| <td width=755>If multiple objects that are '''not all''' from the '''same layer''' have been selected then no layer name will be shown in the '''Layer''' box. Instead both the '''Layer''' and the '''Binding''' box will be left "blank" as shown in the image on the left</td>
| |
| </tr>
| |
| </table>
| |
| </td>
| |
| </tr>
| |
| </table>
| |
| <br>
| |
| <table width=1000> <!-- BEGIN Section Nav Buttons -->
| |
| <tr valign="top">
| |
| <td width=629><span id="skip Assigning Objects to a Different Layer"></span>
| |
| =='''Assigning Objects to a Different Layer'''==
| |
| </td>
| |
| <td width=50>[[image:SkipDown.png|link=#skip Assigning Objects to a Binding Layer|Skip Down]]</td>
| |
| <td width=50>[[image:SkipUp.png|link=#skip Layer Info and Controls|Skip Up]]</td>
| |
| <td width=46> </td> <!-- for Top -->
| |
| <td width=75>[[image:HeadingUp.png|link=#stepInfo|alt=Heading|To Heading]]</td>
| |
| <td width=75> </td> <!-- for Next Down -->
| |
| <td width=75> </td> <!-- for Bottom -->
| |
| </tr>
| |
| </table> <!-- END Section Nav Buttons -->
| |
|
| |
| <table width=1000 bgcolor="lightcyan" cellpadding=2>
| |
| <tr valign="top">
| |
| <td width=10>[[image:BlueDot10x10.png|link=]]</td>
| |
| <td>The '''Active Layer''' is the layer used by the '''Placement Tool''' when objects are added to your '''Trainz World'''.</td>
| |
| </tr>
| |
| </table>
| |
| <br>
| |
| A selected object or group of selected objects can be assigned to a different layer. If multiple objects have been selected then they '''do not''' have to all be in the same layer.<br>
| |
|
| |
| <table width=1000>
| |
| <tr valign="top">
| |
| <td width=265>[[image:InfoPaletteLayerDropBoxList_S20.png|link=]]</td>
| |
| <td width=735>
| |
| <table bgcolor=#000000 width=735 cellpadding=2>
| |
| <tr valign="top">
| |
| <td>
| |
| <table bgcolor=#ffffff width=731 cellpadding=2>
| |
| <tr valign="top">
| |
| <td colspan=2><span style="font-weight: 700; font-size: 15px;">Steps:</span> To change the assigned layer of an object or group of objects:-</td>
| |
| </tr>
| |
| <tr valign="top">
| |
| <td width=20>[[image:DotPoint1.JPG|link=]]</td>
| |
| <td><span style="font-weight: 700; font-size: 15px; background-color: lightcyan;"> Left Click </span> on the '''Layer''' drop down box. The layer containing the object (for a '''single selected object only''') will be shown with a [[image:BulletTick.png|link=]] in front of its name</td>
| |
| </tr>
| |
| <tr valign="top">
| |
| <td>[[image:DotPoint2.JPG|link=]]</td>
| |
| <td>Select the destination layer name from the Drop Down Menu. '''See Warning''' below</td>
| |
| </tr>
| |
| <tr valign="top">
| |
| <td colspan=2>The layer reassignment will start the instant the destination layer is selected</td>
| |
| </tr>
| |
| <tr valign="top">
| |
| <td>[[image:DotPoint3.JPG|link=]]</td>
| |
| <td>If you see a '''Debugging Window''' on the screen as the task is processed, it will inform you when the task has been completed. You can then close the window</td>
| |
| </tr>
| |
| </table>
| |
| </td>
| |
| </tr>
| |
| </table>
| |
| <br>
| |
| <table bgcolor=#000000 cellpadding=2>
| |
| <tr valign="top">
| |
| <td>
| |
| <table bgcolor=#ffffb0 cellpadding=2>
| |
| <tr valign="top">
| |
| <td width=25>[[image:NotePad.PNG|link=]]</td>
| |
| <td>Once a target layer has been selected then the <span style="font-weight: 700; font-size: 15px; color: white; background-color: black;"> Select Layer </span> button, which sets the '''Active Layer''', will become active '''IF''' the target layer is not the '''Active Layer'''. A <span style="font-weight: 700; font-size: 15px; background-color: lightcyan;"> Left Click </span> on this button will set it as the '''Active Layer'''.</td>
| |
| </tr>
| |
| </table>
| |
| </td>
| |
| </tr>
| |
| </table>
| |
| </td>
| |
| </tr>
| |
| </table>
| |
| <br>
| |
| <table bgcolor=#000000 cellpadding=2>
| |
| <tr valign="top">
| |
| <td>
| |
| <table bgcolor=#ffffe0 cellpadding=2>
| |
| <tr valign="top">
| |
| <td width=25>[[image:PencilTips.PNG|link=]]</td><td>You can also set the '''Active Layer''' by selecting its name from the list in the <span style="font-weight: 700; font-size: 15px; color: white; background-color: #797979;"> Layers Palette </span>.</td>
| |
| </tr>
| |
| </table>
| |
| </td>
| |
| </tr>
| |
| </table>
| |
| <br>
| |
| <table width=1000 bgcolor=#ff0000 cellpadding=2>
| |
| <tr valign="top">
| |
| <td>
| |
| <table width=996 bgcolor=#fcbcbc cellpadding=2>
| |
| <tr valign="top">
| |
| <td>[[image:Stop.PNG|link=]]</td>
| |
| <td><span style="font-size: 15px; font-weight: 700;">WARNING:</span>
| |
| <table>
| |
| <tr valign="top">
| |
| <td width=10>[[image:DotPoint.JPG|10px|link=]]</td>
| |
| <td>Setting a layer for an object will move that object to that layer</td>
| |
| </tr>
| |
| <tr valign="top">
| |
| <td width=10>[[image:DotPoint.JPG|10px|link=]]</td>
| |
| <td>Setting a layer for multiple objects that are in different layers will move '''ALL''' those objects to that layer</td>
| |
| </tr>
| |
| <tr valign="top">
| |
| <td>[[image:DotPoint.JPG|10px|link=]]</td>
| |
| <td>If objects are moved from one layer group to another (such as from the '''Route Layers''' to the '''Session Layers''') then it will change where those objects are saved (in the '''Route''' or in the '''Session''')</td>
| |
| </tr>
| |
| </table>
| |
| </td>
| |
| </tr>
| |
| </table>
| |
| </td>
| |
| </tr>
| |
| </table>
| |
| <br>
| |
| <table bgcolor=#000000 width=1000 cellpadding=2>
| |
| <tr valign="top">
| |
| <td>
| |
| <table bgcolor=#ffffff width=996 cellpadding=2>
| |
| <tr>
| |
| <td colspan=2><span style="font-weight: 700; font-size: 15px;">Options:</span> To set current layer to the '''Active Layer''':-</td>
| |
| </tr>
| |
| <tr valign="top">
| |
| <td colspan=2>[[image:Ablue.png|link=]] '''If the <span style="font-weight: 700; font-size: 15px; color: white; background-color: black;"> Select Layer </span> button is greyed out'''</td>
| |
| </tr>
| |
| <tr valign="top">
| |
| <td>[[image:InfoPaletteLayerSelectBtnOff_S20.png|link=]]</td>
| |
| <td>then the selected object is now assigned to the current '''Active Layer''' so there is no need to use this option</td>
| |
| </tr>
| |
| <tr valign="top">
| |
| <td colspan=2>[[image:Bblue.png|link=]] '''If it is NOT greyed out'''</td>
| |
| </tr>
| |
| <tr valign="top">
| |
| <td>[[image:InfoPaletteLayerSelectBtnOn_S20.png|link=]]</td>
| |
| <td>then the selected object is now assigned to a layer that is '''not''' the current '''Active Layer'''. <span style="font-weight: 700; font-size: 15px; background-color: lightcyan;"> Left Click </span> on the <span style="font-weight: 700; font-size: 15px; color: white; background-color: black;"> Select Layer </span> button to switch the '''Active Layer''' to the same layer as the object
| |
| </td>
| |
| </tr>
| |
| </table>
| |
| </td>
| |
| </tr>
| |
| </table>
| |
| <br>
| |
| <table width=1000> <!-- BEGIN Section Nav Buttons -->
| |
| <tr valign="top">
| |
| <td width=629><span id="skip Assigning Objects to a Binding Layer"></span>
| |
| =='''Assigning Objects to a Binding Layer'''==
| |
| </td>
| |
| <td width=50> </td>
| |
| <td width=50>[[image:SkipUp.png|link=#skip Assigning Objects to a Different Layer|Skip Up]]</td>
| |
| <td width=46> </td> <!-- for Top -->
| |
| <td width=75>[[image:HeadingUp.png|link=#stepInfo|alt=Heading|To Heading]]</td>
| |
| <td width=75> </td> <!-- for Next Down -->
| |
| <td width=75>[[image:BackToBottom.png|link=#bottom|alt=Bottom|Bottom]]</td>
| |
| </tr>
| |
| </table> <!-- END Section Nav Buttons -->
| |
|
| |
| <table width=1000 bgcolor="lightcyan" cellpadding=2>
| |
| <tr valign="top">
| |
| <td width=10>[[image:BlueDot10x10.png|link=]]</td>
| |
| <td>The '''Binding Layer''', or '''Bound Layer''' as it is also called, is a tool used in the development of a route or session. It allows you to temporarily assign an object to a second layer while it is still in its original layer. The object will then take on the properties ('''Locked''' or '''Unlocked''', '''Hidden''' or '''Visible''') of both layers.</td>
| |
| </tr>
| |
| </table>
| |
|
| |
| <table width=1000>
| |
| <tr>
| |
| <td>
| |
| <table width=454 bgcolor=#000000 cellpadding=2>
| |
| <tr valign="top">
| |
| <td>
| |
| <table width=450 bgcolor=#ffffff cellpadding=2>
| |
| <tr valign="top">
| |
| <td width=150 align="center">'''Assigned<br>Layer'''</td>
| |
| <td rowspan=9 bgcolor="black" width=1></td> <!-- Row count -->
| |
| <td width=150 align="center">'''Binding<br>Layer'''</td>
| |
| <td rowspan=9 bgcolor="black" width=1></td> <!-- Row count -->
| |
| <td width=150 align="center">'''Object<br>Status'''</td>
| |
| </tr>
| |
| <tr>
| |
| <td bgcolor="black" colspan=5></td>
| |
| </tr>
| |
| <tr valign="top">
| |
| <td>[[image:LayerUnLocked_S20.png|link=]] '''Unlocked'''</td>
| |
| <td>[[image:LayerUnLocked_S20.png|link=]] or '''None'''</td>
| |
| <td>[[image:LayerUnLocked_S20.png|link=]] '''Unlocked'''</td>
| |
| </tr>
| |
| <tr valign="top">
| |
| <td bgcolor=#ffffb0>[[image:LayerLocked_S20.png|link=]] '''LOCKED'''</td>
| |
| <td>[[image:LayerLocked_S20.png|link=]] or [[image:LayerUnLocked_S20.png|link=]] or '''None'''</td>
| |
| <td bgcolor=#ffffb0>[[image:LayerLocked_S20.png|link=]] '''LOCKED'''</td>
| |
| </tr>
| |
| <tr valign="top">
| |
| <td>[[image:LayerUnLocked_S20.png|link=]] '''Unlocked'''</td>
| |
| <td bgcolor=#ffffb0>[[image:LayerLocked_S20.png|link=]] '''LOCKED'''</td>
| |
| <td bgcolor=#ffffb0>[[image:LayerLocked_S20.png|link=]] '''LOCKED'''</td>
| |
| </tr>
| |
| <tr>
| |
| <td bgcolor="black" colspan=5></td>
| |
| </tr>
| |
| <tr valign="top">
| |
| <td>[[image:LayerEyeOpen_S20.png|link=]] '''Visible'''</td>
| |
| <td>[[image:LayerEyeOpen_S20.png|link=]] or '''None'''</td>
| |
| <td>[[image:LayerEyeOpen_S20.png|link=]] '''Visible'''</td>
| |
| </tr>
| |
| <tr valign="top">
| |
| <td bgcolor="lightcyan">[[image:LayerEyeClosed_S20.png|link=]] '''HIDDEN'''</td>
| |
| <td>[[image:LayerEyeOpen_S20.png|link=]] or [[image:LayerEyeClosed_S20.png|link=]] or '''None'''</td>
| |
| <td bgcolor="lightcyan">[[image:LayerEyeClosed_S20.png|link=]] '''HIDDEN'''</td>
| |
| </tr>
| |
| <tr valign="top">
| |
| <td>[[image:LayerEyeOpen_S20.png|link=]] '''Visible'''</td>
| |
| <td bgcolor="lightcyan">[[image:LayerEyeClosed_S20.png|link=]] '''HIDDEN'''</td>
| |
| <td bgcolor="lightcyan">[[image:LayerEyeClosed_S20.png|link=]] '''HIDDEN'''</td>
| |
| </tr>
| |
| </table>
| |
| </td>
| |
| </tr>
| |
| </table>
| |
| </td>
| |
| <td>
| |
| <table width=550>
| |
| <tr valign="top">
| |
| <td colspan=2><span style="font-weight: 700; font-size: 15px;">In Summary:-</span></td>
| |
| </tr>
| |
| <tr valign="top">
| |
| <td width=10>[[image:DotPoint.JPG|10px|link=]]</td>
| |
| <td bgcolor=#ffffb0>If the '''Assigned Layer''' or the '''Binding Layer''' of an object is '''Locked''' then the object will be '''Locked'''</td>
| |
| </tr>
| |
| <tr valign="top">
| |
| <td width=10>[[image:DotPoint.JPG|10px|link=]]</td>
| |
| <td bgcolor="lightcyan">If the '''Assigned Layer''' or the '''Binding Layer''' of an object is '''Hidden''' then the object will be '''Hidden'''</td>
| |
| </tr>
| |
| </table>
| |
| <table bgcolor=#000000 cellpadding=2>
| |
| <tr valign="top">
| |
| <td>
| |
| <table bgcolor=#ffffb0 cellpadding=2>
| |
| <tr valign="top">
| |
| <td width=25>[[image:NotePad.PNG|link=]]</td>
| |
| <td><span style="font-size: 17px; font-weight: 700;">Notes:</span><br>
| |
| ----
| |
| </td>
| |
| </tr>
| |
| <tr valign="top">
| |
| <td>[[image:DotPoint.JPG|10px|link=]]</td>
| |
| <td>Objects in a '''Hidden Layer''' cannot be seen and therefore, cannot be selected, deleted or moved</td>
| |
| </tr>
| |
| <tr valign="top">
| |
| <td>[[image:DotPoint.JPG|10px|link=]]</td>
| |
| <td>The <span style="font-weight: 700; font-size: 15px; color: white; background-color: #797979;"> Layers Palette </span> is the ONLY way to create, delete, name and hide layers</td>
| |
| </tr>
| |
| </table>
| |
| </td>
| |
| </tr>
| |
| </table>
| |
| </td>
| |
| </tr>
| |
| </table>
| |
| <br>
| |
| <table width=1000 bgcolor=#000000 cellpadding=2>
| |
| <tr valign="top">
| |
| <td>
| |
| <table bgcolor=#ffffff cellpadding=2>
| |
| <tr valign="top">
| |
| <td colspan=2>Some examples of using the '''Binding Layer''':-<br>
| |
| <span style="font-weight: 700; font-size: 15px; color: white; background-color: blue;"> Example 1: </span></td>
| |
| </tr>
| |
| <tr valign="top">
| |
| <td width=100>'''The problem:'''</td>
| |
| <td>You need to stop an object from being selected so that you can you move other objects on or around it</td>
| |
| </tr>
| |
| <tr valign="top">
| |
| <td>'''The solution:'''</td>
| |
| <td>Use the <span style="font-weight: 700; font-size: 15px; color: white; background-color: #797979;"> Layers Palette </span> to create a new empty layer and lock it. Set the '''Binding Layer''' of the object to the new locked layer. The object will then be locked so it cannot be selected or moved even though its original layer is unlocked. When the edit has been completed delete the empty locked layer you just created to unlock all its bound objects and remove all their bindings (the objects will not be deleted)
| |
| </td>
| |
| </tr>
| |
| <tr valign="top">
| |
| <td colspan=2><span style="font-weight: 700; font-size: 15px; color: white; background-color: blue;"> Example 2: </span></td>
| |
| </tr>
| |
| <tr valign="top">
| |
| <td>'''The problem:'''</td>
| |
| <td>A group of objects (e.g trees) are blocking access to another object.</td>
| |
| </tr>
| |
| <tr valign="top">
| |
| <td>'''The solution:'''</td>
| |
| <td>Use the <span style="font-weight: 700; font-size: 15px; color: white; background-color: #797979;"> Layers Palette </span> to create a new empty layer and hide it. Set the '''Binding Layer''' of the blocking objects to the new hidden layer. The blocking objects will no longer be visible and cannot be selected even though their original layer is still visible. When the edit has been completed delete the empty hidden layer you just created to make all its bound objects visible and remove all their bindings (the objects will not be deleted)
| |
| </td>
| |
| </tr>
| |
| <tr valign="top">
| |
| <td colspan=2>
| |
| <table bgcolor=#ffffe0 cellpadding=2>
| |
| <tr valign="top">
| |
| <td width=25>[[image:PencilTips.PNG|link=]]</td>
| |
| <td>You can also use the asset filters found in the <span style="font-weight: 700; font-size: 15px; color: white; background-color: #797979;"> Filter Palette </span> and the <span style="font-weight: 700; font-size: 15px; color: white; background-color: #797979;"> Assets Palette </span> to lock or hide specific assets or types of assets from selection when you are working in Surveyor. See the section [[image:PageLink.PNG|link=]] '''[[#Narrowing the Search|Narrowing the Search]]''' for more details</td>
| |
| </tr>
| |
| </table>
| |
| </td>
| |
| </tr>
| |
| </table>
| |
| </td>
| |
| </tr>
| |
| </table>
| |
| <br>
| |
| <table width=1000>
| |
| <tr valign="top">
| |
| <td width=265>[[image:InfoPaletteBindingDropBox_S20.png|link=]]</td>
| |
| <td>
| |
| <table width=735 bgcolor=#000000 cellpadding=2>
| |
| <tr valign="top">
| |
| <td>
| |
| <table width=731 bgcolor=#ffffff cellpadding=2>
| |
| <tr valign="top">
| |
| <td colspan=2><span style="font-weight: 700; font-size: 15px;">Steps:</span> To change the assigned binding layer of an object or group of objects:-</td>
| |
| </tr>
| |
| <tr valign="top">
| |
| <td width=20>[[image:DotPoint1.JPG|link=]]</td>
| |
| <td><span style="font-weight: 700; font-size: 15px; background-color: lightcyan;"> Left Click </span> on the '''Binding''' drop down box. For a '''single selected object only''' the binding layer (which may be '''<none>''') will be shown with a [[image:BulletTick.png|link=]] in front of its name</td>
| |
| </tr>
| |
| <tr valign="top">
| |
| <td>[[image:DotPoint2.JPG|link=]]</td>
| |
| <td>Select the '''Binding''' layer name from the Drop Down Menu. '''Note:''' the objects assigned layer will not appear in the list because an object cannot be bound to its own layer</td>
| |
| </tr>
| |
| <tr valign="top">
| |
| <td colspan=2>The layer reassignment will start the instant the layer is selected</td>
| |
| </tr>
| |
| <tr valign="top">
| |
| <td>[[image:DotPoint3.JPG|link=]]</td>
| |
| <td>If you see a '''Debugging Window''' on the screen as the task is processed, it will inform you when the task has been completed. You can then close the window</td>
| |
| </tr>
| |
| </table>
| |
| </td>
| |
| </tr>
| |
| </table>
| |
| <br>
| |
| <table bgcolor=#000000 cellpadding=2>
| |
| <tr valign="top">
| |
| <td>
| |
| <table bgcolor=#ffffb0 cellpadding=2>
| |
| <tr valign="top">
| |
| <td width=25>[[image:NotePad.PNG|link=]]</td>
| |
| <td>Also see [[image:PageLink.PNG|link=]] '''[[#skip Narrowing the Search|Narrowing the Search]]''' for an alternative method of selecting difficult to access objects.</td>
| |
| </tr>
| |
| </table>
| |
| </td>
| |
| </tr>
| |
| </table>
| |
| </td>
| |
| </tr>
| |
| </table>
| |
| <br>
| |
| <table width=1000>
| |
| <tr valign="top">
| |
| <td colspan=2>As an example, the image below shows what you will see for a single object that has had:-</td>
| |
| </tr>
| |
| <tr valign="top">
| |
| <td width=230>[[image:InfoPaletteLayerSetBindingSet_S20.png|link=]]</td>
| |
| <td>
| |
| <table width=770>
| |
| <tr valign="top">
| |
| <td width=10>[[image:DotPoint.JPG|10px|link=]]</td>
| |
| <td>its assigned layer changed (in the example from "route-layer" to "Station Industries")</td>
| |
| </tr>
| |
| <tr valign="top">
| |
| <td>[[image:DotPoint.JPG|10px|link=]]</td>
| |
| <td>its binding layer set (in the example to "Multi Industries")</td>
| |
| </tr>
| |
| <tr valign="top">
| |
| <td>[[image:DotPoint.JPG|10px|link=]]</td>
| |
| <td>the newly assigned layer is '''Locked''' so you have the option to '''Unlock''' it</td>
| |
| </tr>
| |
| <tr valign="top">
| |
| <td>[[image:DotPoint.JPG|10px|link=]]</td>
| |
| <td>the newly assigned layer is not the '''Active Layer''' so you have the option to '''Select Layer''' and make it the '''Active Layer'''</td>
| |
| </tr>
| |
| </table>
| |
| <br>
| |
| <table cellpadding=2 bgcolor="Aquamarine">
| |
| <tr valign="top">
| |
| <td>[[image:LinkWiki.PNG|link=]]</td>
| |
| <td>
| |
| More information on creating, editing and using '''Layers''' can be found on the '''Trainz Wiki''' at:-<br>
| |
| :'''[[How_to_Use_Layers|How to Use Layers]]'''
| |
| </td>
| |
| </tr>
| |
| </table>
| |
| </td>
| |
| </tr>
| |
| </table>
| |
| <br>
| |
| <table width=1000> <!-- BEGIN Nav Buttons Table -->
| |
| <tr valign="top">
| |
| <td width=629><span id="bottom"></span></td>
| |
| <td width=50> </td>
| |
| <td width=50>[[image:SkipUp.png|link=#skip Assigning Objects to a Binding Layer|Skip Up]]</td>
| |
| <td width=46>[[image:BackToTop.png|link=#top|alt=Top|Top]]</td> | | <td width=46>[[image:BackToTop.png|link=#top|alt=Top|Top]]</td> |
| <td width=75>[[image:NextUp.png|link=#stepInfo|alt=Next Up|Top]]</td> | | <td width=75>[[image:NextUp.png|link=#stepScheduleInfo|alt=Next Up|Next Up]]</td> |
| <td width=75> </td> <!-- for Next Down --> | | <td width=75> </td> |
| <td width=75> </td> <!-- for Bottom --> | | <td width=75> </td> |
| </tr> | | </tr> |
| </table> <!-- END Nav Buttons Table --> | | </table> <!-- END Nav Buttons Table --> |
| | |
| ---- | | ---- |
| ---- | | ---- |
| Line 23,851: |
Line 14,318: |
| <td width=50>[[image:LinkWiki.PNG|link=]]</td> | | <td width=50>[[image:LinkWiki.PNG|link=]]</td> |
| <td> | | <td> |
| <span style="font-size: 17px;">'''Related Links'''</span><br> | | <span style="font-size: 17px;">'''Related Links'''</span> |
| *'''[[How_to_Use_S20_Palettes|How to Use the Surveyor 2.0 Palettes]]'''
| | <table> |
| *'''[https://docs.trainzsimulator.com/ Trainz Simulator Official Documentation]'''
| | <tr valign="top"> |
| | <td>[[image:BlackDot10x10.png|link=]]</td> |
| | <td>'''[[How_to_Use_S20_Tools|How to Use the Surveyor 2.0 Tools]]'''</td> |
| | </tr> |
| | <tr valign="top"> |
| | <td>[[image:BlackDot10x10.png|link=]]</td> |
| | <td>'''[https://docs.trainzsimulator.com/ Trainz Simulator Official Documentation]'''</td> |
| | </tr> |
| | </table> |
| </td> | | </td> |
| </tr> | | </tr> |
| Line 23,861: |
Line 14,336: |
| </table> | | </table> |
| ---- | | ---- |
| This page was created by Trainz user '''<span class="plainlinks">[http://online.ts2009.com/mediaWiki/index.php/User:Pware pware]</span>''' in January 2023 and was last updated as shown below. | | This page was created by Trainz user '''<span class="plainlinks">[http://online.ts2009.com/mediaWiki/index.php/User:Pware pware]</span>''' in February 2023 and was last updated as shown below. |
| ---- | | ---- |
| [[Category:How-to guides]] | | [[Category:How-to guides]] |
 How to Use S20 Tools, that covers the Surveyor 2.0 Tools and the palettes that control how they work.


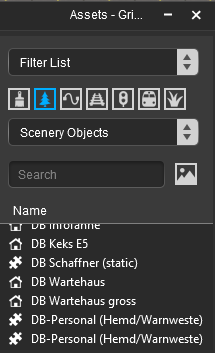
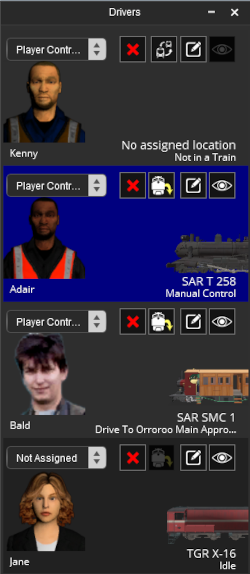
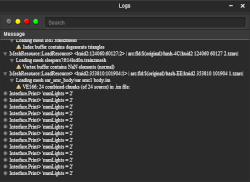
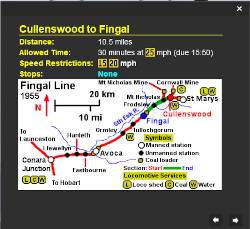
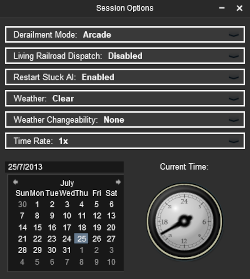


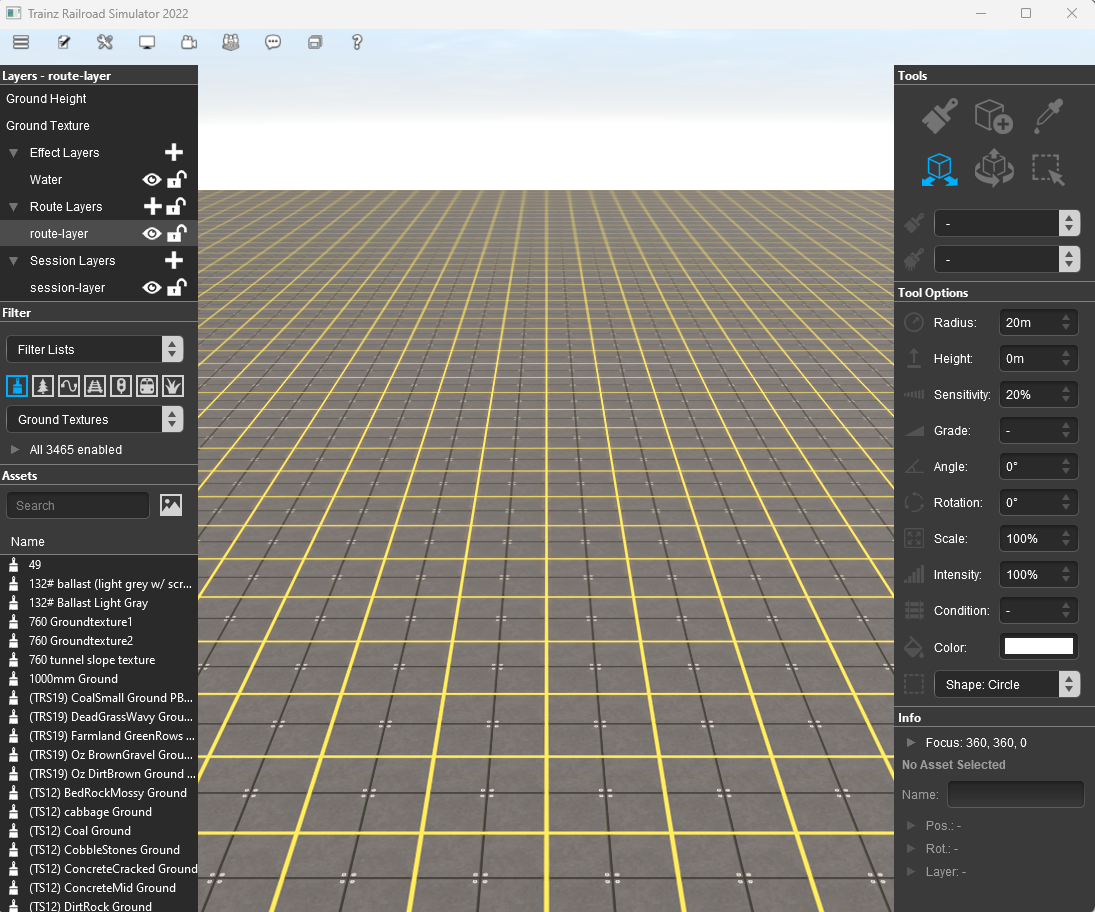

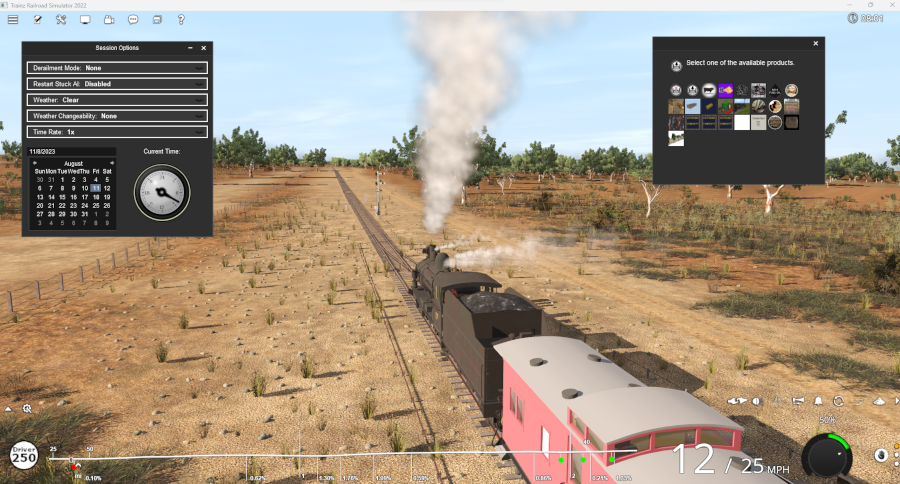


 Window Menu.

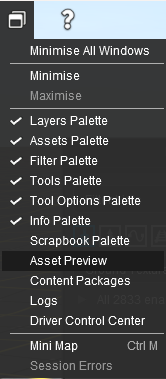
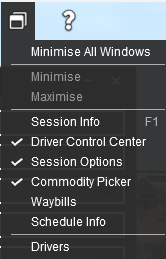


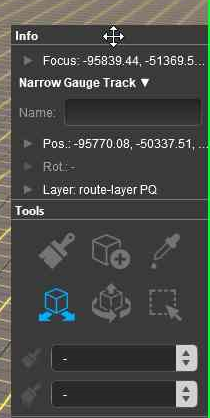
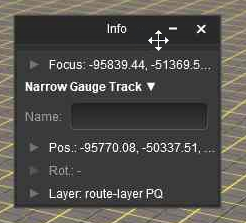
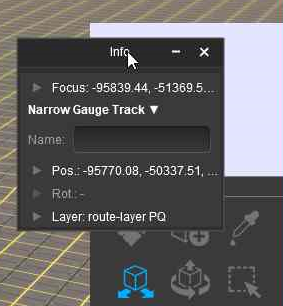
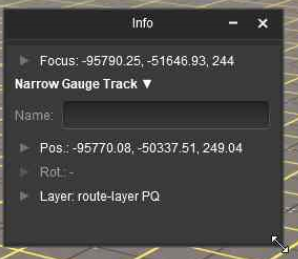

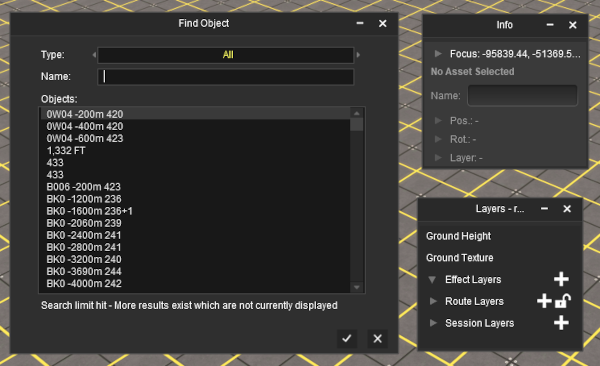
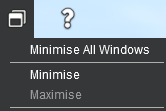
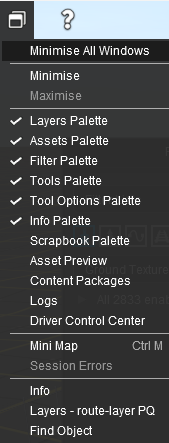


 Free Move Tool and the
 Fine Adjustment Tool)
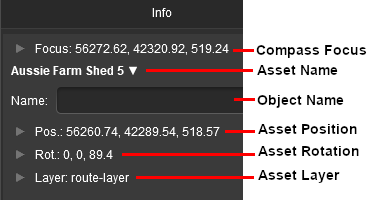
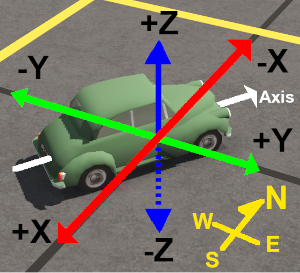

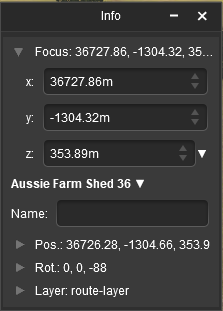

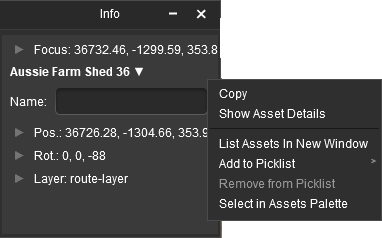
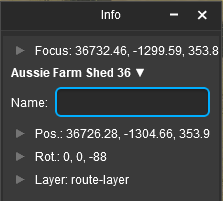

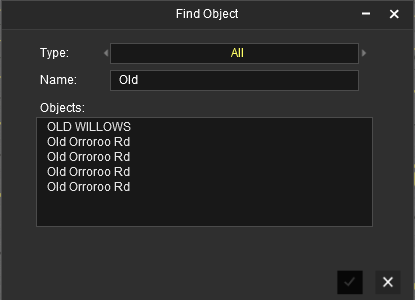

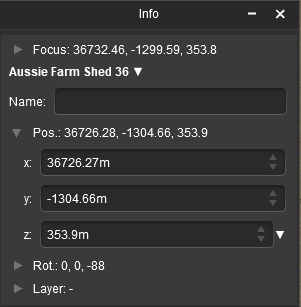

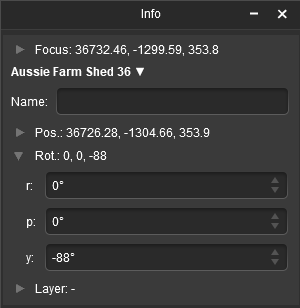
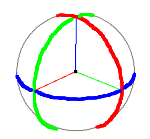
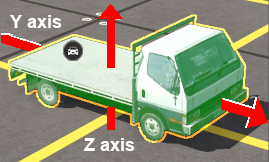
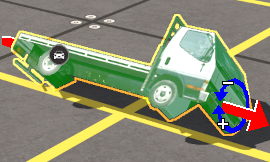
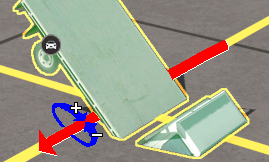
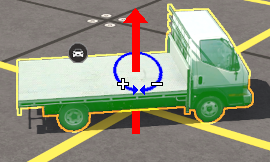
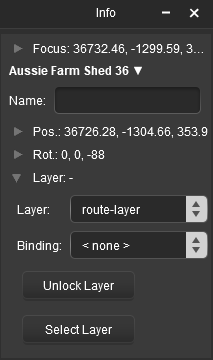

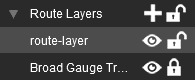
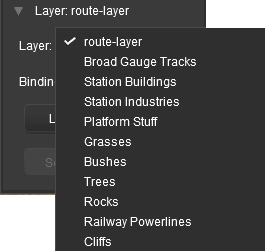



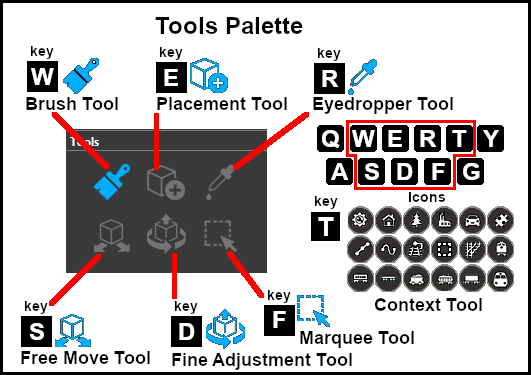

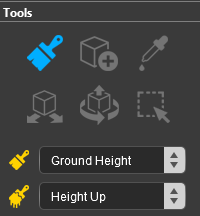
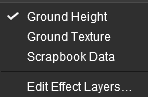

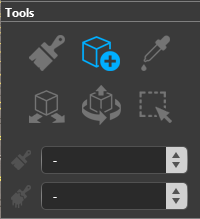


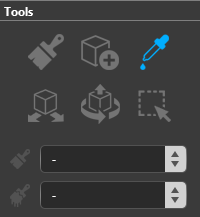

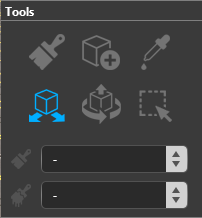

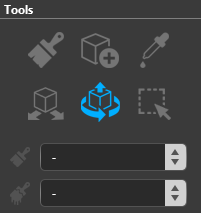
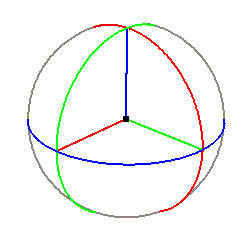
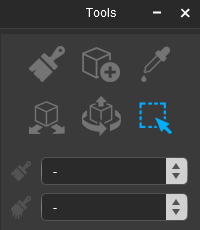
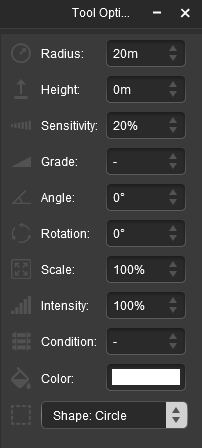
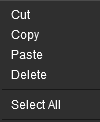
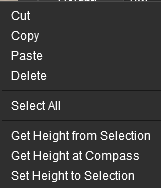
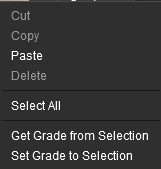
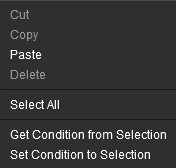

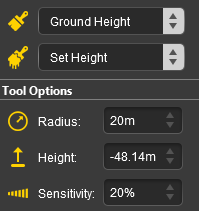

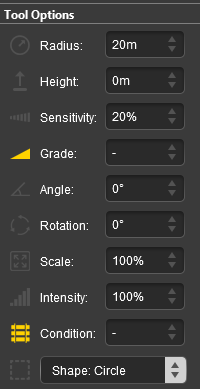




 Docking and Undocking Palettes and
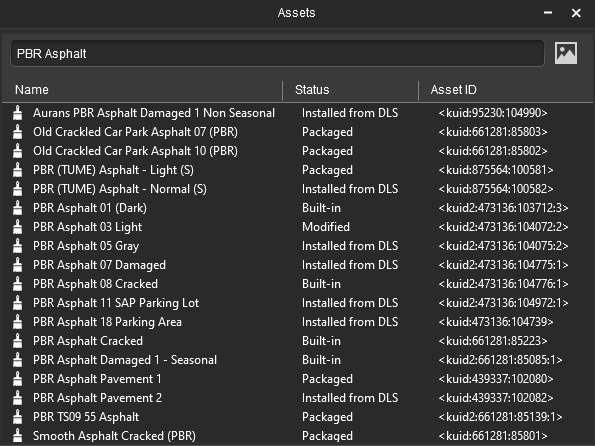


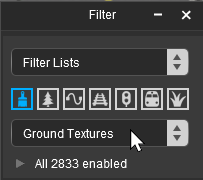
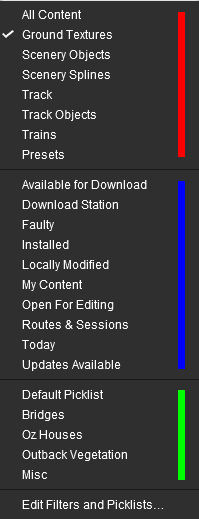


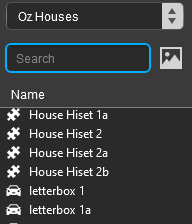


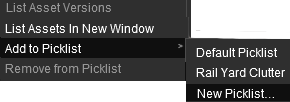
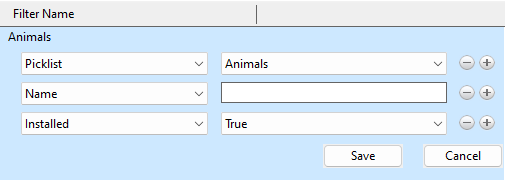
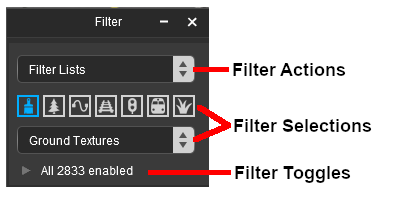
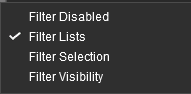


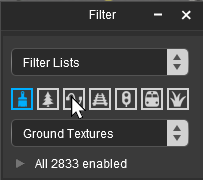


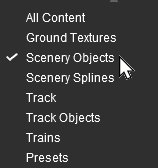

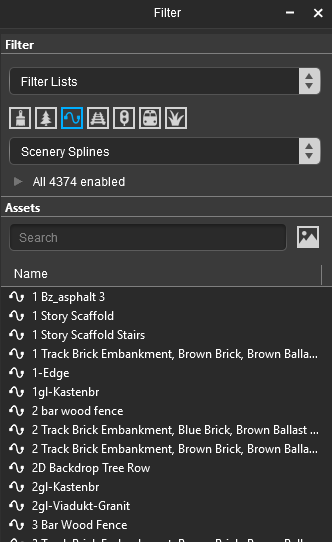
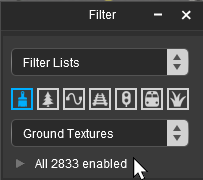
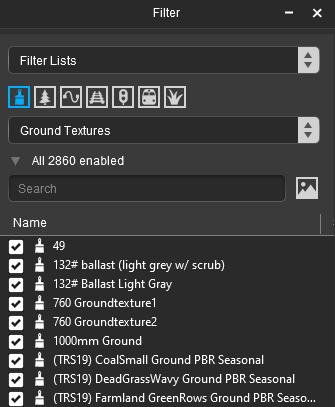





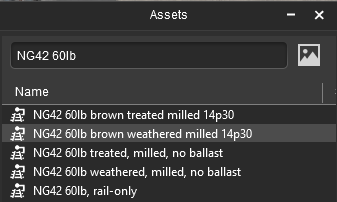
 Marquee Tool to draw or mark out the area.
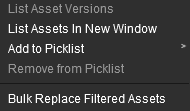
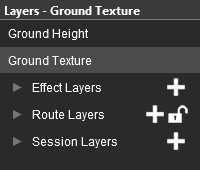
 (unlocked).
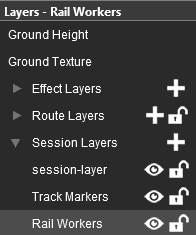
 icon next to its name. Left Click on the icon to add and name a new layer to that group. If you are adding a new Effect Layer then you will also have to identify the type of effect - TurfFX, Clutter, Water or (in Trainz Plus only) Color.
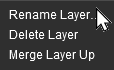
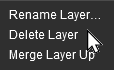

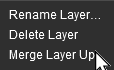
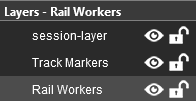
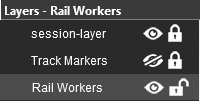
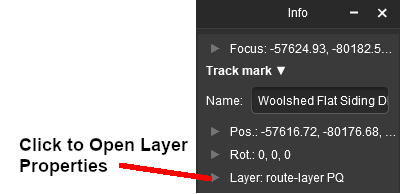
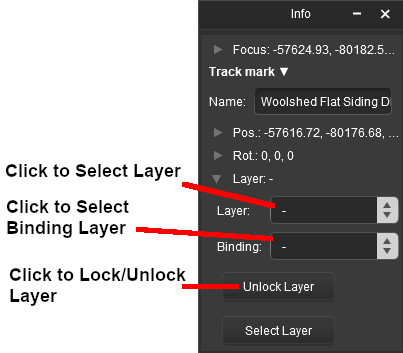
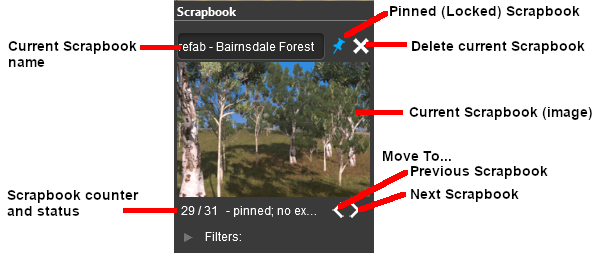


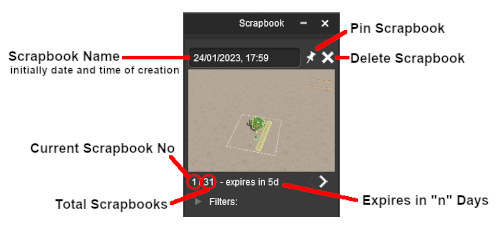
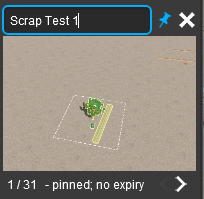

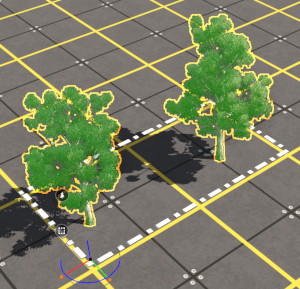
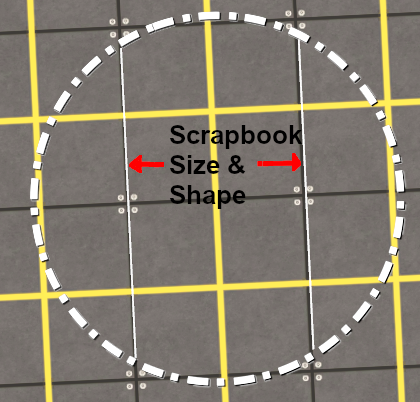
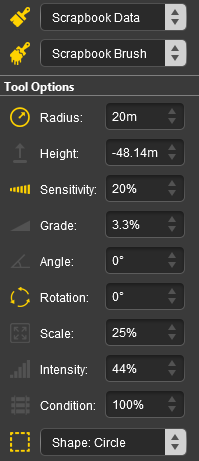
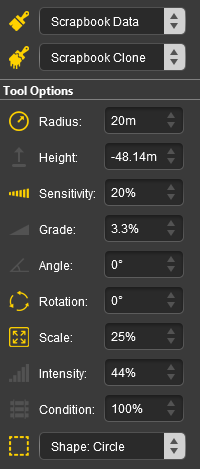
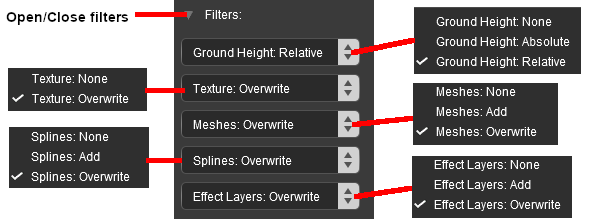










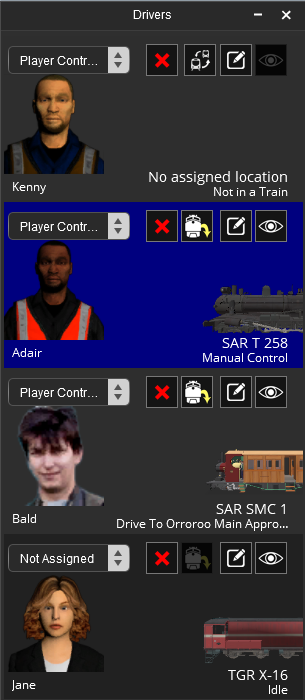

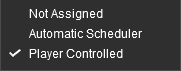


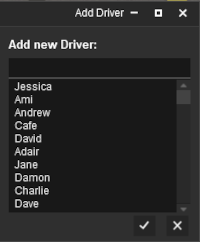
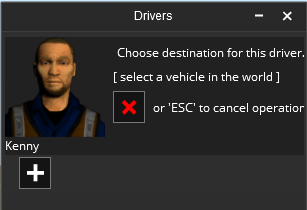
 View Driver Properties Tool, the following Properties window will open
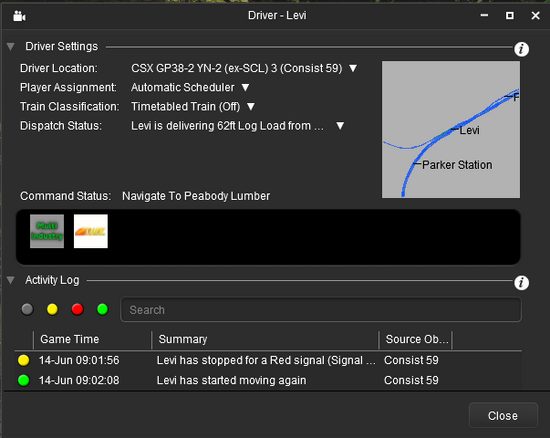
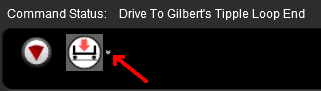
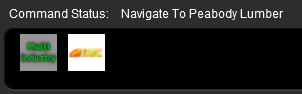

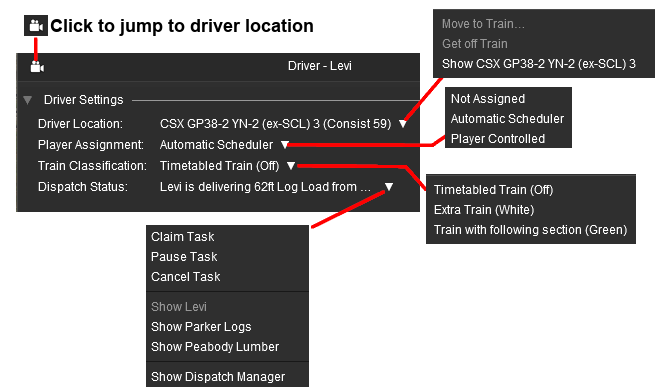




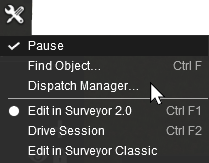
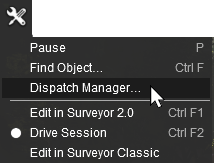
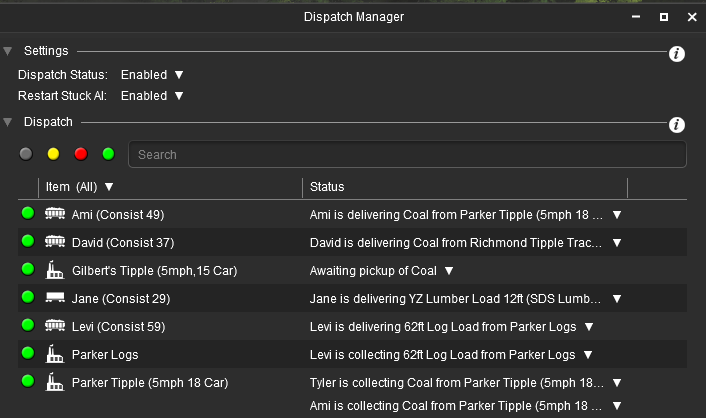
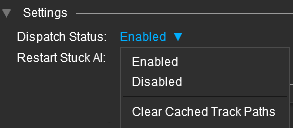
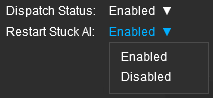
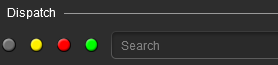


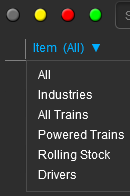
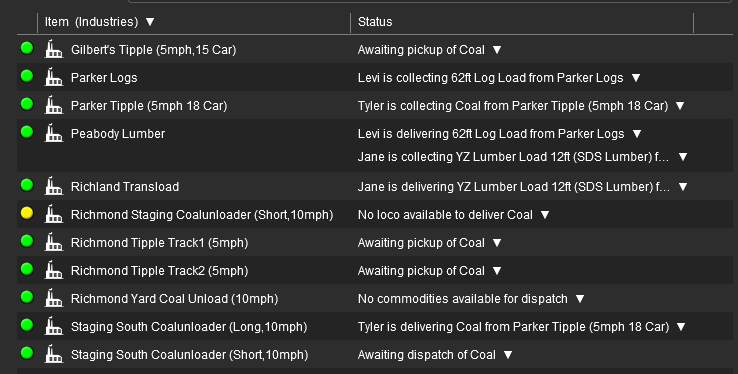
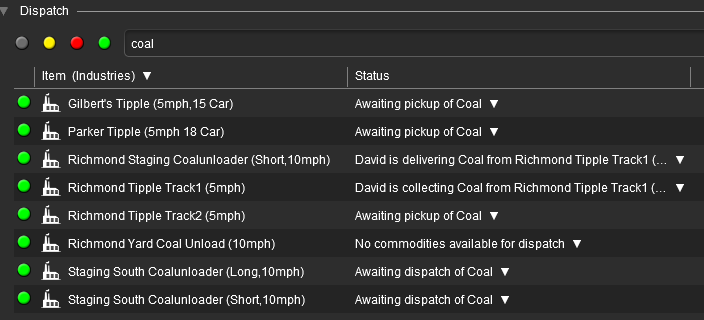

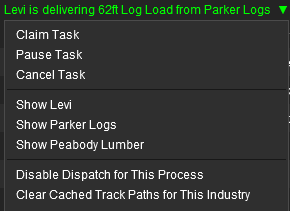
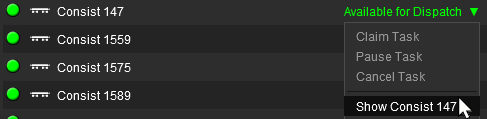


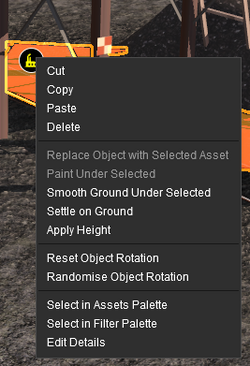





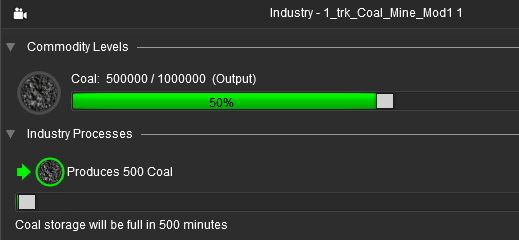
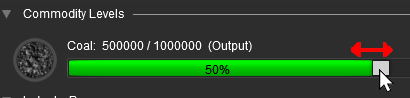
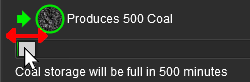
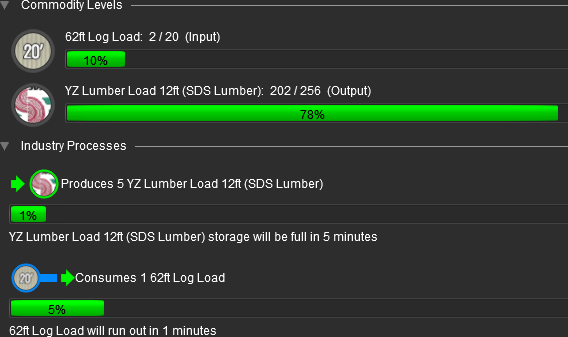






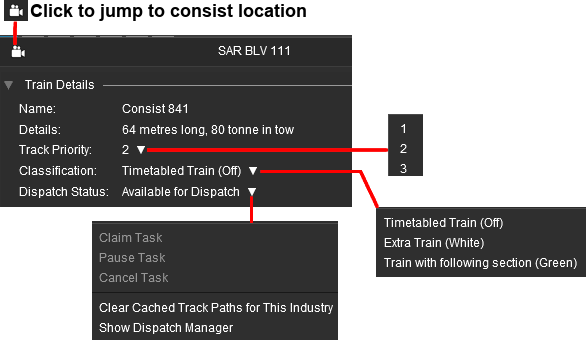
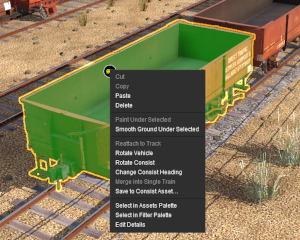

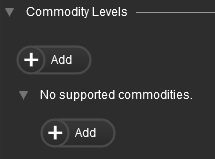
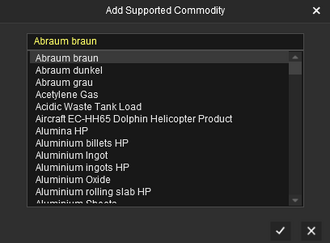
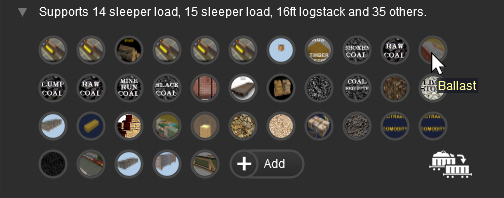

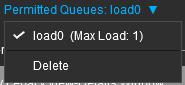
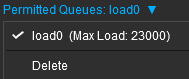
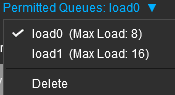


 icon