SAR Gladstone West: Difference between revisions
From TrainzOnline
Jump to navigationJump to search
No edit summary |
mNo edit summary |
||
| Line 123: | Line 123: | ||
<table bgcolor="LightCyan"> | <table bgcolor="LightCyan"> | ||
<tr valign="top"> | <tr valign="top"> | ||
<td align="Center" colspan=2>'''Shunt Locations | <td align="Center" colspan=2>'''Shunt Locations'''</td> | ||
</tr> | </tr> | ||
<tr> | <tr> | ||
| Line 144: | Line 144: | ||
</tr> | </tr> | ||
<tr valign="top"> | <tr valign="top"> | ||
<td colspan=2 align="right">''' | <td colspan=2 align="right">'''Shunt locations may not be signalled'''</td> | ||
</tr> | </tr> | ||
</table></td> | </table></td> | ||
Revision as of 23:35, 29 June 2019
 |
|
   |
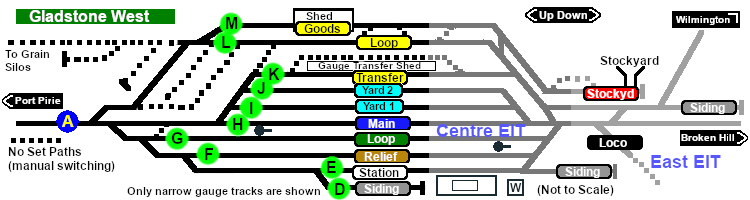
Main Line with Multiple Loops, Yards and Sidings plus loco servicing facilities. A major manned station, junction and a break-of-gauge location on the Port Pirie to Broken Hill line.
|
 |
|||||||||||||||||||||||||||||||||||||||||||||||||||||||||||||||||||||||||||||||||||||||||||||||||||||