How to Create a Picklist: Difference between revisions
From TrainzOnline
Jump to navigationJump to search
mNo edit summary |
|||
| Line 66: | Line 66: | ||
<tr valign="top"> | <tr valign="top"> | ||
<td>[[file:NotePad.PNG|link=]]</td> | <td>[[file:NotePad.PNG|link=]]</td> | ||
<td> | <td>Only assets that are '''installed on your system''' can be added to a Picklist. They can be built-in, base, payware or installed from the DLS.</td> | ||
Only assets that are '''installed on your system''' can be added to a Picklist. They can be built-in, base, payware or installed from the DLS.</td> | |||
</tr> | </tr> | ||
</table> <!-- END Step 2 Table NOTES --> | </table> <!-- END Step 2 Table NOTES --> | ||
| Line 122: | Line 121: | ||
</tr> | </tr> | ||
</table> <!-- END Nav Buttons Table --> | </table> <!-- END Nav Buttons Table --> | ||
='''Using Surveyor'''= | ='''Using Surveyor'''= | ||
Revision as of 02:53, 22 December 2021
The information in this Wiki Page applies to TANE, TRS19 and Trainz Plus.
 |
|
| In Summary: | |
 |
A Picklist is a user created list of commonly used assets (scenery, track objects, splines, textures, rolling stock - anything that you can add to a layout) |
|
You can create multiple picklists of related items (e.g. Bushes, Buildings, Trees, 4 wheel wagons, etc) that will be grouped together for easier selection |
Trainz provides you with two different methods of creating Picklists, using either Content Manager (or Manage Content from the Trainz Launcher) or in Surveyor.
 |
 |
 |
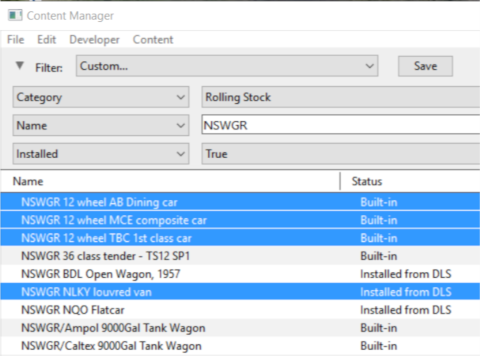
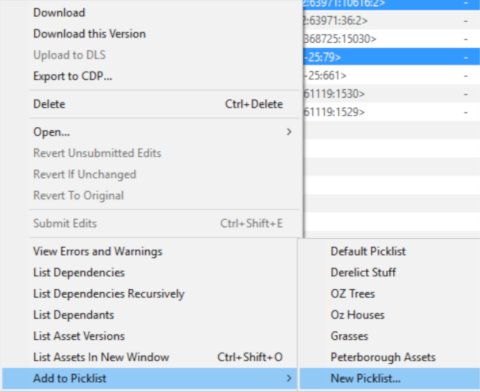
Using Content Manager (CM)
 Steps |
 Select the Assets:
|
|||||
|
|
||||||
 Add the Assets to the Picklist:
|
||||||
|
|
||||||
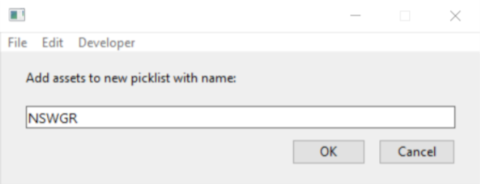
 Enter Picklist Name (for New Picklist Option Only):
|
||||||
|
|
||||||

|
 |
|
Using Surveyor
Steps |
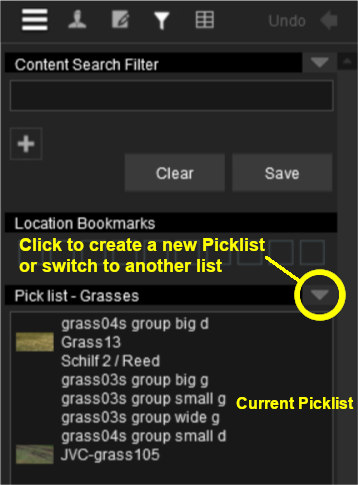
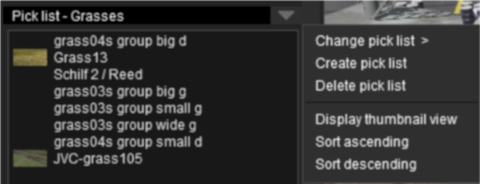
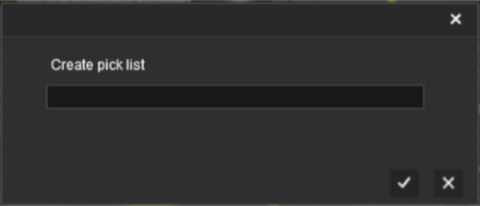
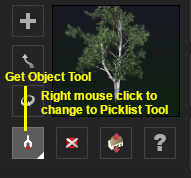
Open the Picklist Window:
|
|||||||||||||||
|
|
||||||||||||||||
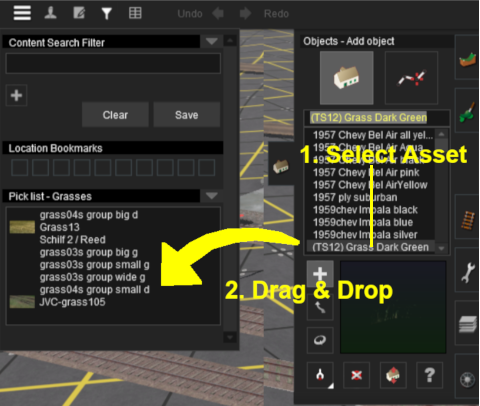
Add the Assets to the Picklist:
|
||||||||||||||||




|
|
Trainz Wiki
 |
More Tutorials and Guides to Using Trainz |
This page was created by Trainz user pware in January 2019 and was last updated as shown below.
