SAR Peroomba Switches: Difference between revisions
From TrainzOnline
Jump to navigationJump to search
mNo edit summary |
mNo edit summary |
||
| Line 154: | Line 154: | ||
</table> | </table> | ||
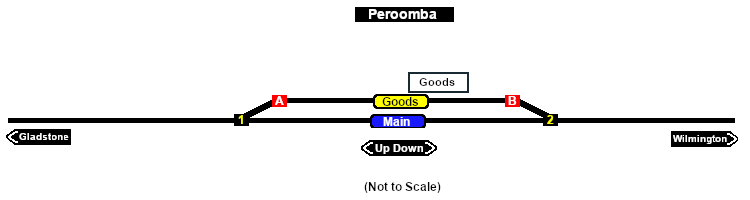
[[image:SAR_Peroomba_Basic.png|link=|alt=Peroomba Switches map]] | <table width=750> | ||
<tr valign="top"> | |||
< | <td>[[image:SAR_Peroomba_Basic.png|link=|alt=Peroomba Switches map]]</td> | ||
</tr> | |||
<tr valign="top"> | <tr valign="top"> | ||
<td | <td align="center"><span style="font-weight: 700;">Map and switches updated in <span style="color: blue;">SAR Peterborough Narrow Gauge Division v2.0</span></span><br> | ||
[[Image:line740.png|link=]]</td> | [[Image:line740.png|link=]]</td> | ||
</tr> | </tr> | ||
</table> | |||
<table bgcolor="LightYellow" width=750> | |||
<tr valign="top"> | <tr valign="top"> | ||
Revision as of 04:56, 27 July 2022
|
|
||||||||||||||||||||||||||||||||||||||||||||||||||||||||||||||||||||||||||||