How to Restore Deleted Assets: Difference between revisions
From TrainzOnline
Jump to navigationJump to search
No edit summary |
No edit summary |
||
| Line 322: | Line 322: | ||
<tr valign="top"> | <tr valign="top"> | ||
<td width=10>[[image:BlueDot10x10.png|link=]]</td> | <td width=10>[[image:BlueDot10x10.png|link=]]</td> | ||
<td>The '''Backups''' folder where deleted assets are held is a subfolder of your '''User Data Folder'''</td> | <td>The '''Backups''' folder where deleted assets are held is a subfolder of your '''Local User Data Folder'''</td> | ||
</tr> | </tr> | ||
</table> | </table> | ||
| Line 339: | Line 339: | ||
<tr valign="top"> | <tr valign="top"> | ||
<td>[[image:DotPoint2.JPG|link=]]</td> | <td>[[image:DotPoint2.JPG|link=]]</td> | ||
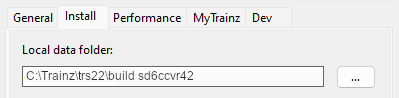
<td>Select the <span style="font-weight: 700; font-size: 15px; color: white; background-color: black;"> Install </span> tab. The location of the '''User Data Folder''' will be shown. | <td>Select the <span style="font-weight: 700; font-size: 15px; color: white; background-color: black;"> Install </span> tab. The location of the '''Local User Data Folder''' will be shown. | ||
<table> | <table> | ||
<tr valign="top"> | <tr valign="top"> | ||
<td width=400 align="center">[[image:UserDataFolderMoved.png|link=]]<br> | <td width=400 align="center">[[image:UserDataFolderMoved.png|link=]]<br> | ||
'''This is an Example Address Only'''</td> | '''This is an Example Address Only'''</td> | ||
<td>The '''User Data Folder''' is usually in the '''C:''' drive '''User''' folder that is normally identified as '''%LOCALAPPDATA%\N3V Games\trs22\build xxxxxxx''' (where "xxxxxxx" is a random sequence of characters) but it can be moved to any location (and given any name) as shown in the image left</td> | <td>The '''Local User Data Folder''' is usually in the '''C:''' drive '''User''' folder that is normally identified as '''%LOCALAPPDATA%\N3V Games\trs22\build xxxxxxx''' (where "xxxxxxx" is a random sequence of characters) but it can be moved to any location (and given any name) as shown in the image left<br> | ||
Instructions on moving your '''Local User Data Folder''' can be found by clicking the button labelled <span style="font-weight: 700; font-size: 15px;">Instructions for moving your content...</span> below the address bar or on the '''Trainz Wiki Page''' at [[image:WikiLink.PNG|link=]] '''[[How_to_Move_Your_User_Data_Folder|How to Move Your User Data Folder]]'''</td> | |||
</tr> | </tr> | ||
</table> | </table> | ||
| Line 380: | Line 381: | ||
<tr valign="top"> | <tr valign="top"> | ||
<td>[[image:DotPoint6.JPG|link=]]</td> | <td>[[image:DotPoint6.JPG|link=]]</td> | ||
<td> | <td> | ||
<table> | |||
<tr valign="top"> | |||
<td width=10>[[image:DotPoint.JPG|10px|link=]]</td> | |||
<td>if the contents are not already highlighted then press (<span style="font-weight: 700; font-size: 15px;"><span style="color: white; background-color: black;"> Ctrl </span> + <span style="color: white; background-color: black;"> A </span></span>)</td> | |||
</tr> | |||
<tr valign="top"> | |||
<td>[[image:DotPoint.JPG|10px|link=]]</td> | |||
<td>paste (<span style="font-weight: 700; font-size: 15px;"><span style="color: white; background-color: black;"> Ctrl </span> + <span style="color: white; background-color: black;"> V </span></span>) in the address from <span style="font-weight: 700; font-size: 15px;">Step <span style="color: white; background-color: red;"> 3 </span></span> above</td> | |||
</tr> | |||
<tr valign="top"> | |||
<td>[[image:DotPoint.JPG|10px|link=]]</td> | |||
<td>press the <span style="font-weight: 700; font-size: 15px; color: white; background-color: black;"> Enter </span> key</td> | |||
</tr> | |||
</table> | |||
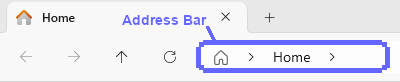
The end result, unless you have moved your data folder, will look something like the image show below.<br> | The end result, unless you have moved your data folder, will look something like the image show below.<br> | ||
[[image:BackupsUserFolder.png|link=]]<br> | [[image:BackupsUserFolder.png|link=]]<br> | ||
| Line 386: | Line 401: | ||
<table> | <table> | ||
<tr valign="top"> | <tr valign="top"> | ||
<td width=10>[[image: | <td width=10>[[image:BlackDot10x10.png|link=]]</td> | ||
<td><span style="font-weight: 700; font-size: 15px; color: white; background-color: black;"> idname </span> is your '''Windows User name''' (abbreviated), and</td> | <td><span style="font-weight: 700; font-size: 15px; color: white; background-color: black;"> idname </span> is your '''Windows User name''' (abbreviated), and</td> | ||
</tr> | </tr> | ||
<tr valign="top"> | <tr valign="top"> | ||
<td>[[image: | <td>[[image:BlackDot10x10.png|link=]]</td> | ||
<td><span style="font-weight: 700; font-size: 15px; color: white; background-color: black;"> random </span> is a sequence of random characters</td> | <td><span style="font-weight: 700; font-size: 15px; color: white; background-color: black;"> random </span> is a sequence of random characters</td> | ||
</tr> | </tr> | ||
</table> | </table> | ||
</td> | </td> | ||
</tr> | |||
<tr valign="top"> | |||
<td>[[image:DotPoint7.JPG|link=]]</td> | |||
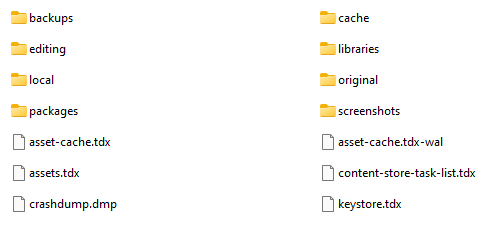
<td><span style="font-weight: 700; font-size: 15px; background-color: lightcyan;"> Double Left Click </span> on the last item in the address list - this will open your current '''Local User Data Folder'''. One of its folders will be the '''Backups''' folder<br> | |||
[[image:UserDataFolderContents.png|link=]]</td> | |||
</tr> | </tr> | ||
</table> | </table> | ||
Revision as of 02:28, 26 April 2025
| The information in this Wiki Page applies to TRS19, Trainz Plus and TRS22 and describes the methods that can be used to restore assets deleted by Content Manager. |
 |
 |
|

Restore Deleted DLS Assets |
 |
|
|
 |
Deleted assets that were originally Installed from DLS can be easily restored by installing them again from the DLS |
| Deleted assets that were installed from the DLS are the easiest of all to restore. Simply use Content Manager to locate the assets and download them again. | ||
| Error creating thumbnail: /bin/bash: line 1: /usr/bin/convert: No such file or directory Error code: 127 | Select the Download Station filter from the Filter drop down menu | 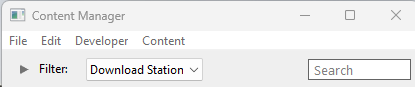 |
| Error creating thumbnail: /bin/bash: line 1: /usr/bin/convert: No such file or directory Error code: 127 | Optional: Type part of the asset name in the Search box to narrow the search | |
| Error creating thumbnail: /bin/bash: line 1: /usr/bin/convert: No such file or directory Error code: 127 | Right Click on the asset name in the displayed list and select the Download option | |
|


Restore Deleted .cdp File Assets |
|
 |
|
|
|
Deleted assets that were installed from .cdp files can be easily restored by reinstalling them from the same .cdp files |
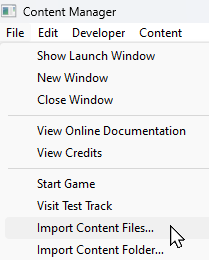 |
Deleted assets that were installed from .cdp files can be reinstalled from the same files.
|
||||||||||||||


Restore Deleted Payware and Packaged Assets |
|
|
|
|
|
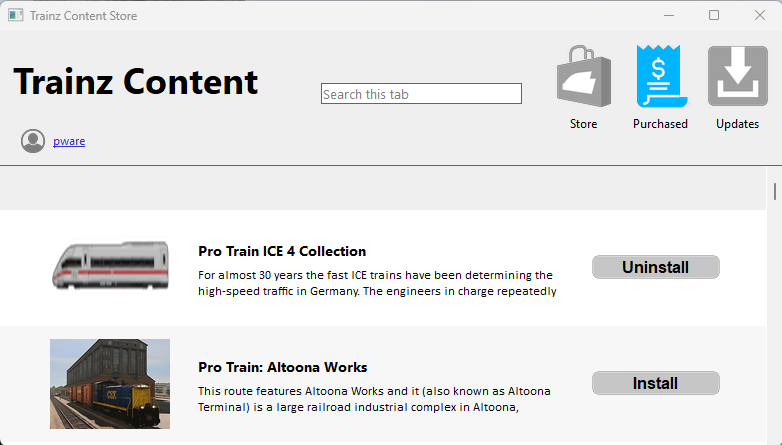
Payware and Packaged assets that were installed from a DLC package can be restored by reinstalling the same DLC Package |
|
If the identical Packaged asset is also on the DLS then it can be restored from there |
|
|
||||||||||||||
Restore Deleted Assets from the Backup |
|
|
|
|
Assets deleted using Content Manager within the last 7 Days are stored in the Backup Folder for the date they were deleted |
|
Deleted assets are stored using their <kuid> code(s) and the date(s) they were deleted. Knowing this information is very helpful but is not vital |
|
Locate the Backups Folder
|
The Backups folder where deleted assets are held is a subfolder of your Local User Data Folder |
|
||||||||||||||||||||||||||||||||||







|
|
Trainz Wiki
|
|


This page was created by Trainz user pware in April 2025 and was last updated as shown below.


