SAR Peterborough Switches: Difference between revisions

From TrainzOnline
Jump to navigationJump to search
Pware (talk | contribs)
New Format
 
Pware (talk | contribs)
No edit summary
Line 5: Line 5:
<table width=750> <!-- BEGIN TABBED link list with Switches page active-->
<tr valign="top">
<tr valign="top">
<td colspan=3 align="center">[[Image:line740.png|link=]]</td>
<td align="center">[[Image:line740.png|link=]]</td>
</tr>
</tr>
<tr valign="top">
<tr valign="top">
<td width=75>&nbsp;</td>
<td align="center">[[image:Tab_HM_Grey.png|link=SAR_Peterborough]]&nbsp;[[image:Tab_IN_Grey.png|link=SAR_Peterborough_Industry]]&nbsp;[[image:Tab_TM_Grey.png|link=SAR_Peterborough_TrackMarks]]&nbsp;[[image:Tab_PH_Grey.png|link=SAR_Peterborough_Paths]]&nbsp;[[image:Tab_SW_White.png|link=]]</td>
<td align="middle" width=600>[[image:Tab_IX_Grey.png|link=SAR_Index]]&nbsp;[[image:Tab_HM_Grey.png|link=SAR_Peterborough]]&nbsp;[[image:Tab_IN_Grey.png|link=SAR_Peterborough_Industry]]&nbsp;[[image:Tab_TM_Grey.png|link=SAR_Peterborough_TrackMarks]]&nbsp;[[image:Tab_PH_Grey.png|link=SAR_Peterborough_Paths]]&nbsp;[[image:Tab_SW_White.png|link=]]</td>
</tr>
<td width=75>&nbsp;</td>
<tr valign="top">
<tr valign="top">
<td colspan=3 align="center">[[Image:line740.png|link=]]</td>
<td align="center">[[Image:line740.png|link=]]</td>
</tr>
</tr>
</table> <!-- END TABBED link list -->
<table bgcolor="lightgrey" bordercolor="lightgrey" width=750> <!-- BEGIN Location link table with LINE and STATION NAMES -->
<tr valign="middle">
<td width=220 align="right">[[Image:SAR_PortPirie-BrokenHill_Line.png|link=SAR_Port_Pirie-Broken_Hill|alt=PortPirie-BrokenHill|Show Port Pirie-Broken Hill]]<br>[[Image:SAR_Peterborough-Quorn_Line.png|link=SAR Peterborough-Quorn|alt=Peterborough-Quorn|Show Peterborough-Quorn]]</td>
<td width=110 align="center">[[Image:Next Left.png|link=|alt=]]<br>[[Image:SAR_Yongala_Name.png|link=SAR Yongala|alt=Yongala|Next Up Location]]<br>
[[Image:SAR_Minvalara_Name.png|link=SAR Minvalara|alt=Minvalara|Next Down Location]]</td>
<td width=90 align="center">[[Image:Location Index.png|link=SAR Index|alt=Location Index|Location Index]]</td>
<td width=110 align="center">[[Image:Next Right.png|link=|alt=]]<br>[[Image:SAR_Ucolta_Name.png|link=SAR Ucolta|alt=Ucolta|Next Down Location]]<br>[[Image:SAR_Gumbowie_Name.png|link=SAR Gumbowie|alt=Gumbowie|Next Down Location]]</td>
<td width=220 align="left">[[Image:SAR_PortPirie-BrokenHill_Line.png|link=SAR_Port_Pirie-Broken_Hill|alt=PortPirie-BrokenHill|Show Port Pirie-Broken Hill]]<br>
[[Image:SAR_Peterborough-Terowie_Line.png|link=SAR_Peterborough-Terowie|alt=Peterborough-Terowie|Show Peterborough-Terowie]]</td>
</tr>
</table> <!-- BEGIN Location link table with LINE and STATION NAMES -->


[[Image:SAR_Peterborough_Basic.png|link=|alt=Peterborough Track Diagram]]<br> <!-- Track map -->
[[Image:SAR_Peterborough_Basic.png|link=|alt=Peterborough Track Diagram]]<br> <!-- Track map -->

Revision as of 12:09, 24 November 2020

    
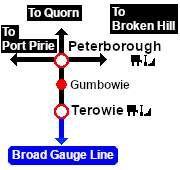
PortPirie-BrokenHill
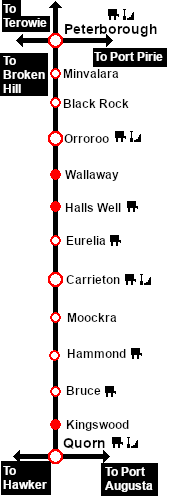
Peterborough-Quorn

Yongala
Minvalara
Location Index
Ucolta
Gumbowie
PortPirie-BrokenHill
Peterborough-Terowie

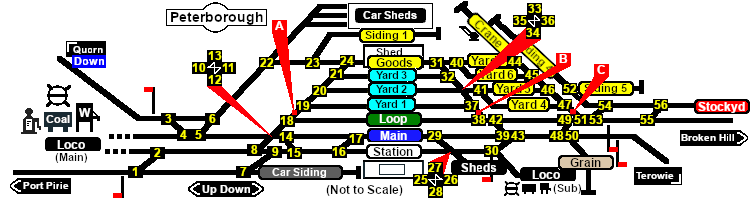
Peterborough Track Diagram

  Switches  
No. Name Facing and L/R Directions
(default direction first)
No. Name Facing and L/R Directions
(default direction first)
PB 1 Down (R) Station/Siding, (L) Station/Loop/Yards PB 2 Up (R) Loco Depot, (L) Port Pirie
PB 3 Down (L) Car Shed/Goods Shed, (R) Station/Loop/Main/Yards PB 4 Up (L) Loco Depot, (R) Quorn
PB 5 Down (R) Station/Loop/Main/Yards, (L) Car Shed/Goods Shed PB 6 Up (R) Quorn, (L) Loco Depot
PB 7 Down (R) Siding, (L) Station PB 8 Down (R) Station, (L) Main/Loop/Yards/Goods Shed
PB 9 Up (R) Loco Depot/Port Pirie, (L) Port Pirie PB 10 Down (R) Main/Station, (L) Loop/Yards/Goods Shed
PB 11 Up (R) Loco Depot/Quorn, (L) Loco Depot/Port Pirie PB 12 Down (L) Loop/Yards/Goods Shed, (R) Main
PB 13 Up (L) Loco Depot/Port Pirie, (R) Loco Depot/Quorn PB 14 Down (L) Main, (R) Station
PB 15 Up (L) Loco Depot/Port Pirie, (R) Loco Depot/Quorn PB 16 Down (R) Station, (L) Main
PB 17 Up (R) Loco Depot/Quorn, (L) Loco Depot/Port Pirie PB 18 Down (R) Loop, (L) Yards/Goods Shed
PB 19 Down (L) Yard 2/Yard 3/Goods Shed, (R) Yard 1 PB 20 Down (L) Yard 3/Goods Shed, (R) Yard 2
PB 21 Down (L) Goods Shed, (R) Yard 3 PB 22 Down (R) Goods Shed/Car Siding, (L) Car Shed
PB 23 Down (R) Goods Shed, (L) Car Siding PB 24 Up (L) Loco Depot/Port Pirie/Quorn, (R) Loco Depot/Quorn
PB 25 Down (L) Loco Depot/Broken Hill/Terowie, (R) Loco Depot PB 26 Up (L) Station, (R) Main
PB 27 Down (R) Loco Depot, (L) Loco Depot/Main PB 28 Up (R) Main, (L) Station
PB 29 Down (L) Broken Hill/Terowie, (R) Loco Depot PB 30 Down (R) Loco Depot, (L) Broken Hill/Terowie
PB 31 Down (L) Broken Hill, (R) Broken Hill/Terowie PB 32 Up (R) Goods Shed, (L) Yard 3
PB 33 Down (R) Broken Hill/Terowie, (L) Broken Hill PB 34 Up (R) Yard 3/Goods Shed, (L) Yard 2
PB 35 Down (L) Broken Hill, (R) Broken Hill/Terowie PB 36 Up (L) Yard 2, (R) Yard 3/Goods Shed
PB 37 Up (R) Yard 2/Yard 3/Goods Shed, (L) Yard 1 PB 38 Up (L) Loop, (R) Yards/Goods Shed
PB 39 Up (L) Main, (R) Loop/Yards/Goods Shed PB 40 Down (L) Broken Hill, (R) Goods Loop
PB 41 Down (L) Broken Hill, (R) Goods Yard PB 42 Down (L) Broken Hill, (R) Grain/Terowie
PB 43 Up (L) Main/Station, (R) Loop/Yards/Goods Shed PB 44 Up (L) Goods Shed, (R) Siding
PB 45 Up (R) Goods Shed, (L) Goods Loop PB 46 Up (R) Goods Shed, (L) Yard 2/Yard 3/Goods Shed
PB 47 Up (R) Goods Shed, (L) Goods Yards/Goods Shed PB 48 Down (L) Broken Hill, (R) Grain/Terowie
PB 49 Up (R) Loop/Yards, (L) Main/Station PB 50 Down (L) Terowie, (R) Grain
PB 51 Up (L) Loop/Main/Station, (R) Yards/Goods Shed PB 52 Down (R) Stockyard, (L) Siding
PB 53 Down (R) Broken Hill, (L) Stockyard PB 54 Up (L) Yards/Loop/Main/Station, (R) Siding
PB 55 Down (R) Broken Hill, (L) Stockyard PB 56 Up (L) Yards/Loop/Main/Station, (R) Siding
PBCP A Up  (R) Catchpoint , (L) Main Yards PBCP B Down  (L) Catchpoint , (R) Broken Hill/Terowie
PBCP C Down  (L) Catchpoint , (R) Main  
 Switch Sets 
 Port Pirie -  Station   1 -R  7 -L  9 -L  15 -L (  16 -R )  Quorn -  Station   3 -R  4 -R  5 -R  10 -R  11 -R  14 -R  15 -R (  16 -R )
 Broken Hill -  Station   55 -R  53 -R  51 -L  49 -L  48 -L  43 -L  30 -L  26 -L  25 -L  Terowie -  Station   50 -L  48 -R  43 -L  30 -L  26 -L  25 -L
 Port Pirie -  Main   1 -L  2 -L  8 -L  12 -R  11 -L  14 -L (  17 -R )  Quorn -  Main   3 -R  4 -R  5 -R  10 -R  11 -R  14 -L (  17 -R )
 Broken Hill -  Main   55 -R  53 -R  51 -L  49 -L  48 -L  43 -R  39 -L (  29 -L )  Terowie -  Main   50 -L  48 -R  43 -R  39 -L (  29 -L )
 Port Pirie -  Loop   1 -L  2 -L  8 -L  12 -L  13 -L  18 -R  Quorn -  Loop   3 -R  4 -R  5 -R  10 -L  13 -R  18 -R
 Broken Hill -  Loop   55 -R  53 -R  51 -L  49 -R  42 -L  38 -L  Terowie -  Loop   50 -L  48 -R  43 -R  39 -R  42 -R  38 -L
 Port Pirie -  Goods   Yards   1 -L  2 -L  8 -L  12 -L  13 -L  18 -L  A -L  Quorn -  Goods   3 -L  6 -R  22 -R  23 -R  24 -R
 Broken Hill -  Goods   Loop   Yards   55 -L  53 -L  51 -R  C -R  Quorn -  Yards   3 -R  4 -R  5 -R  10 -L  13 -R  18 -L  A -L
 Broken Hill -  Yards   55 -R  53 -R  51 -L  49 -R  42 -L  38 -R  B -R  Terowie -  Goods   Yards   50 -L  48 -R  43 -R  39 -R  42 -R  38 -R  B -R
   (        ) = optional switches

PortPirie-BrokenHill
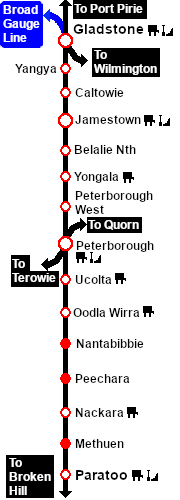
Gladstone-Paratoo Strip Map

Peterborough-Terowie
Peterborough-Terowie Strip Map

Peterborough-Quorn
Peterborough-Quorn Strip Map