SAR Gumbowie Switches: Difference between revisions

From TrainzOnline
Jump to navigationJump to search
Pware (talk | contribs)
mNo edit summary
Pware (talk | contribs)
mNo edit summary
Line 77: Line 77:
<td><span style="background-color: cyan; font-weight: 700;">Up</span> '''(L)&nbsp;Main, (R)&nbsp;Loop'''</td>
</tr>
</tr>
<tr valign="top">
<td colspan=6 align="center">[[Image:line740.png|link=]]</td>
</tr>
<tr valign="top">
<tr valign="top">
<td colspan=6 align="center">[[Image:line740.png|link=]]</td>

Revision as of 20:36, 28 November 2020

    
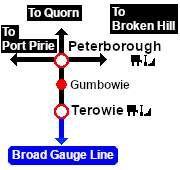
Peterborough-Terowie
Peterborough
Location Index
Terowie
Peterborough-Terowie

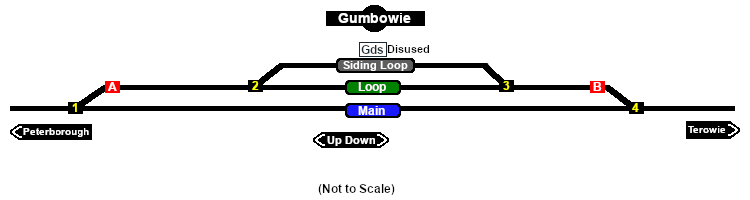
Gumbowie Switches map

  Switches  
No. Name Facing and L/R Directions
(default direction first)
No. Name Facing and L/R Directions
(default direction first)
GB 1 Down (R) Main, (L) Loop GBCP A Up  (R) Catchpoint , (L) Peterborough
GB 2 Down (R) Loop, (L) Siding GB 3 Up (L) Loop, (R) Siding
GBCP B Down  (L) Catchpoint , (R) Terowie GB 4 Up (L) Main, (R) Loop
 Switch Sets 
 Peterborough -  Main   1 -R  Terowie -  Main   4 -L
 Peterborough -  Loop   1 -L  A -L  2 -R  3 -L  Terowie -  Loop   4 -R  B -R  3 -L  2 -R
 Peterborough -  Siding   1 -L  A -L  2 -L  Terowie -  Siding   4 -R  B -R  3 -R

Peterborough-Terowie

Peterborough-Terowie Strip Map