SAR Scenario Depot Fuel Run: Difference between revisions
From TrainzOnline
Jump to navigationJump to search
No edit summary |
mNo edit summary |
||
| Line 113: | Line 113: | ||
<td> | <td> | ||
*The approaches to all locations are protected by invisible signals to prevent the '''AI Half Speed Slowdown Problem''' when approaching a signal at stop. | *The approaches to all locations are protected by invisible signals to prevent the '''AI Half Speed Slowdown Problem''' when approaching a signal at stop. | ||
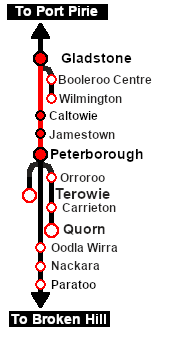
*'''Interlocking Towers''' are available for use | *'''Interlocking Towers''' are available for optional use at '''Gladstone''' (depart), '''Caltowie''' (arrive and depart), '''Jamestown''' (arrive and depart) and '''Peterborough''' (arrive). Click [[image:Line_Index_Label.png|link=SAR_Index|Location Index]] for details. | ||
*Trackmarks and industries have been provided for AI '''Drive To Trackmark''', '''Drive via Trackmark''' and <span style="font-weight: 700;">Drive to <span style="background-color: yellow; color: black;"> Industry </span></span> commands. Click [[image:Line_Index_Label.png|link=SAR_Index|Location Index]] for details. | *Trackmarks and industries have been provided for AI '''Drive To Trackmark''', '''Drive via Trackmark''' and <span style="font-weight: 700;">Drive to <span style="background-color: yellow; color: black;"> Industry </span></span> commands. Click [[image:Line_Index_Label.png|link=SAR_Index|Location Index]] for details. | ||
*Manual (no AI) driving is possible. As a visual driving aid, a '''Caution''' warning sign has been placed at the location of the '''Main Approach Dn''' and '''Main Approach Up''' trackmarks. Click [[image:Line_Index_Label.png|link=SAR_Index|Location Index]] for details. | *Manual (no AI) driving is possible. As a visual driving aid, a '''Caution''' warning sign has been placed at the location of the '''Main Approach Dn''' and '''Main Approach Up''' trackmarks. Click [[image:Line_Index_Label.png|link=SAR_Index|Location Index]] for details. | ||
| Line 127: | Line 127: | ||
<tr valign="top"> | <tr valign="top"> | ||
<td> | <td> | ||
<td align="center">[[image:SAR Scenario Gladstone-Peterborough Strip Map.png|link=|alt=Strip Map]]<br> | <td align="center">[[image:SAR Scenario Gladstone-Peterborough Strip Map.png|link=|alt=Strip Map]]<br>[[image:SAR Scenario Route.png|link=|alt=Route Key]]</td> | ||
[[image:SAR Scenario Route.png|link=|alt=Route Key]]</td> | |||
</tr> | </tr> | ||
</table> <!-- END Strip Map Table --> | </table> <!-- END Strip Map Table --> | ||
Revision as of 21:17, 28 March 2021
| Error creating thumbnail: /bin/bash: line 1: /usr/bin/convert: No such file or directory Error code: 127 | 1 Gladstone to Peterborough Depot Fuel Run | Error creating thumbnail: /bin/bash: line 1: /usr/bin/convert: No such file or directory Error code: 127 |
| A scenario in the SAR Peterborough Base Session | ||
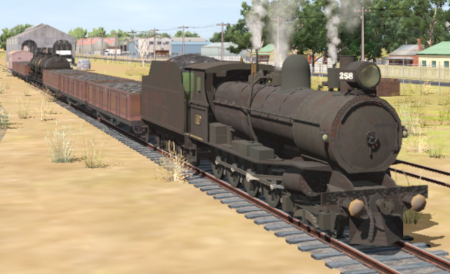
| Loco coal stages and fuel-oil points need to be refilled regularly. This service delivers coal to the loco coal stages at Jamestown and Peterborough, and bunker c oil (for the SAR 400 class Garrett locos) to the loco (main) depot at Peterborough. |  |
 |
|
||||||||||


Getting Started:
|
Tutorial:
|

|
|


This page was created by Trainz user pware in February 2021 and was last updated as shown below.


