How to Move a Picklist: Difference between revisions
m modified to include ability to move Default Picklist in TRS19 SP4 update |
mNo edit summary |
||
| Line 11: | Line 11: | ||
</table> | </table> | ||
<br> | <br> | ||
<table | <table bgcolor="black" width=900> | ||
<tr valign="top"> | |||
<td> | |||
<table bgcolor=#ffffb0 width=896> | |||
<tr valign="top"> | <tr valign="top"> | ||
<td>[[file:PencilTips.PNG|link=]]</td> | <td>[[file:PencilTips.PNG|link=]]</td> | ||
<td>If you have made '''backup copies''' of your Picklists then you have already completed half the work. Use the backup Picklists and steps described in the '''[[How to Backup a Picklist#How to Restore a Picklist|How to Restore a Picklist]]''' section of the '''[[How to Backup a Picklist]]''' Trainz Wiki page to complete the move.</td> | <td>If you have made '''backup copies''' of your Picklists then you have already completed half the work. Use the backup Picklists and steps described in the '''[[How to Backup a Picklist#How to Restore a Picklist|How to Restore a Picklist]]''' section of the '''[[How to Backup a Picklist]]''' Trainz Wiki page to complete the move. | ||
</td> | |||
</tr> | |||
</table> | |||
</td> | |||
</tr> | </tr> | ||
</table> | </table> | ||
| Line 45: | Line 52: | ||
<table width=448 bgcolor="white"> <!-- BEGIN TRS19 table --> | <table width=448 bgcolor="white"> <!-- BEGIN TRS19 table --> | ||
<tr valign="top"> | <tr valign="top"> | ||
<td bgcolor="black" align="center"><span style="color: white; font-wright: 700; font-size: 15px;">In TRS19 (all versions) SP4 and Trainz Plus SP4</span></td> | <td bgcolor="black" align="center"><span style="color: white; font-wright: 700; font-size: 15px;">In TRS19 (all versions) SP4 and Trainz Plus SP4 and later</span></td> | ||
</tr> | </tr> | ||
<tr valign="top"> | <tr valign="top"> | ||
| Line 167: | Line 174: | ||
='''Transfer the List to Another Copy of Trainz'''= | ='''Transfer the List to Another Copy of Trainz'''= | ||
<table | <table bgcolor="black" width=600> | ||
<tr | <tr valign="top"> | ||
<td> | |||
<table bgcolor=#ffffb0 width=596> | |||
< | |||
<tr valign="top"> | <tr valign="top"> | ||
<td>[[ | <td>[[image:NotePad.PNG|link=]]</td> | ||
<td><span style="font-size: 17px;">'''Notes:'''</span><br> | <td><span style="font-size: 17px; font-weight: 700;">Notes:'''</span><br> | ||
---- | |||
<span style="font-size: 17px;">'''Notes:'''</span><br> | |||
If you are transferring the Picklist to another computer then you will need to:- | If you are transferring the Picklist to another computer then you will need to:- | ||
#paste the list from '''Step '''[[file:DotPoint4.JPG|link=]] above into a program such as '''Notepad''' | #paste the list from '''Step '''[[file:DotPoint4.JPG|link=]] above into a program such as '''Notepad''' | ||
| Line 182: | Line 190: | ||
#opening the document (in Notepad) | #opening the document (in Notepad) | ||
#select and copy to the clipboard all the items in the list | #select and copy to the clipboard all the items in the list | ||
Then proceed as described below.</td> | Then proceed as described below. | ||
</td> | |||
</tr> | |||
</table> | |||
</td> | |||
</tr> | </tr> | ||
</table> | </table> | ||
Revision as of 09:36, 2 March 2022
The information in this Wiki Page applies to TANE, TRS19 and Trainz Plus. This guide will show you how to move a Picklist from one installation of Trainz to another, on the same or different computers.
 |
|
|

 |
 |
 |
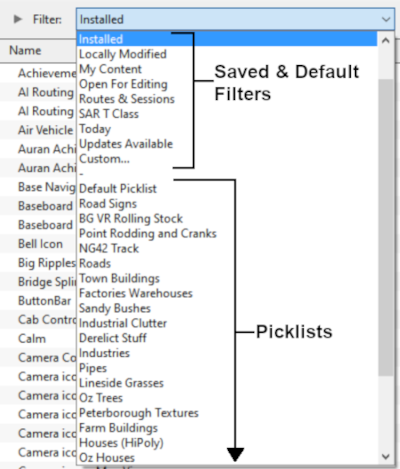
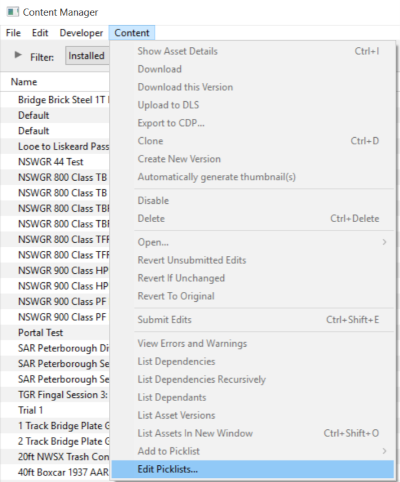
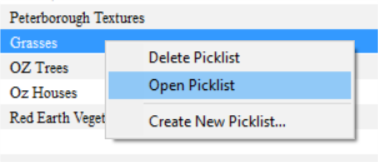
Access Your Current Picklists
 Steps |
 Open CM and Your Picklists
|
||||||||||||||
|
|
|||||||||||||||
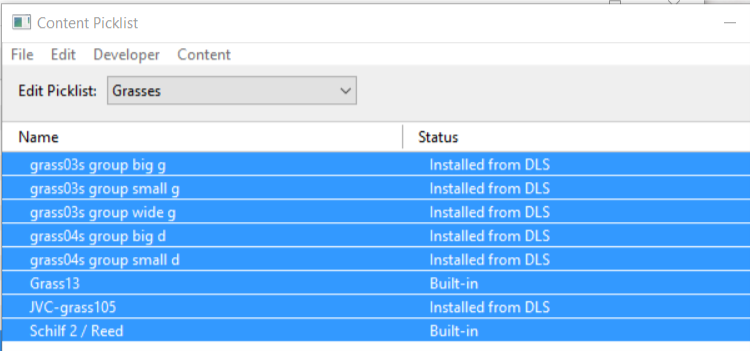
 Select Picklist Contents:
|
|||||||||||||||
|
|
|||||||||||||||
 Transfer List to a New Window:
|
|||||||||||||||
|
|
|||||||||||||||
 Copy Assets in Picklist:
|
|||||||||||||||


|
 |
|
Transfer the List to Another Copy of Trainz
|

Steps |
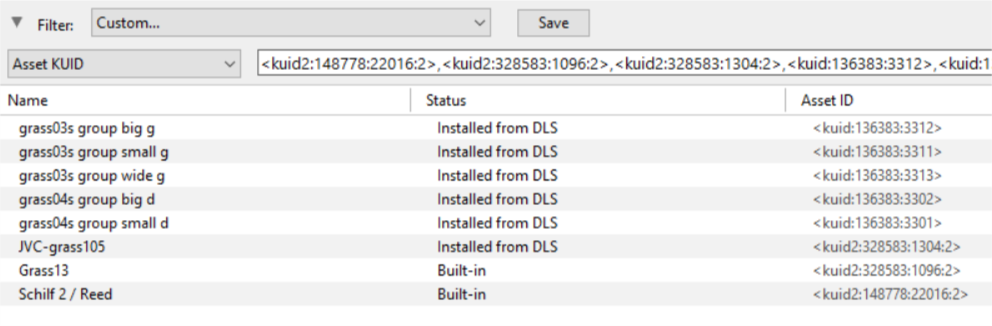
 Open CM in the Destination Trainz and Create a New Filter:
|
|||
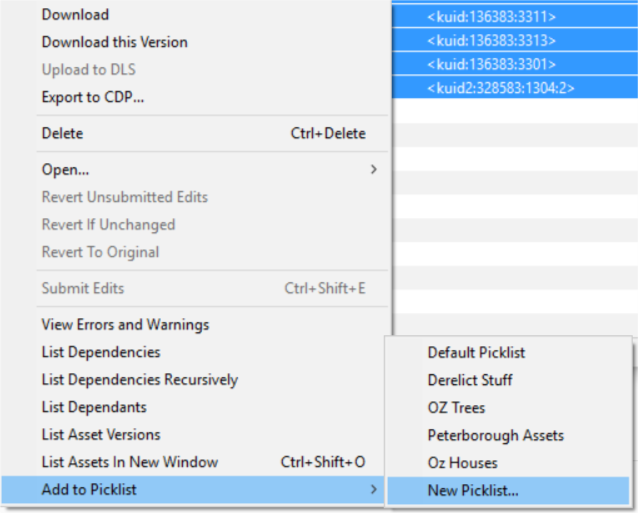
 Create a New Picklist:
|
||||
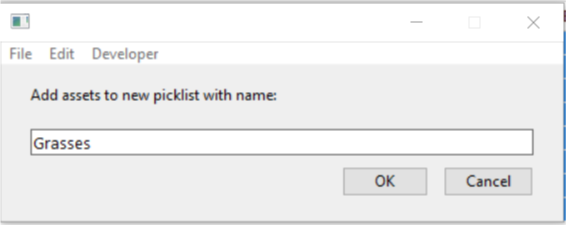
 Enter a Name for the Picklist:
|
||||

|
|
Trainz Wiki
 |
More Tutorials and Guides to Using Trainz |
This page was created by Trainz user pware in October 2018 and was last updated as shown below.
