SAR Paratoo Switches V1: Difference between revisions
From TrainzOnline
Jump to navigationJump to search
Created page with "<!-- V1.0 --> <table> <!-- BEGIN TOP TABLE --> <tr valign="top"> <td width=750> <table width=750> <!-- BEGIN TABBED link list with Switches page active--> <tr valign="top">..." |
mNo edit summary |
||
| Line 9: | Line 9: | ||
</tr> | </tr> | ||
<tr valign="top"> | <tr valign="top"> | ||
<td align="center">[[image:Tab_HM_Grey.png|link= | <td align="center">[[image:Tab_HM_Grey.png|link=SAR_Paratoo_V1]] [[image:Tab_IN_Grey.png|link=SAR_Paratoo_Industry_V1]] [[image:Tab_TM_Grey.png|link=SAR_Paratoo_TrackMarks_V1]] [[image:Tab_SW_White.png|link=]] [[image:Tab_Blank_Grey.png|link=]]</td> | ||
</tr> | </tr> | ||
<tr valign="top"> | <tr valign="top"> | ||
| Line 19: | Line 19: | ||
<tr valign="middle"> | <tr valign="middle"> | ||
<td width=220 align="right">[[Image:SAR_PortPirie-BrokenHill_Line.png|link=SAR_Port_Pirie- | <td width=220 align="right">[[Image:SAR_PortPirie-BrokenHill_Line.png|link=SAR_Port_Pirie-Broken_Hill_V1|alt=PortPirie-BrokenHill|Show Port Pirie-Broken Hill]]</td> | ||
<td width=110 align="center">[[Image:Next Left.png|link=|alt=]]<br>[[Image:SAR_Methuen_Name.png|link=SAR | <td width=110 align="center">[[Image:Next Left.png|link=|alt=]]<br>[[Image:SAR_Methuen_Name.png|link=SAR Methuen_V1|alt=Methuen|Next Up Location]]</td> | ||
<td width=90 align="center">[[Image:Location Index.png|link=SAR | <td width=90 align="center">[[Image:Location Index.png|link=SAR Index_V1|alt=Location Index|Location Index]]<br>[[image:Scenario Index.png|link=SAR Peterborough Base Session_V1|alt=Scenarios|Scenario Index]]</td> | ||
<td width=110 align="center"> </td> | <td width=110 align="center"> </td> | ||
<td width=220 align="right">[[Image:SAR_PortPirie-BrokenHill_Line.png|link=SAR_Port_Pirie- | <td width=220 align="right">[[Image:SAR_PortPirie-BrokenHill_Line.png|link=SAR_Port_Pirie-Broken_Hill_V1|alt=PortPirie-BrokenHill|Show Port Pirie-Broken Hill]]</td> | ||
</tr> | </tr> | ||
| Line 33: | Line 33: | ||
</tr> | </tr> | ||
<tr valign="top"> | <tr valign="top"> | ||
<td align="center"><span style="font-weight: 700;">This is the original <span style="color: blue;">v1.0 Nackara Map and description</span>. For the latest <span style="color: blue;">SAR Peterborough Narrow Gauge Division v2.0</span> version click <span style="background-color: yellow;">[[ | <td align="center"><span style="font-weight: 700;">This is the original <span style="color: blue;">v1.0 Nackara Map and description</span>. For the latest <span style="color: blue;">SAR Peterborough Narrow Gauge Division v2.0</span> version click <span style="background-color: yellow;">[[SAR_Paratoo_Switches_V2|here]]</span>. The V2.0 version of the route and sessions requires Trainz Plus or TRS22</span></td> | ||
</tr> | </tr> | ||
</table> | </table> | ||
| Line 233: | Line 233: | ||
</td> | </td> | ||
<td> | <td> | ||
[[Image:SAR_PortPirie-BrokenHill_Line.png|link=SAR_Port_Pirie- | [[Image:SAR_PortPirie-BrokenHill_Line.png|link=SAR_Port_Pirie-Broken_Hill_V1|alt=PortPirie-BrokenHill|Show Port Pirie-Broken Hill]]<br> | ||
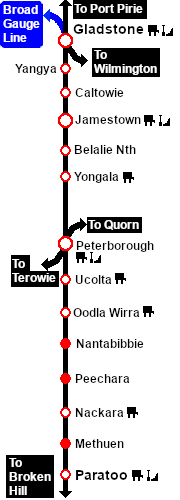
[[Image:SAR_Gladstone-Paratoo Strip | [[Image:SAR_Gladstone-Paratoo Strip Map_V1.png|link=|alt=Gladstone-Paratoo Strip Map]]</td> | ||
</tr> | </tr> | ||
</table> <!-- END TOP TABLE --> | </table> <!-- END TOP TABLE --> | ||
Revision as of 16:19, 28 April 2024
|
 |
||||||||||||||||||||||||||||||||||||||||||||||||||||||||||||||||||||||||||||||||||||||||||||||||||||||||||||||||||||||||||||||||||||||||