|
|
| Line 2,074: |
Line 2,074: |
| <tr valign="top"> | | <tr valign="top"> |
| <td width=25>[[image:PencilTips.PNG|link=]]</td> | | <td width=25>[[image:PencilTips.PNG|link=]]</td> |
| <td>It has been suggested that support for '''TurfFX''' will be discontinued in a future release of '''Trainz''' due to its hardware incompatibility issues. '''TurfFX''' or its equivalent may be added to the '''Clutter''' effect layer.</td> | | <td>It has been suggested that support for '''TurfFX''' will be discontinued in a future release of '''Trainz''' due to its hardware incompatibility issues. The replacement for '''TurfFX''', or its equivalent, may be added to the '''Clutter''' effect layer.</td> |
| </tr> | | </tr> |
| </table> | | </table> |
Revision as of 08:21, 11 September 2026
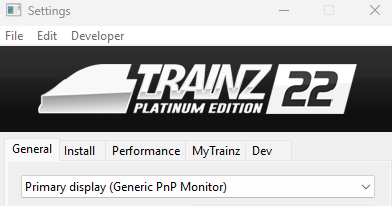
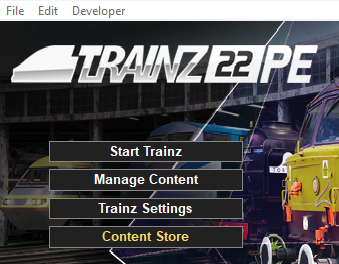
| Start your copy of Trainz which will load to show the Launcher Window (shown below). |
 |
|
 |
The Trainz Settings control how Trainz interacts with your Operating System and Graphics Display, where it stores your data, its overall performance, etc |
|
It also stores your login credentials which, amongst other things, gives you free access to the Download Station or DLS where assets such as routes, sessions, rolling stock and many different types of scenery can be downloaded and installed |
|
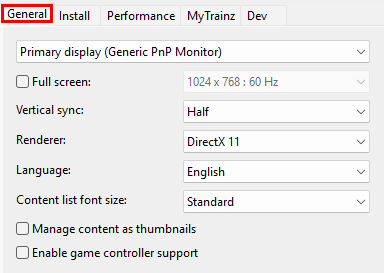
These settings are your display characteristics such as the screen resolution, synchronisation, preferred language and font size. |
| If it has not already been selected then Left Click on the General tab |
|
|
This sets the display monitor that Trainz will run on, its screen resolution and other features. |
Primary Monitor
|
|
|
  |
|
|
|
|
IF you have more than one display monitor/screen attached to your computer then you can select the one that you want Trainz to use. |
|
This will match the display settings to your selected monitor but you will still have to manually move the program windows across to that monitor. |
 |
Notes:
Trainz will always load and run in the monitor where it last ran. This will default to the Primary display monitor as shown in the image below. If you want it to use a different monitor then you will have to manually drag it (both the Launcher and the opening screen) across to that monitor the first time that you start Trainz after changing this setting. From then onwards it will always start in that monitor unless you change it back. The purpose of this setting is to match the Display Settings and Performance Settings to your preferred Trainz display monitor. |
|
| Steps: To Select the Monitor:- |
 |
Left Click on the menu box or its arrow icon to show the attached display monitors that your operating system has detected. |
 |
 |
Then Left Click on the display monitor that you want Trainz to use. |
|
|
|
Screen Size and Display Resolution
|
|
|
|
|
|
|
|
This sets the screen size (as in full screen or windowed), its resolution (in pixels) and the refresh rate (in Hertz or cycles per second). |
 |
If the Full Screen box is NOT checked then Trainz will run in windowed mode with the Trainz Railroad Simulator bar at the top of the program window and the Windows Tool Bar at the bottom of the screen. |
| This allows you to resize the window when required and to easily switch to other programs when needed. The resolution settings drop box cannot be opened if the Full Screen is not checked. |
 |
If the Full Screen box is checked then Trainz will run in full screen mode WITHOUT the Trainz Railroad Simulator bar at the top of the program and the Windows Tool Bar at the bottom of the screen. |
|
The Screen Resolution and Refresh Rate values you set are for your video card and not the display monitor you are using. But it is important to match the selected settings for your video card with the same settings used by your display monitor. Some experimentation may be required to get the best results.
|
|
| Steps: To Set the Screen Size and Resolution:- |
|
Left Click on the Full Screen check box to check it ON. This will allow the full range of available screen resolutions to be shown and selected. |
|
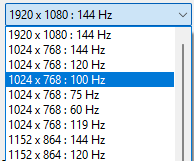
Left Click on the menu box or its arrow icon to display the list of screen resolutions and refresh rates that your graphics card supports. |
 |
Then Left Click on the resolution and rate that you want to use. Some experimentation may be needed to get the best results. |
|
|
|
 |
Vertical Synchronization
|
|
|
|
|
|
|
|
This synchronizes your graphics card with your display monitor in the construction of each video frame. |
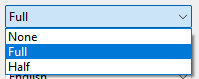
Vertical Synchronization, when turned on, prevents the next frame from being sent to your display monitor before the previous frame has been fully drawn on the screen. If your video card is sending frames faster than your screen can handle then it can lead to an effect known as "tearing" where parts of two different frames are displayed at the same time.
 |
| None |
your graphics card will not delay sending each frame to the display monitor. This produces faster game play without any delays between screen images but it does have the risk of introducing "tearing". |
| Full |
each video frame is sent to the display monitor, line by line, in one pass, when the monitor is ready to receive it. If your display monitor has a refresh rate of 60Hz (frames per second), then your GPU will send its images to the display at 60Hz (frames per second). |
| Half |
each video frame is sent to the display monitor in two passes when the monitor is ready to receive it. The odd numbered lines will be sent in the first pass then the even numbered lines in the second. This will lock your display to half the refresh rate of the display monitor. If your display monitor has a refresh rate of 60Hz (frames per second), then your GPU will send its images to the display at 30Hz (frames per second) made from 2 passes each at 60Hz. |
Renderer
|
|
|
 |
|
|
|
|
DirectX is the Renderer or program interface (API) used by Windows to render 3D images on your display monitor. |
|
If you select the DirectX 12 renderer in the current Trainz Plus beta version then all TurfFX Effect Layers will be disabled and will not appear. |
|
| Steps: To Select the Renderer:- |
|
Left Click on the menu box or its arrow icon to show the options.
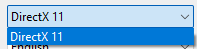
All non-beta Trainz versions |
|
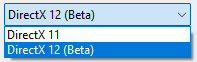
Trainz Plus SP8 beta |
|
|
Then Left Click on the Renderer that you want to use. |
|
|
The DirectX 12 option is in beta test and is only available in the beta version of Trainz Plus. |
|
|
|
The selected language sets the preferred language for all internal menus, palette titles and commands, drop down lists |
|
The language used in all driver session message popups and HTML pages is set within those assets and not in this configuration |
|
The selected font size option only applies to asset lists |
Language
|
|
|
|
|
|
|
|
You can choose a preferred display language for all menus, option boxes, command lists, etc that are part of the program. The default language is English. |
| Steps: To Set the Preferred Display Language:- |
|
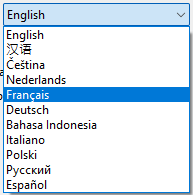
Left Click on the Language menu box or its arrow icon to display the list of available languages. |
 |
| |
 |
|
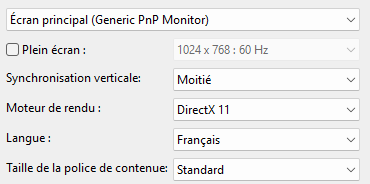
Then Left Click on the language that you want to use - for example Français (French). |
|
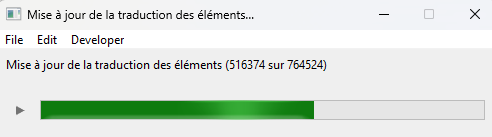
Close the Trainz Settings dialogue window. The program will immediately search all installed assets for language tags that include the selected language in their config.txt files. A progress bar will be shown in the selected language.
 |
 |
When the progress bar completes and disappears close the Trainz Launcher. |
 |
Restart Trainz. The Trainz Launcher will reappear using labels in the selected language.
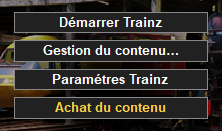 |
All other menu screens will also be shown using the selected language.
 |
|
The names of individual assets, as shown in some Surveyor 2.0 Palettes, Surveyor Classic Tools and in Content Manager, will only use the preferred language IF that language has been added to the asset's config.txt file. Otherwise English will be used. |
|
|
|
|
Font Size
|
|
|
|
|
|
|
|
Lists of assets can be displayed in Content Manager and in some Surveyor 2.0 Palettes in a larger font size. |
| Steps: To Set the Asset Name Font Size:- |
|
Left Click on the menu box or its arrow icon to show the options. |
 |
| |
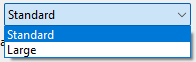 |
There are only two choices: Standard which is the default and Large |
|
|
Left Click on the size option that you want to use.
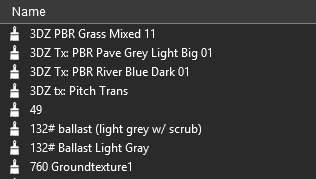
Assets Palette Standard Font |
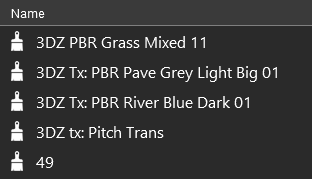
Assets Palette Large Font |
|
This will only change the size of the font used to display the names of individual assets, as shown in some Surveyor 2.0 Palettes and in Content Manager. It has no effect on the font sizes used in Surveyor Classic. |
|
|
|
Misc Settings
|
 |
 |
|
|
|
|
|
You can display all assets in Content Manager using their thumbnails |
|
You can add support for some non-keyboard game controllers |
 Content Manager Thumbnails |
 |
| This allows you to display all the assets in Content Manager using their thumbnails. The thumbnails will be constructed from the actual mesh and texture files (if present) in the assets and not from the Thumbnail.jpg images supplied by the creator. |
| Steps: To Display Assets Using Thumbnails in Content Manager:- |
|
Left Click on the Check Box to turn this control ON or OFF. |
| |
|
This will only affect the display of assets in Content Manager. The Assets Palette and Filter Palette in Surveyor 2.0 each has a button icon that will turn their thumbnail view on and off. |
|
|
| Game Controller Support |
 |
| This allows you to control Trainz using an external game controller instead of the keyboard and mouse. The RailDriver Controller is one example. You must have the necessary software drivers installed. |
| Steps: To Enable Game Controller Support:- |
|
Left Click on the Check Box to turn this control ON or OFF. |
|
|
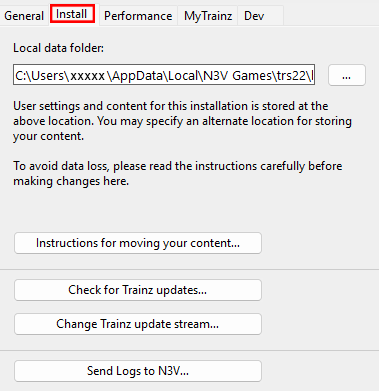
These settings identify the location of your Local Data Folder where all your assets are kept and the type of program updates you want to receive. |
| Left Click on the Install tab |
|
 |
WARNING:
While the steps involved in moving your Local Data Folder are relatively simple they must be done with care. Common mistakes include not checking if the new location has enough storage space (the data being moved can be GigaBytes in size) and simple typing errors will lead to problems. |
|
Trainz Updates
|
|
|
|
 |
This will allow you to manually check if any new updates (Service Packs or Hot Fixes) are available for your version and buld number of Trainz. If you are a beta tester then it will also check for new beta updates. |
|
|
Notes:
Trainz will periodically check for any updates automatically so you do not have to run this manual check at all. If an update is detected by the automatic system you will be given the option to download and install it, or to ignore it for a few days to a week before another request to update is made. This button allows you to change your mind and perform the update at a time that is convenient to you. |
|
|
| Steps: To Check for Trainz Updates:- |
|
Left Click on the button. |
|
|
|
To install the update leave the dropdown menu list at Install and Left Click on the Continue button then follow the prompts.
 |
For the majority of installs there will be no need to change any of the settings shown in the series of windows that will appear. |
|
|
|
Notes: Issues after Installing an Update
|
CAUTION:
When restarting Trainz after an update there may be significant delays |
|
|
Trainz Update Stream
|
|
|
|
 |
This allows you to switch between different update streams that the latest release Trainz versions have available. |
| What is a Trainz Update Stream? |
Any version of Trainz that has not yet reached its End-of-Support date (see the Wiki link at  Trainz Life Cycle Policy for the dates) will continue to receive updates. This includes the current (latest) release versions. These updates will be normal SP (Service Pack) and occasionally HF (Hot Fix) updates. They form the Normal Update Stream and are available to everyone who has a currently supported version of Trainz. |
| In addition, the next release of Trainz, which could be a completely new version or more likely the next SP update, will be undergoing Beta Testing. These Beta test versions will have their own separate update stream, the Beta Update Stream. Usually there will be many beta updates released before the next Normal Update Stream release. |
|
|
Notes: The Beta Update Stream
Beta Test Versions of Trainz are always full of bugs - finding the bugs is the reason for the beta testing. They also have some normal features switched off, to make the testing easier, and contain annoying "pop-up" messages ("Assertions") that will halt the operation of the program whenever an "anomaly" is discovered.
Beta testing is not for everyone
Beta testing requires a lot of patience, some analytical skills and the ability to accurately report the events that led up to the discovery of a possible new bug. Sending possible bug reports to the Trainz Bug Report site is a vital part of beta testing.
If you are not interested in doing any of that then Beta Testing is not for you. If all you are interested in is playing with the "cool new features" that may be present, then you will be disappointed and frustrated.
If you later change your mind then you will find that it is NOT simple to switch back to the Normal Update Stream . You will either have to wait until the next normal stream update is released, which can be several months, or reinstall the program from scratch. |
|
|
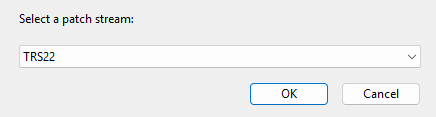
| Steps: To Change Your Trainz Update Stream:- |
|
Left Click on the button. This will open a the first of a series of dialogue windows. |
| |
|
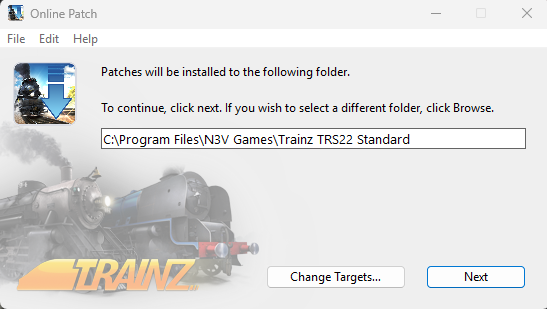
The first dialogue window will allow you to set where the patch will be installed. The current location, where your copy of Trainz is installed, will be shown in the window.
|
| |
|
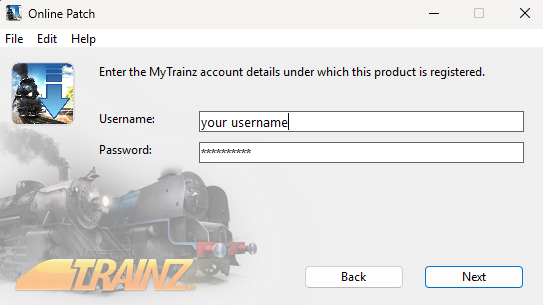
in the second dialogue window enter your Trainz Login details
|
| |
|
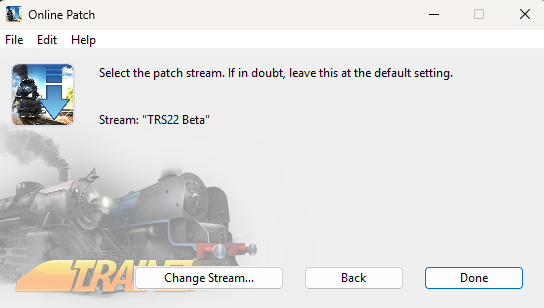
The third dialogue window will show your current Update Stream
|
| |
|
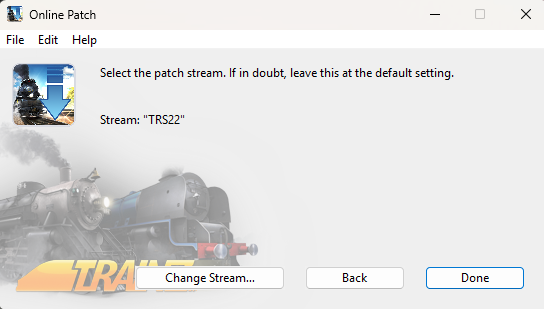
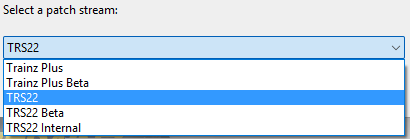
The fourth dialogue window will allow you to change your current Update Stream
|
| |
 |
The final dialogue window will display the new Update Stream. This is a repeat of the third dialogue window.
|
|
You can change your Trainz Update Stream at any time but going from the Beta Update Stream back to the Normal Update Stream is best performed after the beta test program has finished and the beta and normal versions have the same build numbers. If you remain on the Beta Update Stream then you will automatically get the first beta update for the next SP version when it is released. |
|
Send Logs to N3V
|
|
|
|
 |
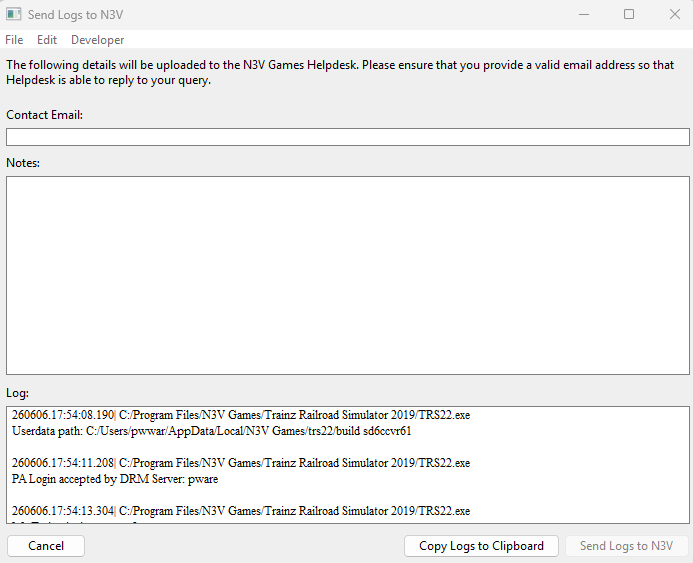
This allows you to send diagnostic logs directly to the N3V Games Support Desk for analysis or to copy the logs to your system clipboard. |
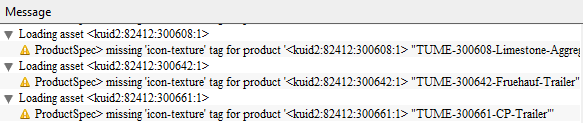
| Trainz keeps a text copy, a "log", of a wide range of actions by the program. These include the results of running a DBR, or an EDBR, error and warning messages generated when assets are installed, assertions created by a beta version, build startups and logins, configuration changes, etc. These logs are NOT sent automatically. You have to manually choose this option each time you want to send the logs. Alternatively, they can be sent to your system clipboard.
|
|
These settings are where you can "fine tune" the performance of the program to better match the hardware of your computer system and the demands of the routes you are running. |
|
You may need to experiment with these settings to get the best match with your system and the routes you run. |
| Left Click on the Performance tab |
|
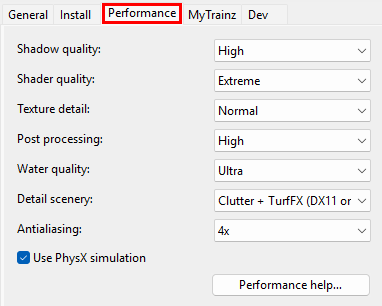 |
|
WARNING:
Changing most of these settings will force you to restart Trainz. |
|
|
CAUTION:
With most of these Performance Settings the end result will depend on your hardware and the routes you are running. But in general, higher settings will lead to lower performances.
Experimentation to find the settings that best suit you is recommended. |
|
|
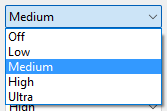
Shadow Quality
|
|
|
|
 |
This allows you to set the visual resolution of shadows, increase the distance at which they will be drawn and the number of object types that will have shadows. Note: Some objects, such as power lines, will only display shadows on the higher settings. |
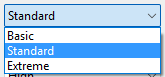
Shader Quality
|
|
|
|
 |
This allows you to select the Shader Quality that will be used. |
|
Notes: About Shaders
What are Shaders? (they have nothing to do with shade). Shaders are short programs that run on your GPU (Graphics Processing Unit). They input raw data from a scene, which consists of triangles together with lighting conditions and other features, and output the finished pixels onto the screen. There are different types of shaders with different levels of complexity and tasks that they perform.
Why do the shaders have to be compiled?. Shaders are designed to operate under very specific conditions such as with a particular software app or with specific graphic settings. When these change, such as after a software update or a change to some of the graphic settings, then the original shaders have to be deleted and new ones created (compiled) and installed in the GPU to match the new requirements. |
|
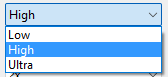
Texture Detail
|
|
|
|
 |
This allows you to set the size of textures that will be loaded. |
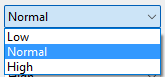
Post Processing
|
|
|
|
 |
This allows you to adjust the level of Post Processing. |
| Post Processing, which happens after an image frame has been constructed, applies filters or special effects to the entire image frame before it is finally displayed on the screen. Examples would include adding motion blur, atmospheric effects, dynamic lighting. |
| Steps: To Set the Level of Post Processing Used:- |
|
Left Click on the Post Processing Drop Down box. This will display the range of available settings. |
| |
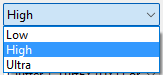 |
|
|
|
Water Quality
|
|
|
|
 |
This allows you to set the level of water effects such as reflections from the surface. |
Detail Scenery
|
|
|
|
 |
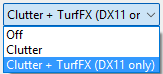
This allows you to show/hide TurfFX and Clutter effect layers. |
| Off |
will hide both TurfFX and Clutter effect layers. |
|
|
None of these settings will hide the Water and Color effect layers. |
|
|
| Clutter |
will show the Clutter effect layer but not the TurfFX effect layer. |
|
| Clutter + TurfFX (DX11 only) |
if DirectX 11 (see  Renderer)) has been selected this will show both the Clutter and TurfFX effect layers (if TurfFX is supported on your GPU). If DirectX 12 has been selected (currently only available in Trainz Plus beta) then only the Clutter effect layer will be shown. |
|
|
It has been suggested that support for TurfFX will be discontinued in a future release of Trainz due to its hardware incompatibility issues. The replacement for TurfFX, or its equivalent, may be added to the Clutter effect layer. |
|
Antialiasing
|
|
|
|
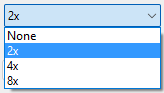
 |
This allows you to reduce the appearance of "jagged edges" on objects by smoothing out their pixelation. |
|
Notes: Antialiasing
Every object on your display screen (even this text) is made of individual pixels and they work like tiny Lego blocks. A horizontal or a vertical line of pixels, or Lego blocks, has no jagged edges.
However, a diagonal line or curve will look like a set of stairs when viewed close up. This is the jagged edge or "jaggies". Antialiasing eliminates or reduces the "jaggies" by adjusting the colours of the pixels along the edge and the surrounding area so that they form a smooth transition from the object colour (e.g. the black lettering) to the background colour (the white page). |
|
PhysX Simulation
|
|
|
|
 |
This allows you to switch particle effect collisions on/off. In future updates other physics related features will be added. |
| An example of particle effects collisions would be smoke being blocked from passing through the roof and walls of a tunnel or an engine shed. The object (tunnel or shed) must be created with PhysX meshes that will interact with smoke particles. For most scenes this will have a small impact on performance but the performance will decrease as the number of particles and objects with PhysX meshes increases. |
| Steps: To Set the PhysX Simulations ON/OFF:- |
|
Left Click on the Check Box to turn this control ON or OFF. No restart will be needed after changing this setting. |
|
|
|
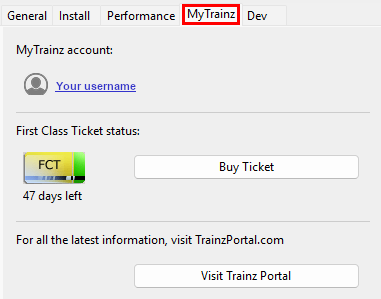
These settings identify your user login details. In some older versions this Tab is labelled Internet. |
|
You can also check your current FCT status and, if required, purchase more FCT access. |
| Left Click on the MyTrainz tab |
|
Enter Login Details
|
|
|
|
|
|
|
|
Your Login details are needed to access the Download Station and other online data. |
|
Your Trainz Login is the same as the Trainz Forum Login that you used to purchase or subscribe to your current copy of Trainz. If you do not have a Trainz Forum Login then you can create a new account. |
| Steps: To Enter your User Details into Trainz:- |
|
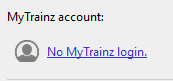
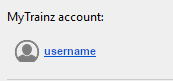
Left Click on the link No MyTrainz login or username
|
If you simply need to confirm your current login then Left Click on your username link and renter your details. |
|
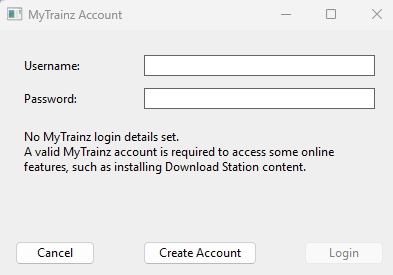 |
|
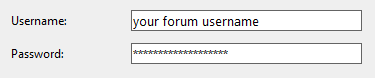
Enter your Trainz Forum Username and Password into the dialogue window text boxes.
|
If you do not have a Trainz Forum login then skip to the next section
Create an Account. |
|
|
Left Click on the  button which will become active as soon as data has been entered |
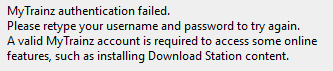
| There will be a delay while the data is checked. This will be followed by one of two messages
|
|
IF you see the login succeeded message then Left Click on the  button.
IF you see the failed message then try again (you may have mistyped the username or password). If the failed message persists then contact the Support desk. |
|
After entering your login details, close the Trainz Settings dialogue window and exit the Trainz Launcher. Then restart Trainz. |
|
Create an Account
|
|
|
|
|
|
|
|
You will need a Trainz Account to be able to access the online features of Trainz including the Download Station where there is a vast library of free assets (routes and sessions, locomotives and rolling stock, signals and tracks, scenery of all types, ground textures, etc) available for you to download and install. |
|
A Trainz Account will also give you a Trainz Forum Login username and password to access the Trainz Forum. |
| Steps: To Create a New Account:- |
|
Left Click on the link No MyTrainz login or username |
|
|
In the dialogue window (shown right) leave the Username and Password text entry boxes blank and Left Click on the  button. |
|
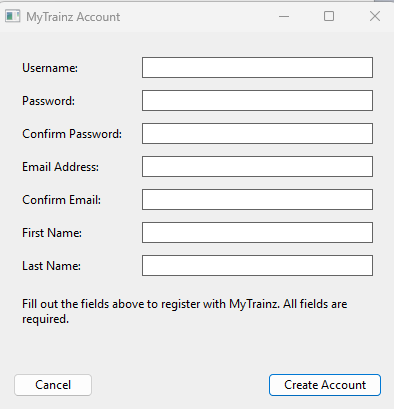
In the New Account Dialogue Window (shown right) enter ALL the information requested. |
 |
|
When complete, Left Click on the button. This will create a new Trainz Account with a Username and Password to enter into your Trainz program and into the Trainz Forum. |
|
After entering your login details, close the Trainz Settings dialogue window and exit the Trainz Launcher. Then restart Trainz.
|
|
|
|
|
The FCT or First Class Ticket is an optional prepaid feature that gives you higher speed priority access to the Download Station or DLS. |
|
An FCT is automatically included in all Trainz Plus subscriptions for the duration of the subscription. |
| As soon as you access the DLS using Content Manager your FCT status is checked using your Trainz Login. If you have an active FCT then you will be given priority access at the maximum available download speed. |
|
Many of the issues that some users have in accessing the DLS (with or without an FCT) come down to 3 external factors:-
 |
Your AV software interrupts the download to conduct a "real time scan" of the incoming data.
Solution: add TRS22.exe (or the named executable file for your version of Trainz) to the Real Time Scan Exclusion List of your AV software. |
|
Your VPN software blocking the download. This problem appears in only some VPNs, not all.
Solution: temporarily disable your VPN software for the download. |
|
Your ISP is blocking the download. One particular ISP in the USA has been named in several Trainz Forum Posts as the cause of this problem.
Solution: unfortunately, you will have to change your ISP OR, if you are using a laptop, download the DLS assets from a free wifi location. |
|
|
How to Purchase an FCT
|
|
|
|
|
|
|
|
You can purchase an FCT from the MyTrainz Tab or from the Trainz Discussion Forum web site. |
|
You can purchase an FCT for 7, 30, 90, 180 and 365 days. |
|
If you have a Trainz Plus subscription, then an FCT is automatically included in your subscription. |
How to Activate an FCT
|
|
|
|
|
|
|
|
Once activated an FCT will run automatically for the full calendar duration of the ticket. |
|
An FCT that is part of a subscription is automatically activated with the subscription. |
|
An FCT that is part of a Trainz Plus subscription will be automatically activated with the subscription. It will terminate at the end of the subscription period (one month or one year) and will be automatically reactivated by a subscription renewal. |
|
 |
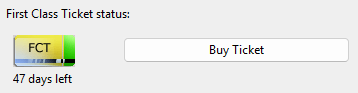
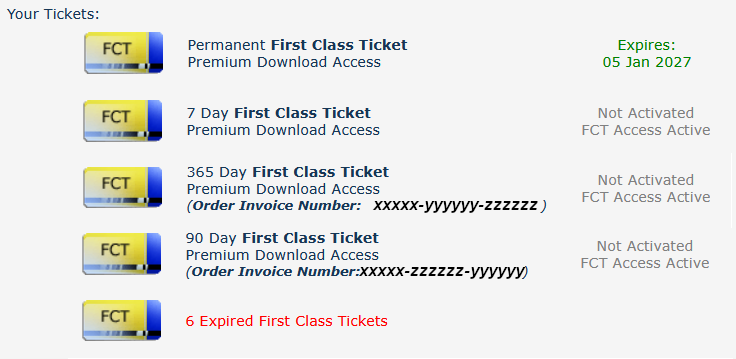
The FCT Status shown in the Install Tab indicates how many days are left on your current FCT.
If you have an FCT with days in credit (e.g. 47 days left) then it will be active as soon as you use Content Manager to download from the DLS. |
|
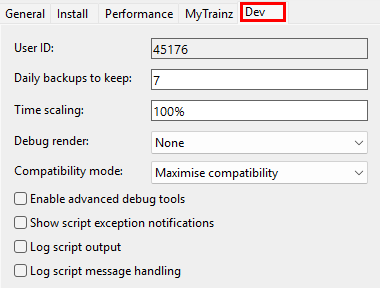
These settings are designed for asset developers ONLY to test the performance and other features of the assets they create. |
|
Unless you are an experienced asset developer you are strongly advised to NOT change these settings. |
|
They also control how often automatic backups will be made of any routes or sessions that you are currently developing in Surveyor. |
| Left Click on the Dev tab |
|
 |
|
WARNING:
The settings in this tab are designed to be used by asset creators and developers and NOT for general gameplay. Some of these settings will disable functions, such as some scripts, that will lead to errors and assets not working correctly. Many of them will reduce overall performance and even alter the visual appearance of objects and textures to assist in debugging. |
| USE WITH CAUTION |
|
|
User ID:
|
|
|
|
This is your Trainz user identity code for creating assets and each user has their own unique identity code number. All assets that you create, or clone, will contain this number at the start of their <kuid> code.
For example:-
This User ID was created when you registered your first copy of Trainz and it cannot be changed.
|
Daily Backups to Keep:
|
|
|
|
 |
This sets the number of Automatic Backups of your currently loaded route and session that will be created each day. These backups are saved in the Local Data Folder (see Local Data Folder) and are only kept for 7 days. |
Time Scaling:
|
|
|
|
 |
This allows you to slow the rate at which time passes when running a session. All aspects of the session - the session clock, the compass and cursor movement speeds and the time experienced by moving consists - will be slowed. |
Debug Render:
|
|
|
|
 |
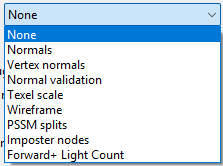
This allows you to select different image rendering methods to help identify problems with the texture, surface effects or appearance of objects. |
Compatibility Mode:
|
|
|
|
|
CAUTION:
This setting causes more problems than any other due to misunderstandings about what it does
It has an option Maximize performance which is frequently taken to mean that it will give you the best possible overall performance. While it will usually achieve this it is NOT its main purpose. It will deactivate many scripts used in legacy assets that make calls to obsolete functions. While this will improve performance it will almost certainly generate issues in routes that use those legacy assets and scripts. The main purpose of this option is to allow developers to more accurately test the performance of a new asset under conditions that fully comply with the latest standards.
If you are using legacy assets in your route and you are NOT testing how a new asset performs under optimal conditions, then DO NOT select Maximize performance. |
|
 |
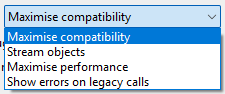
This allows you to modify the loading, operation (especially scripts) and error reporting of assets used in a route. |
| Maximise compatibility |
This is the default for TRS19, TRS22 and Trainz Plus. No legacy asset scripts are disabled and the entire route will be loaded into memory. Both will degrade overall performance. This mode should be used if a route or session contains legacy assets that do not perform well in other settings. |
| Stream objects |
Only those parts of a route that are active and close to the player's point of view are loaded into memory, a technique called "route streaming". This reduces overall loading time, resource usage and improves performance, especially on larger routes. This is the default setting for routes that are packaged with TRS19, TRS22 and Trainz Plus because they have been tested and found to work in this mode without any issues.
There are some downsides:- switching the camera to a distant part of a large route can cause delays while assets are loaded. Scripts that require data from assets that have not been loaded may experience issues. |
| Maximize performance |
This can significantly improve performance by using route streaming and disabling the scripts used in many legacy assets. It is expected that this will become the default setting in future Trainz versions so script creators should use this mode when developing and testing their assets. |
| Show errors on legacy calls |
This is the same as the Maximize performance setting but it will report attempts by scripts to use legacy or obsolete script functions. Because of this extra "debugging" its performance is slightly below that of Maximize performance. This setting should only be used for testing and debugging asset scripts. |
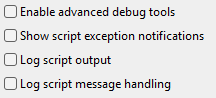 |
A set of Check Boxes that will enable/disable various debugging functions and produce reports (logs).
| Steps: To Set the Debug/Log Controls ON/OFF:- |
|
Left Click on the required Check Box to turn the control ON or OFF.
See the Checkbox List below for a description of each option.
|
|
|
 |
Enable advanced debug tools |
When checked this activates the TrainzUtil program which runs in parallel with Trainz. See TrainzUtil for more information. |
|
Show script exception notifications |
When checked this will log script errors (such as calls to obsolete or missing script functions). |
|
Log script output |
When checked this will place the output of all scripts into the logs. |
|
Log script message handling |
When checked this will copy all messages passed between scripts into the logs. |
|
|
Trainz Wiki
 |
More Tutorials and Guides to Using Trainz
|
This page was created by Trainz user pware in July 2026 and was last updated as shown below.