SAR Nantabibbie Switches

From TrainzOnline
Revision as of 05:25, 22 November 2020 by Pware (talk | contribs) (Created page with "<table> <!-- BEGIN TOP TABLE --> <tr valign="top"> <td width=750> <table width=750> <!-- BEGIN TABBED link list with Switches page active--> <tr valign="top"> <td colspan=3...")
(diff) ← Older revision | Latest revision (diff) | Newer revision → (diff)
Jump to navigationJump to search
         

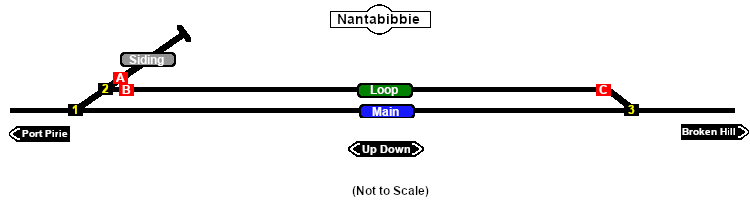
Nantabibbie Switches map

  Switches  
No. Name Facing and L/R Directions
(default direction first)
No. Name Facing and L/R Directions
(default direction first)
NB 1 Down (R) Main, (L) Loop/Siding NB 2 Down (R) Loop, (L) MOW Siding
NBCP A Up  (R) Catchpoint , (L) Port Pirie NBCP B Up  (R) Catchpoint , (L) Port Pirie
NBCP C Down  (L) Catchpoint , (R) Broken Hill NB 3 Up (L) Main, (R) Loop
 Switch Sets 
 Port Pirie -  Main   1 -R  Broken Hill -  Main   3 -L
 Port Pirie -  Loop   1 -L  2 -R  B -L  Broken Hill -  Loop   3 -R  C -R
 Port Pirie - MOW Siding   1 -L  2 -L  A -L  

PortPirie-BrokenHill

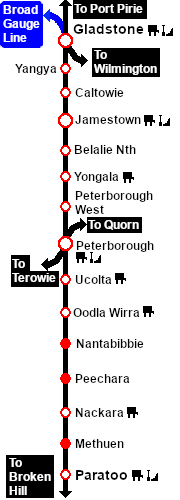
Gladstone-Paratoo Strip Map